Robert K Baggs is a Headshot, Portrait, and Commercial photographer from London & Hertfordshire. He’s been published in broadsheets, magazines, and websites globally including the likes of The BBC, National Geographic, and The Telegraph. In addition to this, Robert’s work has been displayed in galleries from New York to Paris.
Like all modern love stories, I found macro photography on the internet. I hadn’t long bought my first camera when I was stunned by the intricacy of insects when observed close up. I hurriedly punched in ‘Amazon’ and began searching for the lenses I’d seen in the EXIF data of the photos I admired and quickly sank in to a penniless depression. However, I picked my peasant self up off the floor, dusted myself down and decided to find a cheaper alternative to see if macro photography was ‘for me’. I found one and it was.
From then on my love for macro photography grew and so did my arsenal of equipment. In the years I’ve been a serial bug-botherer and crouching garden lurker I have learnt a lot and gradually compiled a document of information with the view to someday write a guide. What started out as a curiosity and a £7 ($10) macro filter quickly turned in to an interest and I have spent an unthinkably large number of hours honing my craft. Now, macro (albeit product) photography is one of my chief sources of income and I feel that I am in a position to offer some of my knowledge. There will always be more talented, creative, learned and passionate macro photographers than me but I’ll share what I know and answer any questions in the comments.
Although this guide is comprehensive, I’m purposely leaving out detailed explanations of magnification and similar such in-depth-camera-nerdery but I implore you to read up on it at some stage.
The Gear
Macro/Close-up Filters
These filters are the unsung heroes of macro photography. I’d go as far as to say that in no other genre of photography can you dip your toe in the pool so inexpensively.
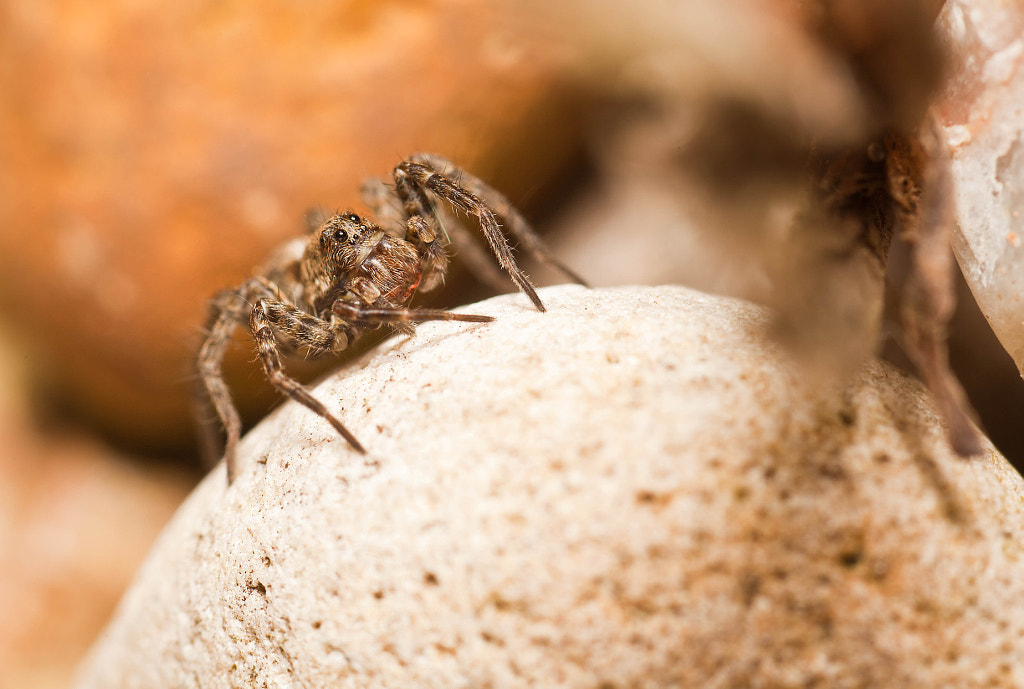
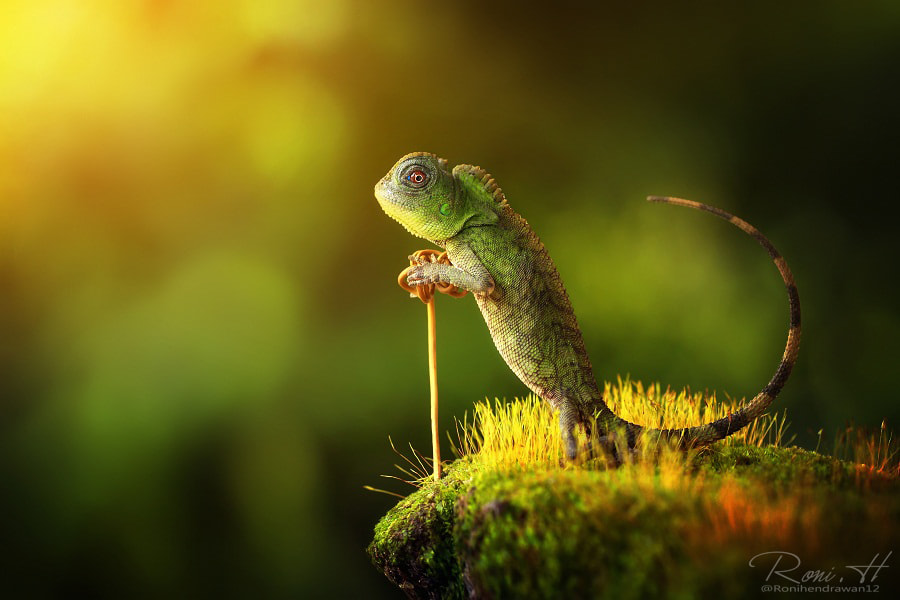
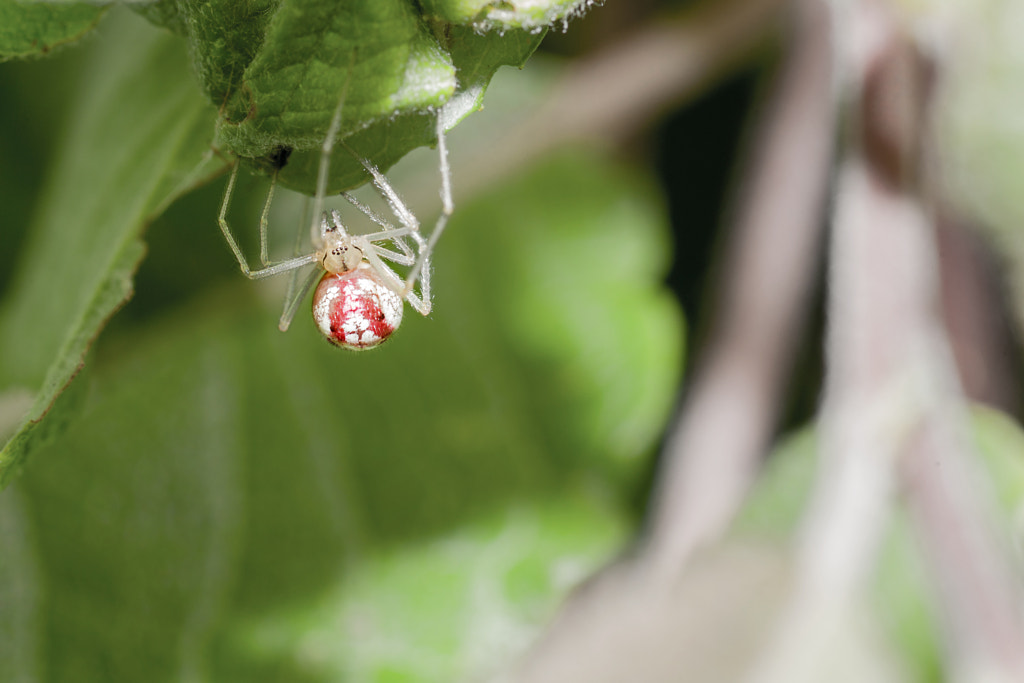
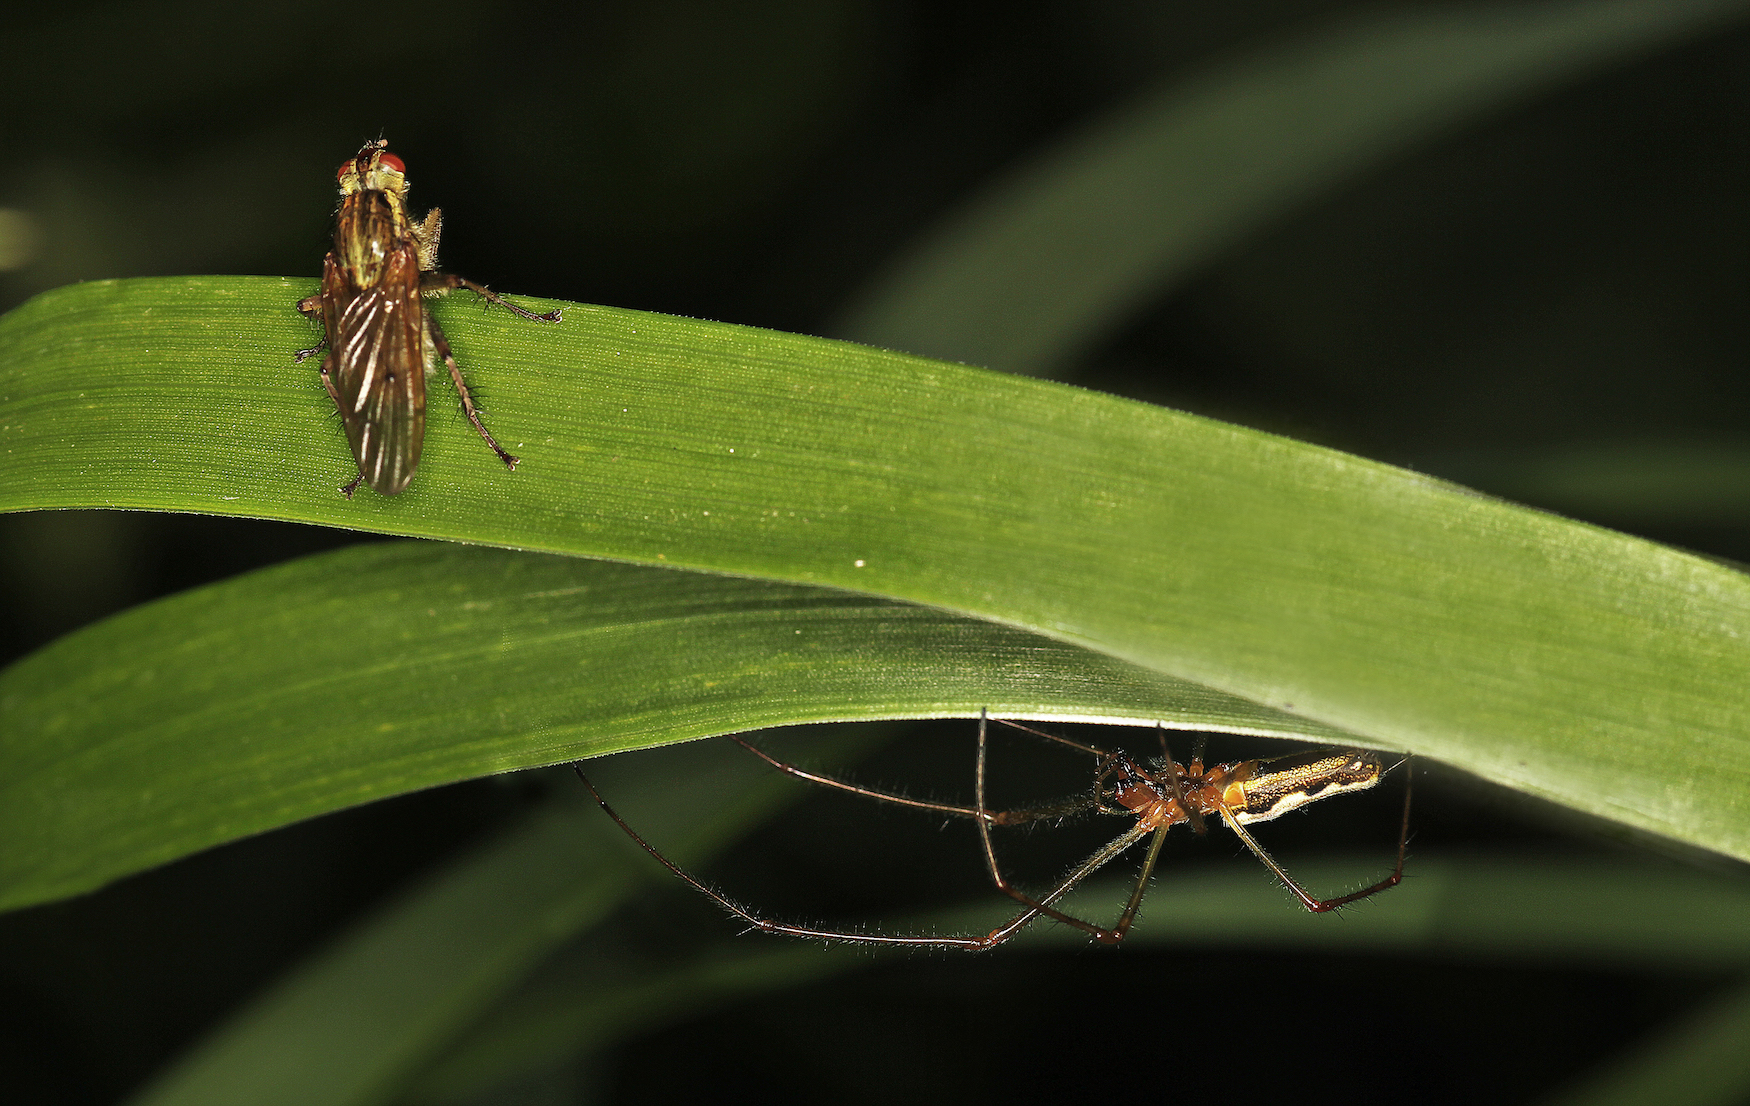
The following shots were taken by me when I was ‘dipping my toe’. I had little to no idea about lighting macro shots, I had little to no idea about editing images and I was armed with only a Canon 550D, the 18-55mm kit lens it came with and a very cheap macro filter. All these years later I still like these images (particularly the successful spider) and I am confident that much, much more can be achieved with the same completely unspecialised and attainable set up.
Don’t get me wrong, the image quality is low but that was more to do with my inexperience in post-processing as opposed to a result of the filter. If you think you may enjoy macro photography, this ought to be your first step.
Reverse Rings
I arrived late to the reverse ring party. I had heard about them, I had even seen great results, I just couldn’t figure out when and why I would use them over my macro lens and extension tubes. Nevertheless, my curiosity got the better of me and as they are also rather cheap, I gave them a go.
There is a lot of literature available on using reverse rings and as I’m somewhat inexperienced with them, so I will keep this section short and include only observations I made first-hand.
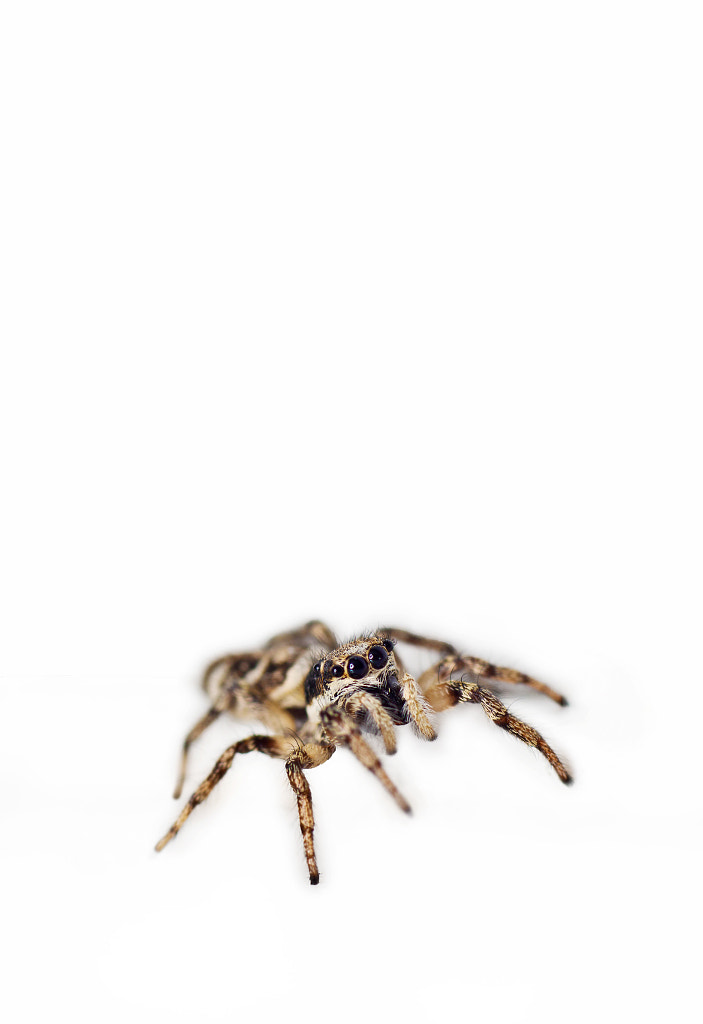
The above image was actually a result of my curiosity running away with me; it’s a reversed 100mm lens AND extension tubes (which are explained at the end of this section). Here’s what I learned:
1. The magnification is incredibly impressive.
2. You have to get so close to your subject that the glass is nearly touching it.
3. Lighting is quite tricky and damn near impossible with 3 extension tubes added. I had to use multiple bright lights situated very close to the subject and bump ISO to 1250 and widen the aperture a little. Flashes were rendered useless as they all lit past the subject.
How this tiny jumping spider had the patience to sit still on my laptop (yes, that’s what the surface is) while I did all this is a mystery to me. I hear reversing a 50mm is much more usable out-and-about and this is another toe-dipper I would recommend to those of you with a passing interest.
Macro Lenses
If you’ve decided that you want to explore the wonderful world of photographing tiny things you previously didn’t care for, then a macro lens can open up a lot more opportunities.
Now, a caveat I ought to add is that I shoot Canon and so my advice on Nikon (and other DSLR manufacturers) is simply the average of all the opinions I could find rather than mine. There are far too many lens review sites that go in to exceptional depth for me to need to do the same, so I will give a simple overview of your best options.
The Versatile Macro Lenses
These lenses are multi-purpose and a lot easier to justify to your significant other when they notice the money siphoned out of your joint account. Although they are macro lenses, they can be used for other types of photography and their usual focal length is particularly pleasing for portraiture. The best options:
Canon EF 100mm f/2.8 Macro: This is the lens I have used for 99% of my macro work and I cannot recommend it enough. Like a lot of macro lenses, its autofocus at the macro level is hit and miss but that isn’t the biggest of problems. It is very reasonably priced and creates excellent results.
There is an L variant which nearly doubles in price compared to the non-L option although I am reliably informed it is a noticeable difference.

Sigma 105mm f/2.8 EX DG OS HSM Macro: After asking photographer friends and I reading a plethora of reviews, this lens appears to be the best option for Nikon and Sony as well as being a very good option for Canon too.
It is a similar price to Canon’s 100mm non-L macro lens and can be found for under £300 ($430) used.
The Specialist Macro Lens
There really is only one option here: The Canon MP-E 65mm 1-5x Macro. This lens is for macro and macro only. It is infamously tricky to use at first and will require practice before you start tapping in to its potential; however, its potential runs very deep indeed.
I would refer you again to Ed’s website to see just how incredible the results can be. You can photograph mites of only a millimeter and see unparalleled detail. It is around the same price as the Canon 100mm f/2.8 L but with far more limited applications.
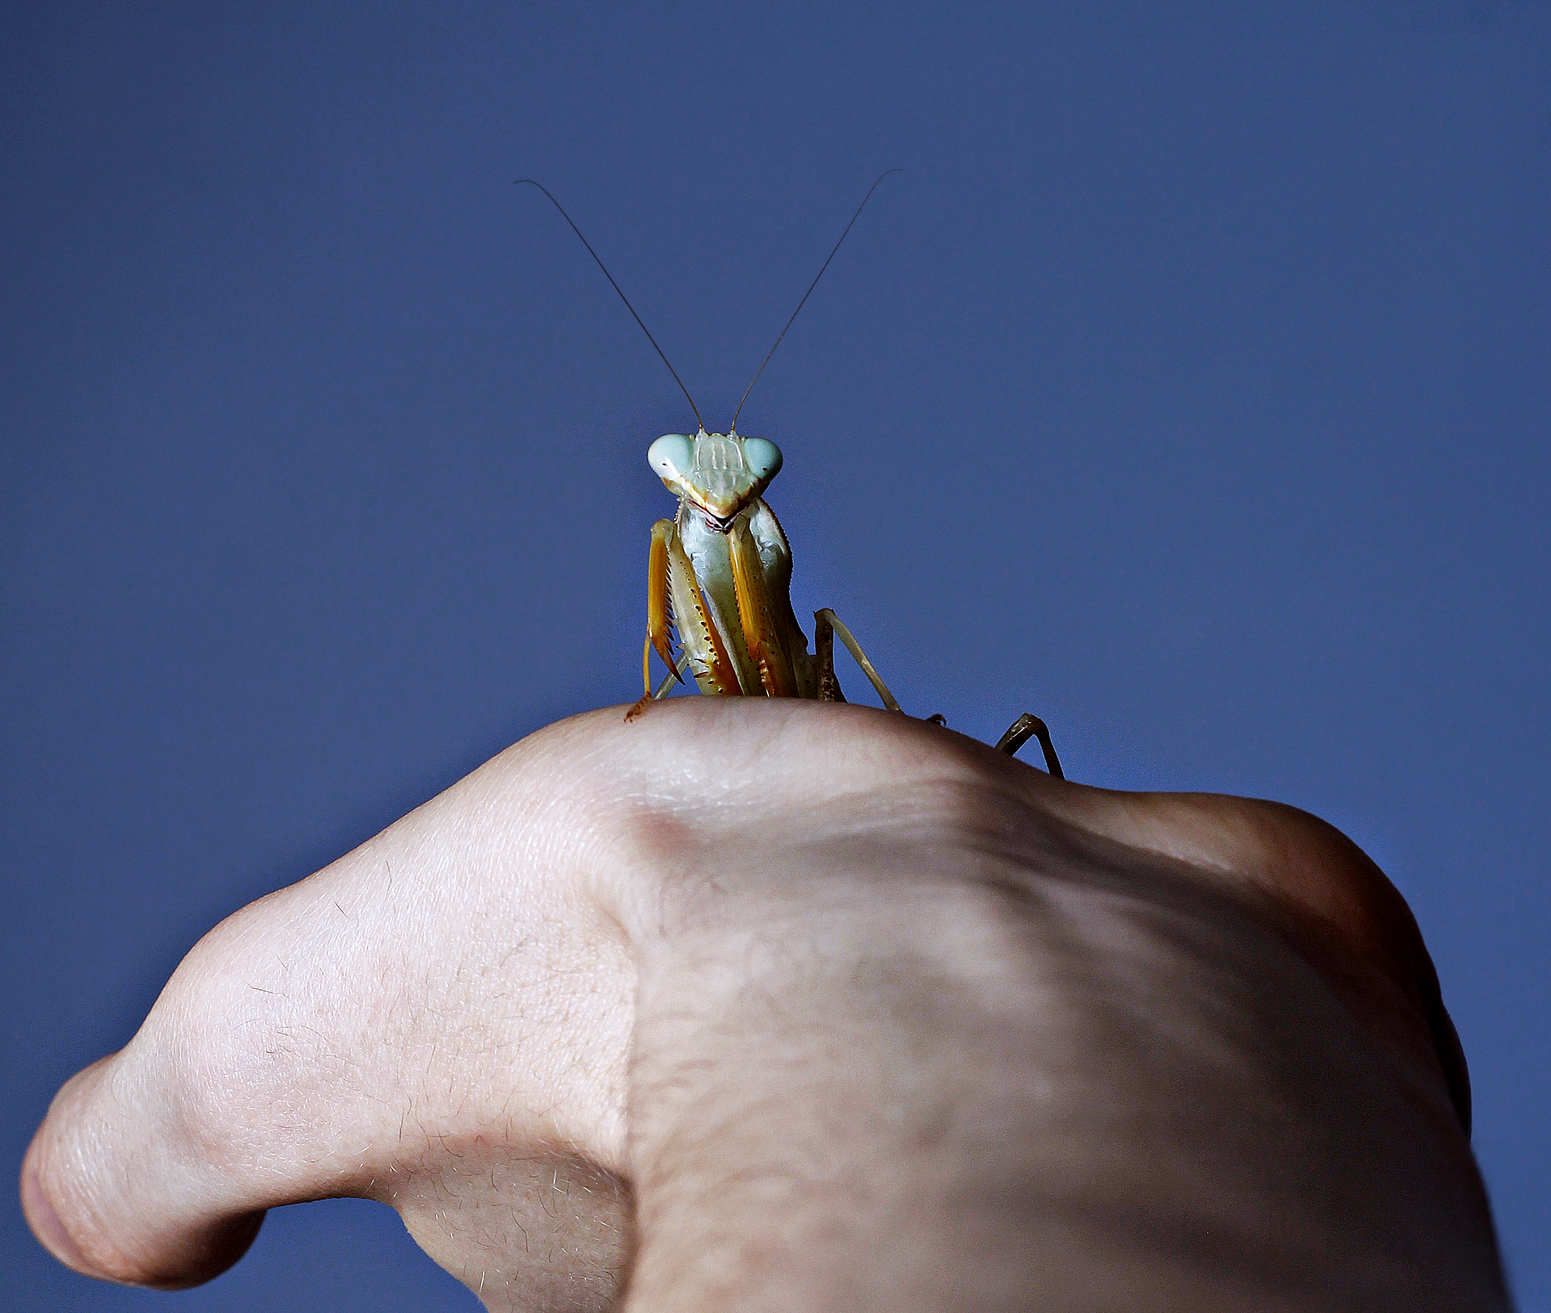
Due to its high magnification it is usually paired with a very high end macro flash—the MT-24—which you can learn more about in the lighting section. Below is an example of the more extreme end of its potential.

Extension Tubes
Extension tubes are surprisingly simple things. Unlike their teleconverter cousins with whom they can be confused, they have no optical element; that is, there’s no glass in them. In fact, there’s very little to them altogether.
The aim of the game for extension tubes is to reduce the minimum focusing distance so that you can get closer to your subject and a higher magnification. This is especially useful when you’re working with the tiniest of insects.
Extension tubes tend to come in threes; 36mm, 20mm and 12mm. They can be stacked for the maximum effect. They are relatively inexpensive and have a drastic impact on your minimum focusing distance although it’s worth noting that substantially more light is needed to correctly expose a shot, particularly with all 3 stacked.
The Lighting
Lighting is to a macro photographer what ingredients are to a chef; the better the ingredients, the better the results. However, this can send you down a rabbit hole which ends in empty wallets and results that could have been achieved (at least for the most part) without remortgaging and selling private images of your better half.
I will cycle through lighting setups I have tried and tested in financial brackets and I will ward you away from mistakes I have made.

Free: Natural Light
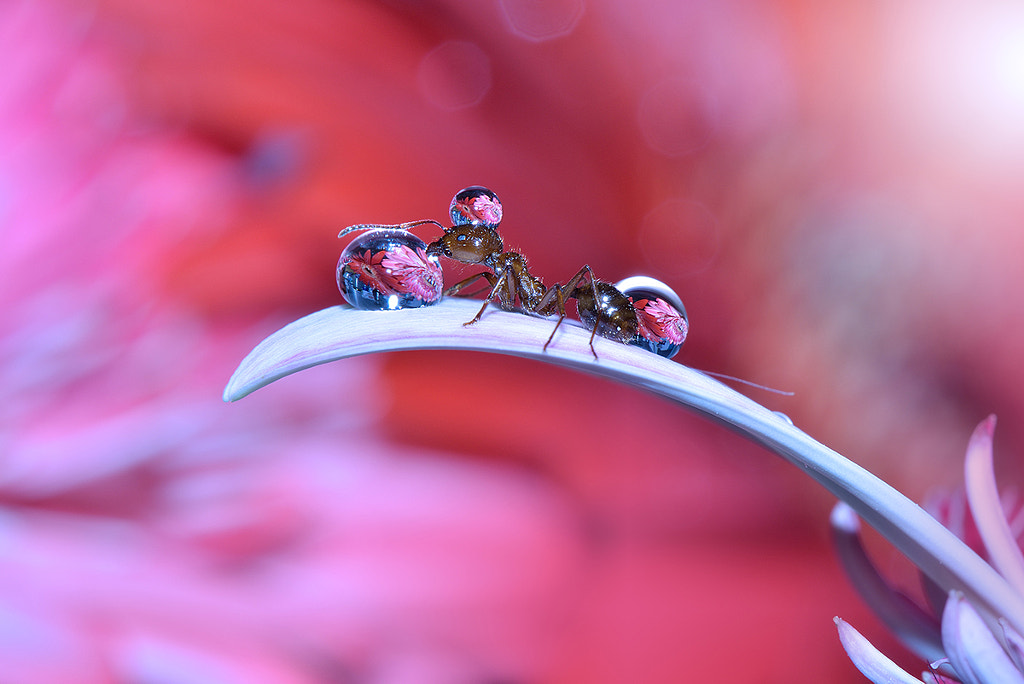
It’s not impossible to shoot macro with natural light, and if someone tells you it is, they’re lying… or at least, sort of. The above shot was taken using only natural light, but there are limitations.
Firstly, you need a bright day. Those overcast days that populate 75% of my year here in England just won’t cut it. You will have to boost the ISO too high, lower the aperture too low, or lose the insect in the frame.
With bright sunlight you can get reasonably close and still expose the image correctly; however, you’re at the behest of the insect and the weather. Should your subject decide it doesn’t have high enough SPF sun cream on to tolerate this UV exposure and relocates to a shady leaf, you’re almost certainly out of luck.
Nearly Free: Reflectors
As above, this is certainly possible… but again, not ideal. You still need a bright day, but you can fill any shadows, you can brighten your subject, and you can adjust to some re-locations.
The overarching problem I found with reflectors is you need an assistant or several more arms to make everything work. With macro photography, I move a lot. It becomes very awkward to juggle the reflector, my camera, and my position without wobbling the camera as I shoot, falling over, or scaring the insect away with a big white impending disc. Of course, smaller reflectors, remote releases, and tripods can overcome a lot of these difficulties but mobility is far too important to me and all of those sacrifice it.
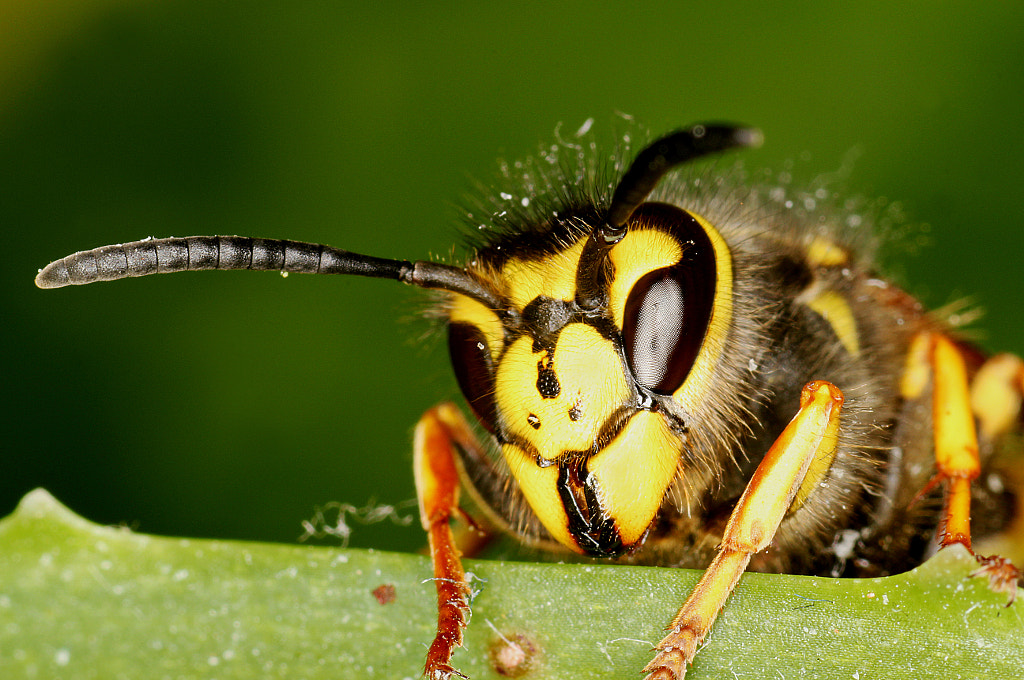
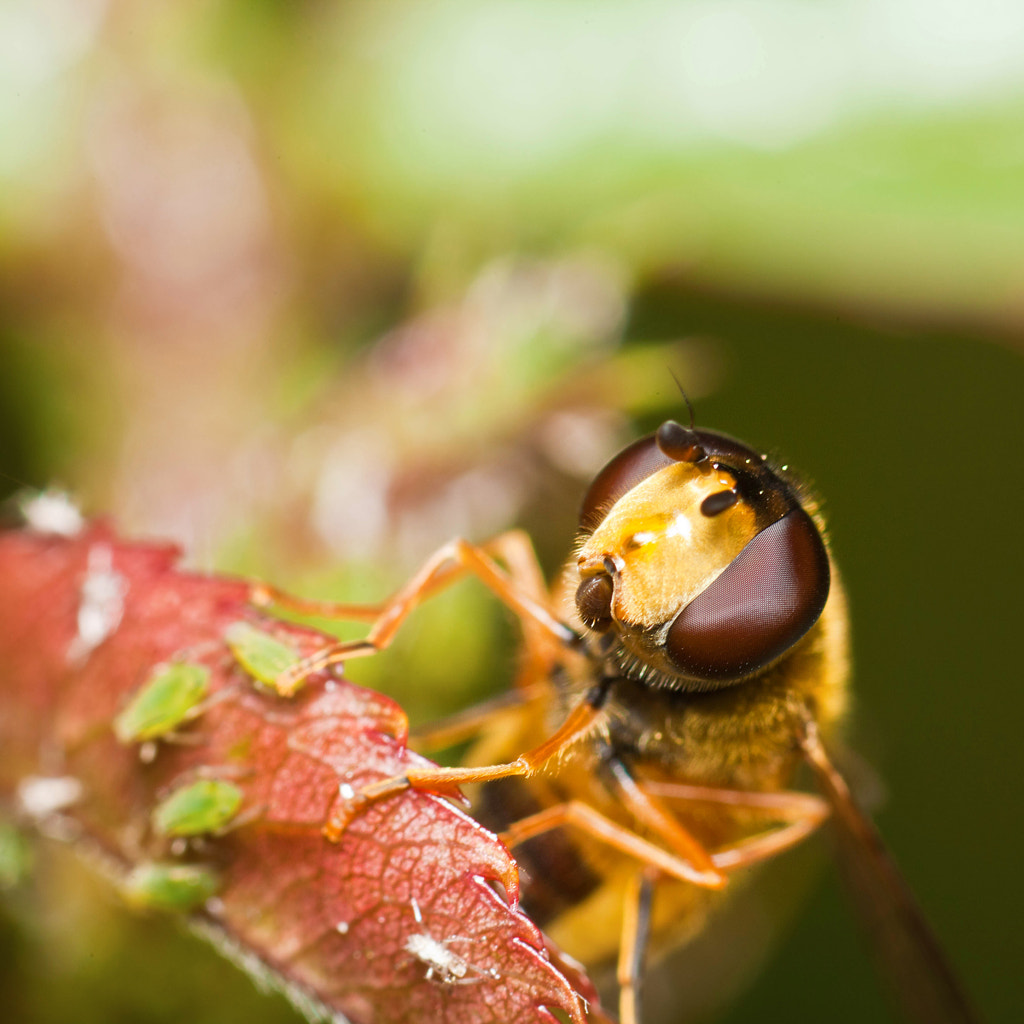
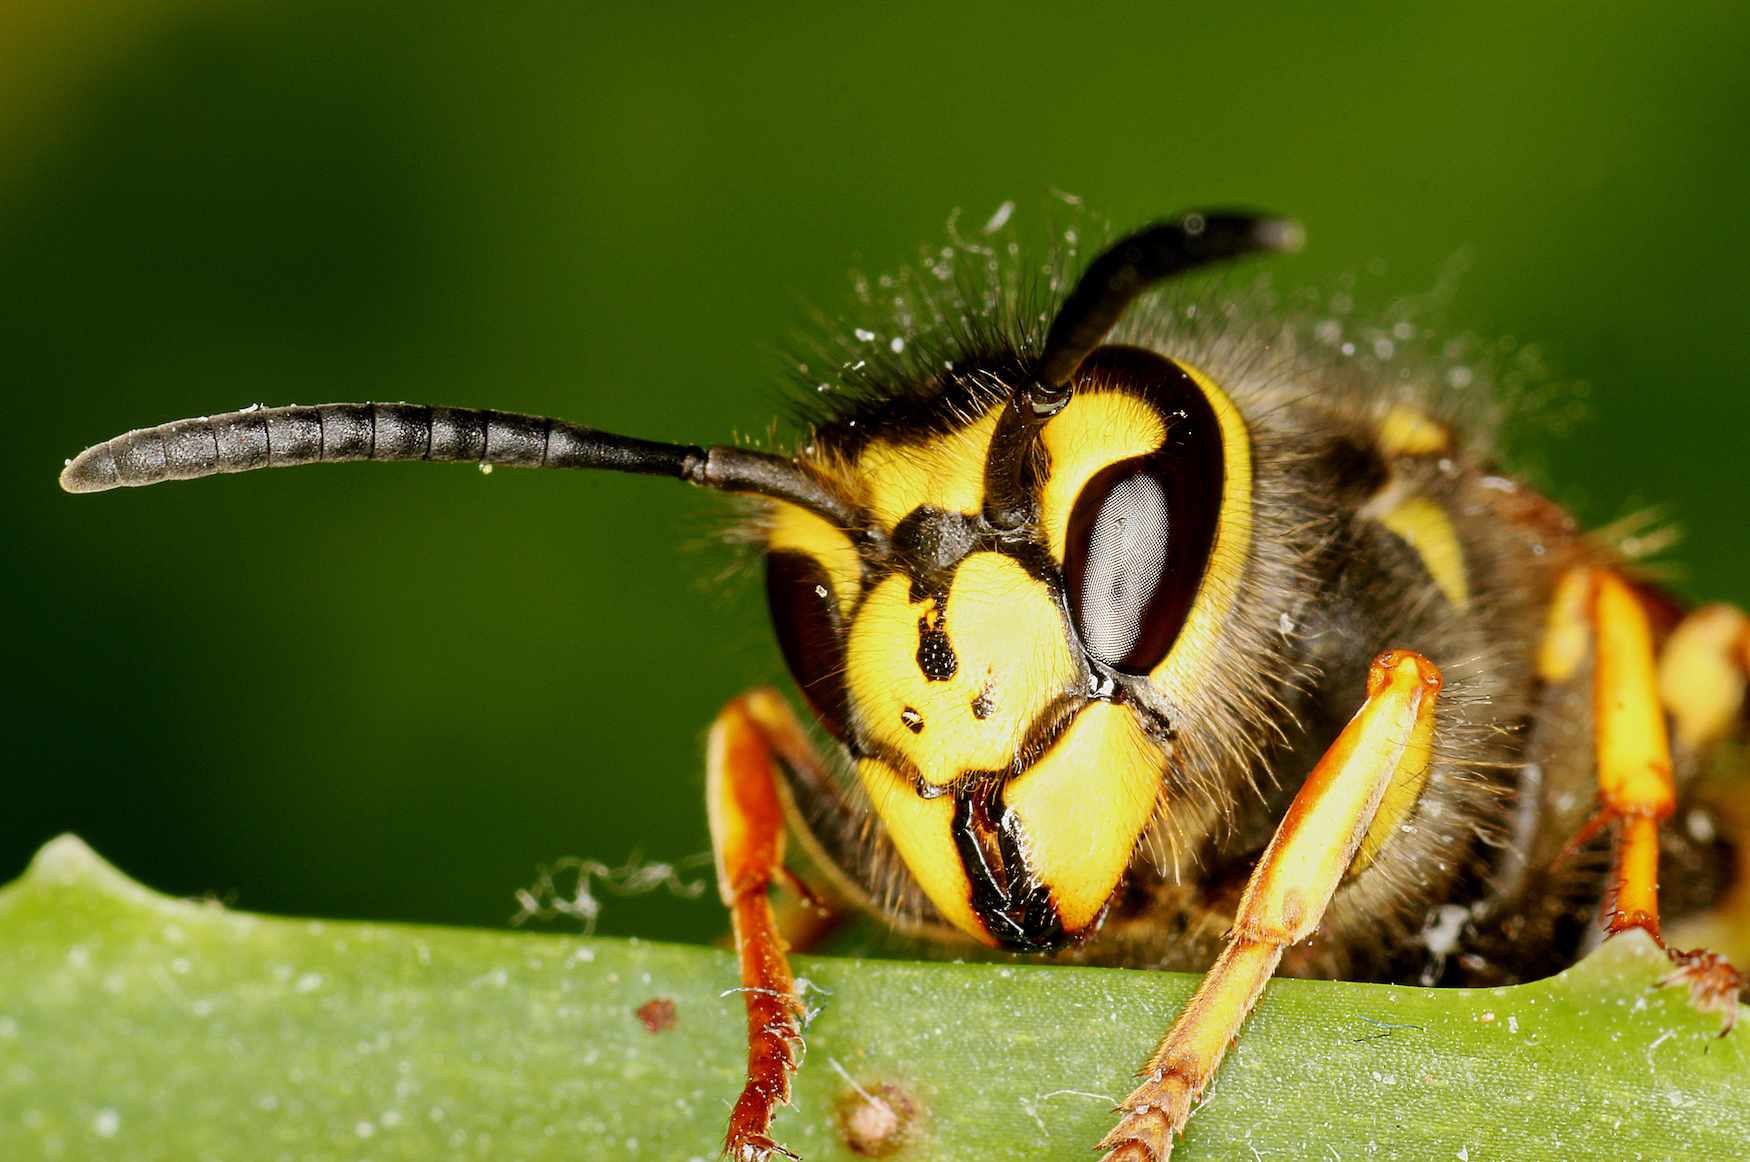
The shot at the top of this section was taken during very bright sunlight and using a 48cm white reflector that was bouncing direct sunlight straight on to the hoverfly. I only needed to push the ISO to 320 to get to my preferred shutter speed of 1/200th.
Entry Level Flashes
It is here I made my first real mistake. I had read how incredible ring flashes were for macro photography. This is primarily due to them being fixed on to the front of the lens and always lighting your subject. This much is without question true.
However, I didn’t want to give £500 ($720) or more to Canon and decided to see if any Chinese eBay shops could sort me out with something a little less financially imposing.
After 20 days my rather suspect looking package arrived and I set it all up. It looked the real deal but I quickly learnt its sync speeds were far too slow to be useful. In its place I bought the Marumi Ring Flash.
These are available around the £100 ($145) mark, though I implore you to do some research as I have it on good authority that you can get a near identical unit for closer to £80 ($115).
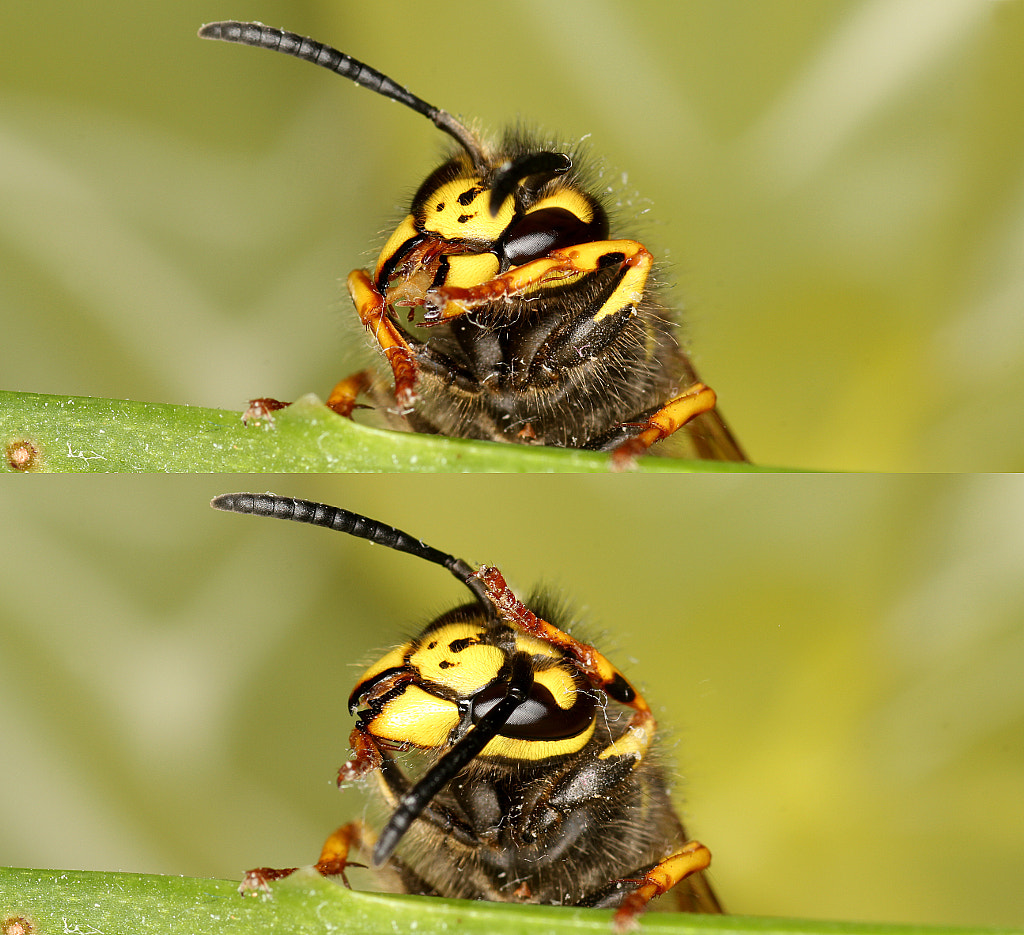
They really are a great first choice for getting sharp and well-lit shots. That said, given the proximity of the ring flash to the subject, you need to be sensitive to how harsh the light can be. Here’s an example of me slightly misjudging that:
Another method which I see overlooked very often is ordinary flash guns. I’ve had some success with my Canon 430EX II on my camera’s hotshot with a small portable soft box over the top of it. The only problem you can run into is that, if you get very close to the subject, the lens can block a lot of the flash’s light.
High End Flashes
The top end flash guns for macro tend to follow the same format: two flash units situated on either side of the lens. This gives you a lot more control over your lighting and it’s widely regarded as the best choice, particularly if you’re using a specialised macro lens like the MP-E 65mm.
The two most common examples are Canon’s Twin Lite MT-24 EX and Nikon’s Speedlight Remote Kit R1. Both will set you back around £400-500 ($550-700).
Other
This is the section I most wanted to write. The industry of lighting in photography baffles me. I was chatting with an electrician friend of mine recently and we worked out that we could create a light I wanted for portrait work for around £60 ($85) and a company I won’t name, slapped a fancy label on it and wanted ten times that price. Light behaves exactly the same regardless of what context its source is designed for.
The example image above this section was taken without a single flash gun in almost pitch black conditions. Instead, I used 3 snap-on LED Hybrid Lights which are, in essence, small banks of LED bulbs (around the size of a large torch). They give a nice crisp white light as a permanent light source.
I used one at 45 degrees to the left of my camera close to the subject. I used a second 45 degrees to the right of my camera as a fill light, twice as far away as the left light source. I then used a final snap-on at 90 degrees to the subject as a second fill light to eliminate harsh shadows and give a more even feel.
Yes, I respect that this setup is far too cumbersome to be your go-to lighting, but the salient point is this: if you can’t afford the best flash guns, there are always alternatives and hand held LED torches with multiple small bulbs are very effective.
The Settings
With all photography, knowing your settings is important—that’s obvious. With macro photography, knowing which settings you need without trial and error can be the difference between a portfolio-worthy shot and a useless fuzzy blob (and no, you can’t call it abstract art simply because you missed!).
In most cases, the fastest sync speed to flash guns is 1/200th and as insects move at almost imperceptible speeds, you want your shutter speed as fast as possible. So, in the exposure triangle, you usually have the most control over flash gun power, ISO, and aperture.
Aperture: This is a bit of a curve ball in macro photography. You might think that with the focal plane being so narrow, the narrower the aperture the better, but that’s not strictly true.
With macro lenses, you are so close to your subject that the difference between f/7.1 and f/13 will often be almost undetectable. As a result, I tend to use my lenses’ sweet spots for the sharpest results which are around f/11.
I won’t go in to what the ‘sweet spot’ is, but if you’re not sure there are numerous articles and videos out there explaining it.
ISO: Your approach to ISO ought to be similar to how it is with any photography: the lower the better, generally speaking. That said, I will make one observation. I have found that high ISO is punished more in macro photography than in some other areas.
With astrophotography, for example, ISO of even 3200 or 6400 is not only necessary at times, but will not impact the final image all that much. With macro photography, however, the focus on detail is huge and with the greater attention to image quality comes the decreased value in high ISOs.
Get to know what your camera can handle in terms of ISO without the image becoming noisy, grainy and soft.
Flash gun power: There is very little to say on this subject, fortunately. It is merely a case of working out which output correctly exposes your subject.
All I would in say in way of a tip is that a lot of insects (and many other macro subjects actually) have shiny or reflective surfaces. So be careful not to overexpose some areas and lose precious detail and texture.
It is also worth repeating my earlier advice here: small soft boxes or diffusers really help to cut out the harsh light of macro photography.
Tips and Tricks
‘If you can’t find anything, you’re not looking hard enough.’ This is my first tip, and one I live by when it comes to macro photography.
As unpalatably arrogant as this sounds, the person who gave me this sage advice was… me. The first time I said it was for about ten minutes before the shot of the spider surrounded by flies taken with a Canon 550D, kit lens and macro filter.
I had plodded around the garden for 15 minutes, staring at plants like a crazed botanist. I couldn’t even find so much as the staple macro subject of a Bluebottle. I then defiantly muttered to myself the non-sequitur above and, lo and behold, I discovered the rather successful spider. From that day on, whenever I couldn’t find anything to photography, I’d repeat that saying and keep looking.
What I would suggest initially is learning an area; be that your garden, a local lake or pond, or even just a large local bush (stop sniggering). Insects are habitual creatures like anything else—as I will come on to shortly—and they are attracted to certain things and repelled by others. It pays to know where interesting insects dwell.
Shoot on an out-breath. This tip can serve you well across a lot of photography, and it was given to me by a marksman.
When I first started macro photograph I used to hold my breath while edging in to that beautiful slither of focus. I would miss myriad shots and I blamed the shutter button shake, but that wasn’t it. My marksman friend told me that when you shoot, you pull the trigger at the end of a breath and don’t hold your breath to pull the trigger as that can cause you to wobble. Heed this advice! Shooting a rifle and macro shooting an insect with a camera have remarkable overlap; both require a very steady hand and accuracy that is measured in millimeters.
A secondary tip along the same plane of thought is to use a monopod where possible. I found this awkward but there are incredibly talented macro photographers who swear by them.
If the insects won’t come to you, go to the insects. I live in England and our wildlife is largely uninteresting; this extends to insects.
One option I fully recommend is visiting butterfly or insect houses. There are plenty and I have never had any of their employees unhappy about me and my giant camera following the insects about. In fact, it’s usually quite the opposite.
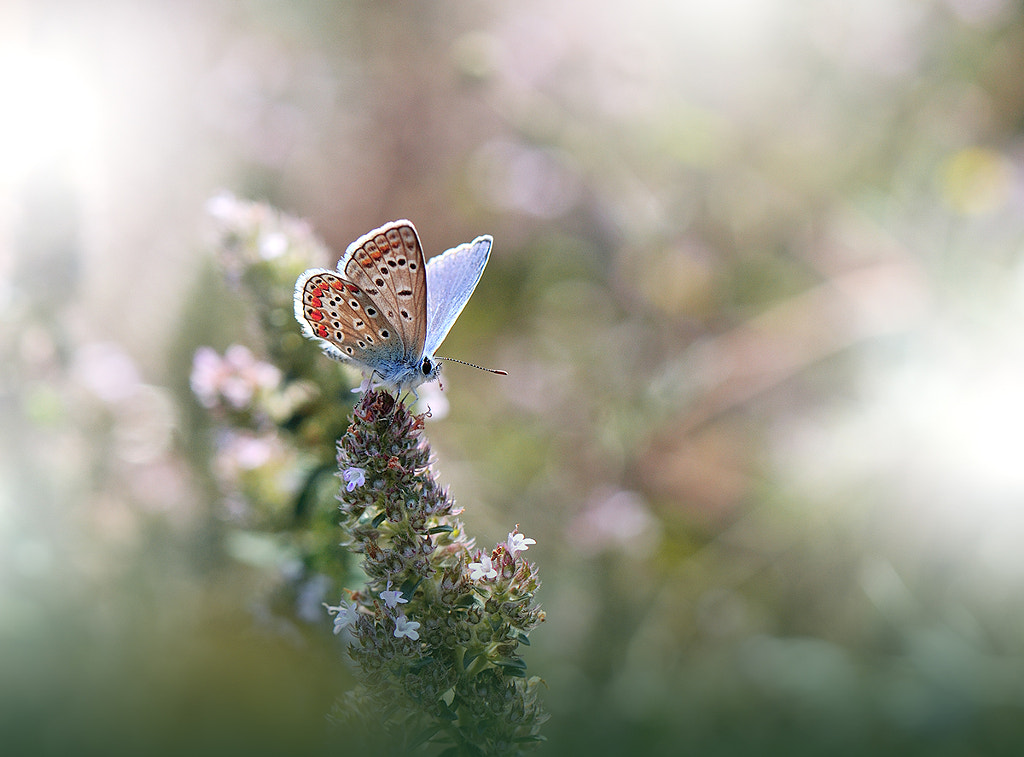
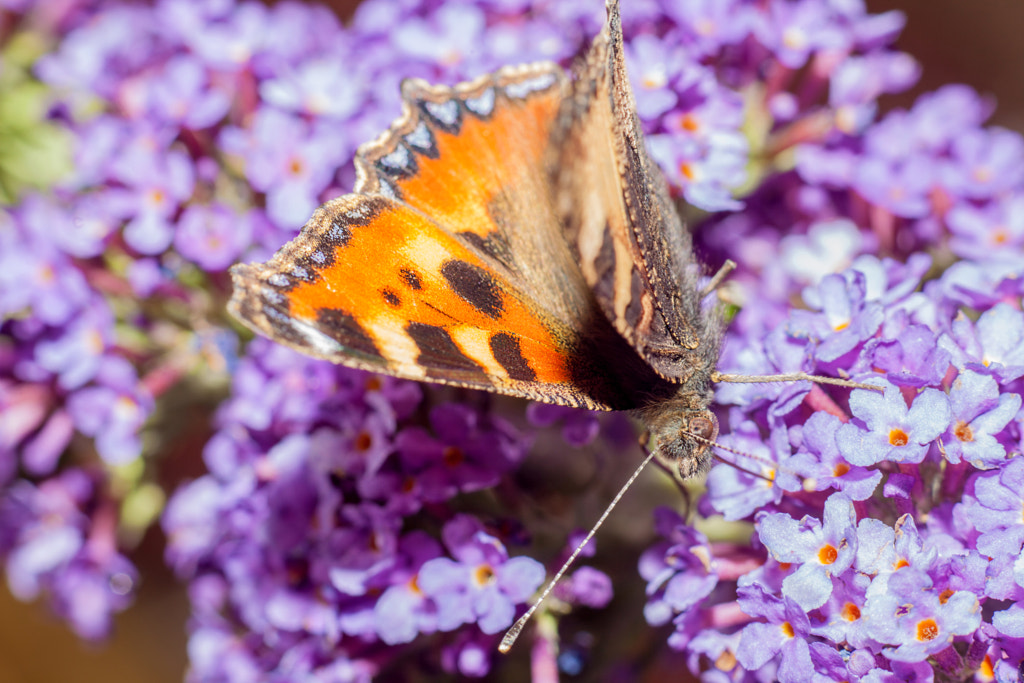
In the below image, which was taken with natural light in a butterfly house, one of the ladies who worked there followed me around telling me about all the different types of butterflies and their behaviors.
Shoot at the beginning and end of the day. This tip seems a little counter-intuitive, particularly when the reason is explained: the temperatures are cooler and so the bugs are less active.
This is advice I had forgotten until Ed reminded me, but it is very useful to know. In the early morning and in the early evening you will find that insects are a lot more tolerant of you and less inclined to move around allowing you to edge towards that perfect shot. And speaking of edging towards your subject…
Move slowly around your subject! This is obvious, I know, but it’s easy to forget. You’ll be as calm as a Hindu cow until some rare insect lands near you and then form and light-footedness goes out the window.
Always approach your subject very softly and edge in to focal range. Avoid sudden movements and as Ed again reminded me:
Don’t let your shadow pass over the subject. Be aware of where the sun is and don’t cause an eclipse on your subject. Firstly, it’ll throw off your lighting settings but, more importantly, most insects are attuned to shadows being predators and darting off in to the undergrowth when the sun is blotted out.
Insects are habitual like any conscious creature. They will often frequent the same plants and areas, they will act differently in different temperatures, and they like what they like.
What do I mean by this? Insects are often where they are because they want to be there not that they happen to be there. As Ed qualifies: ‘if you frighten something away, it’s sometimes worth waiting, camera ready, to see if it returns.’
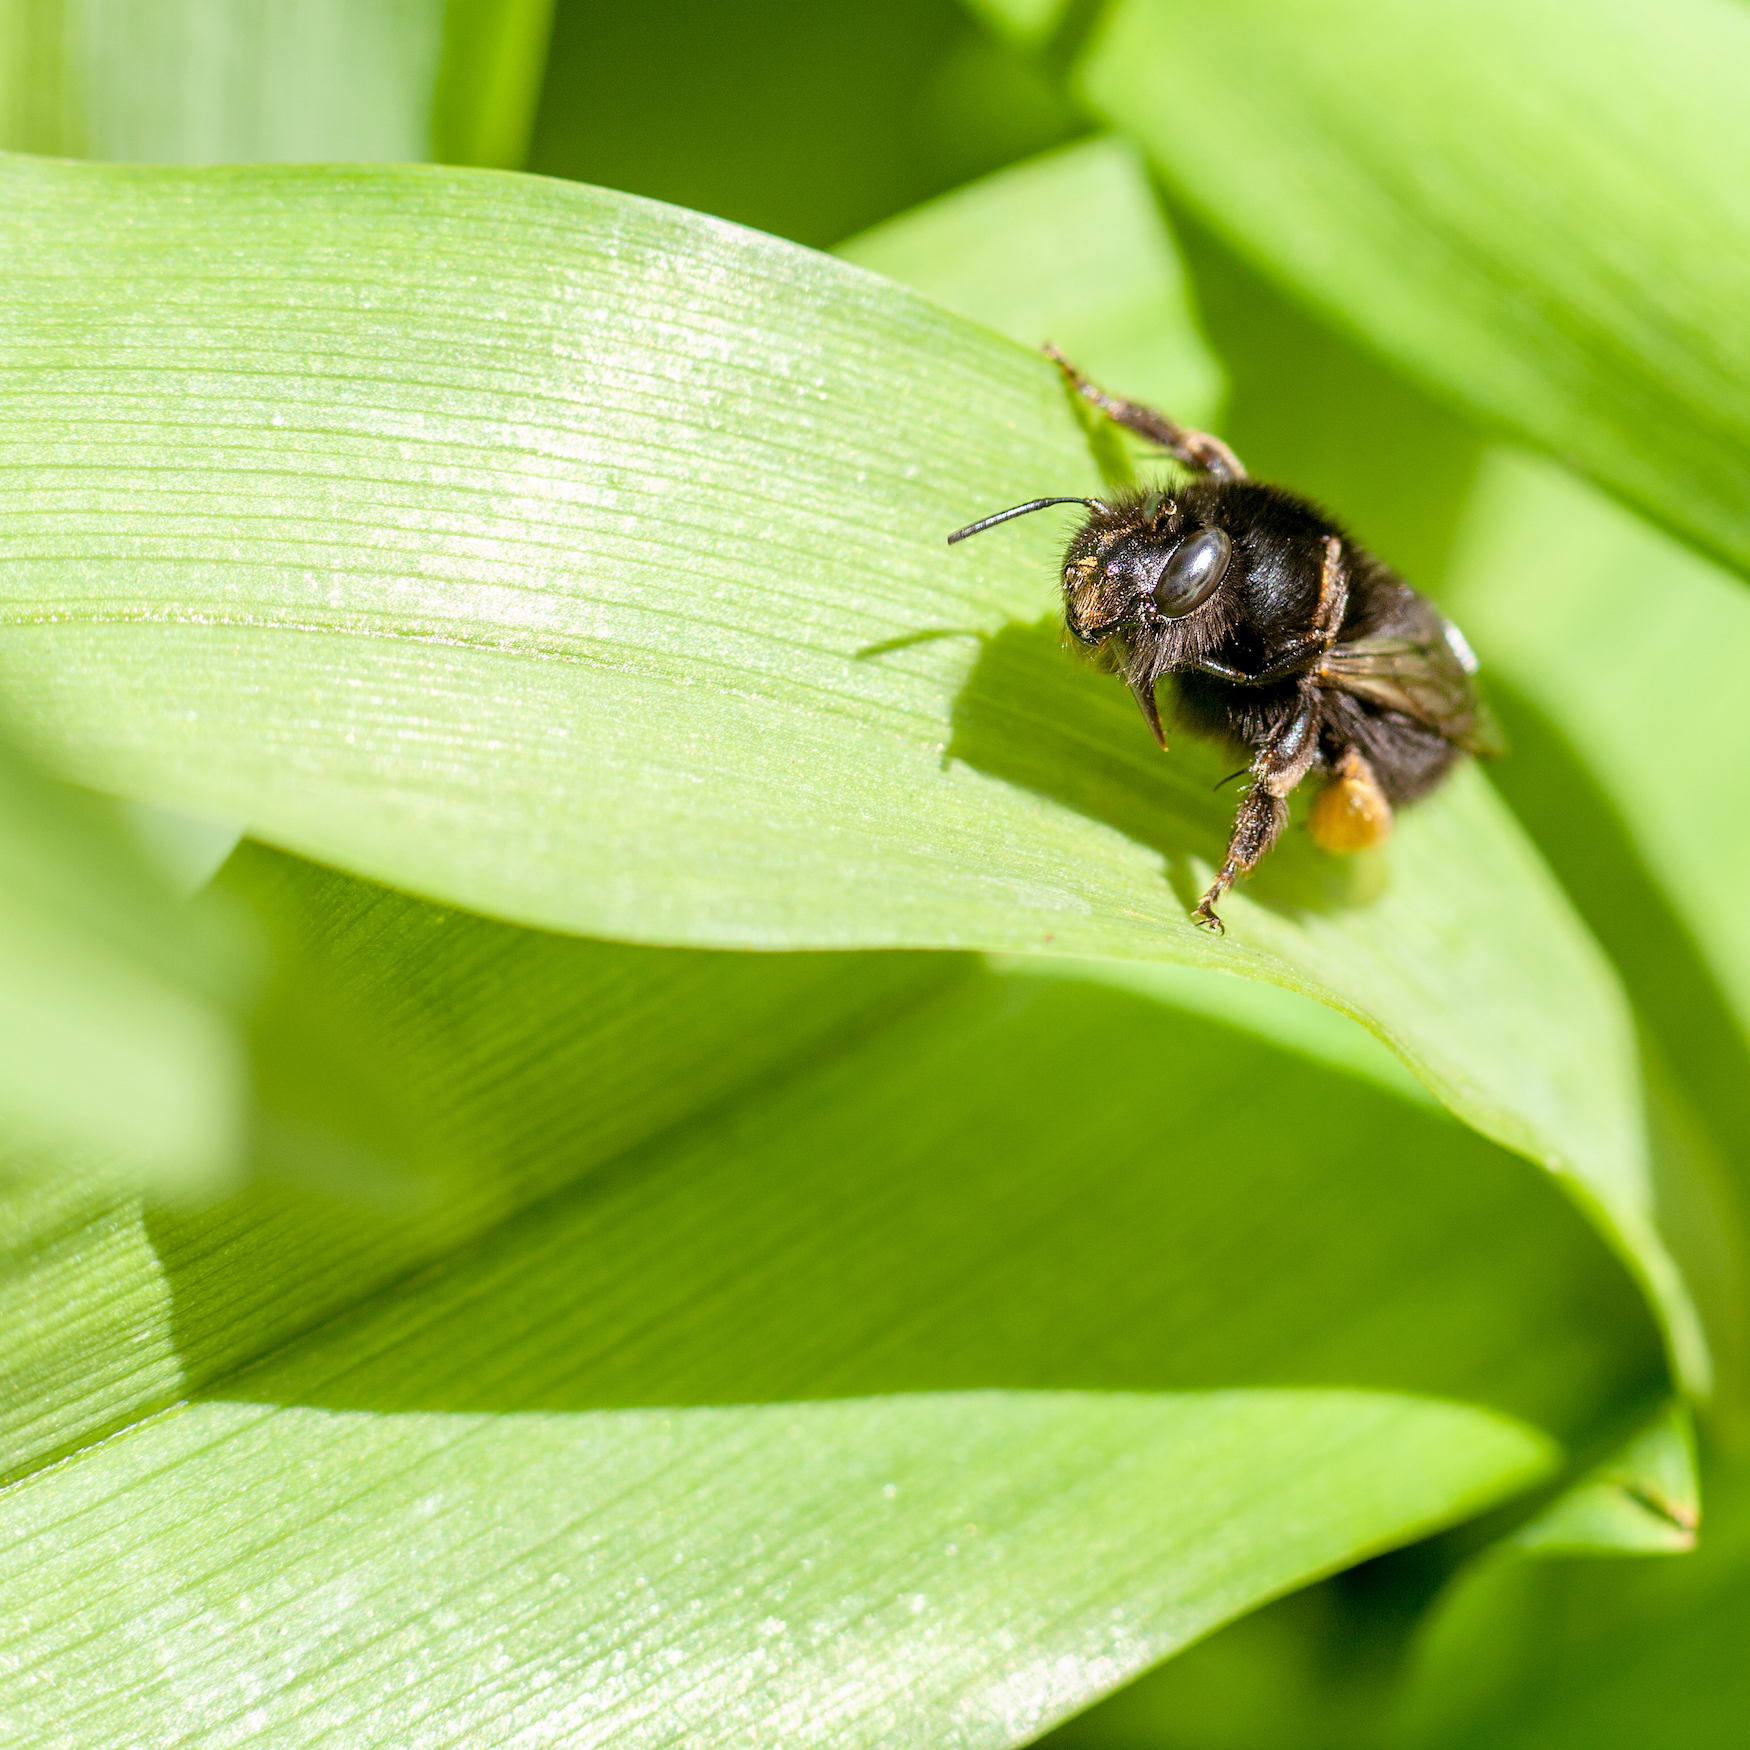
I can’t offer a better example than the below images. They were taken a year apart to nearly the day (16th April 2014 and 14th April 2015) and were both taken in the same 2 meter squared area of lawn near some roses. That’s how habitual insects can be. Plus, these two shots bring me on to the most important tip.
Patience
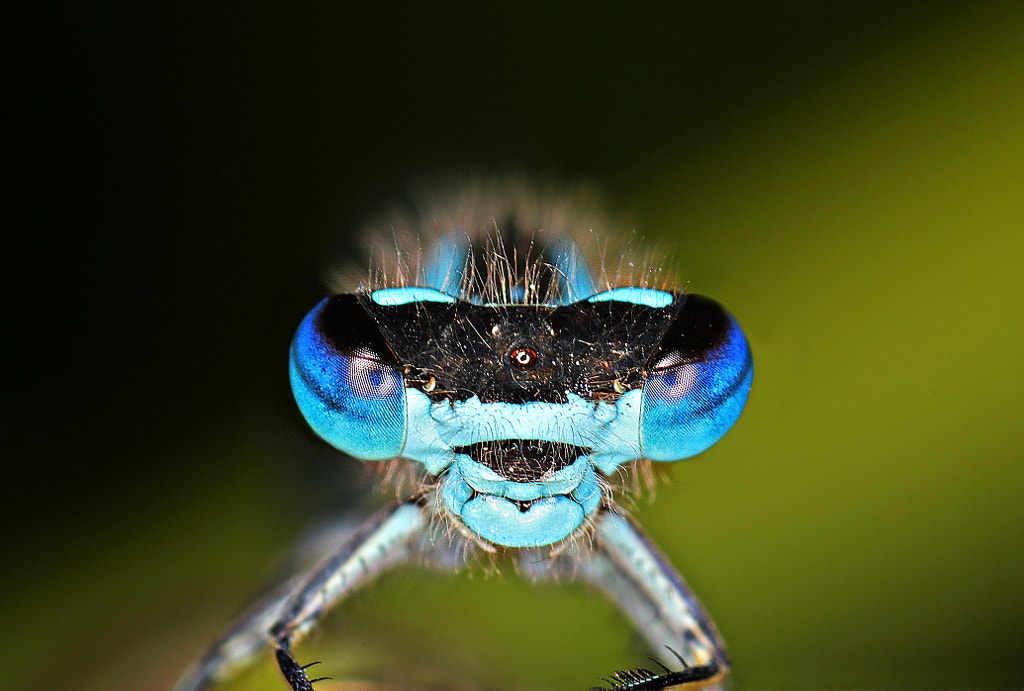
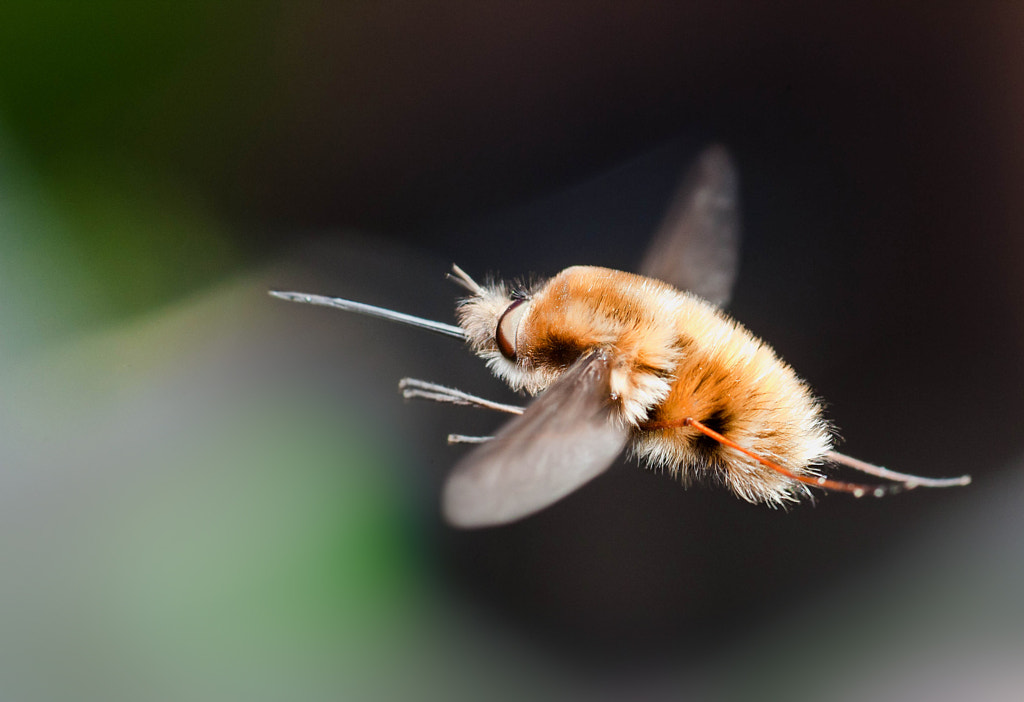
As with all wildlife photography, an enormous amount of patience is necessary. The headshot of the Damselfly earlier in this guide took me months of going back to the same lake where I had seen several of them. Then, on the day I got the shot, I followed the same Damselfly for nearly an hour until it fully settled. However, the two images above of the Beeflies in flight take the biscuit.
The first shot took over 2 hours and over 1000 missed shots to get. The area this Beefly was in is overlooked by at least 5 houses and there’s zero chance that the occupants can see a Beefly (marginally bigger than a Bluebottle) from whichever vantage point they are at.
Instead, they see a twenty-something man, in shorts and shirtless, with a massive camera and flash guns, crouched and waddling around a small patch of lawn for hours, stopping occasionally to fire flashes at, for all intents and purposes, nothing.
The next year the shot took under 2 hours and around 400 missed shots. Capturing a fly (it is actually a fly, not a bee) in flight requires monk-like patience but all the most unique shots do. Take your time; the shot will come.
Conclusion (including TL;DR)
Macro photography changes the way you look at the world while it changes the way you look at the world. Insects you previously showed mild disdain and disgust for suddenly become incredibly interesting when you realize just how intricate they are.
I mean, that’s part of the beauty of photography isn’t it? It allows you to capture moments that would be lost to the human eye or indexed in a vast library of dusty memories never to be looked at again.
For the astrophotographer, galaxies unavailable to the naked eye are unlocked; for the portrait photographer, micro expressions are frozen in time for all to enjoy; for macro photographers, the layers of detail that we overlook with a near criminal lack of due care and attention bubbles to the surface and can be transferred to sizes great enough to strike awe in to all those who cast eyes on it.
TL;DR
- Bugs cool
- Photography expensive
- Macro filter/reverse rings cheap
- Lenses justifiable to angry spouse
- Stop paying silly money for lights
- Don’t go home; look harder
- Be patient
- Look insane to neighbours
- Profit
This article was original published in 2016.
You Might Also Like These Articles:
- Incredible Macro Photos Taken With A smartphone & DIY Lens
- Macro Photography: 4 Tutorials Full of Tips & Tricks
- 35 Mobile Photography Tips For Taking Better Smartphone Shots
- Tutorial: How to Process Macro Photos


Leave a reply