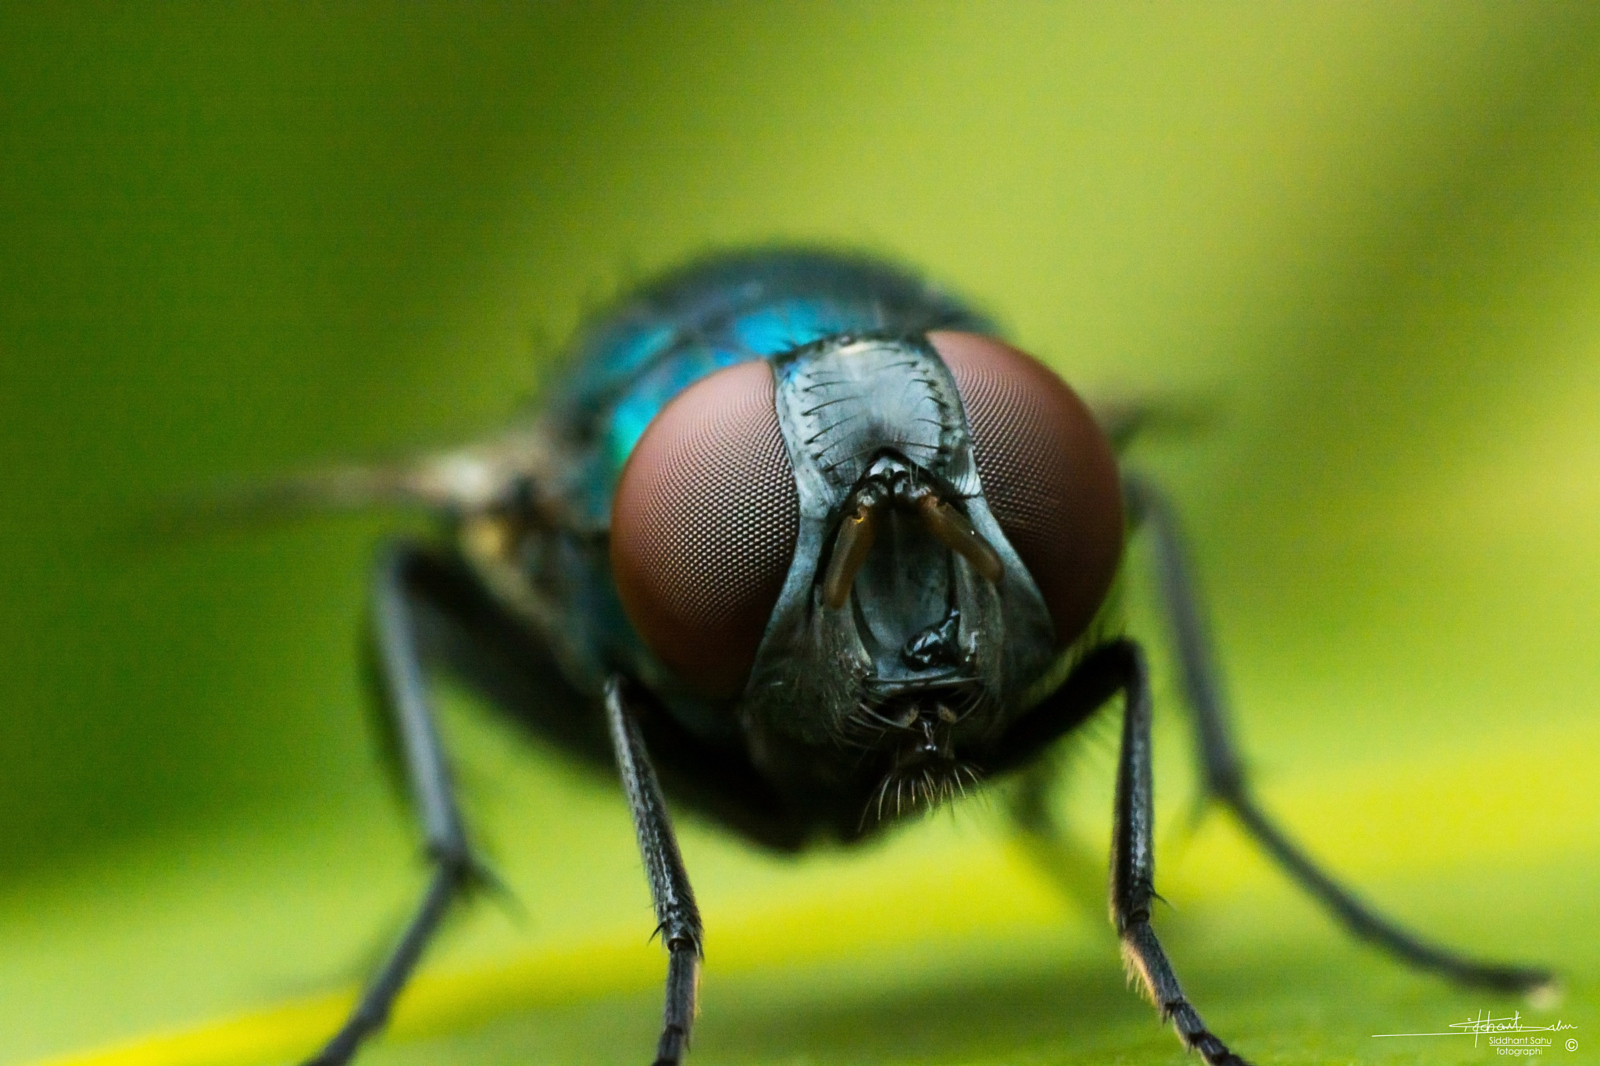
Siddhant Sahu is a passionate, young macro photographer from India whose work far outstrips his 16 years of age. He uses minimal gear—just a reverse lensing setup—but manages to capture incredible photos all the same.
To see more of his work, check out this 500px ISO feature, follow him on 500px, give him a like on Facebook, or check him out on Instagram.

Introduction
Hello, my name is Siddhant Sahu, a 16-year old hobbyist photographer from India. I take photos because I love doing it… and life is too short to do things that you don’t love. Life is like ice cream, enjoy it before it melts!
In this small article I would like to demonstrate how I processes most of my macro photos.
I firmly believe that post-processing is as important an aspect as shooting the photo itself. Although it is definitely worth spending as much time as you can spend on taking the original photograph, it’s often the quality of your editing that takes your photos to the next level.
A Note on Capturing Your Photos: The first and foremost step is to shoot in RAW format. Never shoot anything other than RAW. This way you’ll gather the most information your camera is able to capture.

Post-Processing
Overview
Most of my processing is just simple editing done mostly in Camera Raw or Lightroom. Both are the same and work great for me. The final step is to render my image in Photoshop and give it some final retouch if needed.
Import and Convert if Necessary
After you’ve transferred your photos from the camera to your computer, the next step it to import your desired photo into Photoshop. Since you listened to me and shot a RAW file, it’s possible that the files are not be supported by the version of Camera Raw installed in your computer, so we can covert the raw file to .DNG which is the file format Adobe can understand no matter which version of Camera Raw you use.
If you need to do this, an Adobe DNG Converter is available free on the Adobe website.
Now that you have your desired photo, which you want to edit converted to DNG format, just import it into Photoshop. Camera Raw will automatically read your DNG files and now you are good to go for your real editing.

Color Profile
The Camera RAW window will automatically pop up. At this point you will be able to see the color profile in which you are processing your image below the window. Make sure that it is sRGB, which is the color profile all the web browsers support and accept across the Web.
If you are on other color profiles like the Adobe RGB, after you render it and upload to the Web, you will see color mismatch in some places. Adobe RGB has greater color depth than sRGB, but it’s not accepted everywhere, so unless you are not printing your image it is recommended to edit in sRGB.
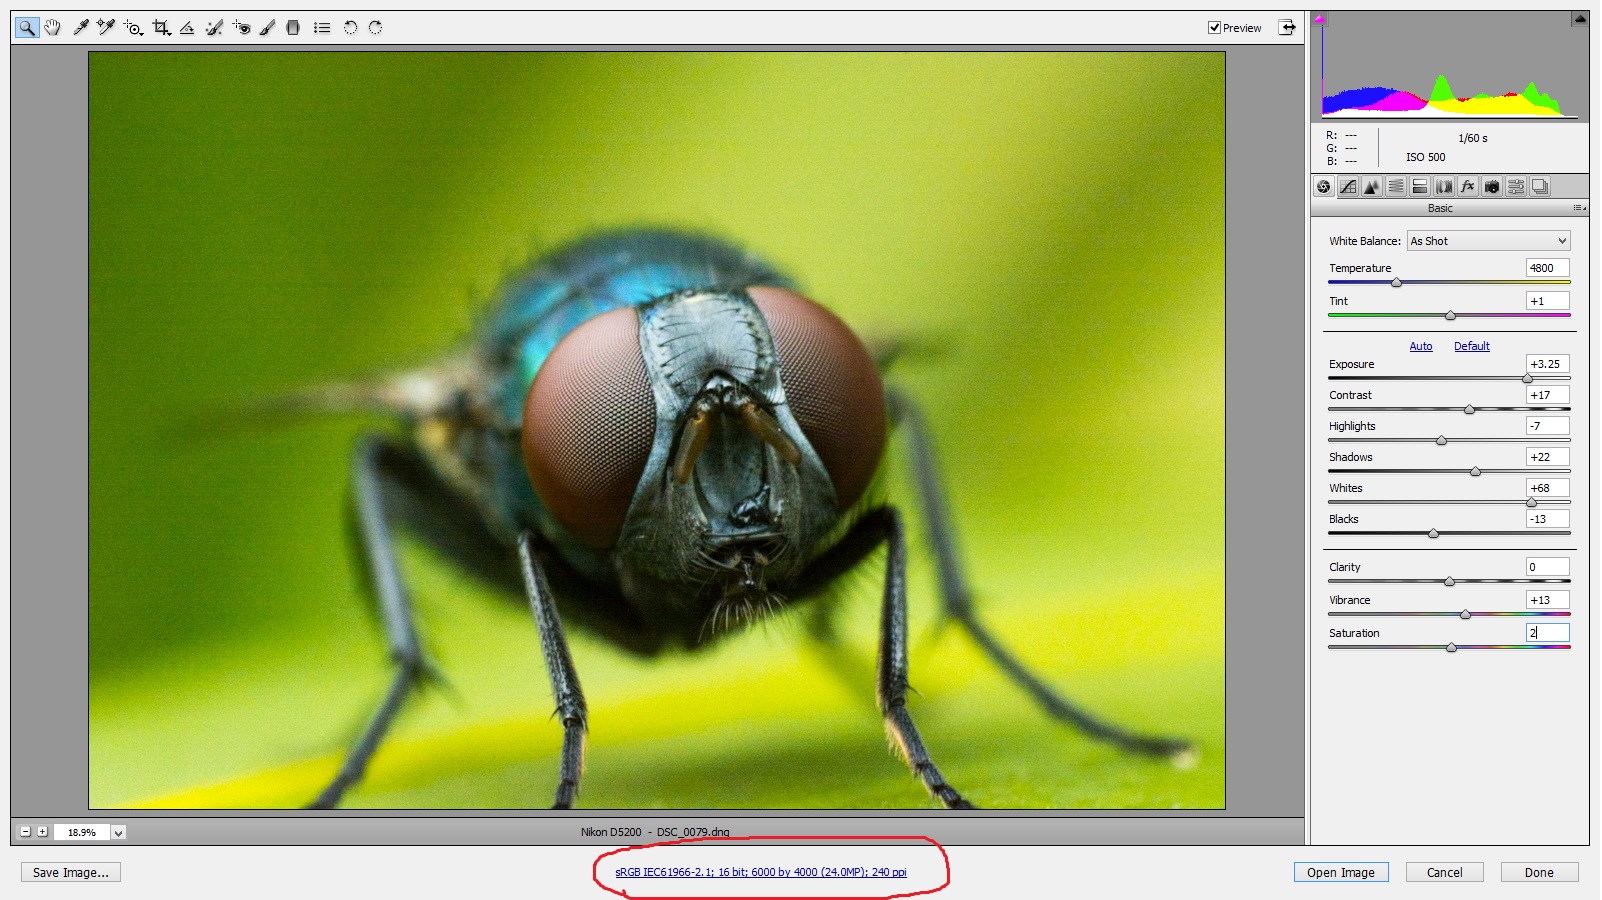
Let’s Get Editing – How I Handle Each Slider
1. My images are generally a bit underexposed out of the camera, so first I need to increase the exposure a bit while making sure that I don’t overexposed it.
2. Then I also do some subtle changes in “White Balance” (Temp), making the specific changes that work best for each individual image.
3. I usually don’t mess with the “Highlights” slider.
4. I tend to increase the “Shadows” slider so I can pull more details out of the shadows, giving the image a flatter look.
5. Then, while pressing and holding the Alt or Option key, I increase the “Whites” slider until I see some white spots on the image, indicating that the region is overexposed.
6. I do the same with the “Blacks” slider, holding the Alt or Option key and moving it in the opposite direction, stopping when I see some color patches.
7. Then I increase the “Contrast” slider a bit.
Note: All of the adjustments help me to create more contrast in the image and get rid of that flatness that pulling out shadow detail created.
8. Next, I like to add a bit of “Vibrance” to the image, as it is interesting to discover the colorful world these tiny creatures live in, which is impossible with just naked eyes.
9. Then, finally, I add just +2 “Saturation” … very subtle.
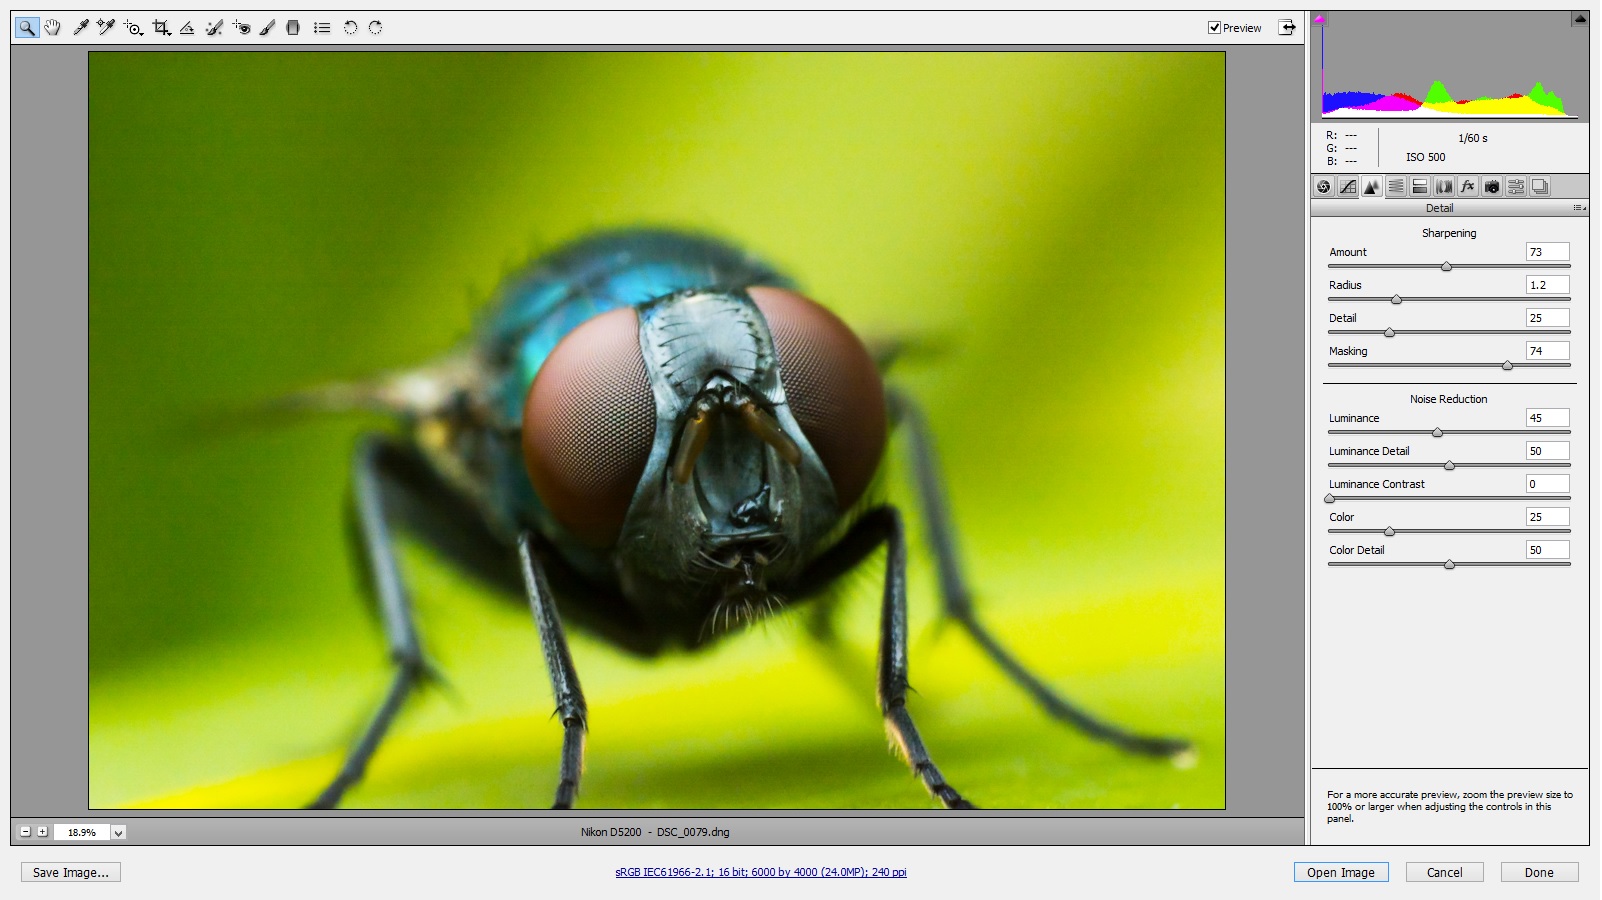
Details Adjustments
After applying all the global adjustments above, I look more closely at the image by zooming in and search for faults. Those I correct using brushes and local adjustments.
Then I sharpen the image a bit, masking the area where the sharpening is needed and also decrease a bit of the noise.
Now we are done with the Camera RAW adjustments! It’s time to open the image in Photoshop.
Photoshop Adjustments
If required, I dodge and burn specific area and sometimes do a gradual S curve with the curves adjustment to just add a bit more contrast only if the image is lacking. Now it’s almost done (as I said, most of mine editing is in Camera Raw and simple).
Next, I save the image and sharpen it a bit again accordingly depending on the resolution. To sharpen, I duplicate the image layer, change the blend mode to “overlay,” and use a high pass filter or the unsharp mask.
And that’s it! I’m done. It’s time to publish the photo.
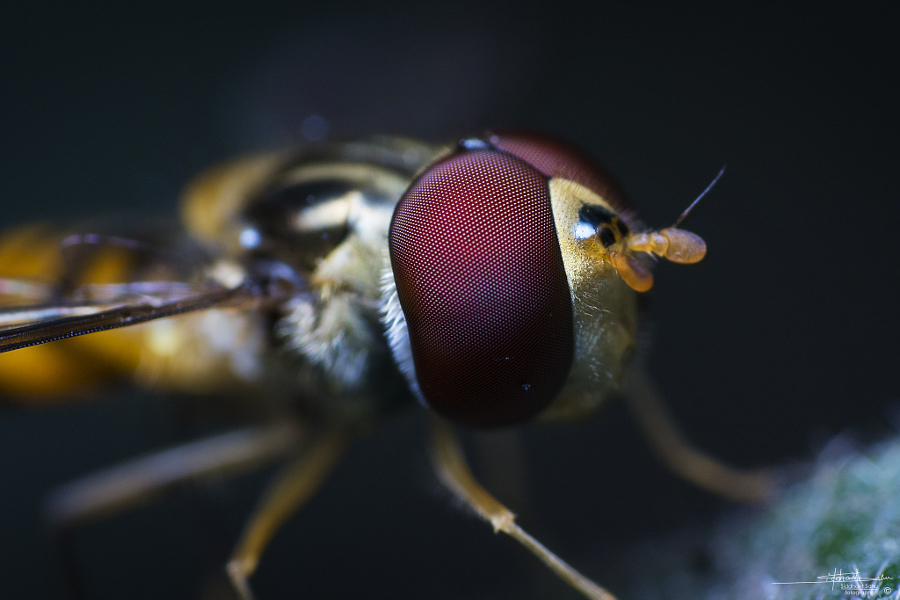
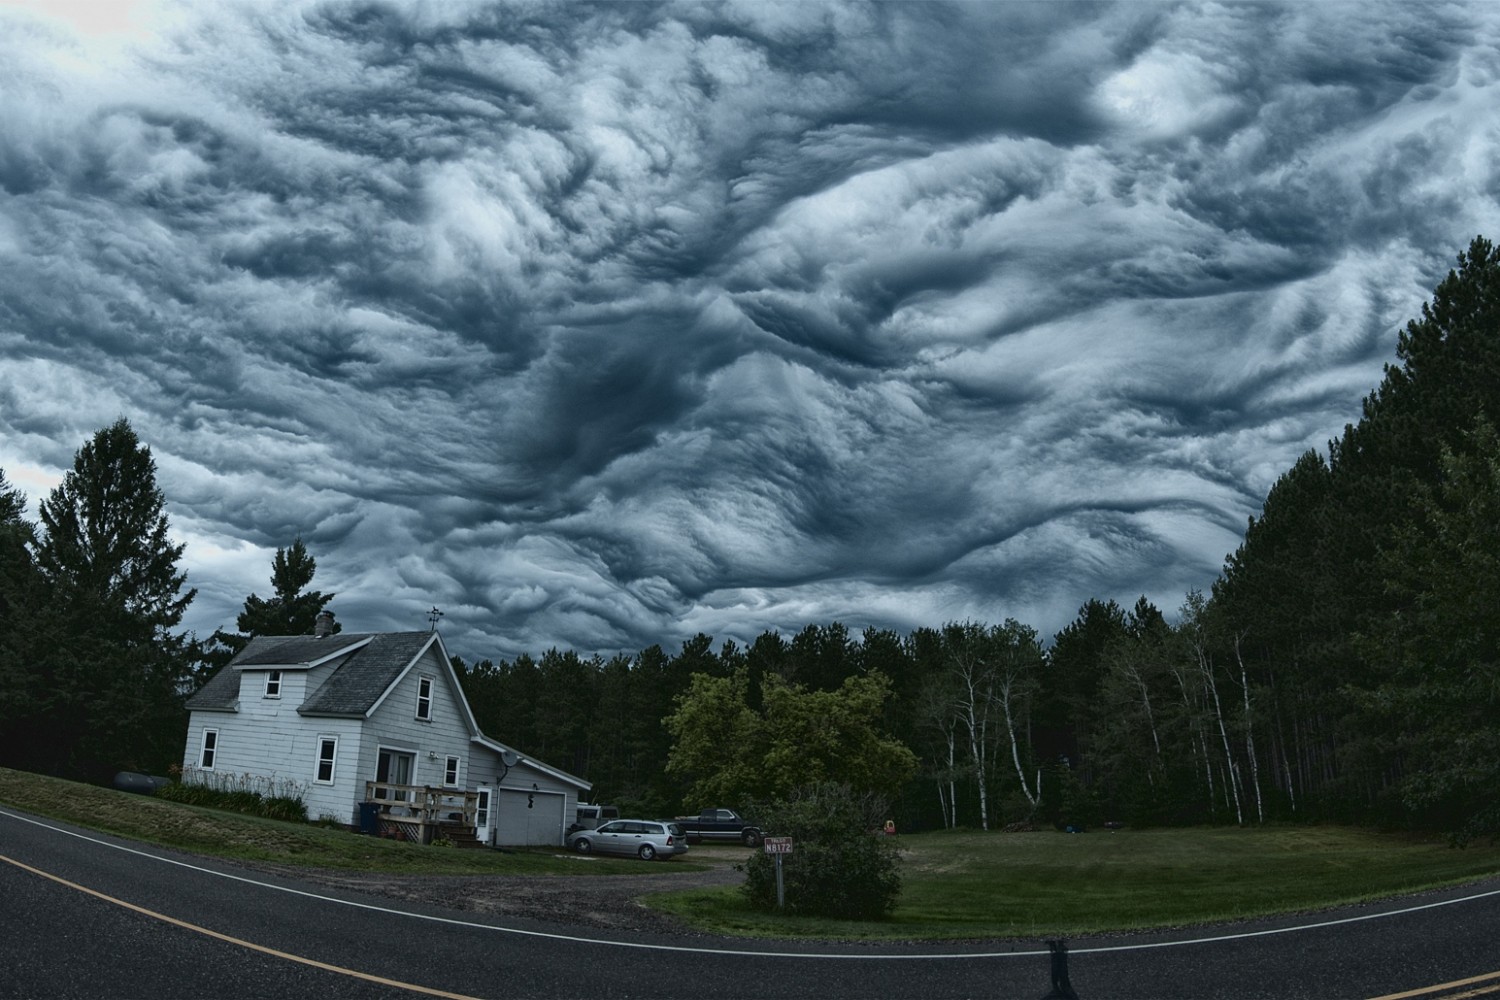
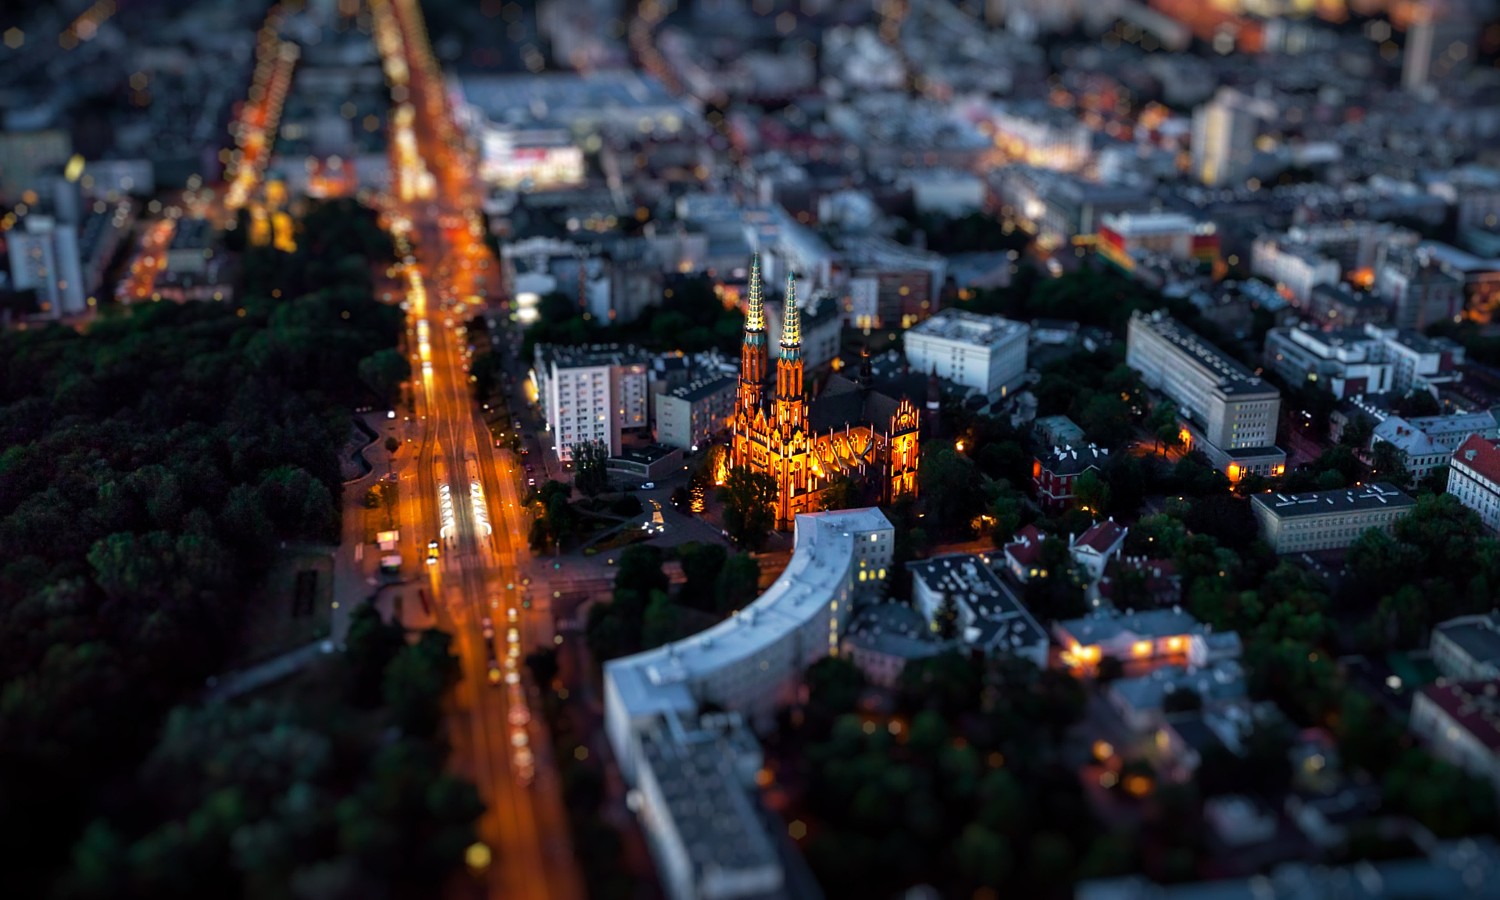
I hope you found this basic post-processing walkthrough helpful! Here are two before-and-after comparisons to show you what the adjustments described above do for my photos:
[twentytwenty]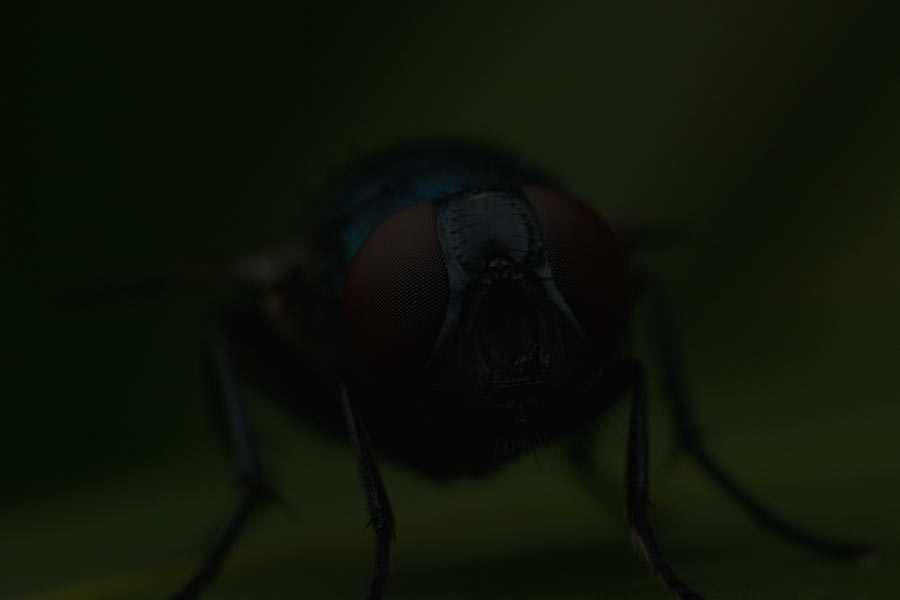
 [/twentytwenty]
[twentytwenty]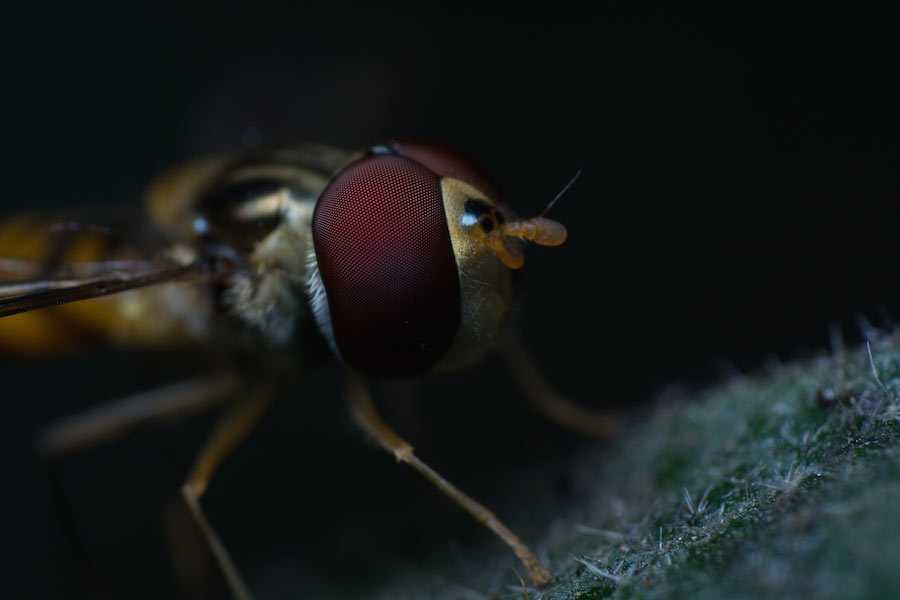
 [/twentytwenty]


Leave a reply