Last year, the Creative Insights team at Getty Images reported that customer searches for “real people”, “real family”, and “authentic moments” went up by a whopping 218%, 678%, and 122%, respectively. In recent years, there’s been a huge push in the photography industry to highlight regular people and everyday experiences. Leading brands ranging from Bumble to Gap to Spotify have all incorporated people who are not professional models into their campaigns.
Whether your specialty is portraiture, fashion, or commercial lifestyle sessions, this shift means that you don’t necessarily have to work with pros to produce a top-quality photo shoot. Your friends and family can be a tremendous resource—not only on personal projects and test shoots but also for your professional portfolio.
When you’re working with any model—and especially models who don’t have a lot of experience under their belts—the most important thing is helping them to feel comfortable and confident. If they feel at ease and free to experiment, they’ll reward you with expressive, creative poses that you might not have even anticipated. Here are a few easy, simple posing ideas to get you started and some tips for making the most of a shoot with friends.
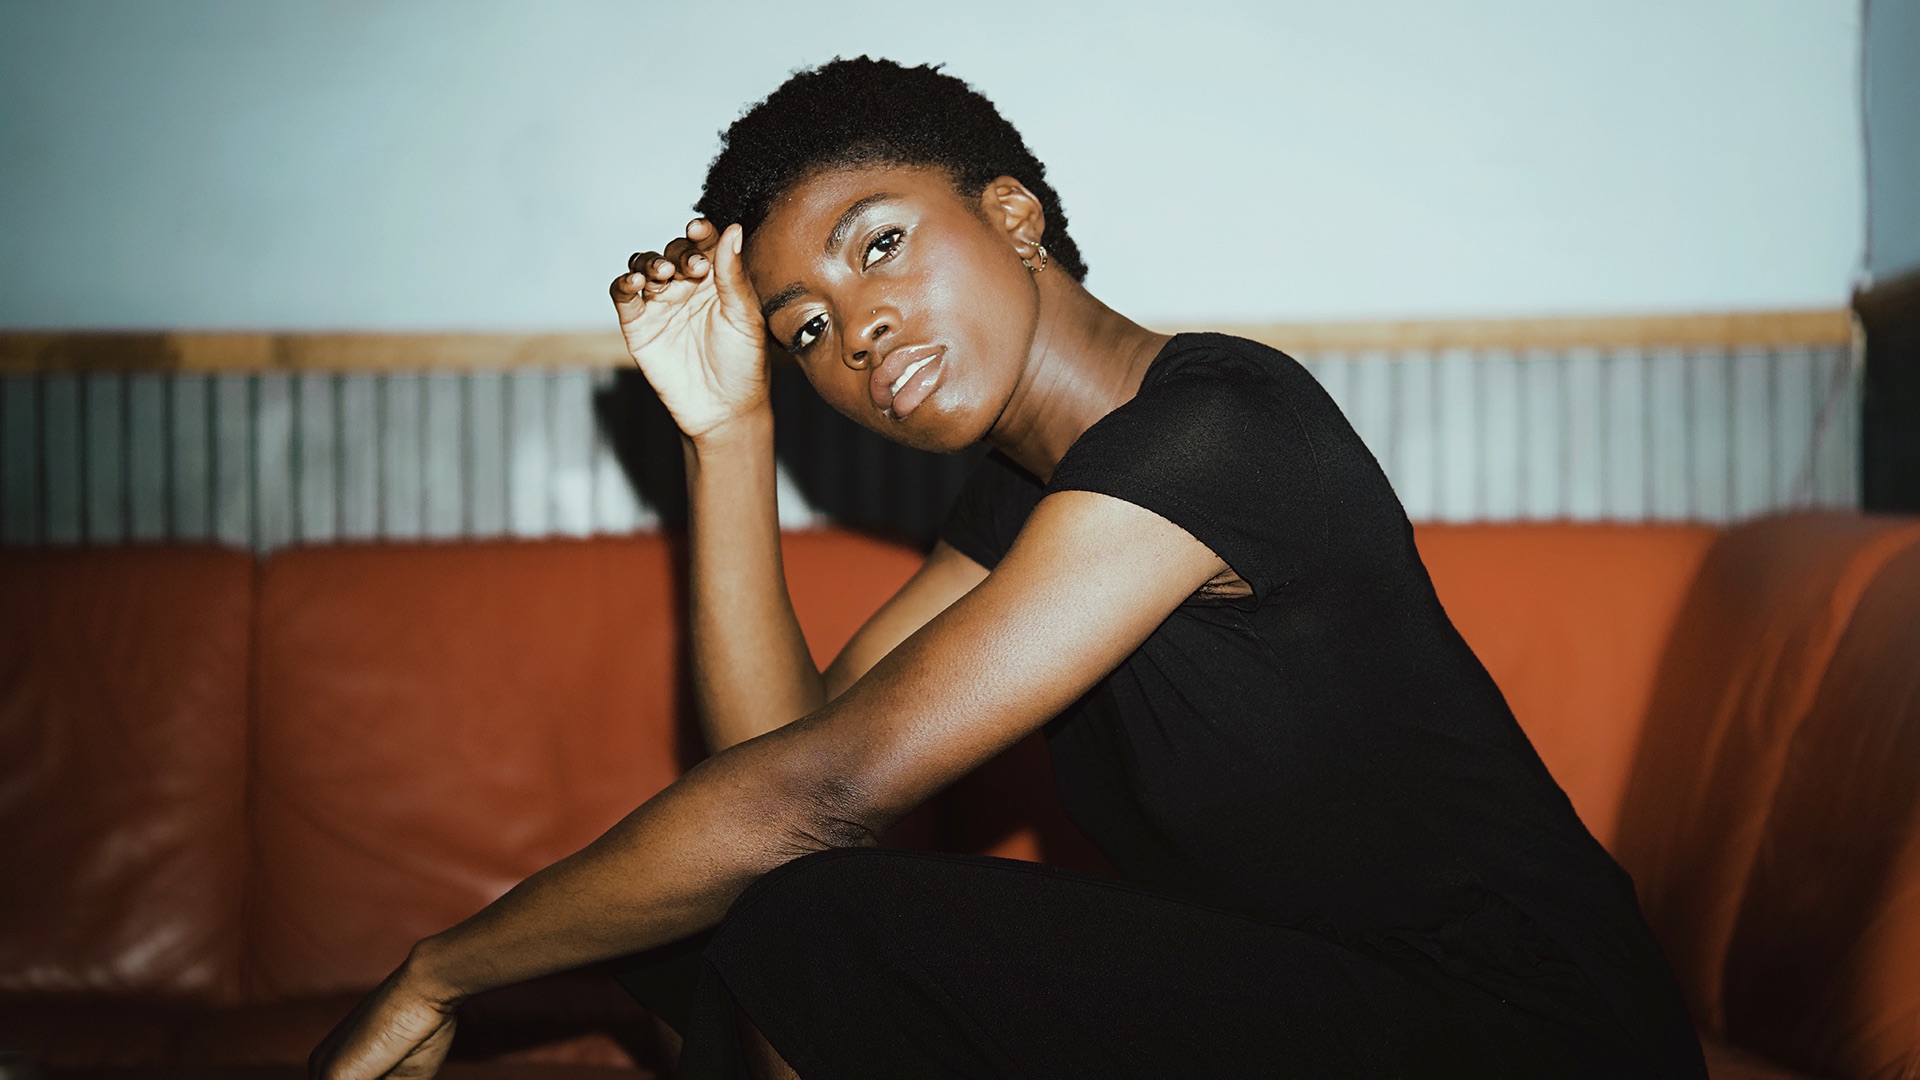
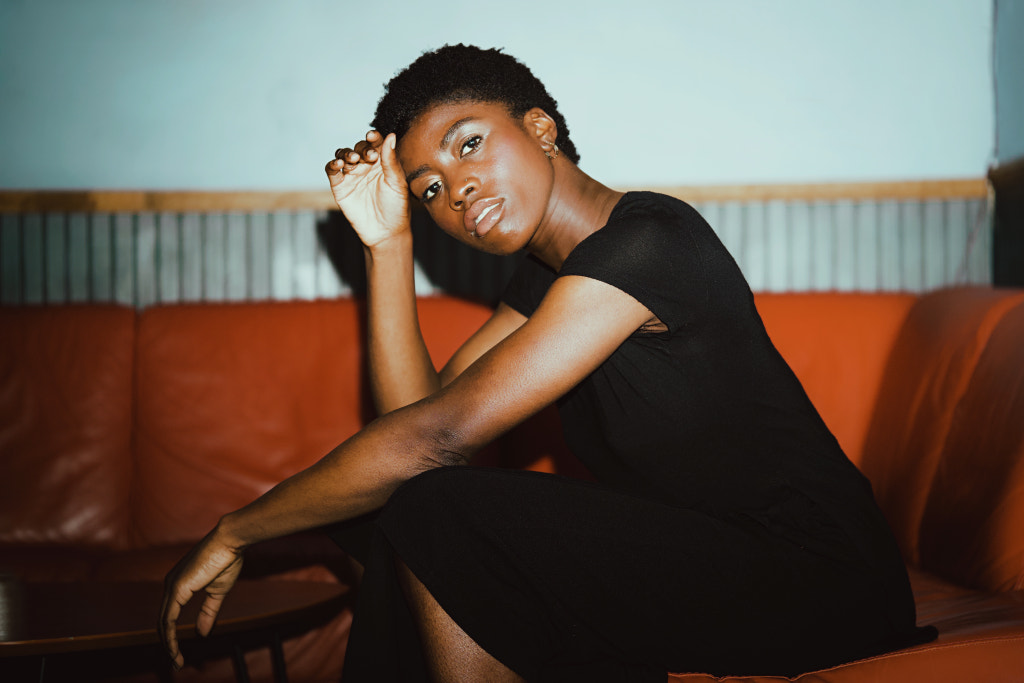
Sitting down
Seated poses are great for the beginning of a shoot because they’re comfortable—and you don’t have to worry about as many moving parts as you would with a standing shot. You can have your models sit anywhere from a stool to a bench, as long as they’re relaxed and free to move around a bit, leaning forward and back. From this simple seated position, you can have them place their elbows on their knees, join their hands together, touch their face—the options are endless.

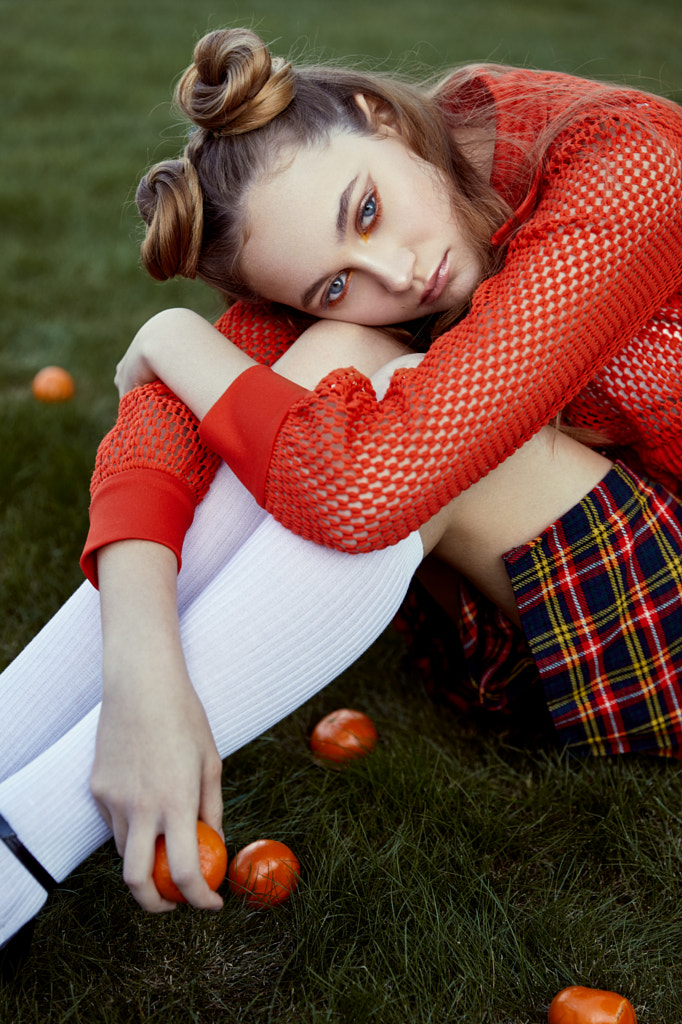
Tip #1: Help with wardrobe
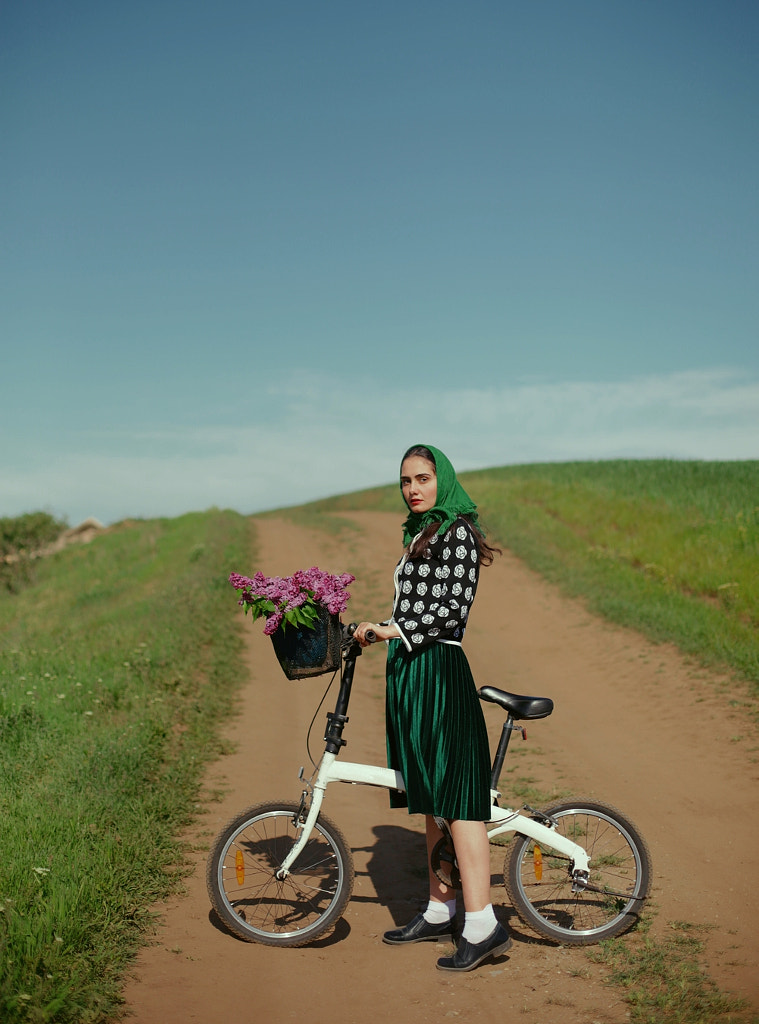
Non-pro models don’t know what outfits will look best on camera, so help them look and feel their best by sending along some mood boards or ideas before the shoot. Make sure they select clothing that they feel comfortable with, and that allows for movement.
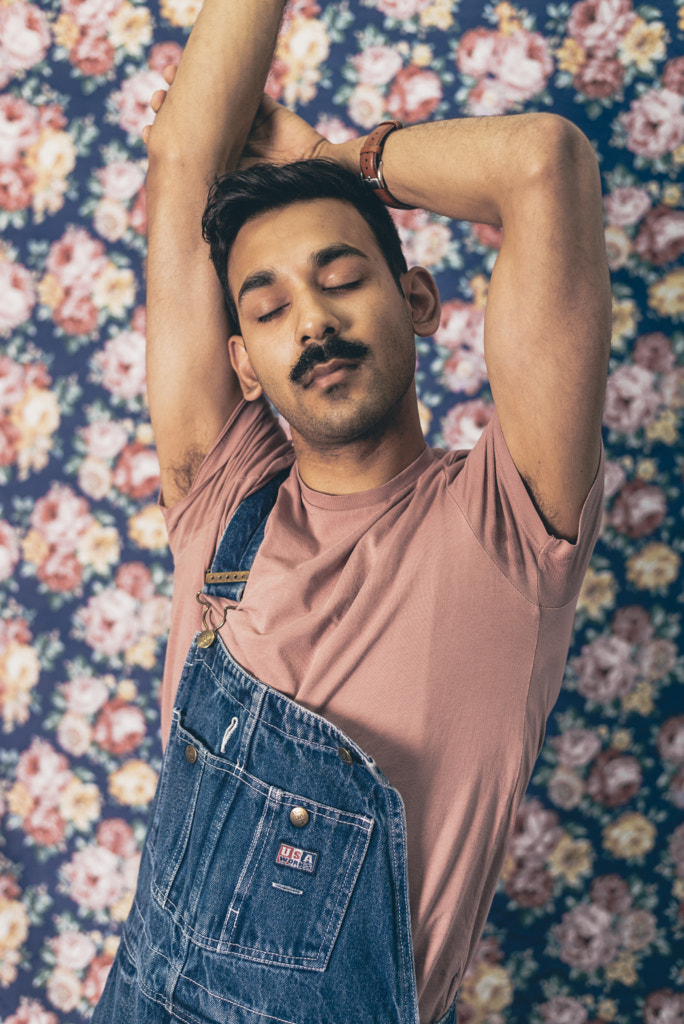
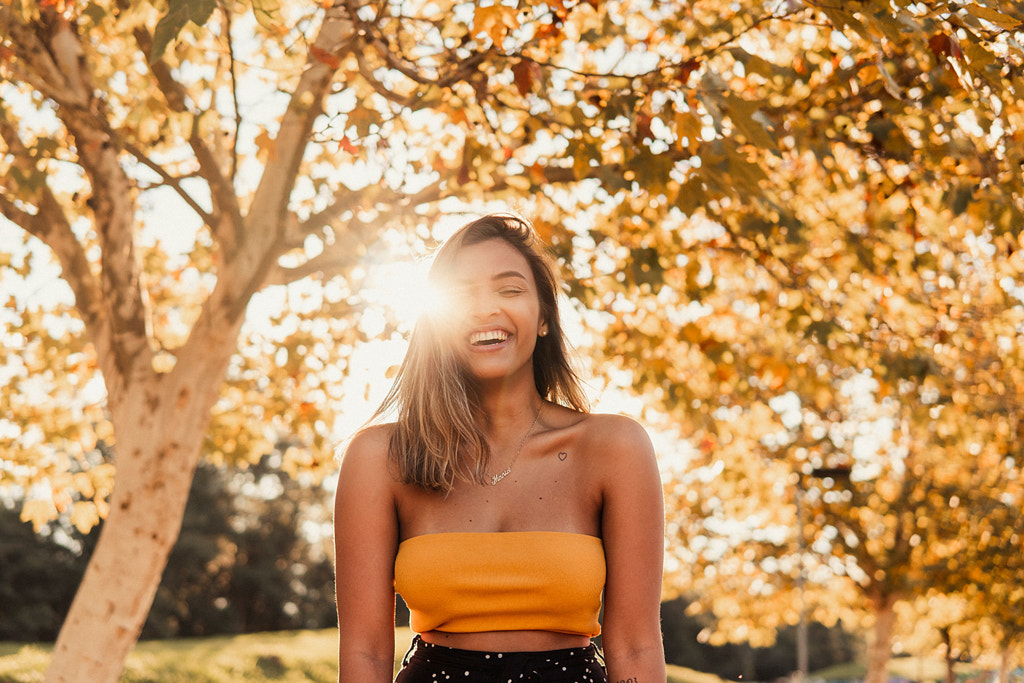
Give them a heads up on the location, and consider coordinating with your background. If you’re shooting outdoors in the park, perhaps you select florals; if you’re shooting in an industrial space, solid colors and denim might be a better choice.
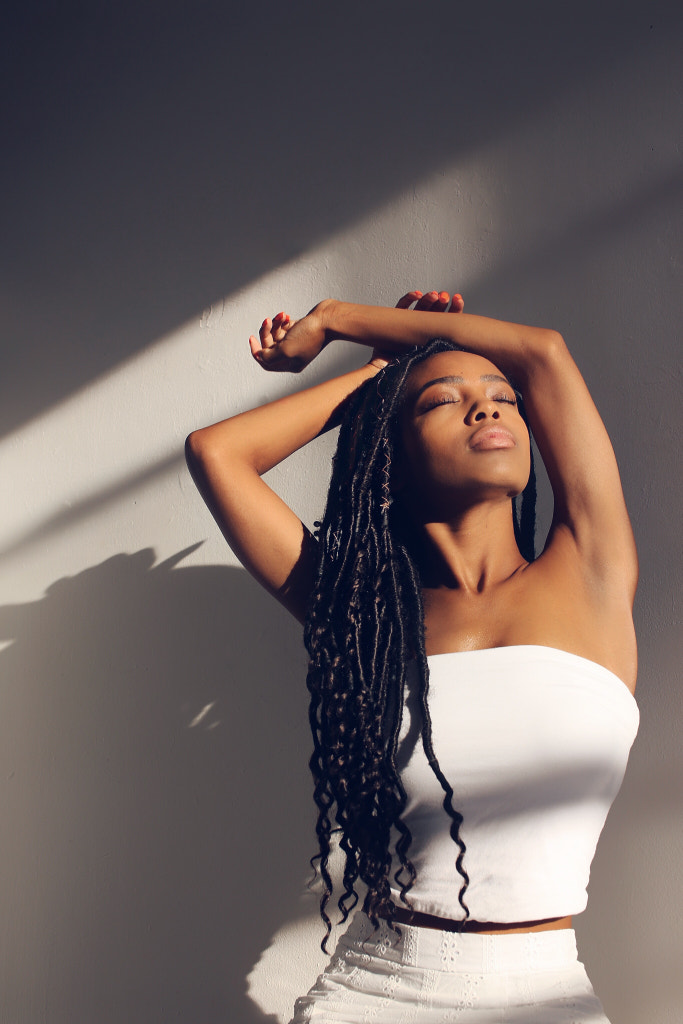
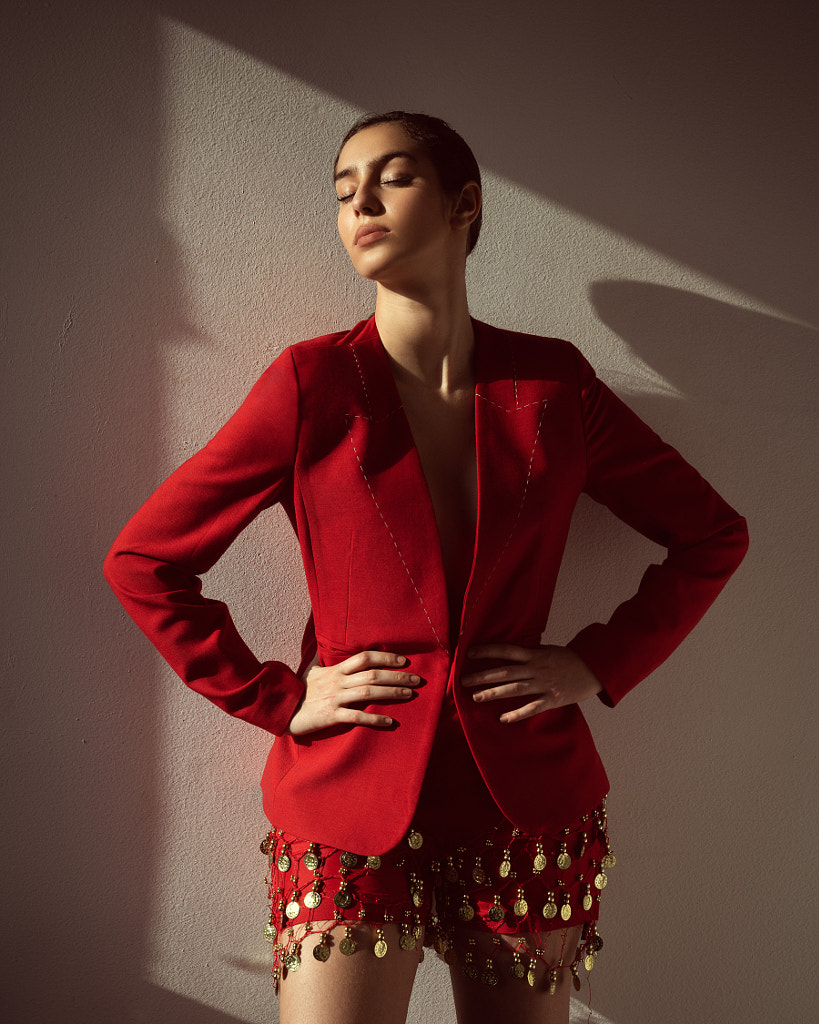
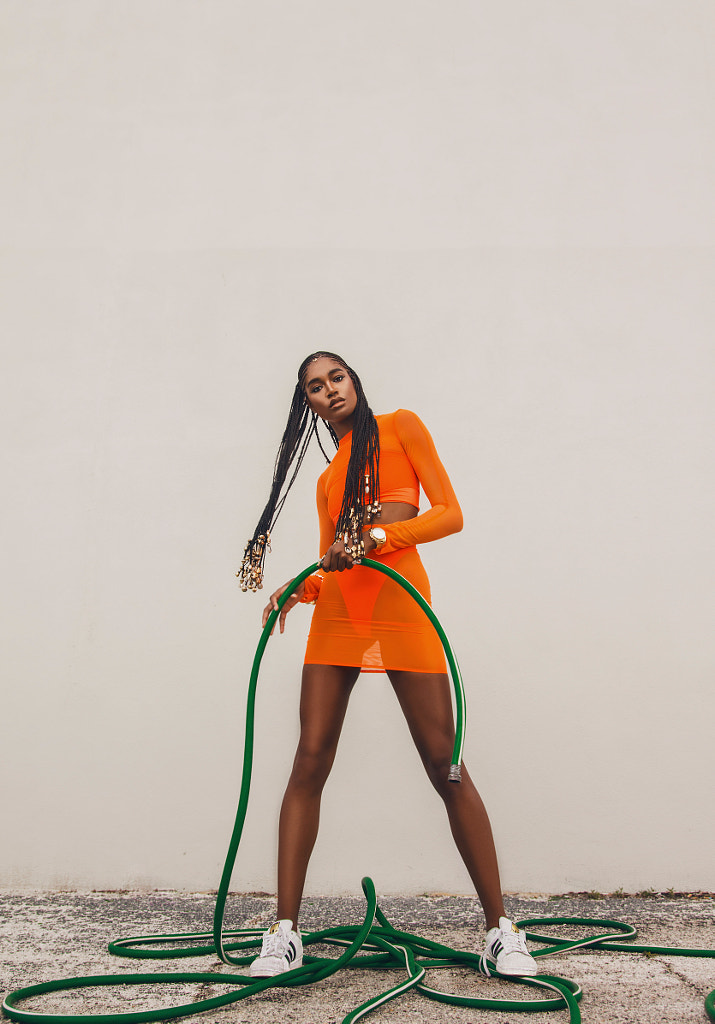
Extending the arms
Inexperienced models sometimes have a tendency to keep their arms stiff by their sides, so encourage them instead to separate their arms from the torso and bend them at the elbows. By having your model place a hand up behind the head or down at the hip, you’ll create that nice triangle of negative space between the arm and the body.
Encourage your friends to take up space; this is something new models are sometimes afraid to try, but it’ll also help show their personalities and leave them open to experimentation.
Tip #2: Share references
Some poses are hard to describe in words, and that’s where reference photos come into play. Send your model some examples and tear sheets of the kinds of gestures and expressions you plan to shoot, and invite their feedback.
Browse 500px and magazines for ideas, and check out other references from art history, including paintings and sculptures. You can also download the Posing App for some ideas.
Do your friends have any favorite photos and poses of their own? Ask them to send those through so you can add their poses to your shot list as well. Finally, don’t forget to bring all your materials and ideas to the shoot itself in case you’d like to refer back to them.
Pointing the toes
Asking your model to point a toe will instantly elongate the body, making it appear taller. This pose also serves to accentuate athleticism and anticipate movement—just think of Degas’s ballerinas or the Discobolus of Myron sculpture.
Tip #3: Start with a warmup
People who aren’t used to modeling often feel pressure to automatically start “posing” as soon as the camera comes out, but resist the urge to move into formal poses right away. Instead, give your models a chance to warm up.
Tell them you’re just taking some test shots to start and continue your conversation as normal, asking them about their day and what they have in mind for the shoot. The earlier you remove that pressure, the more comfortable your friend will feel. Some of those “test shots” could end up being the best of the day.

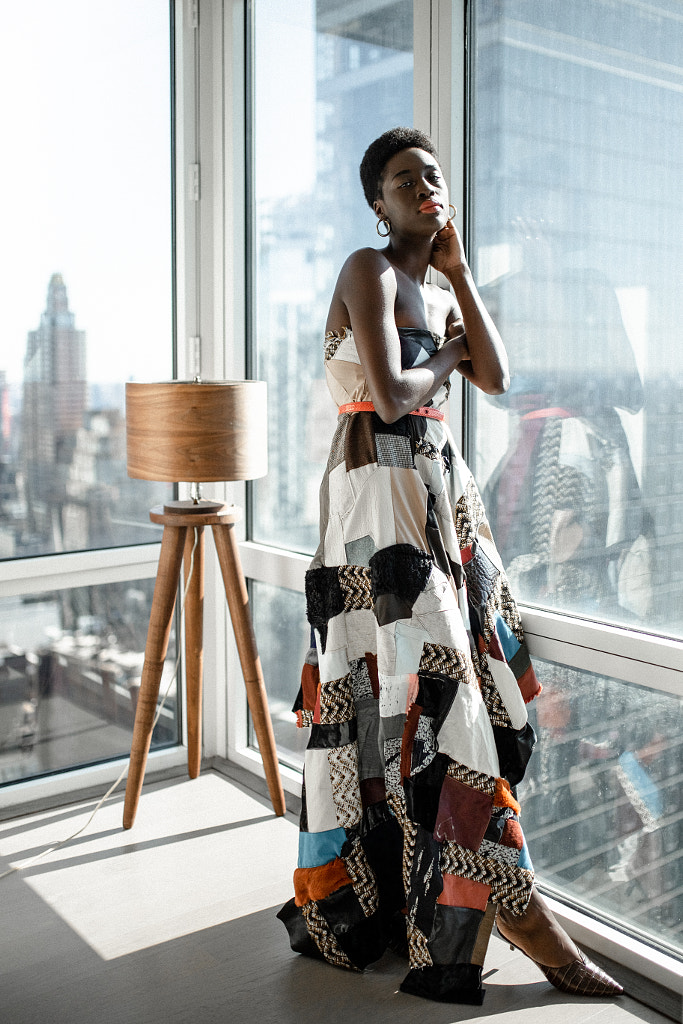
Bending the knee
The Venus de Milo, Michelangelo’s David, Perseus with the Head of Medusa—there’s a reason so many famous sculptures feature a bent knee. Bending the knee puts your model’s weight on one side, creating a dynamic but balanced composition throughout the entire body.
Tip #4: Bring a mirror
We borrowed this tip from 500px Ambassador Julia Wimmerlin. Sometimes, it helps for models to look at themselves in the mirror as they pose and move around the set. That way, they can make adjustments and see your direction take effect in real-time.
This works well during the warmup phase especially, when you’re just getting used to working together. After a few minutes, you won’t need it anymore, so feel free to remove it (you don’t want it to become a distraction).
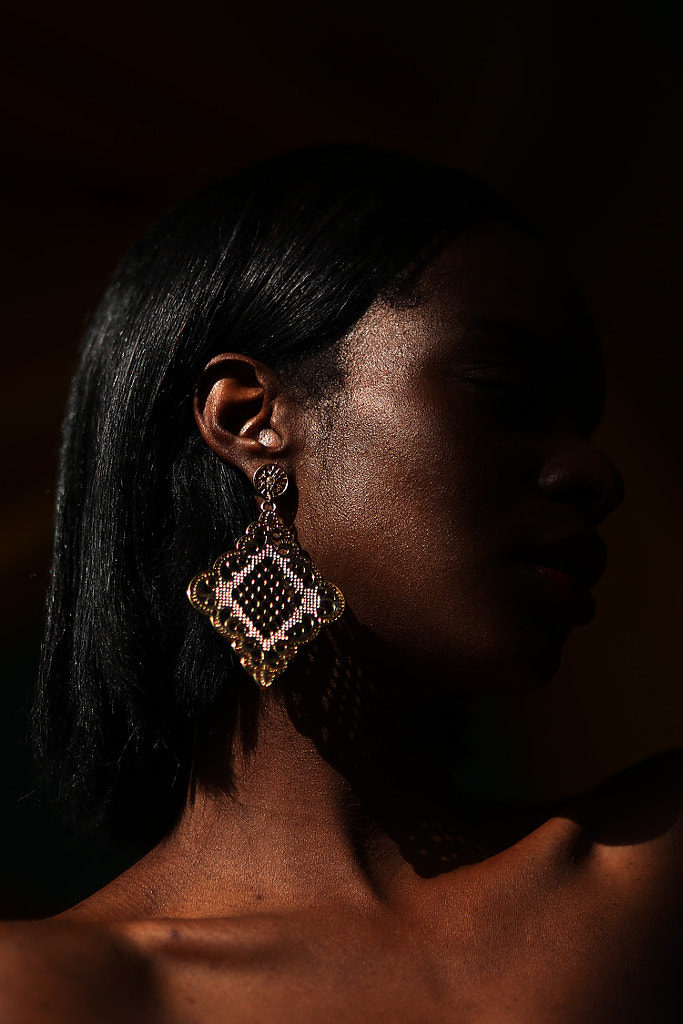
Soft hands
Our natural inclination can be to ball our hands up into fists, but unfortunately, this gesture doesn’t translate well on camera. The simple action of separating our fingers, while curling and elongating them, can make a significant difference in terms of the overall look of a pose, elevating it from awkward to elegant in seconds.
Tip #5: Give feedback
Even the most experienced models need direction, so don’t be afraid to keep the conversation going throughout the shoot. Provide consistent, clear feedback about what works, and give occasional, actionable prompts like “turn your head slightly” or “bend that elbow a bit.”
Don’t be afraid to get specific or pose yourself to show them what you have in mind. Remember: the model can do no wrong, so direct, but never criticize. If your models do something you like, let them know it looks great. A little encouragement goes a long way.
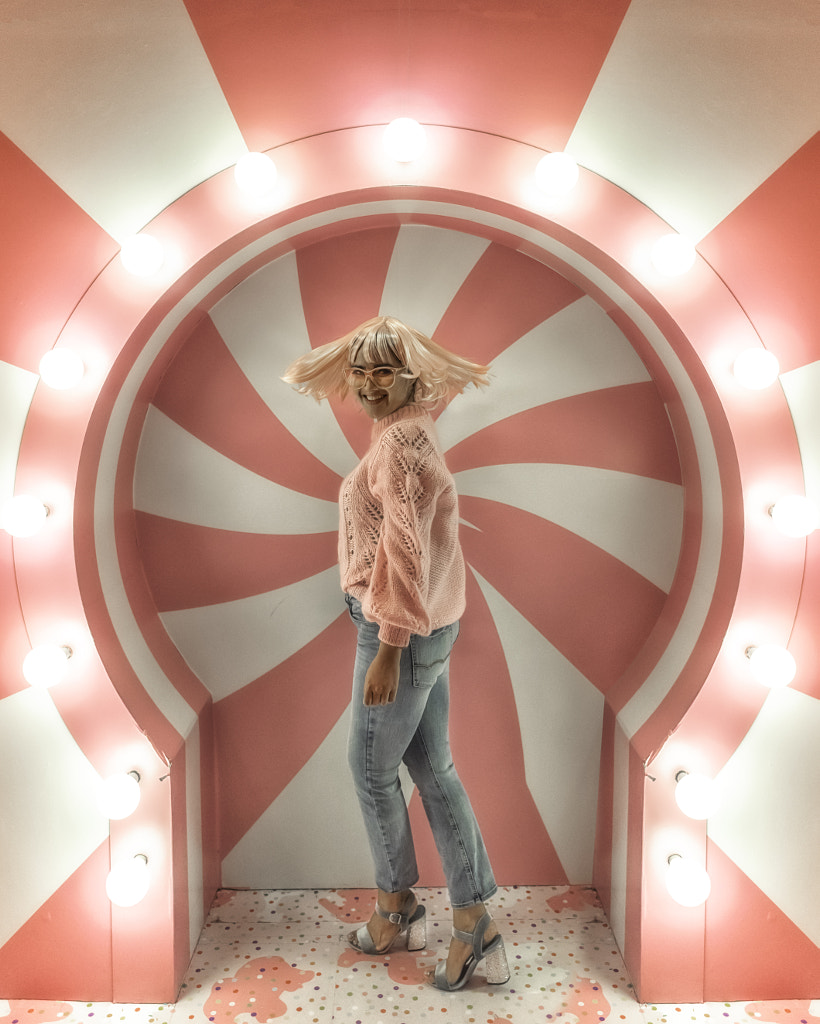
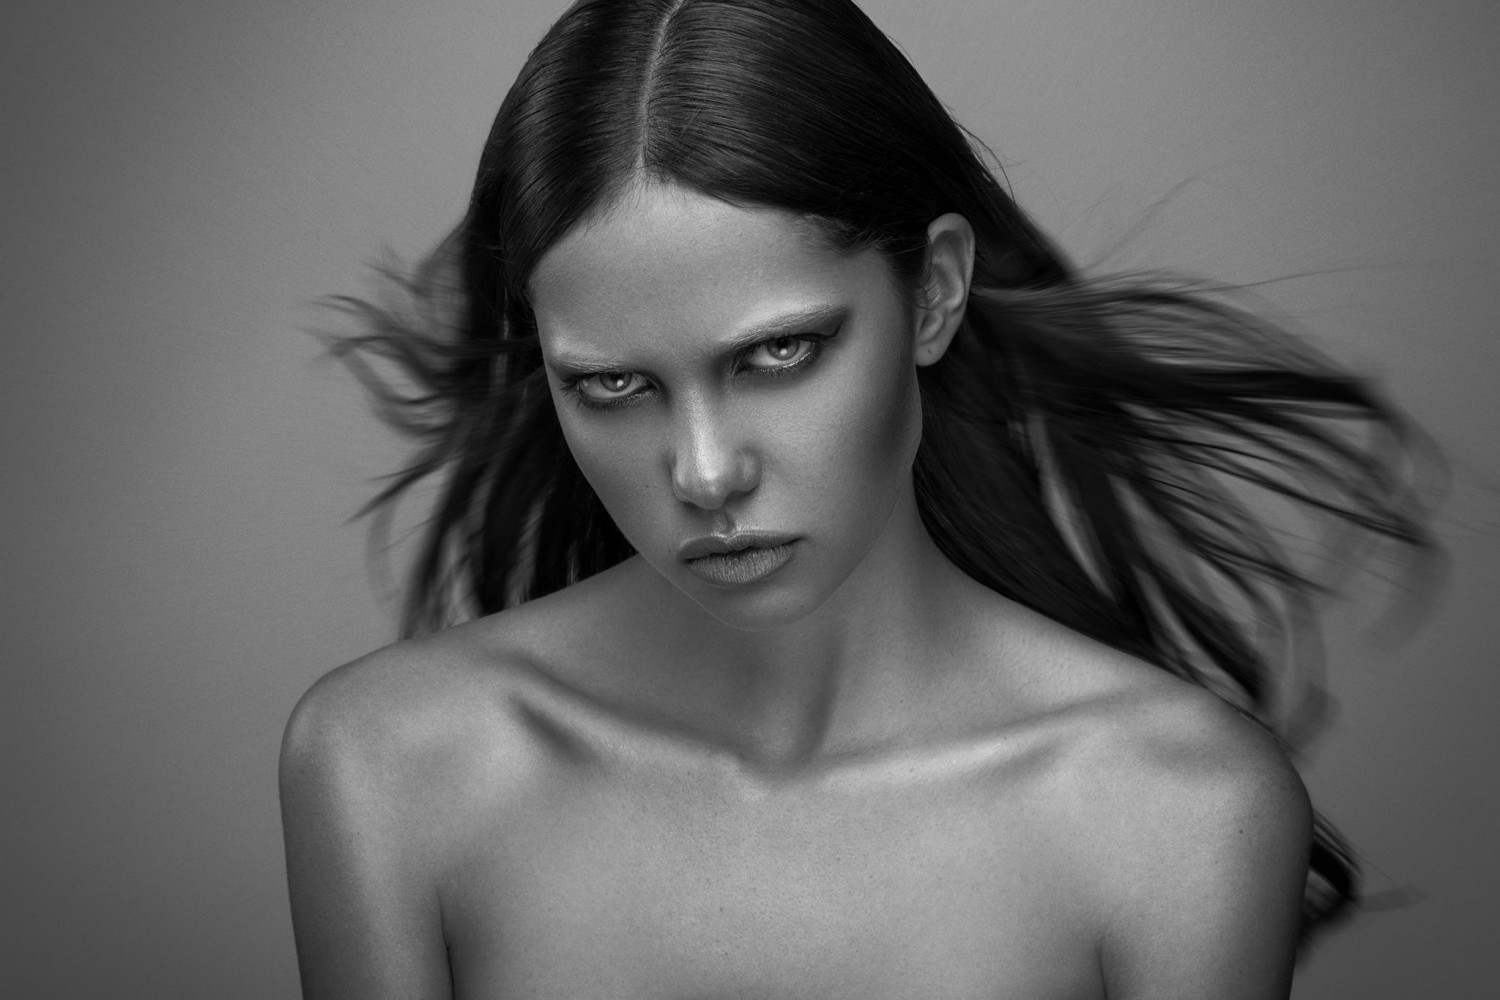
Twirling in place
Use every trick at your disposal to encourage your models to move around on set. Even if you’re in a small studio space, a simple spin can be a good way to loosen up new models, especially if they have a habit of standing straight and rigid. Ask them to let their hair down and play with it. A coy look over the shoulder at an angle can also be more dynamic than a standard front-facing portrait.
Tip #6: Focus on emotions, not poses
Yes, this is an article about posing, but over-posing will deliver the same results as no posing at all: tense expressions and wooden gestures. Instead of micro-managing the pose itself, help your models understand the look and feel you want. Reminding them of a funny anecdote from your past, for instance, will create a better shot than simply telling them to smile.
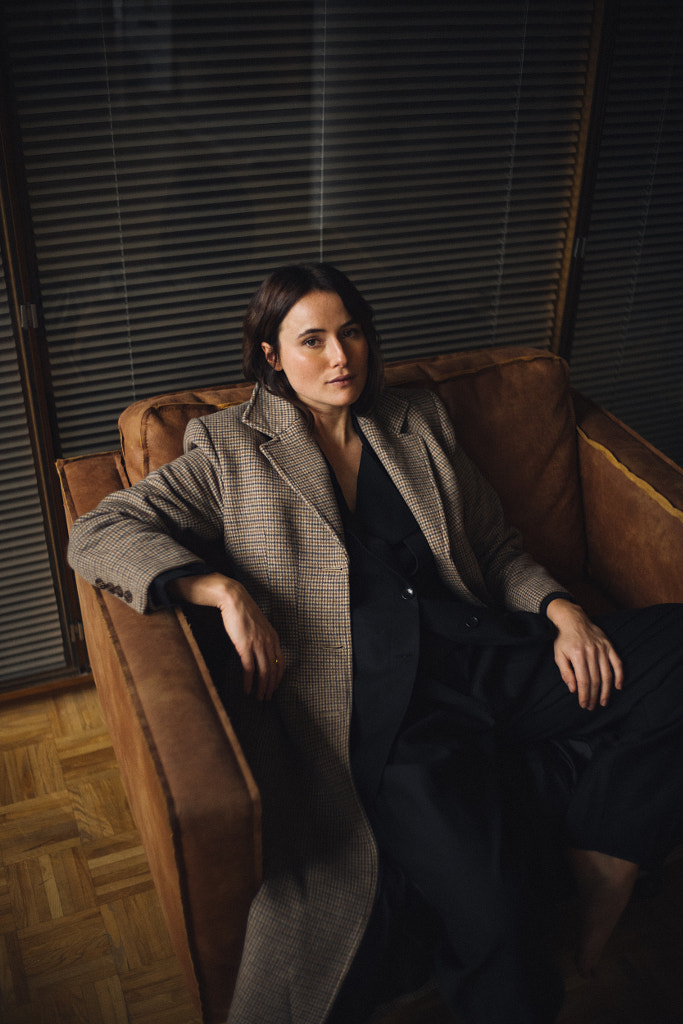
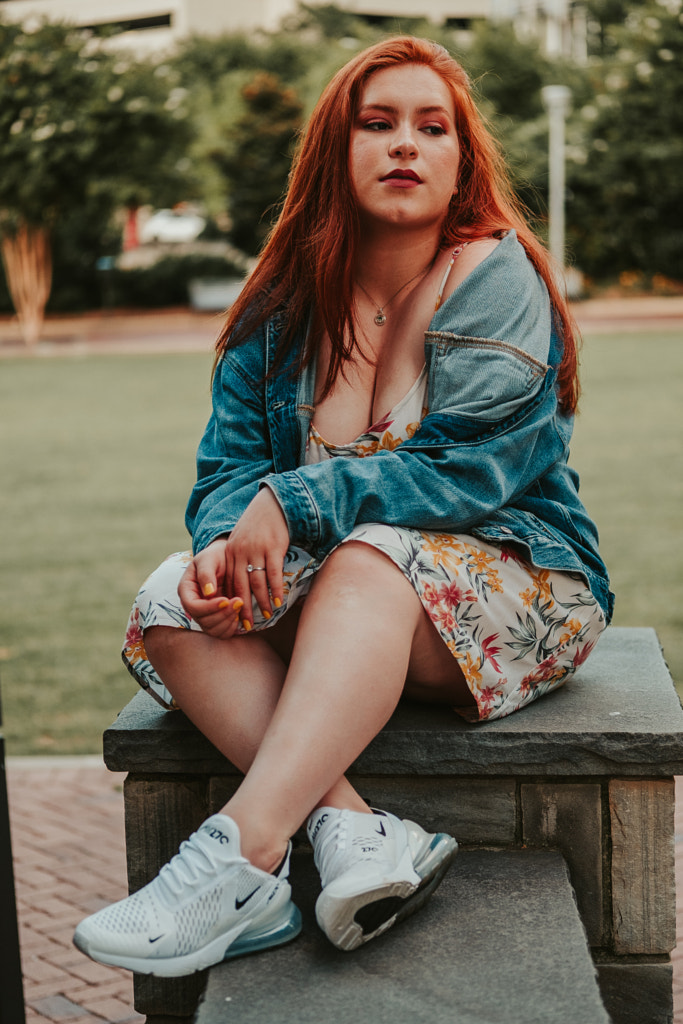
Using the furniture
Some poses are all about context and interacting with your environment, so take advantage of the surfaces and props you have at your disposal. Whether it’s as subtle as a hand on the table, à la Portrait of Madame X or as spare and minimalistic as Irving Penn’s portrait of Salvador Dali, a simple piece of furniture to lean or sit on can make a world of difference.
If you’re outdoors without a place to sit, have your models lean on a wall for support; a colorful or textured wall can serve as a posing tool and a cool background in one. A tree or boulder also works if you’re in a lush landscape.
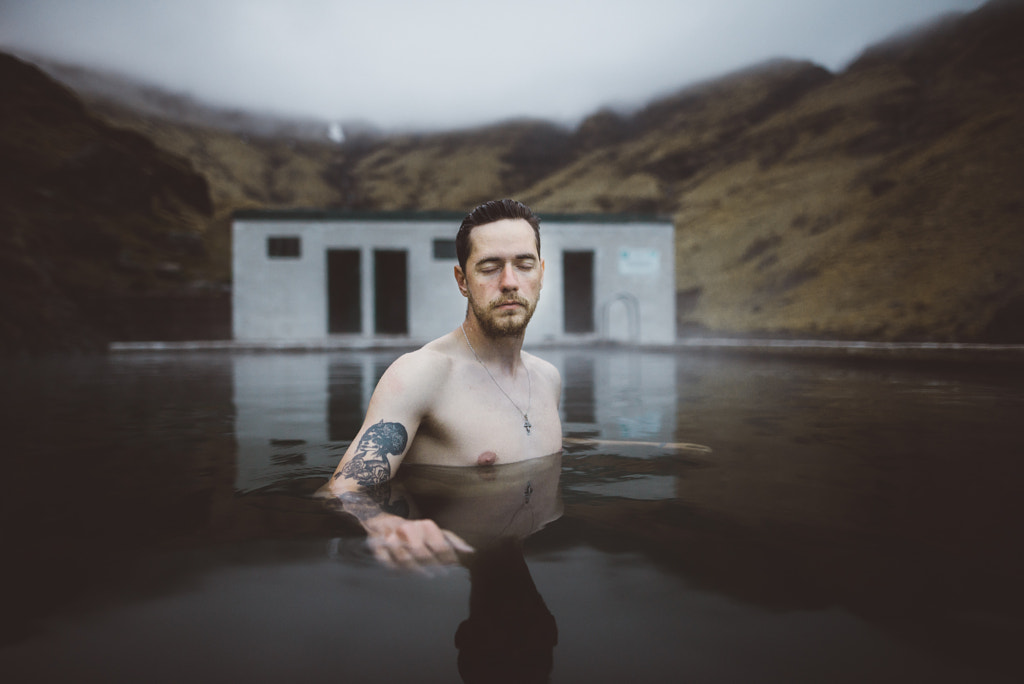
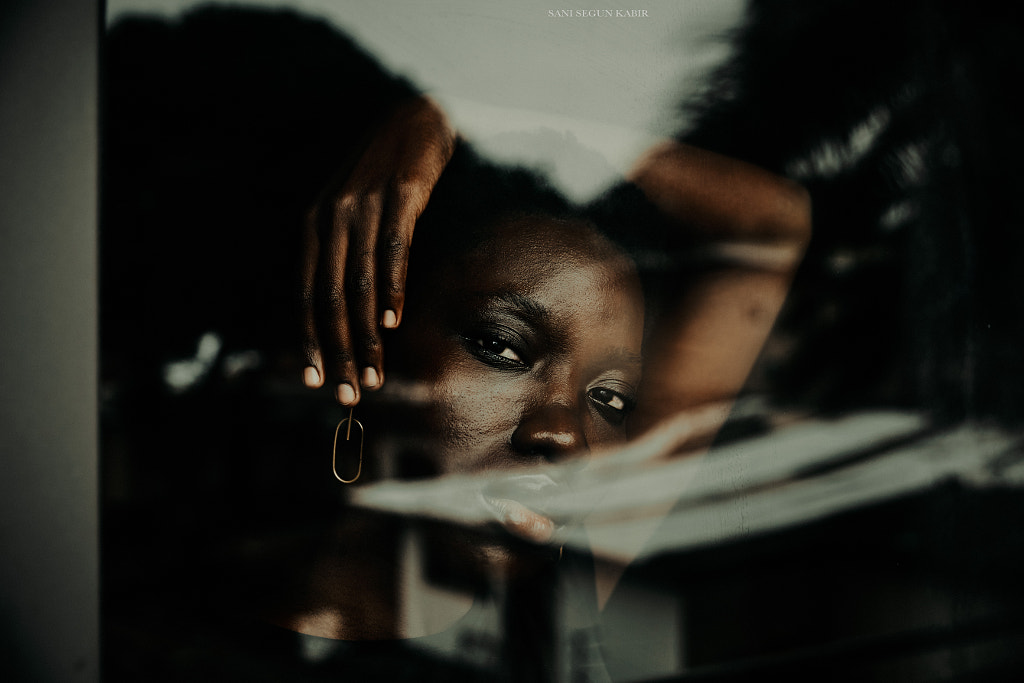
Tip #7: Close the eyes
No one likes being told to say “cheese” and smile, but many of us are in the habit of doing just that whenever we see a camera. To get your models to relax their expression, have them close their eyes until the moment you’re ready to get the shot, then ask them to open. You’ll end up with soft, wide eyes (no squinting) and a candid, natural-looking face.

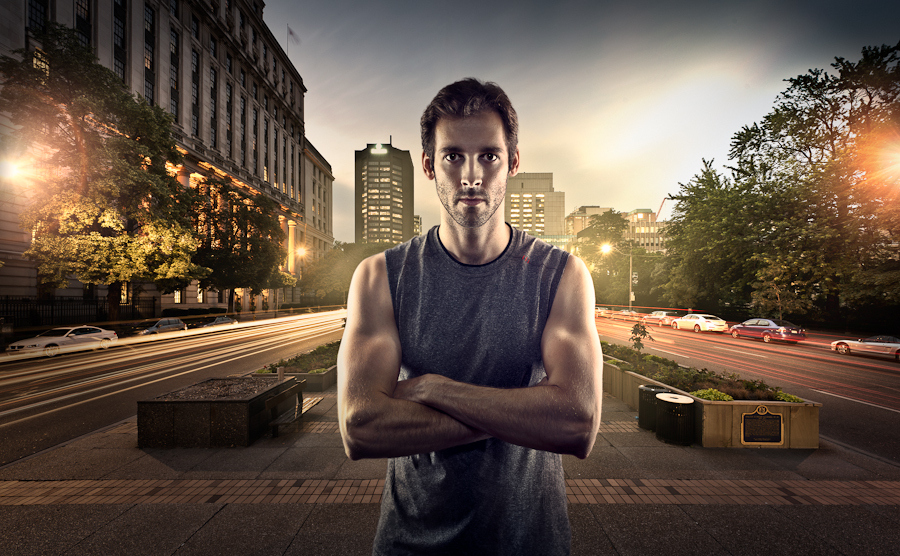
Taking action
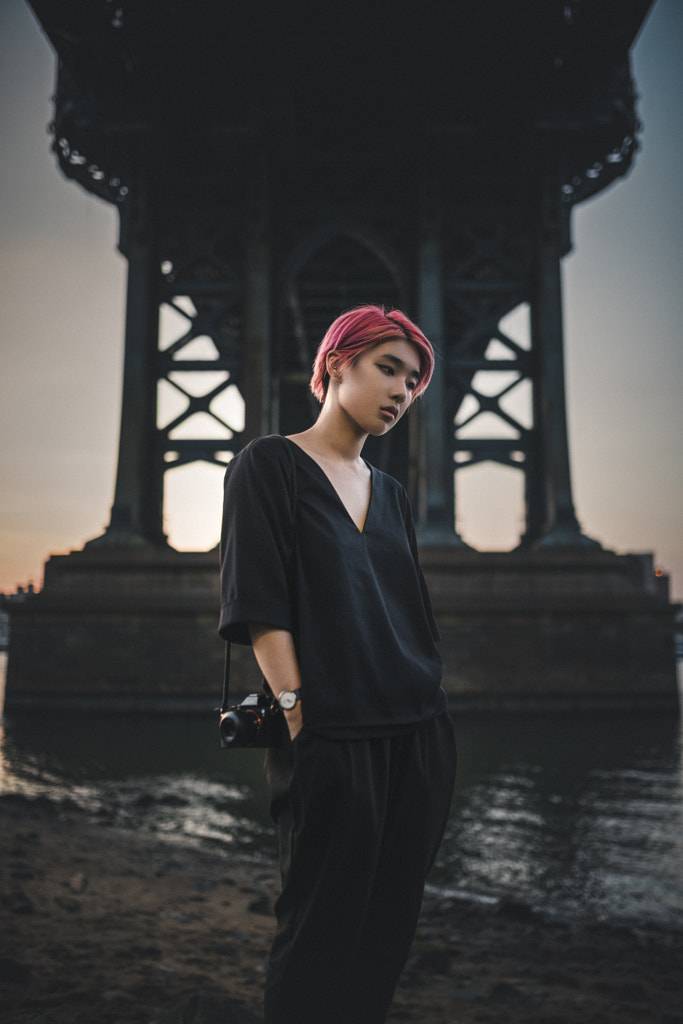
Sometimes the best poses aren’t really “poses” at all. Consider giving your models an activity (preferably one they enjoy), and let them do what they do best. Play the part of a photojournalist and observe. Whether you’re working with a musician or athlete, engaging their natural instincts will result in authentic poses that feel real.
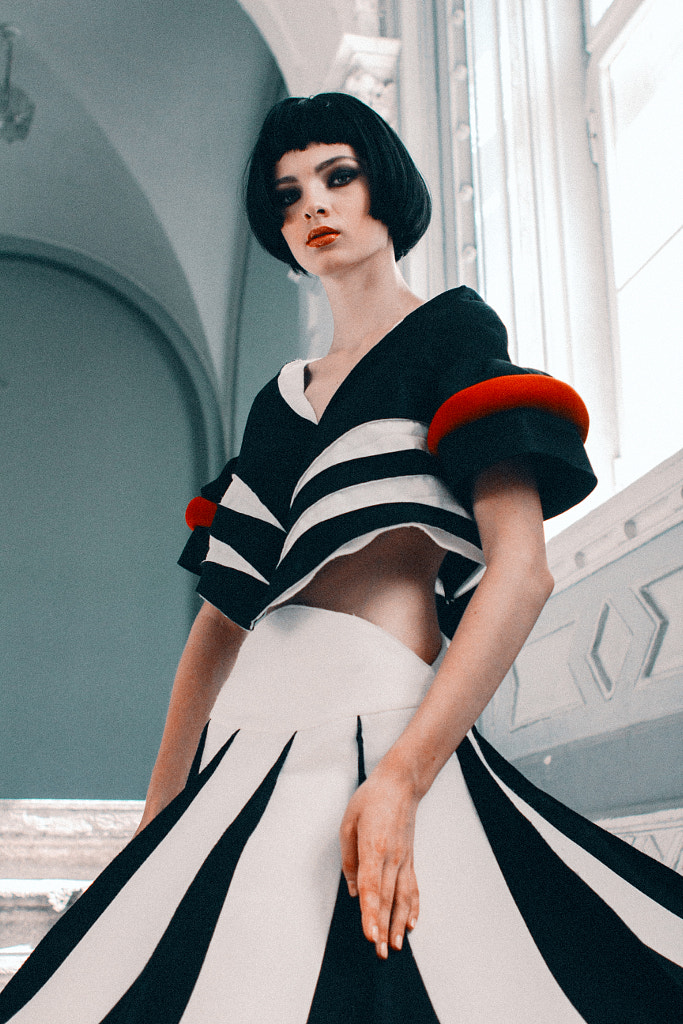
Tip #8: Change your perspective
Sometimes the issue isn’t with the model’s pose but the photographer’s vantage point, so feel free to move around to find the best angle. If you want to make your model look taller, get low to the ground and look up. If you want to accentuate the angles of the face, move to the side. Posing isn’t just about where your models put their hands and legs but also where you stand in relation to them.
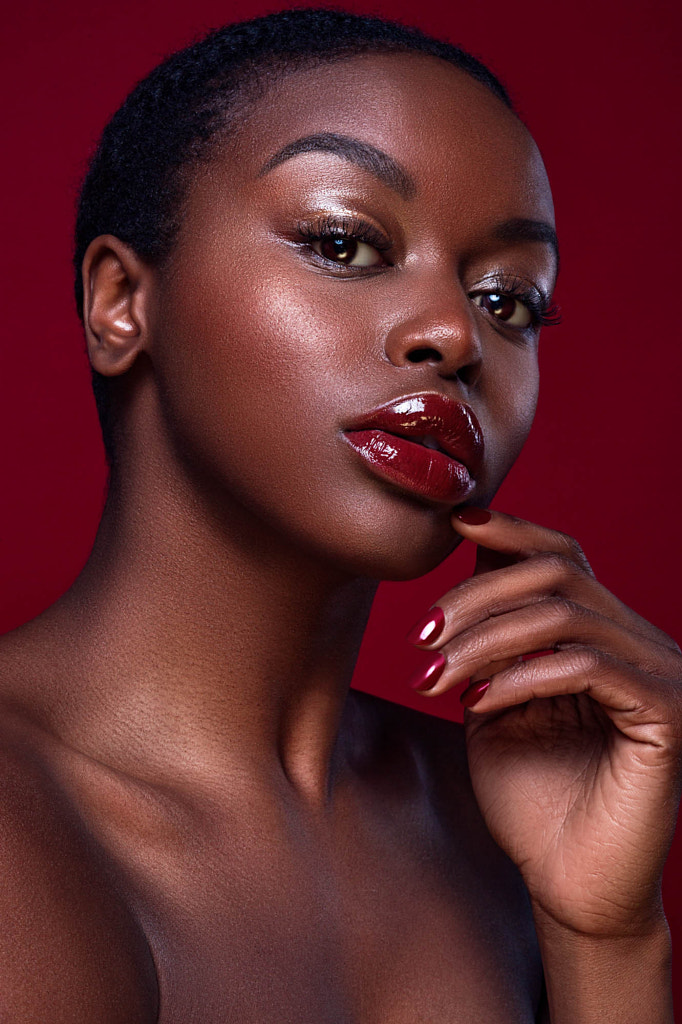
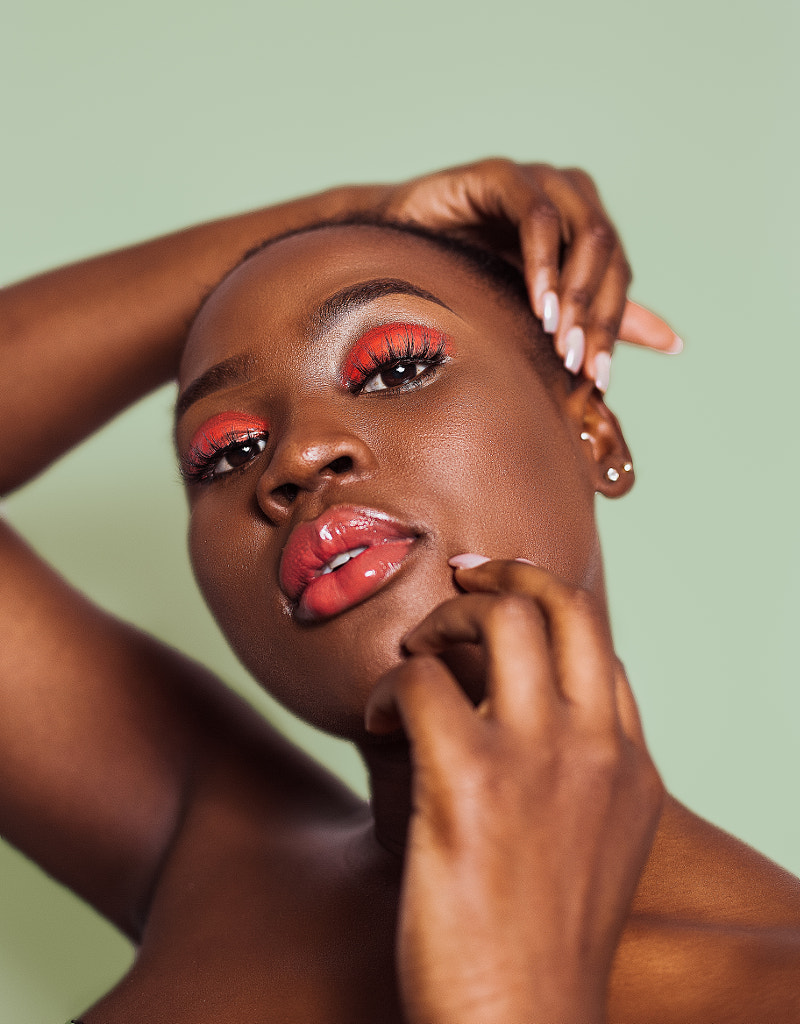
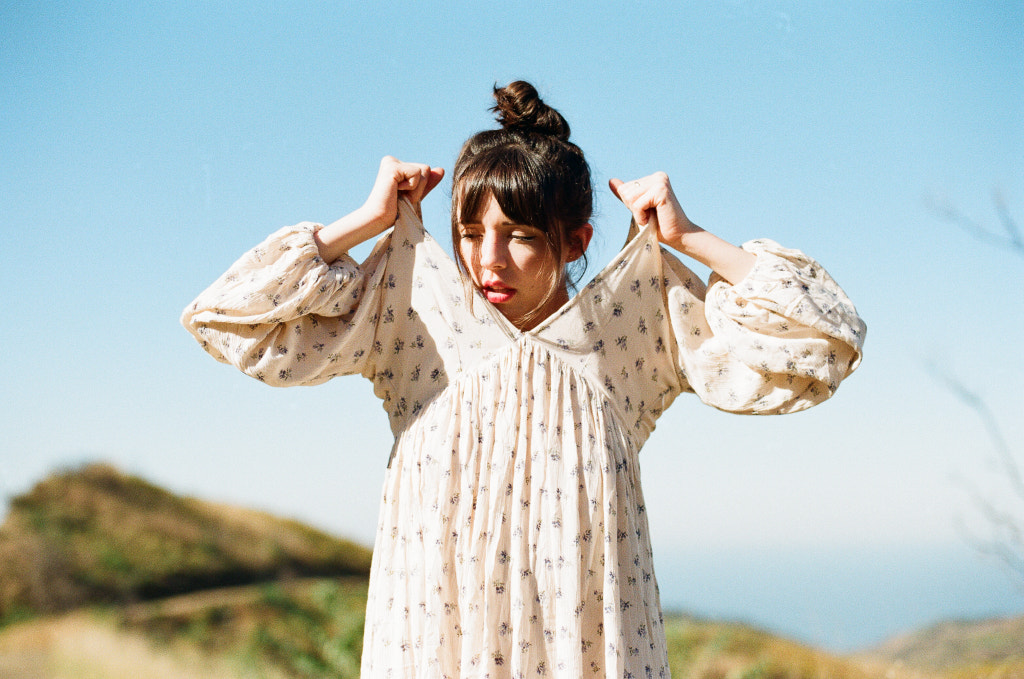
Framing the face
Hands can be just as expressive as the face itself, as evidenced by the work of the iconic photographer Yousuf Karsh, whose portraits of everyone from John Steinbeck to Andy Warhol featured hands-in-frame. Hands and arms both work well for “framing” the face and highlighting your model’s expression, without complex posing.
Tip #9: Mix it up
Nothing ruins a great pose like having the model hold it for an extended period. Even if you don’t get the shot, don’t stay in one spot or pose for too long. A slight change or small movement can work wonders. You can always go back to a pose after you’ve tried others, but remember to keep your model moving for fluid, relatable gestures.
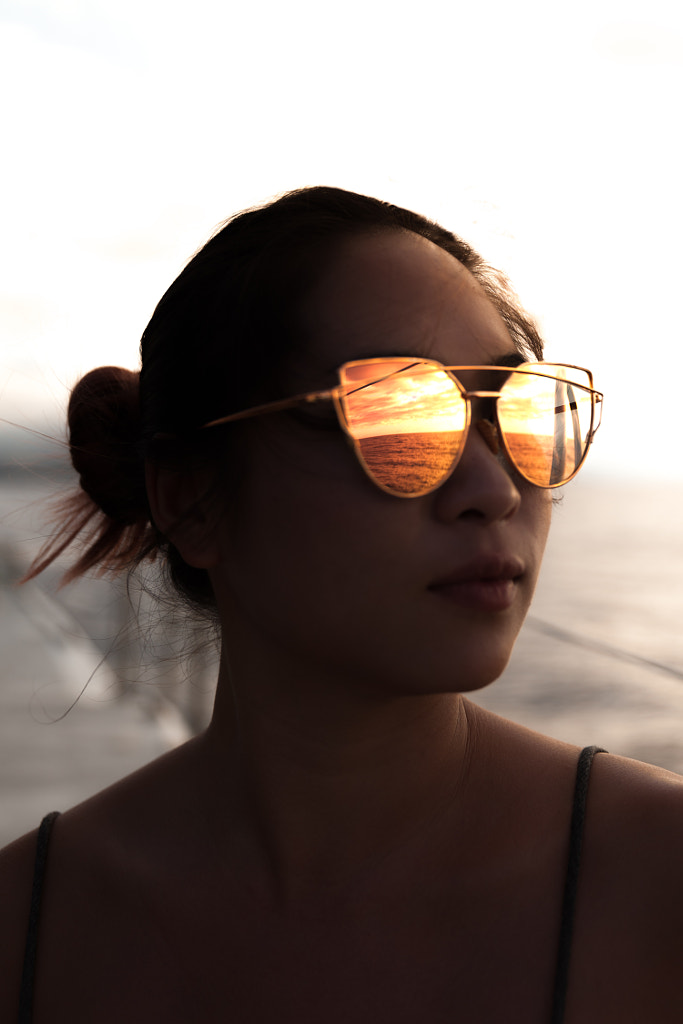
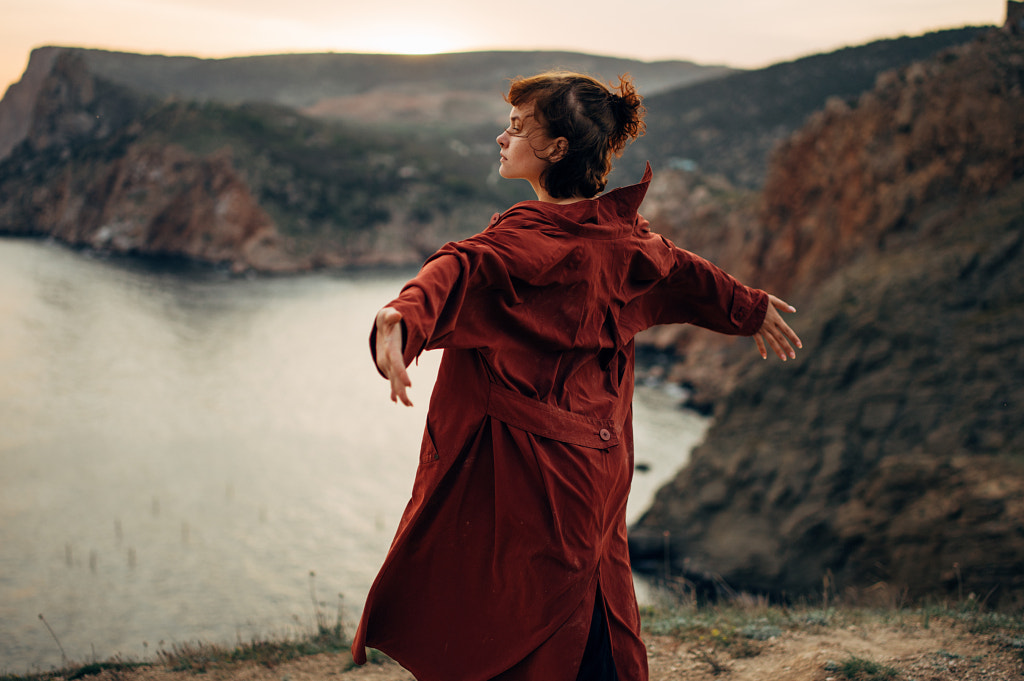
Looking ahead
Asking your model to look straight at the camera is a bit like telling them to “say cheese” in that it can result in a canned, rather than spontaneous, expression. Instead, ask them to look into the horizon (this works best if you’re in a beautiful location).
Ask them to remember a meaningful moment or imagine a dream or goal they hold close to their hearts. More often than not, giving your models something to think about will produce natural expressions and poses that you can’t plan or fake.
Tip #10: Include the whole body
While it’s always a good idea to get a variety of images with different perspectives, vantage points, and orientations, be careful not to crop your model off at the joints. Unless it’s deliberate and you have a creative reason for doing it, cutting someone off at the limbs could distort the overall effect of an otherwise great pose.
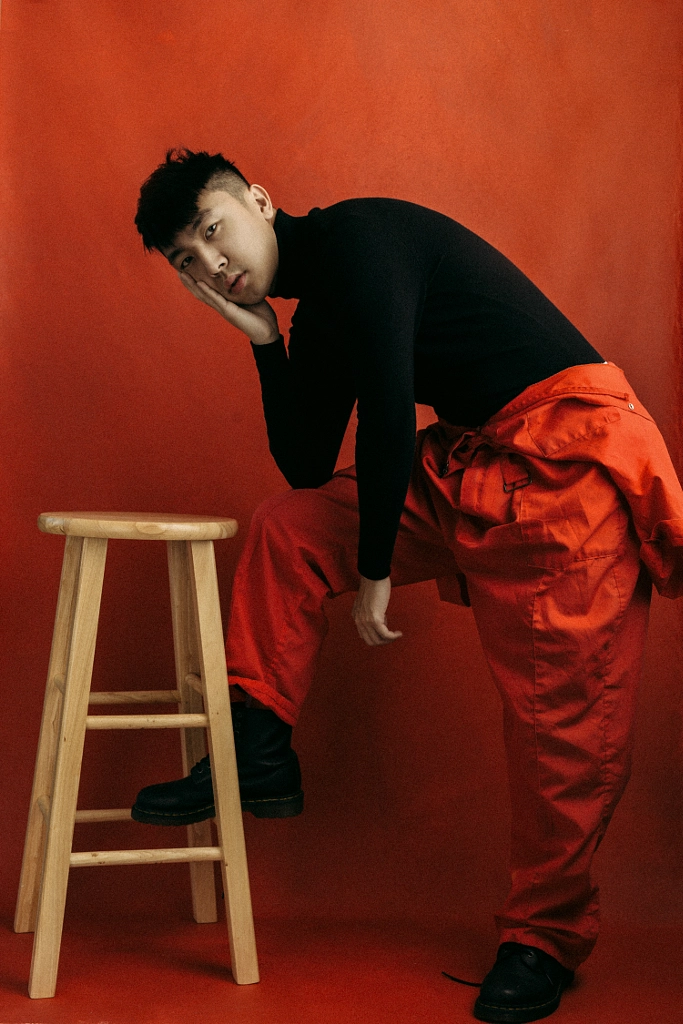
Playing with pockets
We included pocket poses in our male posing guide as well as our female posing guide for a few reasons: they look good on everyone, and they eliminate the need for your models to “do something” with their hands. Hooking a thumb around a belt loop also does the trick, while still keeping the hands visible.
This pose can work when you’re warming up in the beginning of a shoot or later to highlight the outfit itself. Remind your model to keep the body relaxed rather than slouched; an open posture can convey both confidence and grace.
Tip #11: Share your favorite shots
If you get a shot you love, show your models and tell them what you like about it. Sharing your photos can provide a boost of confidence and make your model a bigger part of the collaborative process; beyond that, it can also be instructive about what kinds of poses work best on set.

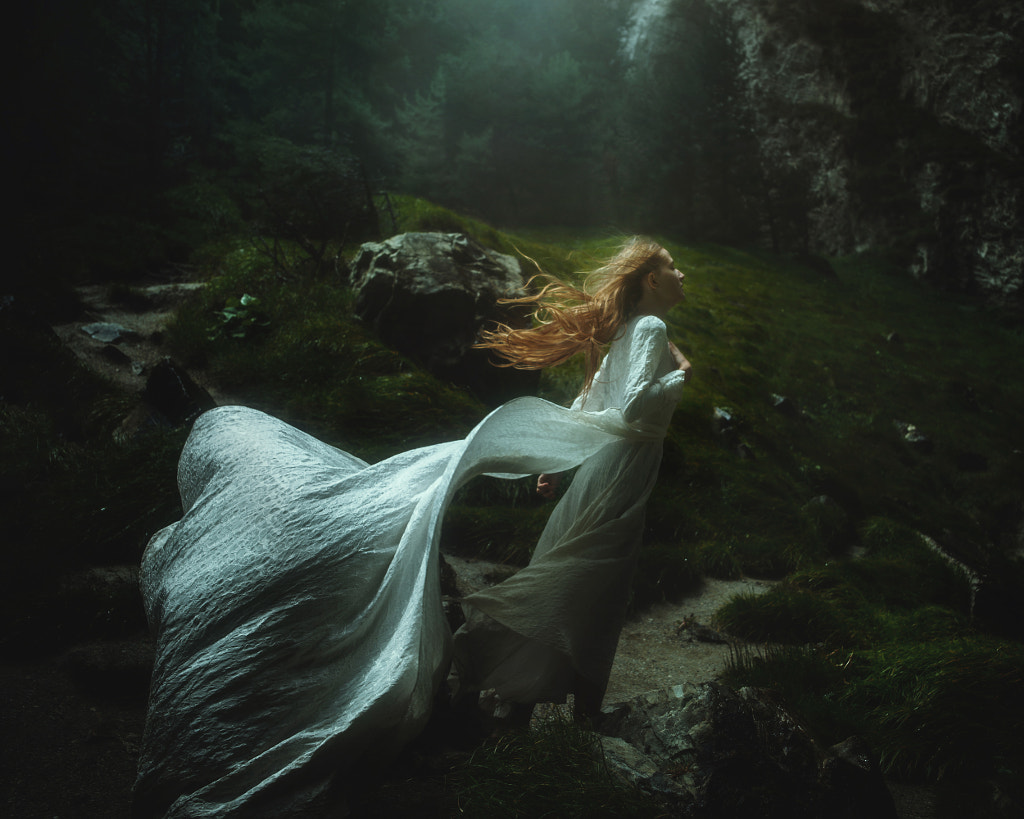
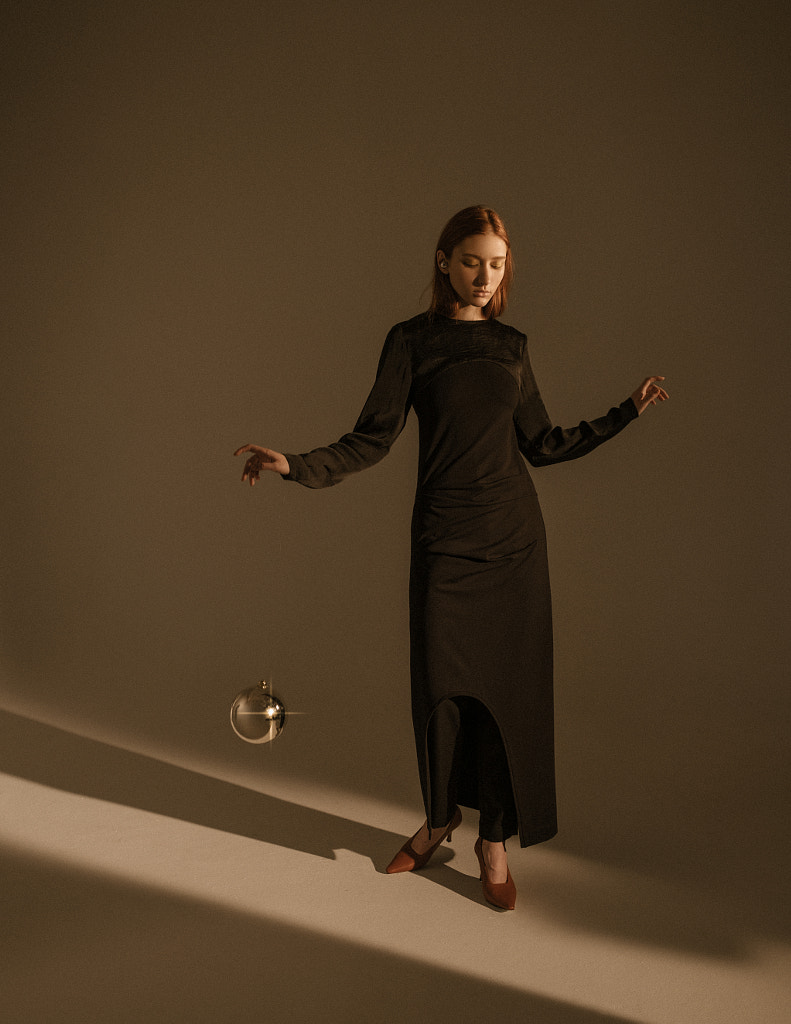
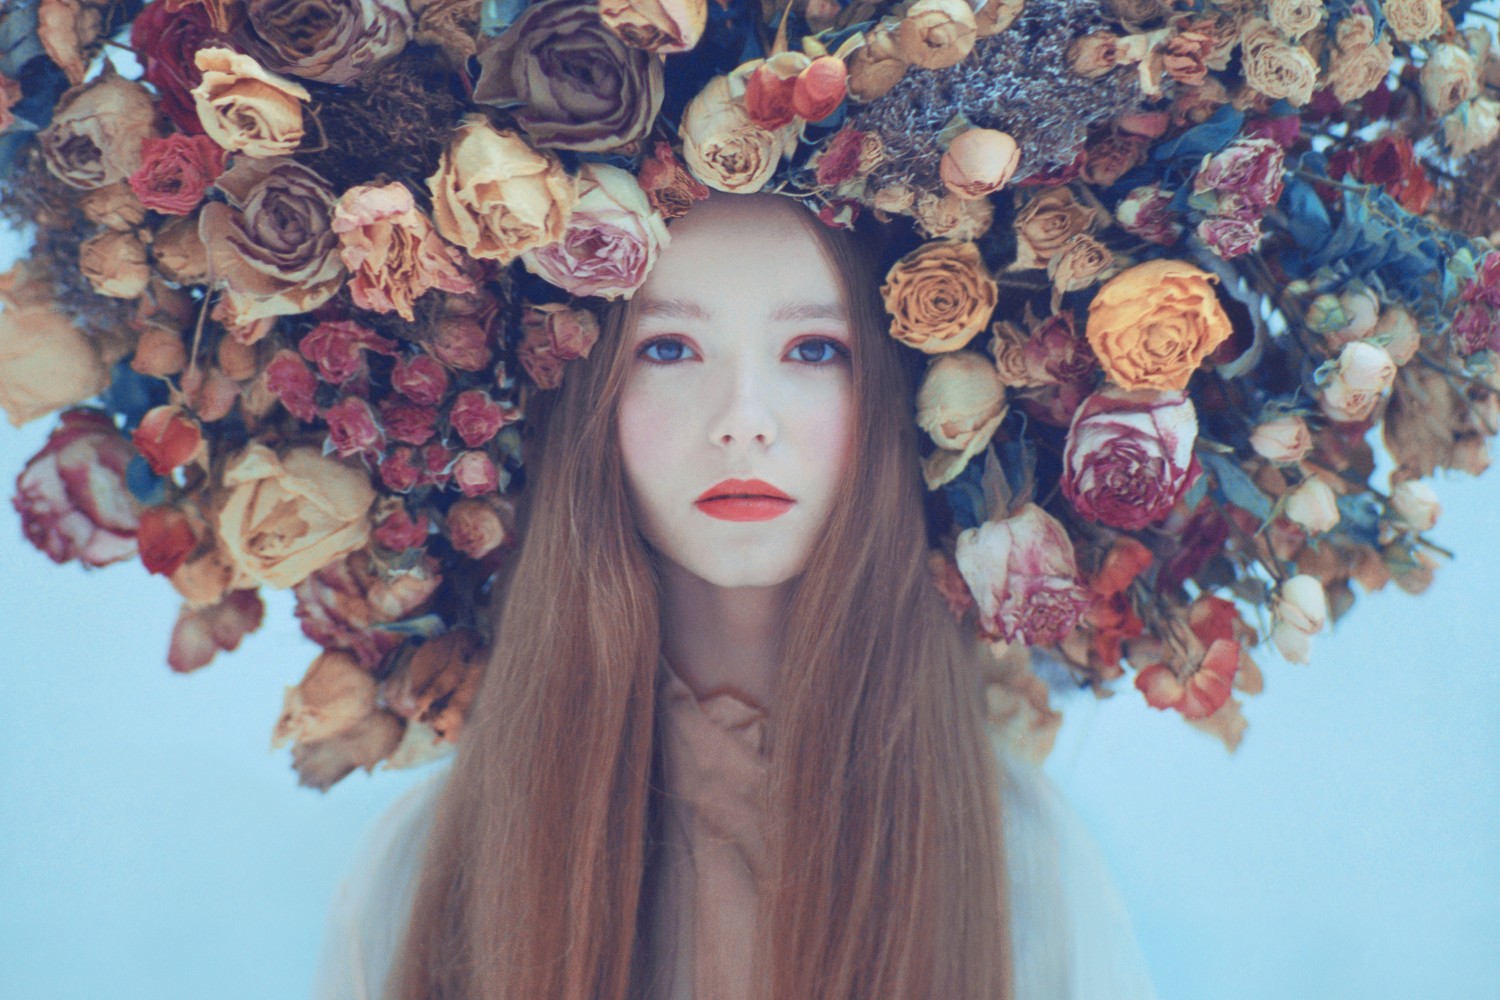
Incorporating fabric
Take a look at Nadar’s famous portrait of the actress Sarah Bernhardt, and you’ll understand the power of draping. Although Bernhardt’s pose is simple—she’s just turned slightly to the side—the giant velvet fabric creates a gorgeous silhouette. If your models aren’t up for overly athletic poses or complex configurations, tell a story using clothing. Create an hourglass or triangle shape, like Nadar did, or make the body look longer with billowing fabric extending beyond the frame.
Tip #12: Get close
At the beginning of a shoot, you’ll probably start off with full-body poses just to give your models space and let them relax into the flow of the session. But as the shoot progresses, feel free to move in for those detail shots. By focusing on the eyes, the fingers, or the smile, you’ll tell a more intimate—and often personal—story. Consider Steve McCurry’s portrait of Sharbat Gula: it’s all about the eyes.
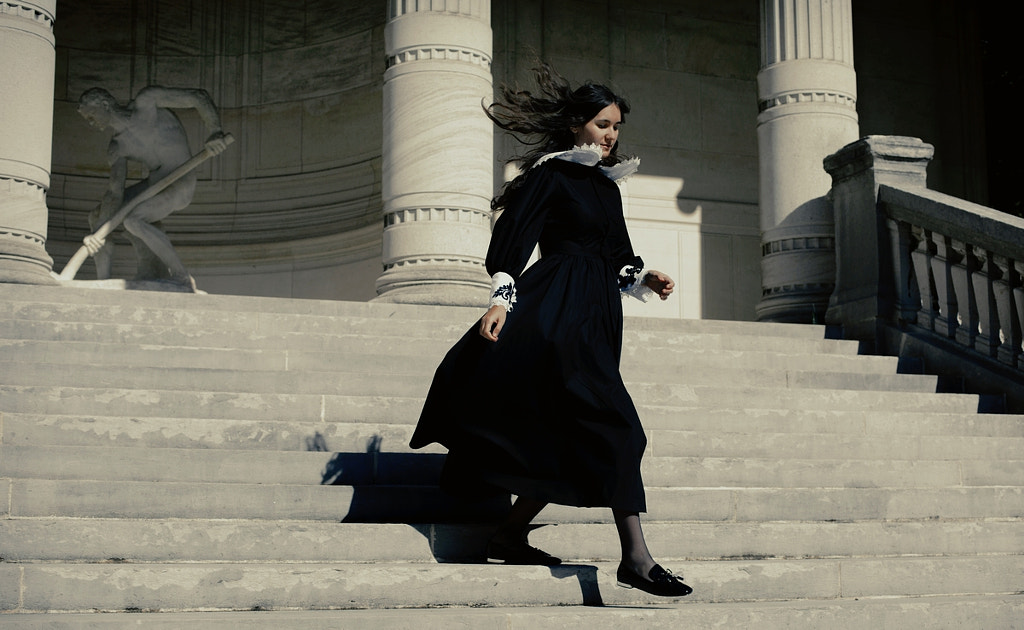
Ascending and descending steps
Stairs are perfect for posing because they add depth and dimension, and they also infuse your photos with a sense of motion. Positioning yourself below your models on a set of steps will also accentuate their height, while having them place each foot on a different level will create visual interest.
Tip #13: Shake it out
If you find yourself and your model circling through the same poses over and over, try shaking it out. Have your models shake out their hands, feet, legs, and arms. Have them shake their head back and forth and nod it up and down. A good shake can break any tension and remind you of what matters: having fun. Plus, you can get some motion shots while you’re at it.
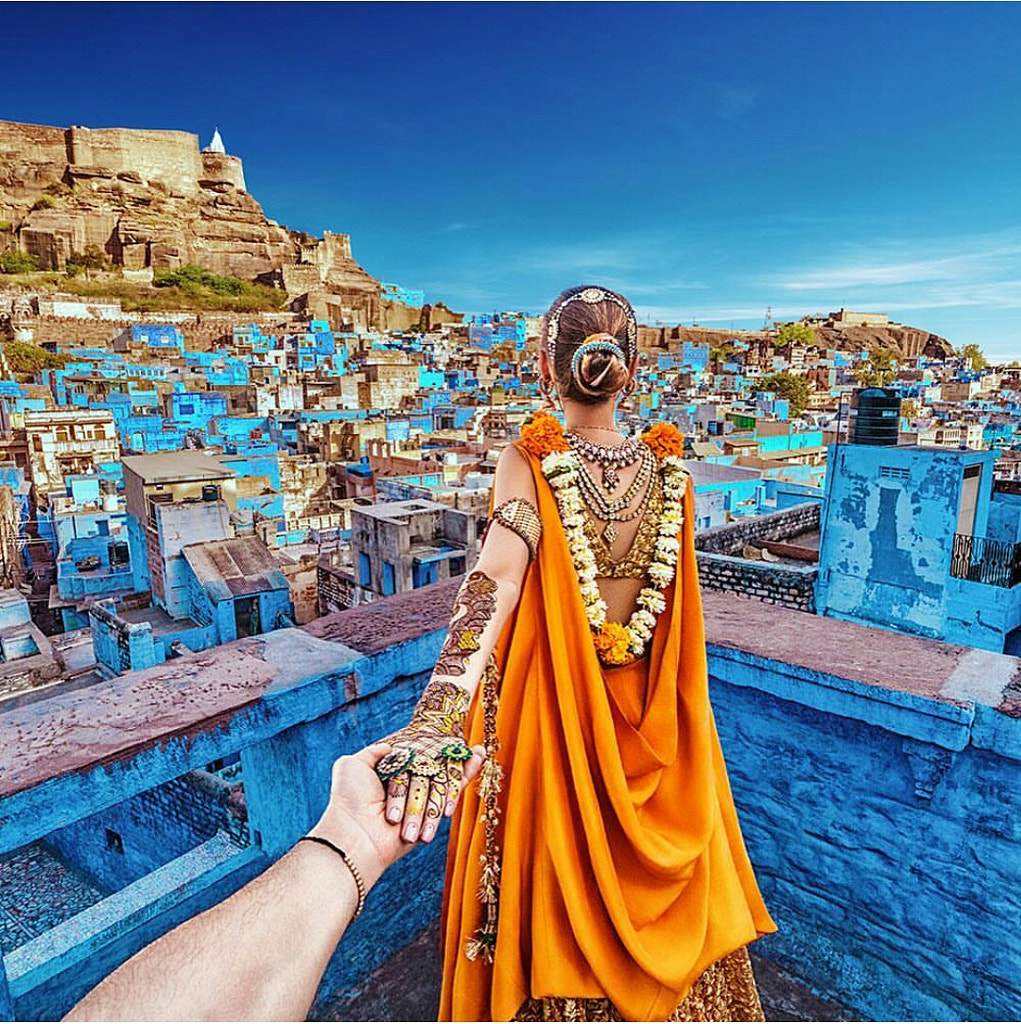
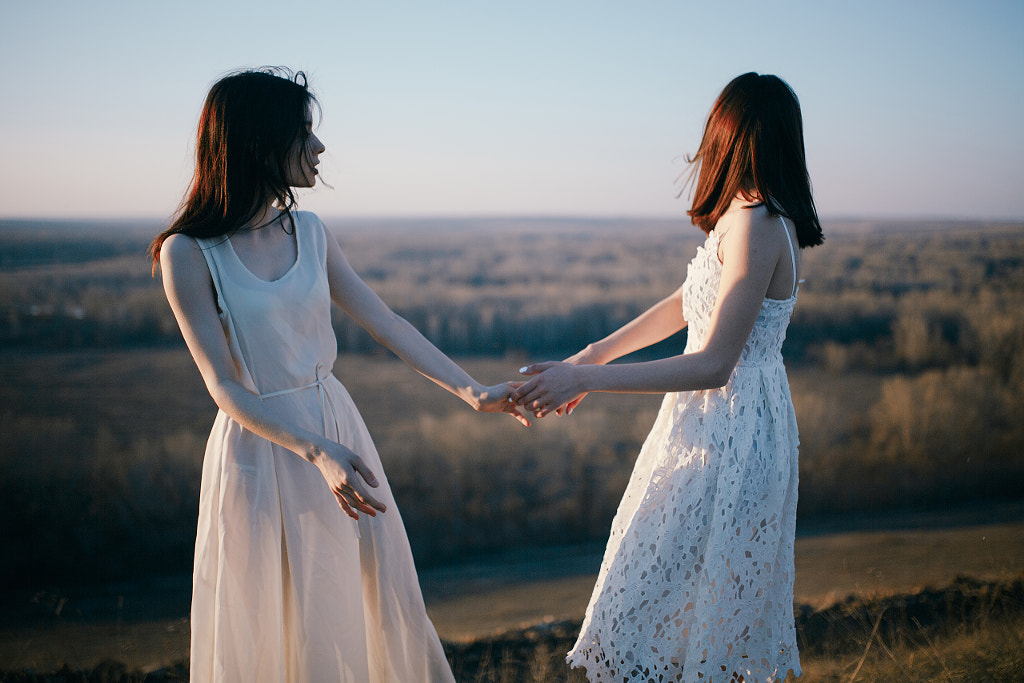
Taking a hand
Murad Osmann started the viral #FollowMeTo project back in 2012, by collaborating his then-girlfriend, now-wife Nataly on a series of photo shoots around the globe. In every shot, Nataly, dressed to suit the location, led Murad by the hand through the streets and landscapes of the world.
It’s a pose that’s still emulated—and reinterpreted—today, in part because it conveys a universal narrative with a personal twist. As a bonus, it encourages collaboration between yourself and the model, as you’ll be getting in the frame too, even if it’s just your hand.
Tip #14: Keep it simple
For newer models, posing can feel overwhelming, so keep the atmosphere casual and light on set. Opt for easy, natural gestures at first, before challenging your model to experiment with any gymnastics or high-fashion poses. The trick here is capturing your friends as they are in everyday life, so stick with the basics and allow their personalities to shine.
Not on 500px yet? Sign up here to explore more impactful photography.


Leave a reply