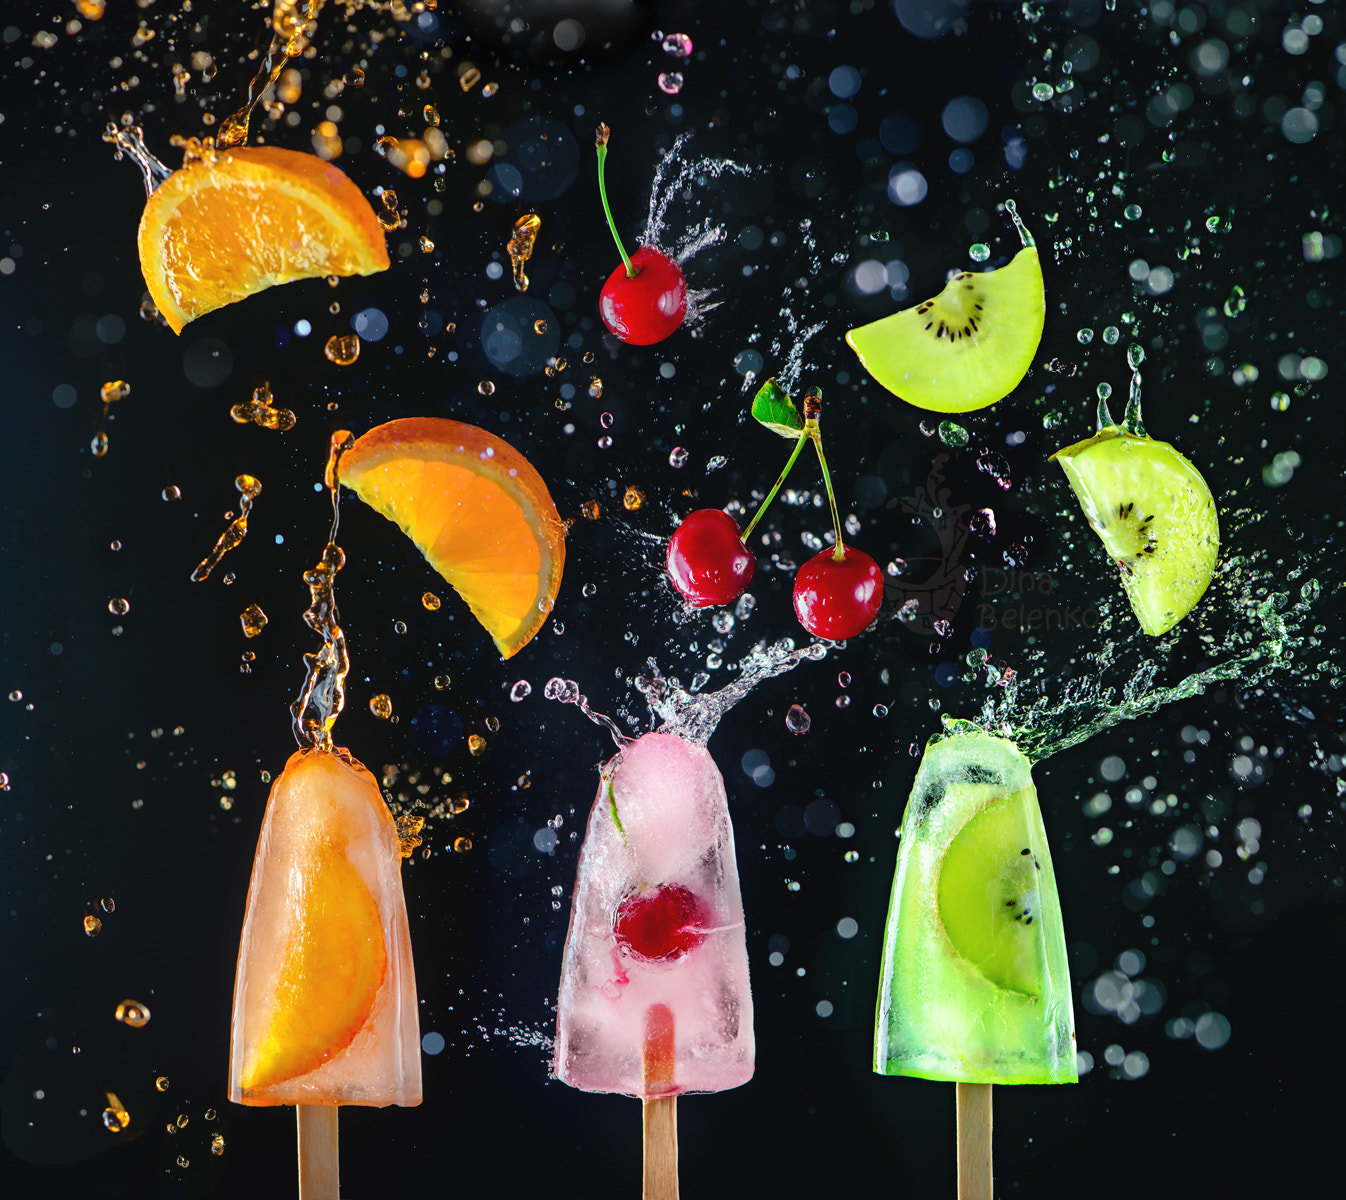
Everyone on my Instagram feed is complaining about a cold summer and cloudy weather. But, even if your summer is gloomy and unenjoyable, there’s something that can cheer up almost anyone. Popsicles! Especially if you’re about to photograph them in a fun and exciting way with splashes and levitating fruits.

1. Props
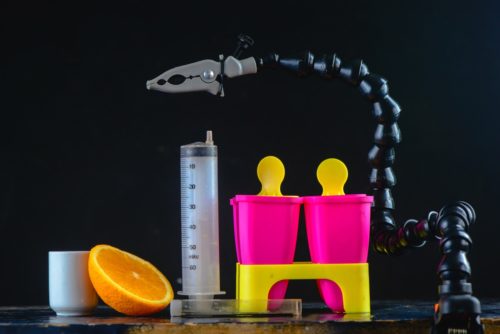
To create this dynamic image we will need:
- Popsicle molds
- Means to suspend pieces of fruit in the air (either professional clamps or long, thin needles in a pair with a brick of floral foam or styrofoam)
- Syringe or shot glass to pour water
- Fruit
- Food coloring
- Light source suitable for shooting splashes (in my case, two speedlights)
- camera and a tripod
2. Preparation
The popsicle is cast as our lead, so let’s make it pretty. I’m a terrible cook, so my popsicle is basically a slice of fruit frozen in lemonade. But you can use any normal recipe you like. Just remember that it will be better if you keep the popsicle transparent (because transparent ice is extremely beautiful in backlight). You can also use some food coloring for the water we’re going to pour if you want it to match the color of the popsicle.
3. Composition
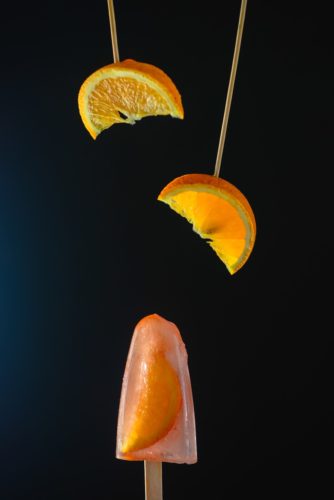
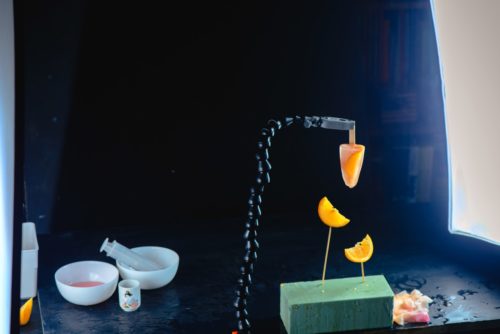
I like when gravity acts in unobvious ways in photos, so let’s turn our popsicles upside down to create the illusion that drops of water are falling up. Hold the popsicle by the stick and fix it steadily (in my case it’s fixed with Wimberley Plamp, but a ruler on a stack of boxes will also do).
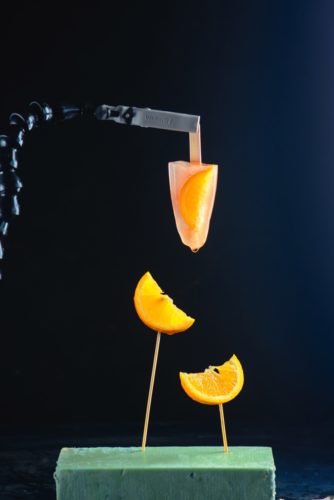
Pierce the slices of fruit with long needles or skewers and insert them in a brick of floral foam. Make sure that everything is holding perfectly still.
3. Lighting
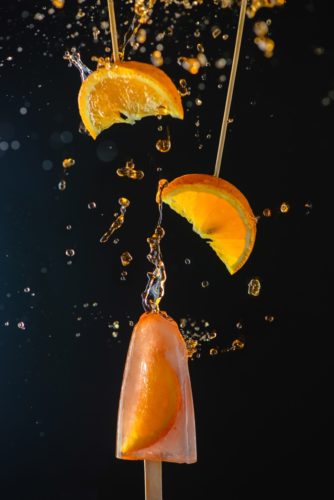
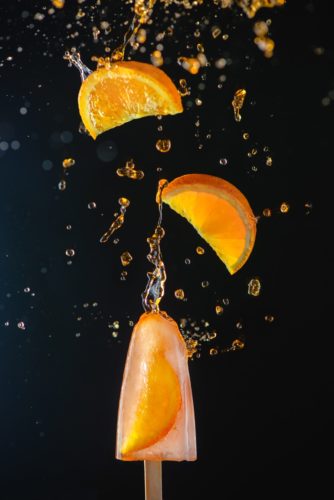
To freeze splashes in motion, I used two speedlights: one inside a stripbox (on the right and slightly behind the scene) and another behind a large diffuser (on the left side). You can see how they work one by one:
— The first shot is made only with the key light from a stripbox (the light appears to be coming from the left since the image is already turned 180 degree clockwise),
— The second shot is filled with both speedlights (note the lifted shadows).
Both speedlights are set on a low power (about 1/8 or even 1/128); it creates a very short impulse and because of that the motion of the liquid looks frozen. That means that your shutter speed doesn’t really affect the action—with the speedlights off, your shot would look just like a black rectangle.
Also, set your camera in “continuous mode” to take several shots in a row.
4. Shooting
Now, make sure that your speedlights are working and that you like your composition. Get ready and pour some water from a syringe on a popsicle. Take a sequence of shots. Experiment with magnitude and direction of the bursts, until you get a frame that suits you. Don’t forget to sprinkle some water on the fruit slices too, so the action appears more flawless and natural.
5. Post-processing
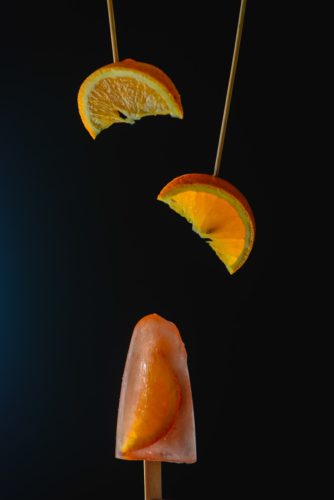
Choose the best shot and open it in Photoshop. Turn the photo 180 degrees, so the popsicle is at the bottom and the splashes are at the top. Use Clone Stamp or Patch Tool to delete all visible supports, adjust colors and contrast and, if needed, combine the best splashes and drops together (I usually do it by putting each shot on a separate layer and using Layer Mask). Voila!
Maybe it’s worth trying something like this with real ice cream and milk—what do you think? Stay inspired and share your thoughts in the comments!
Dina Belenko is a master of creative still life photography, a 500px Ambassador, and a successful Marketplace photographer.


Leave a reply