Tim Ebert is a 17-year-old photographer based out of Mainz, Germany. He’s been taking pictures for about 4 years, and is constantly searching for breathtaking landscapes to try and capture with his camera.
To learn more about Tim or follow along as he captures more images like the photograph above he’s about to tell you the story of, give him a follow on 500px, Instagram, and Facebook.
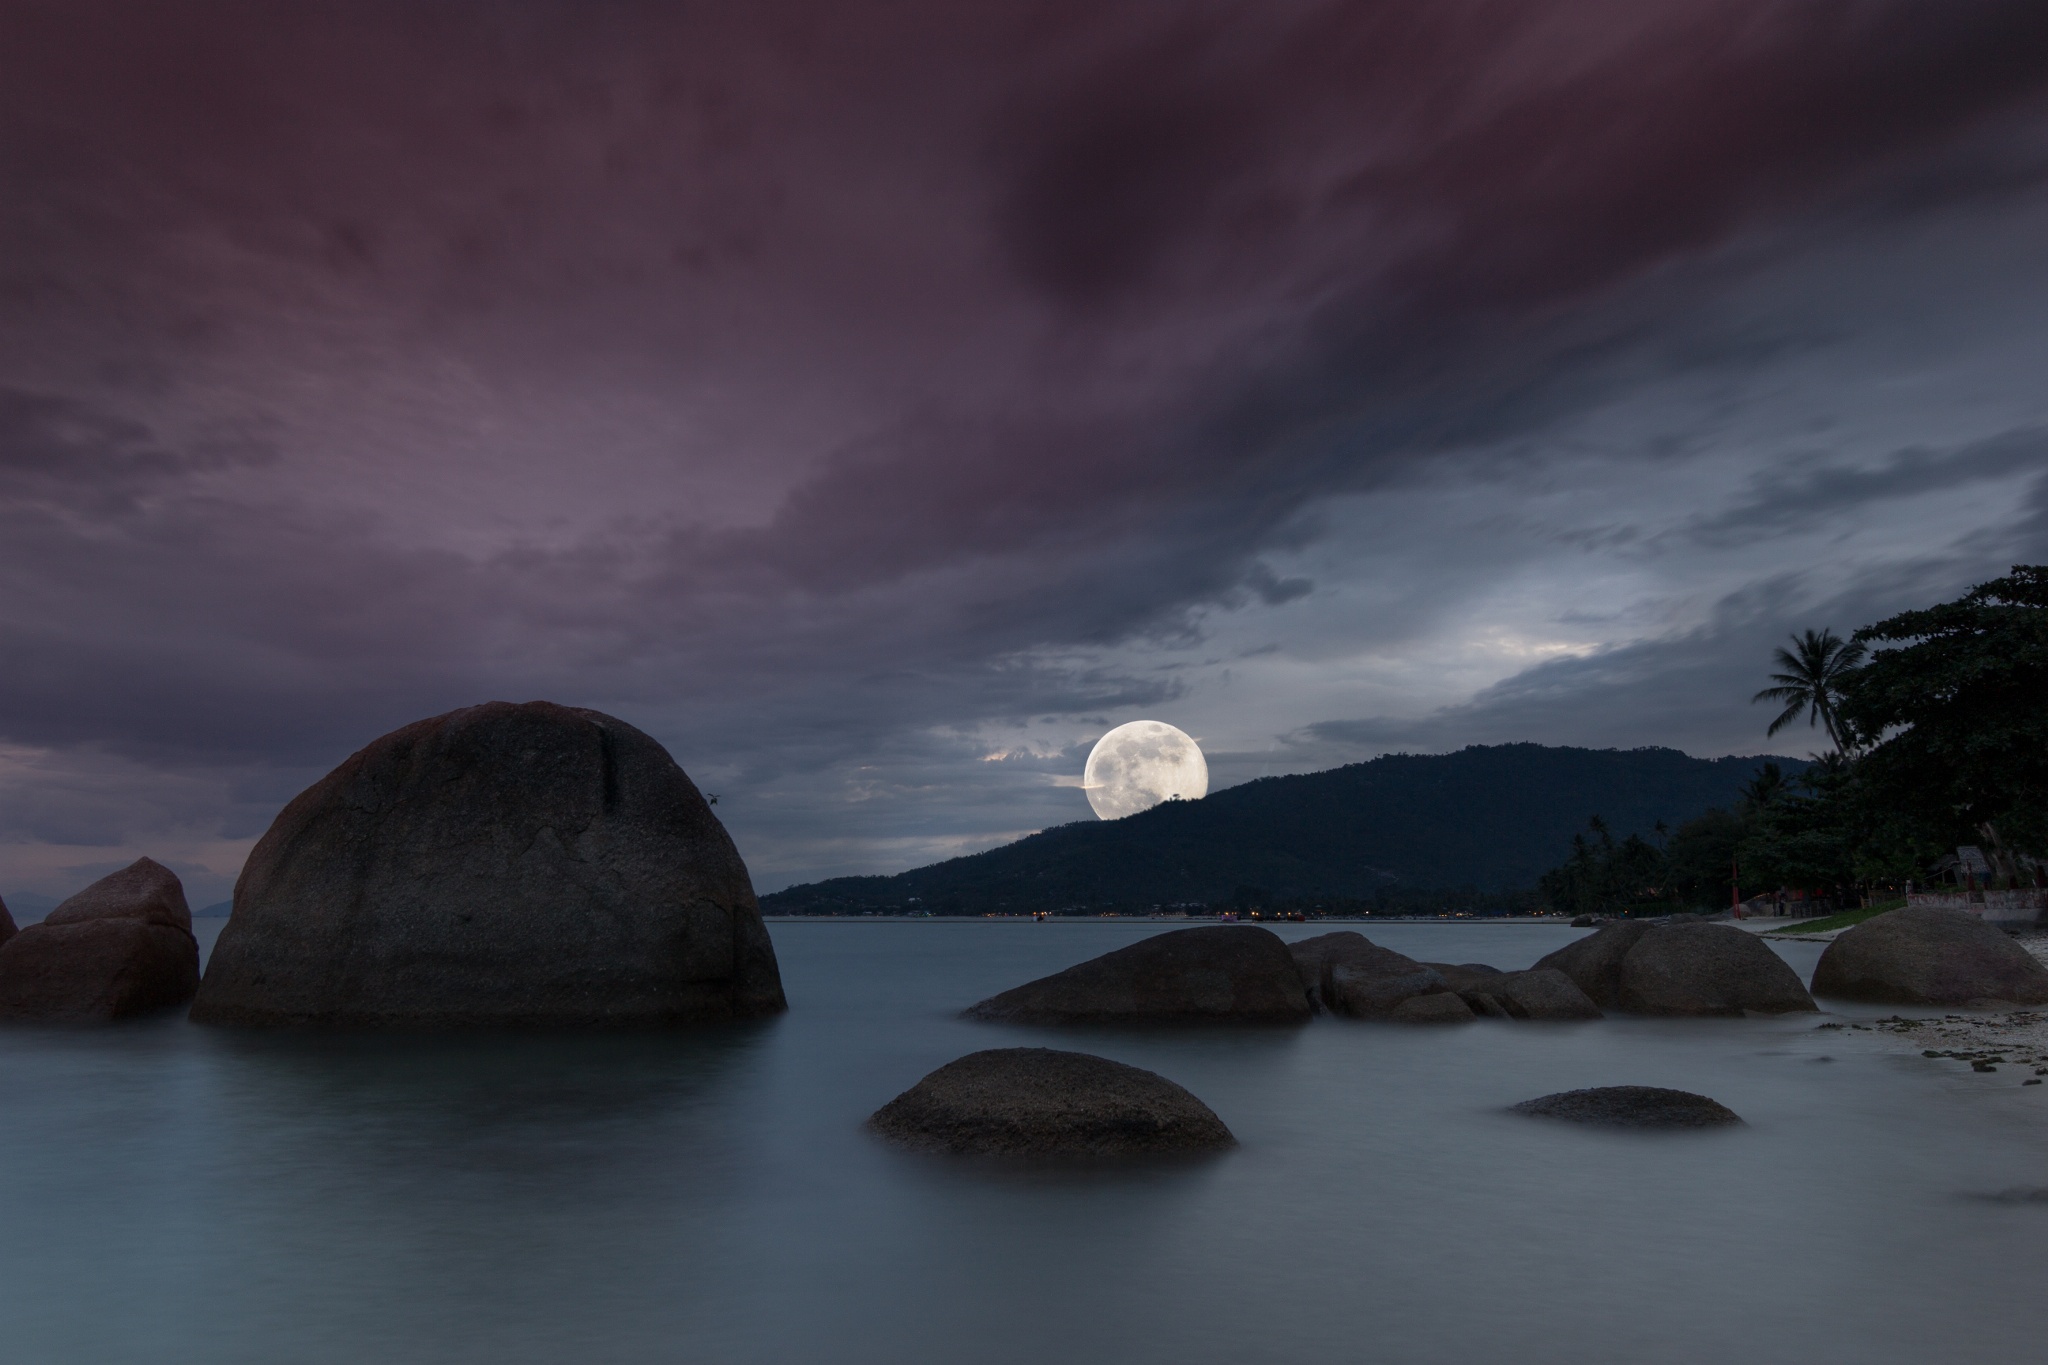
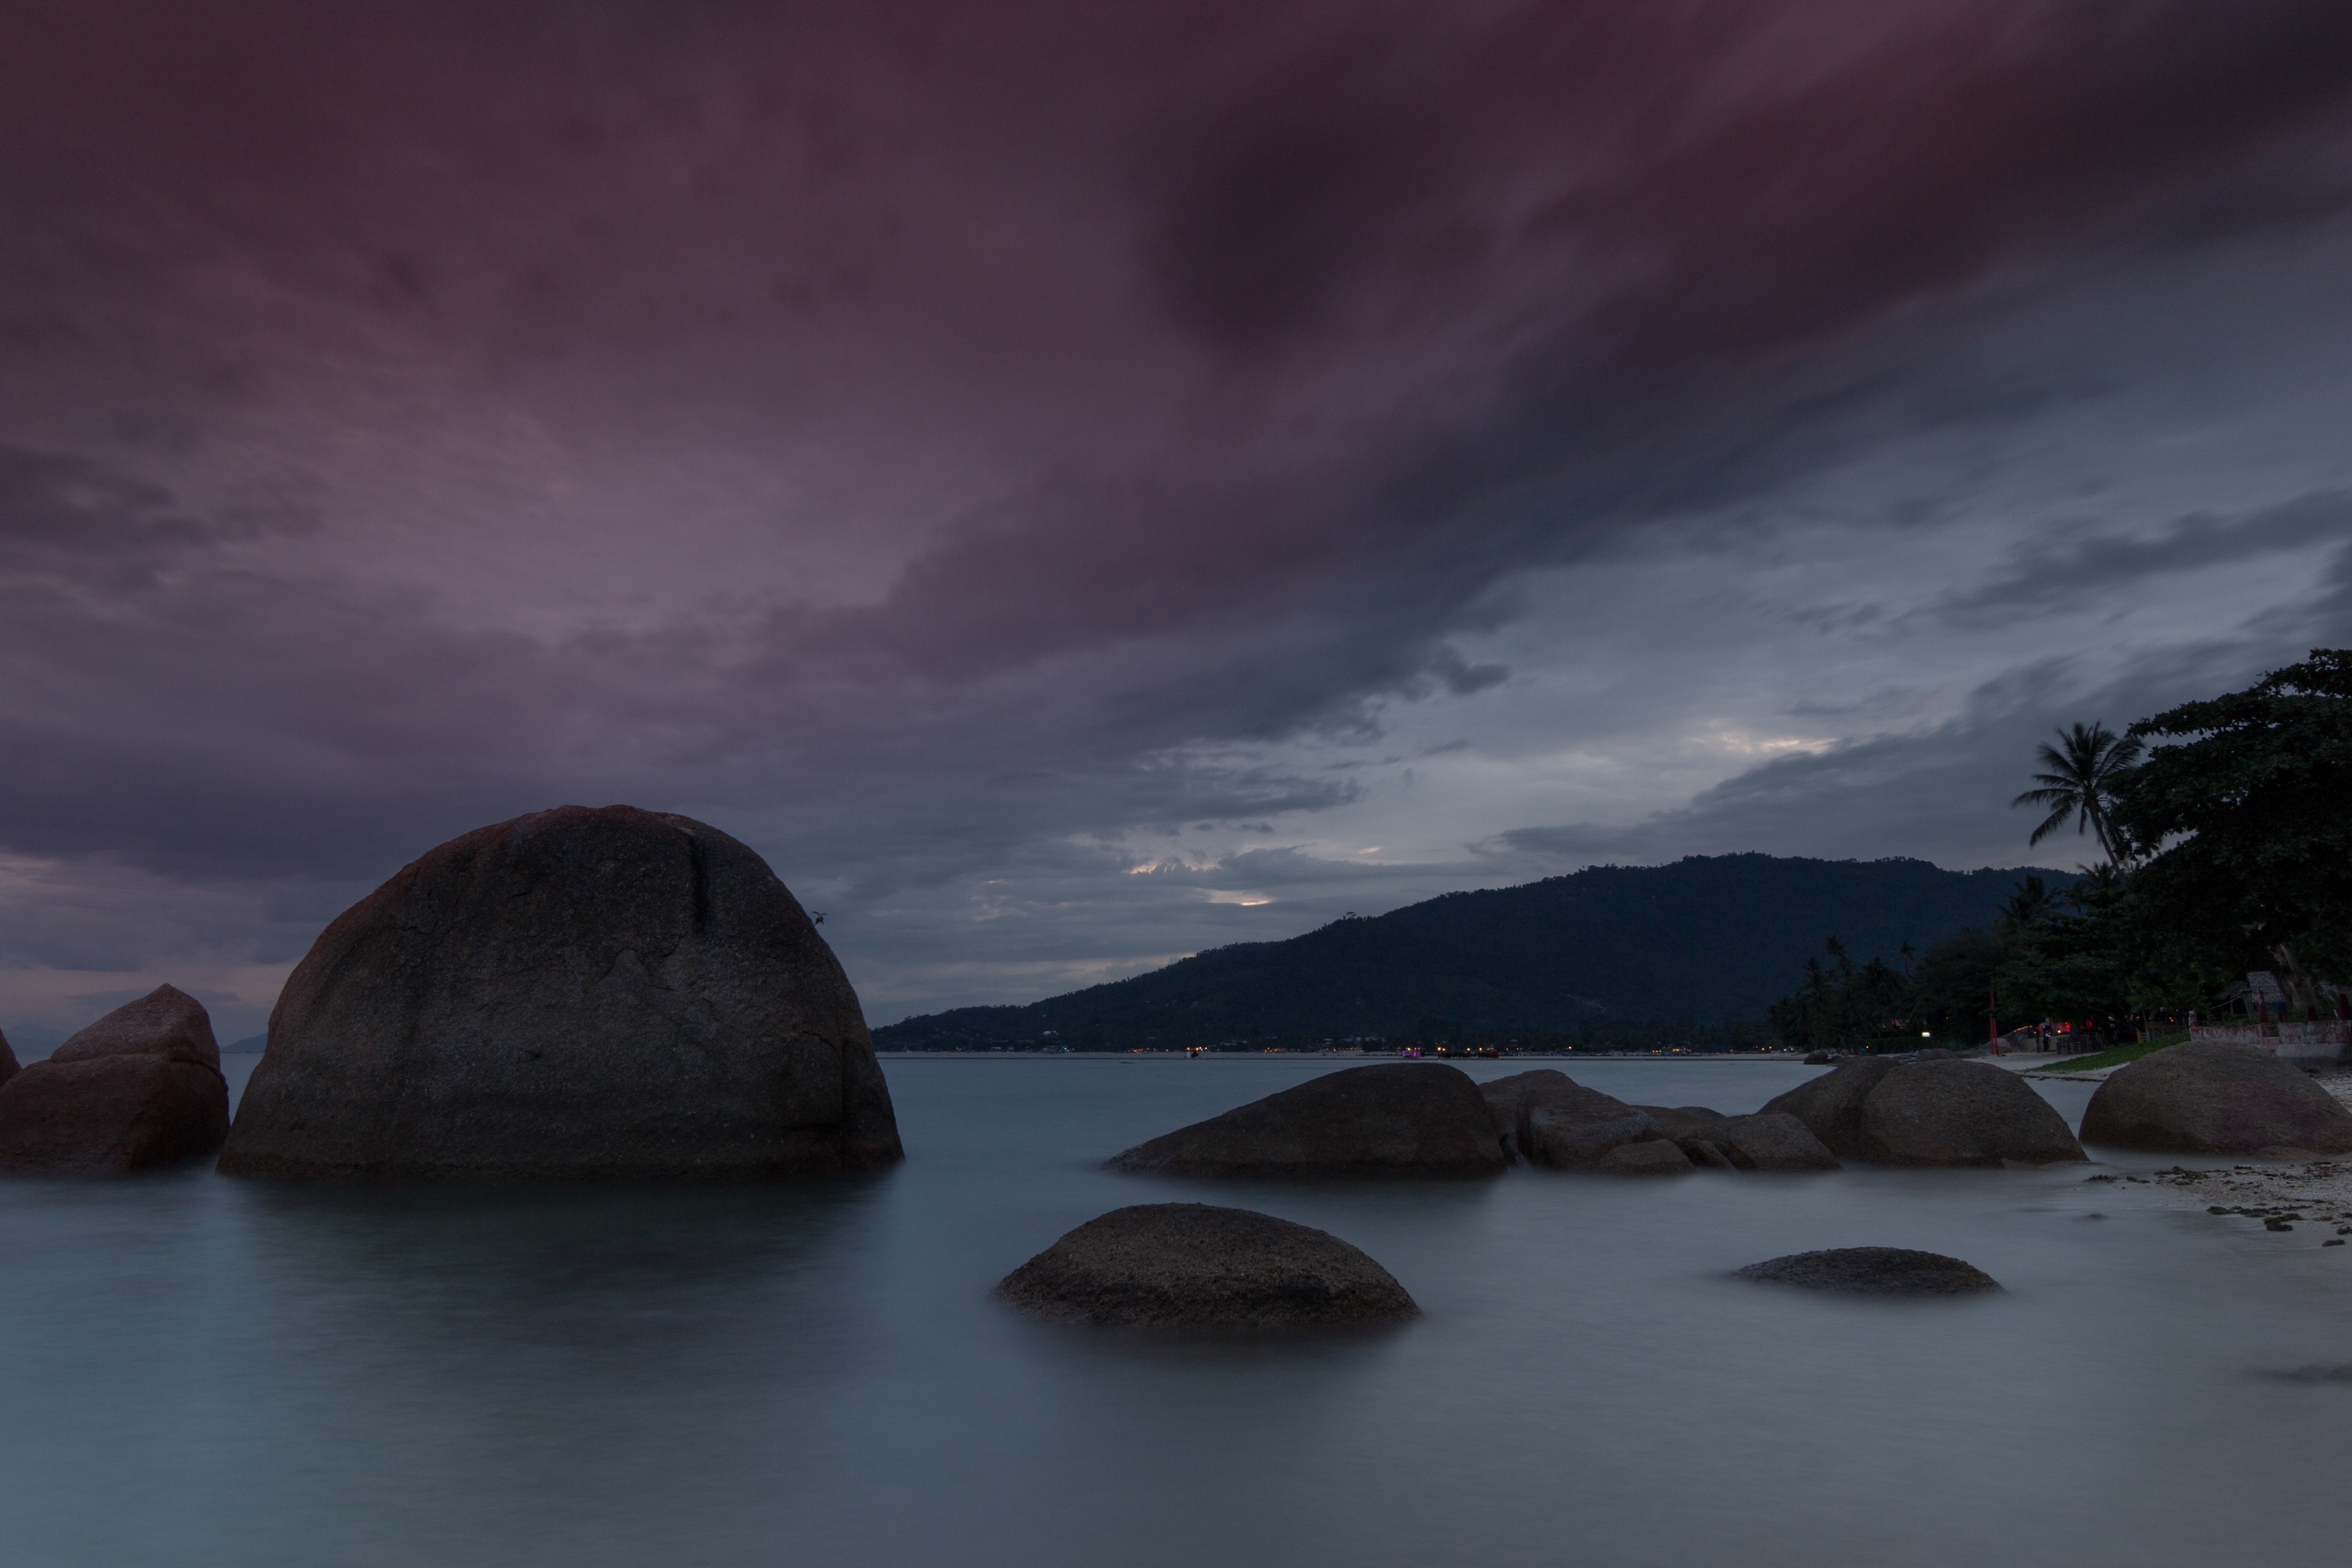
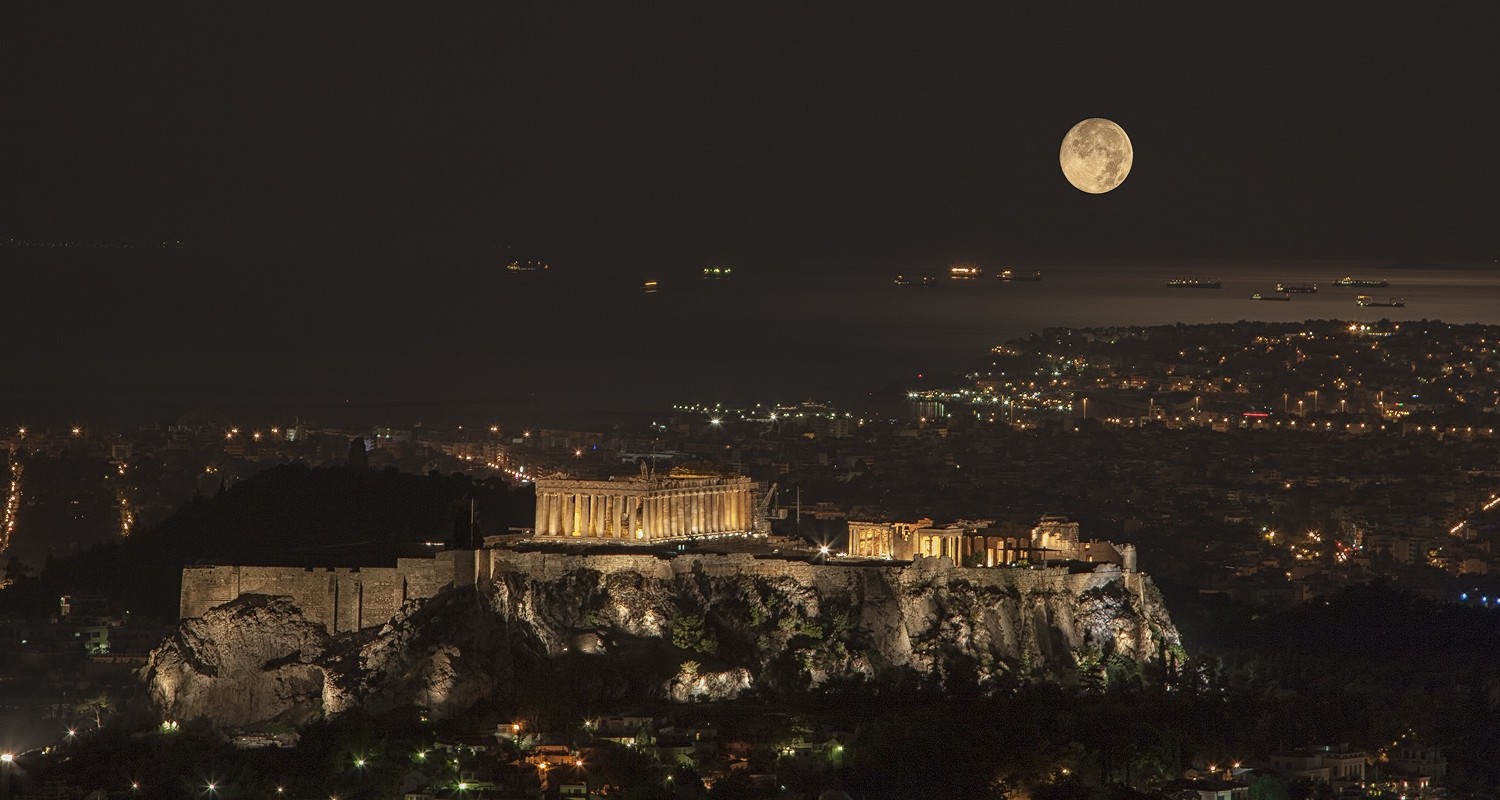
Today, I want to tell you how I captured the image Moonrise – Supermoon 2014, photographed in Thailand.
I will present you my equipment guide, the planning, camera setup, post-processing workflow, and how this picture became the cover of Bangkok Airways’ in-flight magazine “Fah Thai.” I hope you enjoy the story!
Equipment Guide
1. A Camera (Wow, Captain Obvious!) — For this shot I used a Canon EOS 60D, which is a prosumer DSLR for photo enthusiasts. You could just as easily use an entry-level DSLR since the sensor is the same.
It’s also not necessary that you use a DSLR (if you prefer a mirrorless system, for example) but you have to make sure that your camera allows you to control every setting — aperture, shutter speed and ISO.
2. A Tripod — If you want to take your photography to a higher level, you have to buy a solid tripod that can handle the weight of your camera and works well in various weather and surface conditions.
For my image the tripod was essential, because I shot a long exposure that would not be possible handheld. Personally, I use the Manfrotto 055XPROB tripod with the Manfrotto MHXPRO head.
3. Neutral Density Filters — Neutral Density Filters (ND-filters) reduce the amount of light that enters the lens. To get the water to look more like fog, you have to take a long exposure (between 1 and 30 seconds), which produces overexposed images if the environment is too bright.
Instead of reducing the aperture, you can add a ND-filter to limit the light, and then adjust your shutter-speed manually.
4. Graduated Neutral Density Filters — The traditional ND-filter affects the whole image, but in my case the sky was still too bright as I adjusted the exposure for the foreground — this is why I chose to use a graduated ND filter.
Basically, a graduated ND filter gets ‘gradually’ darker from one side of the filter to the other. This way, depending on how you place it over your lens, the sky can become darker while the foreground does not change. Voila! A perfectly balanced picture.
Planning/Location Scouting
To be sure that I positioned my camera correctly and stood at the best possible place to capture the supermoon rise with the rocks and ocean in the foreground, I checked where the moonrise was going to happen ahead of time.
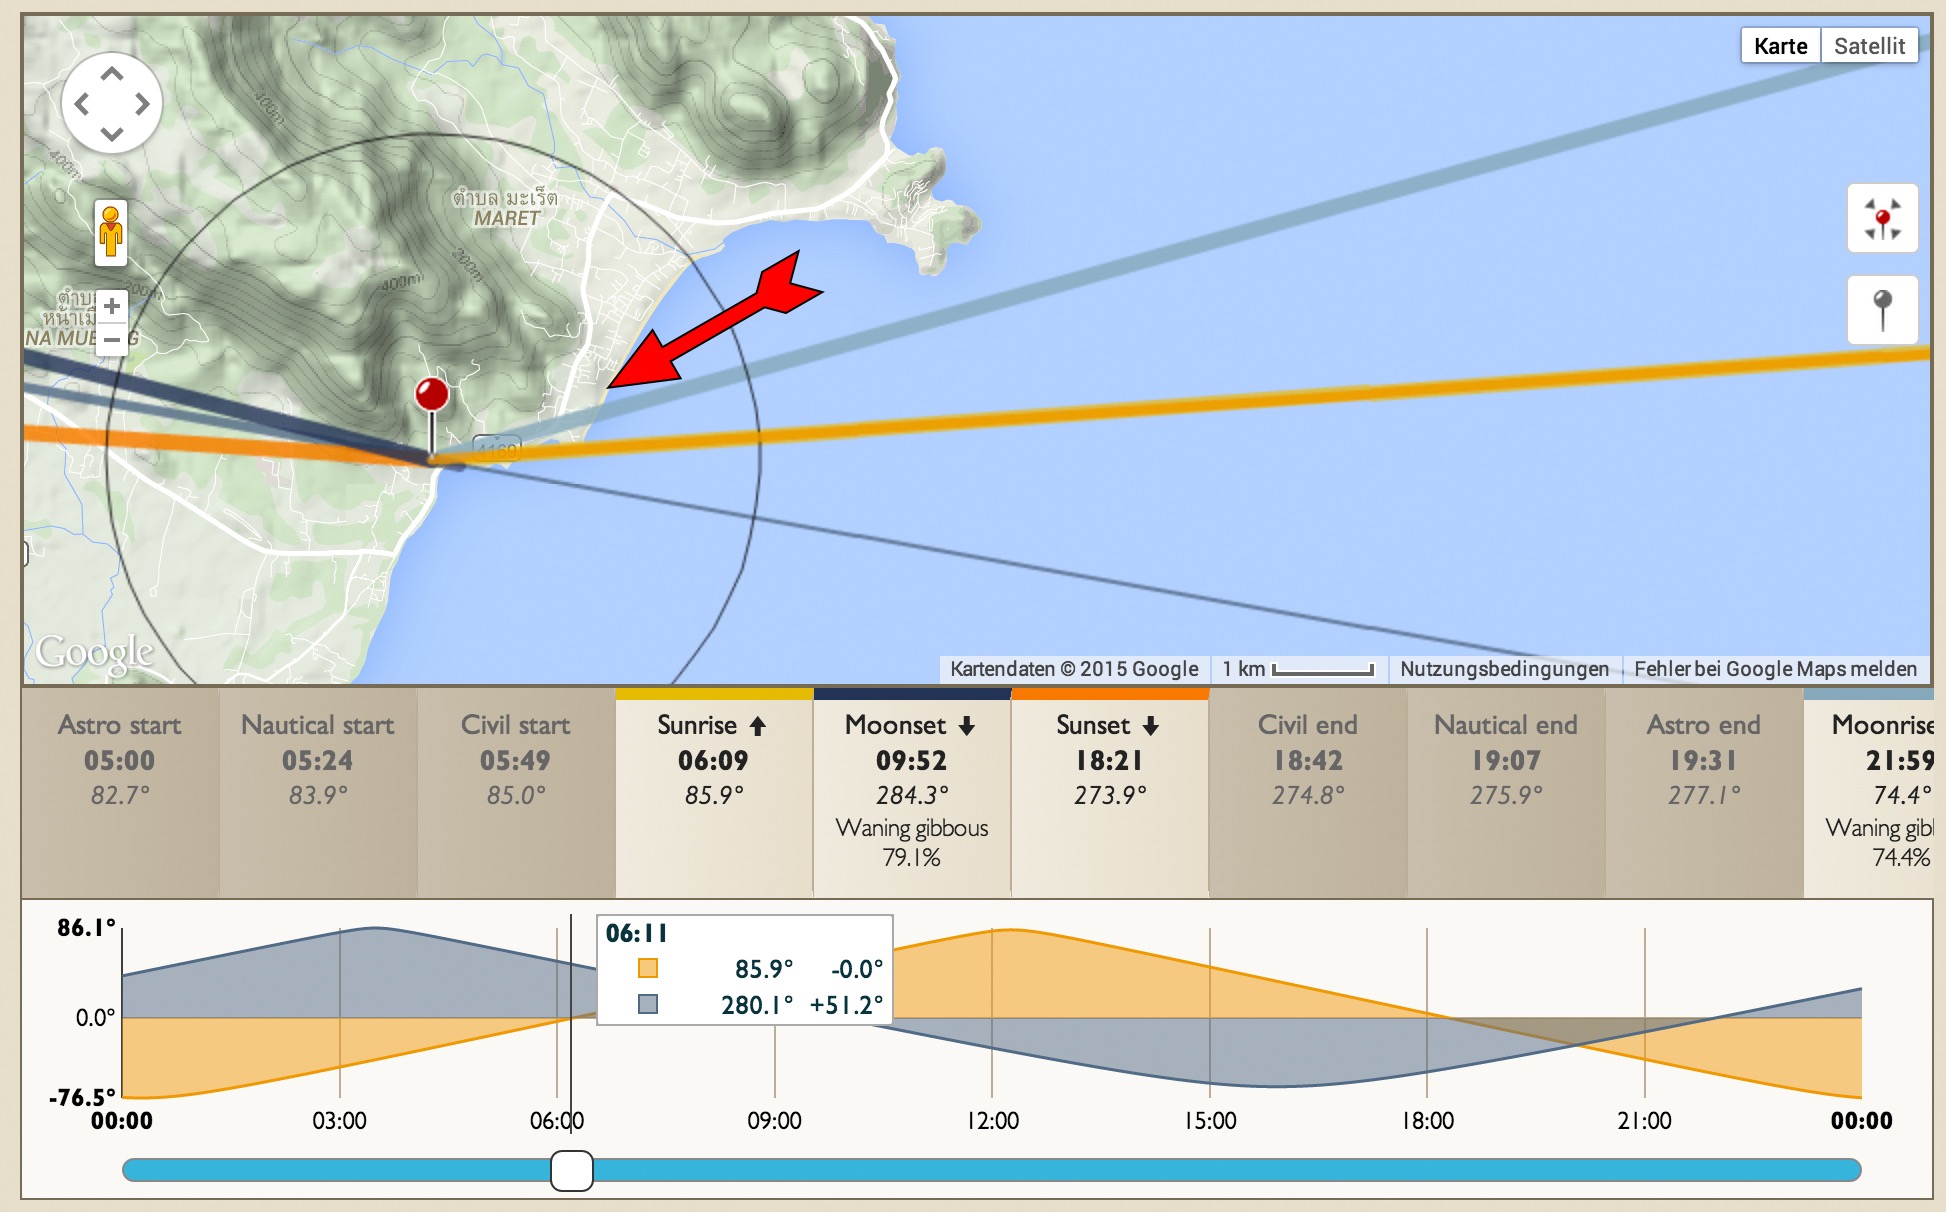
The desktop application “The Photographer Ephemeris” helped me a lot during my location scouting, because I was also able to see the different periods of the moon-phases, and at which time they changed. (The red arrow in the graphic shows the spot, where I shot the picture.) One day before I shot the final picture, I visited the spot to see if it was possible to shoot there and to perform a test shot (I did this with my iPhone).
Location Scouting is one of the most important steps of photography. You sleep much better if you visited the spot before, you know better how to deal with the situation, and you don’t discover any surprises at the shoot.
The place where I captured my image was away from the main hotels, so there was no extra light pollution coming from these buildings. Furthermore, I had to carry my camera and tripod trough a few sections where it was only possible to swim because of ebb and flow of the tides, so I packed my gear in a dry-bag and carried it above my head while I was trying to reach the right spot.
Camera Setup
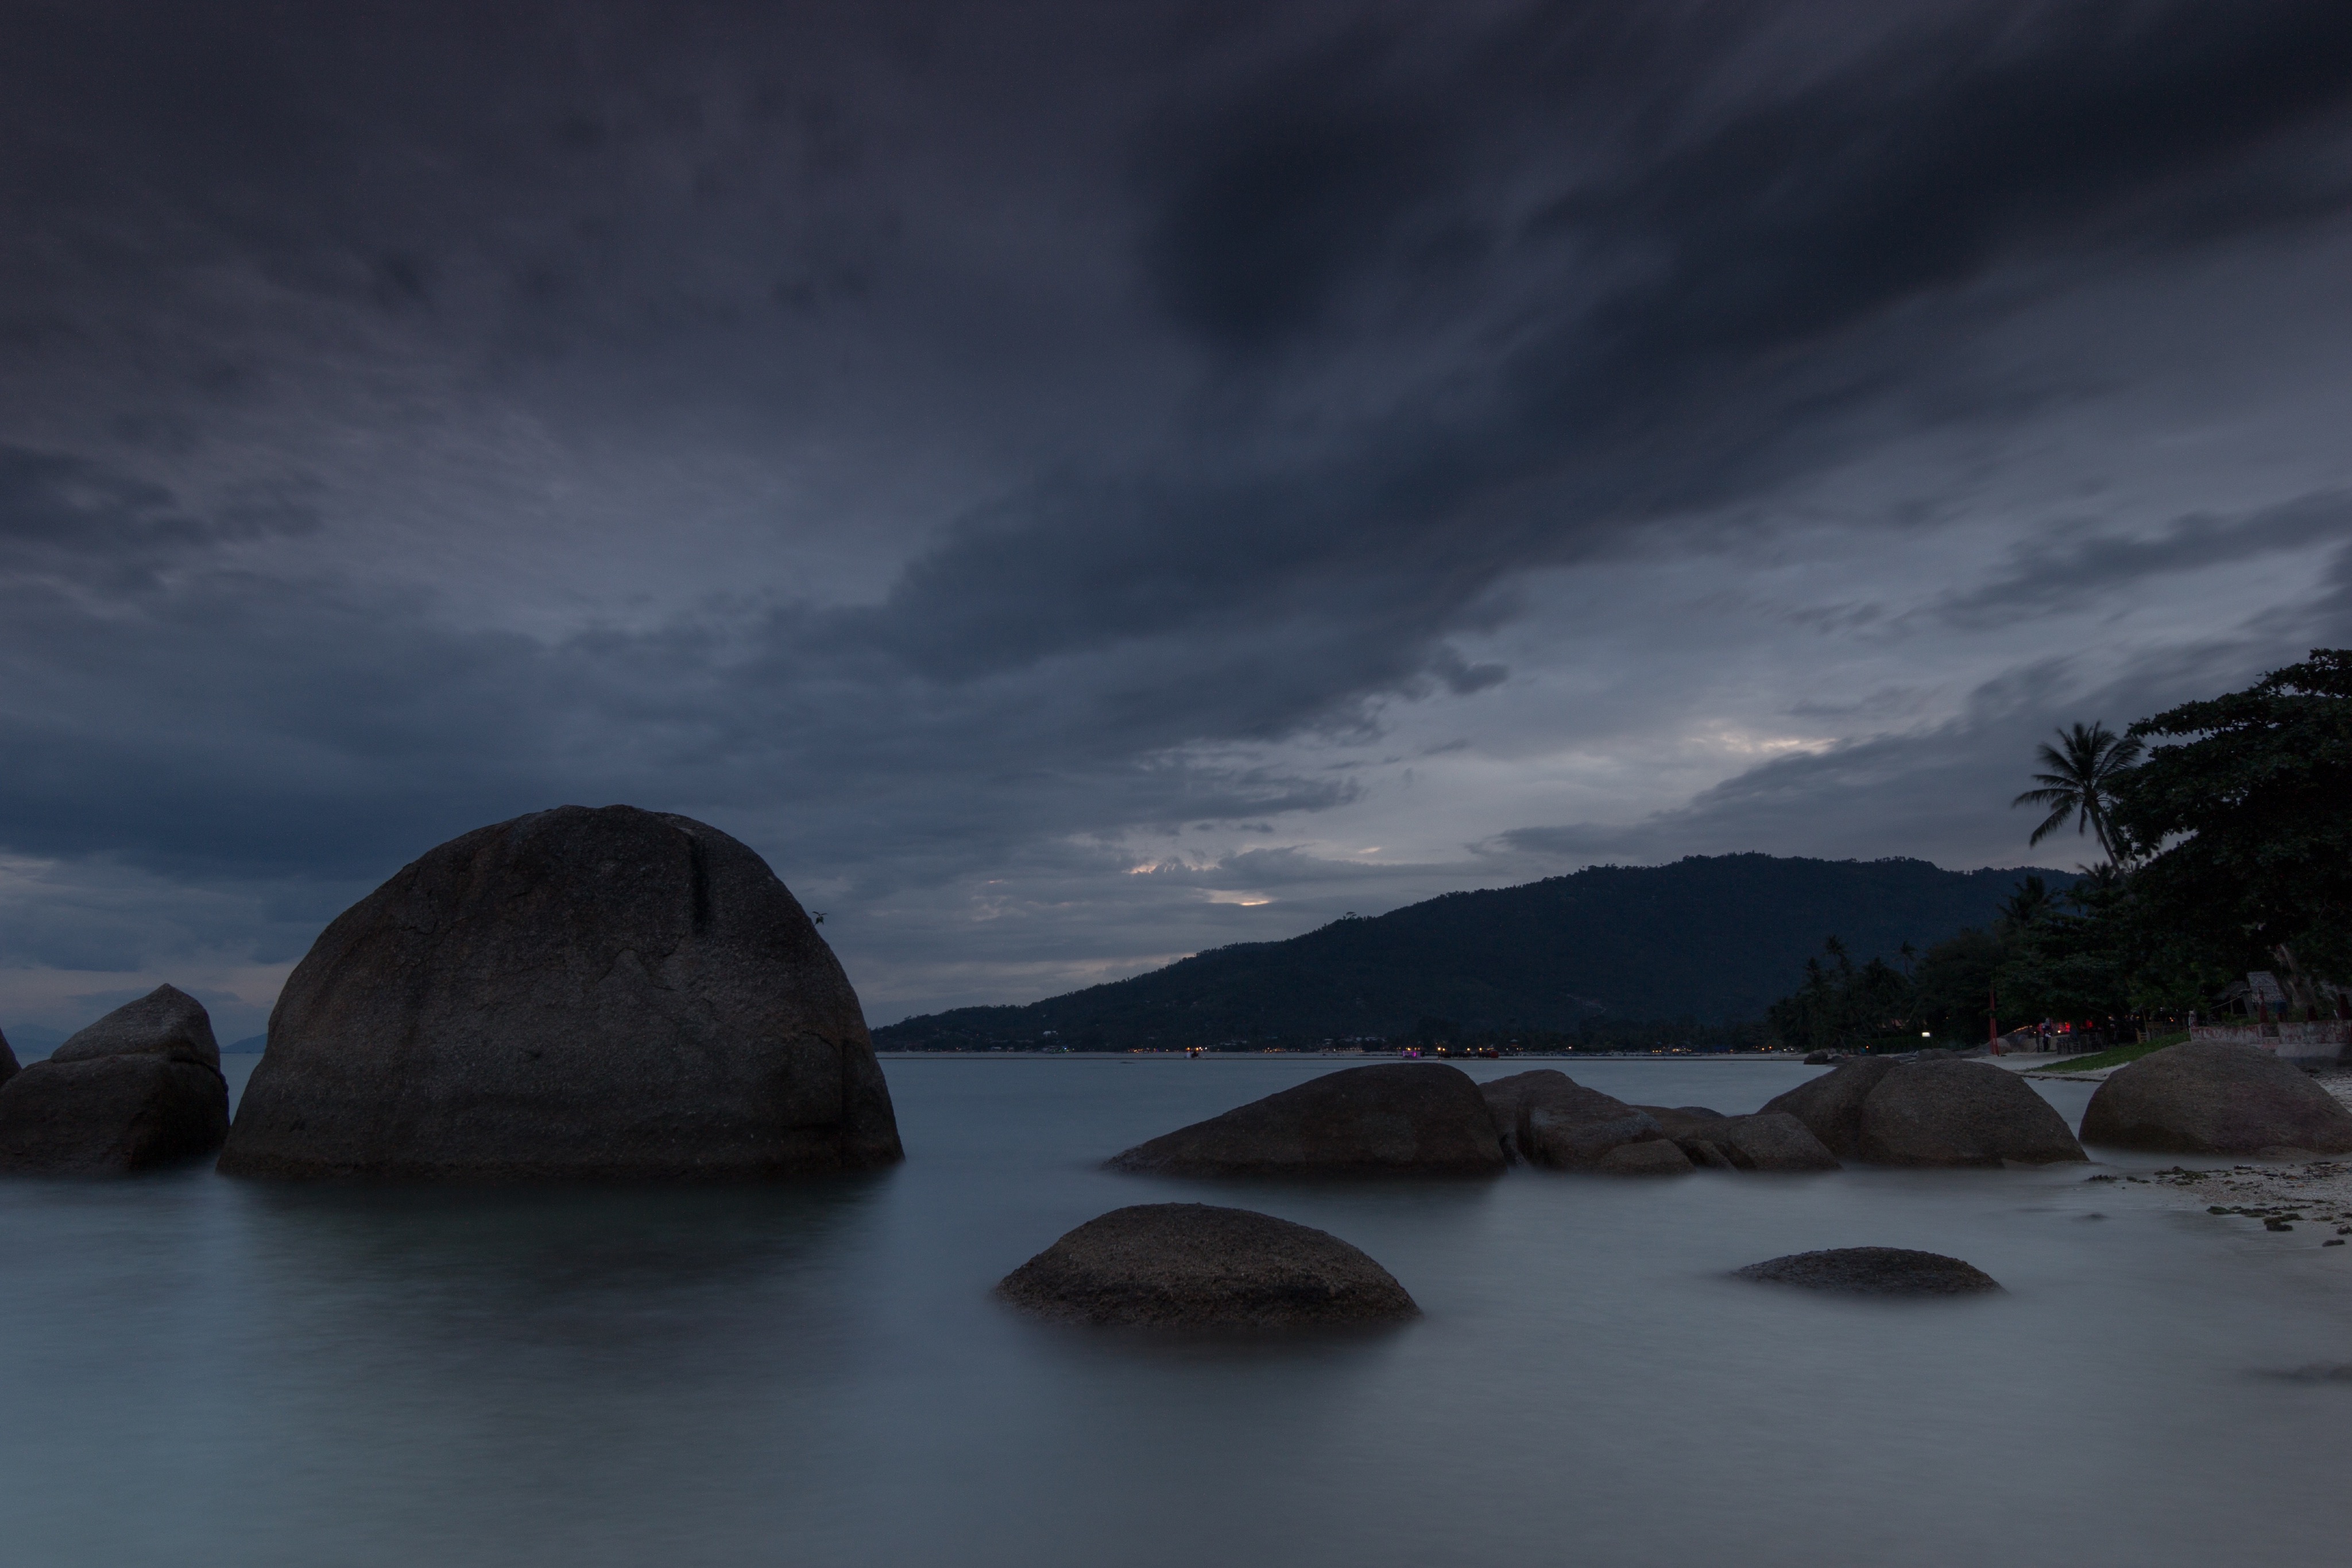
I captured 2 images with different exposures to create this image. The first picture contains the image without the moon (this image was created 2 hours before the moonrise). I shot this image with a long exposure time to blur the water because I love this look of descending fog.
The second image includes the exposure of the moon. Due to the brightness of the supermoon (30% brighter than the normal moon) no environment was visible in the picture, only the details of the moon and the silhouette of the mountain.
I merged these two images later in Photoshop, so I simply combined two exposures to create one.

1st Image: Landscape without the moon. 13 sec | f/9 | ISO 100
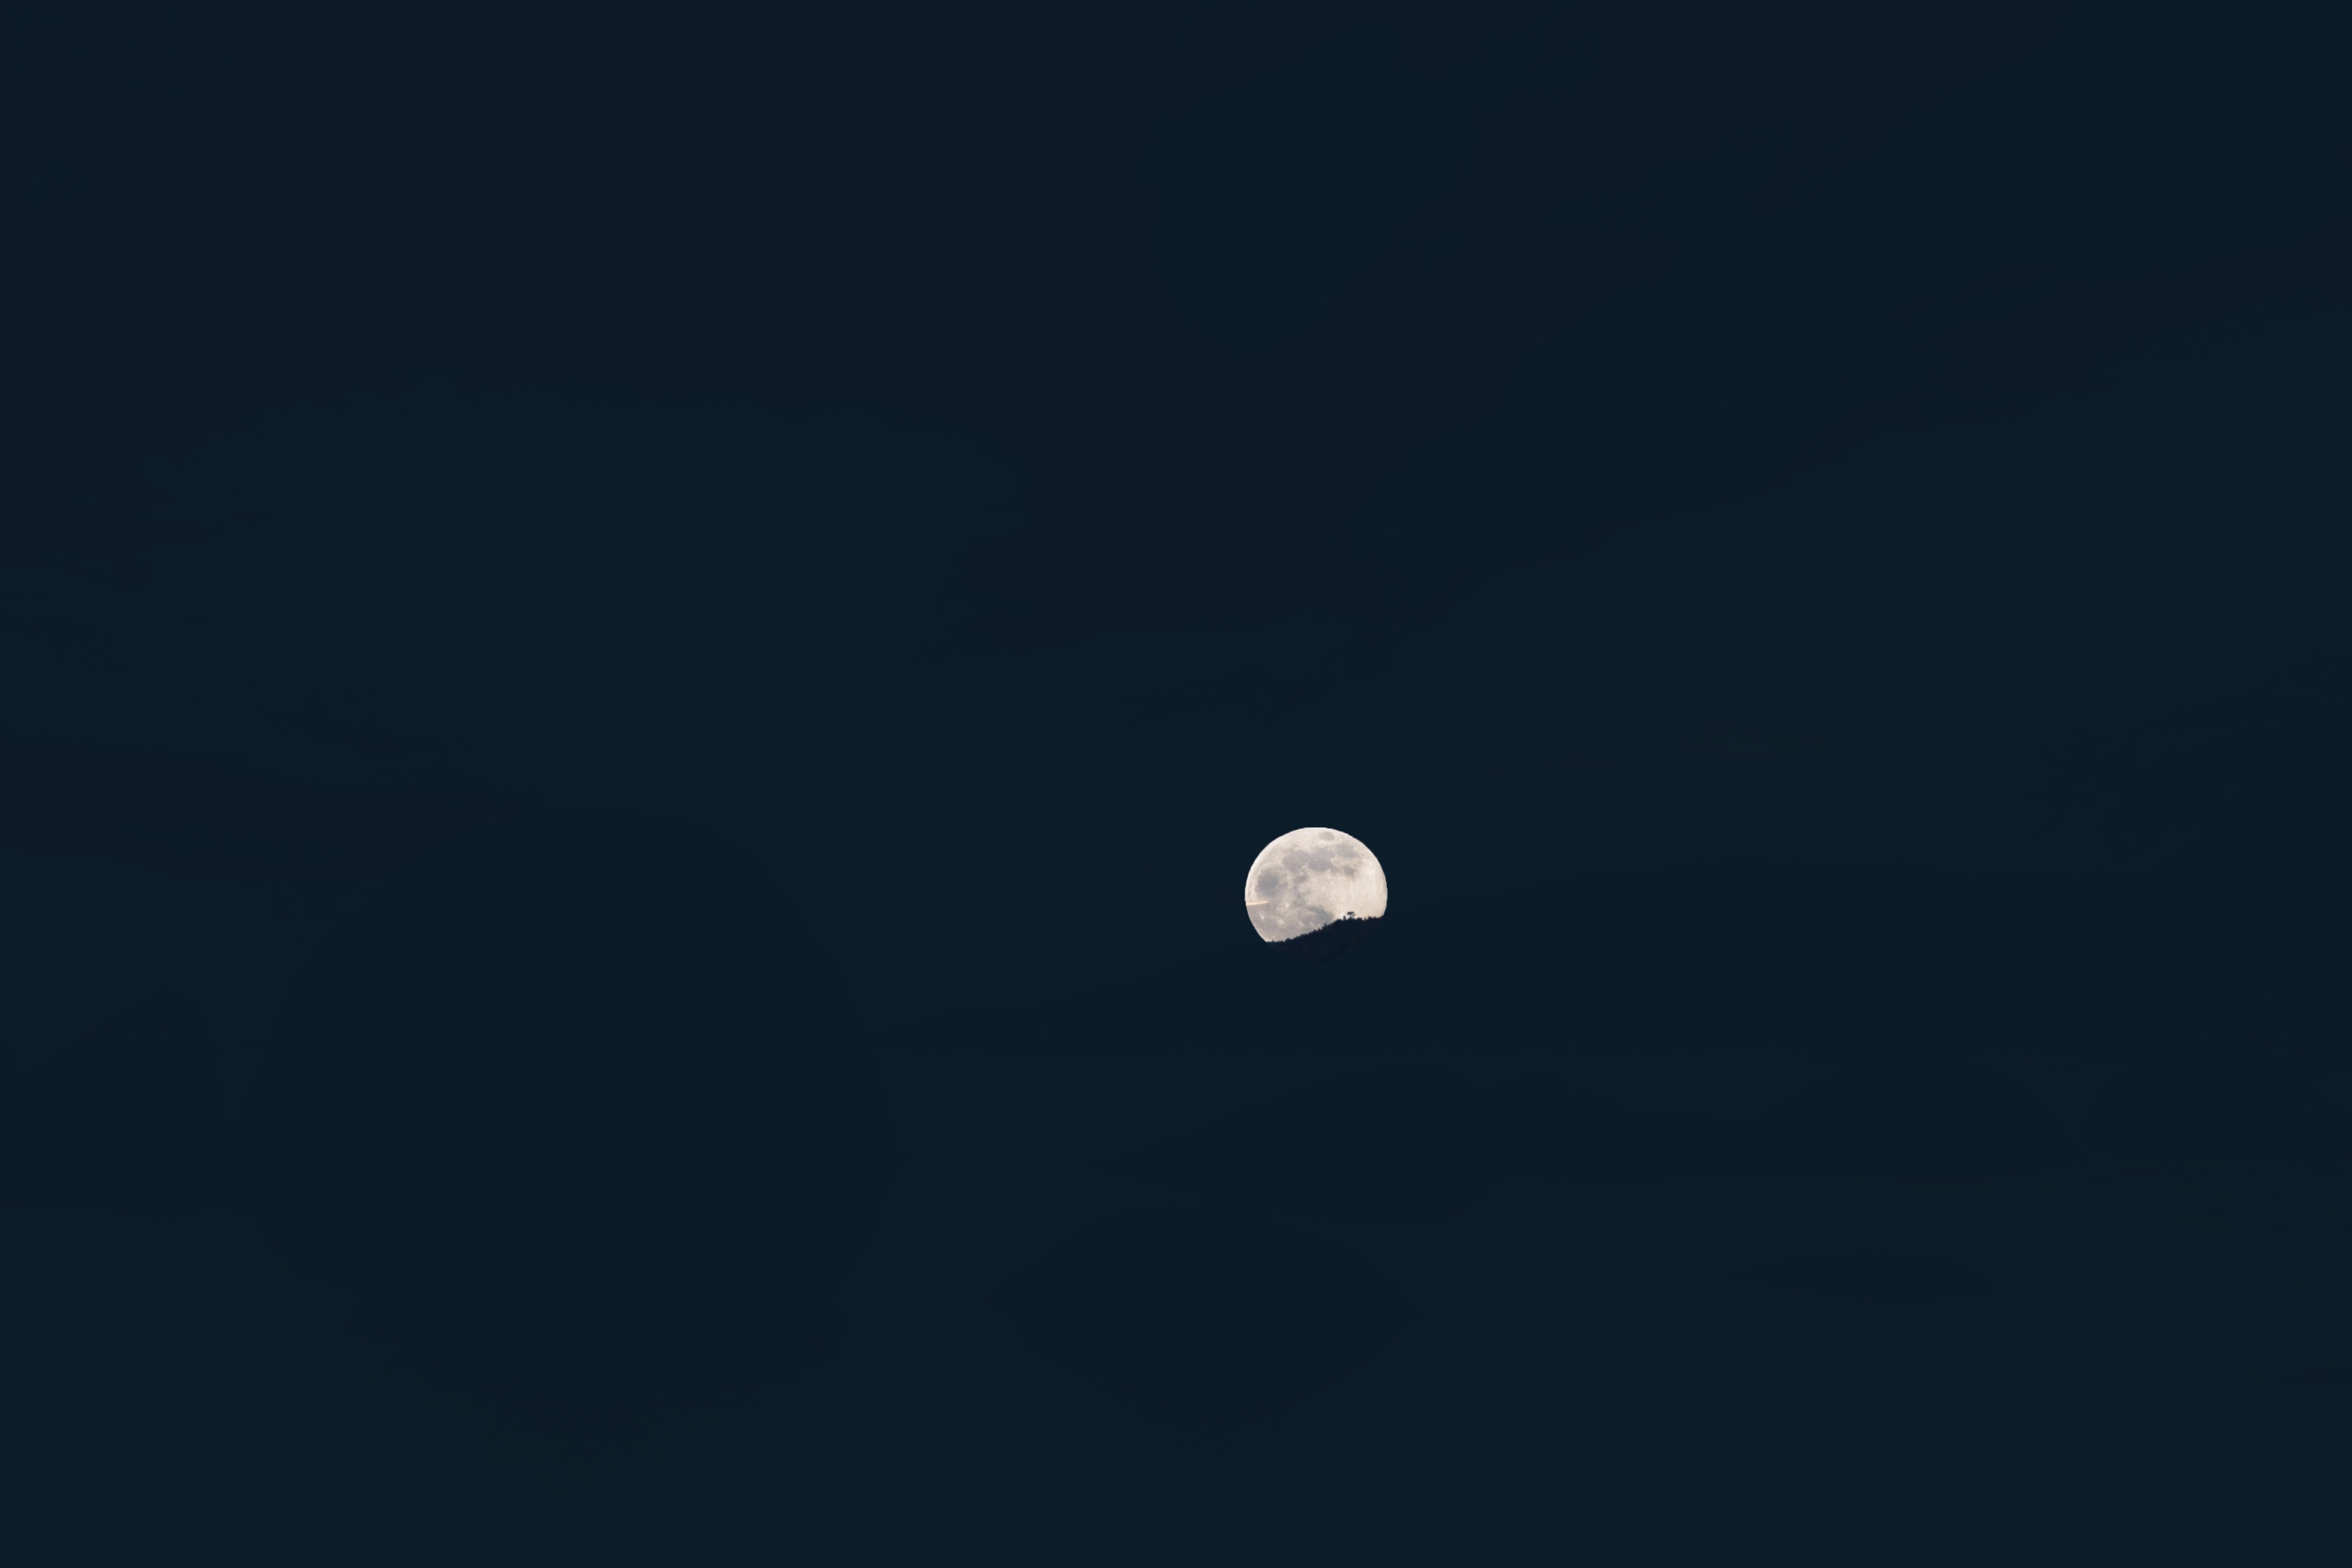
2nd Image: Silhouette of the mountain with the detailed structure of the moon. 1/80 sec | f/8 | ISO 100
Shooting Mode
I always use the M (Manual) Mode on my camera, so I have the full access to the adjustments of my DLSR.
Focal Length & Focus
I used my Tokina 11-16mm f/2.8 at 16mm for this image. That way I had a wide angle to capture the landscape and ensure that the moon was completely visible and not cropped. I focused manually to infinity, because at a wide angle like 16mm (APSC-size) almost everything is in focus and I knew the moon will appear behind the mountain.
Aperture
I recommend using an aperture between f/7.1 and f/11 for landscapes, because most of your lenses are extremely sharp in this area, even in the corners, and show less chromatic aberration.
ISO
For long-exposure photography, keep your ISO as low as possible. You want to create an atmospheric image, which could easily be destroyed by digital noise. If you can, use a longer shutter speed, turn the ISO down to 100 (like I did) and balance the exposure with the shutter.
White Balance
I always use Auto White Balance, because I shoot every picture in RAW format and can adjust the White Balance later in Photoshop/Camera Raw.
Most of the time Auto WB works fine, but in this case, I tinted the picture a bit more blue to set a mysterious atmosphere — but that was just my personal taste.
Post-Processing
First of all, I did not manipulate the tones in this image except for the upper part of the sky. I added a soft purple brush to achieve a little gradient. In my opinion, this little change gives the image a more interesting look.
I also dragged a little “Dodge & Burn” brush over specific areas — for instance the rocks — to hone the exposures.
In the next step, I merged both exposures to create one final image. I selected the detailed moon and simply copied it with Adobe Photoshop CS6 into my first picture. That step was very easy because I did not move my tripod while I was shooting the images.
Inside Photoshop, I used the blend mode “Difference” to perfectly align them.
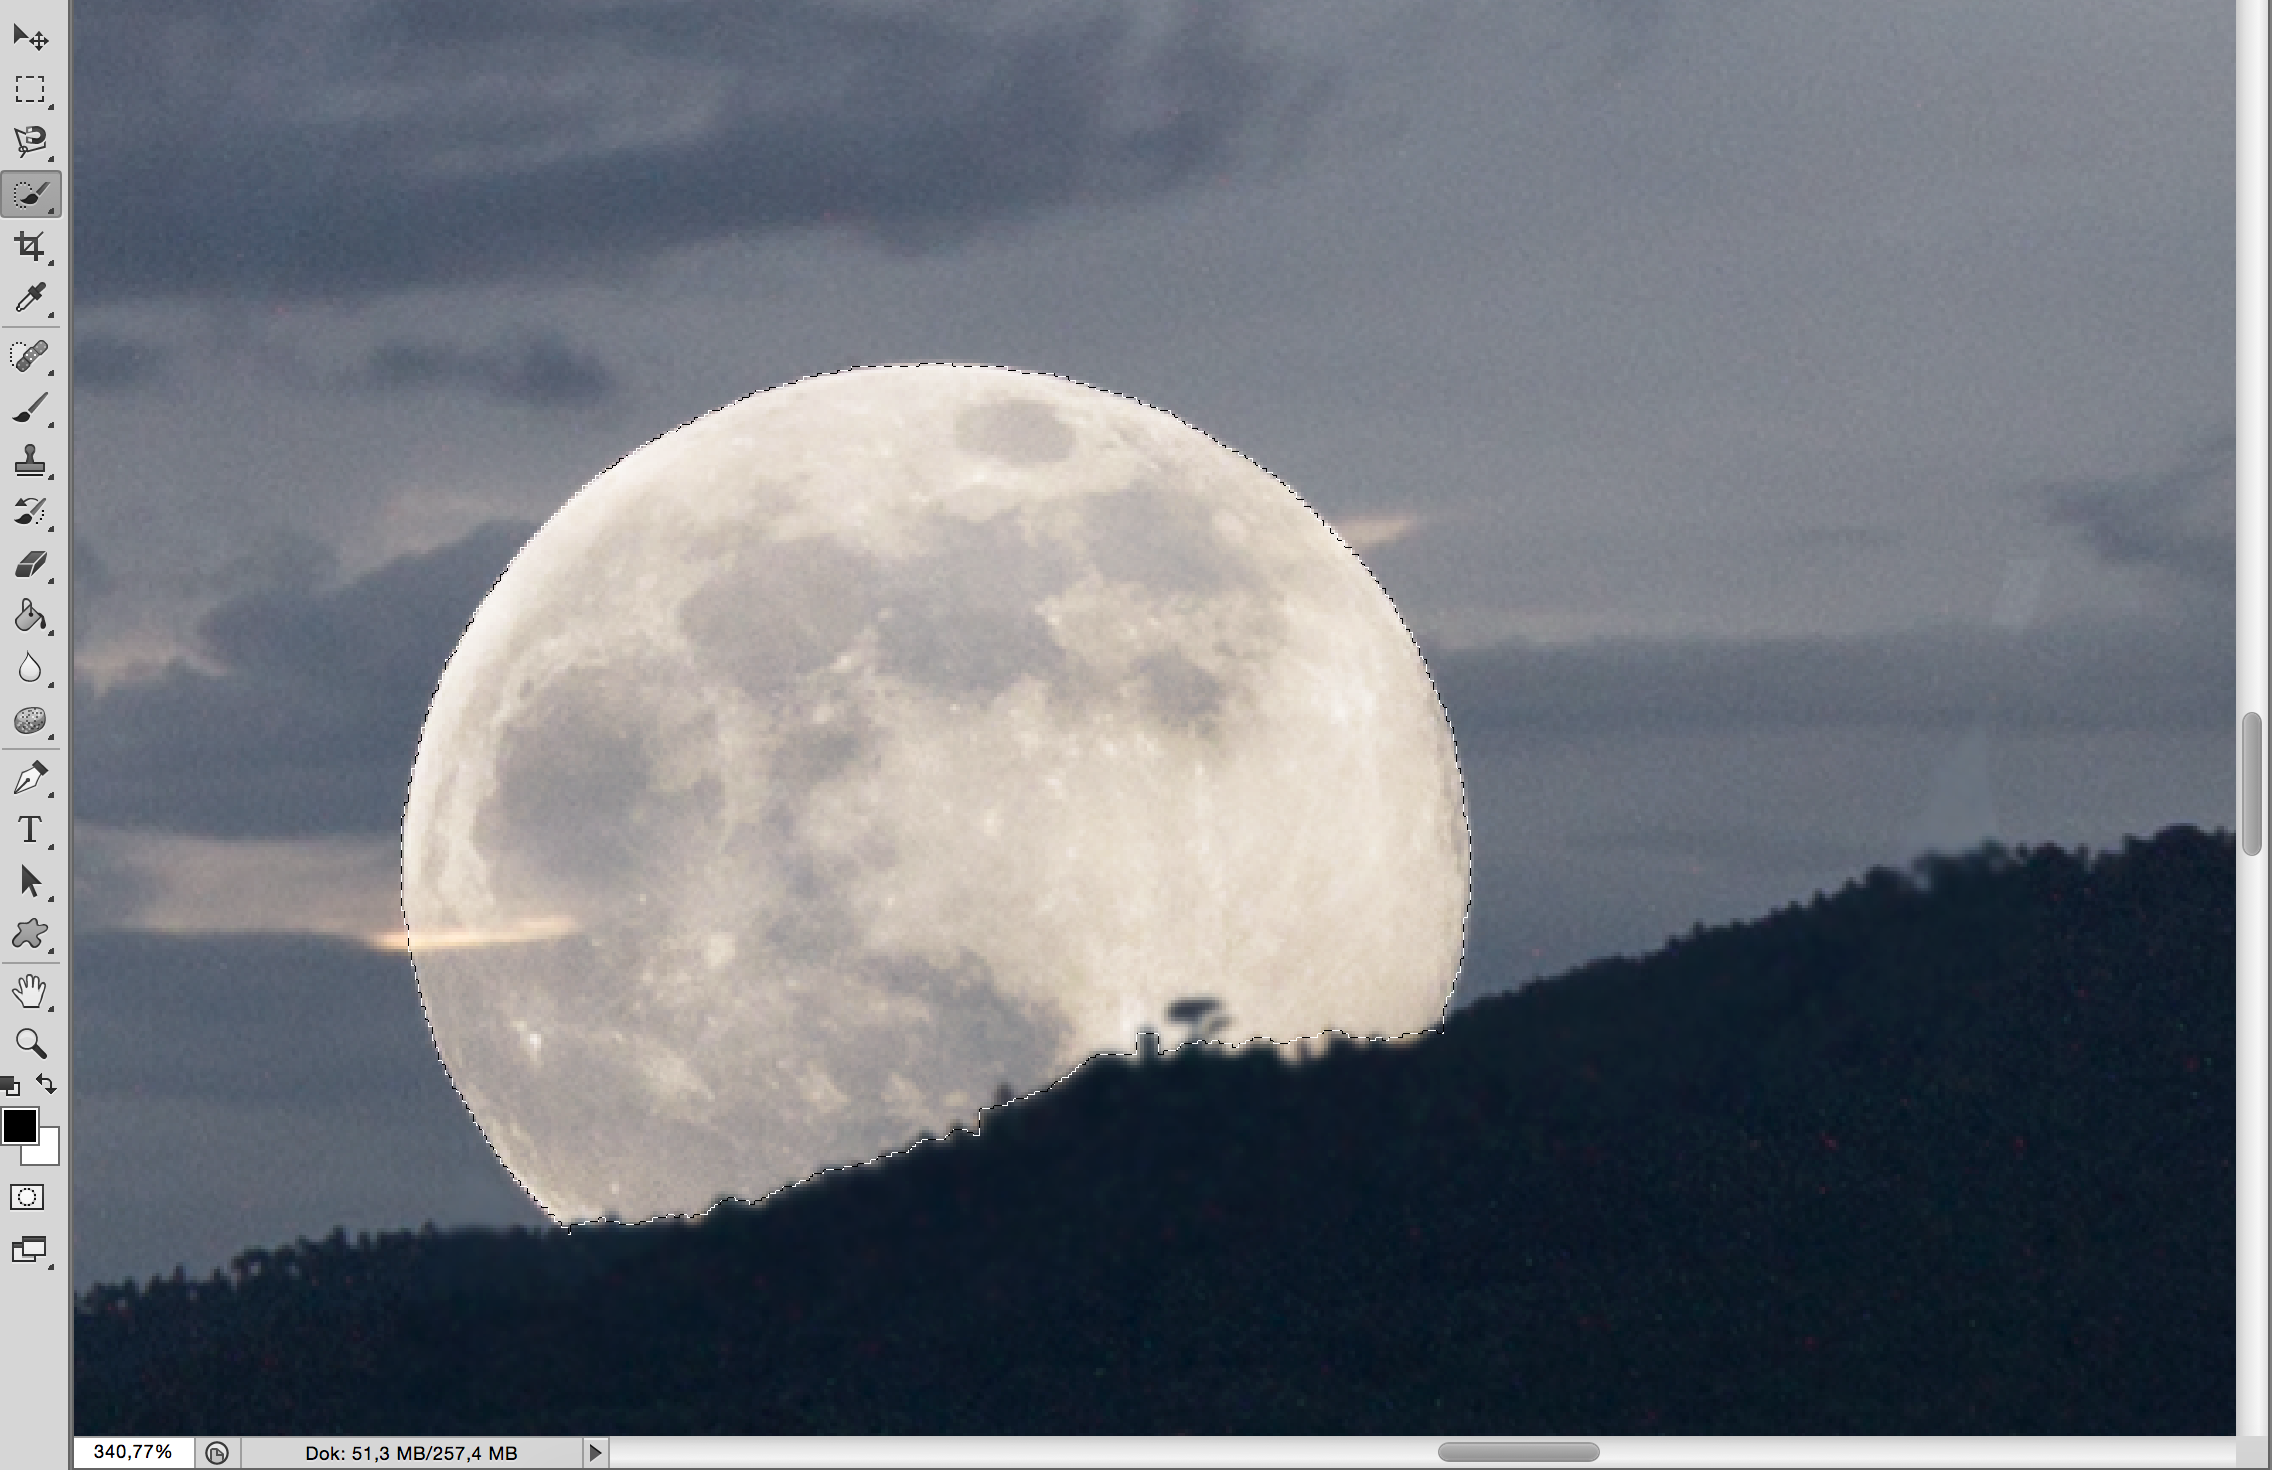
Afterwards, I set the blend mode for the Supermoon to “Screen,” so the moon became more realistic and fit better into the other exposure.

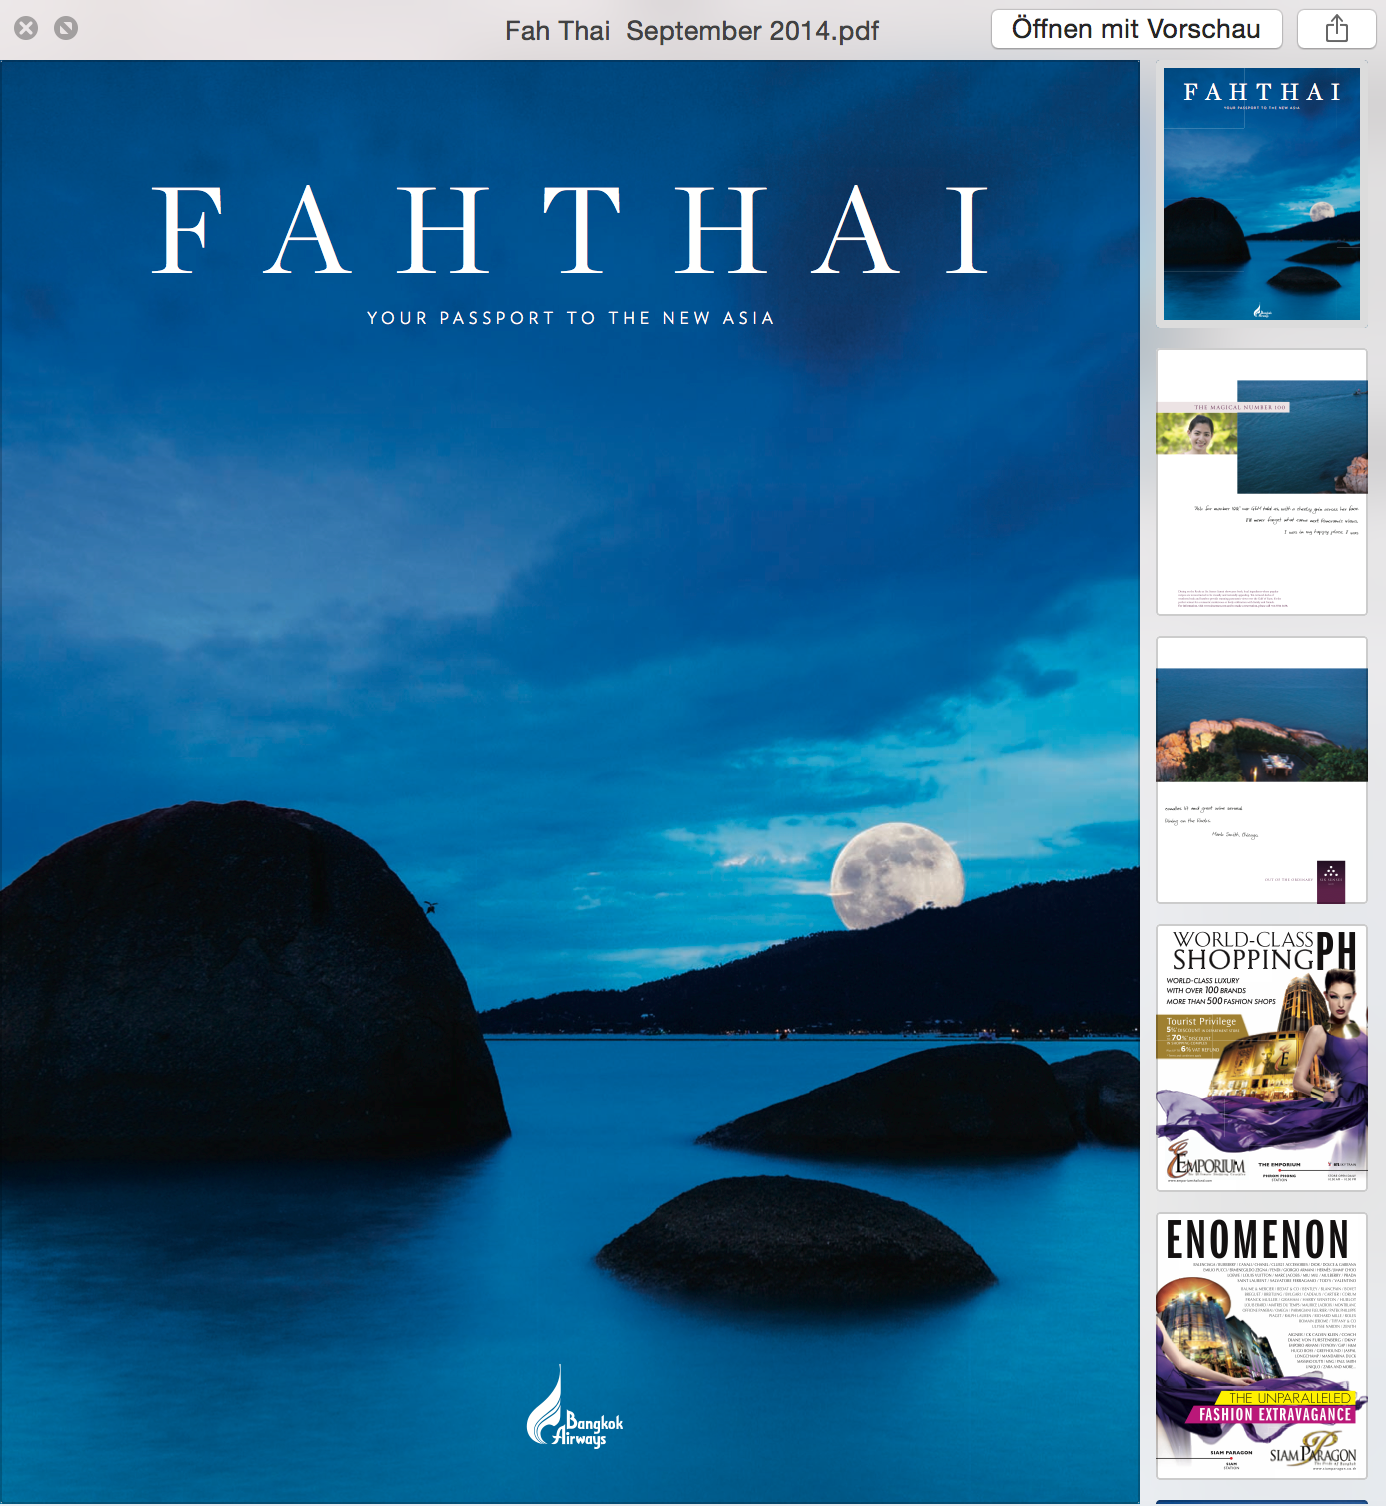
How My Image Made it Onto the Cover of Bangkok Airways’ in-flight magazine “Fah Thai”
I uploaded the final image onto my 500px account and tagged it with “#supermoon2014.” Soon after, it was featured on a 500px ISO collection named “39 Stellar Supermoon Images You Need To See,” and the photo immediately blew up.
After just a few hours I had over 20K views on my image, and a few days later I received an email from Jenny, the photo editor for Bangkok Airways’ in-flight magazine “Fah Thai.” She told me they were considering using my picture in their upcoming edition of the magazine.
To be completely honest, I thought it was a spam email and did not reply for two days, but then I asked myself: “What, if this is not spam? It would be my chance to get featured in an in-flight magazine, and Bangkok Airways is not a small airline company… what did I have to lose?
So, I replied and sent her a high-resolution, un-watermarked copy of my picture — which was of course very foolish. Fortunately, she replied and made me an offer, which I accepted.
After a few weeks, I received two copies of the magazine with my photo on the cover!
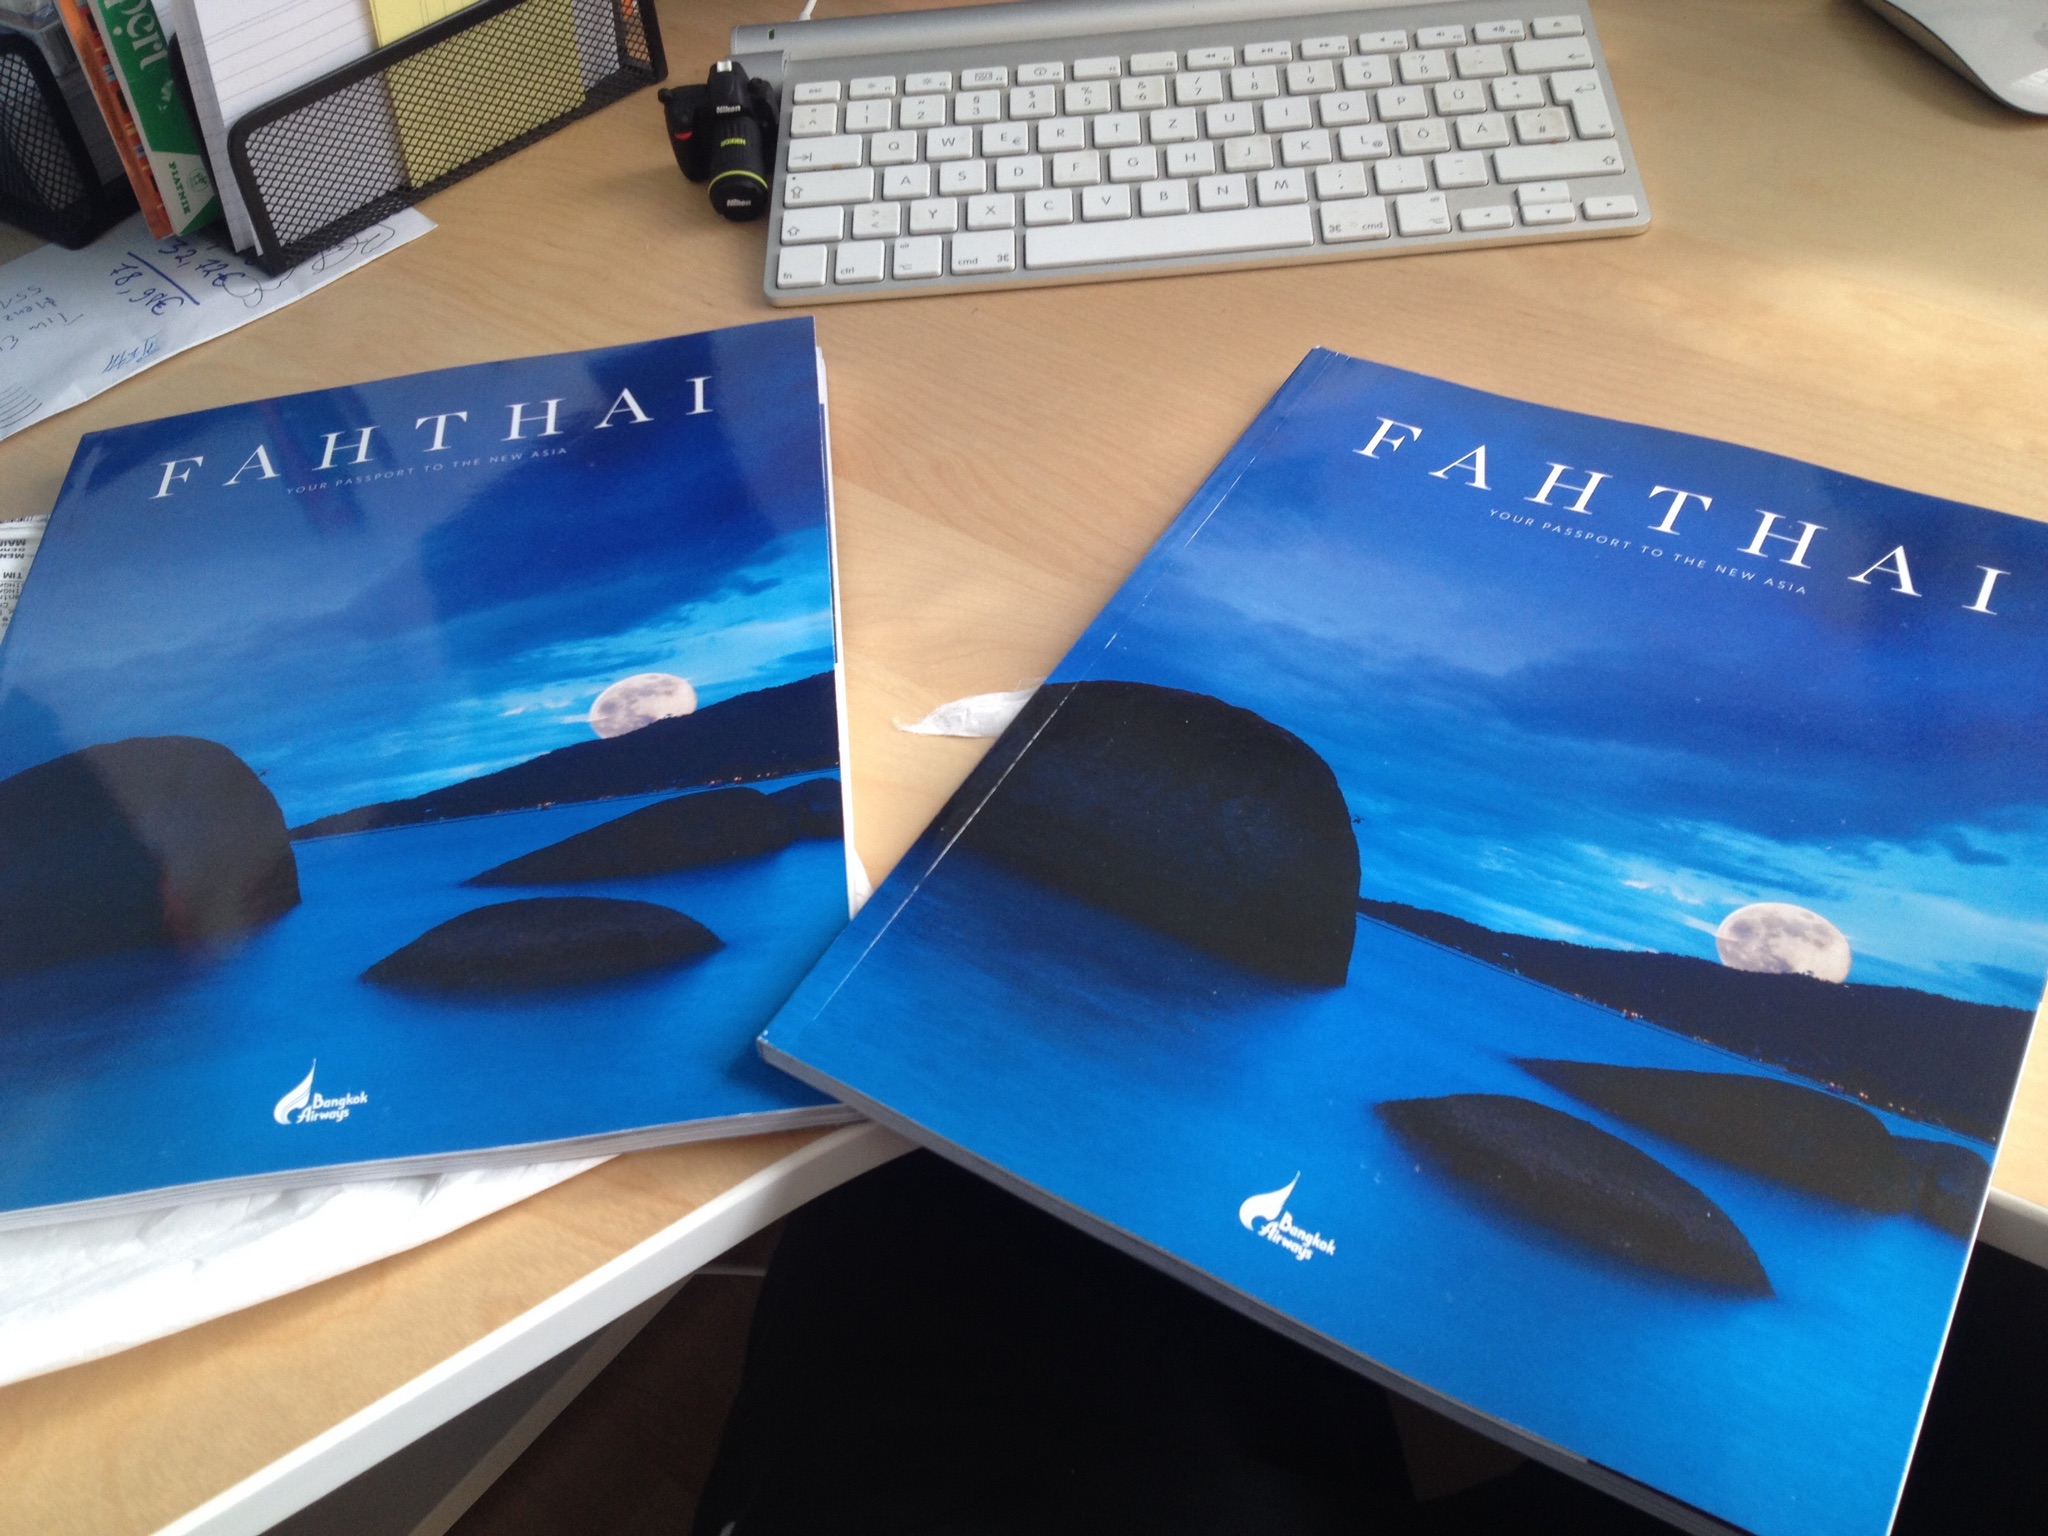
It is a really nice feeling, and still makes me happy to know that my photograph made the cover of an in-flight magazine. Thanks to 500px, photographers like me are able to share their photos online, get in touch with other people, and get noticed. It’s awesome!
I hope you liked reading my article. I wish you all a wonderful day, and don’t forget: “It is all about the shot!”
Leave a reply