Wiebke Haas was born in 1991 in Germany. After school she spend 3 years of learning to became an official certificated photographer before she took the risk of self-employment. During an internship for renowned animal photographer Tim Flach in London she was able to gather an enormous amount of photographic insight and knowledge. Furthermore, it was here that she learnt to love clean structures and well laid out compositions.
You can find more of her beautiful photography on 500px, her website, Facebook, and Instagram. And for our German readers, check out her new book “Faszination Pferdefotografie” here.
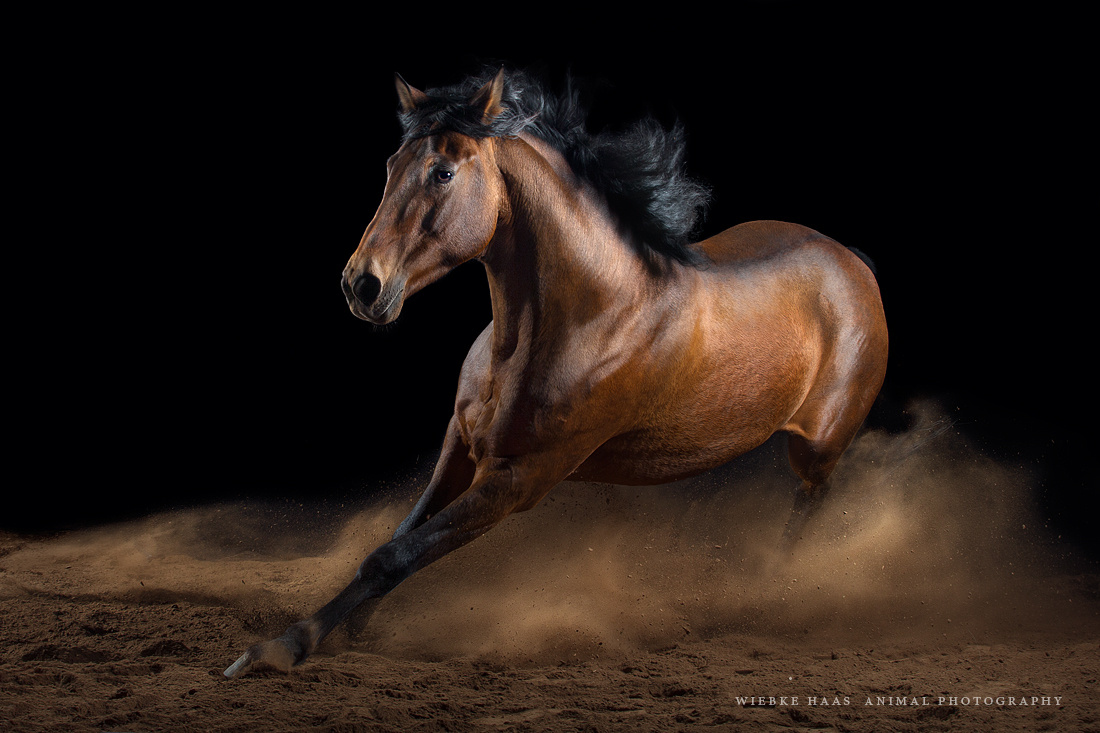
It’s not a secret that horses belong to the most magnificent animals on our planet or at least that’s what an equestrian would say. The pure strength, elegant moves, silky and fluffy manes and tales and a tender spirit are why we fell so easily in love with our equine friends.
But when it comes to taking a photo of a fast galloping horse or a simple portrait of their pretty faces, the equine grace can turn into silly hippo- and giraffes-like figures.
Let me give you some advice to start your equine photo journey.

1. The Gear
First of all, the most important thing for nice horse photos is to use a telephoto lenses starting at 135mm at
minimum. The pincushion distortion these lenses create works very well on horse motifs and makes your model look more compact and elegant.
My equipment for an equine photo session:
Canon 135mm f/2.0: I’m using this lens for portraits of a horse and its owner. It produces a really nice bokeh and is a pin sharp lens.
Canon 70-200mm f/2.8: This is my tool for nearly everything else. Especially for horses in movement a zoom lens brings a lot more flexibility than a prime lens.
Canon 1DX: As a professional the camera body is as important as the lens. For an equine photo session you’ll need a fast camera, a good noise performance (especially when shooting action motifs in bad weather) and, of course, a fine sensor for high quality images.
Pro Tip: If you have to choose between a really fast crop camera and a not so fast full format camera I’d definitely select the better sensor over the camera speed. You can learn when to hit the trigger button but you can’t improve a bad sensor in comparison to a full format sensor.

Additional Resource:
- The Best Cameras Lenses For Different Styles Of Photography
2. Preparing Your Model
Preparing a horse for a photo session properly is a very important task and involves quite a bit of knowledge about the breeds and riding styles. Read up on all information you can find on the web about the special breed of your model. Consult horse breed encyclopedia. Ask the owner for typical horse tack and methods for presenting the horse typical for the breed.
Washing or grooming the body, mane and tale is essential for a photo session, no matter the breed. Don’t forget to clean the bridle you wan’t to use. If you are planning pictures of the horse and the owner ask your human model for color matching clothes.

3. Preparing the Studio Setup
When photographing horses in studio it is best to take your studio to the barn instead of taking a horse to a (tiny) studio room. In most cases you can use the riding hall, a hay store, or something similar.
You will need a mobile background system and a huge black blanket (minimum 3m to 4m) the bigger the better. Unfortunately the use of background paper is not that easy because of damp caused by the sand of the riding hall.
You can use nearly every lightning set up you know from your normal studio work with smaller models. Just make sure that your softboxes are a little bit bigger (because a horse is bigger than a human or a dog) and arrange for enough space between the lamps. On my sets I usually make sure the horse has at least the space that it’s got in a horsebox.
Be careful with the cables. I’m trying to put my cables close to walls so there is no risk for the horse to stumble upon them. It’s useful to have a helping hand on your lamps so just in case the horse is trying to escape someone can move the technique stuff.
Before starting the photo session give the horse some time to get known to the new situation. In most cases my models need just 10 – 15 min to feel comfortable on set.

4. Attention Please!
Tension is the key for good portrait shots of horses. Try to make the horse bend its neck a little bit so that the animal looks more agile and elegant. Your assistant can use rustling bags, food, an umbrella, a reflector, or sounds from your smartphone to get the attention of a horse. It’s that simple.
Gather information about your model’s character and behavior beforehand. Some horses are really cool and not that easy to impress with this stuff while others are really sensitive and easily upset. Usually less is more. Try to use as little stimuli as possible to get the horse’s attention and definitely don’t scare your model!
You also need to communicate clearly to the horse owner where exactly he or she has to move the horse to fit in front of your background.

5. Preparing an Outdoor Location
Preparations are really important for horse photo sessions and will save you a lot of work and nerves.
Remember: A horse is not a dog. In most cases you can’t just position it somewhere on a green meadow and then simply get it galloping towards you by calling their name.
For this reason meadows with endless spaces are not a great photo location. In this case you’ll have to run a lot and will miss some of the best action motifs. But don’t worry, it’s easier to split a paddock by simply building a new fence right in the middle of it than trying to get more space on a really small paddock.
Your photo location should be big enough for using a focal length of 200mm, but not so big that you have to search for the horse in your image. Make sure that you choose a nice background without distracting elements like houses or power poles, and put enough space between the background and model. This will support the separation of the horse from the background.
If you build up a new fence for splitting the location, let the horse become familiar with this new item before you let it run free.


6. Directing the Horse
When everything is set up for your action shots, you just need to tell your model where to run. Horses are gregarious animals. They’ll probably try to get back to their herd. If there are horses on the other side of the fence, you can use this as arrival point (in case your model is strongly influenced by its horse friends).
Simply ask the horse owner to bring it to the best starting position from where it has some space to run towards the “arrival point.” Two to three assistants can help to lead the horse on its way. If this method doesn’t work, try the paddock exit as an arrival point.
Make sure your model will not run endless circles at the end of your paddock where you can’t take nice shots. It’s always better to stop the horse at a point, calm it down, and bring it back to the starting position. This way, it will not lose its energy too fast.
7. Learning the phases
If you have trouble capturing the right phase of a trot or gallop, train your eye and reaction time with the help of YouTube videos of running horses. Pause the video whenever you’d hit the release button. This will also prevent you from having to sift through an endless stream of pictures you can’t use.

8. Photographer’s Position
In most cases, the low angle shot is the most flattering point of view.
That means: Get down on your knees. You’ll get a more impressive effect.
And again: Always try to use as long a focal length as possible.
When I’m photographing outdoors I always use an aperture of f/2.8 (or f/2.0) to get the best separation from the background. In the studio I try to get more depth of field by using an aperture around f/11.
Even when your location is perfectly set up, be flexible! It’s an animal and you have to improve your position when your horse is choosing another way.


9. Patience
This is the simplest and most effective advice I can give: always be patient with your animal model. Watch closely and learn more about your model so that you can react spontaneously when your model is offering a pose.
10. Retouching
By properly preparing a good photo session, you will not have to do too much retouching work. I use Lightroom and Photoshop to get exposure, contrast, saturation, and colors on a nice level. In Photoshop, I’ll retouch halters and ropes (if I want to remove them) and fences.
Don’t remove horse tack that actually makes sense in the situation shown on your picture (like reins or something from the saddle when there is a rider on the horse’s back)!

You Might Also Like These Articles:
- Equine Ecstasy: 30 Most Popular Horse Photos on 500px
- Photographer Captures Epic Swim With Horses In Dominca
- The 27 Most Weird Animals On Earth Captured On Camera
- How To Produce Your Own Creative Shoot, Plus, Stellar Photo shoot Ideas


Leave a reply