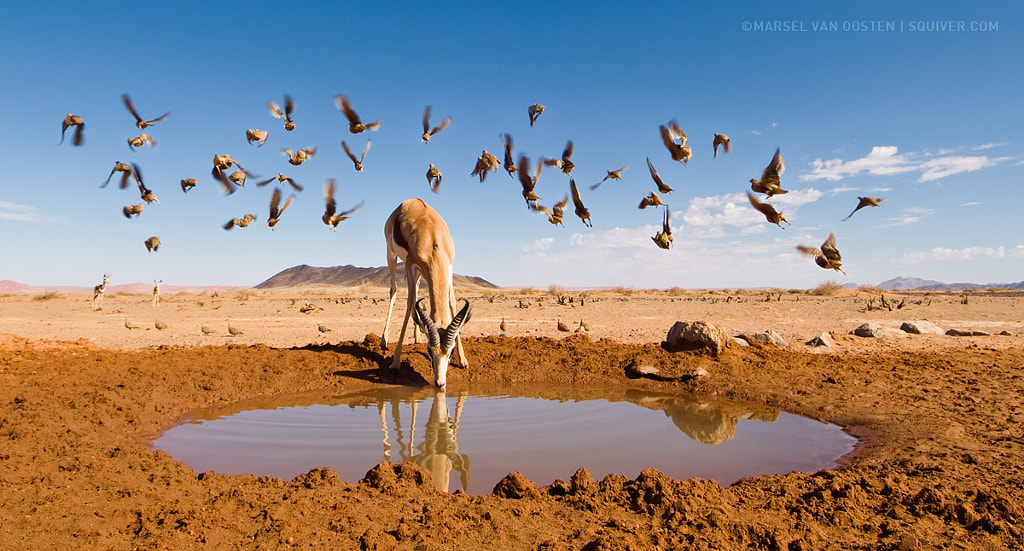
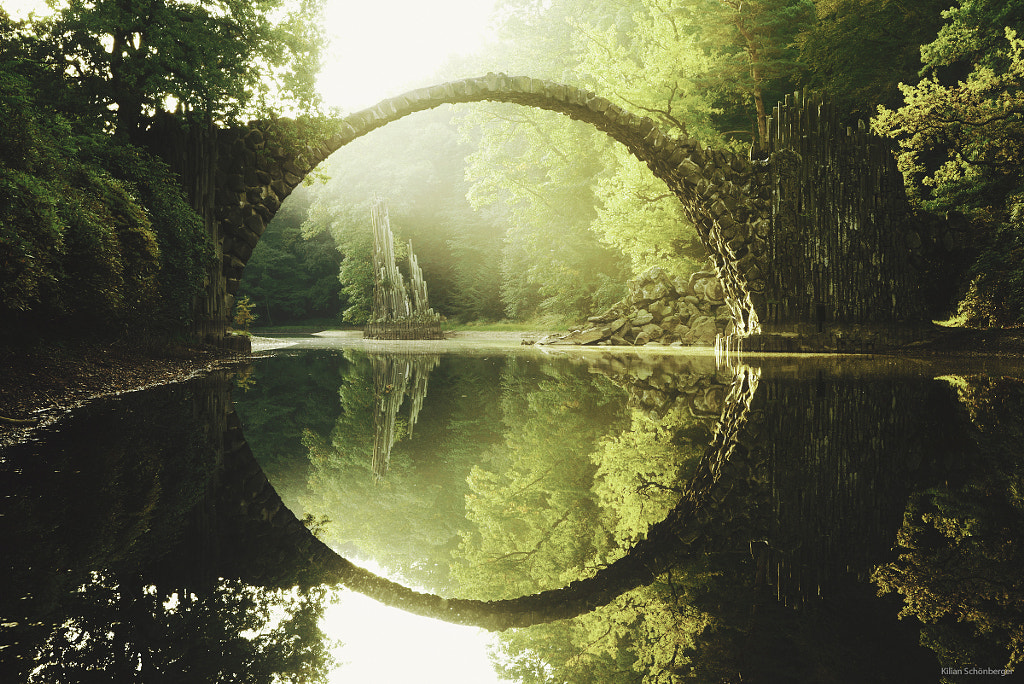
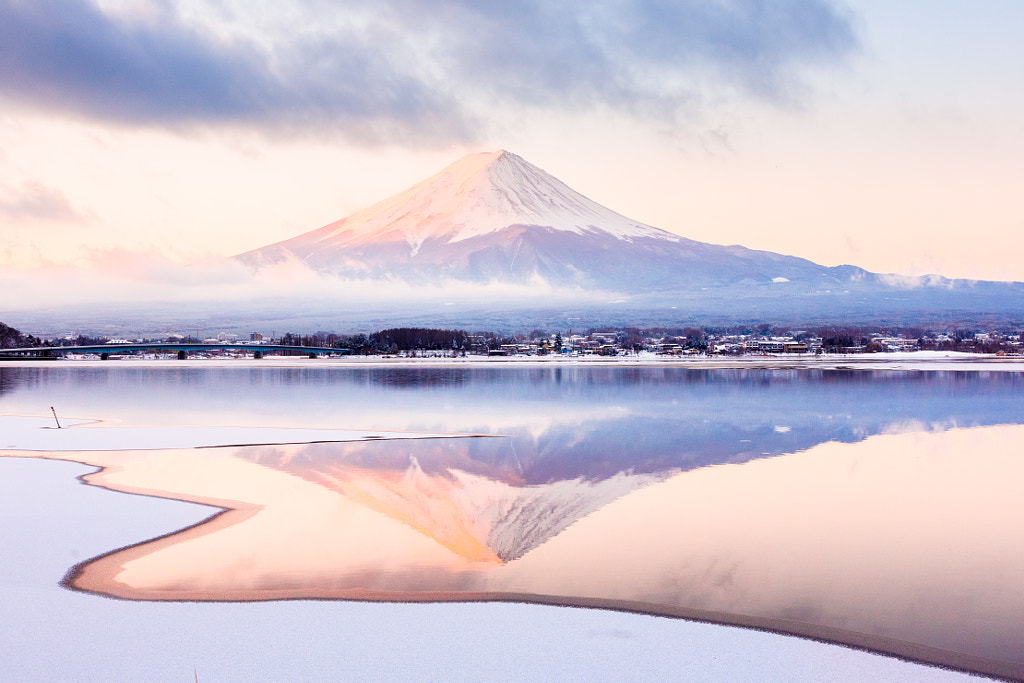
In Namibia, Marsel van Oosten captures the mirror image of a springbok, pausing to drink at a watering hole in the afternoon light. On a snowy morning on Lake Kawaguchiko, Loic Lagarde captures the perfect reflection of Mount Fuji in the still water. And at Germany’s Rakotzbrücke Devil’s Bridge, Kilian Schonberger photographs a fairytale setting in full bloom.
When we talk about reflections in photography, some of those discussions are about avoiding them for fear of distracting glare (that’s what lens hoods and polarizing filters are for, after all). But the truth is that reflections are also a creative photography tool, and when used wisely, there’s nothing quite like the effect they create.
Browse social media for trending hashtags like #reflectionphotography, #reflection_shotz, #reflection_perfection, and you’ll find hundreds of thousands of pictures made around the world. Reflections can be found on many surfaces, both natural (quiet lakes, ponds, even puddles) and manmade (mirrors, metals, or even wet pavement). For that reason, reflections transcend genres; you’ll find them in classic landscape photographs, but you’ll also find them in street photos and experimental portraiture.
Let’s take a look at how you can elevate your photography using the mirror effect.
Reflections in landscapes and cities
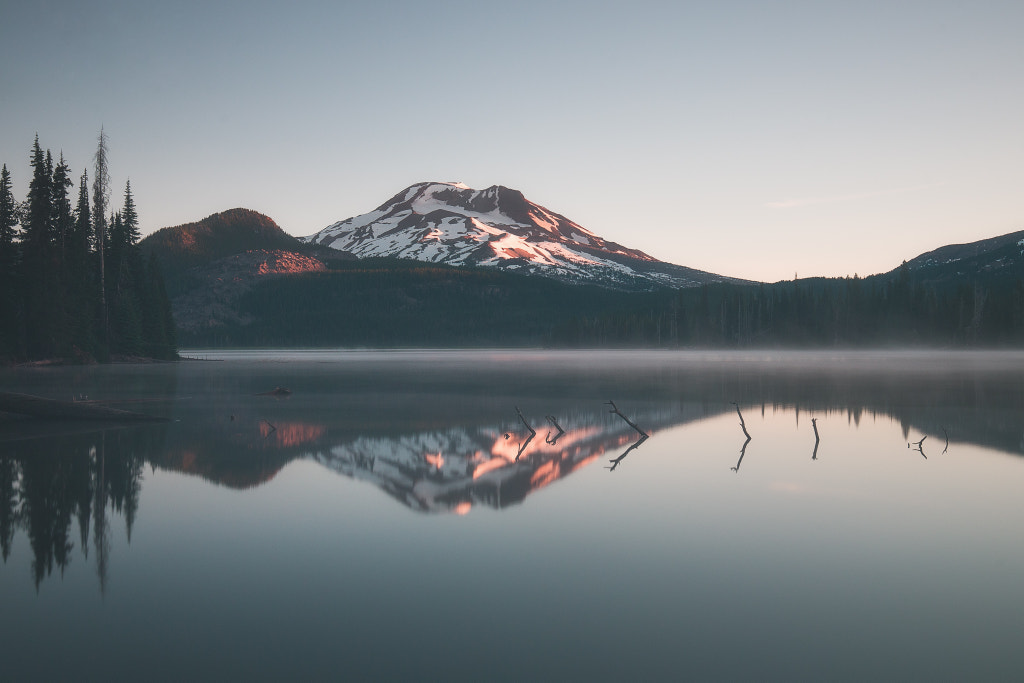
Landscapes and seascapes offer plenty of opportunities for “mirror images,” but since you’re dealing with an unpredictable subject, planning is essential. Tomas Havel captured this tranquil moment while exploring Sparks Lake in Oregon in the morning light. In general, the best time for those still waters is early morning before the sun rises; after the sun appears, the water will usually lose that calm, marble surface.
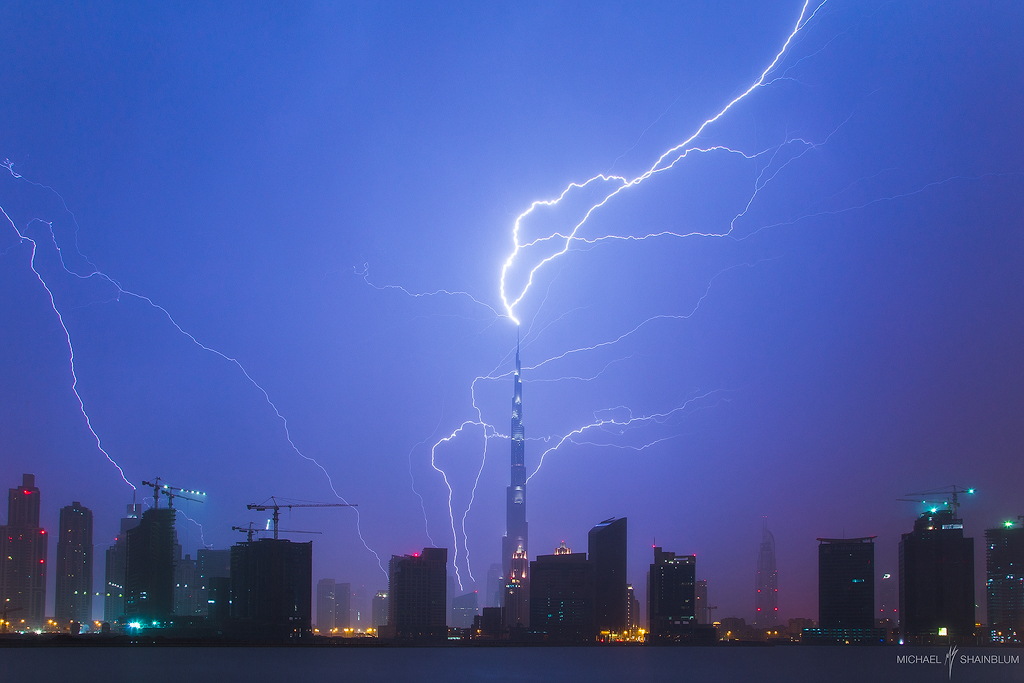
Of course, you’ll also need to check the weather and plan around any wind, rain, fog, ice, or snow. Consider the time of your shoot, the color of the light, and the clouds in the sky, as these will all influence the outcome. Midday sunlight can be too harsh, resulting in unattractive glare, so plan for the golden hour, the blue hour, or twilight. In Prague, Martin Rak captured this mirror image of noctilucent clouds, also known as night-shining clouds, a phenomenon only visible during the twilight hours.

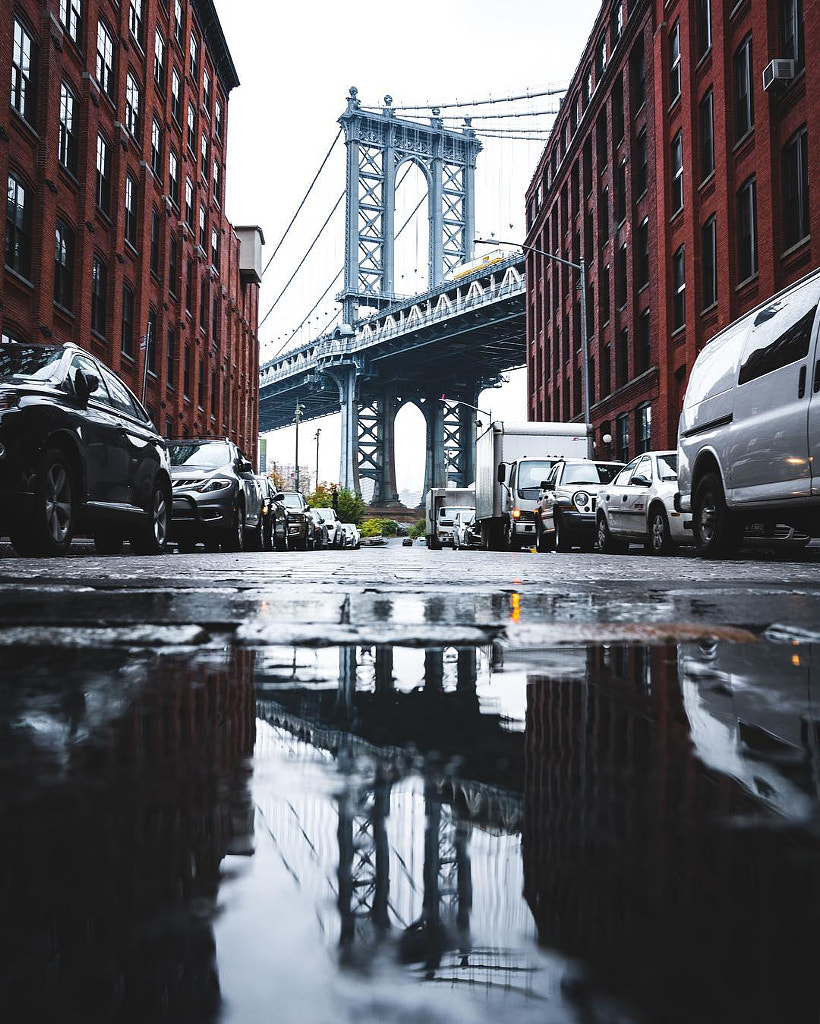
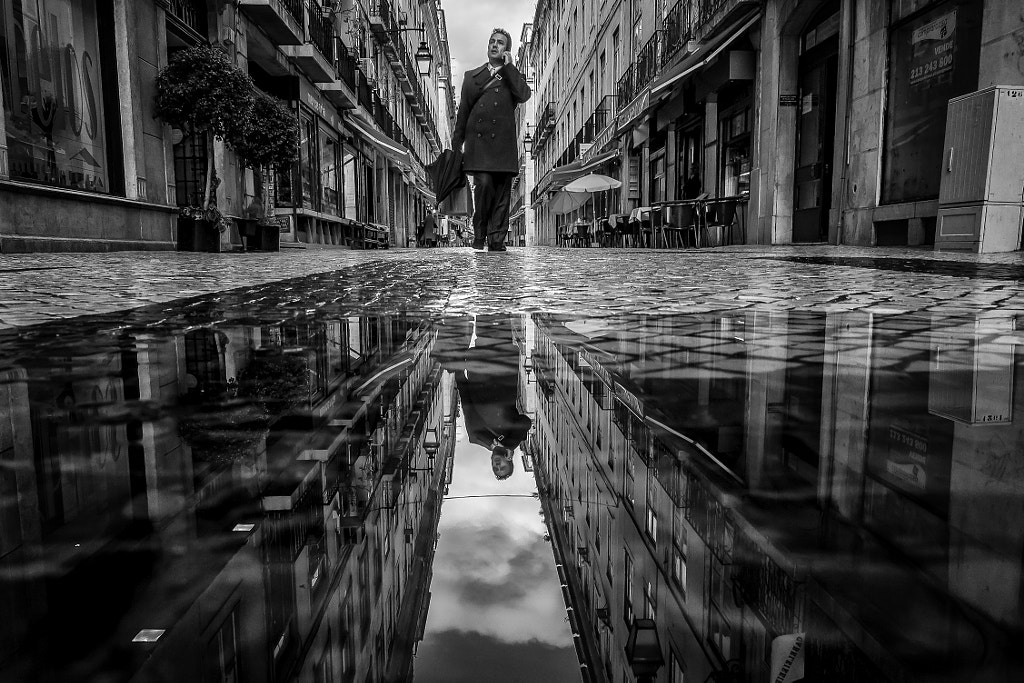
If you’re shooting in the city, the best time for water reflections is just after the rain, when there are still puddles and wet streets, but everything is calm. If you want to capture the reflected lights of the city, including street lights and neon signs, wait until the blue hour or nightfall, and then head out. Ryan Millier is a master of the rainy-day technique, transforming the streets of New York City into a labyrinth of mirrors.
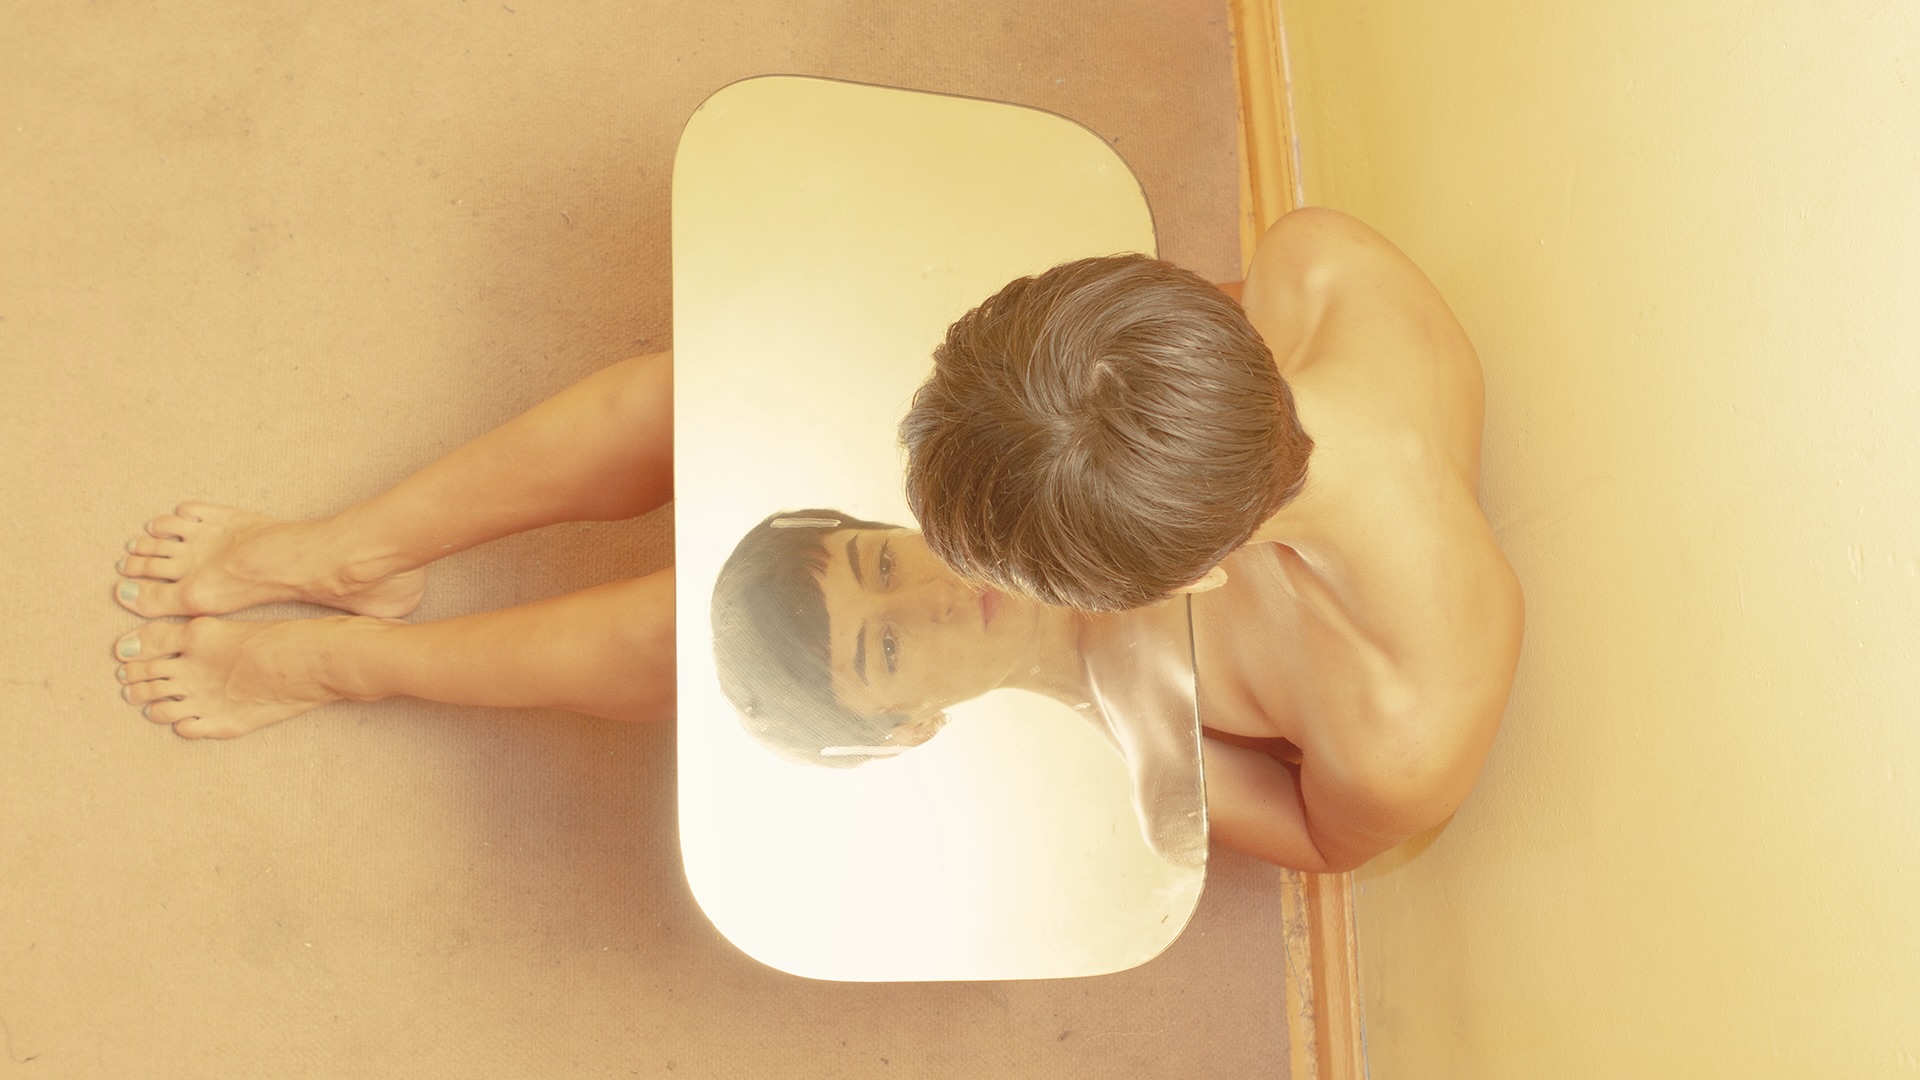
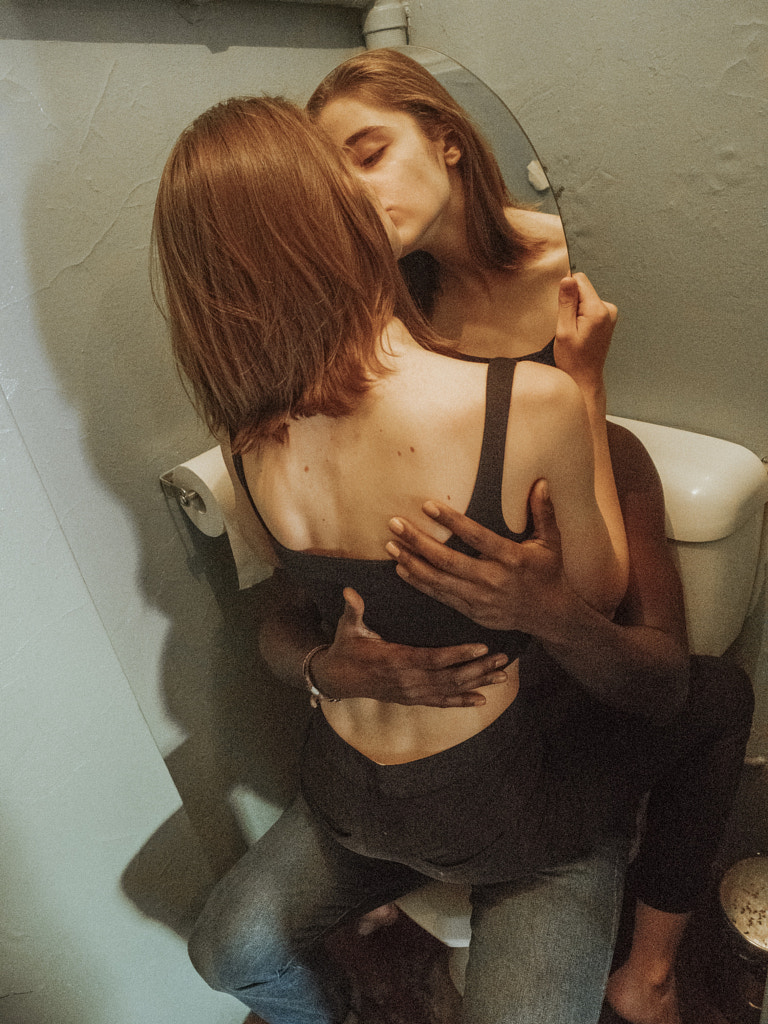
Reflections in portraits
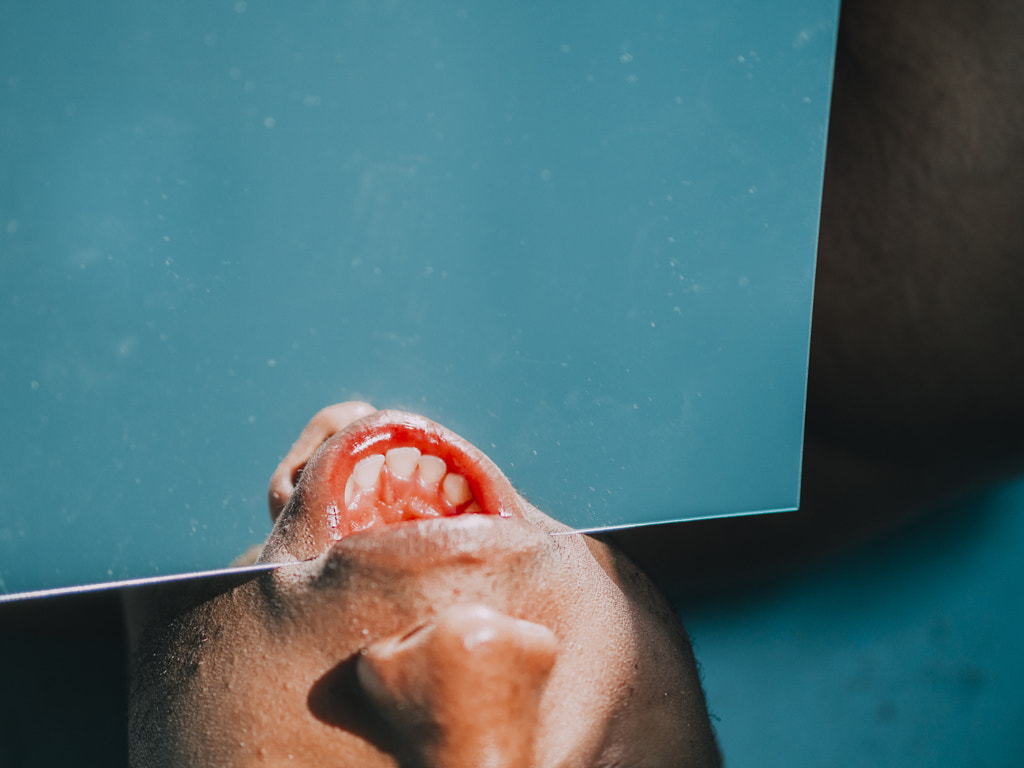
In 1955, Elliott Erwitt photographed a now-iconic kiss reflected in a car mirror. Vivian Maier created several photographs throughout her lifetime using her own reflection—captured in glass and mirrors. Francesca woodman used mirrors to replicate and fragment her body in self-portraits.
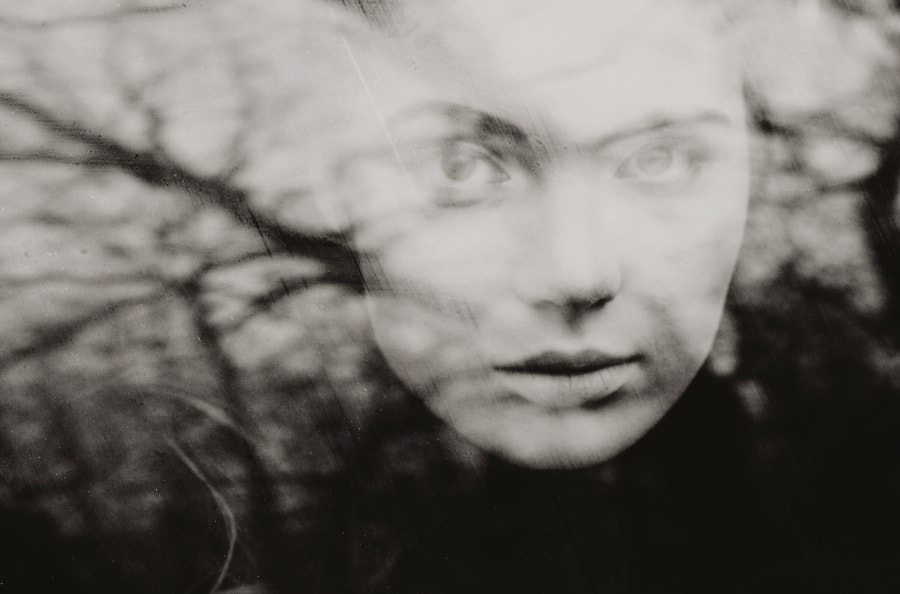
More recently, Felicia Simion has used reflections to produce a kind of double exposure effect in-camera and create surreal “faceless” portraits. Denise Kwong uses mirrors to distort the human face, creating uncanny abstractions and impossible scenarios. Portraits are perfect for experimental reflections with a fine art twist.
Composition
No matter what kind of reflection you’re shooting, your composition will make all the difference. There are no “rules” here; while we’re normally told to follow the “rule of thirds,” landscape photographers often prefer to place the horizon line in the middle of the frame when they’re shooting reflective surfaces to create some symmetry.
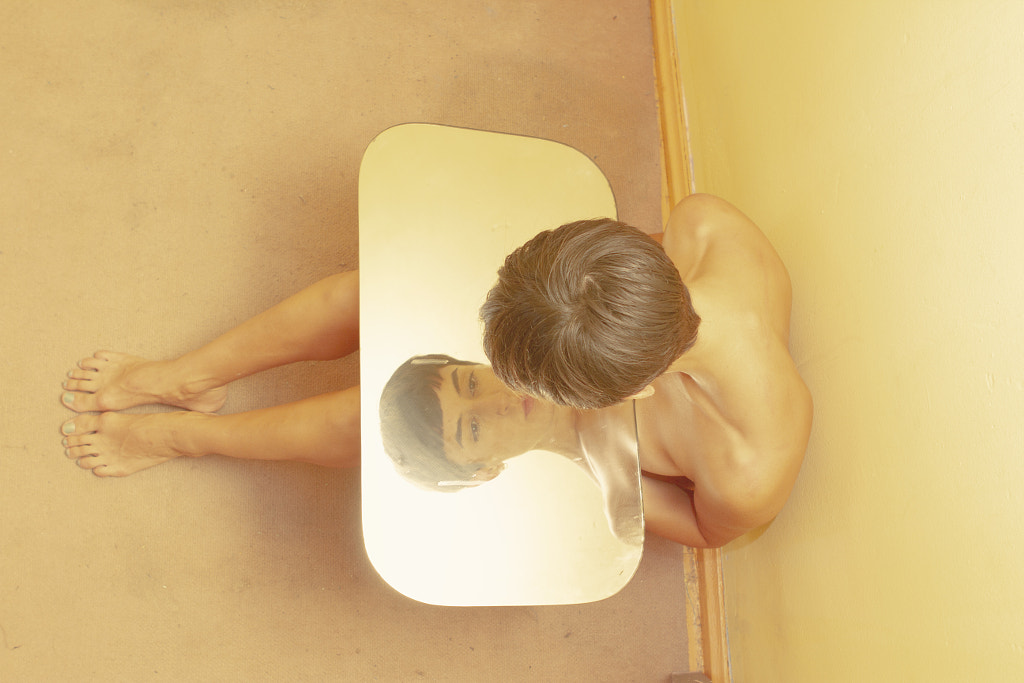
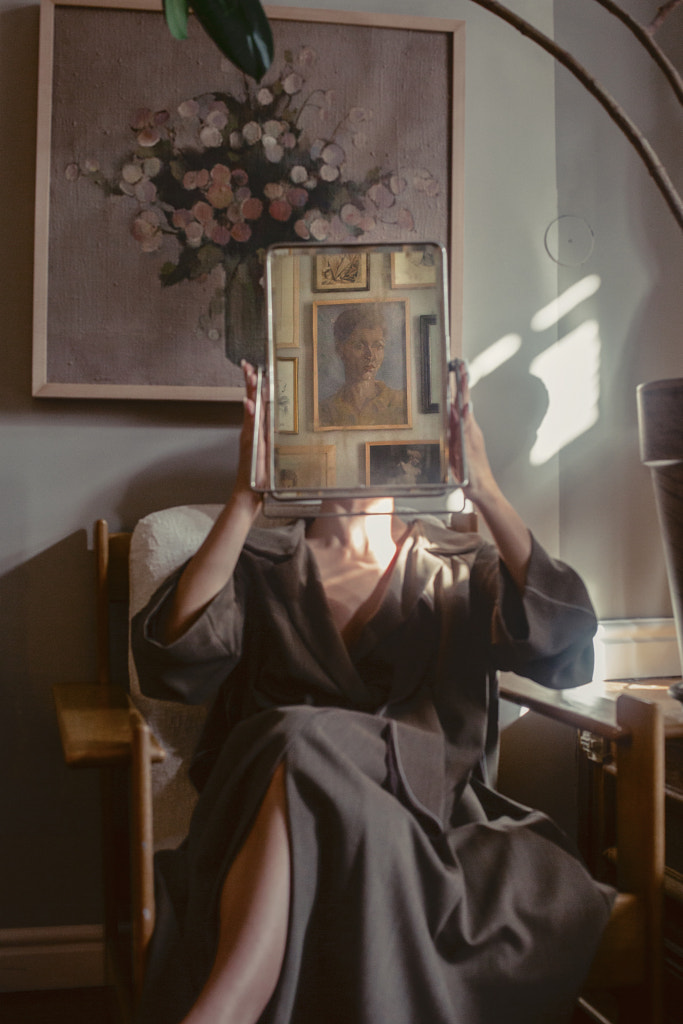
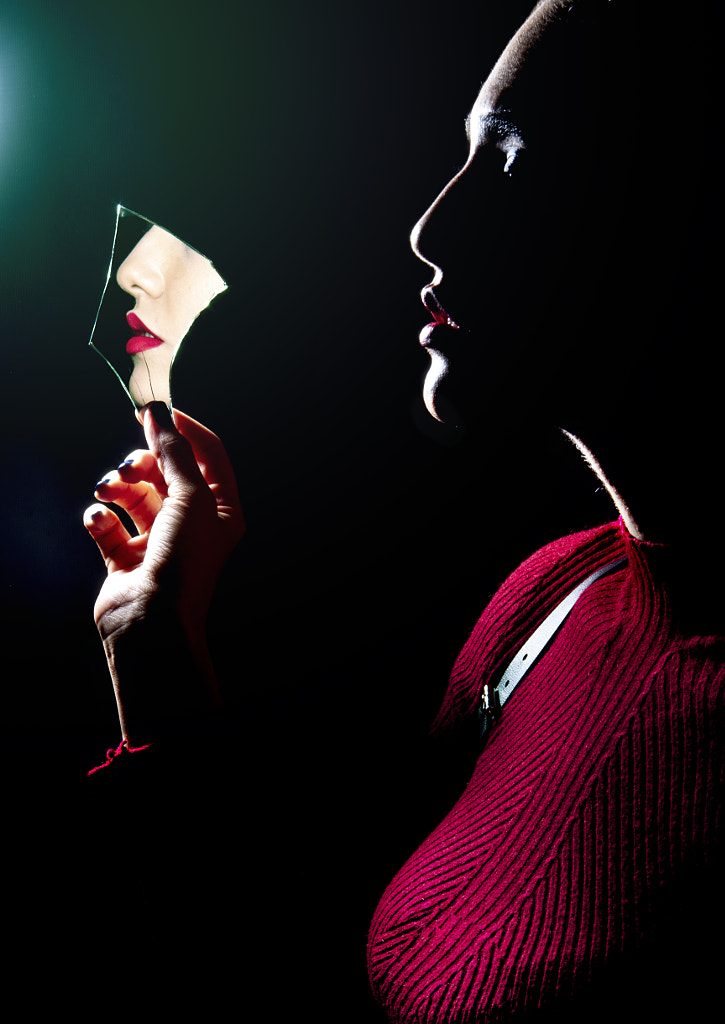
If you’re working in a studio, where you have more control, you can think outside the box as well. In this portrait (above), Karen Khachaturov placed the mirror smack-dab in the center third of the frame, heightening the sense of the uncanny or surreal. In the photo below, on the other hand, Reza Rasa placed his model’s lips (both her real lips and reflected lips) along the upper third’s line, drawing our eye to that pop of red.
Most importantly, think about how much of the reflection you want within the frame. It can be half-reflection, half-reality; the reflection can be a blink-and-you-miss-it detail in the corner, or the entire photo can be dominated by the reflection for a more abstract twist. To create this picture in the streets of Portugal, Daniel Antunes placed the horizon line higher than you might expect, to make the reflection all the more powerful, opening a portal into another world. Feel free to get low.
A final note: simple is usually best. Your subject and its reflection are the scene-stealers, so you don’t need much more to make an impression. If you want, give your shot plenty of negative space, allowing the eye some breathing room.
Lenses and camera settings
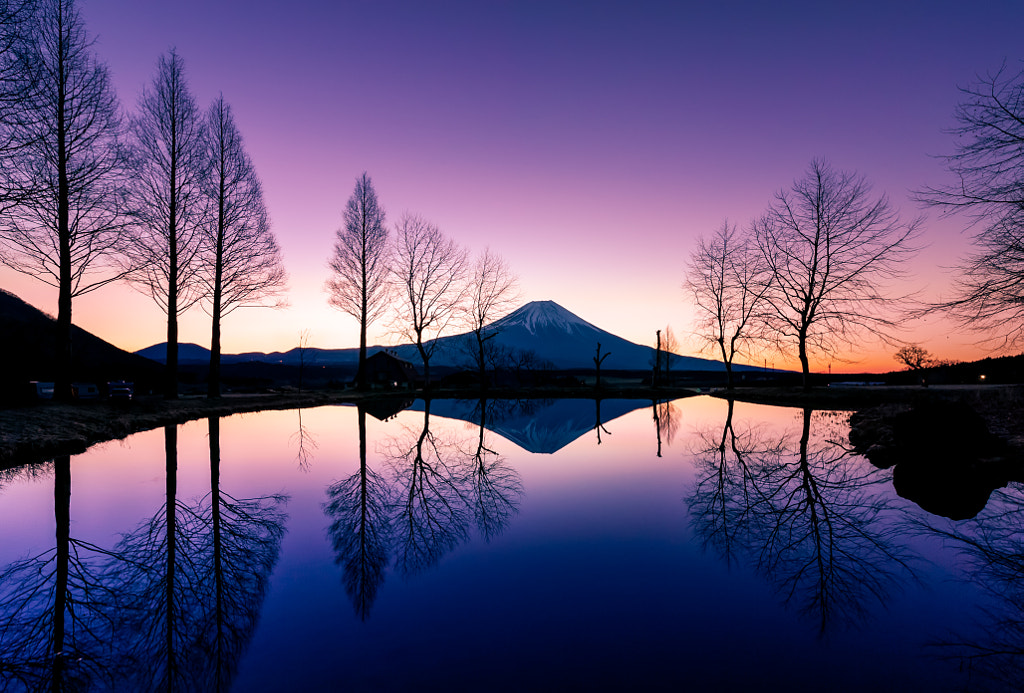
Your lens choice will be determined by the composition you want. If you’re shooting a landscape and want much of the scene in view, choose a wide-angle. For the photo below, Yasuhiko Yarimizu used an ultra-wide 14mm to capture the full view of Mount Fuji at dawn. If, on the other hand, you want to focus on a detail in the distance, a longer lens will be a better bet. Keep in mind that the longer you go, the narrower your depth of field will be.
For landscapes, you need to stop down your aperture to widen that depth of field and keep both the landscape (in the background) and the reflection (in the foreground) in focus. In portraits and street photography, on the other hand, you have some flexibility.
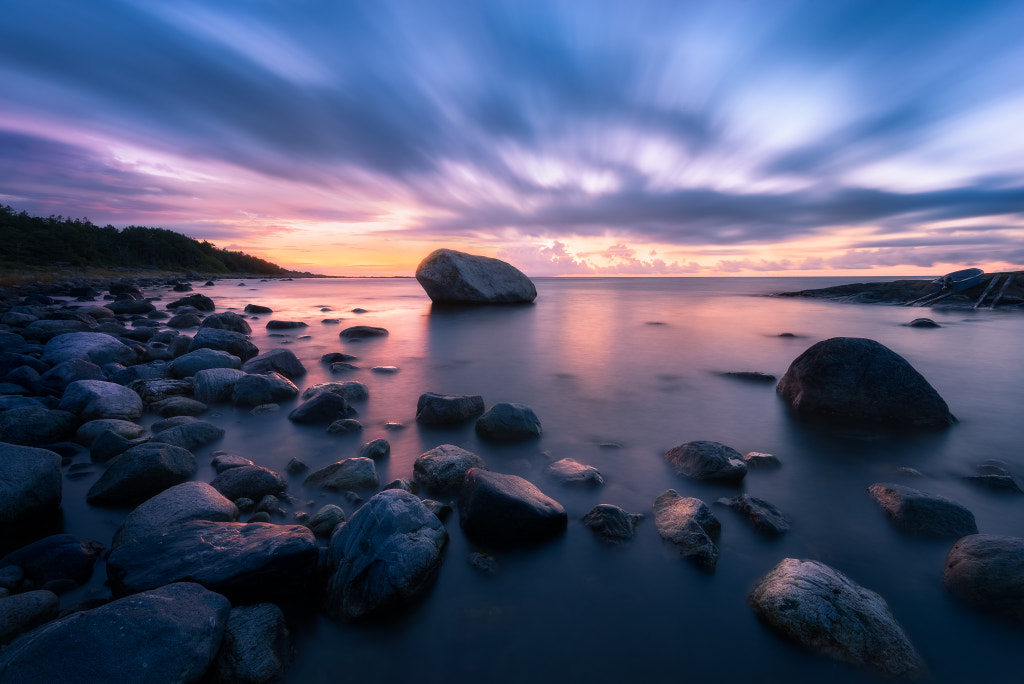
Shutter speed is similarly subjective; go faster for sharper mirror images, or slow it down for a smoother, blurred aesthetic. The slower you go, the less crisp and more creamy that reflection will be. Plus, you run the risk of ripples—but ripples can be a good thing, especially if you’re going for that blurred/textured/impressionistic look. Ole Henrik Skjelstad used a 30-second exposure to gorgeous effect when shooting first light over the island of Tromøya in Norway.
Finally, watch your exposure. When dealing with puddles and bodies of water, the reflection tends to be darker than the actual scene, so you want to make sure you’re not losing detail in the shadows. Expose manually, and keep an eye on your histogram. Another tool to consider is a graduated ND filter; these will block out some of the light in the sky, so your highlights aren’t blown-out, while also allowing enough light to hit the bottom of your frame.
With all that being said, it’s hard to get a reflection photo perfect in-camera, so take time for editing. Crop your pictures for the perfect composition, and see if (subtle!) tweaks to contrast, shadows, highlights, saturation, or sharpness make a difference. In trickly light, for a better dynamic range, you might choose to bracket your exposures and combine them using layer masks.
In the beginning, looking for reflections and putting these photography tips into practice is an exercise in observing what we usually overlook: a glass storefront window, a car mirror, a puddle in the street, or a hidden stream in the woods. But over time, you might find yourself noticing and playing with reflections everywhere you go, from your daily commute to work to an afternoon hike in the mountains. Take advantage of those moments as they present themselves.
Not on 500px yet? Sign up here to explore more impactful photography.

Leave a reply