Alexandria Huff is a studio portrait photographer based in both San Francisco and rural Oregon, where she teaches lighting workshops and takes close-up portraits in a chiaroscuro style of everyday people.
She is a Marketing Coordinator at BorrowLenses.com, an advisor for anti-theft service Lenstag.com, and has been writing for 500px since 2013. Her work can be found here on 500px and on her website.
Earlier this year, I released a tutorial on how I create my chiaroscuro-style portraits. Since then, I’ve received responses along the lines of, “I followed your instructions and my portraits do not look like yours. What am I doing wrong?”
No one is doing anything wrong. However, there is a very delicate dance between light, the shape of someone’s face, and the expression they have on their face. There are lighting patterns that tend to be universally flattering, such as Rembrandt, Loop, and Butterfly lighting, but you can’t depend on positioning alone for every portrait. For every rule, there are exceptions.

Rules & Exceptions
The Rule: Use Rembrandt and Loop Lighting. My lighting style uses a variation of Rembrandt and Loop lighting with a large, heavily diffused light source very close to the subject’s face. This means that the light is slightly above eye level, about 30-45º from the camera, and pointed downward.
The Exception: If the subject has very deep-set eyes then lower the light to more of an eye-level position rather than slightly above eye-level. I find that this helps fill in those sockets, along with reflectors.
The Rule: Use broad lighting to soften problem skin and to widen thin faces and short lighting to bring out a sculpted look and thin the “fat”. I use “fat” in scare quotes because how a face photographs can be very different from actual BMI. In broad lighting, the light is hitting the part of the face closest to the camera. In short lighting, it is just the opposite.
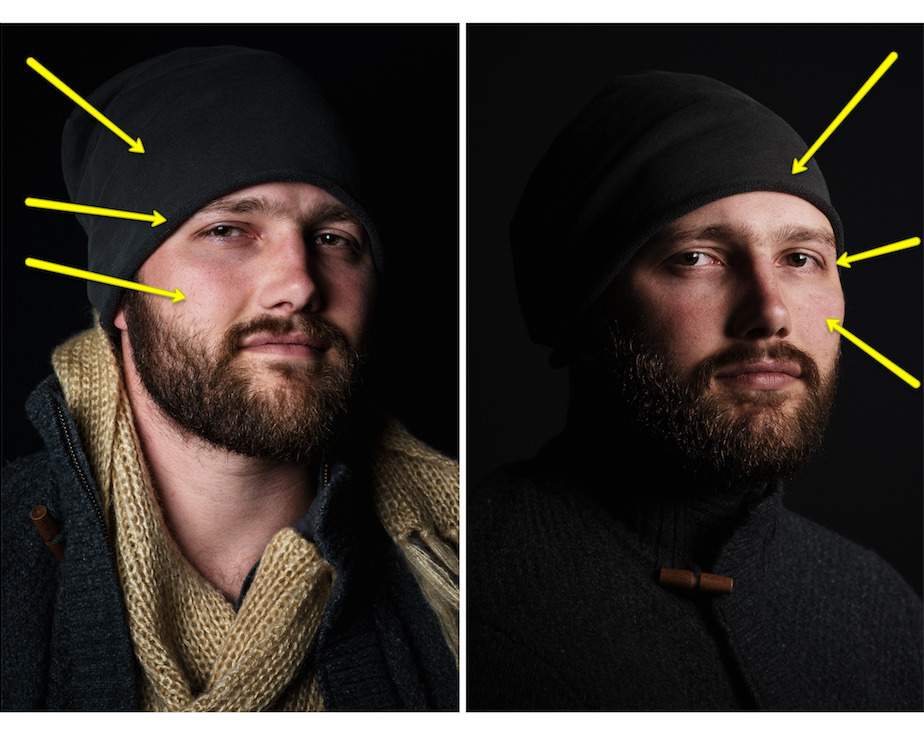
In my draft shot of Gabe on the left, I used broad lighting (light is placed on the side closest to the camera). For my final on the right, I used short lighting.
The Exception: This is my most often broken rule. I light for the person and for their expression. I have photographed very thin people with short lighting and moon-faced people with broad lighting.
The Rule: Use a grid to narrow light spread and get more shadows.
The Exception: I use grids quite often but you don’t need them for falloff. Most of the time, I feather my light to get the kind of shadows I am looking for.
The Rule: Find the subject’s dominant eye and light for it.
The Exception: If you have the time to spend, take a shot from all angles.

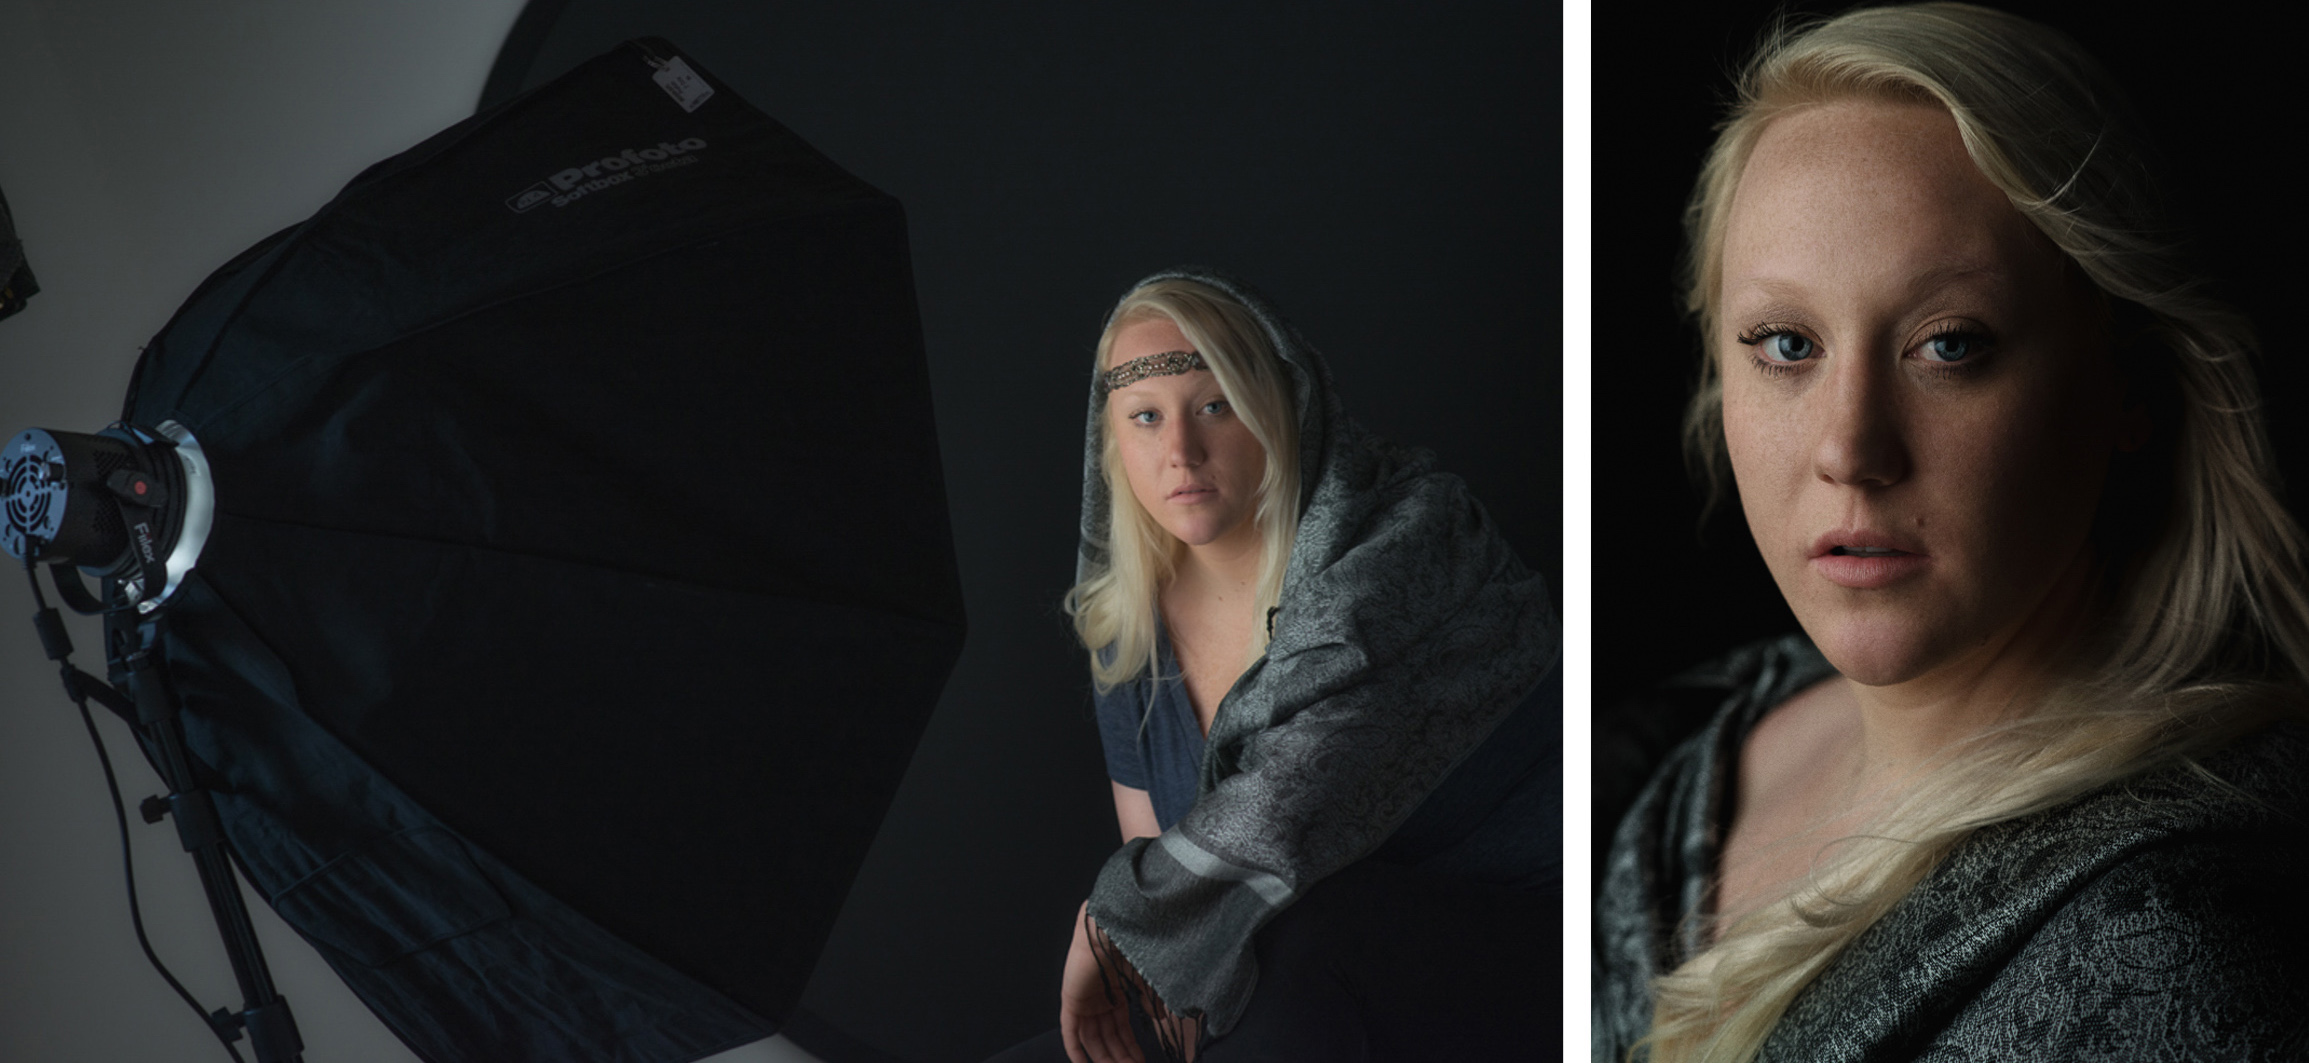
Shoot from all sides. I did several draft shots of Liana (you can see the final shot here) regardless of what I thought might have been her “good side”.
A Confession
I flounder. A lot. To help with that, I have a system I like to call the “feather shake.” To feather the light, you don’t move the position of the stand so much as change the position of the softbox.
Once I have my subject in place and my light set to a basic just-above-eye-level-45º-from-camera-and-pointed-downward position, I rotate the softbox head back and forth like it is shaking its head “no”. This causes only part of the softbox to be hitting the subject’s face and, when placed very close to them, can produce that pleasing window-like soft light with quick falloff. Practice feathering. It’s a dark art and I have yet to master it.
Basic Problems
1. Dark eyes with no catchlights in them.
Solution: Lower your light.
2. My model is wearing glasses.
Solution: Avoid short lighting.
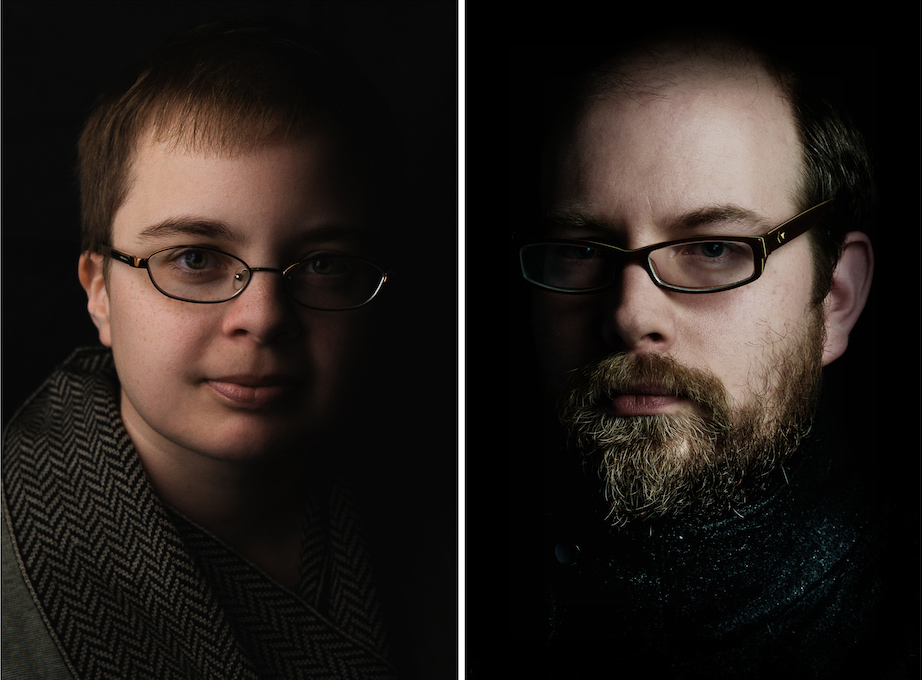
For Hannah and Obediah, I used broad lighting (light is illuminating the portion of the face closest to the camera). I could have used short lighting but it would involve raising the light higher or tilting the glasses in undesirable ways in order to keep the light outside the angle of reflection.
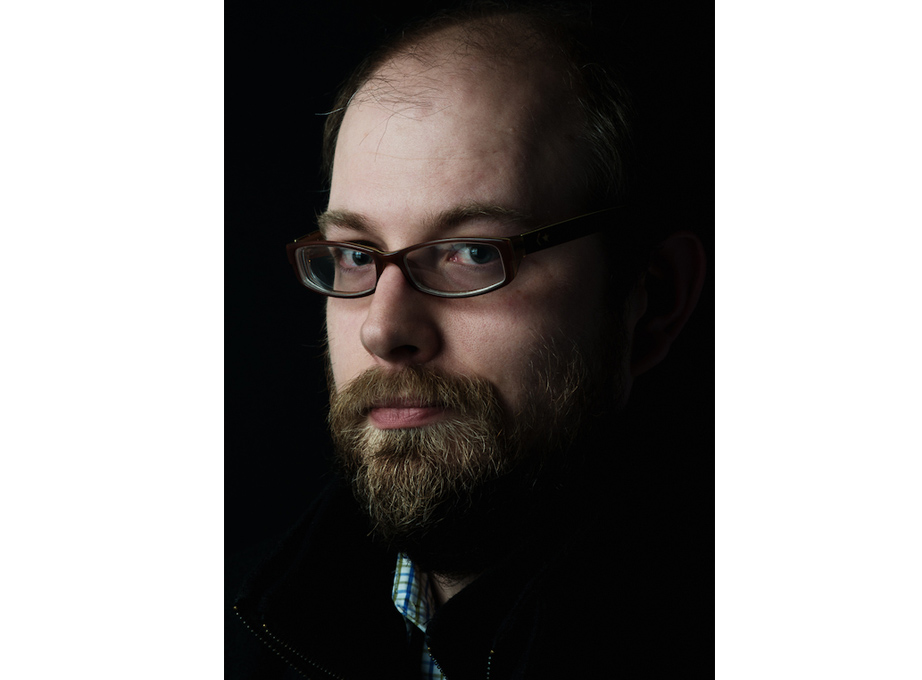
Here is a draft shot of Obediah with short lighting demonstrating the problem it can be for glasses.
3. My background is getting too much light from the feathering.
Solution: Move your subject away from the background.
Your Subjects
People get hung up on lighting sometimes at the expense of being a director. If you photograph models who know how to pose then skip this section because I don’t photograph models – I photograph everyday people. Peter Hurley’s squinching technique is incredibly effective as is neck-turtling, relaxed jaws, fan-blown hair, and “mood theater” (getting the subject to think of something specific to render a certain expression).
Special Considerations
Some people have asked me to address two specific situations and if I do anything special as far as lighting is concerned:
Dark Skin — The only change I need to make here is with exposure, either with the light itself, in-camera, or simply placing the light a little closer to the subject.
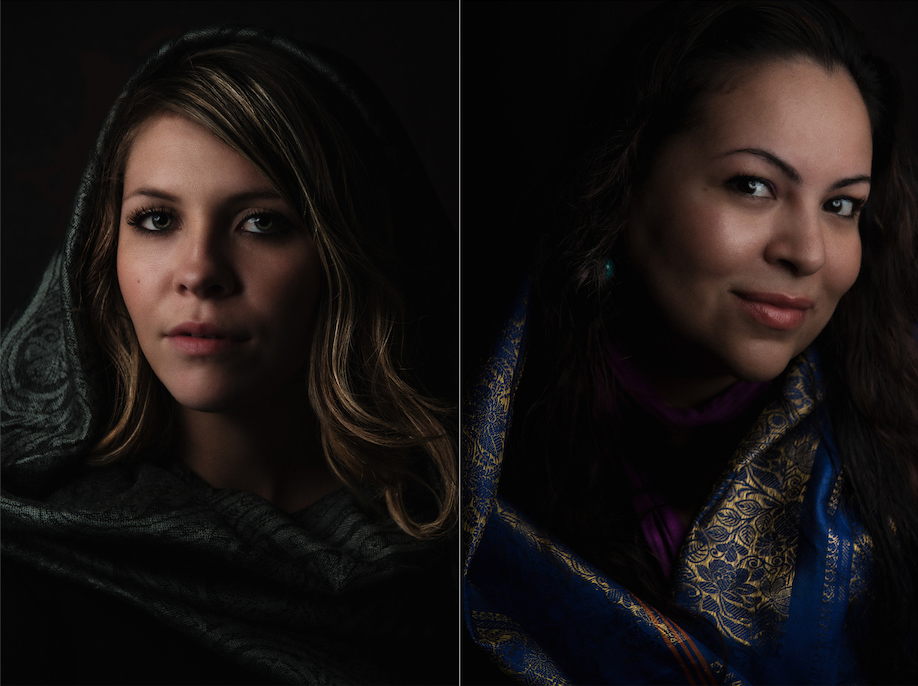
Here are two coworkers I photographed on the same day. All the settings are exactly the same except that Andrea, on the right, is photographed at f/5.6 versus Aubrey’s f/6.3. Also, Andrea’s light is a bit closer. Darker skin tends to need a little bit more light but is otherwise treated the same as fair skin in my experience.
Mature Skin — I use larger light modifiers for older skin. I once pulled out a 7’ parabolic for an older client. A painting expert who knows a bit about light, she jokingly asked, “just how old do you think I am?!” If you don’t have a large modifier, use a heavily diffused one and feather it.
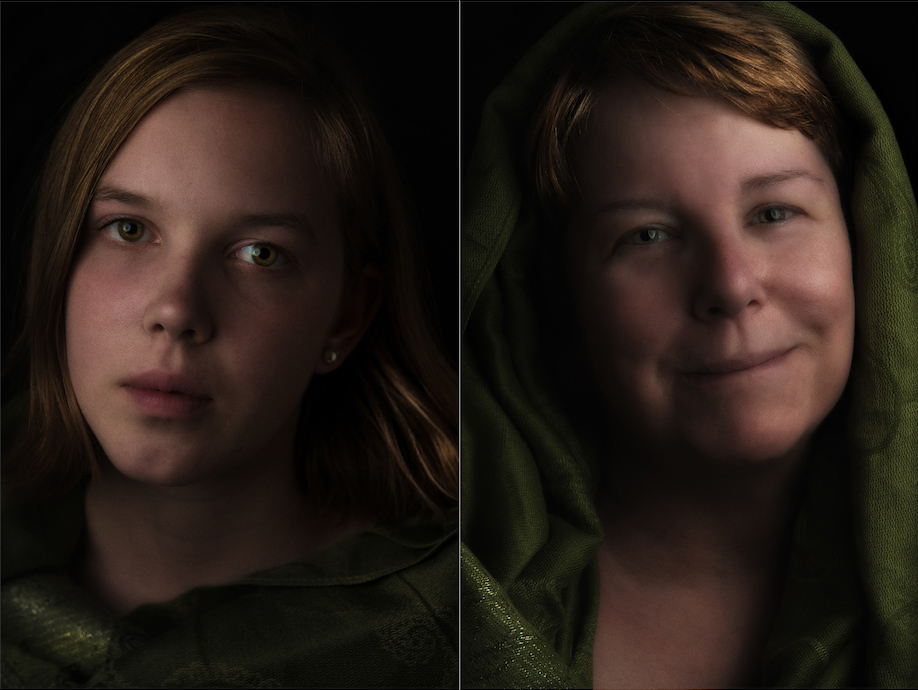
I don’t always have a choice in modifiers. I once photographed everyone at my family reunion with only 1 small octabox. As you can see in the catchlights, my mother-in-law has the modifier placed closer to her and feathered a little more than my young cousin does.
Conclusion
If your romantic vision for painterly lights and darks is all turning into mud during your shoot remember these key things:
1. Stop moving the light stand everywhere like a crazy chicken and, instead, do a “feather shake”.
2. Give your subject more attention than your strobe.
3. Break the rules about broad and short lighting. What looks good on your subject may surprise you.


Your Photos
Have you attempted chiaroscuro photography? We would love to see your results, please share links to your photos in the comments below.
Leave a reply