Hi! My name is Alex Huff, I am a studio portrait photographer in San Francisco by night, a product photographer and copy writer at BorrowLenses by day. Today I’d like to share with you a tutorial behind a series that I created with back-to-basics light, that allows for less fuss on set and a more focused experience with your model.
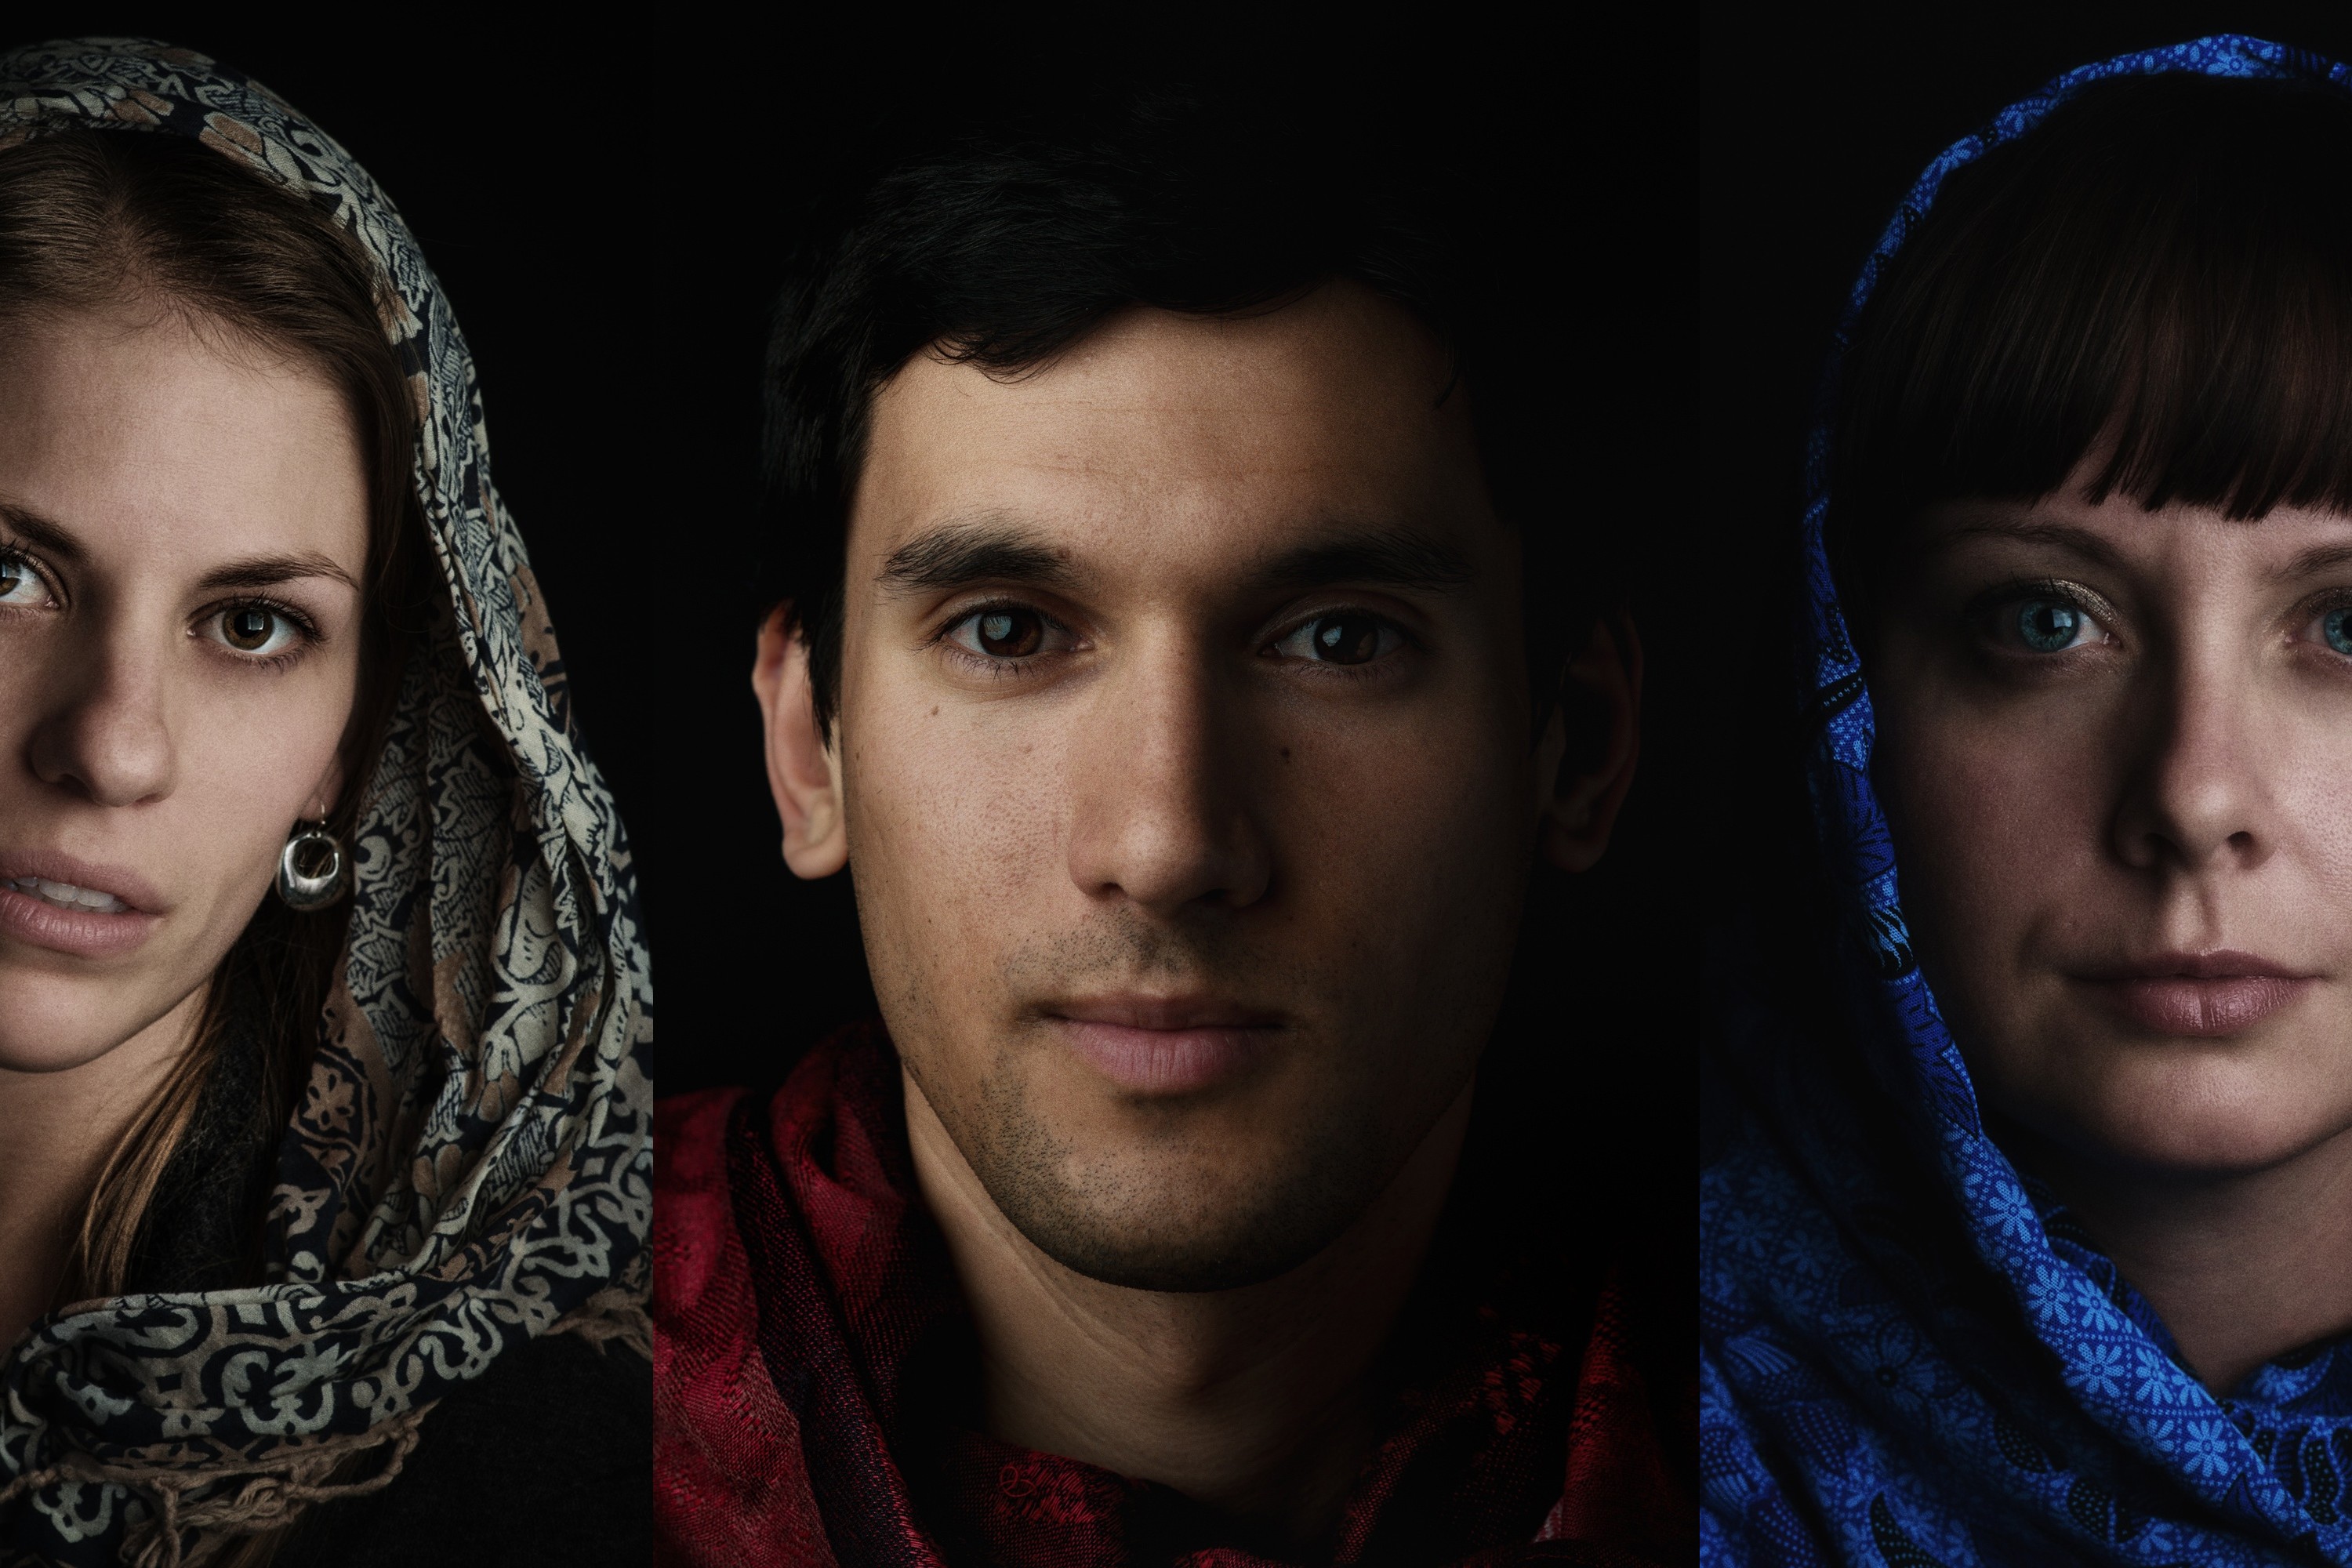
This series began as a gift to an art instructor and a challenge to myself to create very painterly portraits of her daughters without relying too much on post processing. The gift was a success and I set out to create an entire collection of moody close-ups that give homage to tenebrism and chiaroscuro.

Other photographers may enjoy this tutorial because this technique is very accessible to both beginners and professionals. It forces you to think more carefully about the direction of your light in relation to different faces. The tight crops and close proximity of the light lends itself to small-space studio shooting.
Equipment
- Elinchrom BX-Ri 500Ws Monolight
Substitutions: Elinchrom D-lite 2 Monolight or Nikon SB-910 Flash - Elinchrom 39” Deep Octabox
Substitutions: Westcott 28” Apollo Softbox - White Reflector
- Camera, I used a Nikon D800
Substitutions: Any camera that fires off-camera flash - Portrait or zoom lens. I used a Nikon 135mm f/2D AF DC or Nikon 85mm f/1.8G
Substitutions: Space permitting, mid-to-telephoto length
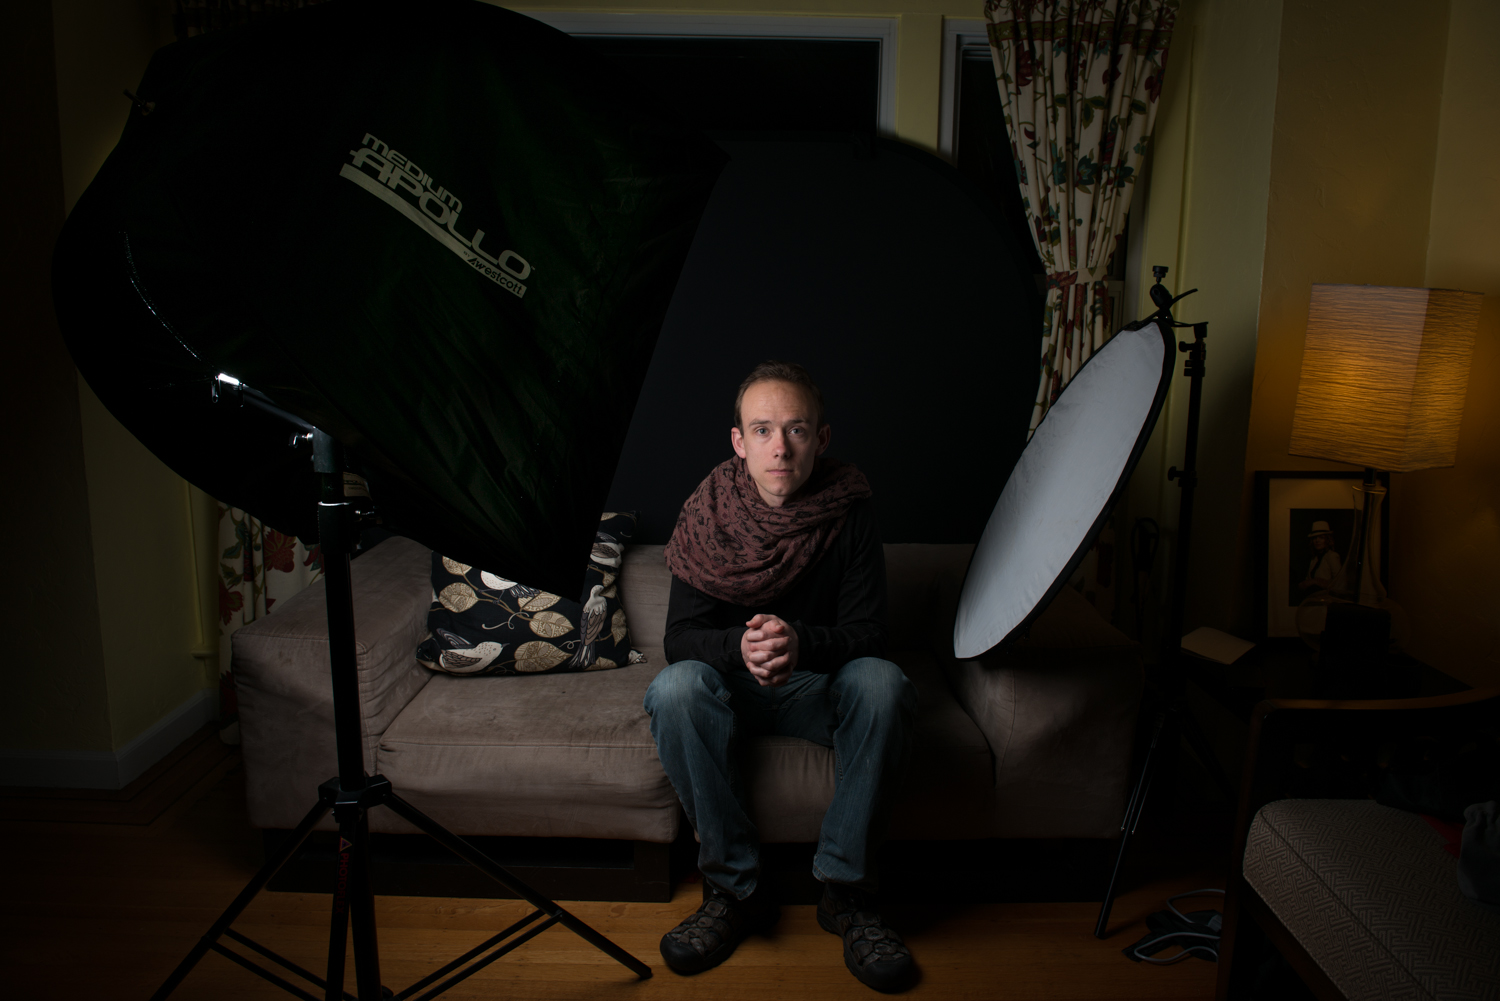
My model, Andrew, in my home studio with 1 monolight in an Elinchrom Octabox and a reflector nearby.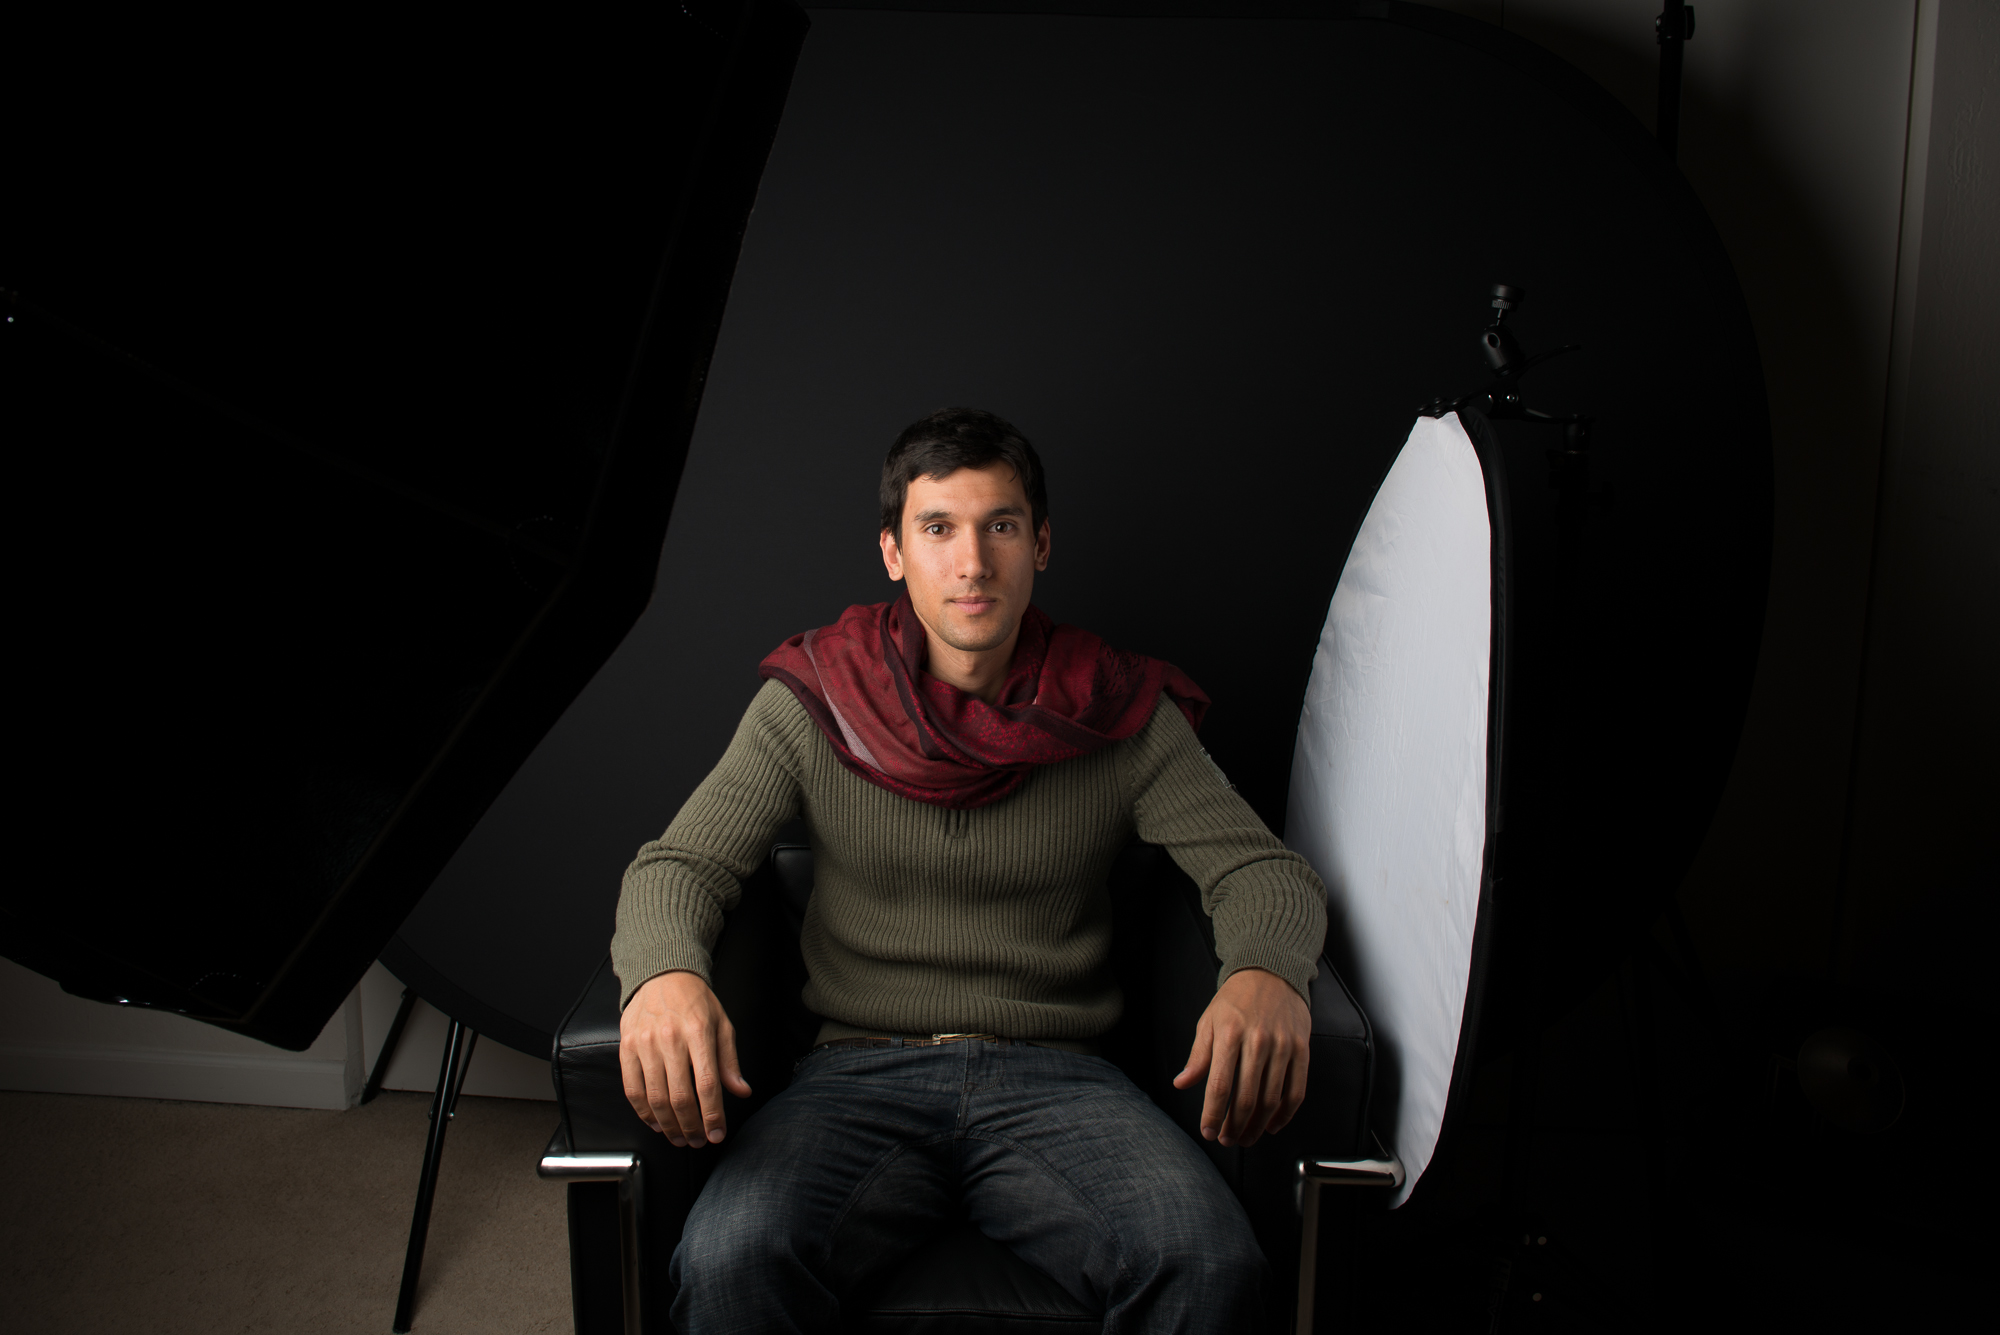
Step 1: Lighting and Camera Settings
Before turning on the lights make sure your ambient is registering as completely black in your test shot. I light to start with a black scene in the way a painter begins with a blank canvas. This is typically achieved for me at ISO 100, between 160th of a second – 250th of a second.
My monolight is set to a low power and placed inside a softbox that is very close to my subject, slightly above them and pointed downward. I start at a 45 degree angle and feather in or out to taste. I prefer to shoot with deep softboxes for their “wrap-around lighting” qualities and around 3 feet in size for quick-but-still-soft falloff. On the opposite side of the softbox, just on the other side of my model, I place a white reflector for just a touch of fill.
I start shooting at f/8 and stop my aperture up or down from there as needed. I do not touch my other settings.
Cropping in-scene is preferred, for me, over cropping in post. I shoot very tight and usually handheld.
Step 2: Mood and Model Direction
My models are typically against a black or dark gray backdrop or wall, seated comfortably.
The aim is for a solemn mood which often results in fits of giggles. I tend to shoot just after a fit when the face has reset itself but there is still life in the eyes.
It is a good idea to switch up your key light and reflector halfway through the shoot. Your model’s “good side” may be the one previously in the shadows.
I shoot from both angles of a model’s face, which is a flattering and safe position. However, don’t forget that straight-on shots can be very powerful.
My image of Brian in-camera and the final product.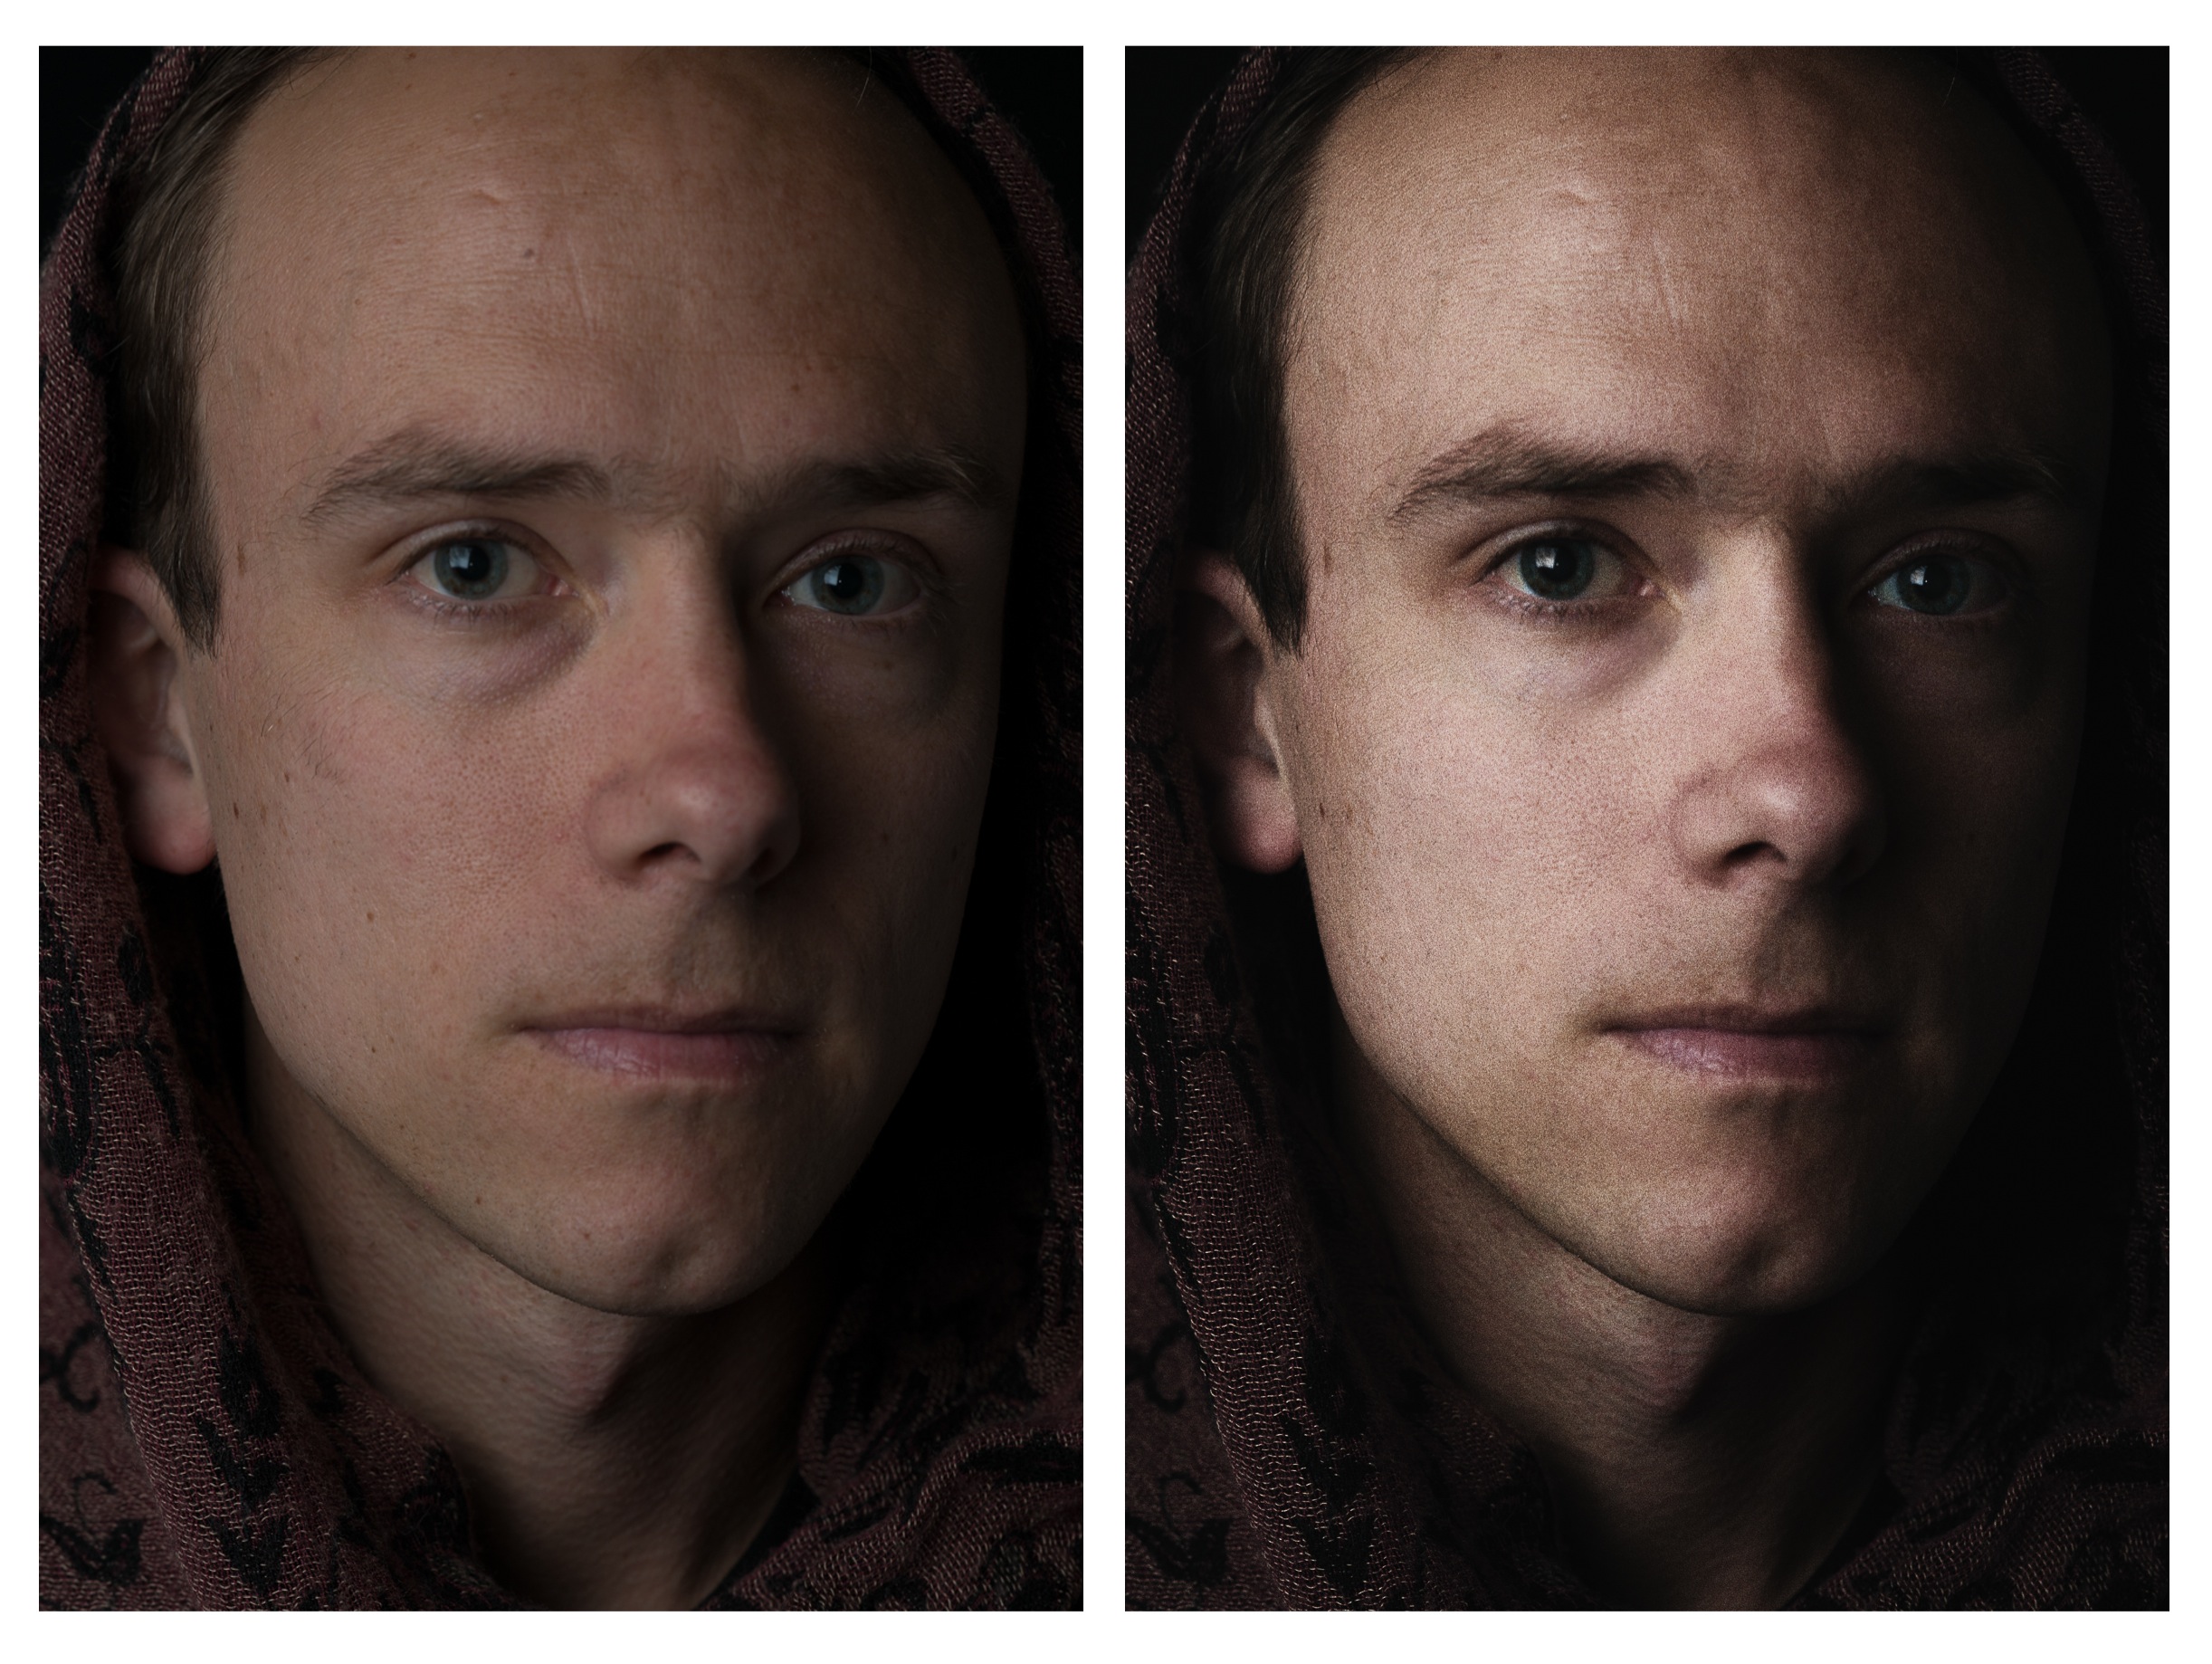
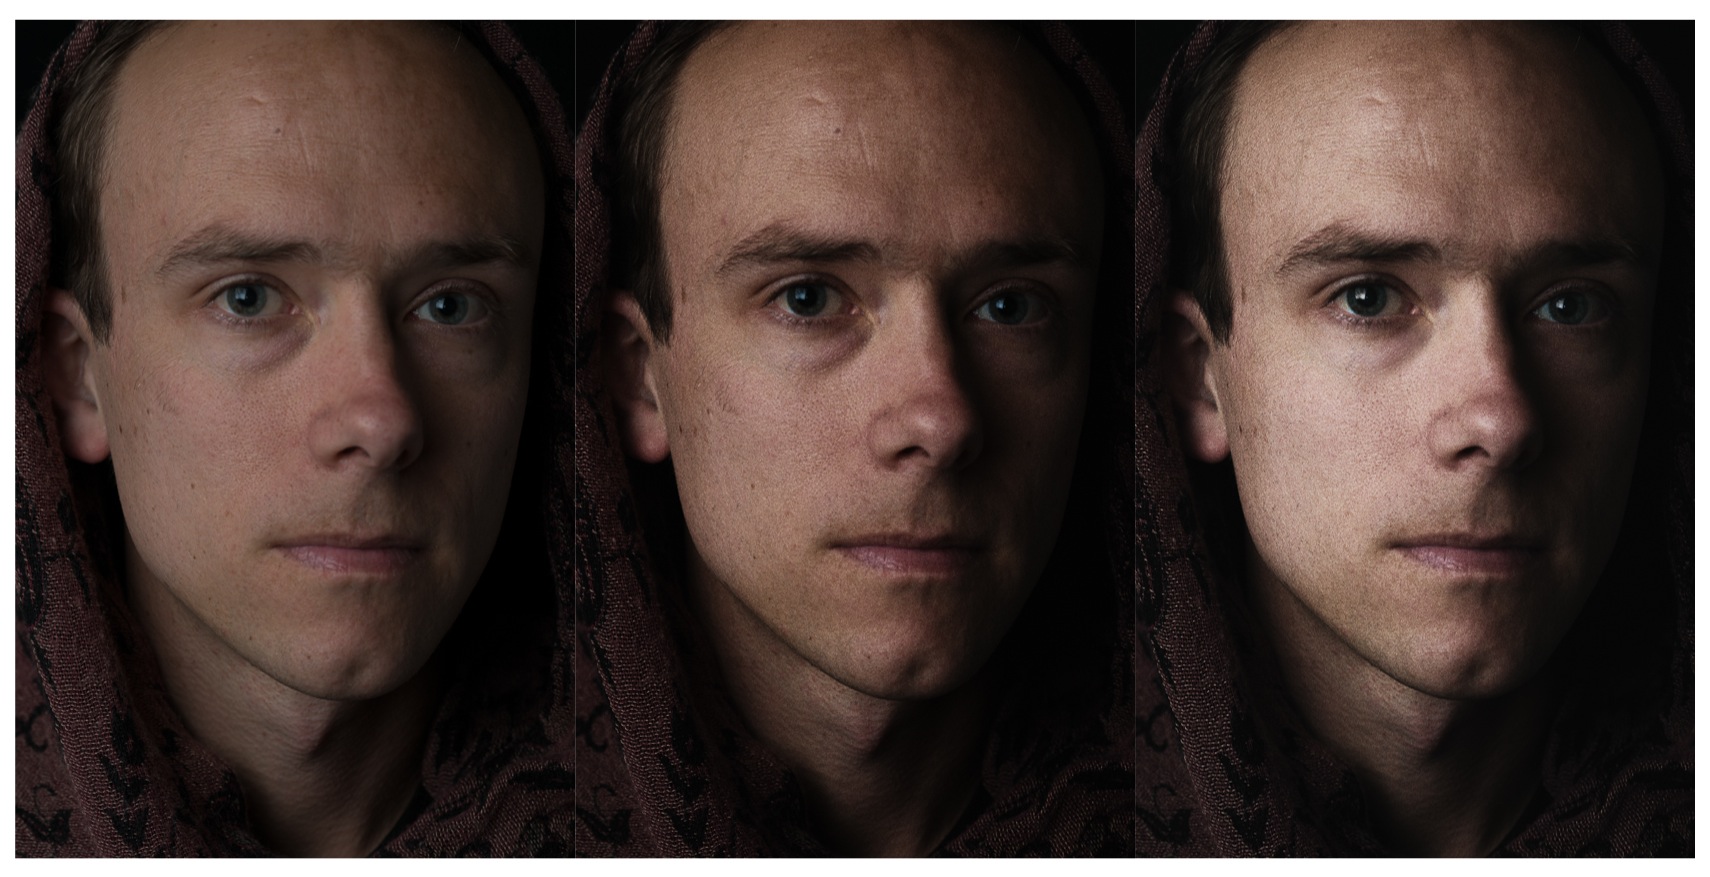
Step 3: Editing
Adobe Lightroom and Nik Software are the editing programs I use. I use Lightroom mainly for broad edits, such as exposure or clarity adjustments, or for blemishes. I use Nik Software to be creative! If you don’t have NIK experiment with Lightroom and Photoshop settings to get a similar effect.
Brian in Nik Software undergoing adjustments using the Fuji Superia 800 film filter.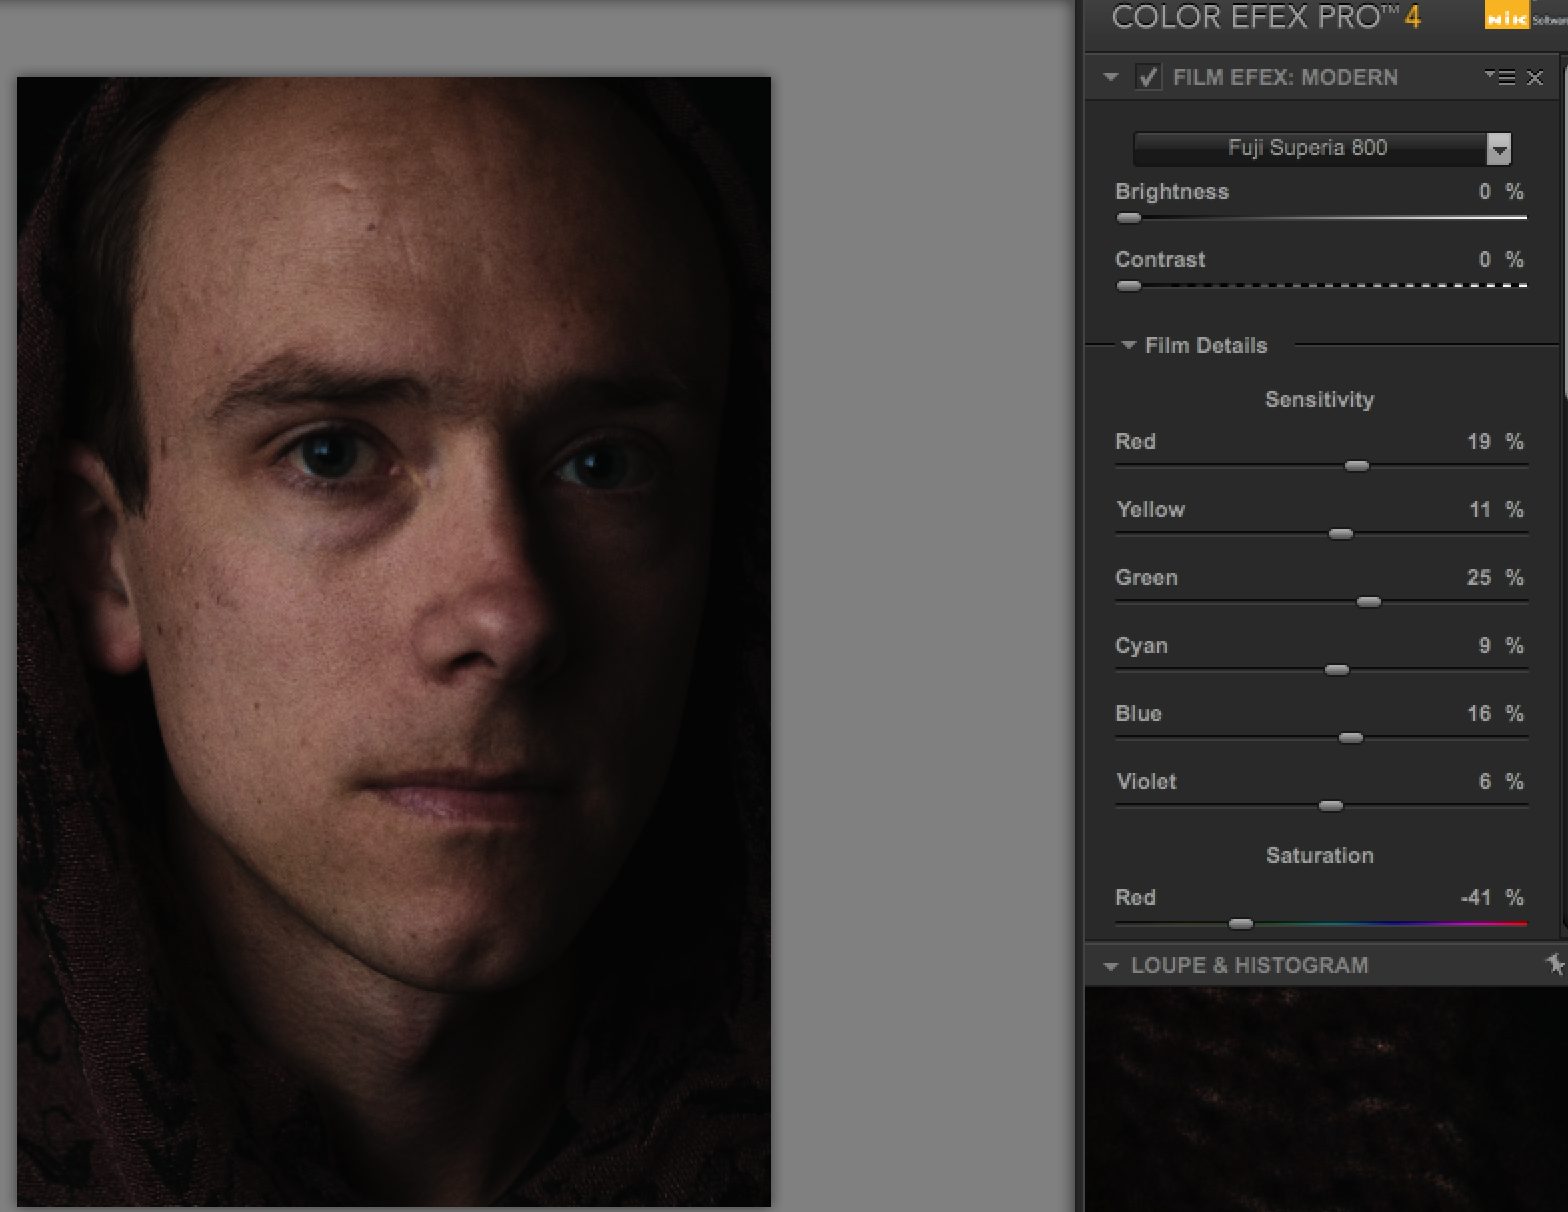
Going right into Nik as a plugin from Lightroom, I use the Fuji Superia 800 film filter (though I also really like the Agfa Optima 400 for the look I am going for). Under “Film Details”, I make small adjustments to the film filter, such as red saturation and grain amount. I always add a little grain to these images because I find that it prevents them from looking too clean or modern.
Adding some grain to the image in Nik Software.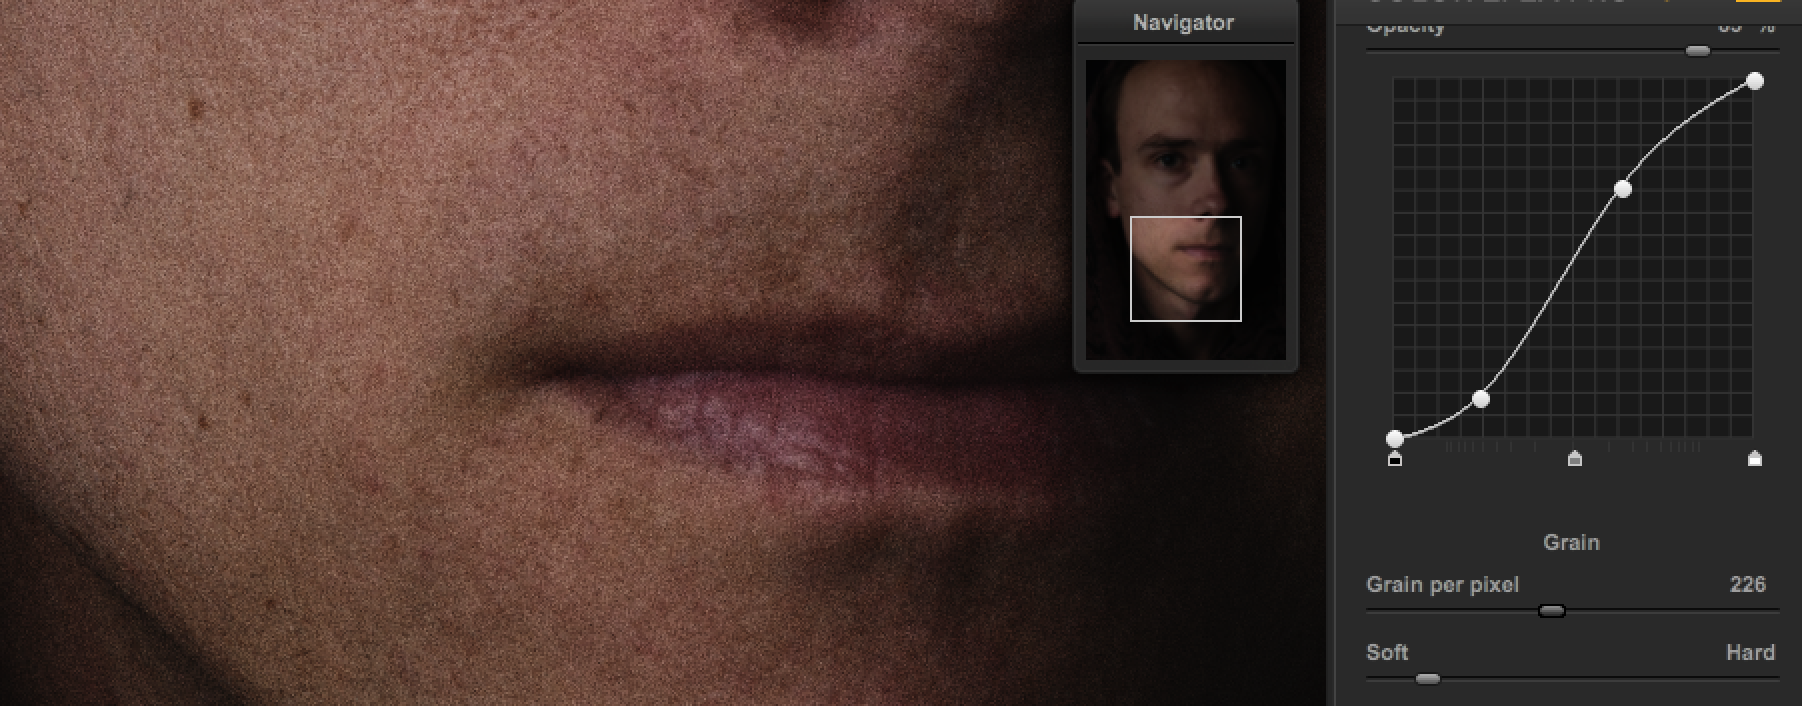
After applying my film filter, I look at my image in Lightroom just to see if there are any more changes I need to make. I don’t want the skin to be perfectly flawless–there should be at least some texture in the face and, for these, I like to maintain most of the face’s natural features such as moles and small scars. I use a lower-opacity healing brush to tone down certain areas of the face.
Using a lower-opacity healing brush, I make some spot adjustments in Lightroom.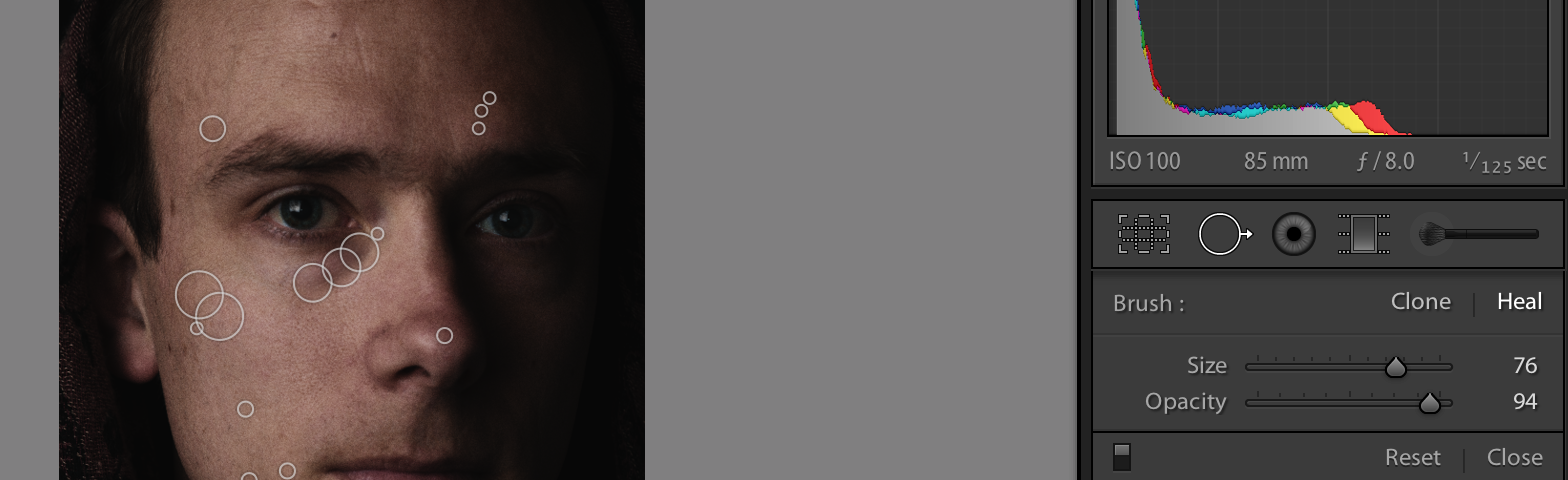
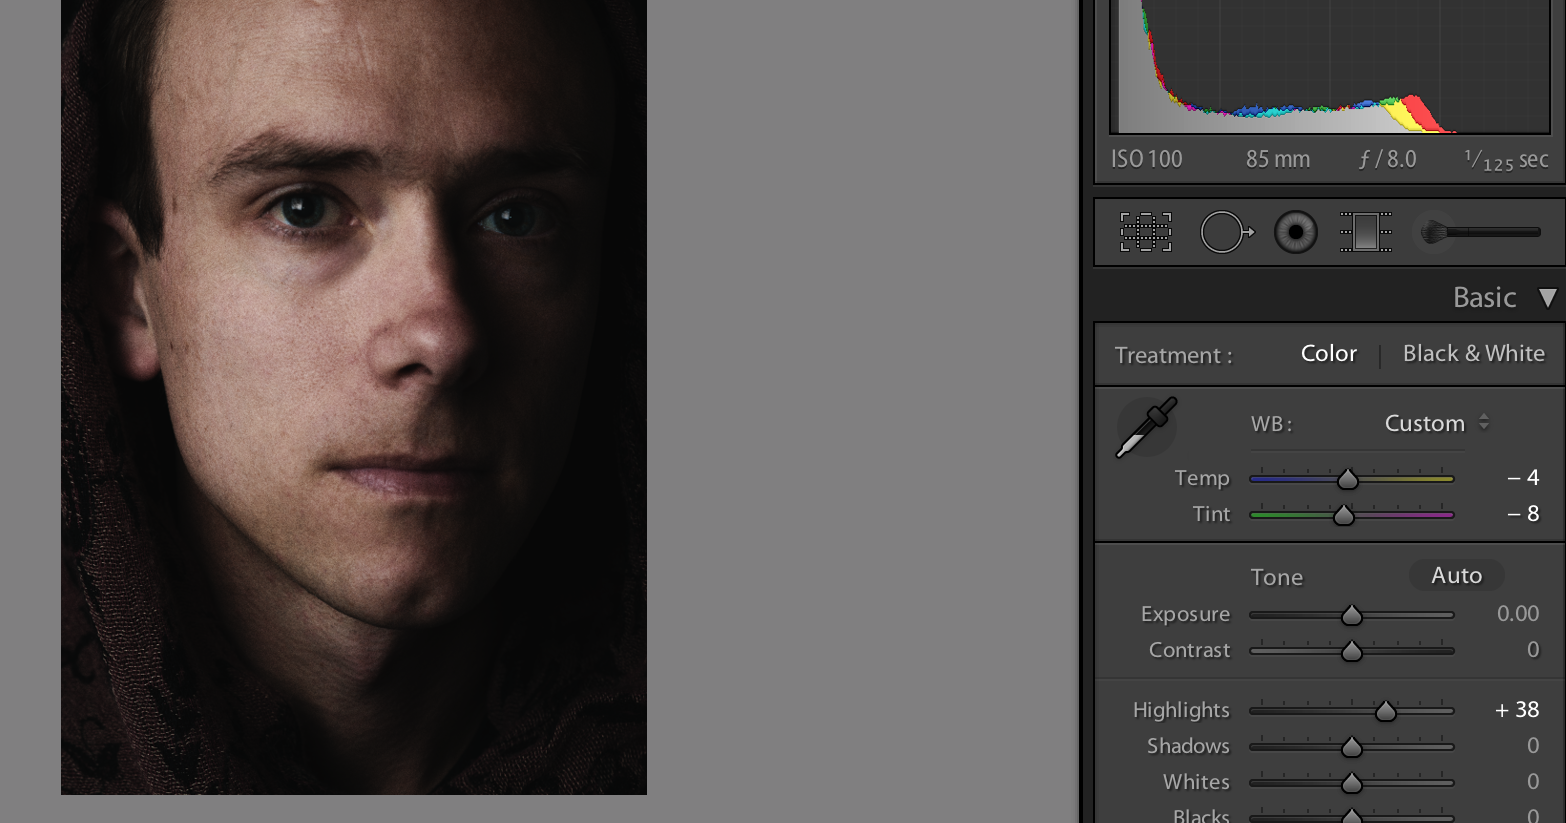
Lastly, I play with my highlights and my tint and temperature. I don’t often need to do this but for this image, I like the way the skin glows a little more with these settings. When the lighting is right in-camera, the edits become quick and simple.
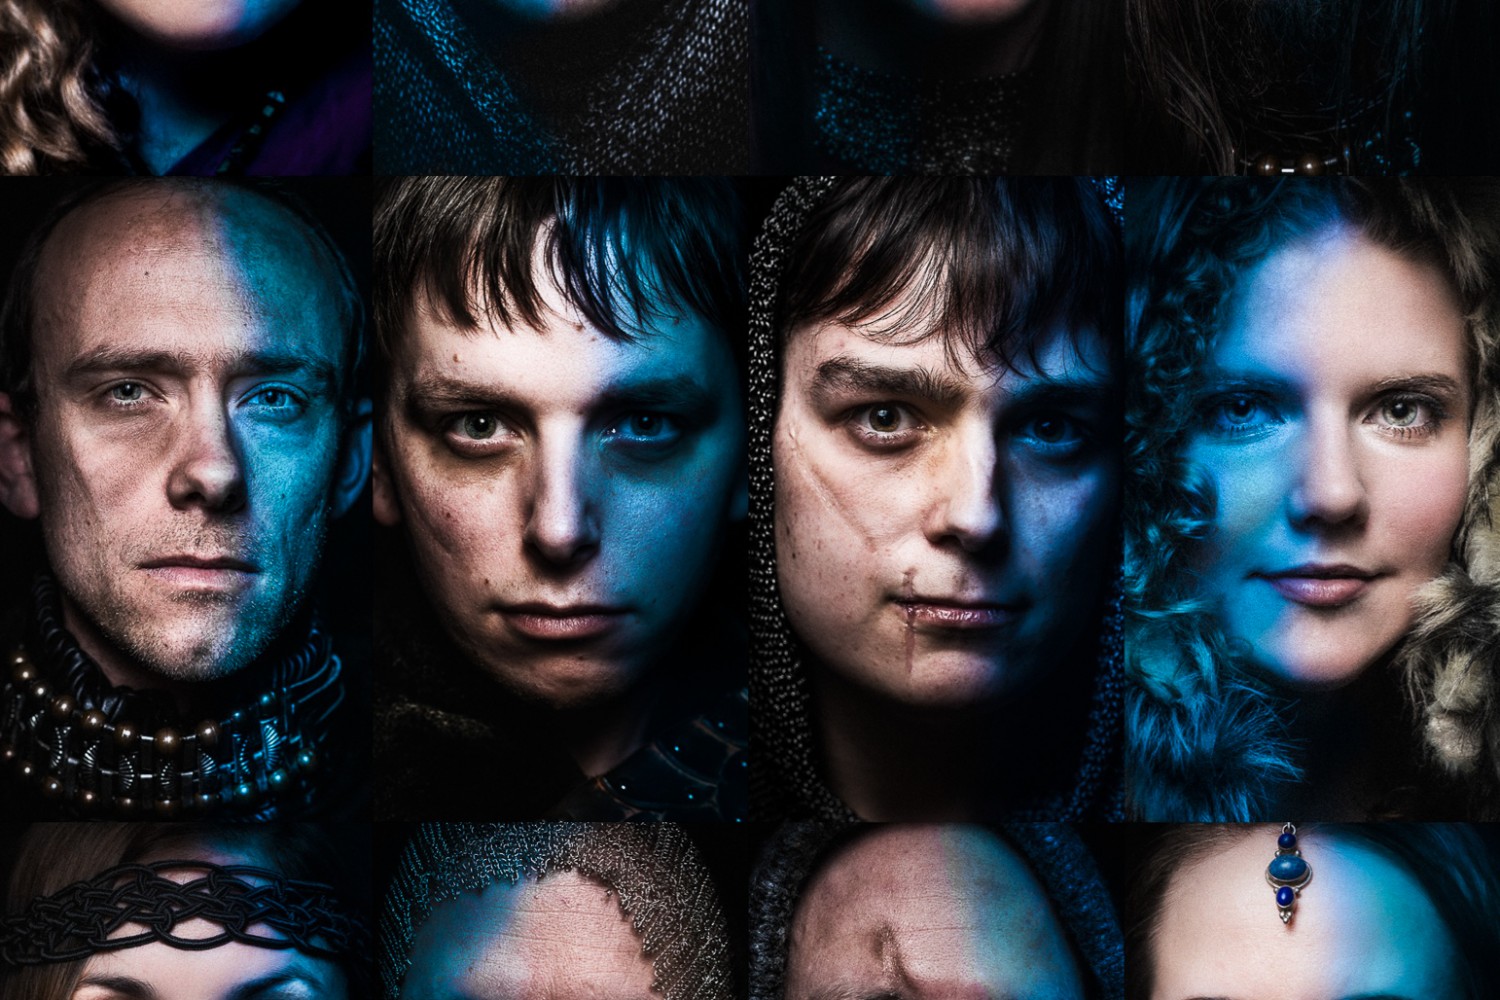
Thanks to Alex Huff and to BorrowLenses for sharing this tutorial and thank you for reading! If you’re looking for more how-tos check out previously featured “Game of Thrones” article, revealing the secret behind creating your own show’s character.
Have fun creating your own chiaroscuro portraits. Let us know if you already tried this technique, share links in the comments below or send in your results to dl@500px.com. We are excited to see your photos!


Leave a reply