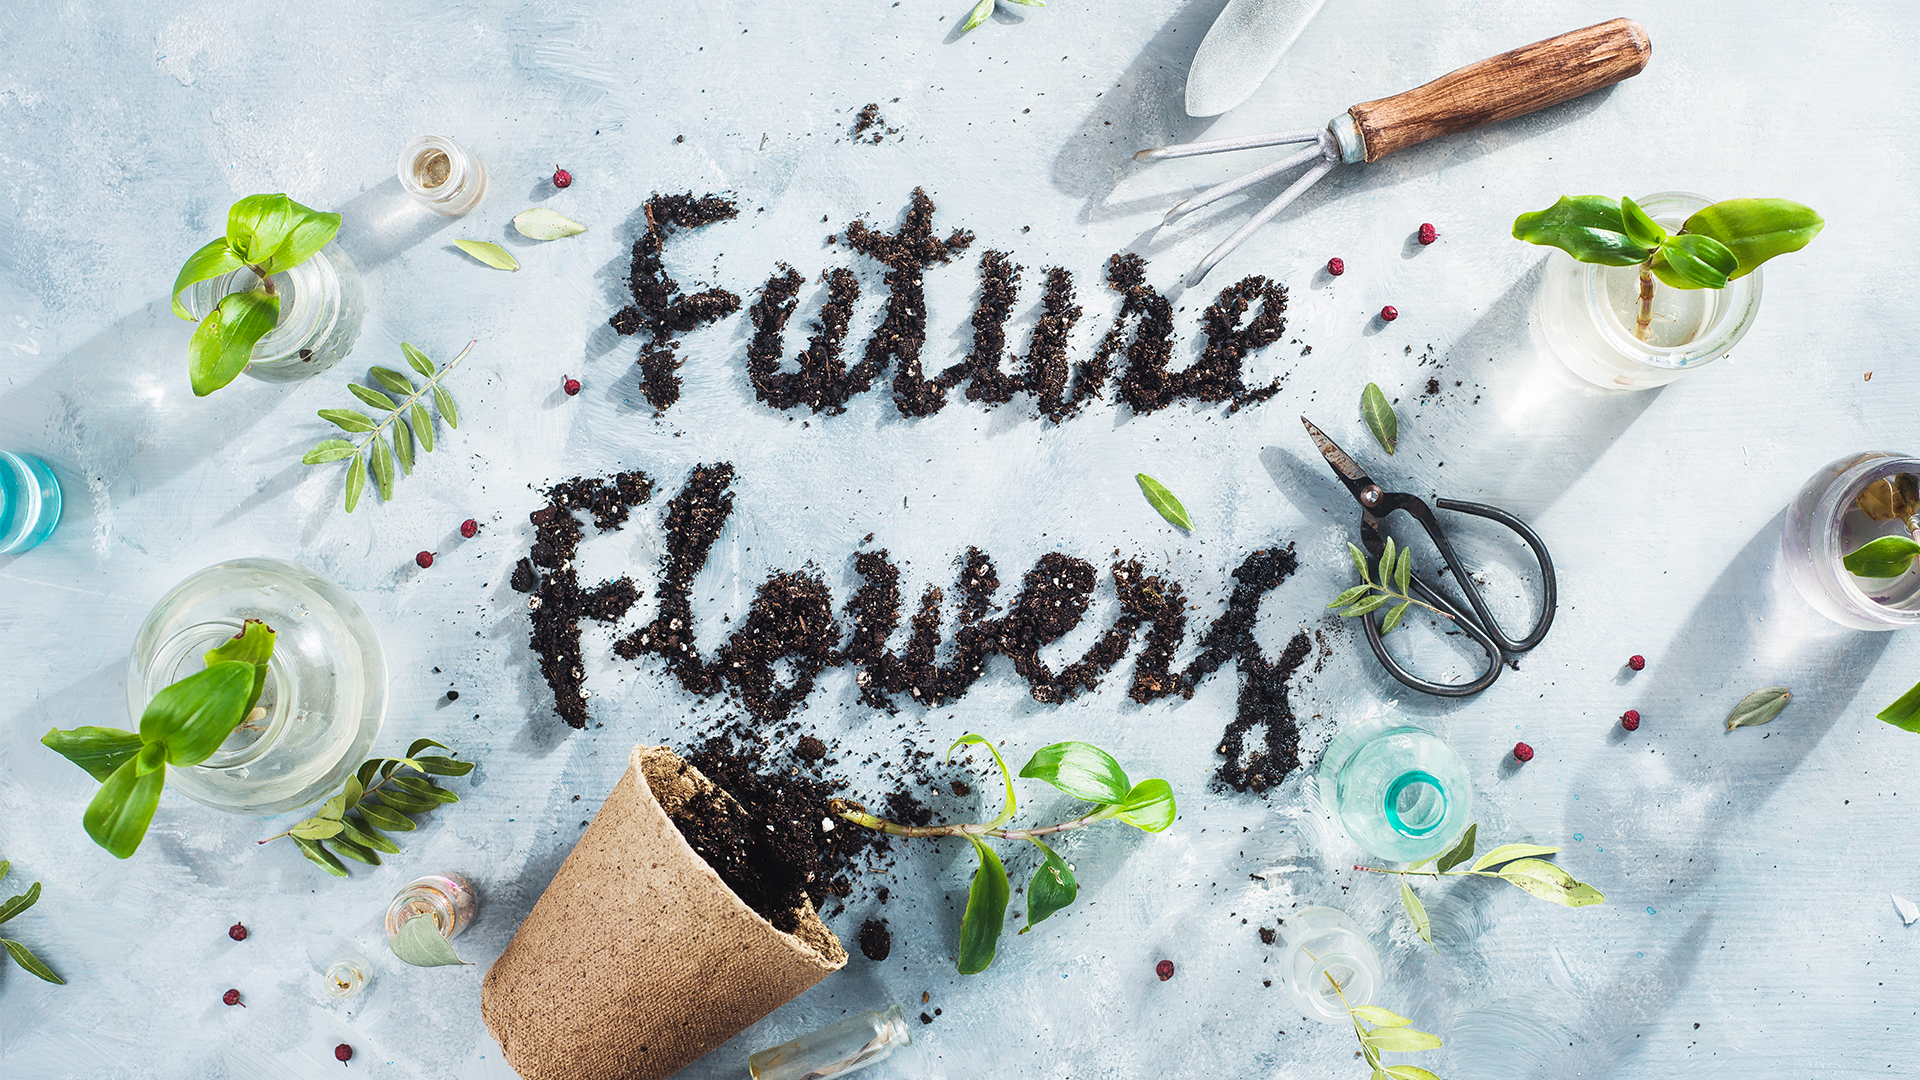
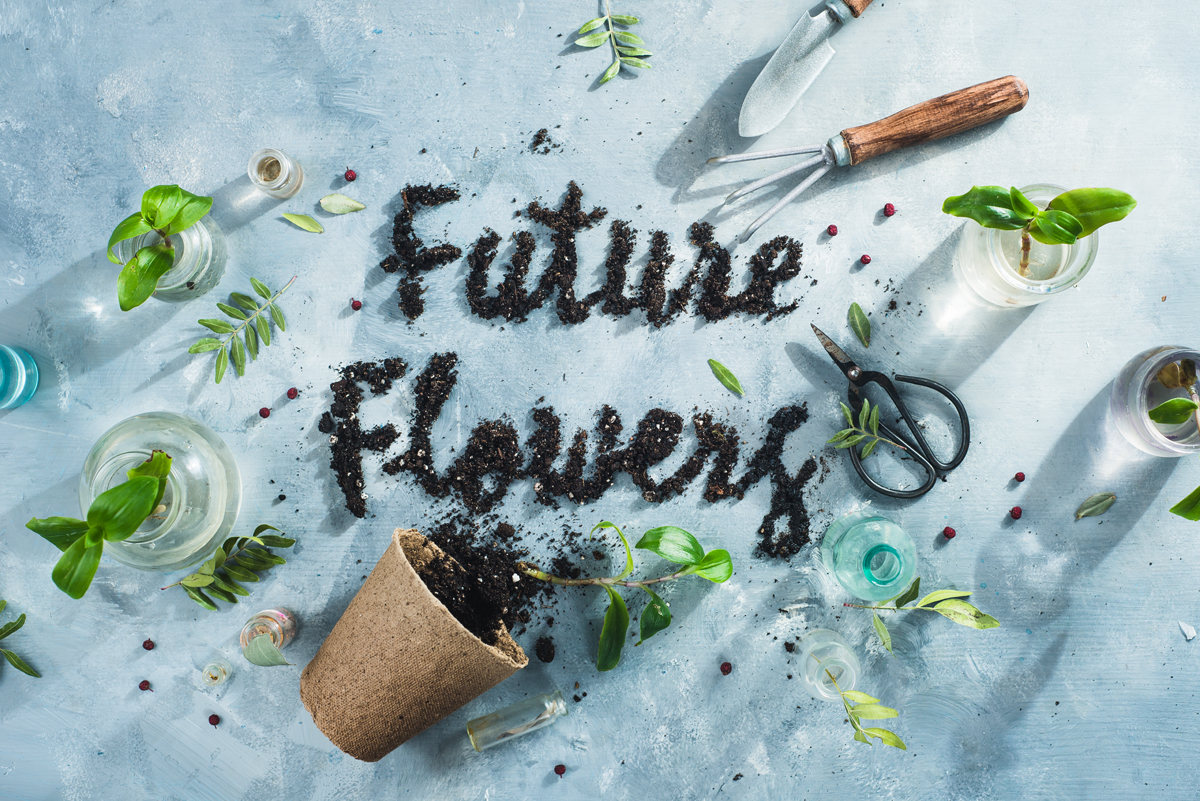
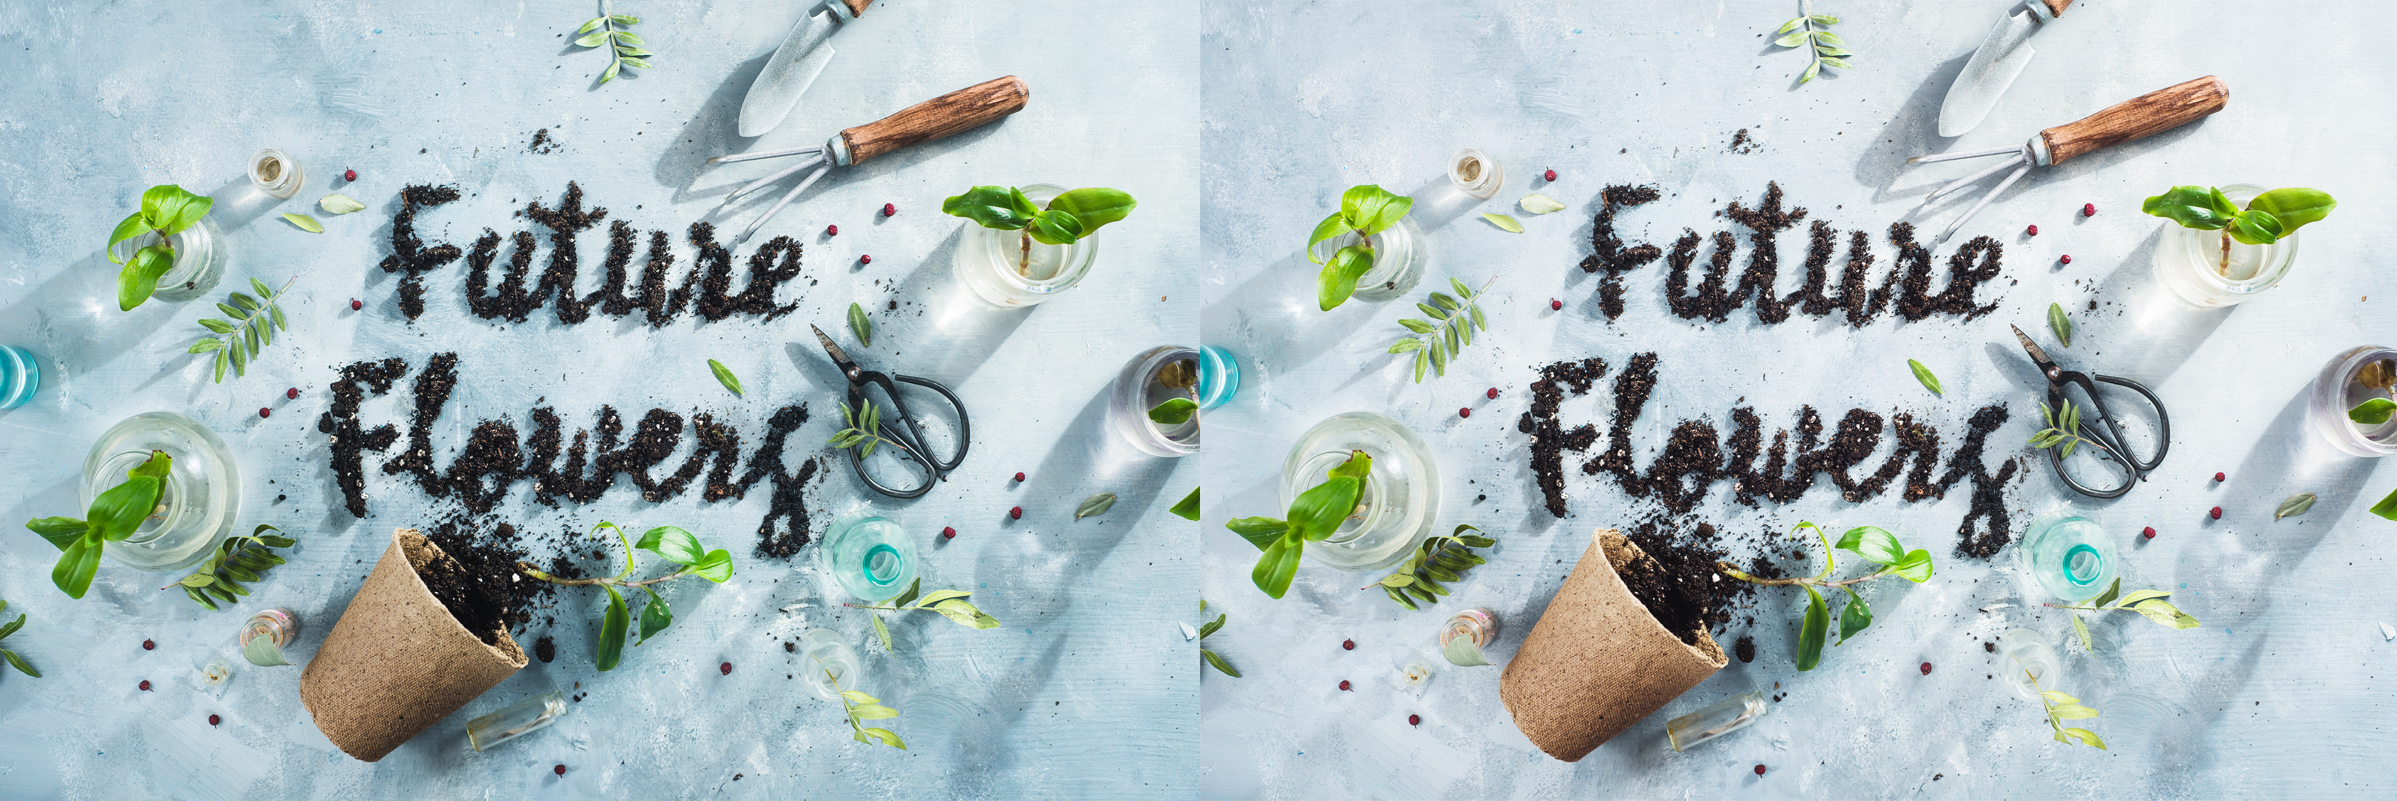
I’m a big fan of dimensional typography, i.e. text made from flowers, chocolate, wire or any other substance that you can mold in a certain way. Getting started may seem difficult, but it’s actually much easier than it seems. Let’s start with a springtime sign made with soil for plants in the garden.

1. Props and Gear
You will need:
- Paper, pencil, and a layout knife for the template;
- Soil for the text;
- Items for your still life (e.g. gardening tools, flower pots, a couple of green leaves);
- Camera;
- Any light source;
- A tripod.
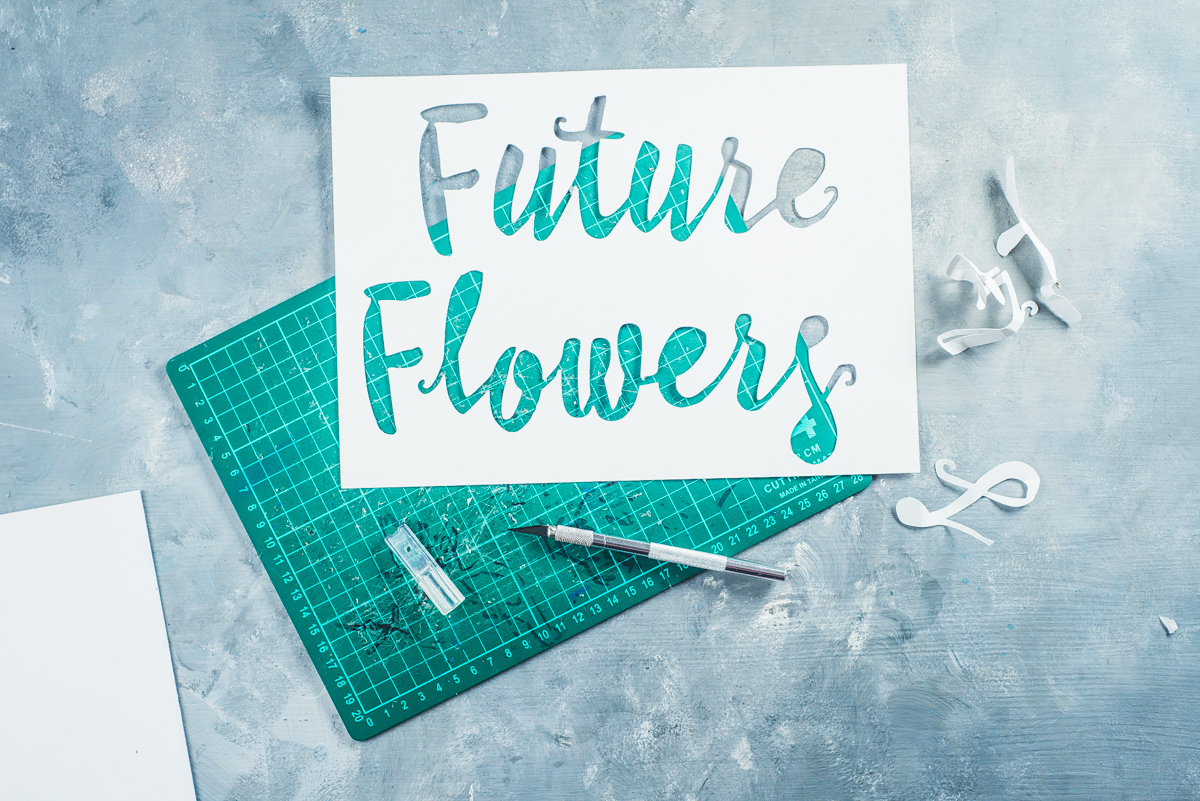
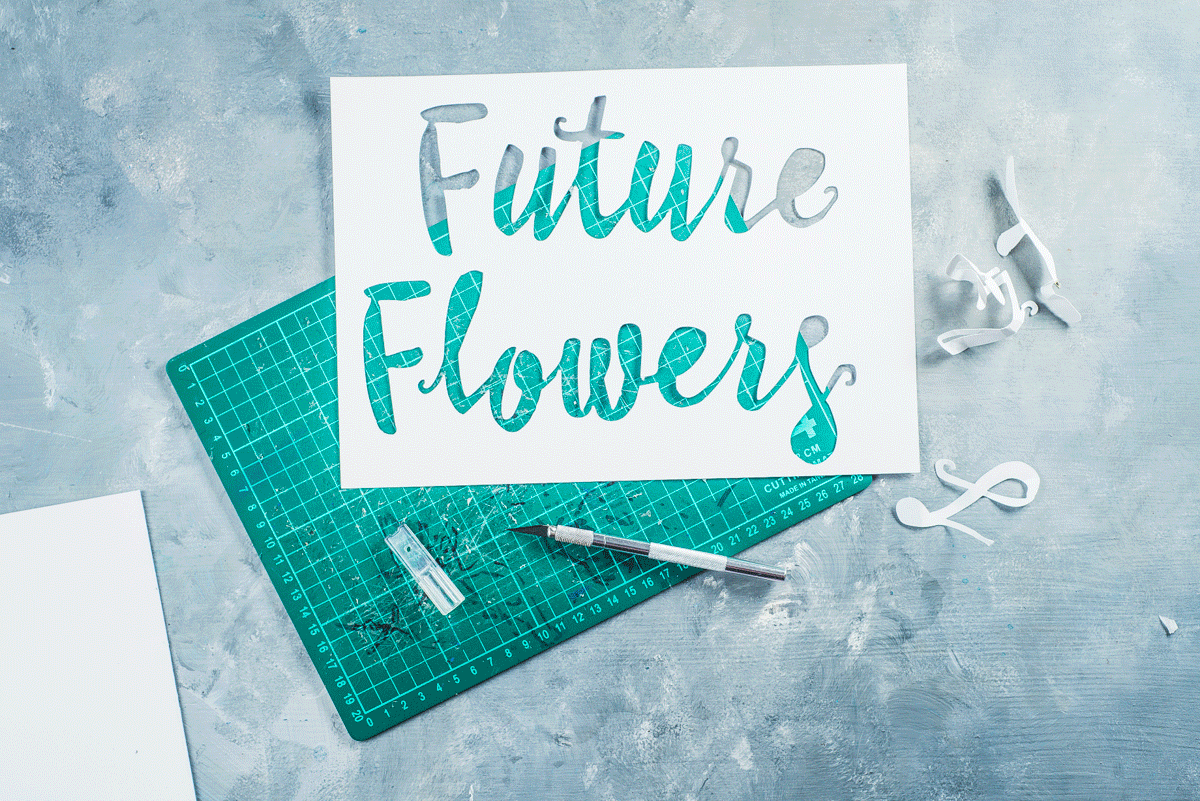
2. Template
First, you need a template. I can’t draw and am pretty lousy at lettering, so I just traced some typed-out text. Try to make all (or most) of your letters connected, so it will be easier to remove the template after forming the text.
Draw the text you want to use and cut it from a sheet of paper using a layout knife. Be patient: it may take some time, but the final picture is worth it.
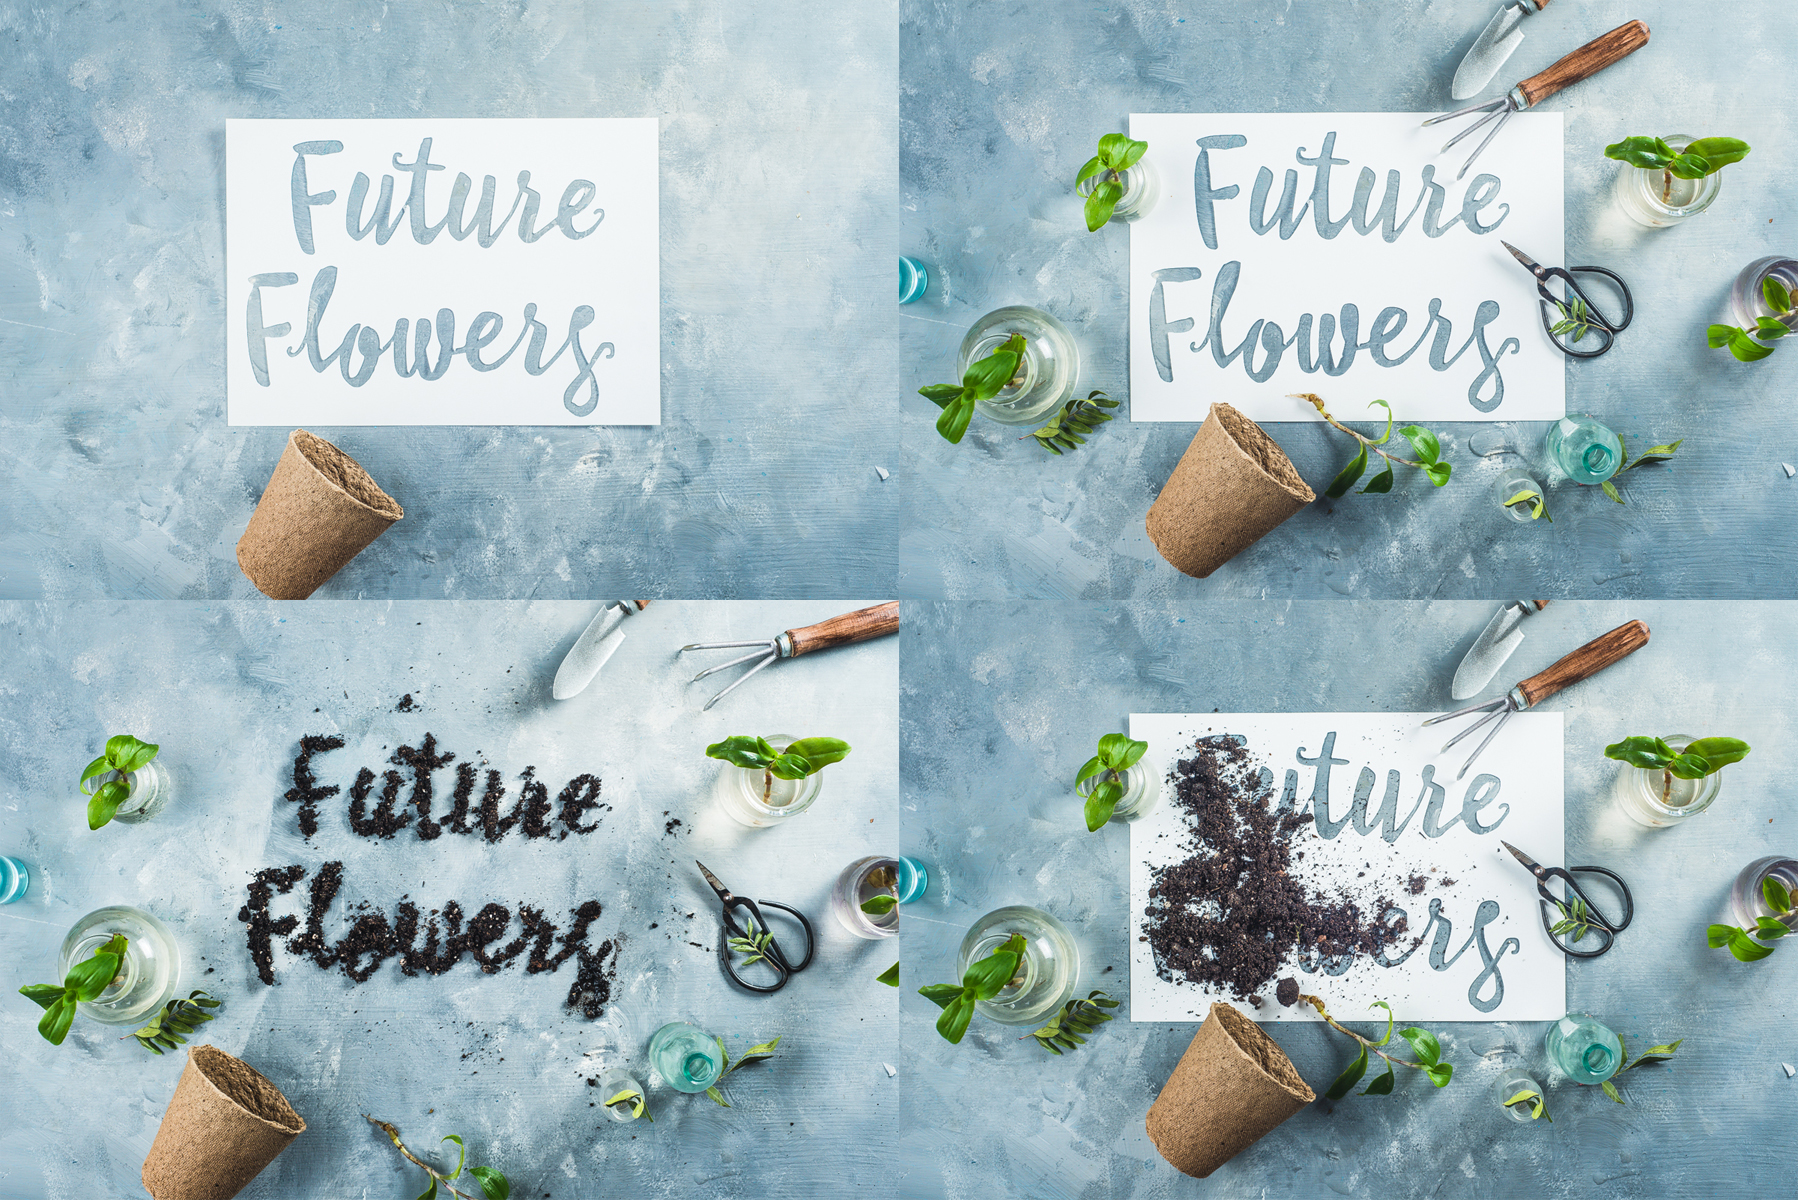
3. Composition
I prefer arranging the composition before filling the template. That way, it’s convenient to move objects around without fear of disturbing the text. Keep your template in the centre of the composition and arrange other objects around it, starting with the biggest ones (like a spade and rake) and moving to little details (like leaves and tiny bottles).
Is everything in its place? Perfect! Next, fill the template with soil and slowly (very, very slowly) remove the paper.
Ta-da! Your spring text is now ready.
4. Lighting
You can use pretty much any lighting setup you like. I wanted to get some flares coming from my glass bottles, so I used very harsh lighting from the right. I used a speedlight in a stripbox placed very low, on the level of my backdrop (practically in 30 cm from the floor). To make this key light harsher, I removed the diffusing cloth from my stripbox.
To balance that light and lift the shadows, I used another speedlight behind a large diffuser on the left. The last touch is a reflector at the bottom.
5. Shooting and Post-processing
Make sure you like your composition and lighting—don’t be afraid to overexpose your flare a little and take a shot! There’s almost no post-processing involved in this tutorial, just a quick adjustment of color and contrast. Voilà!
Learn more about Dina Belenko on our Brand Ambassadors page, and follow her on 500px.


Leave a reply