Practical Photography is the world’s best magazine for photographers who want to improve their camera skills. Whether you’re an absolute beginner, seasoned enthusiast or budding pro, you’ll find all the skills, techniques and ideas you need to take your passion to the next level. Subscribe at greatmagazines.co.uk/pp
Adobe Camera Raw is one of the most powerful options available for processing your RAW files. Not only can you take full control of basic settings, such as brightness, contrast and color, but you can also make more refined localized adjustments, including lens correction and viewpoint.
If you weren’t perfectly square-on to your subject when you shot it, you can easily x it post-capture, by straightening the image on a horizontal plane. Another common problem when looking up or down at your subject is converging verticals. This often happens when shooting architecture with a standard wide-angle lens, rather than a wide-angle tilt & shift. Unfortunately, very few of us own one of these specialist lenses, but that won’t cause you any problems, as you can also quickly correct distortion on the vertical plane.
When using Lens Correction for fixing perspective problems, it can be helpful to process the image first. This gives you a clear idea of how final the result will look, so we’re going to convert to high contrast black & white.
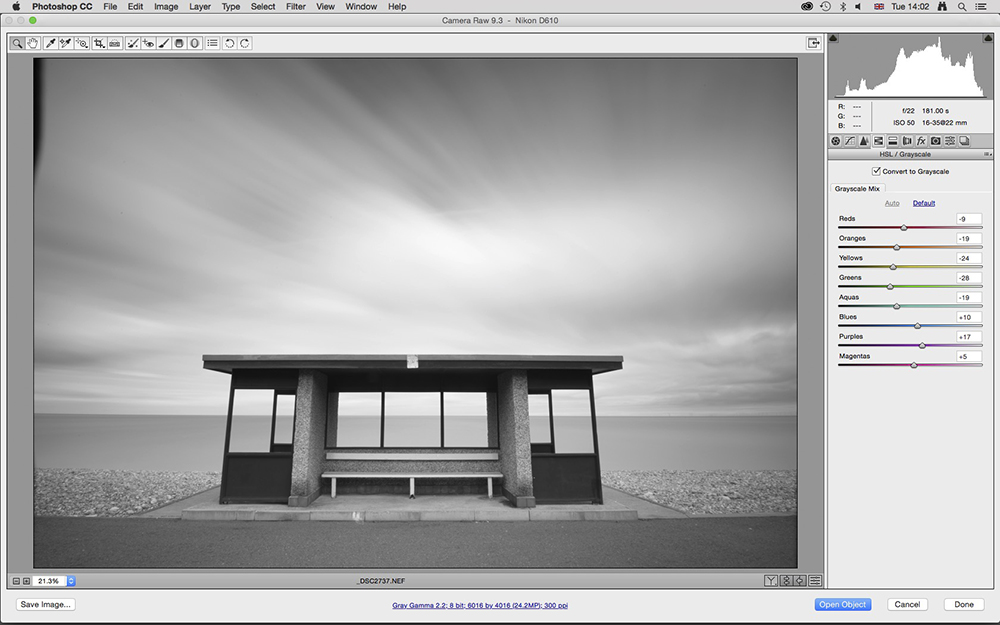
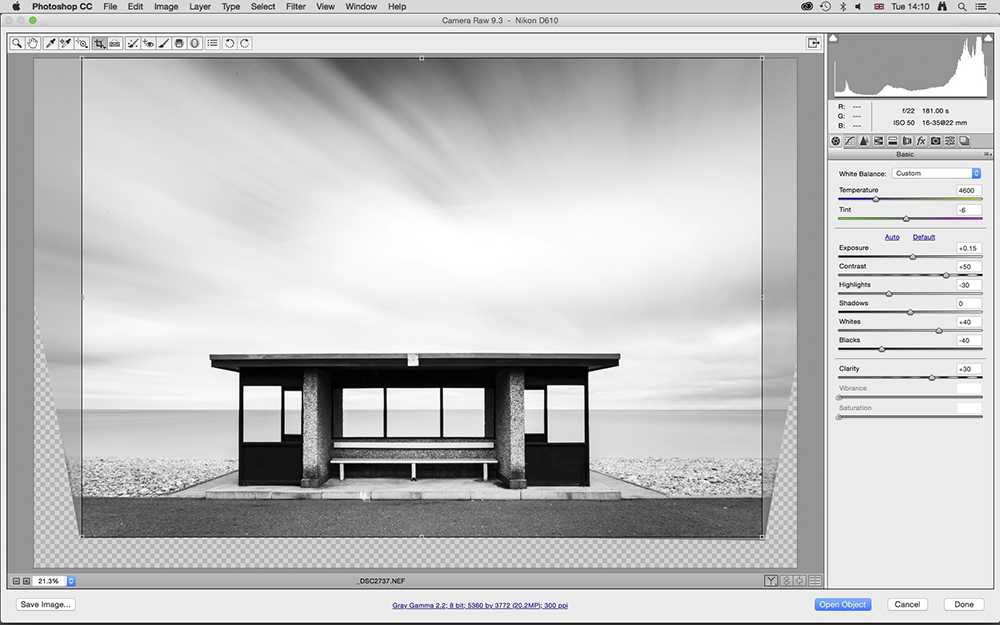
1. Correct white balance
Open your image in Adobe Camera Raw and process it as normal before correcting distortion.For this shot we corrected white ballance for a better mono conversion.
Simply drag the Temperature and Tint sliders in the opposite direction of the color you want to remove. Once finished, click on the HSL/Grayscale tab and check Convert to Grayscale.
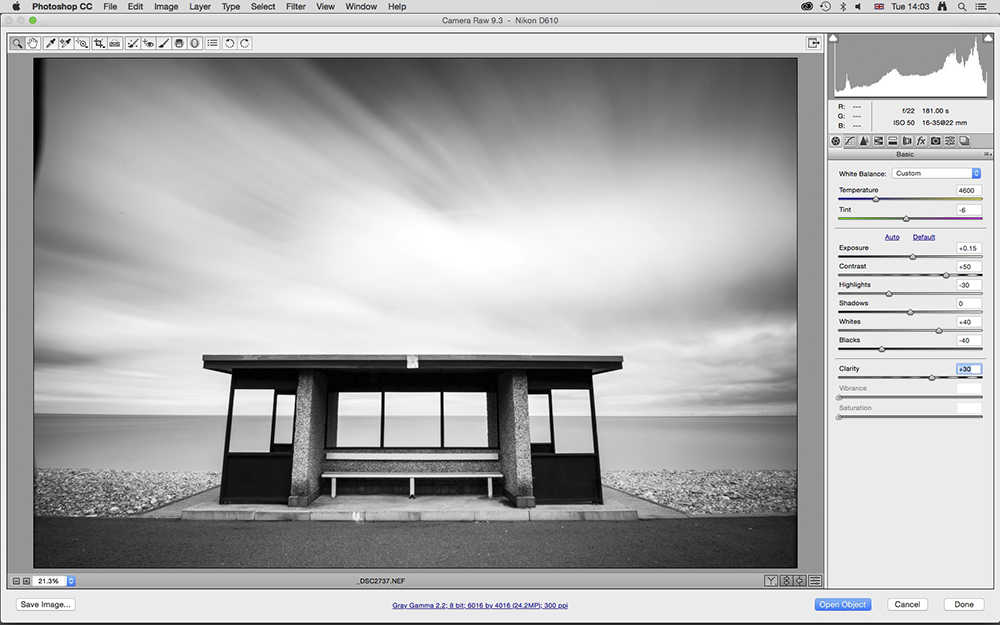
2. Process the image
The image will now be black & white but will be very dull, so click back onto the Basic tab. First increase Contrast to +50 and then adjust Exposure to lighten or darken the shot if necessary.
To further boost contrast we changed Whites to +40, Blacks to -40, and Clarity to +30. This blew the highlights out, so we set Highlights to -40.
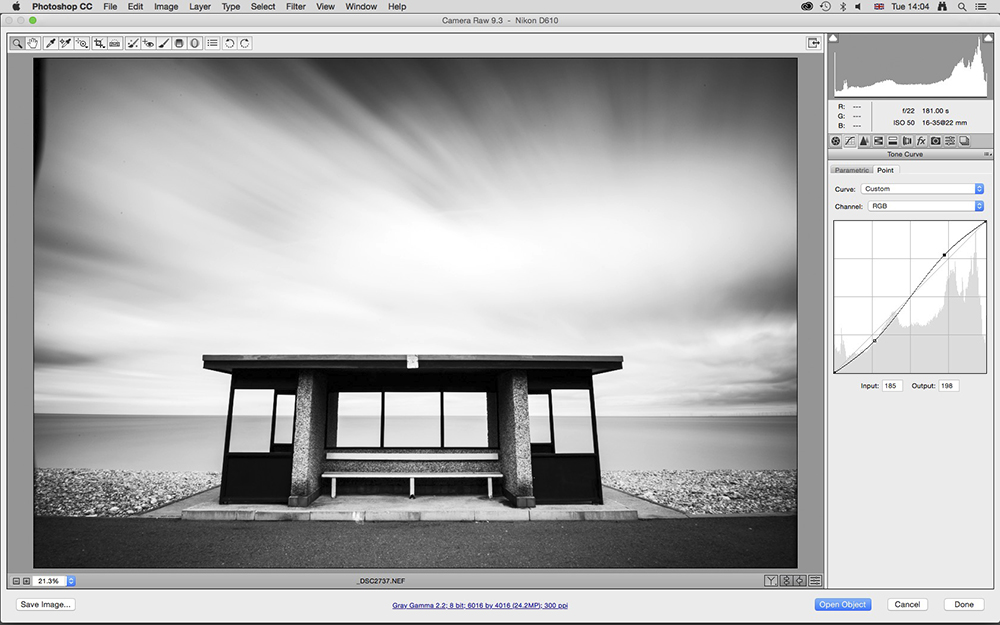
3. Set Tone Curve
At this point the image will be beginning to look really good, but we can increase contrast further.
Click on the Tone Curve tab and make sure the Point tab is selected within this area. Now create an S-curve by left-clicking your mouse near the top of the straight line and dragging up and left. Do the opposite near the bottom.
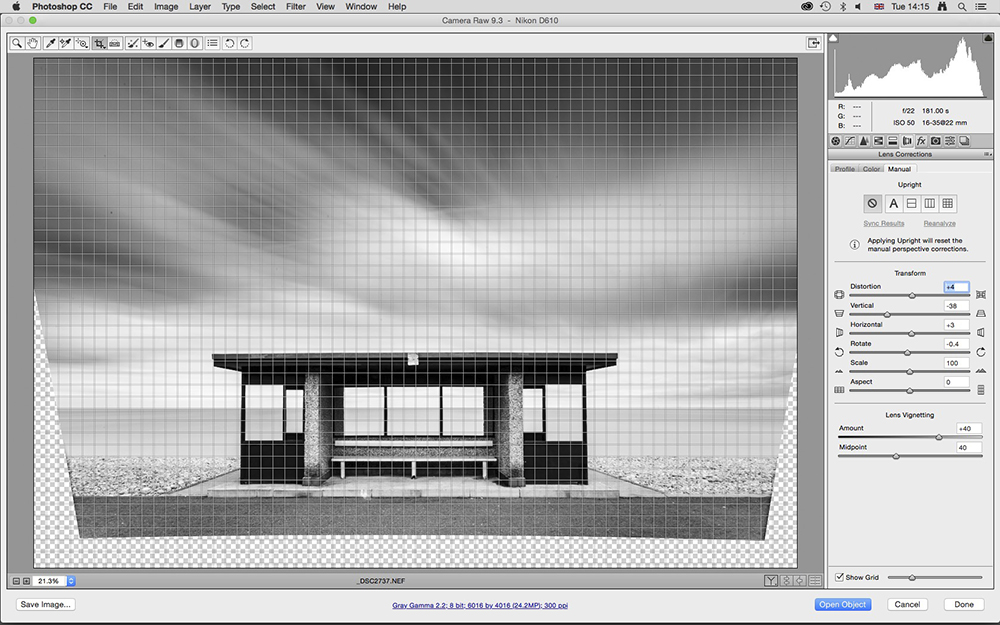
4. Fix distortion
Click on the Lens Correction Tab and you’ll see a series of self-explanatory sliders. Distortion corrects lens barrel and pincushion distortion. The two most important sliders here are Vertical and Horizontal.
Drag these left or right to fix viewpoint issues. Rotate will level subjects or the horizon. Lens Vignetting is used to apply or remove vignettes.
5. Use the Crop Tool
Click back onto the Basic tab and then click on the Crop Tool icon at the top-left of the Adobe Camera Raw window. Next, press the Caps Lock key on your keyboard to set the precise cursor. This will make it easier to apply the crop box.
Left-click your mouse in one of the bottom corners where the image has been pulled in (for us that was bottom-left), then drag to set the crop and hit Enter.
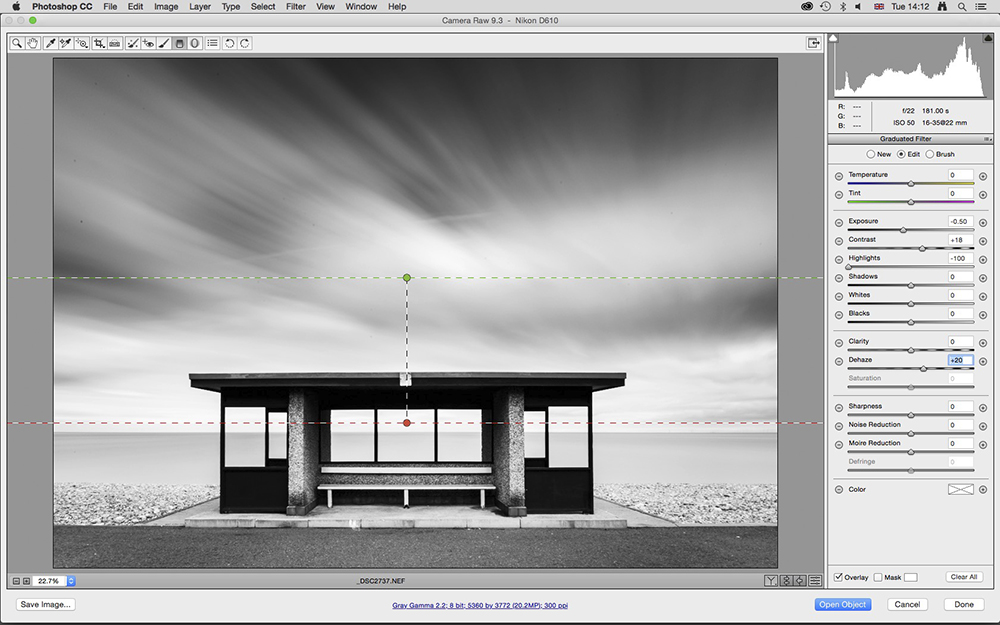
6. Add a Graduated Filter
Graduated Filters are a great way to add localized adjustments to large areas of the image. They’re perfect for working with skies, and in our shot that meant recovering detail.
To do this we reduced Exposure to -50, boosted Contrast to +18, set Highlights to -100, and added +20 Dehaze. If you have an older version of Camera Raw that doesn’t have Dehaze, increase Clarity instead.
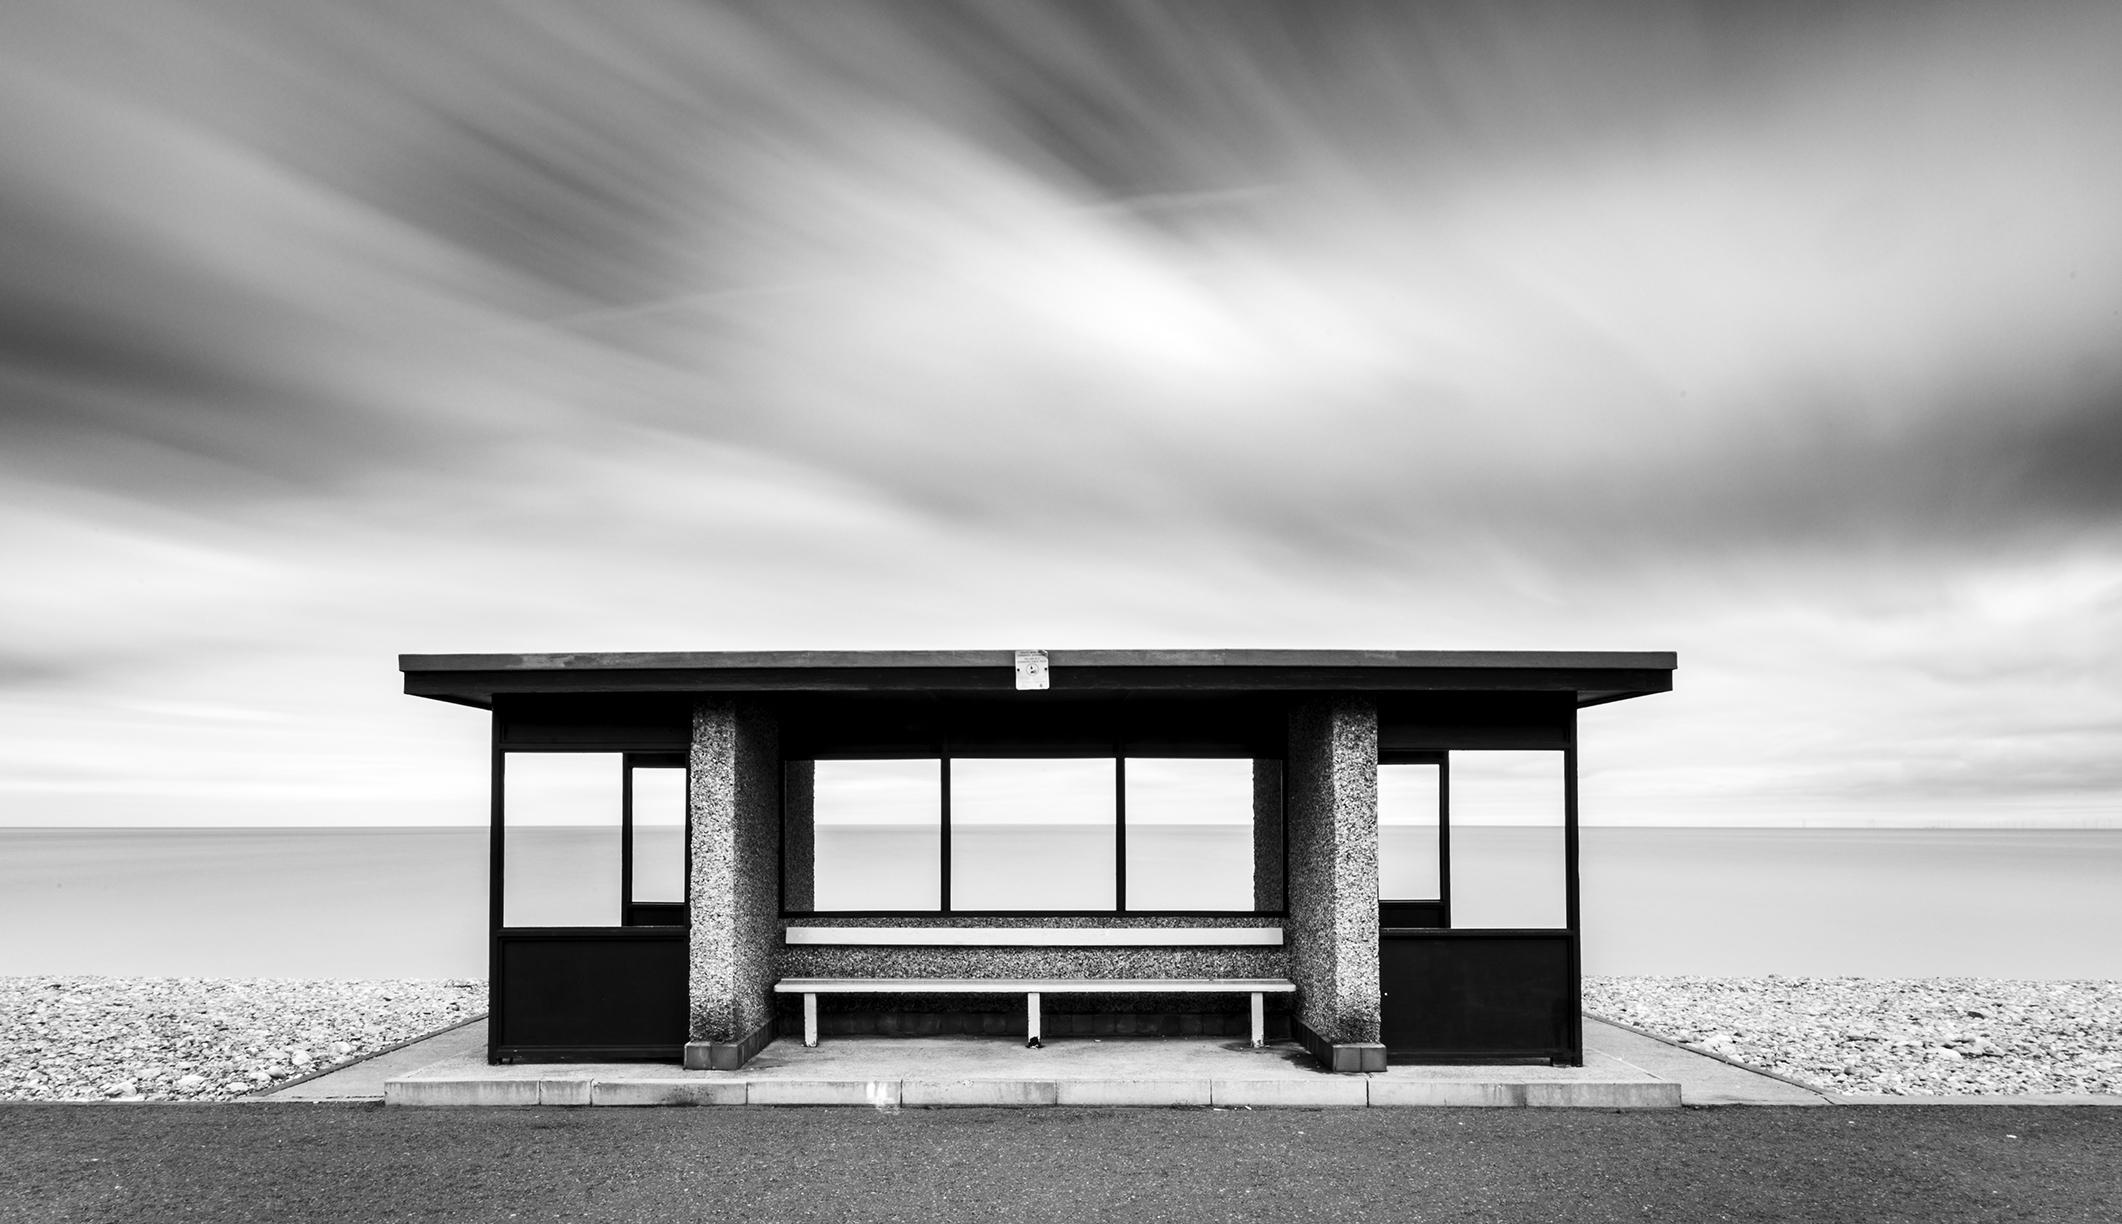
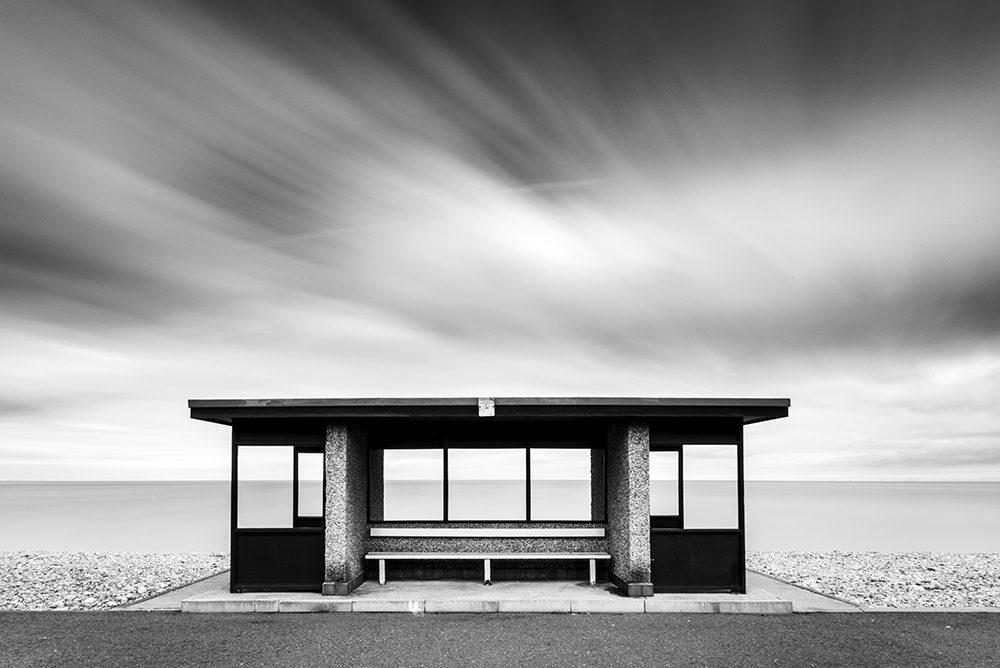
And that’s it! Here’s the before and after:
[twentytwenty]
 [/twentytwenty]
We hope you found this short Camera Raw tutorial useful! If you prefer video, we’ve put together a video version of the tutorial here. And if you still have questions after that, feel free to drop them in the comments down below!


Leave a reply