
Dina Belenko is a creative still-life photographer from Russia and incredibly successful 500px Prime photographer. Her artistic images capture magical stories behind everyday inanimate objects. In this tutorial, Dina shares an amazing technique for capturing shapes in the reflections of coffee and tea. Read on, stay inspired, and enjoy!
Coffee cups are probably my favourite subject to shoot. I love all their different shapes and forms, and I love the light reflecting on the surface of tea or coffee. There’s something so dreamy in these round reflections.
So, why do not use them to tell a small, cozy story?

1. Sketch.
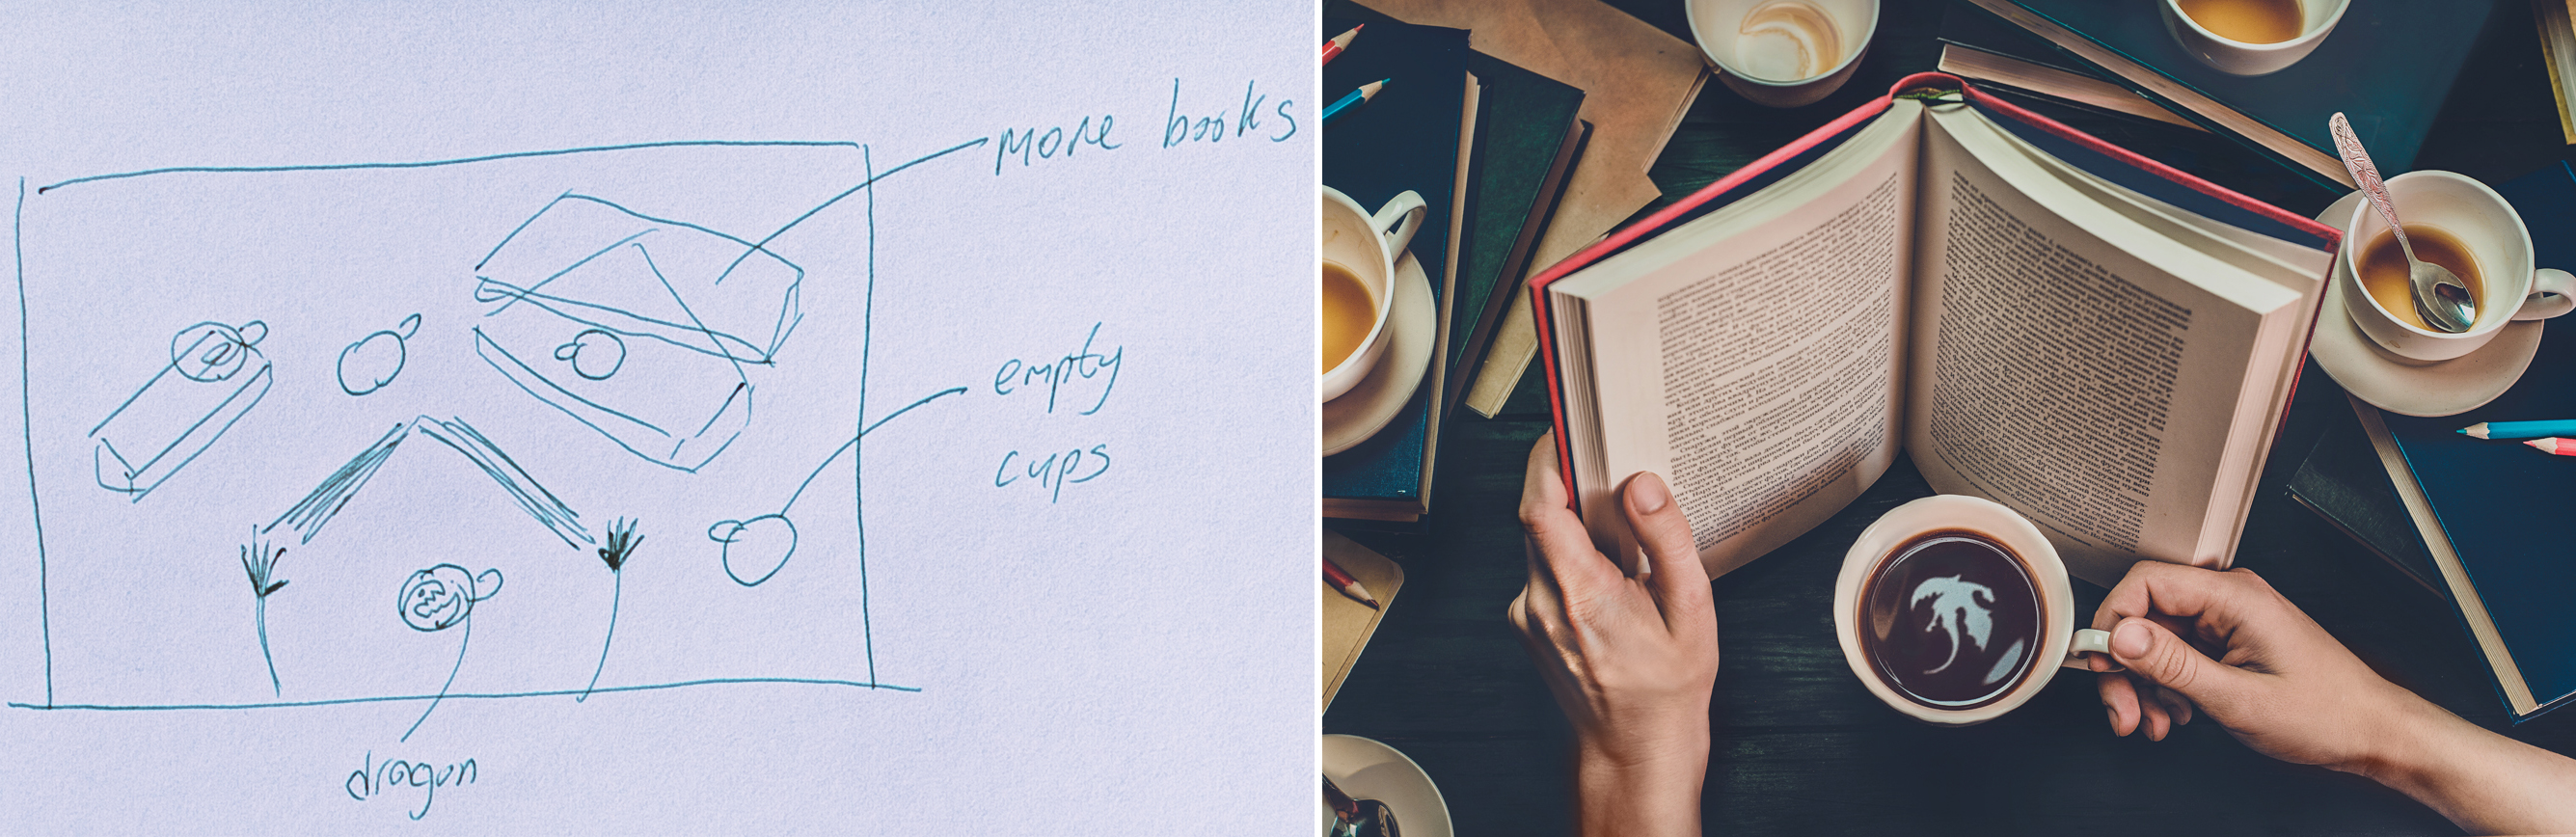
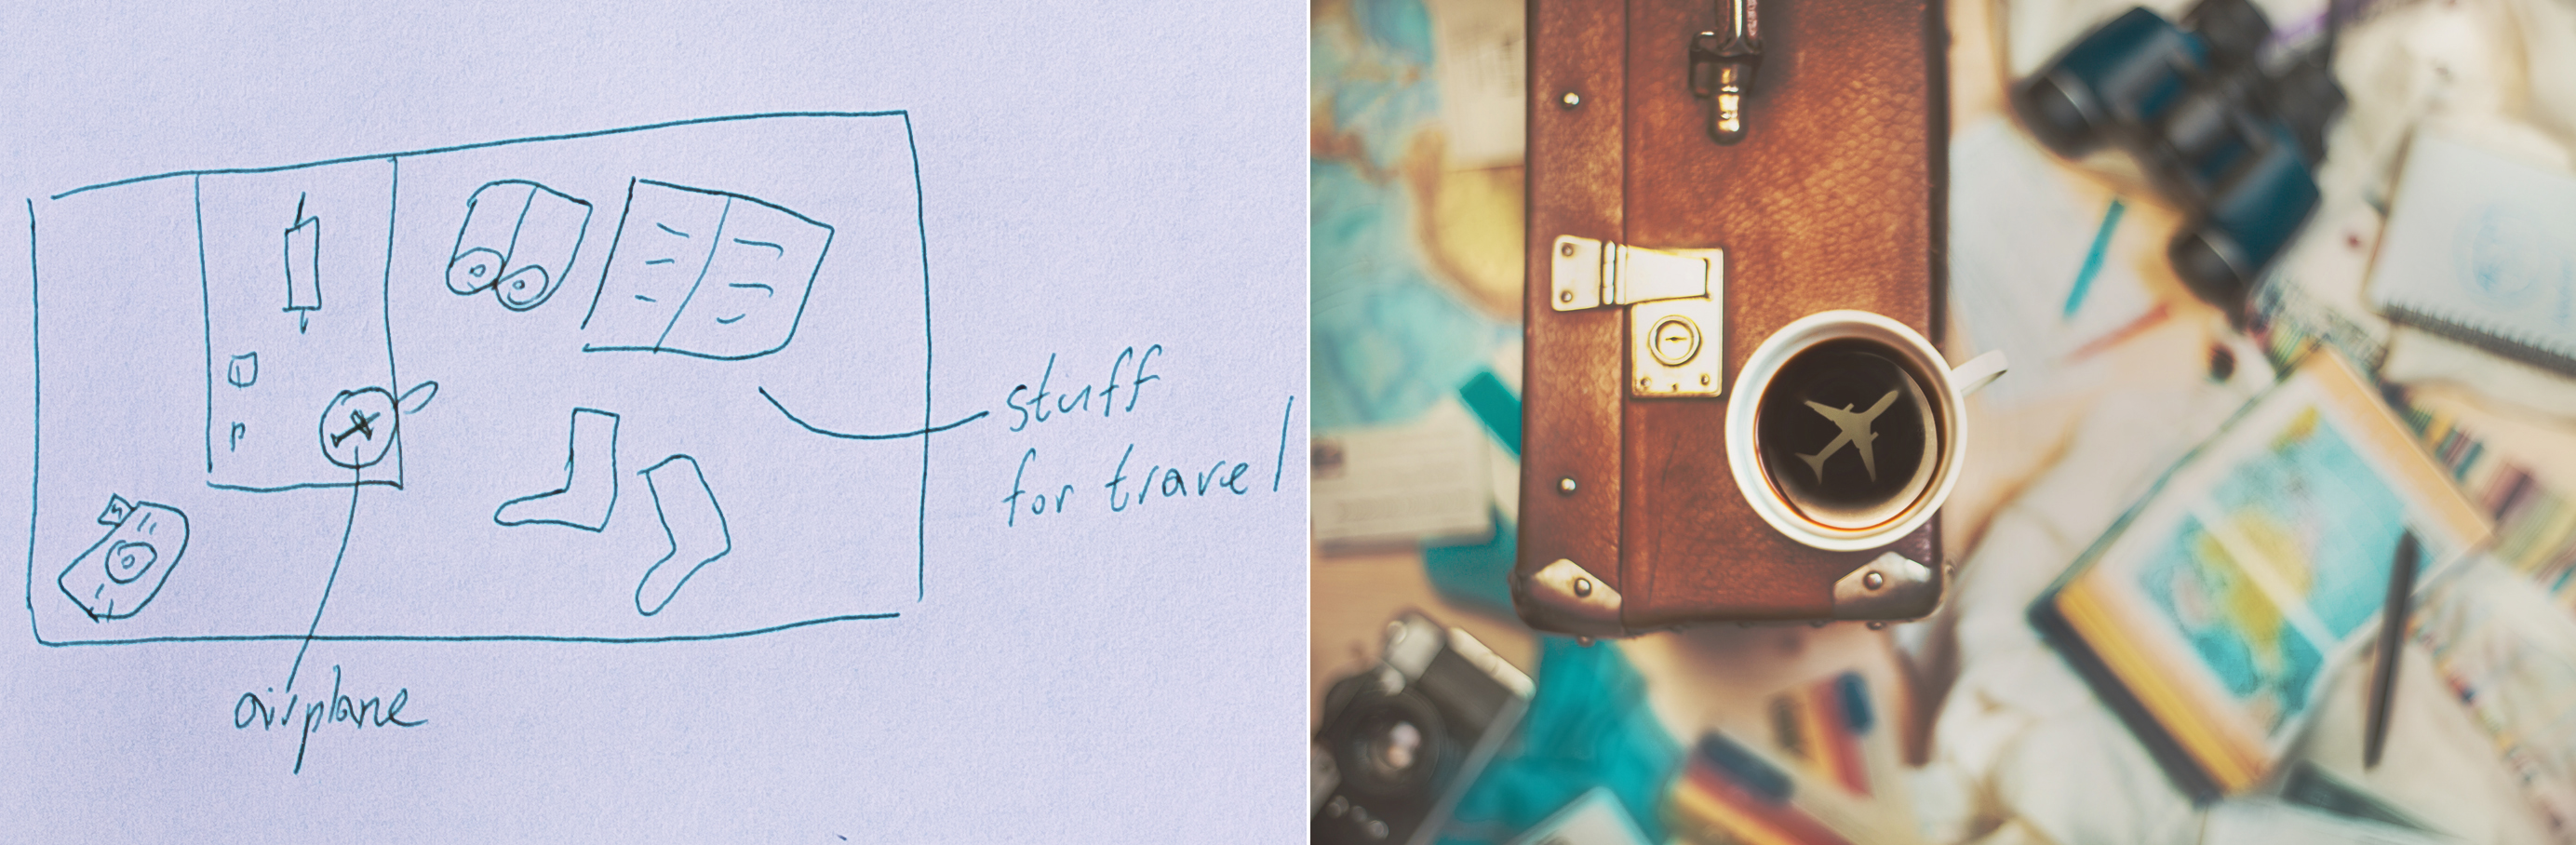
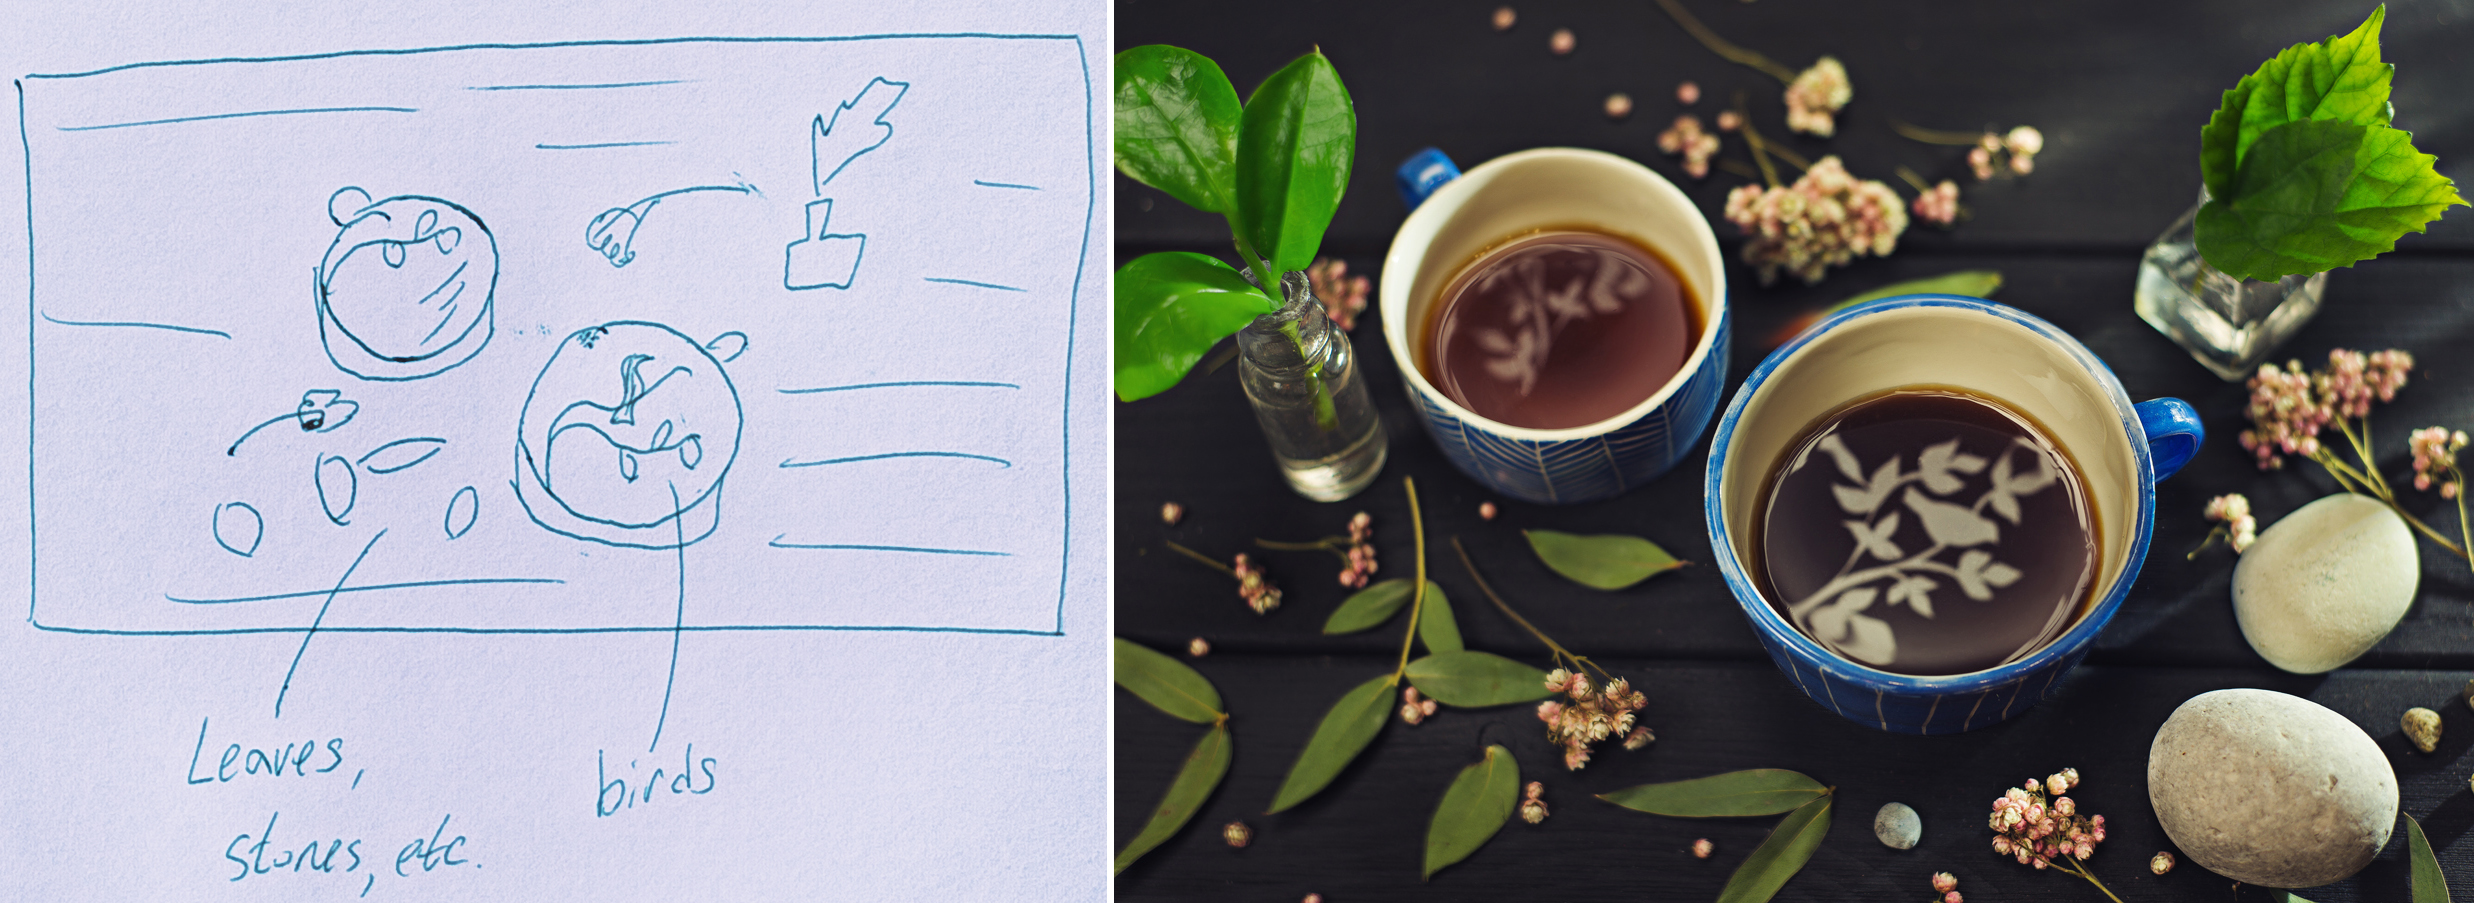
First of all, we need to make a sketch. We need to find something that will connect the reflection in the cup and all objects around it. Why do you have a sea horse in your cup? Because you’re dreaming about sea and holding a shell in your hands. Why are all these ferns surrounding your cup? Because you have a ghost dinosaur inside it.
I think, the best way to come up with an idea for a shot like this is to think about your character, your hero.
Who is it? A child who wants to be an archaeologist? A reader obsessed with fairy tales? A traveller who flies
all around the world? Good. What would your character think about? Dinosaurs, dragons, airplanes, sea waves, elves, Sahara landscapes, anything!
Catch your character’s thoughts and make a reflection silhouette from them.
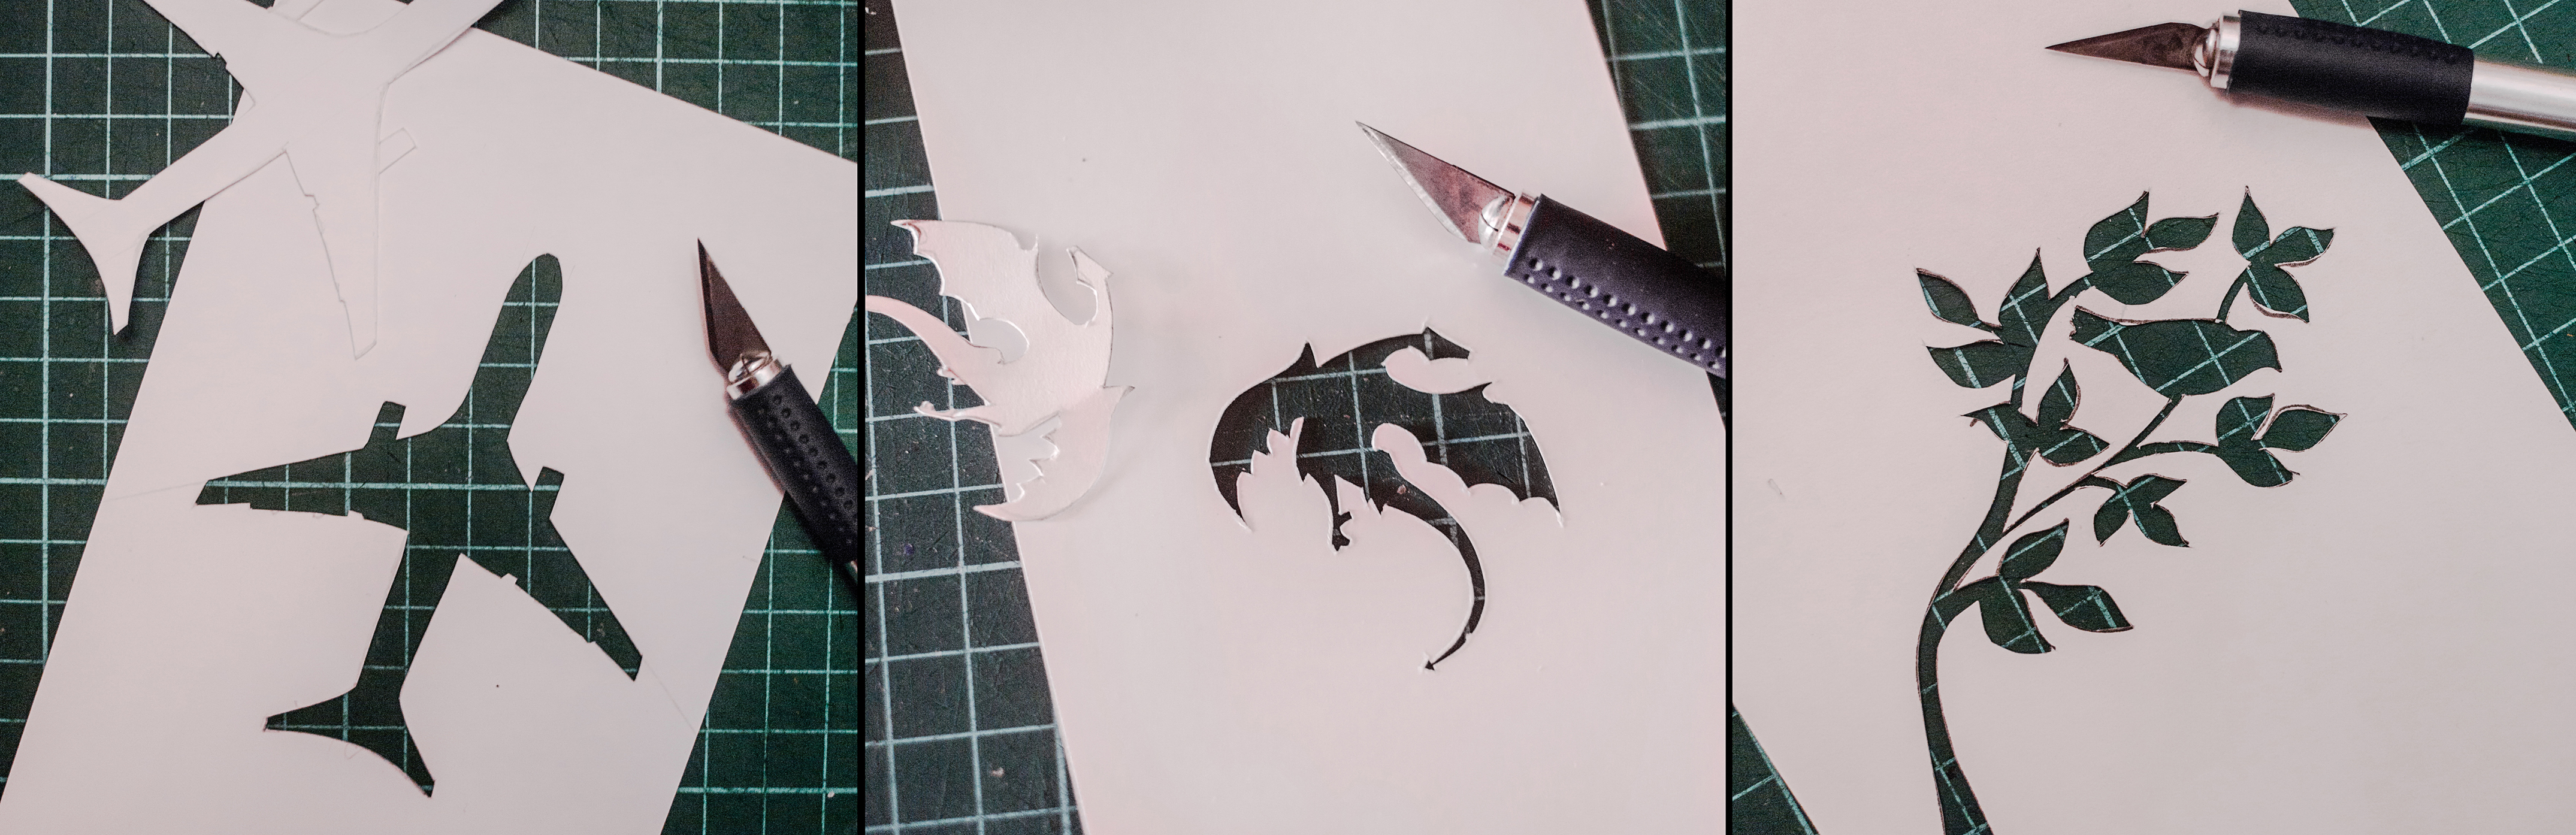
2. Cutting out
Now we need to cut our figures out from paper. Remember that we will not need the figure itself, but a cutout of it in the paper. So be careful and use the sharpest knife you have (you are very lucky if you have a plotter, but it’s not very hard to do it by hand).
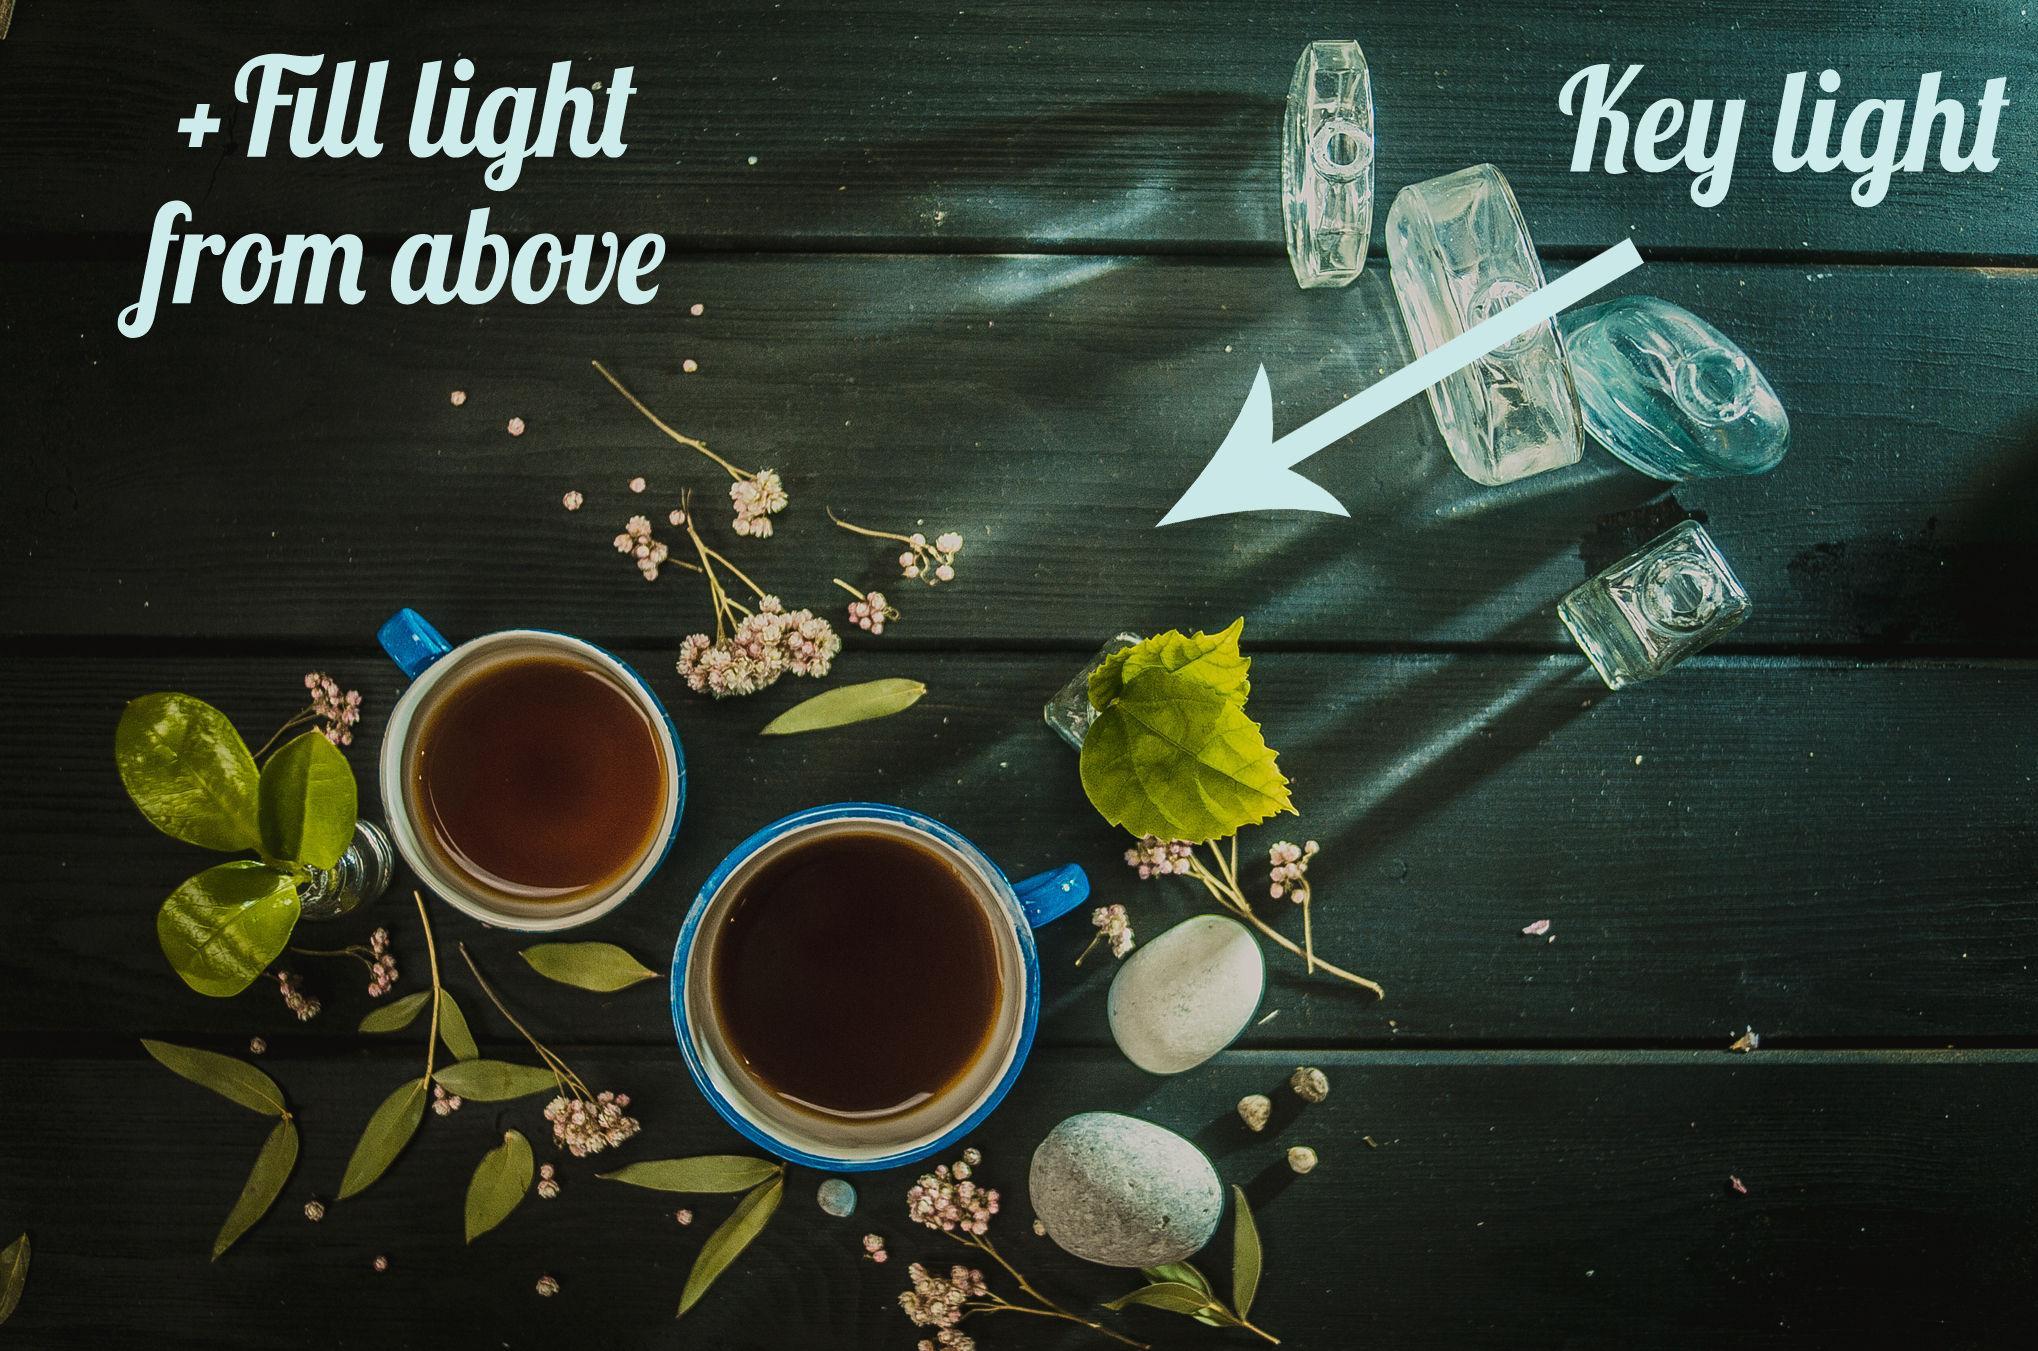
3. Lighting
You can use any lighting scheme you like just as long as you have a soft light right above your cup, so it can make a bright spot on surface of coffee. If you have only one light source, a big reflector above the cup will also will do the trick.


I used two light sources: a key light on the right side (I put a couple glass bottles in front of it to make some nice flares) and fill light on the top.
4. Shooting
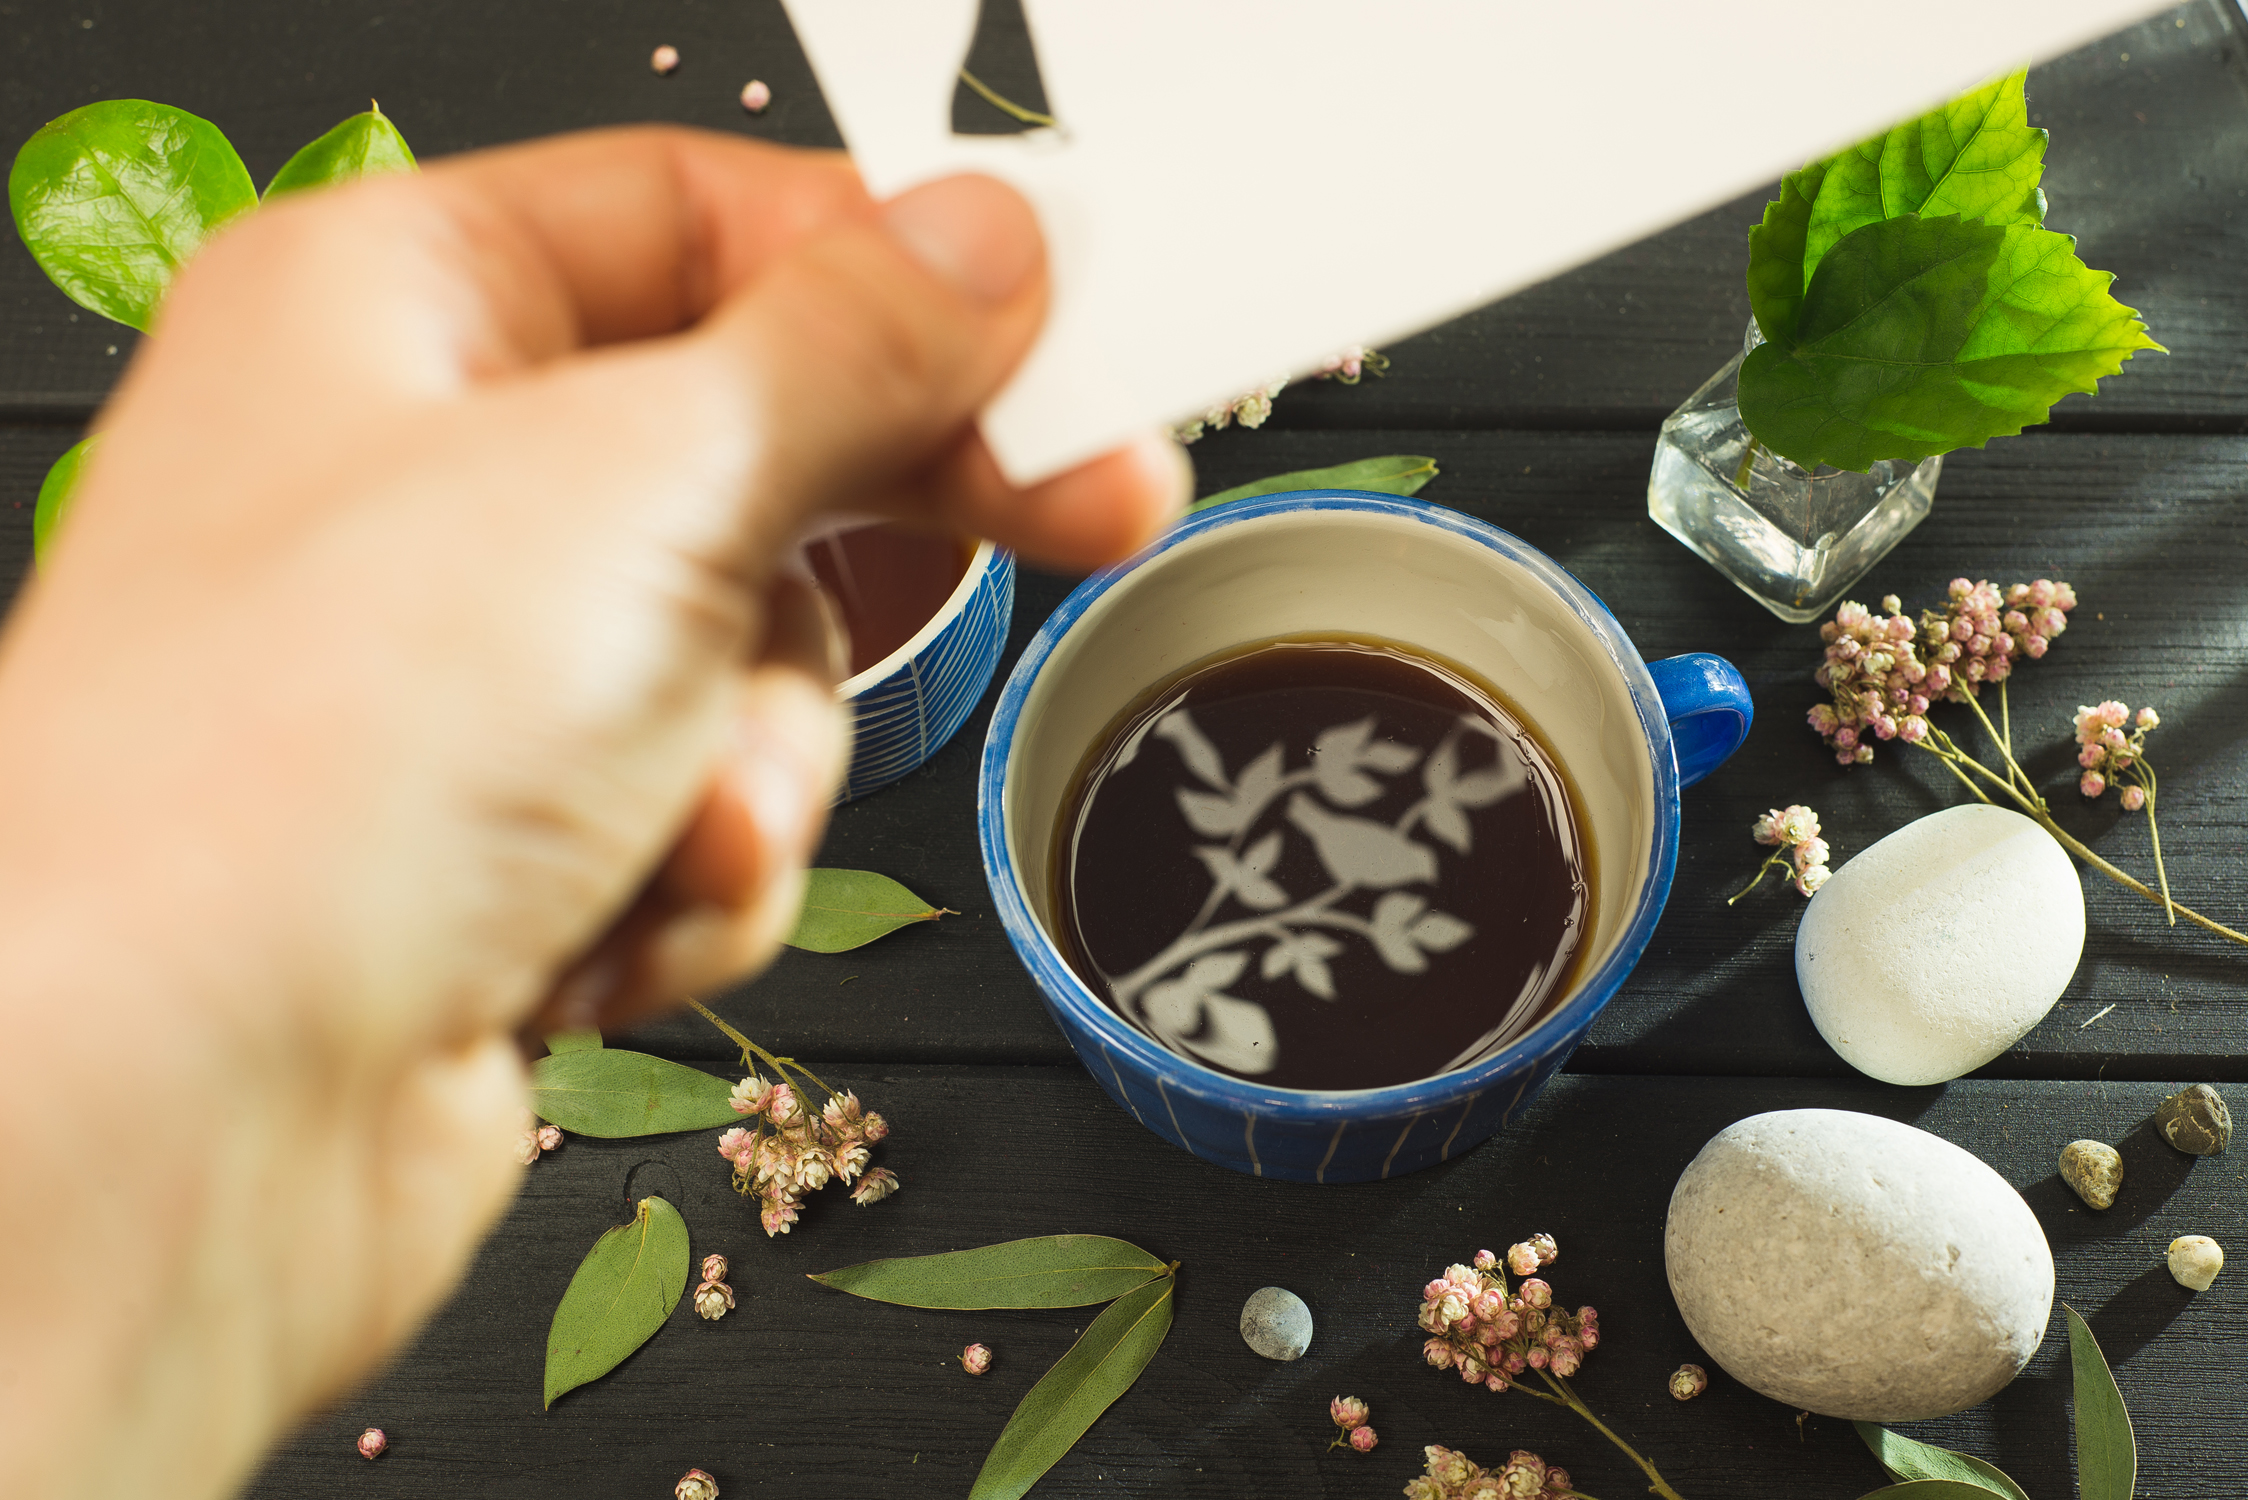
Put the sheet of paper with the cutout figure between the fill light and the cup so you can clearly see a fancy reflection. Sometimes, the right size of reflection comes with your hand in the frame, but you can always capture two shoots and combine them later, so don’t worry about that.
I’m not very good at photo manipulation, but using a tripod makes it a very simple even for me.


5. Processing
After combining the pairs of photos into a final, shot all that remains is to slightly adjust the tones and enjoy the finished picture! Here are the three I created:


Stay inspired and good luck!


Leave a reply