
According to a survey carried out last year by the American Institute of Architects, the pandemic year led to multiple home design trends, from the rise in sunrooms to the demand for three-season porches. 68% of the architects and firms who participated said they’ve fielded increased requests for home offices, and 28% saw a boost in demand for exercise spaces. Meanwhile, as people have looked to jazz up their homes, interior designers have forecasted the emergence of trends as far-reaching as bolder colors and nostalgic antiques for 2021.
Interior photographers have long inspired and encouraged us to introduce beautiful details into our own homes, from macrame wall hangings to ceramic tiles to reclaimed wood. But the last year and a half has shaken up the industry and created unexpected opportunities for creative, out-of-the-box shoots. Whether your area of expertise is real estate, architecture, or lifestyle, shooting interiors is an important skill in any photographer’s toolkit in 2021. Here are our top seven tips for getting started.
Ask questions
Interiors tell stories, so do some research before your shoot to learn more about the space. Homeowners, architecture firms, interior designs, realtors, etc., will prove to be some of your best resources, as they know about the history of the interior and its unique selling points. Meet with them to discuss your plans, and keep the lines of communication open.
Work with your client(s) to build a detailed shot list that covers everything, from the classic wide-angle shots to tighter shots of specific elements that make the space special. This is a collaboration, after all. The more you know about the designer or architect’s vision, the better equipped you’ll be to translate it into images.
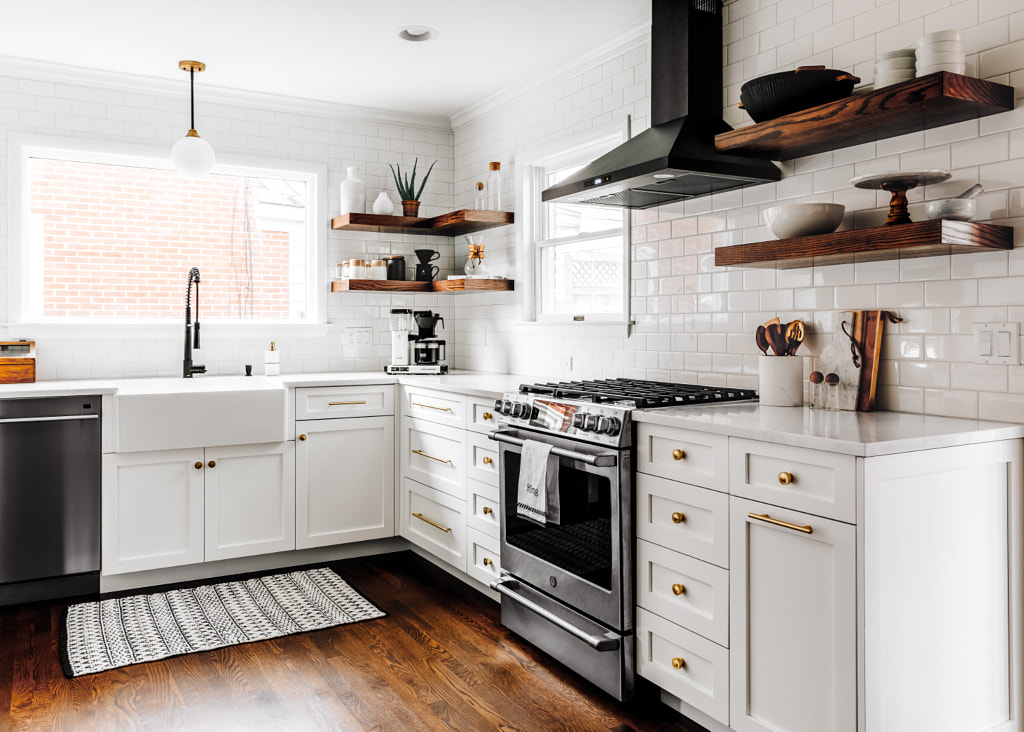
Switch off the lights
There are no strict “rules” in photography, but this tip comes close. Overhead lights can easily mess up your white balance with unwanted yellows and create unsightly shadows, so turn them off and do a walkthrough to study how natural light falls across the space. If you have control over the timing of the shoot, schedule it for an overcast day or during the golden hours, and open up the windows in the space for soft lighting.
When working with natural light, sheer curtains can act as a nice diffuser. You’ll also need a tripod for longer shutter speeds, and it’ll also help keep those lines straight and level. Of course, you can always use a reflector to fill in areas of shadow.
While some interior photographers swear by natural light alone, that’s not always realistic. If natural light won’t cut it, feel free to bring your flash units and diffusers to mimic that “magic hour” aesthetic. Bouncing and diffusing light will create a more natural look. Whenever possible, scout the space before your shoot and take some test shots to assess your lighting needs.
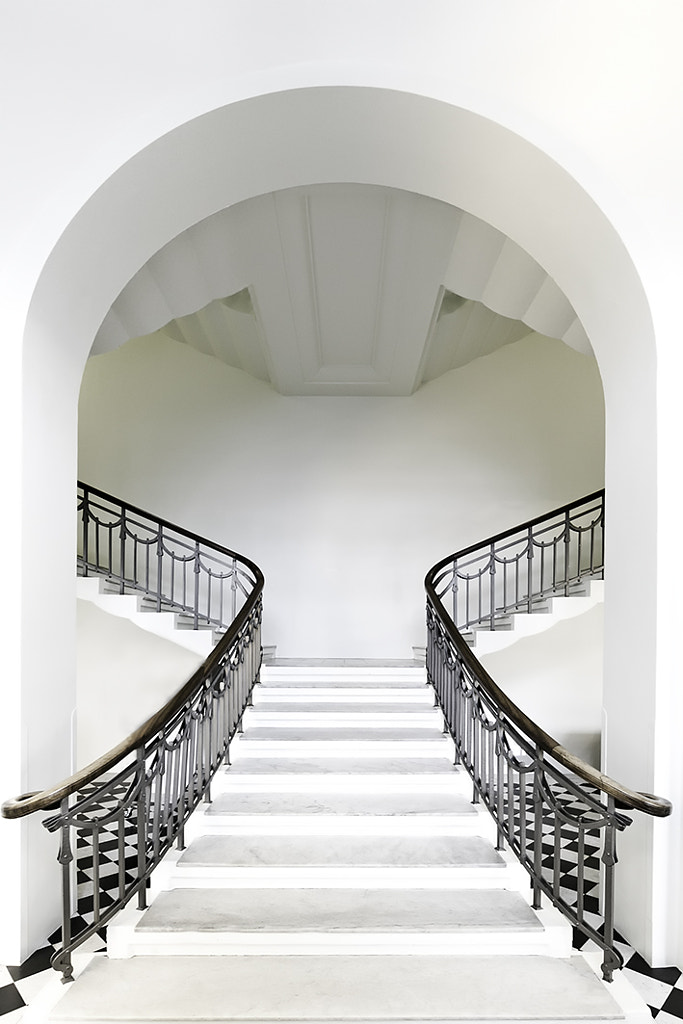
Get your lines straight
Using a tripod is the first step towards getting those perfect horizontal and vertical lines; if possible, select a geared head over a ball head for more control over the fine details. You can also enable gridlines on your camera for extra help in composing your shot and lining everything up. Finally, you can finesse your lines in post-production; this step is especially important when using a wide-angle lens, as they can result in unwanted distortion.
Interior photographers often prefer to shoot straight-on and from waist level or “doorknob height” for an appealingly neutral view of the space. Go too high, and you risk wonky lines. Go too low, however, and you’ll get the underside of tables and furniture—something you generally want to avoid.
Note: Straight vertical and horizontal lines are especially important when you’re using a one-point perspective, so that the camera is parallel to the wall. Get those angles off just a little bit, and it’ll be immediately noticeable.
Experiment with focal length
In interior photography, the default lens tends to be a wide-angle, but that’s not to say that wider is always better. When shooting for real estate, of course, those wide shots are essential for capturing the entire space, but there are some cases where you might want to go tighter to highlight the details or accents. If the edges of your frame are looking distorted and introducing more clutter and distractions than you hoped, feel free to ditch the wide-angle and try something longer.
Note: Speaking of lenses, be mindful of your aperture. When shooting all the details of the room, from front to back, a smaller aperture (larger f-number) will be key for ensuring everything remains in focus. To compensate, you might need to use a slower shutter speed (all the more reason to bring a tripod!). For close-ups of specific objects or decorations, you might open your aperture back up to create an intentionally blurred background.
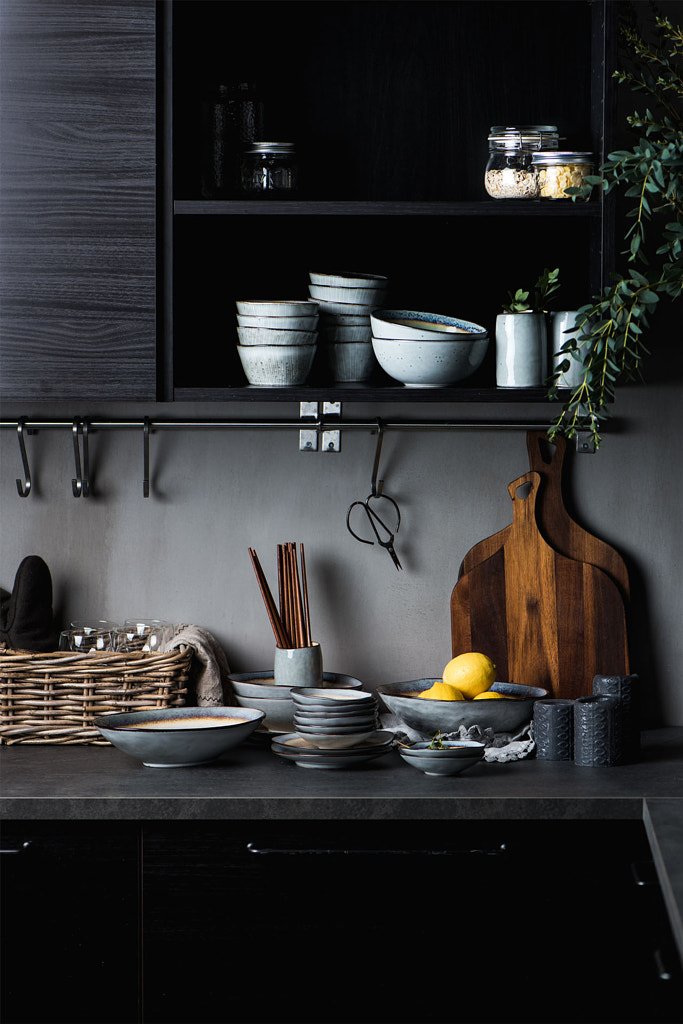
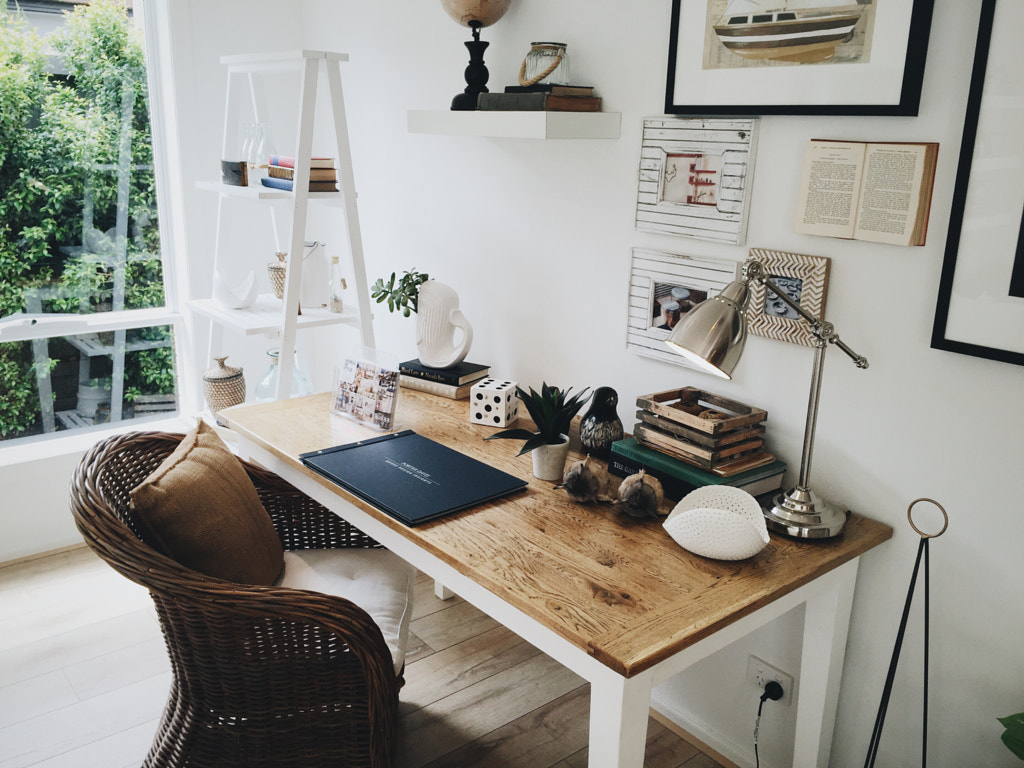
Go minimal
As an interior photographer, your job is to show off the essence of the space, without distractions. The brief will vary based on the client, architect, or designer, and some elements and pieces will be important to include. Still, a little decluttering is almost always a good idea. Wipe down those surfaces, and fluff those pillows.
If you can move things around, do it. No one wants unattractive cords or appliances sneaking into the frame, and it’s much easier (and faster) to remove these things on location rather than in post production. Once the space is clean, you’ll have more room to work and manipulate the light as you see fit, whether it’s natural or artificial. Make sure to include plenty of negative space for that airy aesthetic.

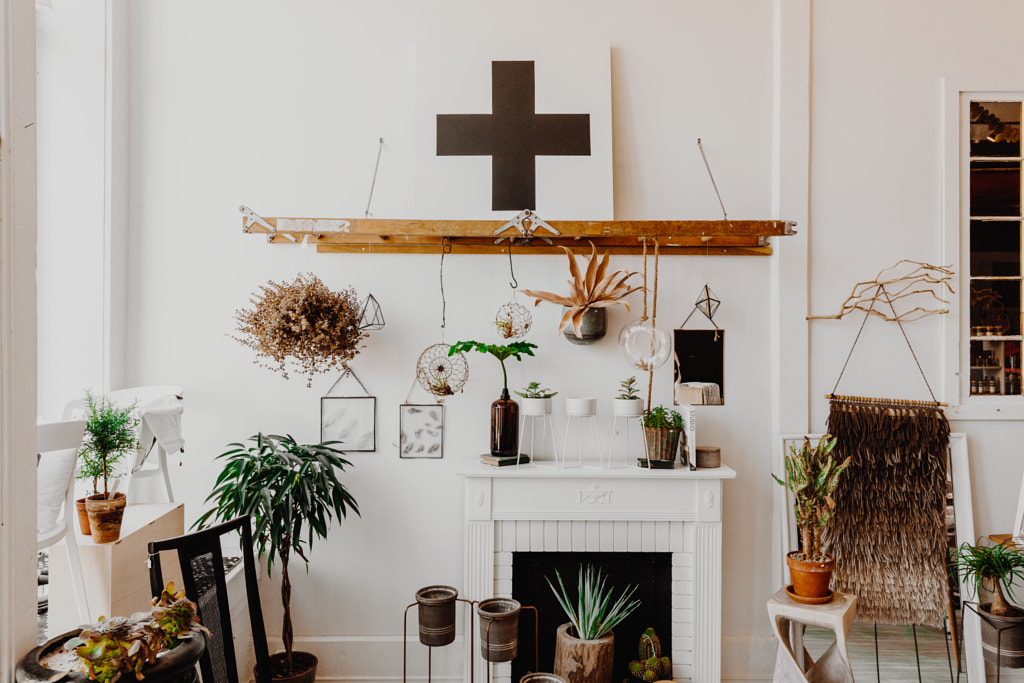
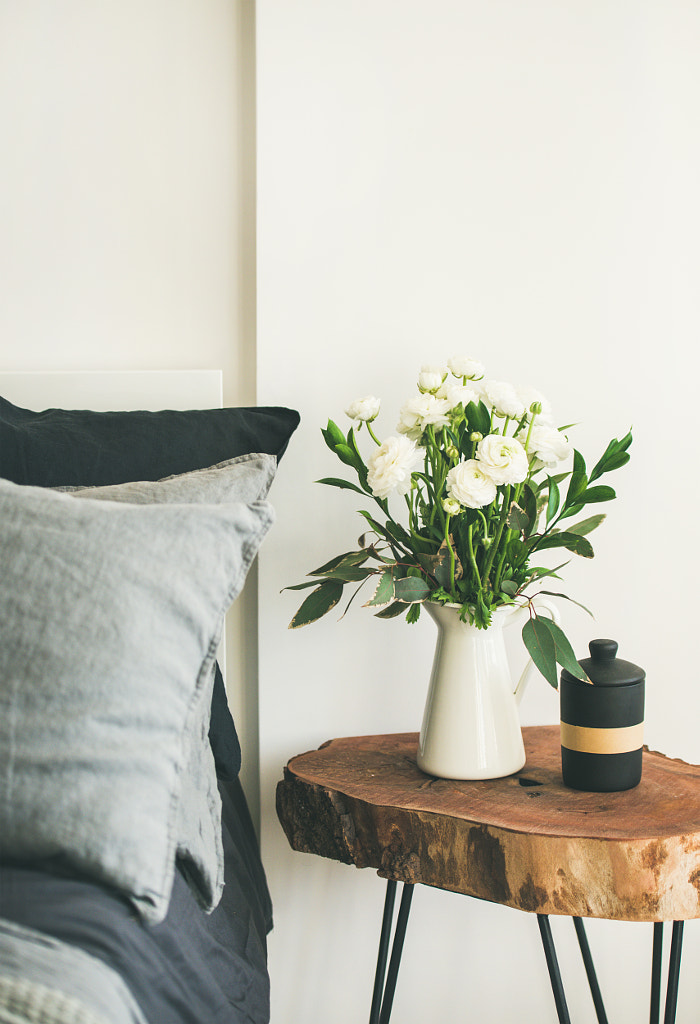
Add a touch of authenticity
Decluttering doesn’t mean stripping the space of its personality. While real estate and architecture films generally prefer their spaces to look totally immaculate for that “blank slate” vibe, you might have more leeway when styling or propping for lifestyle shoots. In those cases, consider including personal touches, such as houseplants, artwork, or handmade ceramics. That authentic, “lived-in” feeling is trendy right now, and it can help imbue otherwise ordinary spaces with character and style.
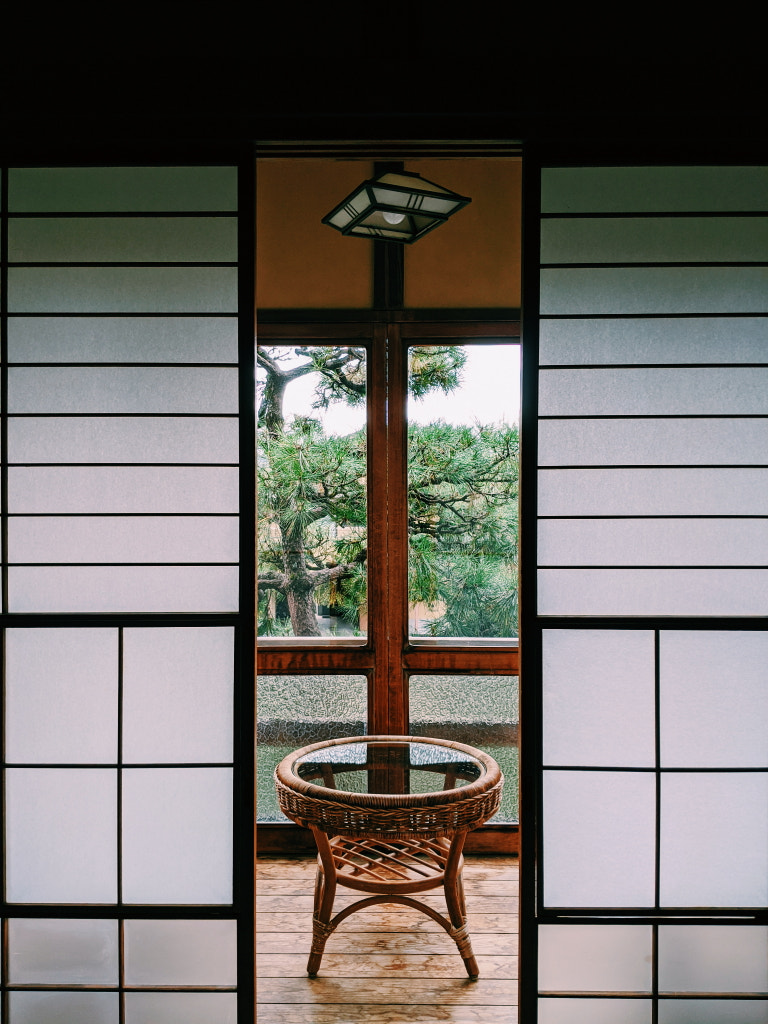
Bracket your exposures
Depending on the interior, it might be difficult to get details in the shadows as well as the highlights; this issue frequently presents itself when you’re trying to shoot an indoor space as well as the outdoor view from a window. In that case, you can take three different exposures and merge them in post for a better dynamic range. Another option would be to leave those windows overexposed; this approach can work if the view of the outside isn’t particularly appealing.
Not on 500px yet? Sign up here to explore more impactful photography.


Leave a reply