Ignacio Palacios is best known internationally for his travel and landscape work. He has been continuously traveling around the world since 1998 but since he came to Australia in 2008, he has focused on photographing landscapes and using digital imaging techniques to produce more creative and fine art work.
His images have been published in international photographic magazines and books all over the world including National Geographic, Australian Geographic and Lonely Planet Guides.
To see more of his work, follow him on 500px, visit his website, or check him out on Facebook.
[twentytwenty]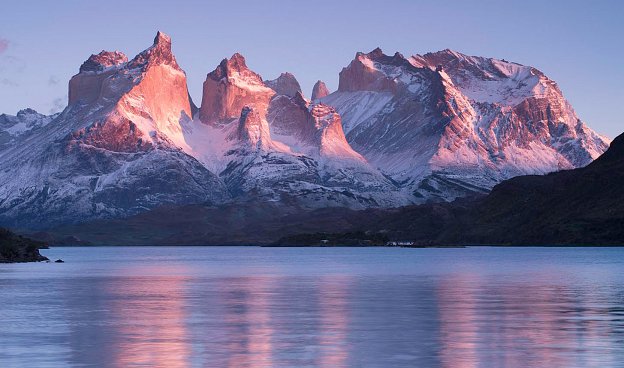
 [/twentytwenty]
Step 1 – The Capture
For me photography is a two-step process: the capture, and the post-processing. Both are very important and I love both.
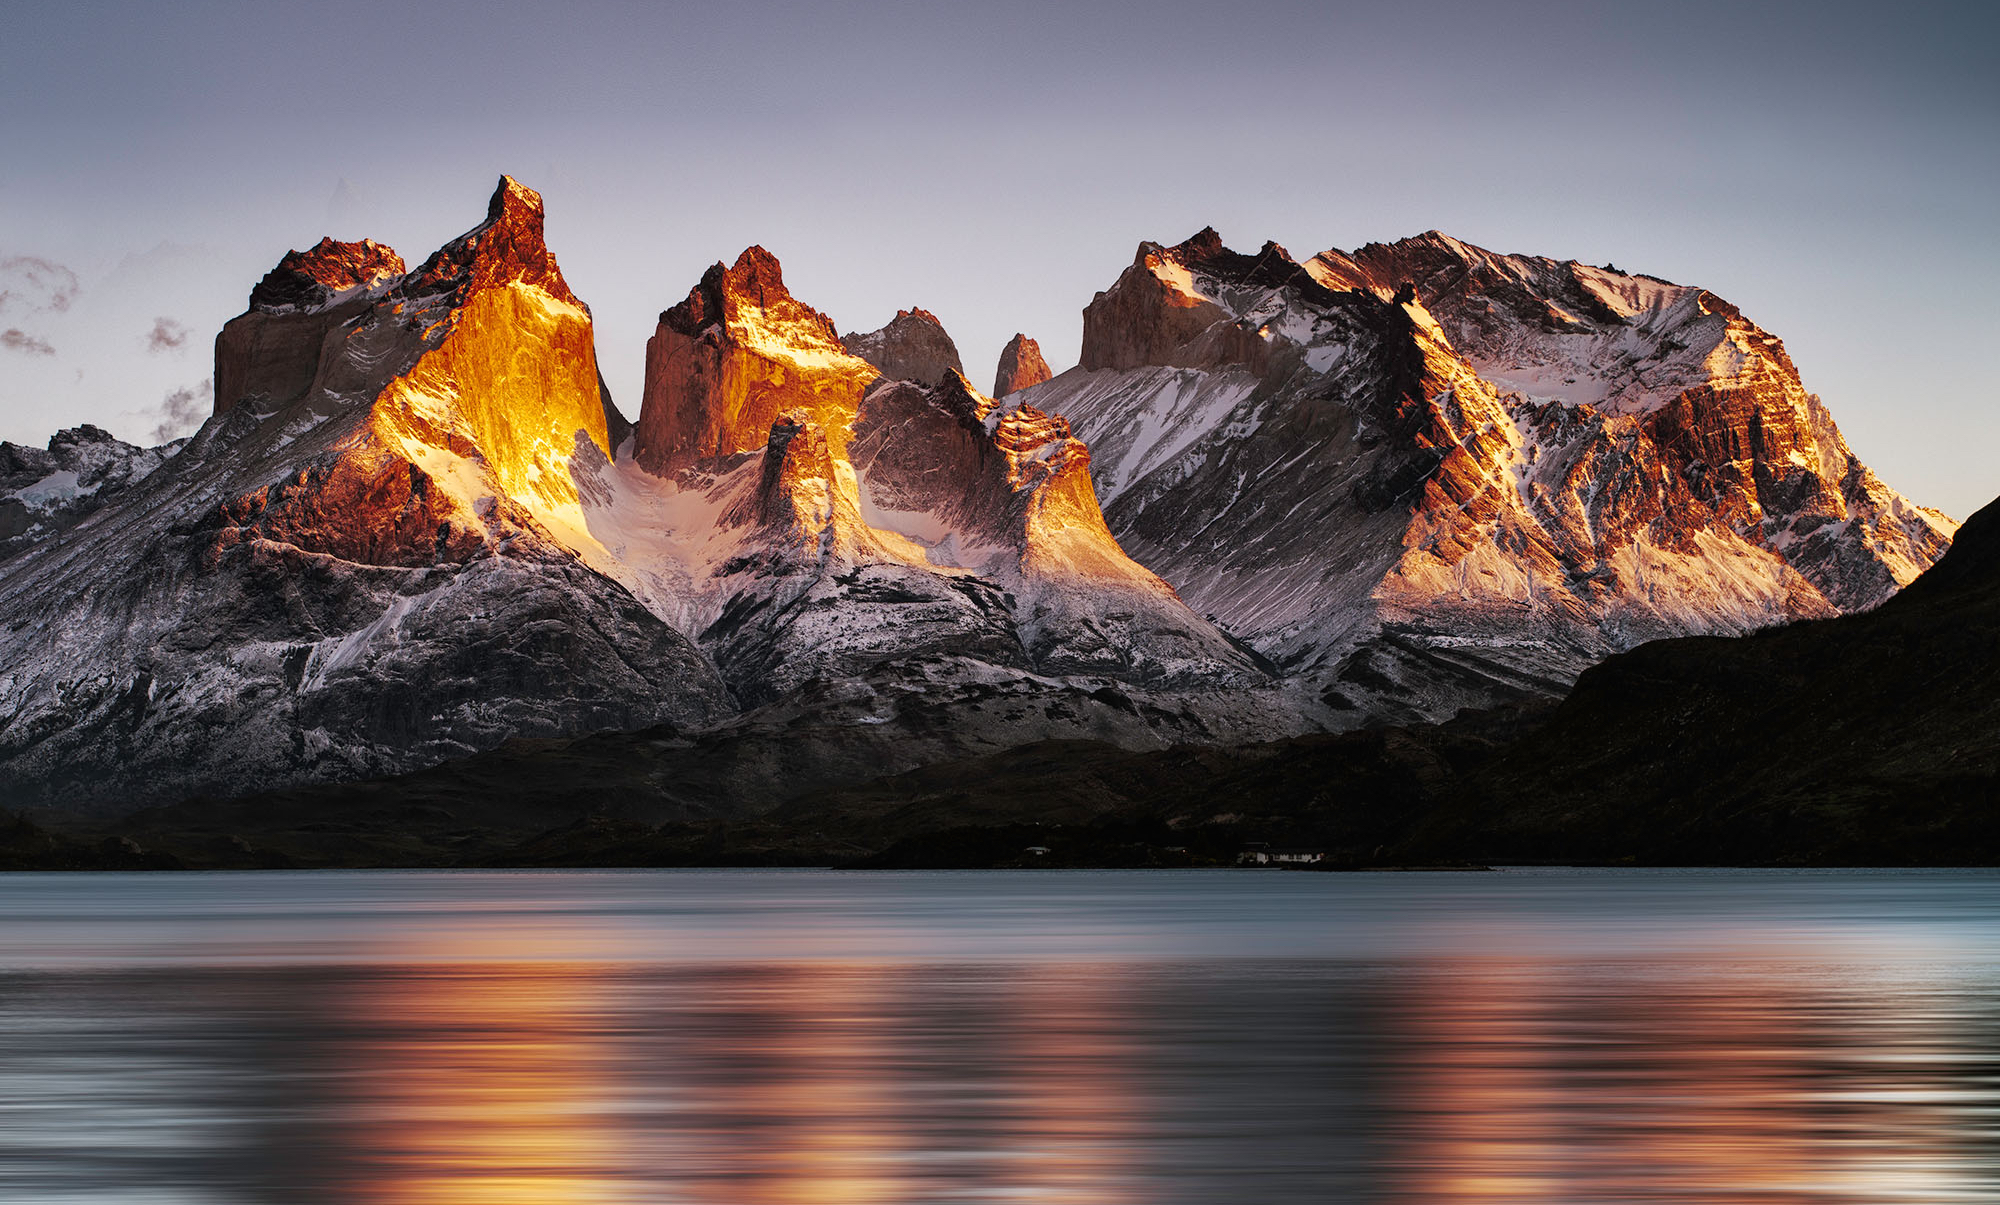
This photograph was taken in Torres del Paine National Park at sunrise (5:30 AM). The weather over there can be tricky and we hadn’t seen the mountains at sunrise for a couple of days, so we were a bit frustrated. When we woke up that morning and saw the famous horns, it was magical. We were camping right on the lake so it took me a minute to jump from my sleeping bag and set up the gear.
The landscape of the park is dominated by the Paine massif, which is an eastern spur of the Andes located on the east side of the Grey Glacier, rising dramatically above the Patagonian steppe. Small valleys separate the spectacular granite spires and mountains of the massif. The park has been elected as the 5th most beautiful place in the world by National Geographic so my friend Pep and I could not just leave the park without taking a proper photograph…
This first photograph is the original capture with my Pentax 645D, a medium format camera with a 40 megapixel sensor that I have been using for the last two years together with my Nikon SLR. The image was taken with the standard smc PENTAX-D FA645 55mm F2.8. This is the equivalent to 43mm on a full-frame SLR.
In landscape photography, the choice of the lens will create completely different photographs. Wide angle lenses are very popular in landscape photography and will get you the big scene, but sometimes, to isolate the point of interest and create images that reveal more details than can be seen with the naked eye, you will need a telephoto lens. This will also flatten the perspective, making the foreground and the background appear closer to each other. Normal lenses like the one I used will create balanced images that will feel more natural because their field of view is similar to that of the human eye.
I took a few other shots that morning with the wide angle 25mm, the 120mm, and the 300mm F4 lenses. So yes, my bag was pretty heavy and my knees reminded me of the fact a few times, but it was well worth it!
The settings I used were: 0.8 sec, f/11 and ISO100. Of course, this was captured using a tripod and the resulting RAW file was then processed in Camera RAW, Photoshop, and Nik Software. A good tripod is mandatory in landscape photography, and an excellent tripod is mandatory if you shoot medium format and/or want to do long exposures. Patagonia is one of the windiest regions in the world and I felt that not even the best tripod in the world would keep my camera still… But that morning was calm…
Step 2 – Processing the RAW File
The second image is the result of the post-processing done with Camera Raw. When I shoot landscapes, I normally shoot aperture priory mode and I never go above f11 or f13. Each lens has a sweet spot and you should not push the aperture to f22 as this will create an optical issue called diffraction, which will actually make the photograph softer (the light blends around objects and can start to have an effect at apertures smaller than f11/f13 – depending on the quality of the lens – giving a blur of detail).
Therefore, although f22 will get you the maximum depth of field, using a range from f8 to f11 will actually create a sharper photograph. In this particular photograph I didn’t need maximum depth of field anyway, as I planned to blur the water later on, so I used f11 which I knew would give me the sharpest photograph.
You want to capture as much data as possible, and with digital cameras the way to do this is to overexpose slightly. This means to move the histogram to the right. This is because digital capture records information on a 0 to 256 scale (zero=black and 256=white) but the higher the number of the level the more data is being captured. However, be careful you don’t clip the whites, just overexpose the photograph until the data nearly touches the right side of the histogram and then drop it back with Camera Raw, Lightroom, or Capture One.
The other reason to overexpose is because underexposed images are far more prone to sensor noise, and if you lighten an underexposed image, the noise hidden in the shadows can become very obvious. With the newest SLRs noise is not such an issue, but just bear in mind that underexposure is more problematic than overexposure in general.
In Camera RAW, the main thing I did was to correct the white balance. The Pentax 645D is a great camera but this is its only weak point. Luckily, if we shoot RAW, we can correct the white balance very easily in Camera RAW or Lightroom. I have also tweaked the contrast and levels, as well as increased the vibrance and clarity slightly.
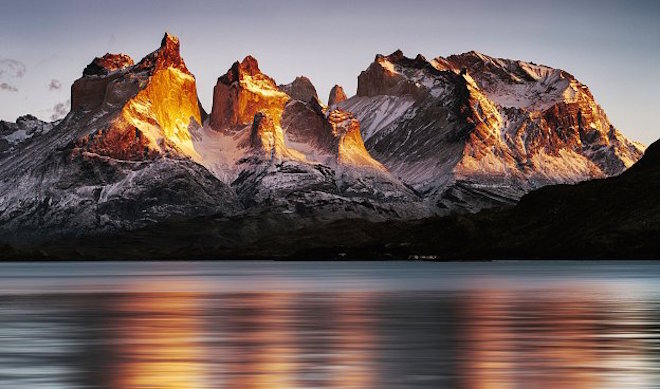
Step 3 – Photoshop and Nik Software
This image has 10 layers in Photoshop, which is actually not very many for me. My mate Pep Roig is a very traditional photographer and likes the photographs as straight as possible from the camera, so he would disagree with a few of the steps I am taking here, but I think he is just jealous that he could not take the reflections on the water (he was shooting from a different point) 😉
I have used Color Efex Pro (Nik Software) to extract a bit of detail, but you have to be careful when using this filter because it creates quite a bit of noise. Other adjustment layers I have used are curves, color balance, and saturation. The main thing I did in Photoshop was probably creating the effect on the water with a motion blur filter and a bit of vignetting around the Photograph. Sharpening was done both in Camera RAW and Photoshop using the smart sharpening tools.
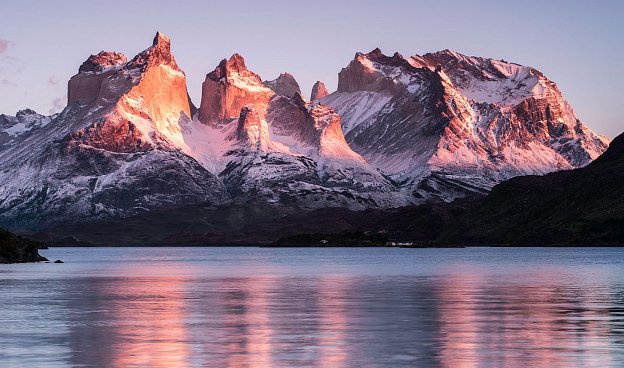
I actually did a squared version of this image which is the final image that I posted in 500px and became quite popular. Here it is:


Leave a reply