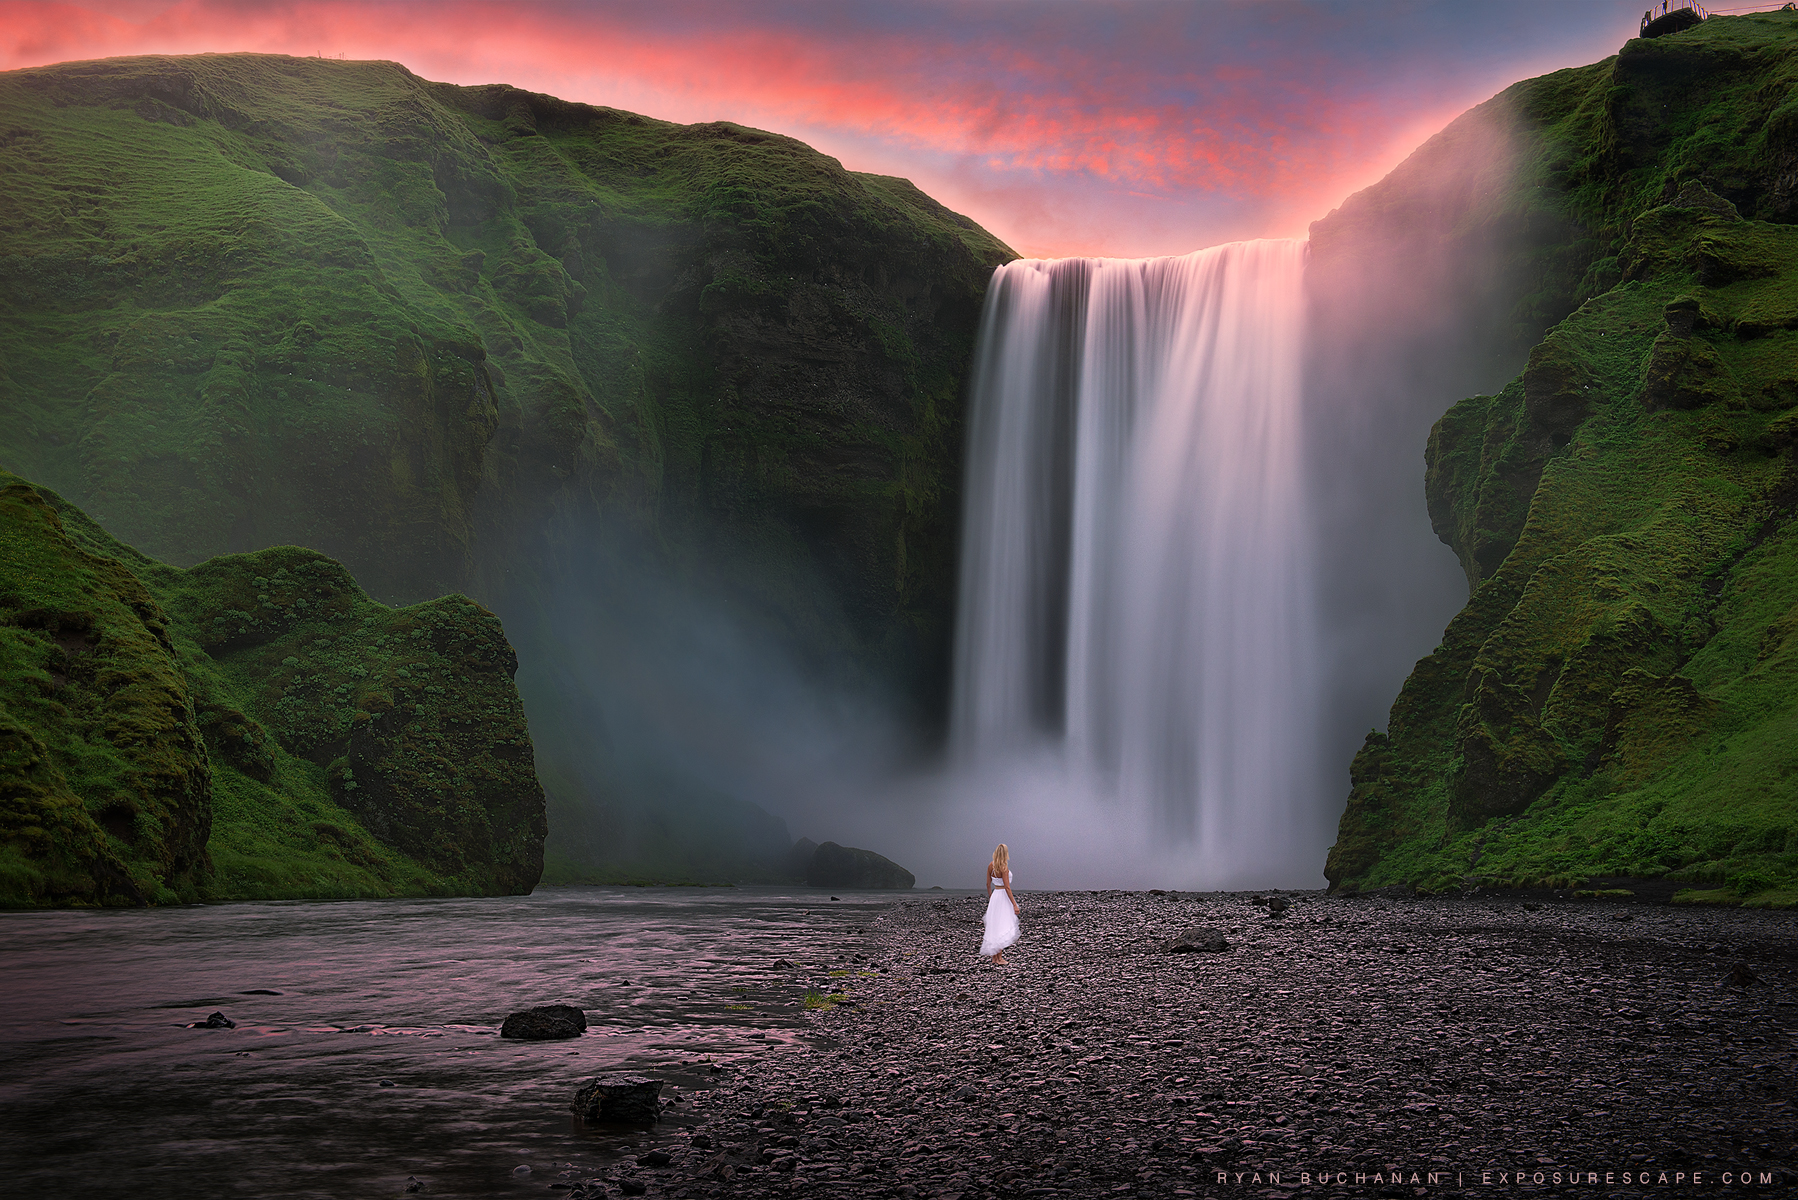
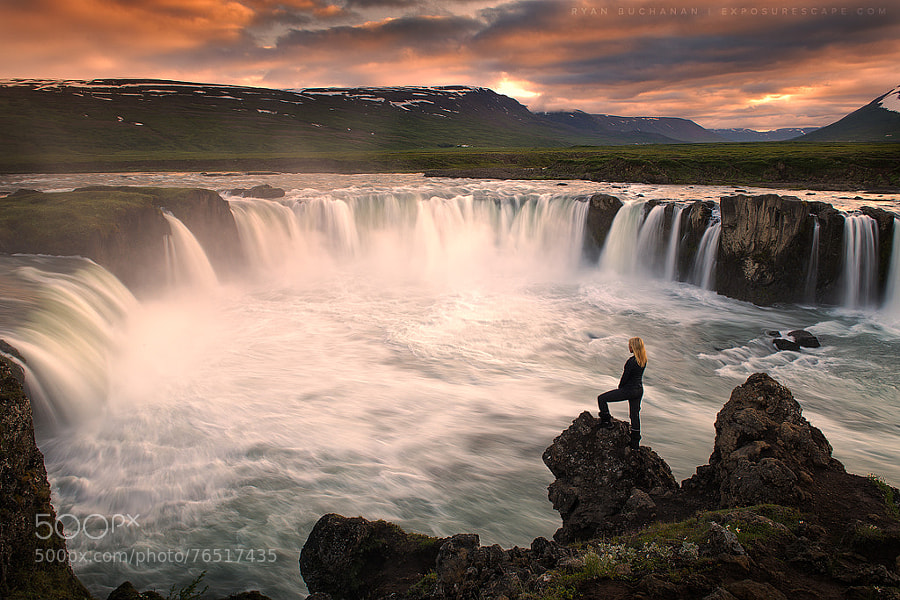
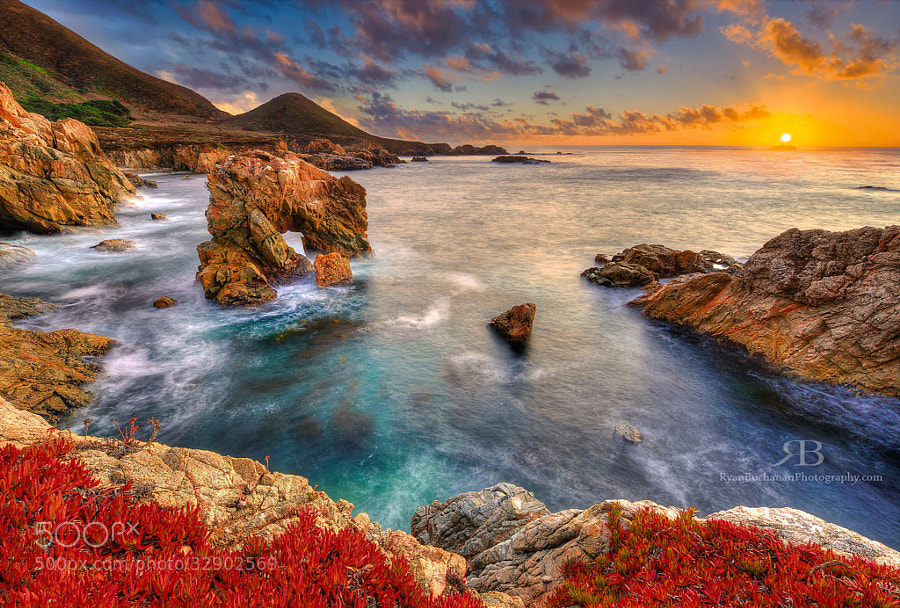
With deft skill plus a bit of luck, great photographers are able to capture perfectly-timed moments on camera, resulting in the most dramatic and moving images. In Texas-based photographer Ryan Buchanan‘s case, the timing couldn’t have been any more perfect during a visit to Iceland with his girlfriend. Right after shooting a portrait of her against the iconic Skógafoss falls, the sky, light, and strong emotions all came together as he proposed to her. Leave it to a landscape photographer to think of the most breathtaking spot to propose—and snag an unforgettable photo op while at it!
When we stumbled upon this dreamy picture making its rounds on 500px’s Popular page, we just had to ask the photographer all about it. Below, Ryan shares the exciting (and very sweet) proposal story behind this shot—with details on setup, gear, and post-processing. Read on, and get inspired!
“June 15th in South Iceland. I had to convince my girlfriend of over a year and a half, Natalie, to drive from the warm comforts of our guest house in the small village of Vik to the mighty Skógafoss. It was a tough sell on a cloudy and rainy evening at 11:00 p.m. but I explained that we needed to take a chance on catching the elusive Icelandic midnight sun, plus get some “alone time” at the romantic falls. With a bottle of wine in my hand, I sealed the deal, but I knew that having these stars align was a long shot. In any case, I had bigger motives, and I needed to catch a break. Thirty minutes later, we pulled up to the revered, mystifying waterfall, and the rain ceased. The entire area was uninhabited and serene—just Natalie, me, and Skógafoss. Destiny was calling, and I was nervous as hell.
If I was going to ask this woman to marry me, this was the place to do it.
As on many of our “photography vacations,” I had asked Natalie to bring her flowing, white dress, promising her that I would find a creative way to weave her into a grand photographic opportunity someday. And tonight, I was going to deliver. Even though she was freezing cold, she made the quick change in the car and ran out barefooted, laughing into the cold skóga-spray. I setup my Nikon D800E on my Manfrotto tripod, quickly composed a few shots, and then fired away. But I was really not focusing on the shots or planning on getting anything good—I was just mentally preparing for a life-changing event.
And then I got my signal from above. At around midnight, the skies began to miraculously part. At the sight of this perfect, unexpected light, I snapped into hyper-focused photographer mode.
HOW I GOT THE SHOT
I moved my setup and composed one last shot at 44mm at f/16 with a 3 second exposure and an ISO of 100. I signaled her into position, wiped down my lens from the spray, and fired off a couple more with the surreal midnight sun glow raging above us.
 THE PROPOSAL
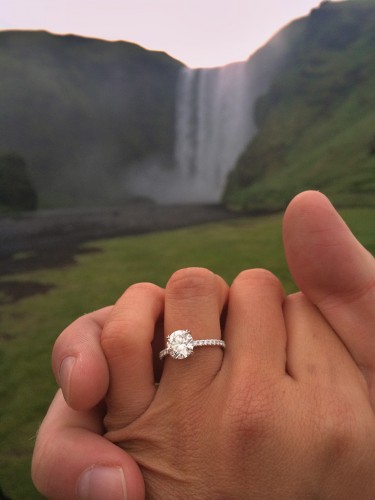
I came to believe my efforts were blessed. I was ready as I was ever was gonna be. I took a deep breath, waved her back towards me, and met her halfway to place a blanket around her. With Skógafoss roaring and my heart pounding through my chest, I pulled out the ring that had been burning a hole in my pocket all the way from Texas. Then, I dropped to one knee, and proposed.
It was a powerful moment we will never forget. I couldn’t have imagined it to be any more perfect—a magical location for just the two of us. And in typical Icelandic fashion, 15 minutes later, the skies closed back up. I was given my window of opportunity and I took it—a photo and a fiancée!
There was some difficulty taking this shot mostly due to my nerves and shaking hands, but also because of the spray and the longer exposure I wanted. I had my full-size microfiber towel—a must for any Iceland trip—draped over the camera at all times. I adjusted my camera settings and when ready, I would pull back the towel and quickly wipe the lens down with Kimtech Science KimWipes (which take the spray right off without streaking), then fire. Before Natalie ran out in front of the falls, I instructed her to strike a few poses, and hold completely still for 10 seconds each. She did a great job on this one. The longer shutter captured nice movement in the water and made her dress wave in the wind which turned out to be a nice effect as well.
POST-PROCESSING
As far as post-processing, I used my ever-progressing method along with some newer techniques for me involving luminosity masks. I started with some basic color adjustments for the greens and lens profile correcting in Lightroom 5. Then, in Photoshop CC, I spent a few hours playing with luminosity masks and applying numerous adjustment layers in order to get my preferred balance of tones, contrast and color throughout. Luminosity masks make a big huge difference, but they do take a lot of practice and dedication to use them to their full potential—I am still learning new things with every image I process. As a final step, I selectively sharpened the image.”
Now let’s meet the photographer behind the lens. In this exclusive interview, Ryan Buchanan shares his tips, gear recommendations (including a drone!), and more insights into his landscape work and process. Scroll down!
Hi Ryan! Congrats on your engagement! So, when’s the big day?
RYAN BUCHANAN: Thank you very much! The big day is April 18th, 2015. And apparently, I’m already behind on my guest list, save-the-date cards, and engagement photos, but I’m working on it.
Can you tell us a bit more about yourself?
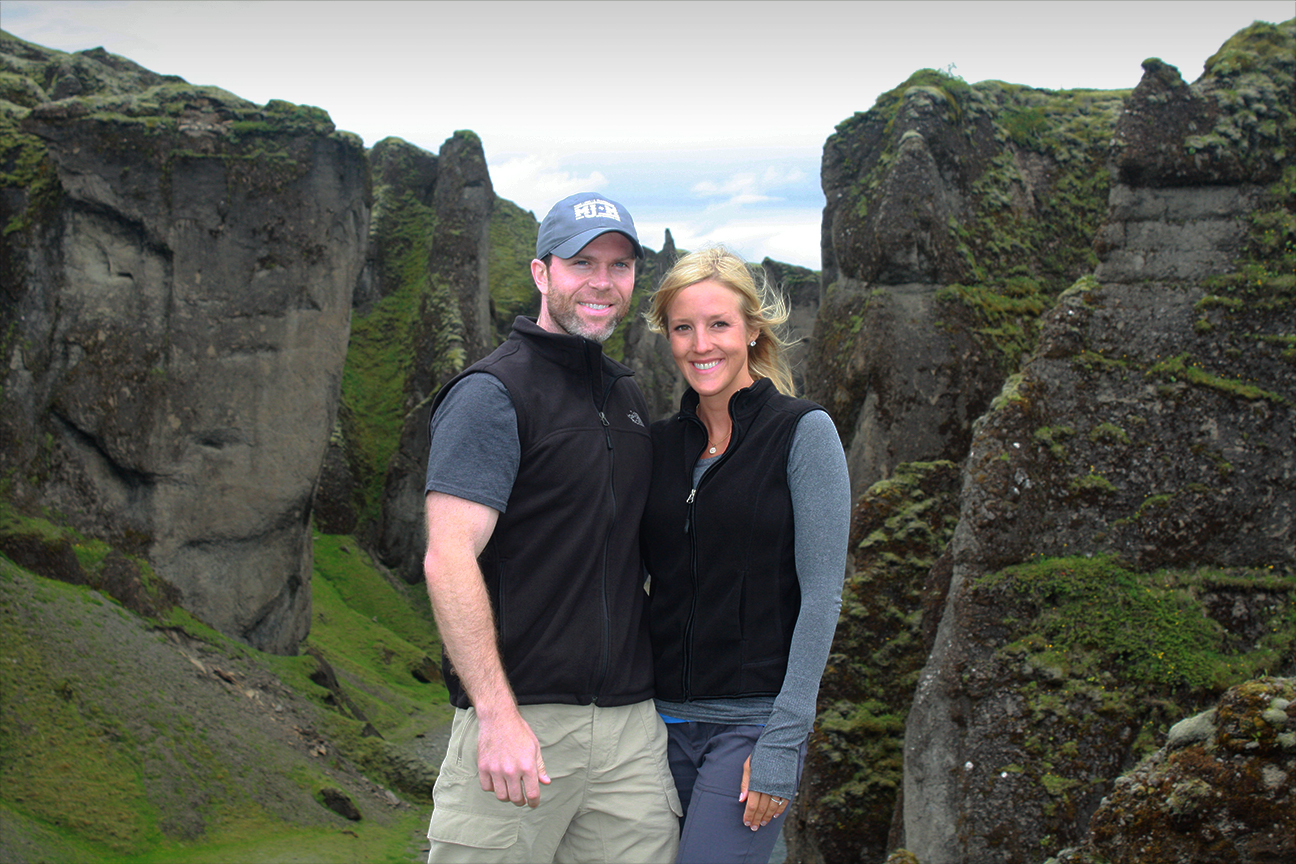
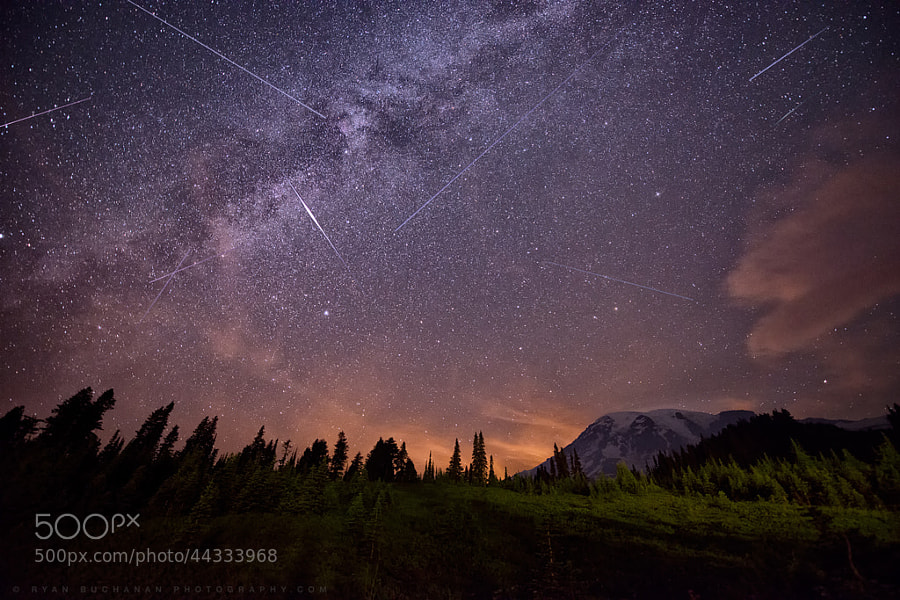
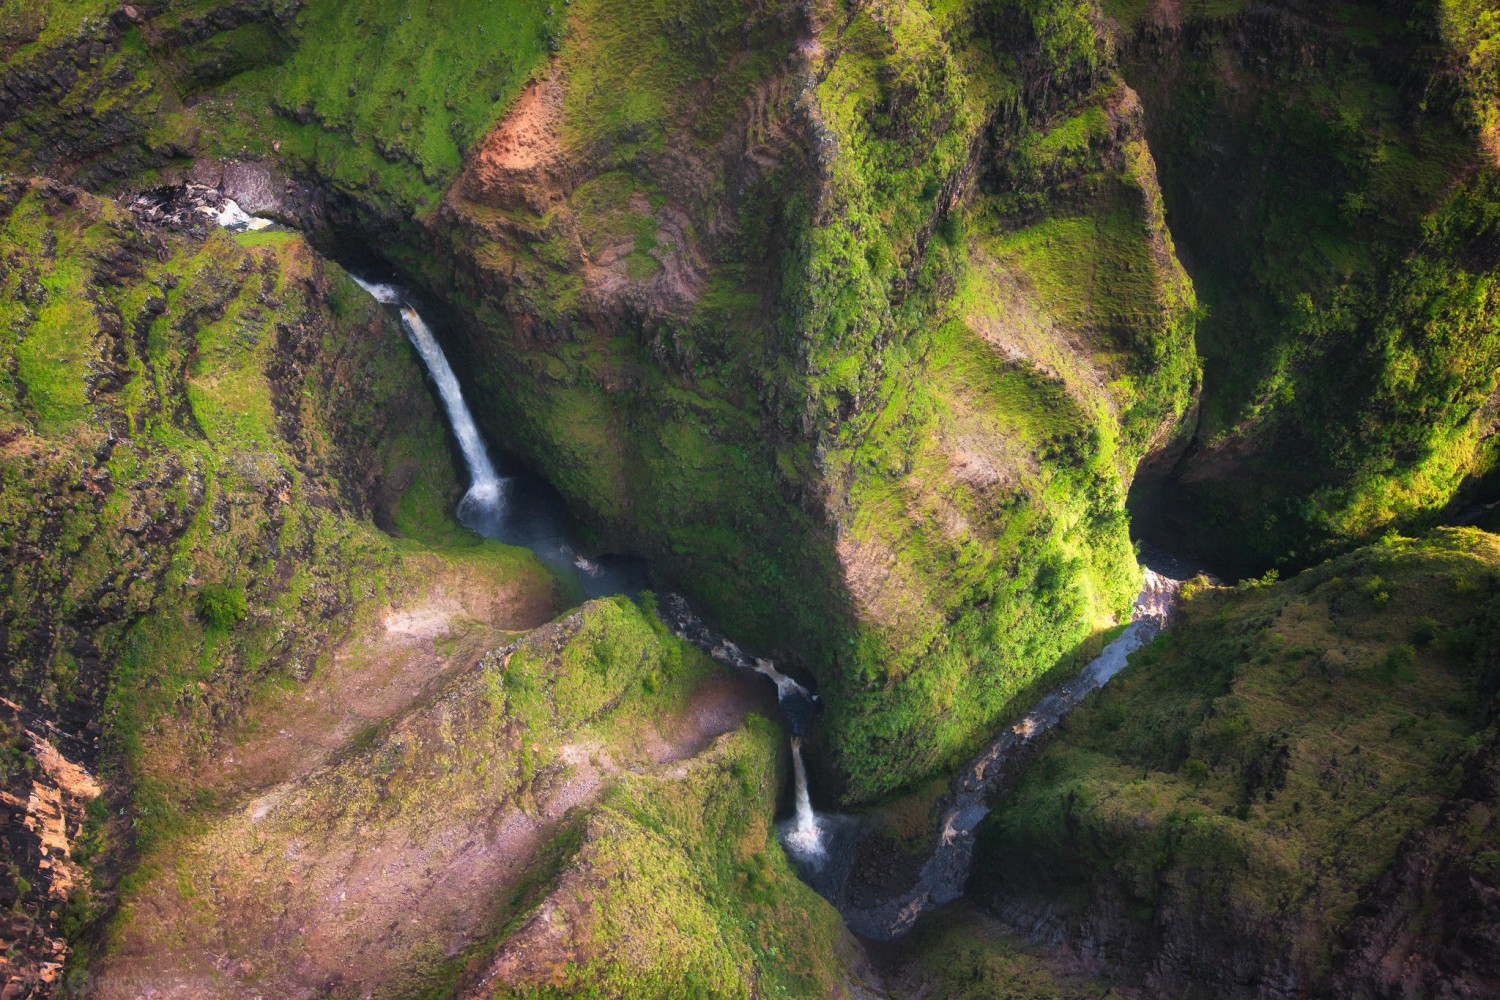
RYAN: I currently live in Austin, Texas. I’m VP of marketing for an in-house advertising agency that specializes in direct response marketing across all types of media. I started my career as a graphic designer and illustrator, and I’ve always had the drive to incorporate my creative side into my work life. I’m a big traveler, nature and science lover, and avid golfer. I’ve recently found a new addictive hobby: shooting aerial videos and photos using my new favorite piece of equipment—the drone.
How did you meet your fiancée?
RYAN: Natalie is a neo-natal intensive care RN and was the primary nurse to a baby born at just 24 weeks. The father of the baby, Brad, and I are good friends—I was in his wedding. Throughout their long, four-and-a-half month stay in the NICU, Natalie became really close with both Brad and his wife. They eventually introduced me to Natalie. We all went on a double date, and the rest is history. Trenton, the baby, will be the ring bearer in our wedding.
How sweet! How did you get started with photography?
RYAN: I’ve always had a love for landscape paintings and photography. As a graphic designer, I would use photography in my daily work. Looking through so many styles of photography helped me learn about lighting, balancing a scene, and what compositions worked. Luckily, I had a Nikon D3X at my disposal because of my job, so I started taking my own photographs for our advertising projects and on my vacations. I was able to learn the camera and how to process my images. My experience with Photoshop helped with that. It was a trip to Argentina in 2011 that made me forever hooked. I bought my own personal, full-sensor camera, a Nikon D800, shortly after in early 2012. And now there’s no turning back.
What are your favorite subjects to shoot?
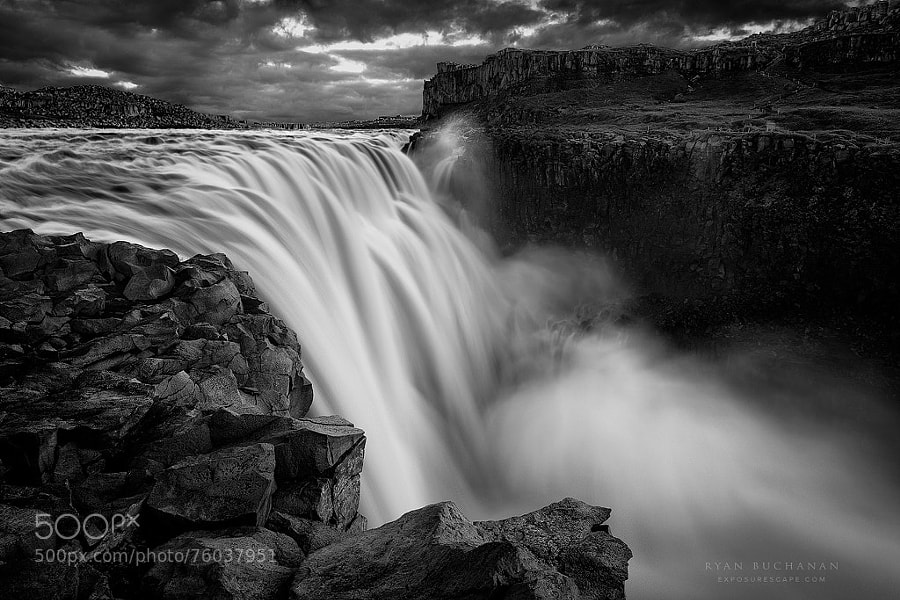
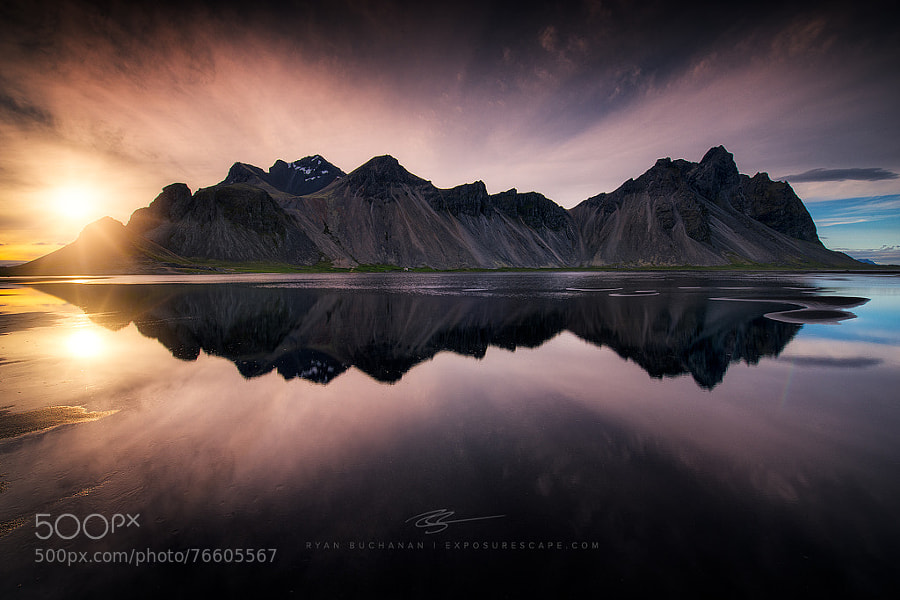
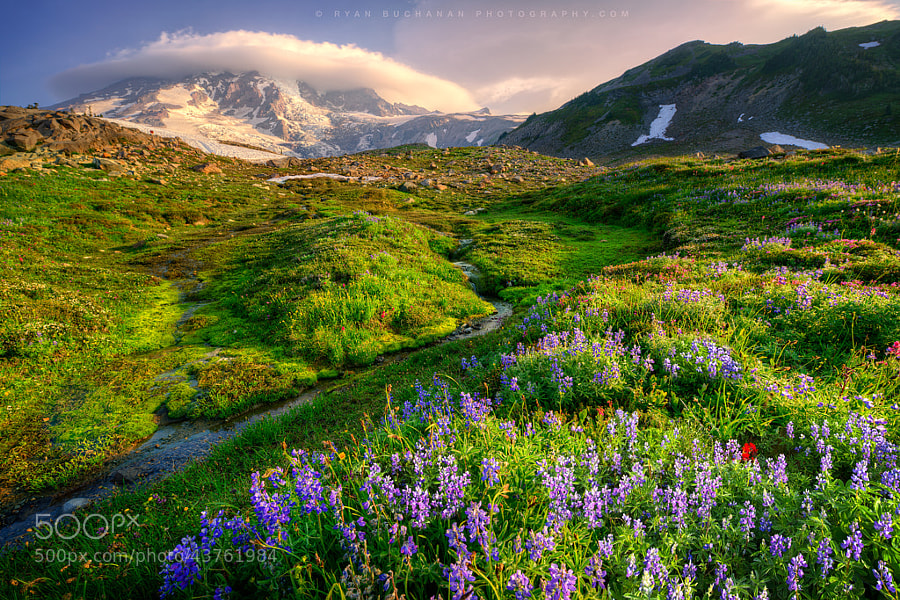
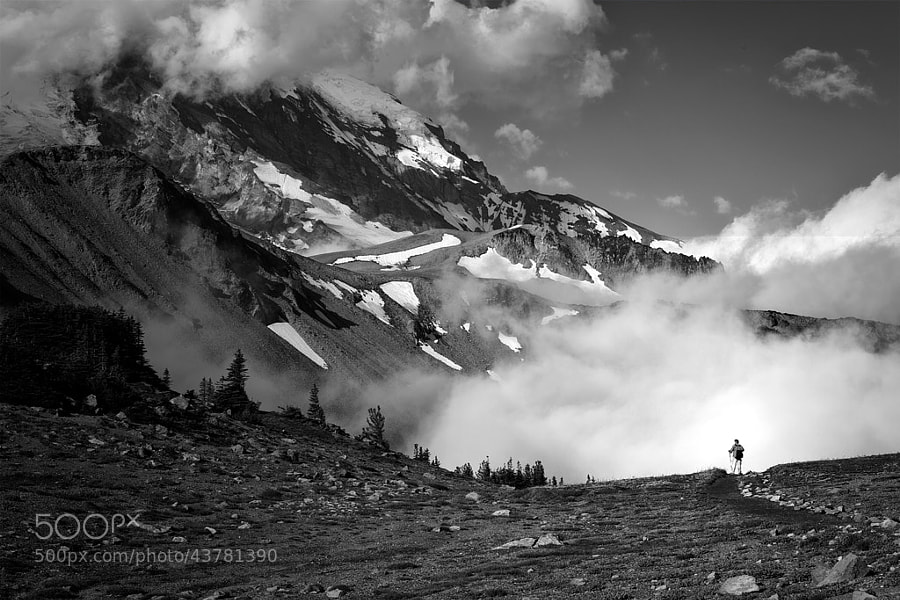
RYAN: There are few words that can convey the feeling of standing alone on a mountaintop, or isolated on some remote beach, waiting for all of the elements to converge with the perfect light. For me, it’s the perfect escape. Shooting landscapes allows me to appreciate the extraordinary beauty around us, and interpret it in my own creative way. A moment in time—just for me—that can never be exactly duplicated. Within the realm of landscape photography, I love to shoot mountain scenes, ocean scenes, and waterfalls, which allow me to use longer exposures, adding energy and an ethereal quality to the image.
As an outdoor photographer, what do qualities do you look for when scouting for locations?
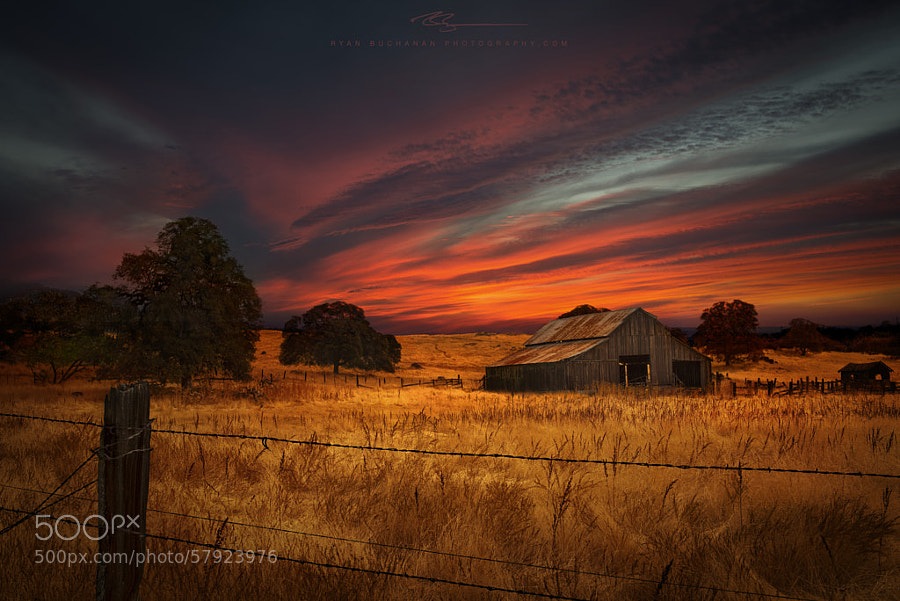
RYAN: When scouting for locations, my first step is usually to search for a main subject or focal point, like a mountain, a waterfall, a barn, or something that catches my eye. I then see what foreground and mid-ground elements I can use to create depth and visual interest in the scene. I look to incorporate lines, patterns, textures and shapes that keep the viewers eye engaged. I am also always aware of where the light will hit the scene, and how it will affect the scene. I am also thinking abstractly, and ask myself: What shapes am I seeing? How can I use this triangle, curve or zigzag? I’m also aware of the visual weight each object carries in a scene: Does this dark shadowed area balance out in the overall scene? Are there any counterpoints I can incorporate? Can I continue a pattern in the sand with the textures of the clouds? How can I blend the elements together to make a more complete image? And so on.

What can we find in your camera bag?
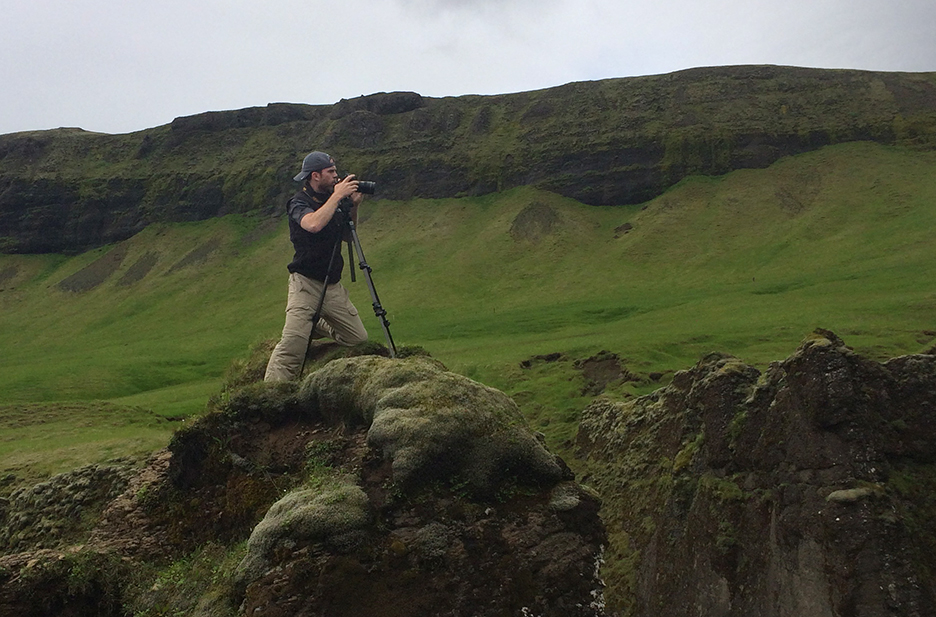
RYAN: You will find a Nikon D800E and a backup D800 just in case. I use my Nikkor 14-24mm and 24-70mm most of the time, but I also have a 70-200mm as well as an 80mm Macro. I love shooting longer exposures. For those shots, I carry a B&W 77mm 3.0 (1000x) neutral density filter, as well as a ProMaster digital HGX variable neutral density filter. I use a Manfrotto 190CXXPROB tripod with a Giottos ball-head. Some essential accessories I always carry with me are a full-size microfiber towel, lens pen, and Kimtech Science KimWipes. For wading in the water, I use knee-high shoe covers by Neos. These days, I carry around the new addition to my photography arsenal: my DJI Phantom Vision 2+ drone—a flying camera that I bring on most of my trips now. You can see how I use it in my video from Iceland here.
Hit play to see Ryan’s video shot with a DJI Phantom Vision 2+ drone:
Where is the best location in the world to take the best landscape photos in your opinion?
RYAN: Tough question. I have been to many places over the last few years, and there are so many more I want to visit. I am most amazed by the variety of jaw-dropping landscapes in Iceland. It’s a place where you can literally stop every 10 miles around the island for incredible, otherworldly photo opportunities—not to mention, the 6 hours of golden light you get during the summer months, as the sun doesn’t set. It’s a photographer’s paradise! Coming in close seconds are the Pacific Northwest, Argentina, and Hawaii.
Do you have any expert tips for photographers who want to improve their landscape shots?
RYAN: Move around. When you arrive at a location, don’t immediately set up and start firing away. Take your camera off of the tripod, and walk around to different positions. Try out different angles and focal lengths—take some hand-held test shots to see how the composition looks on screen. Once I have found a position I want to explore, if needed, I’ll shoot some bracketed shots, so that I can be sure that I have the correct exposure for each area in the frame—such as a bright sky versus a darker foreground.
RYAN (continued): Take your time with post processing. It really is half the battle. I spend anywhere from one to six hours on one shot fine-tuning everything down to the smallest detail. Learn to use luminosity masks. I use the TK luminosity mask actions panel. This really allows you to achieve perfect tonal balance throughout your image by making targeted adjustments on ultra-specific areas. I’ve also found how important correct image sharpening is as a final action. I also find it helpful to complete your first-round of processing, and then not look at your image for at least three days. Come back to it with fresh eyes, note your initial reaction, and then make your final adjustments from there. I usually have a “What was I thinking here?” moment.

To see more of his gorgeous work, follow Ryan Buchanan on 500px, or visit his websites: ExposureScape.com and DroneScape.com.
You can also connect with him on Facebook and Twitter.

Got a question for Ryan about his pictures and process? Interested in learning more about wedding photography? Leave a comment for him below!


Leave a reply