My obsession with simplicity continues today with another edition of a series we’re calling “Simple Technique, Stunning Results.”
The first article in the series showed you how the gorgeous still life photo ‘Rose’ was captured. Today we’ll reveal the simple secrets behind Stefan Beutler‘s photo “Fragile,” one of the most popular portraits uploaded to 500px this week.
Curious how this stunning shot was shot and processed? Wonder no more, we’ve got the scoop.

Where the rose photo was captured with gear any amateur might have lying around or could easily afford, Fragile was most certainly not. Shot on a Canon 1Dx with an EF 85mm f/1.2L lens attached, this photo was not cheap to shoot.
It was, however, very simple from a technique standpoint… and there is cheaper gear you could substitute if you’re not the proud owner of this particular $4,600 camera and $2,000 lens.
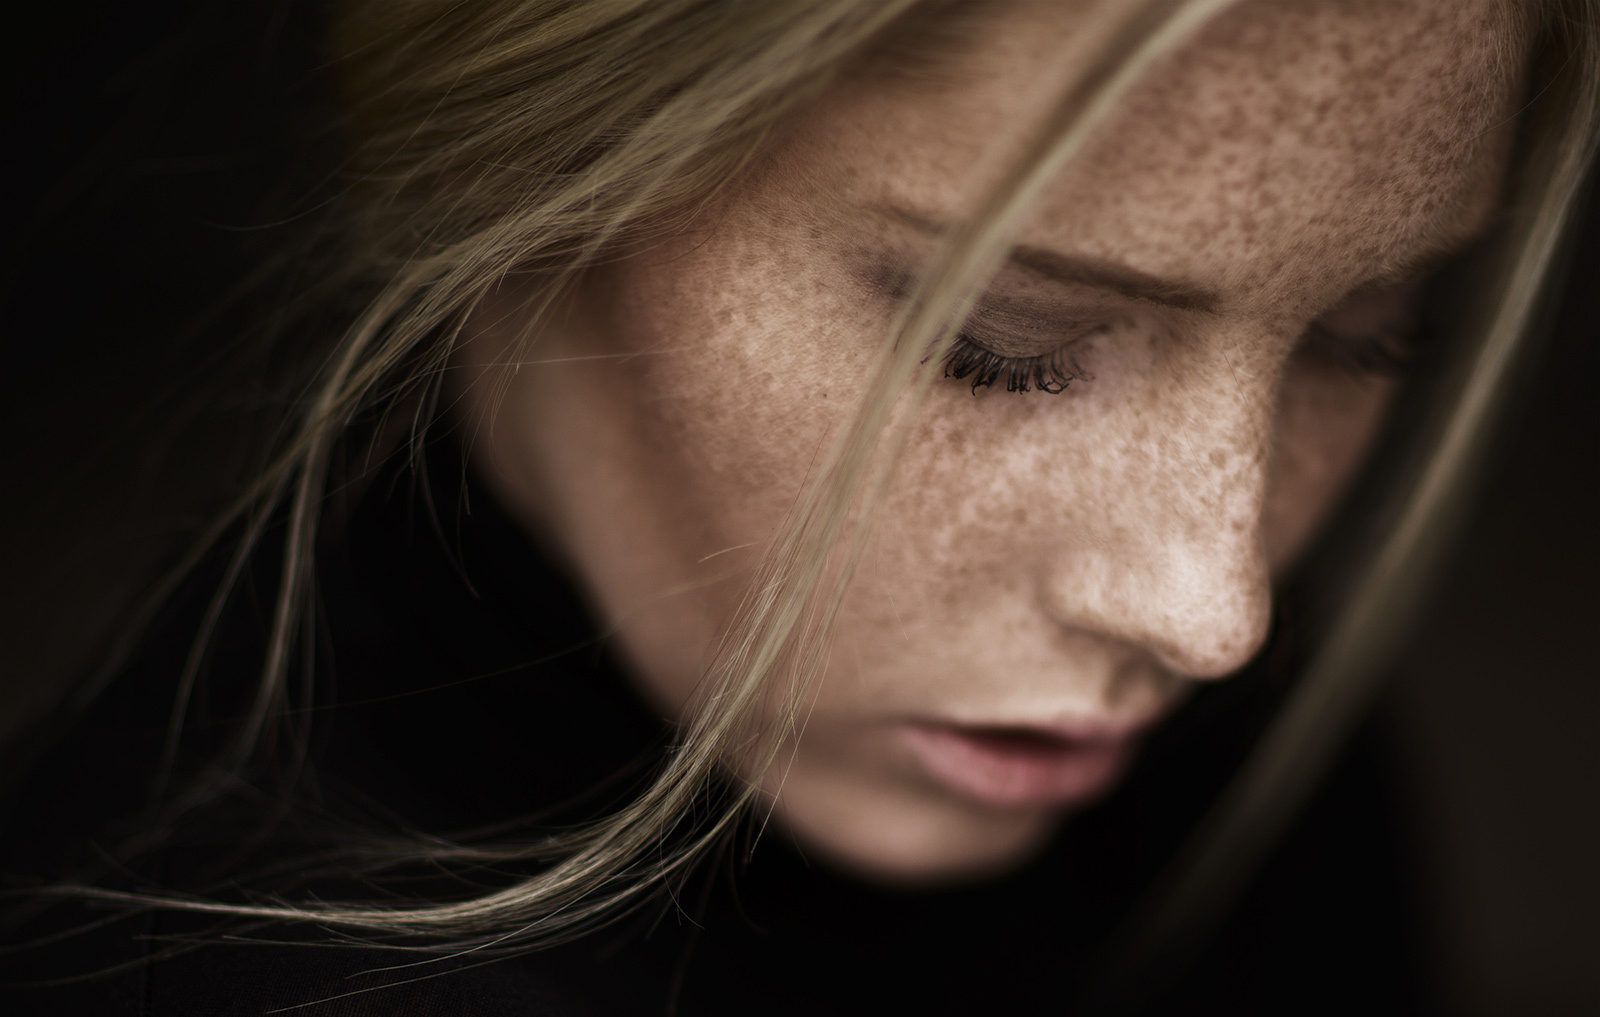
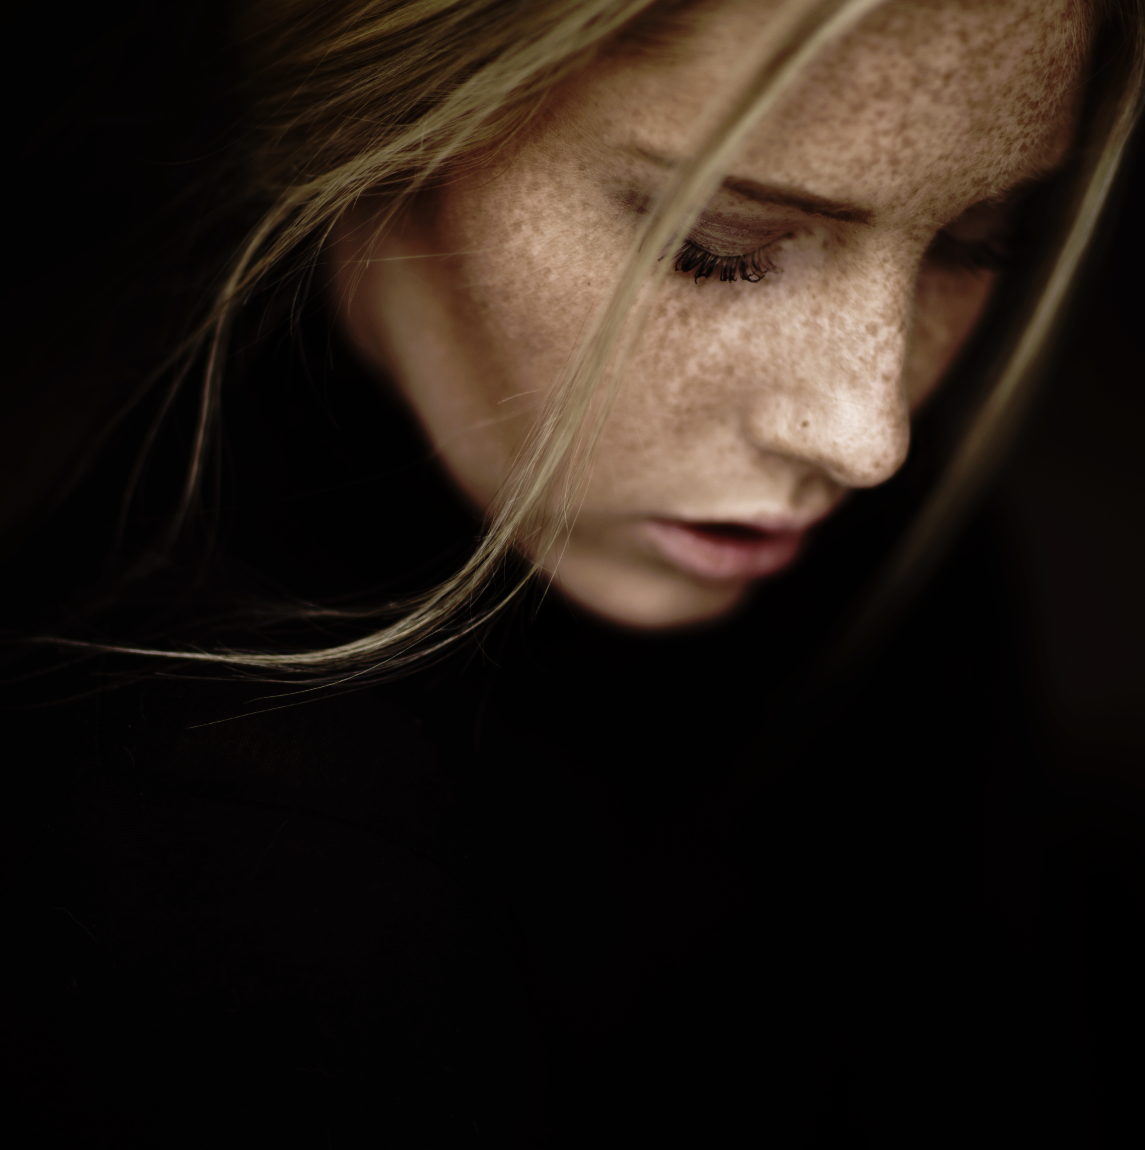
Capturing the SOOC image (below, already cropped to square) was pretty simple. No flash was used, just a reflector. The wind helped with the hair, and the depth of field is the result of a wide-open aperture.
The picture was taken in my balcony doorway, with a reflector to get some more light on her face (a heater did a great job keeping us warm, since it was about 2°C outside). The sky was overcast and I used grey paper for the background.
During my conversation with Sophie, I saw her hair flying in the wind from the heater. This was my picture 🙂
As usual, the aperture was open. Focus on the eye.
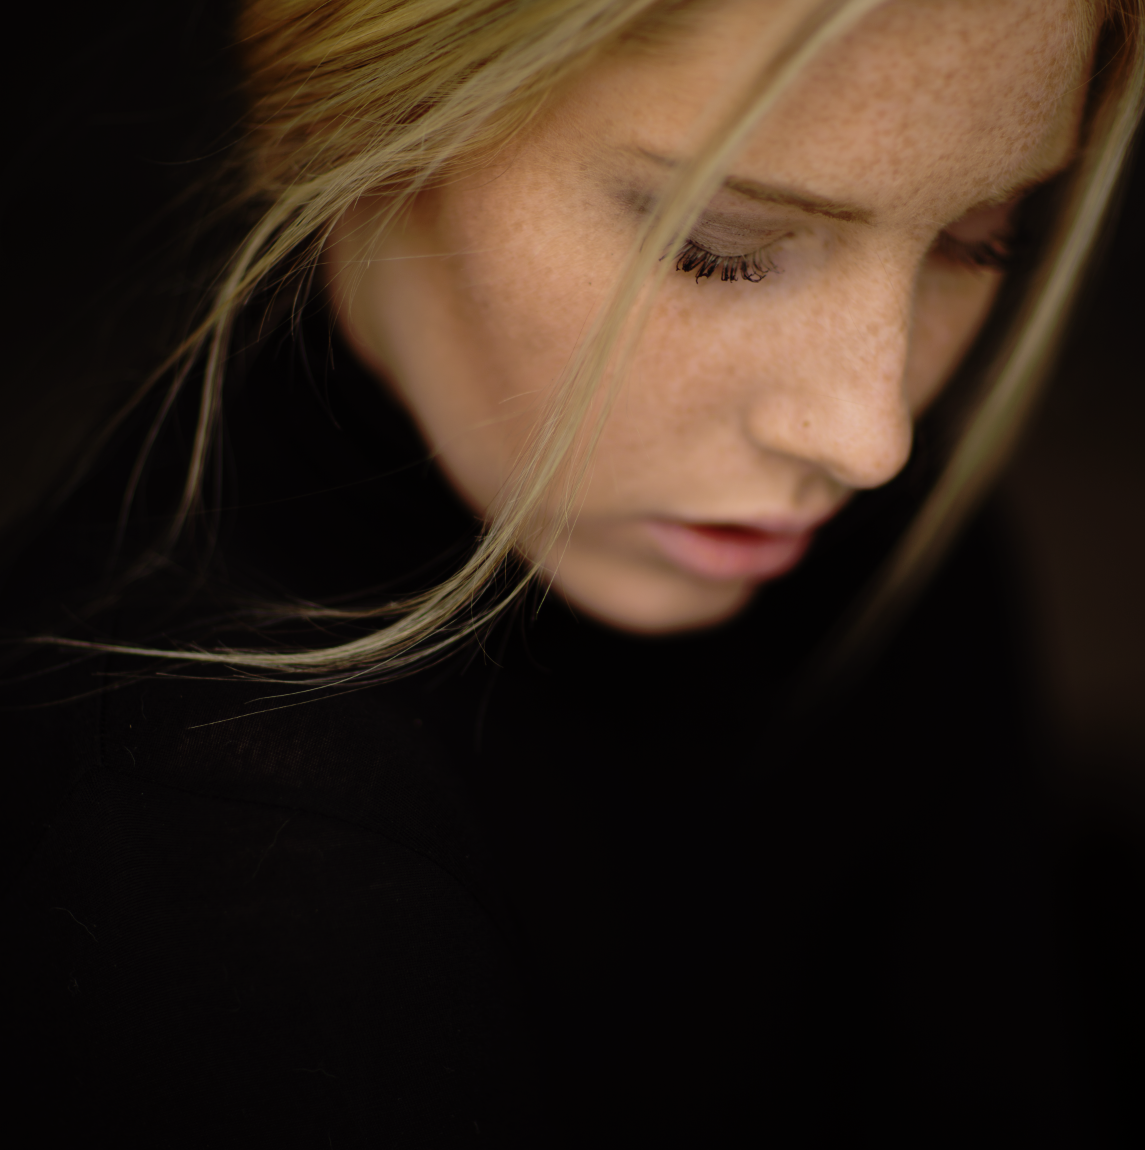
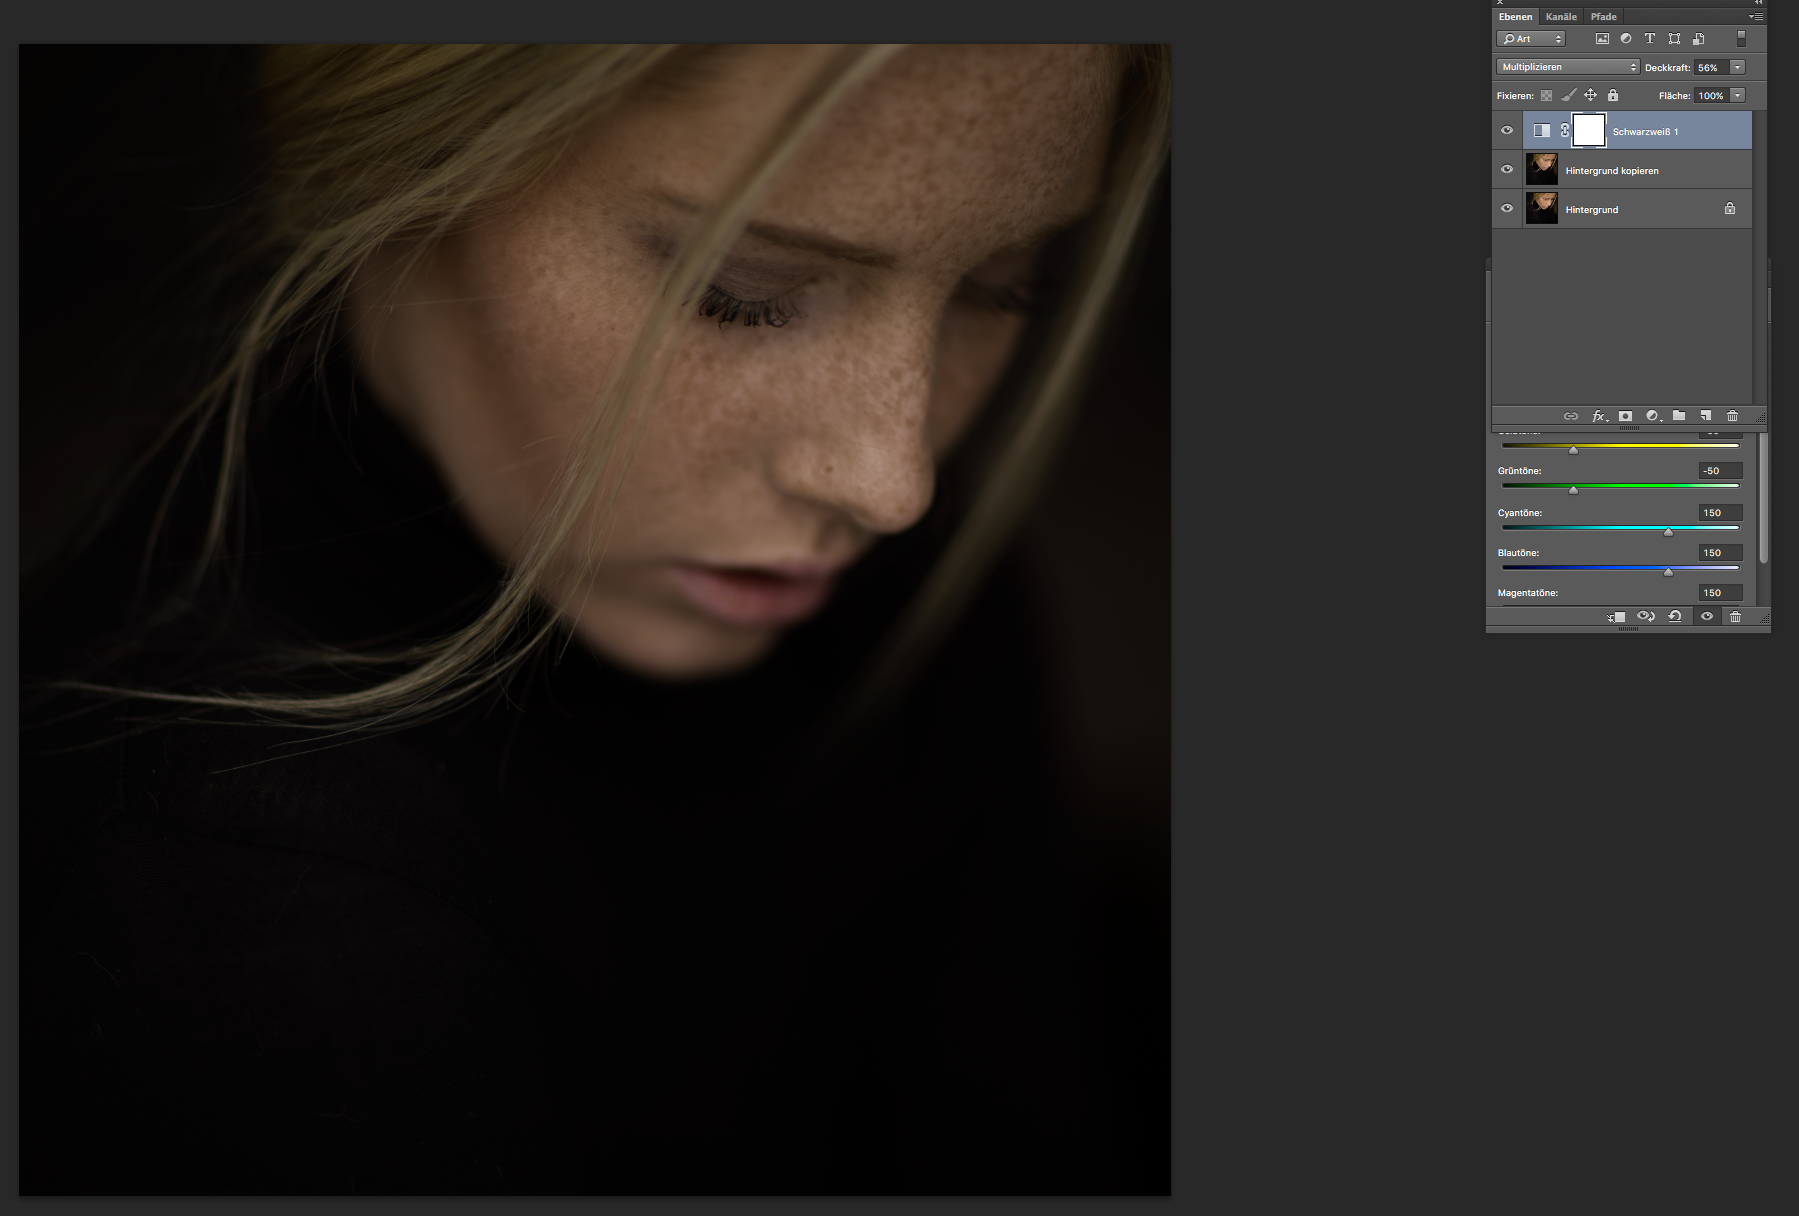
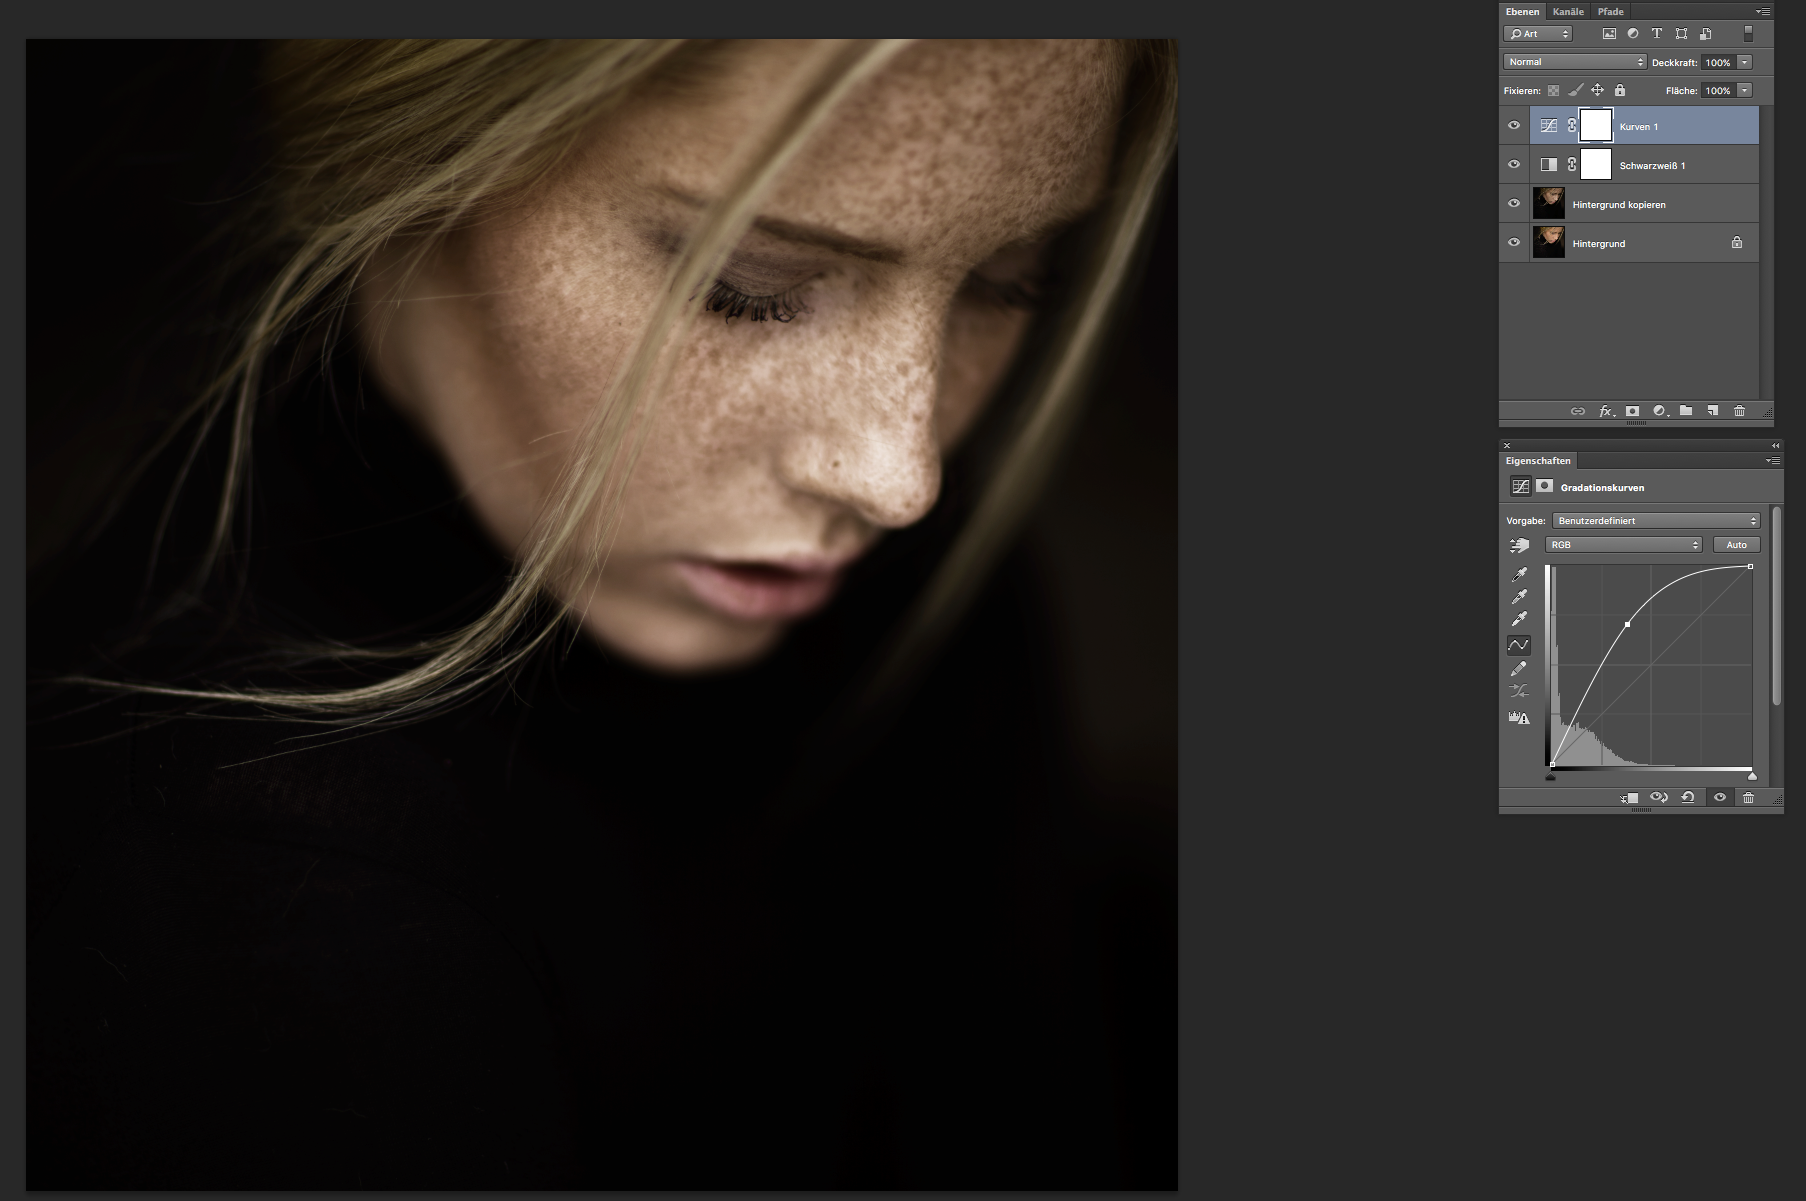
From there, the rest was post processing to bring out the model’s freckles and add a bit more drama to the shot. Here’s how Stefan described the steps he took, complete with Screenshots to help you better understand exactly what he did in Photoshop:
First, I cropped the image to a square. Then I pushed the freckles by adding a Black & White adjustment layer and selecting the “High Contrast Blue Filter”, set to blend mode “Multiply” with an opacity of about 60%. Then I added a Curves adjustment layer to make the photo brighter.
And that was it! I repeated those steps one more time and then I was finished. Nothing more to do 🙂
1. Crop

2. Add B&W Adjustment layer, select “High Contrast Blue Filter” from the dropdown.
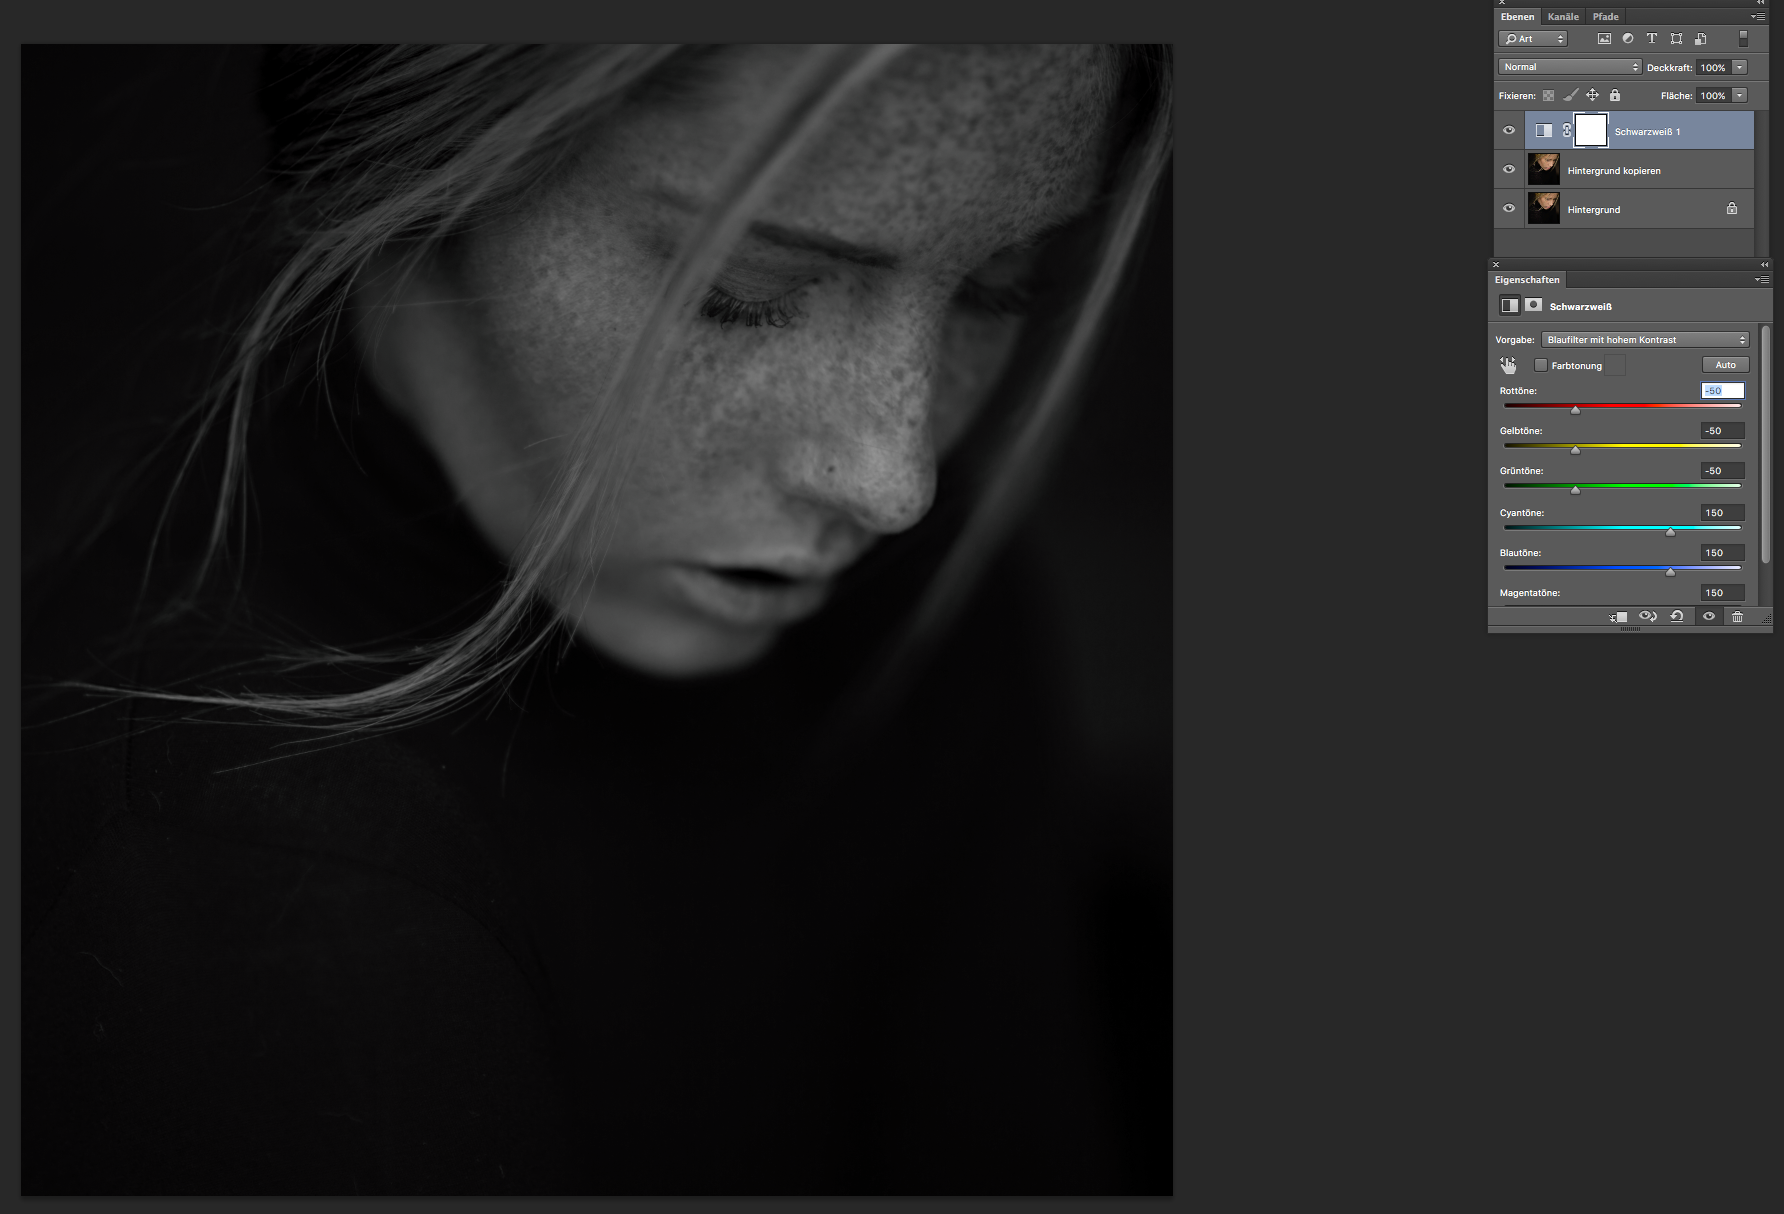
3. Set Blend mode to Multiply, set opacity around 60%.
4. Add Curves adjustment layer, lighten the image by pulling the curve up.
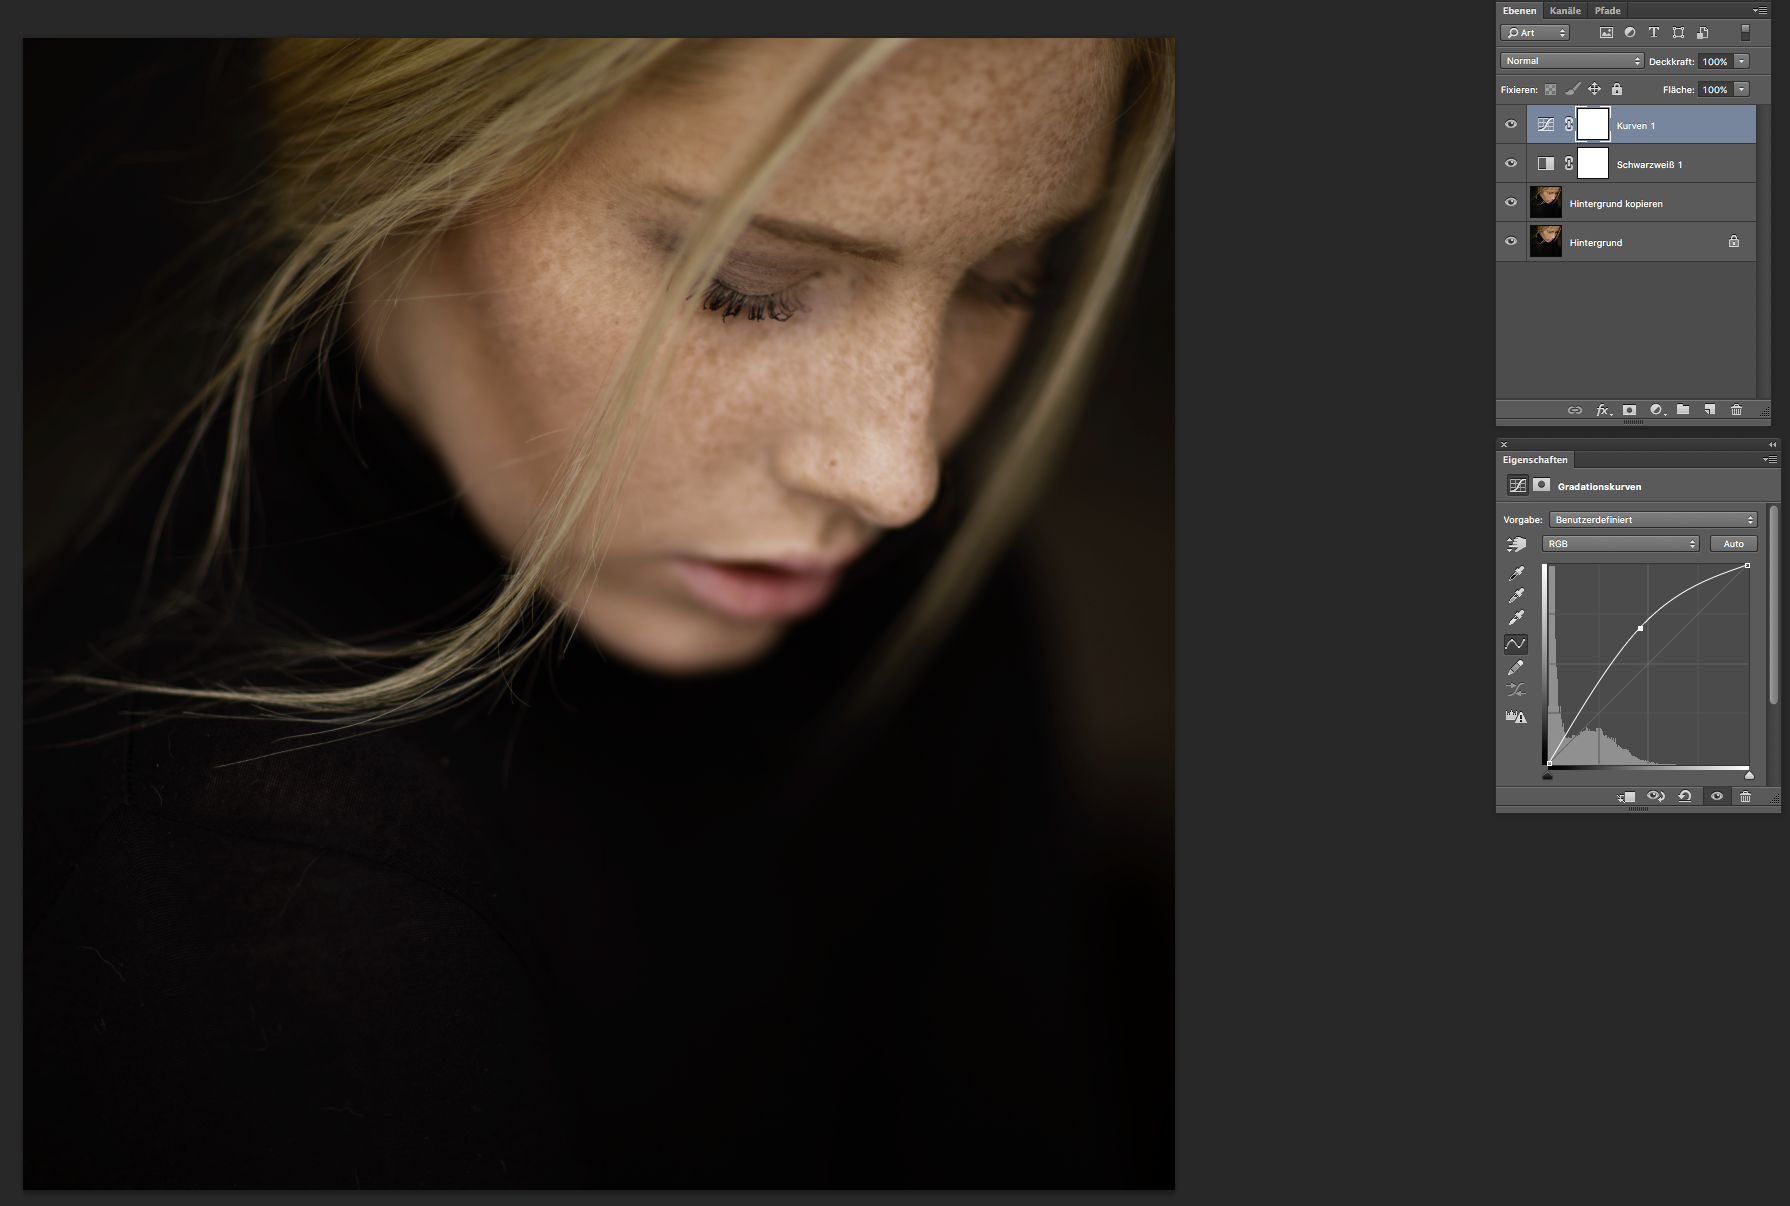
5. Rinse and Repeat as needed
Here it is from start to finish—SOOC to post-processed final image:
[twentytwenty]
 [/twentytwenty]
We were totally blown away by this portrait and how simple it was to capture and process. Sure, it wasn’t cheap to shoot, but it could have been—a Canon rebel and cheap 50mm f/1.8 would have done a comparably good job, and a prosumer Canon like the old 60D with the 50mm f/1.4 certainly could come close.
Stay tuned for more “Simple Technique, Stunning Results” posts, and if you want to see more of Stefan’s beautiful work, please follow him on 500px, visit his website, or go show him some love on Facebook and Google+.


Leave a reply