Jimmy McIntyre is a world-renowned travel photographer, educator, and 500px ISO contributor. His photos have been published in local and national magazines, including the BBC. His online courses on digital blending and post-processing, and his Raya Pro Panel, can be found on his official website.
Sometimes when we’re shooting a scene, we’ll capture an object with beautiful textures. When looking at the RAW files later on, we may choose to enhance these textures/details in order to give extra depth to the image.
There are a number of methods you can use to enhance details in Photoshop, each with their own benefits. Today we’ll look at High Pass filter, which is also a very powerful sharpening method.
(You can check out an alternative detail enhancing method, which is also very effective, here: How To Enhance Details In Photoshop)
Video Tutorial: How To Enhance Details
1. Duplicate background layer: With the background layer selected, hold CTRL+J (or CMD+J on a Mac) to duplicate it.
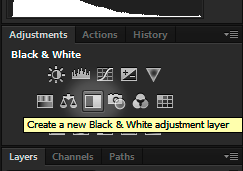
2. Open a Black & White Layer: Once you’ve done that, just right-click on the B&W layer and choose Merge Down, so that the B&W merges into the duplicate layer.
3. Select Hard Light Blend Mode: Next, go to the Blend Mode of the duplicate layer (the dropdown box that says ‘Normal’ at the top of the Layers panel), and change it to Hard Light or Vivid Light.
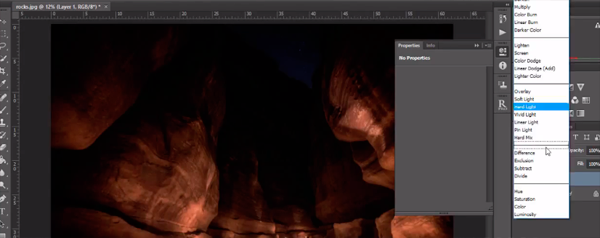
4. Apply High Pass Filter: Now go to Filter>Other>High Pass. In the radius that appears, move it left or right while looking at the details in your image to decide how strong you’d like the effect. Try to be subtle, as a large radius can create halos. Press OK when you’re happy.
5. Selectively Apply: With the duplicate layer selected, create a black mask by going down to the Add A Mask icon at the bottom of the layers panel, holding Alt (Option on a Mac), and left-clicking on this icon. The duplicate layer will be invisible. With a white paintbrush, and the black mask selected, you can begin to mask in the details.
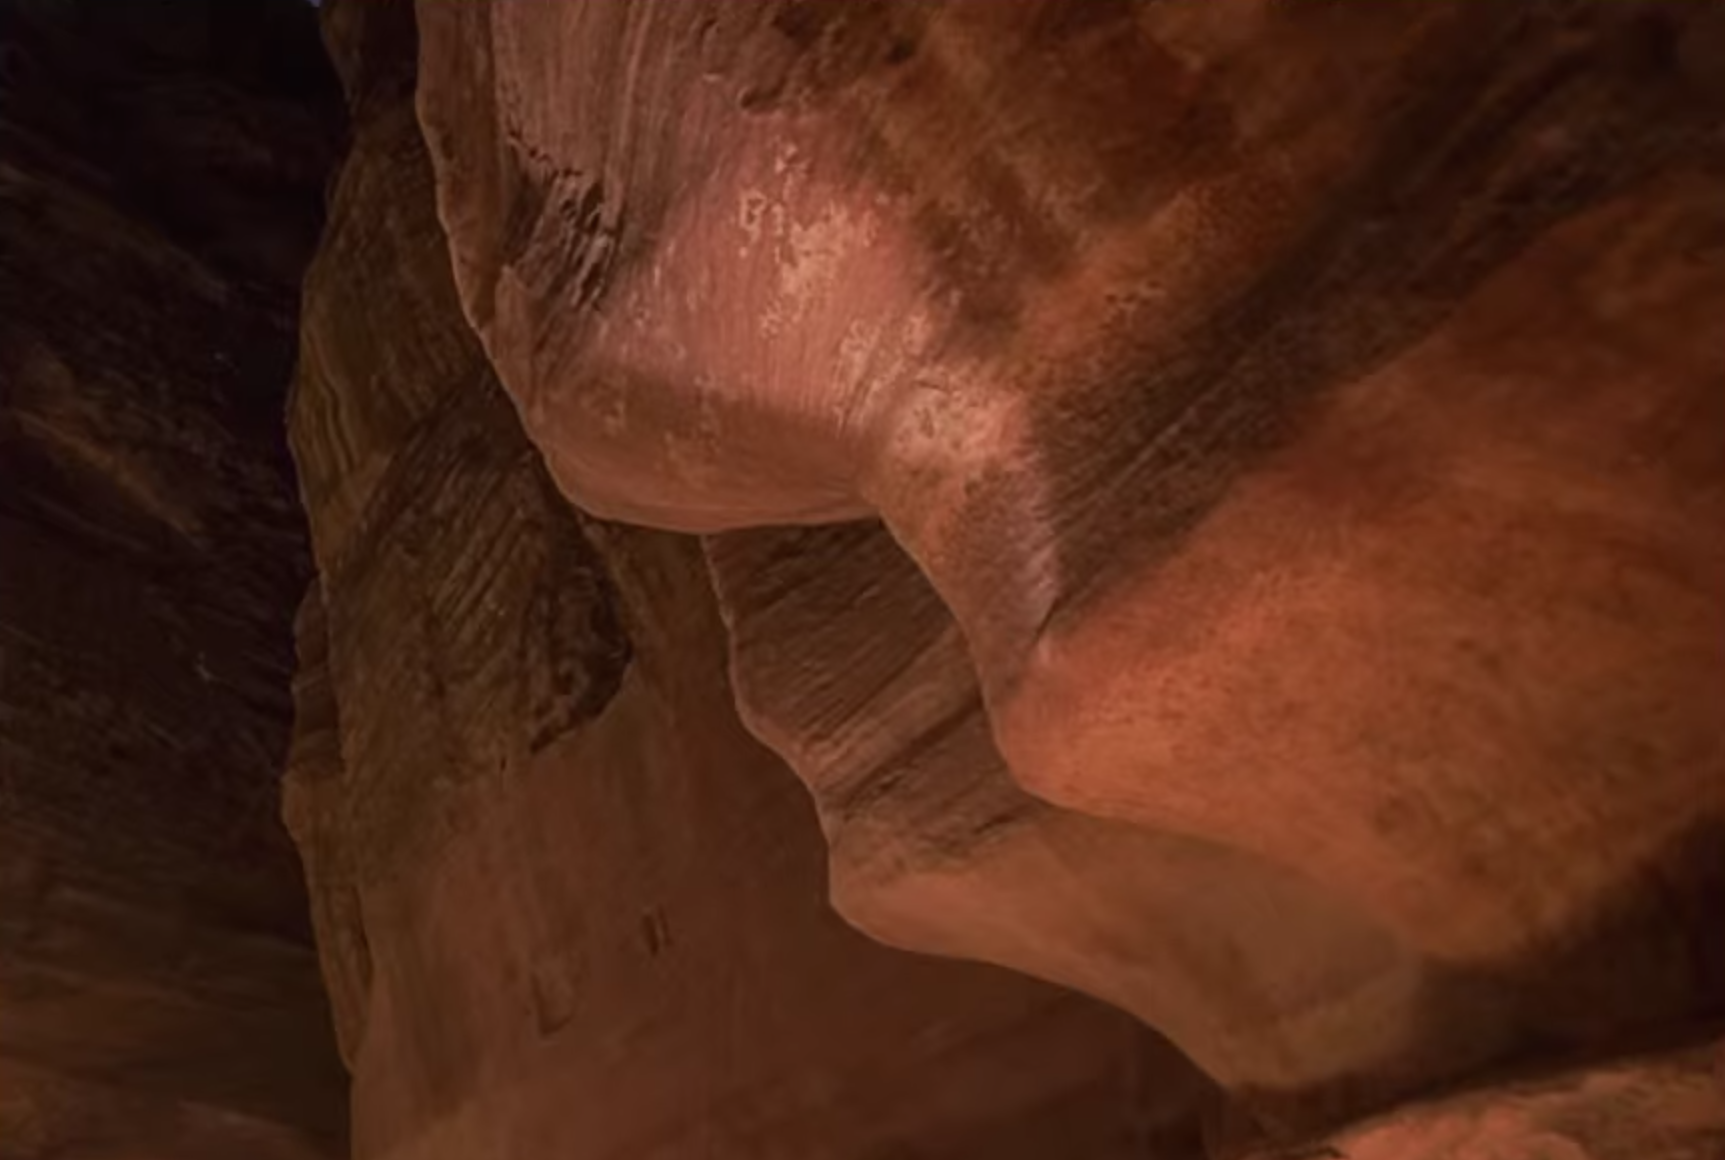
And that’s it! An effective way of enhancing the lovely details in your image. Here’s a zoomed in before and after so you can see the effect for yourself:
[twentytwenty]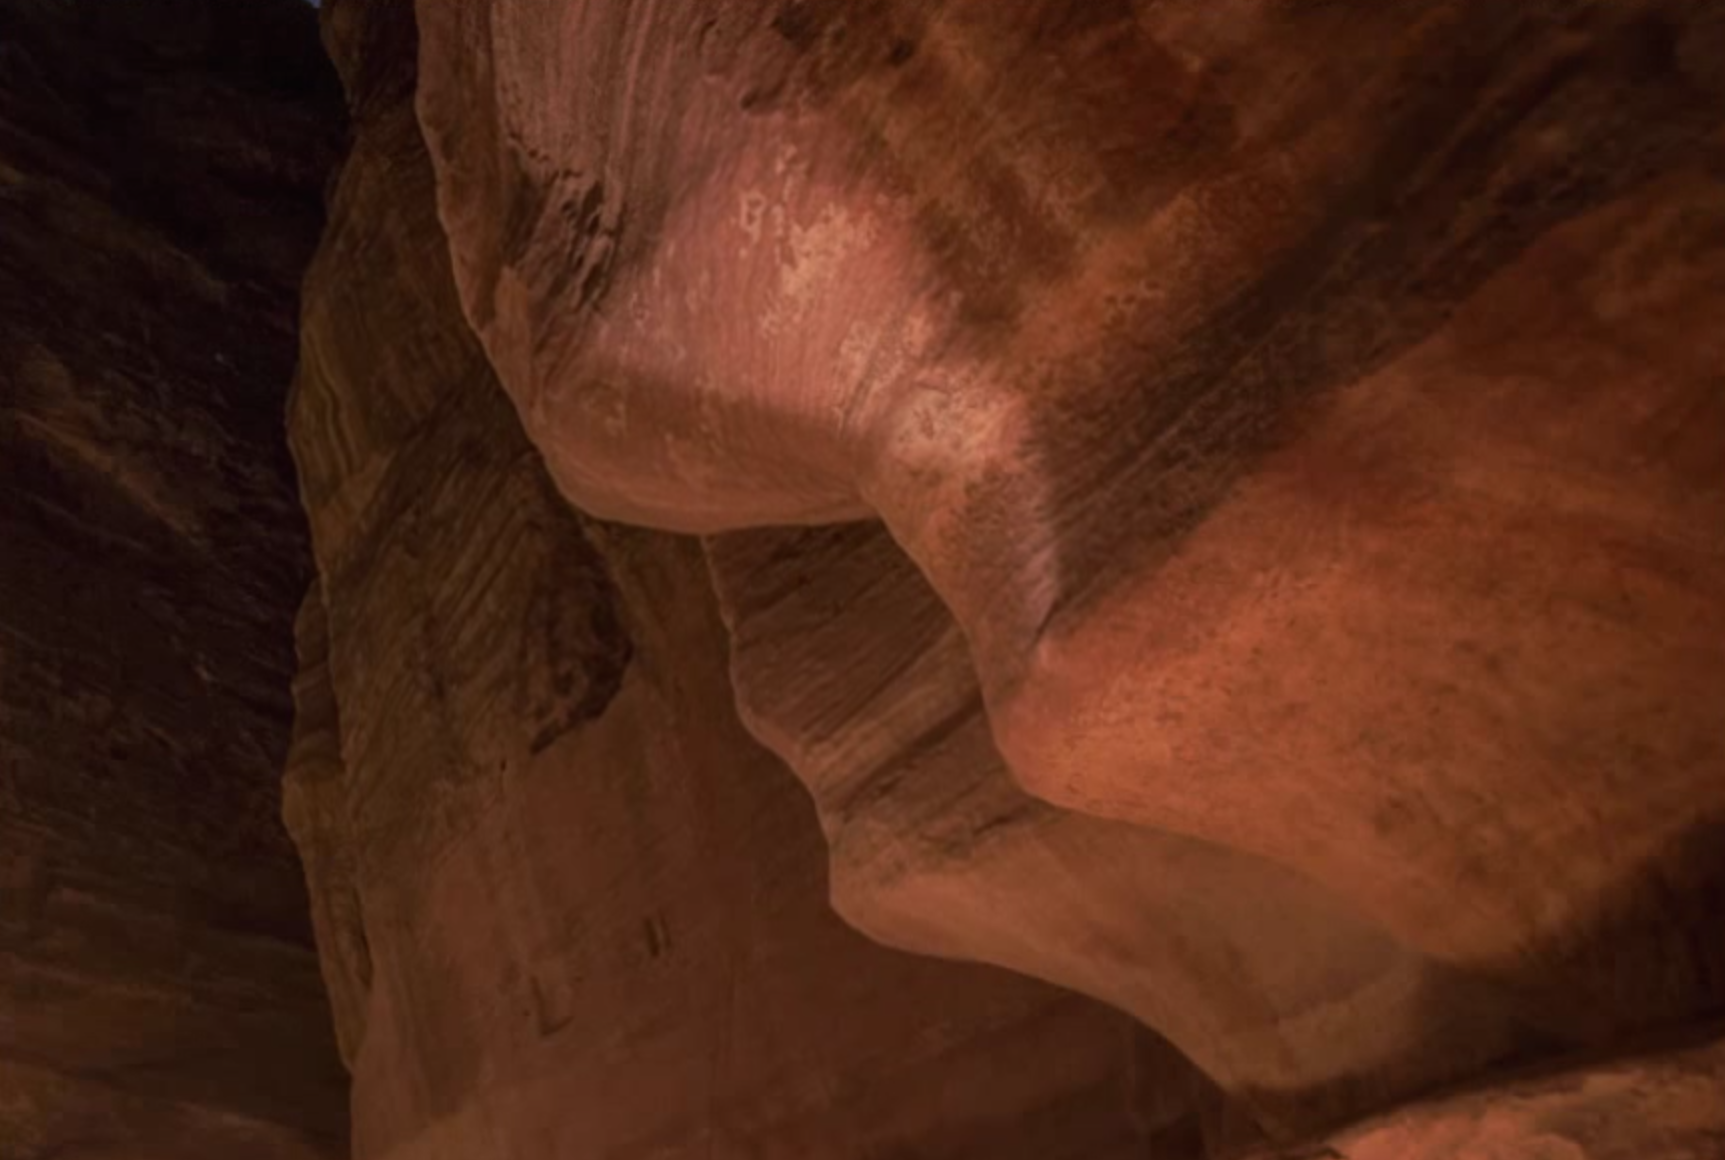
 [/twentytwenty]
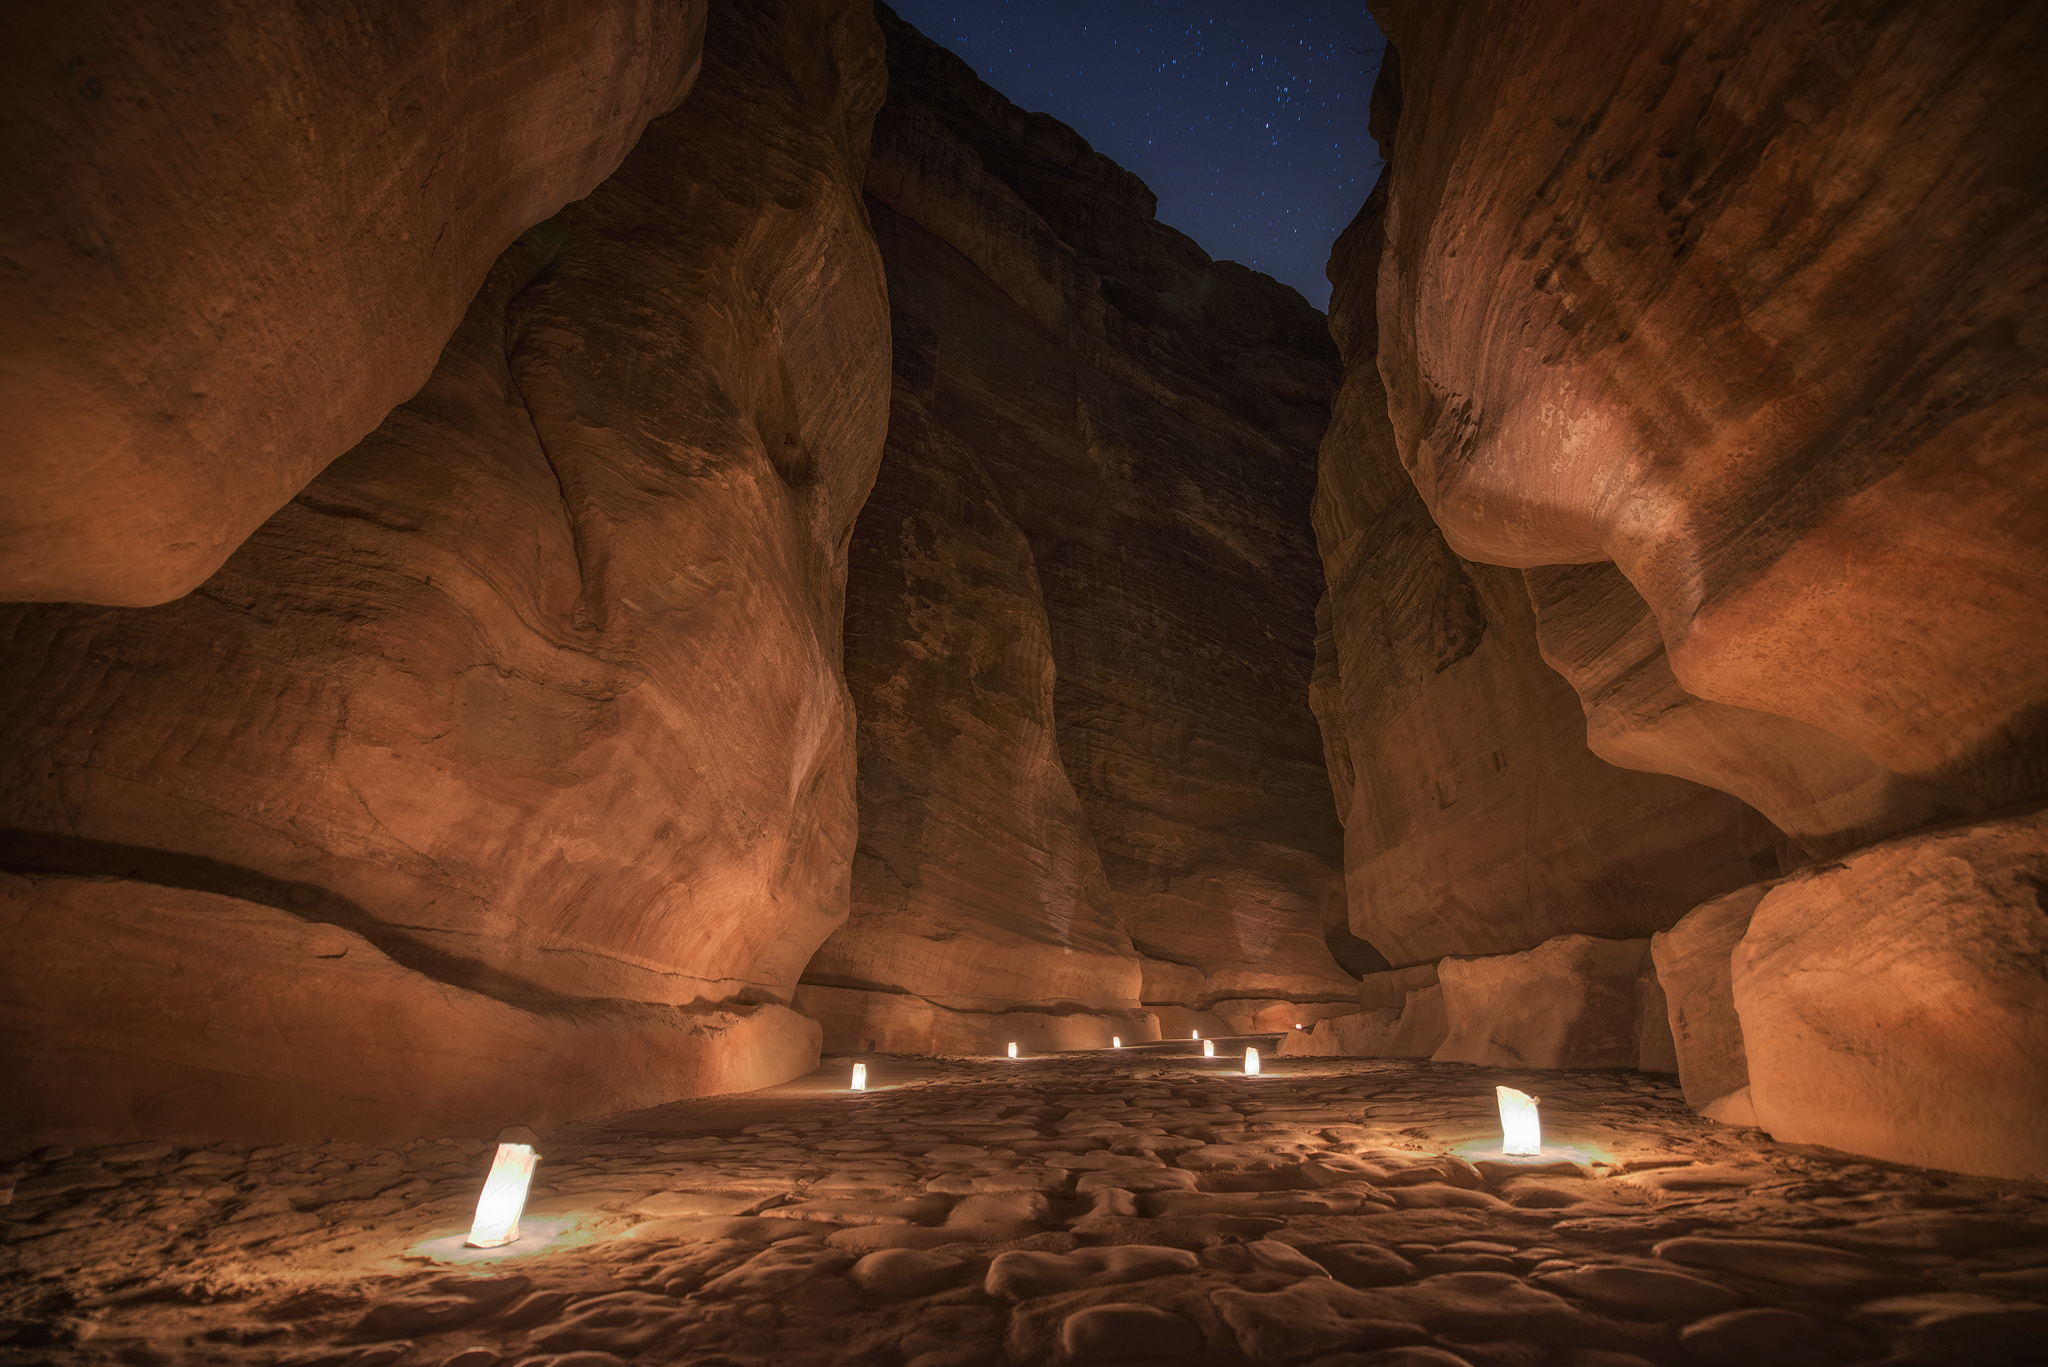
And here’s the final image:
I’m always happy to connect with other photographers! You can visit me through the links below:
My website
My Facebook page
YouTube Channel for more videos
My photography newsletter Including The Free Easy Panel—sign up now!


Leave a reply