My name’s Warui Belmont, I’m a 25-year-old amateur photographer. What I try to capture in most of my work is the way I’m feeling in that moment, that’s why I lean towards Low Key and portraits, and try to make some tests in the old “What would happen if I… (use this, place that, avoid this, etc.)” fashioned way.
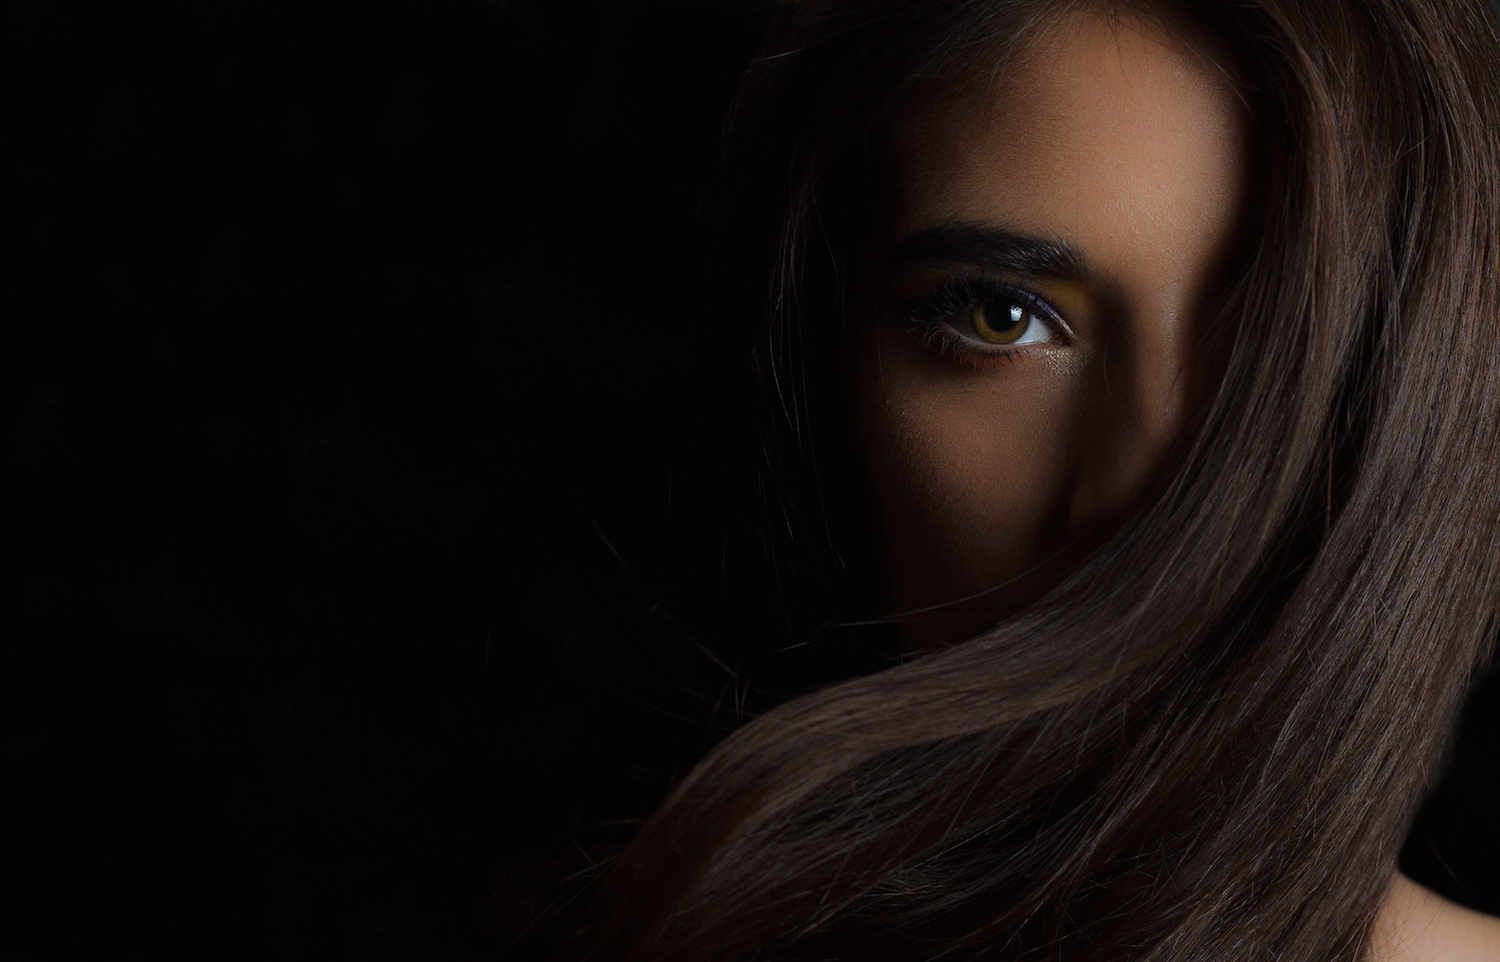
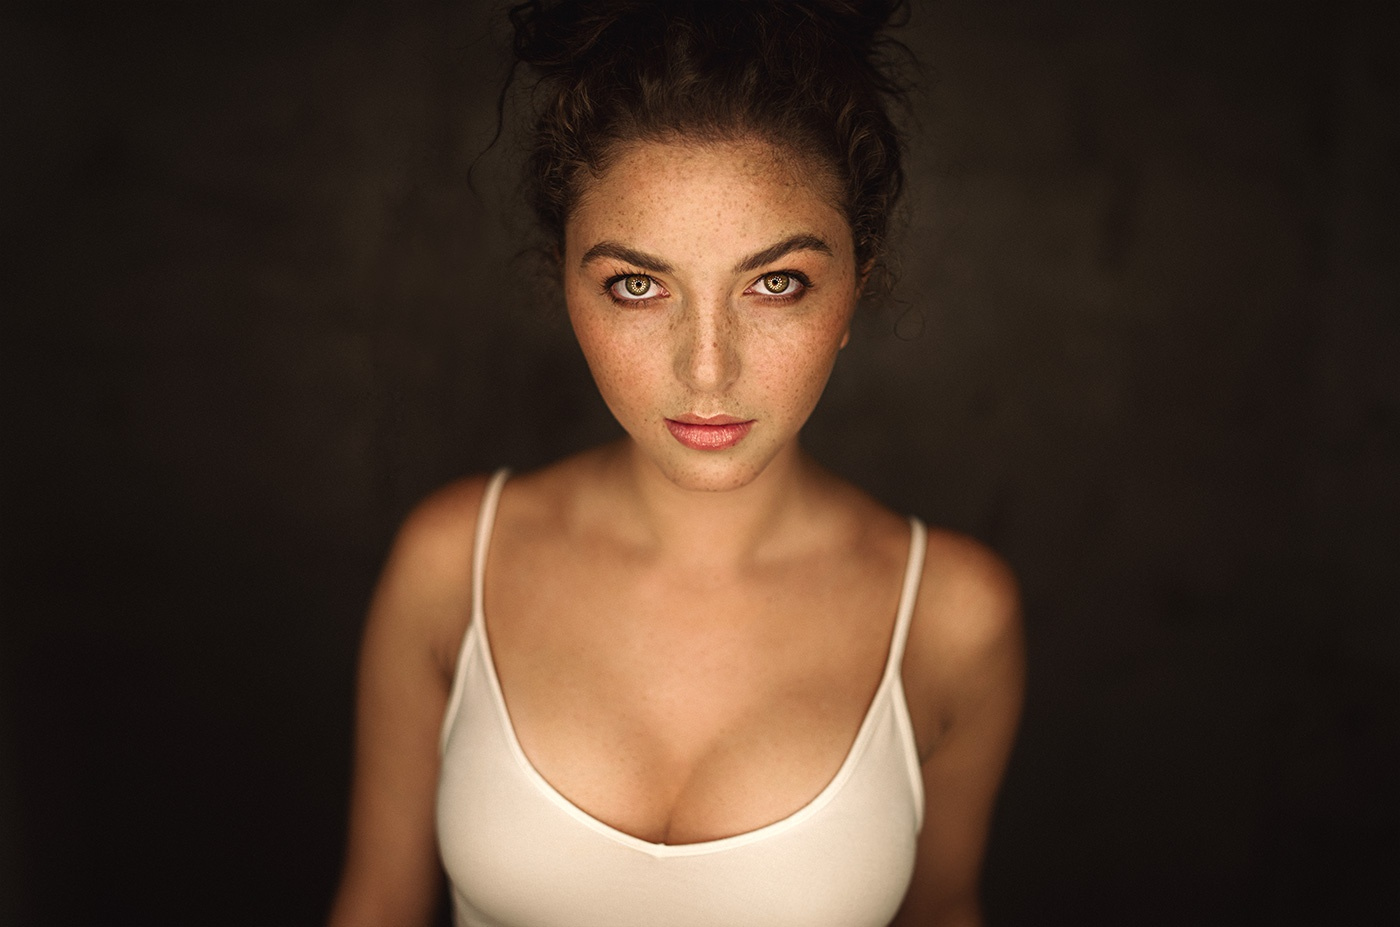
For “Desirability,” I tried to capture the mystery and beauty I really like in a woman. The photo was taken during a photo shoot in which I was assisting with lights. Luckily for me, the photographer David Lujan allowed me a few minutes with the model to take some photos for my own, and with some help of our Make Up Artist Kevin Salazar, I captured this photo:

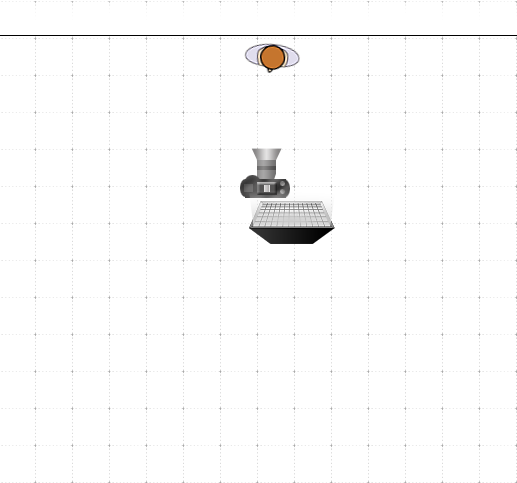
Setup
This shoot took place in an abandoned building: no doors or windows left, dust everywhere, and all the walls covered by graffiti… this was our set. Arii, our model, stood a few inches away from the wall. We put the camera right in front of her, with a 50x50cm softbox placed right above the camera.
With kelp of Kevin Salazar, our MUA and the only available person at that moment, we developed the idea in a minute. He would stand next to our model, holding her hair and throwing it into her face.
After a few attempts, I got the result I was looking for.

Gear
I shot this photo with my Canon EOS Rebel T3 using an EF 50mm f/1.8 II.
Exposure Settings: 1/200 sec; f/5.6; ISO 100.
Flash Settings: Manual 1/2.
All this was made in less than 5 minutes.
Post-Processing
For the initial post-processing, I used Adobe Lightroom CC to crop the image and make some small adjustments.
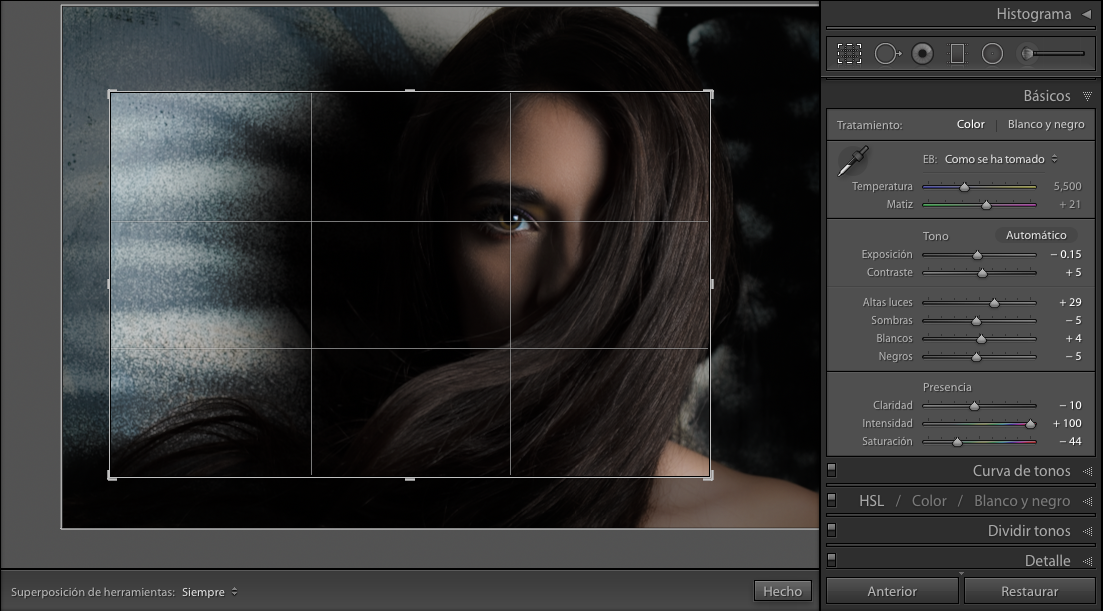
I then exported the photo into Photoshop and used the frequency separation process. To do this, first duplicate the background photo twice and name the duplicates Color & Textures.
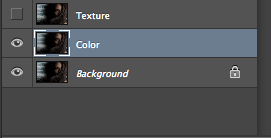
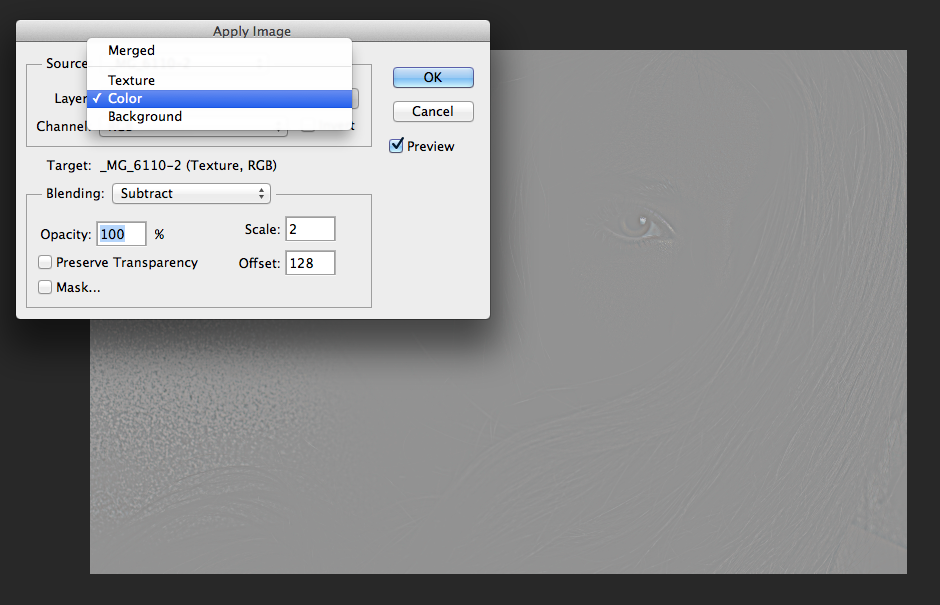
Next, apply a Gaussian Blur (Filter>blur>Gaussian Blur) to the “Color” layer with a radius of 10 pixels. Then select the “Texture” layer go to the “Image” Menu, where you will select “Apply Image.” A window will show up.
I only re-selected the “Layer” option. It originally said “Merged” so I selected the layer in which I applied the blur, in this case “Color.” Changed blending to “Subtract,” and checked parameters.
Opacity: 100% | Scale: 2 | Offset: 128. Preserve transparency, Mask, and Invert must remain UNCHECKED. And we’ll get this grey version of the Photo:
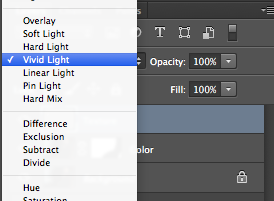
Now, change the “Color” layer blending Mode to “Vivid Light”
In the “Color” layer I worked with the colors and lights (skin, hair, eyes, make up), while on the “Texture” layer, using the clone stamp tool, I got rid of any imperfections on her skin. I then duplicated all the layers I had and merged them (only the copied ones) to have all the changes I made in 1 layer, and select it.
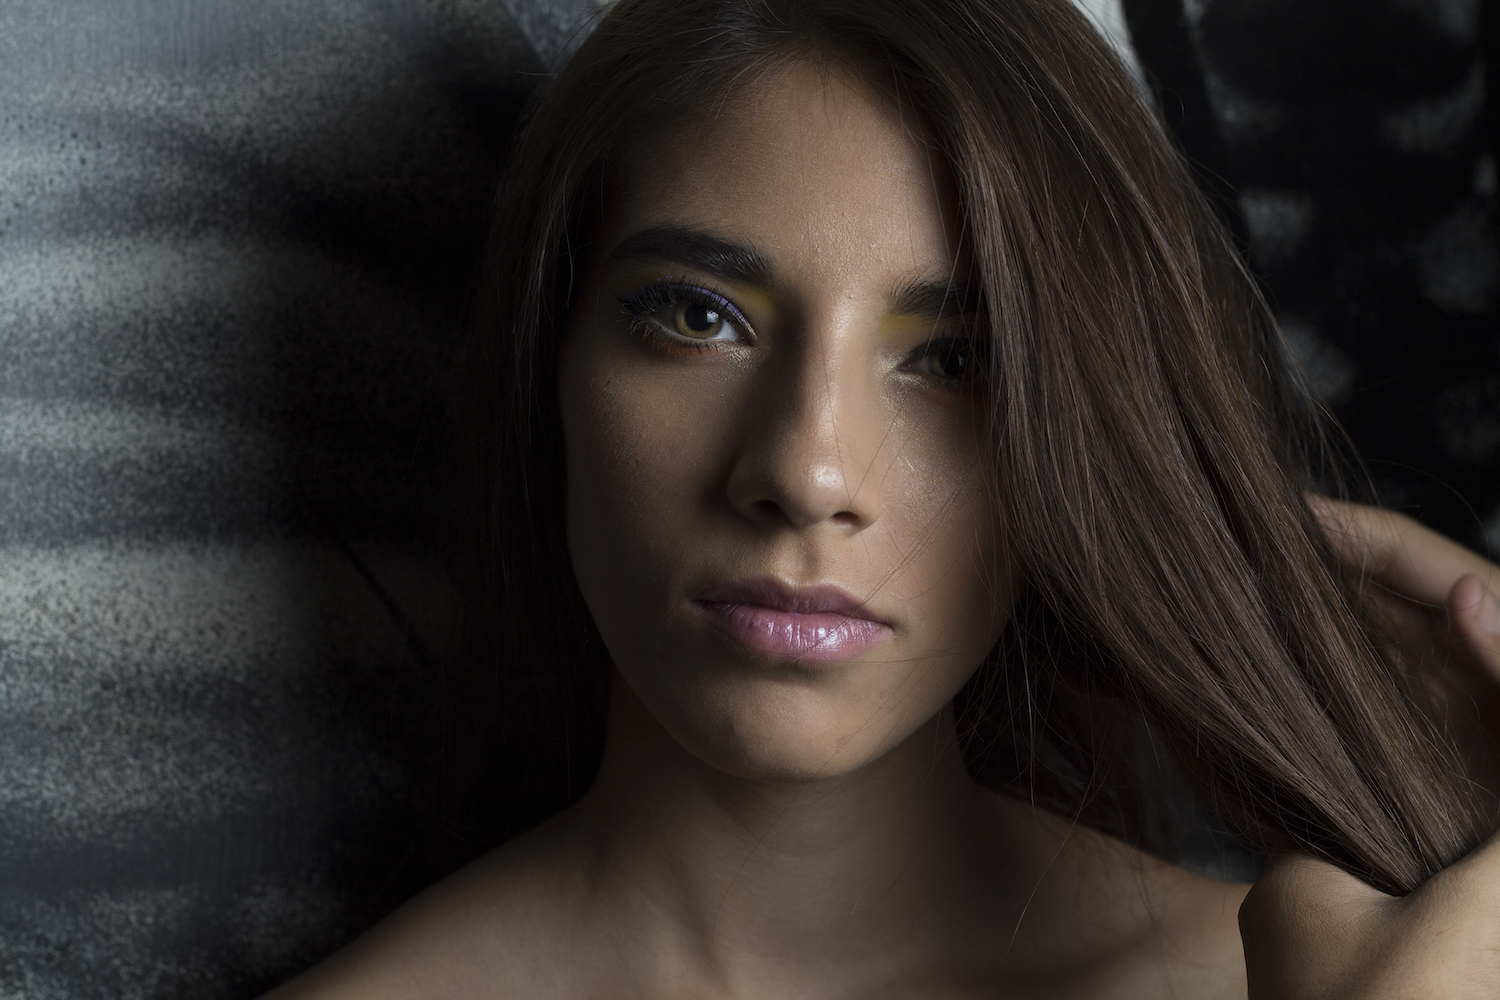
Did you notice how the raw file is Arii standing in front of a white wall covered in dust and black graffiti? With the clone stamp tool, I selected the blackest spot of that wall, and start cloning it all through the remaining background. This is the final result:
Thanks to everyone who took the time to read this tutorial, I tried to make it the best I could with my limited knowledge of English and the short amount of time I had to make this. Also thank you to everyone who liked, favorite, and commented on “Desirability.”
If you have any doubts, suggestion, comments, etc. for me, you can write them in the comments below. I can also be reached via email at warui.project@gmail.com.
Also check out the rest of my work at the links below, and if you like it, follow me. Nothing would make me happier:
500px: https://500px.com/Waruibelmont
FB: https://www.facebook.com/diskefotografia
Instagram: https://instagram.com/waruibelmont/
Cheers and Saludos to all!


Leave a reply