Marsel van Oosten is a professional nature photographer from Amsterdam, The Netherlands. Together with his wife Daniella he runs Squiver, a company that offers specialized nature photography tours, for small groups of all experience levels, to exciting destinations worldwide.
Marsel won the grand title ‘International Nature Photographer of the Year’ twice in a row, and he won several First Prizes in the Wildlife Photographer of the Year Awards and the Travel Photographer of the Year Awards. Check out his website for spectacular images, videos and photo tours: www.squiver.com
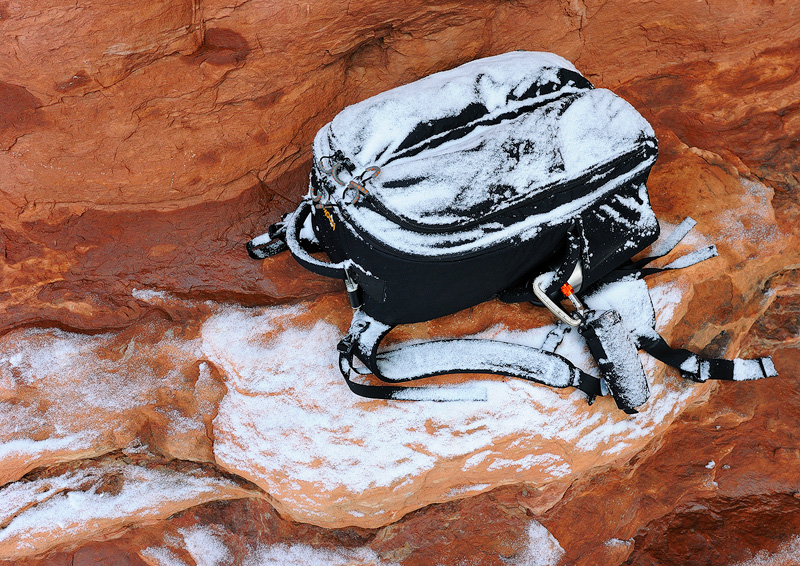
My first Kiboko during yet another weather test in Utah.
In The Beginning
I remember the first time I saw the Gura Gear Kiboko camera backpack — I thought it was ugly and seriously lacked padding, but I was fascinated by the unique butterfly design. Then my good friend Chris Gray showed me what he was able to fit in his Kiboko, and I was shocked. At the time, I used a large LowePro backpack that was almost identical in size, but twice the weight and a lot more bulky. I decided to give the Kiboko a try, and I never looked back.
The pack was near perfect. Near perfect, because after a while the zipper broke and I couldn’t close the bag anymore, but one email to customer service, and a replacement bag was on its way. That happened to be the Kiboko 2.0, which had a better zipper that ran more smoothly and was immune to dust and sand (my preferred habitat).
There were a few minor things that I thought could be improved upon, and I emailed those to Andy Biggs, the founder of Gura Gear. He replied that I would really like the new design. Enter the Bataflae, Kiboko’s successor.
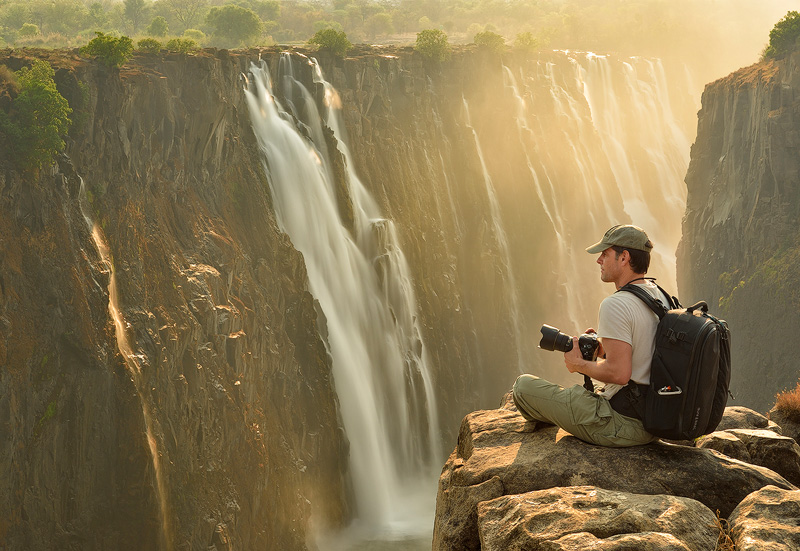
Selfie with the Bataflae at Victoria Falls, Zimbabwe.
The Concept
The Bataflae uses the same unique butterfly access system as the original Kiboko. The flaps open in the middle, exposing the interior without opening the entire bag. The inside of the pack is divided down the middle into two completely separate halves, each accessed by the zipper on one side.
This is particularly handy if you don’t want or can’t open the entire pack. In a safari vehicle for instance, space is often limited — and even if it isn’t, it’s usually dusty and you don’t want to open the entire pack every time you need something. This bag was designed specifically with safaris in mind, and it shows.
But the butterfly design not only works on safaris. In Iceland for instance, I found that it was possible to get to my gear in a snow storm without exposing all my gear. With a traditional flap, you have to open your bag all the way to access the items that are close to the bottom it. Doing so in the rain will get all your gear wet.
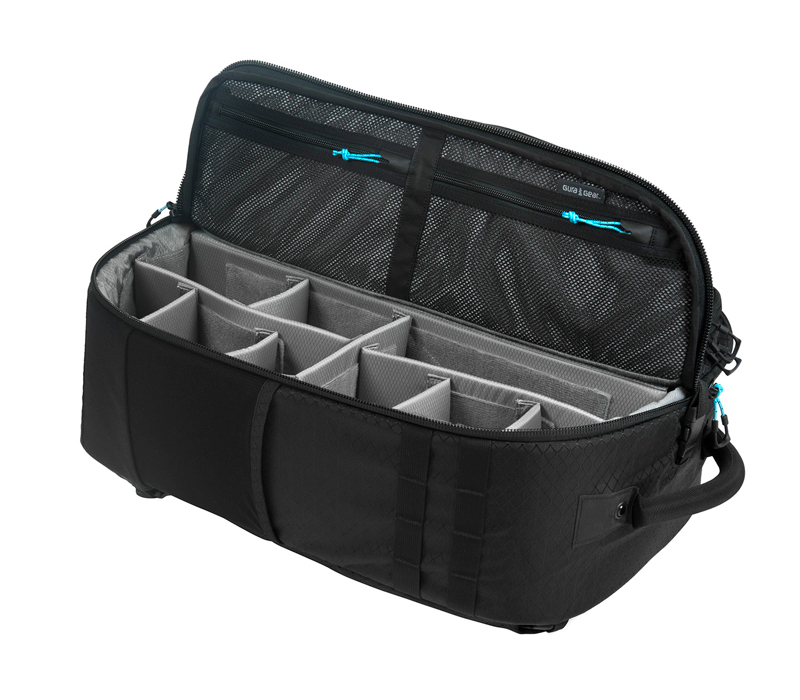
Opening one of the butterfly flaps gives you access to half the bag.
The flaps don’t stay open, you have to hold them open yourself. Some photographers find this annoying, but I think it’s great – even when the bag is closed but the zippers are open, I can quickly access my gear, yet everything is still protected from dust or drizzle. However, for those who like to open the entire pack, the Bataflae has a solution: a flexible elastic band and a buckle at the top of the pack that allows the pack to be used as a butterfly (buckle closed), or fully opened like a traditional pack (buckle open). The centre divider is attached to the lid with velcro, so when you close the bag, the divider attaches itself to the lid again. I must say that I hardly ever open the entire lid, but it is nice to be able to do so – it does make the bag a lot more flexible – more about that later.
The second thing you will notice when you pick up this pack, is how incredibly light it is. I already mentioned that I initially thought that the Kiboko lacked padding — all serious camera bags have loads of padding to protect your valuable gear. But while it’s nice to have your babies protected by thick walls of foam, it’s not really necessary. You either carry the pack on your back, or you put it down gently, and when you go on an airplane, you take it as cabin luggage. The thinner padding feels like a design flaw at first, but it’s actually clever thinking: less weight.
Not only that, thinner padding also means: more space. As a result, the Bataflae is both the lightest and roomiest pack in its class.
Each main compartment has additional storage in its lid. It’s amazing how much you can fit into these extra pockets – in one of them I often put an SB-900 flash, flash trigger, two polarisers, two ND filters, batteries, gels, and two flashlights. When I don’t need a lot of gear, I can roll up a fleece or rain coat and put it in there.
Every compartment has a couple of zipped pockets. These are great for small items, such as AA batteries, lens cleaning cloths, business cards, camera and tripod tools, etc. Even when I bring a lot of gear, I never fill all these pockets.
Design
This is not a bag for fashionistas, and that’s a good thing. I want my camera bag to look as unattractive and stealthy as possible. The introvert design of the Bataflae doesn’t scream ‘expensive camera gear inside!’, and there are many places in the world where that is a real bonus. The pack comes in different colours, but I prefer black. I wear a black shirt or sweater when I go to the airport, so the straps of the pack sort of blend with my clothing and it’s less obvious for the person behind the check in desk that I’m carrying a 40 pound camera bag.
The main zippers are a different colour than the auxiliary pocket zippers, which is a great improvement over the Kiboko. It’s easier to see which ones you need to pull, and it’s easier to see if you’re bag is actually closed. In South Georgia I once flung my Kiboko over my shoulders, only realising that I had not closed it when I heard my D800 with 24-70 lens attached fall to the ground. I now know that if I don’t see those two blue thingies at the top, I should not pick up the bag.
The inside zippers are all safely tucked away inside rubber cover, so they won’t scratch your gear – very clever.
One thing that I would like, is that the bag had a few reflective strips. When shooting landscapes at night, I tend to put the bag down and then move slowly wander off to the point where I can’t find the bag anymore. A few reflective strips will make it a lot easier to find the bag again with even a small flashlight.
So how much gear does it take?
The 32L Bataflae is like the inside of a blue whale. I like to work with three camera bodies with the lenses attached, and a few extra lenses. Add a flash, flashlights, batteries, cards, remotes, rain covers, GPS and a whole bunch of other stuff to that, and you’ve got a serious amount of gear. It will all fit. The image below shows what’s inside my bag on an average trip.
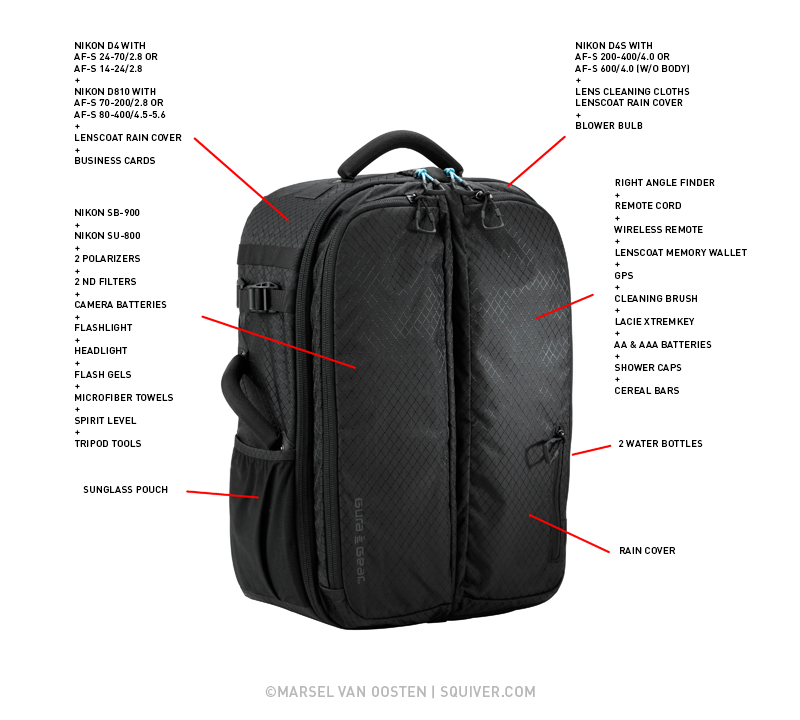
The contents of my Bataflae on an average trip.
To have my cameras attached to the lenses is important to me. On safaris I don’t want to miss any moments because of changing lenses, and not having to change lenses also means no dust issues. I spent a few months in the Sahara in Northern Africa and I have learned my lesson the hard way. There are many camera bags that will fit a lot of gear, but none of them will fit as much as the Bataflae, and with most you will have to take the bodies off the lenses to be able to use the space in the bag efficiently. Not an option for me.
On a safari I typically have my 200-400/4.0 with body attached in one compartment, and my 70-200/2.8 and 24-70/2.8, both with bodies attached, in the other. The lens hoods are all on the lenses in reverse, and there’s still a little wiggle room. As the bodies are higher than the lenses, I often put my rain covers under the lenses to level the combos.
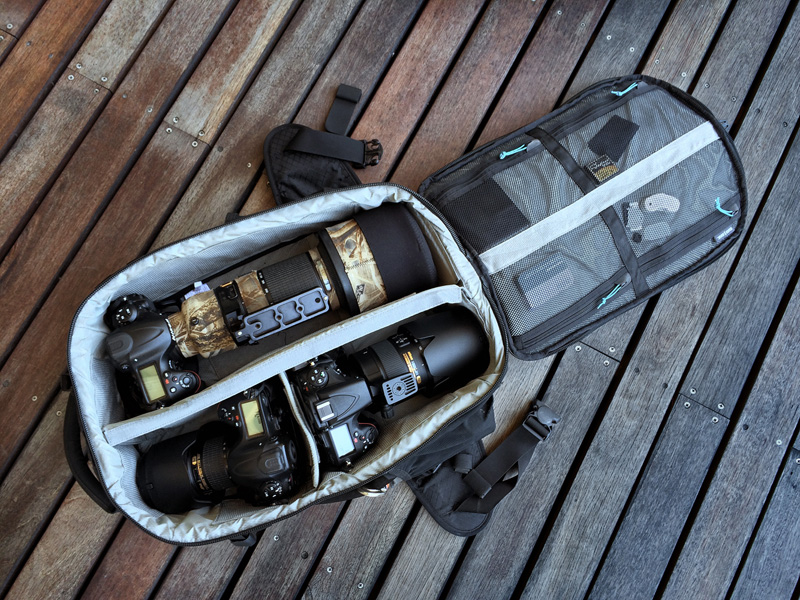
Three pro bodies with L-brackets and lenses attached – no problem.
Two of my cameras have L-brackets attached, and those tend to make a pro camera even bulkier. The extra width is a potential problem, but this is where the Bataflae shines. As the centre divider has velcro on all sides, I can make a compartment wider on one end (where the body is) and more narrow on the other. The narrow end then becomes the wide end for the other compartment, so I can fit another body with L-bracket attached there.
I find that this fine tuning of the dividers is much easier with the thinner padding than with the thicker dividers that most other packs use. Actually, the flexibility of the padding results in a flexible bag — you can more or less ‘shape’ the bag by pushing here and there.
What about my laptop?
The lid of my old LowePro pack had an extra compartment that was big enough to fit my 13” MacBook. The butterfly design of the Bataflae obviously does not allow me to do so. At first I thought this was a real disadvantage, but I soon realised I was not thinking straight. Even when I traveled with my MacBook in my LowePro pack, I still had a laptop-style bag with me with external drives, chargers and cables, headphones, e-reader, snacks, etc. And few people carry their laptops to a shooting location.
I’m sure the guys at Gura Gear were aware of this when they designed the Chobe — a laptop bag for photographers. On every trip, my camera gear is in my Bataflae, and my laptop and peripherals are in my Chobe. If you’d like to know more about the Chobe – I wrote a review on it here.
If you really want to be able to put your laptop in your camera bag — it’s possible. The compartments of the Bataflae are pretty deep, so there is a little bit of space between the gear and the lid. If you unlock the main buckle and open the entire lid, you can actually put a laptop on top of your gear and then close the lid again. A MacBook Air for instance would be a perfect fit.
Additional Features
There is a water bottle pocket on the outside that will hold two small bottles or one large one. The pack has a built in rain cover that is easily accessible and quick to fit over the bag. One of the outer compartments has a lanyard that I use to attach my LensCoat card wallet — I never have to worry that I might drop or lose my cards as they are safely attached to my pack.
For some extra peace of mind, the main compartment is lockable using a user-supplied lock. The seam-sealed, adjustable rain cover is not attached to the bag and can be used as a ground cloth. The bag comes with plenty of dividers.

The built-in lanyard with my LensCoat card wallet and emergency whistle.
Tripod Attachment
If you’re considering a bag like this, that means you’re serious about photography and your equipment. That also means that you always use a tripod. The Bataflae offers two solutions for carrying a tripod.
The first one involves a system of three straps to attach a tripod to the back of the pack. One on each side which wrap and clip around the upper portion of the legs, and then an elastic cord that secures the bottom part. Too complicated and too fiddly in my opinion. Also, a larger tripod will make the bag pull away from you more when it’s attached that far away from your back. The second option is to slide two of the legs in a side pocket and secure the top part with a strap. For me this is the faster and more comfortable way to carry the tripod, although having the tripod on one side can ruin the balance of your bag.
Gura Gear calls the straps on this pack ‘M.O.L.L.E. (Modular Lightweight Load-carrying Equipment) compatible attachment points with quick-hook side straps’. These straps work fine, but it’s very easy to lose them when they’re just attached to the pack, doing nothing. I’ve already lost most of them.
Most of the time, I usually just carry my carbon finer tripod. It’s a bit too large for the pack but light enough for a short hike.
Comfort/Ergonomics
Electronics tend to get smaller and lighter over time, except for camera gear. Put two bodies, three lenses and a flash in a bag, and you already have a bag that most people would consider heavy. The Bataflae is the lightest bag in its class (5.3 LBS), and that helps.
I find that the bag is comfortable to wear, especially if you don’t have to cover large distances. When I fill the bag to its maximum capacity and go on a serious hike, I find that the shoulder straps are too thin, and so is the waist belt. This bag was not designed for hiking. That said, if you keep the weight down, it will stay comfortable for a long time.
On landscape trips that involve some hiking, I sometimes put just one body and two wide angle lenses in the bag, and fill the excess space with a rain jacket, a fleece, water and some snacks. That’s also what I like about the largest Bataflae – even if you don’t need a lot of camera gear, the extra room is very useful.
‘There are only two emotions in an airplane: boredom and terror.” – Orson Welles
Airline Travel: Size Does Matter
Traveling by air is a nightmare for photographers, especially when you’re flying cattle class. Anyone who has ever watched the luggage crew throw suitcases into an airplane, knows that checking your camera bag is not an option — it needs to go into the cabin. But because of fees on checked bags, more passengers are bringing carry-ons, which are growing in size. And with planes more crowded than ever, bins fill up before everyone has reached their seat. Travellers fight physics and one another to shove one more bag overhead. Or they’re forced to check luggage at the gate.
The Bataflae was designed with air travel in mind. It is within the average maximum cabin luggage size restrictions, and it fits the overhead luggage compartment of most commercial aircrafts worldwide. You just need to make sure you get into the plane before your neighbour does.
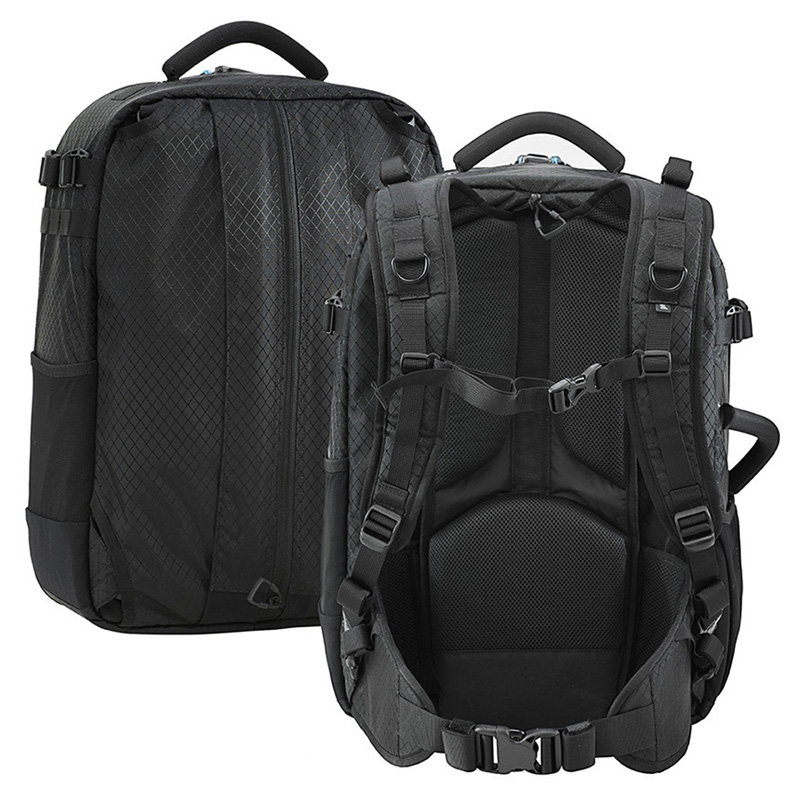
The entire harness can be tucked away in a dedicated compartment.
The harness system of the Bataflae is stowaway in design and contains a removable waist belt. If you want, you can zip the entire harness into a dedicated compartment that is hidden behind the harness itself. It will make the bag look less bulky and it will be easier to slide it into the overhead luggage bins.
Be careful to not stuff too much into the auxiliary pockets — the pack may get too bulky and you won’t be able to get it in the bins anymore. I usually travel with a photo vest, so when I need to take some items out of the pack, I can temporarily put them in my vest.
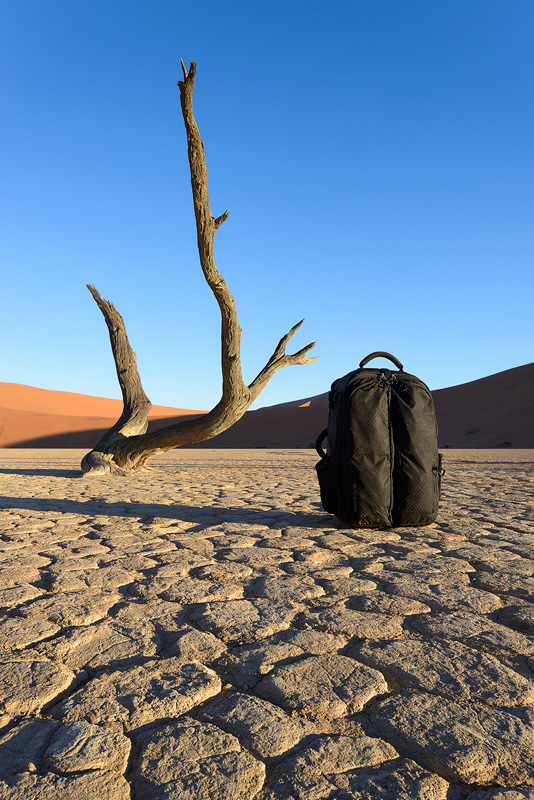
My Bataflae in Deadvlei, Namibia.
Build Quality
The construction of the bag is tough and well-made. The materials all feel very tightly constructed and the bag oozes quality in every little detail. That said, I do find that the zippers are very stiff and tough to open. You really have to hold the bag with one hand while opening the zipper with the other. The Kiboko zipper was not weather sealed, but it was very smooth to open — you could actually do so with one hand. I have noticed that the zippers are even more difficult to open in cold weather, or when the zipper is not straight (when the side of the bag is leaning against something for instance). This happens to be the only major negative point I can come up with for this pack.
For our photo tours I travel with my Bataflae 8 months a year. From the snow, ice, and rain in Iceland, Japan, and Antarctica, to the dust and heat in Namibia and Zambia — the Bataflae can handle it all.
The most wear is at the bottom of the bag, but it’s very minor. And talking about the bottom, I’d like that part to be truly waterproof so that I can put the back on a wet surface without the moisture getting through. I know that I can use the rain cover to rest the bag on, but in reality I often forget to do that or I simply don’t have the time.
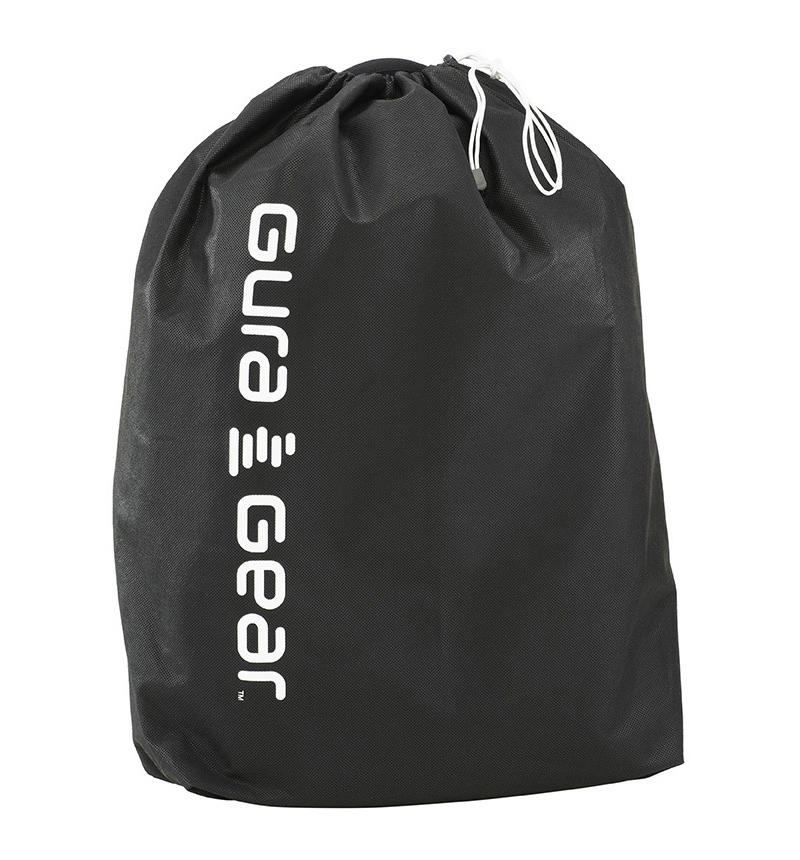
The Bataflae comes in a neat dust cover for storage.
Pros:
-Clever design
-Swallows a ridiculous amount of gear
-Comfortable
-Lightweight
-Flexible
-Great overall build quality
-Easy and quick access
-Fits the overhead luggage compartment of most commercial aircrafts worldwide
Cons:
-Pricey, but you get what you pay for
-The weatherproof YKK zippers are very stiff and hard to pull when opening/closing, especially in cold weather
-Easy to lose the tripod straps, I already lost three.
-Not a bag for long hikes
Conclusion
This is by far the best bag you can buy in this class. Clever design, lightweight, comfortable, great build quality, and it swallows a ton of gear. As always, quality comes at a price — this bag ain’t cheap. But if you’re willing to spend thousands of dollars on cameras and lenses, you should get yourself a quality bag to carry and protect it with.
For long hikes, a bag like the Tilopa from F-Stop seems to be a better choice. I once briefly tried one on, and the harness felt very good. I thought it would be good for this review to test that bag as well, so I contacted F-Stop. Even after sending four (!) reminders over a period of almost six months, I never heard back from them. Not a single email. Which brings me to customer service — Gura Gear responds quick and they are very helpful. To me this is important as well. If something breaks, you want a quick solution.
At this moment, I can’t think of a better camera bag. Highly recommended.
Leave a reply