We’re not surprised that Game of Thrones is constantly trending because every episode of this hit HBO show is just epic—and it’s seen by millions of viewers around the world. Remember this Game of Thrones-inspired fantasy portrait tutorial we published last year? Today, we’re giving you a new way to get creative with this popular, trending theme—and a reason to change that old profile photo.
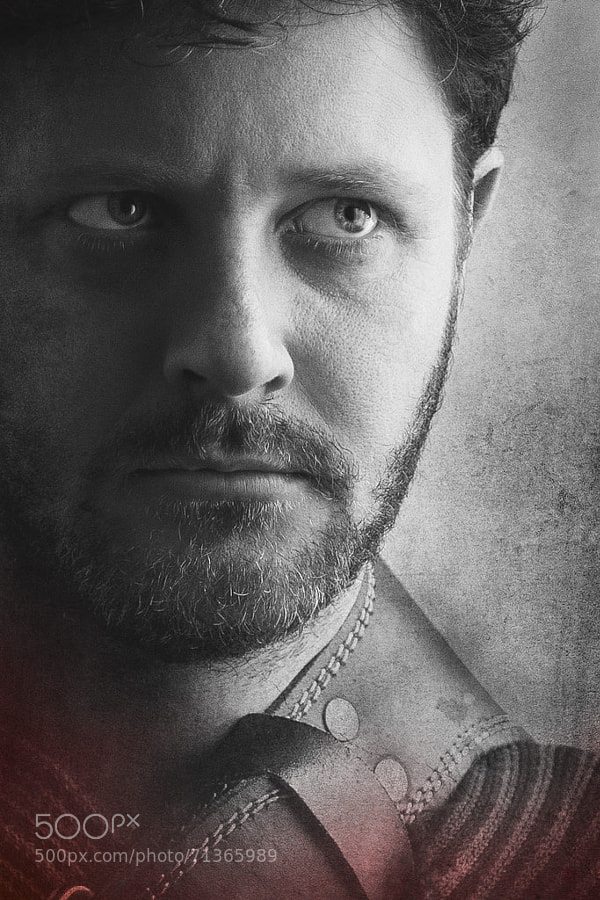
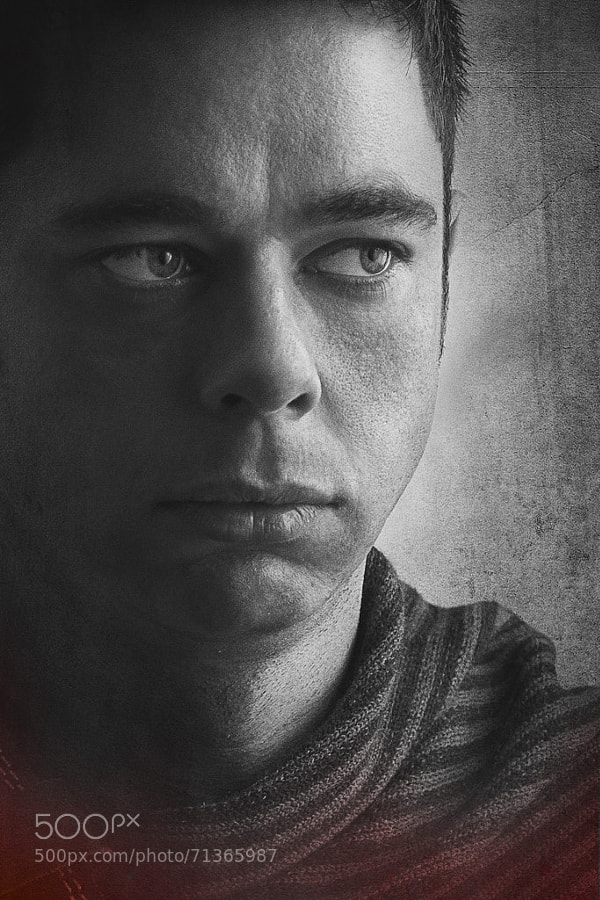
Rodrigo Capuski, a studio photographer from Brazil, is going to teach you how to recreate the black and white portraits, as seen in Game of Thrones’ Season 4 promo posters. Scroll down, and try these themed portraits with your friends and clients!
How To Shoot Portraits Inspired By
Game of Thrones Season Four Posters
by Rodrigo Capuski
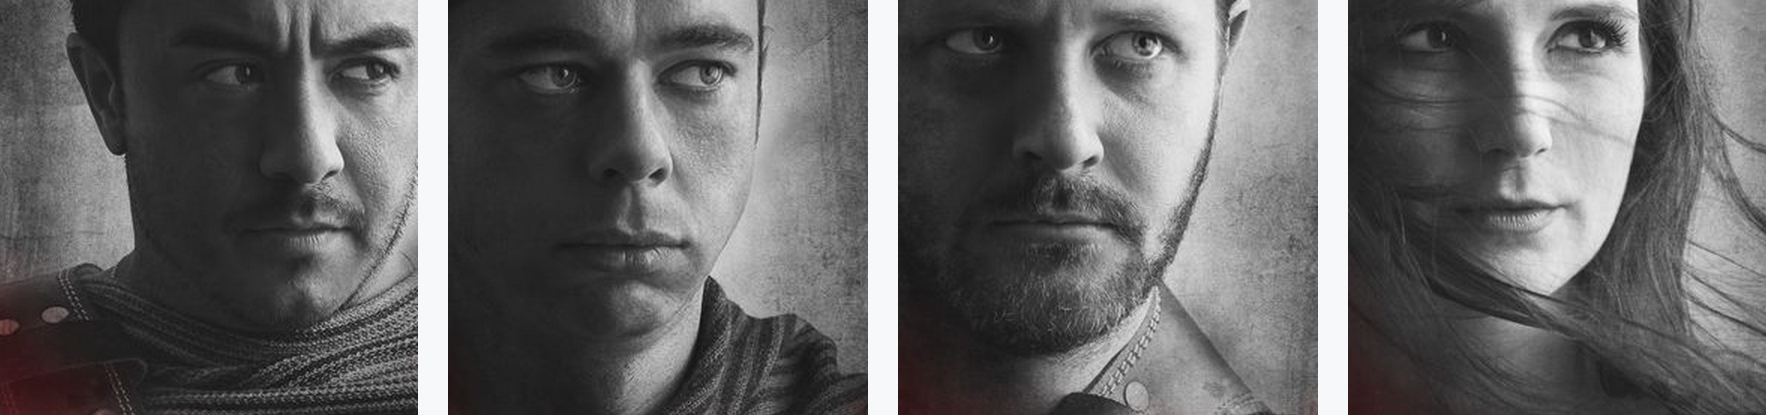
With striking framing and expressions, watchful and suspicious eyes, overlapped by textures and bloody red smudges, the black-and-white portrait posters of Game of Thrones Season Four are just as provocative as the episodes of this hit TV series.
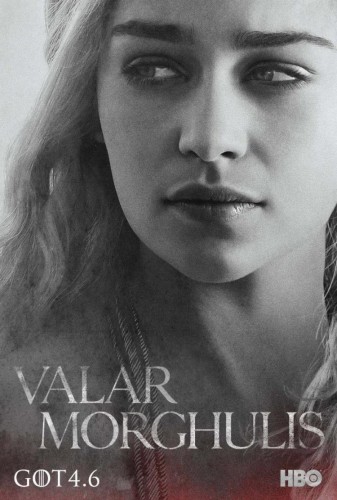
Image via geektyrant.com
Reproducing these portraits doesn’t involve complex equipment or flash lighting. Natural light is enough. The key to making these portraits work will lie in directing your model to pose and your model’s facial expression.

Equipment You’ll Need:
- A stool
- A camera in manual mode (M)
- A lens between 50 and 200mm. My ideal would be 85mm. For this I used 24-105mm at 105mm
- A fan, if your model has long hair
- Costumes and accessories inspired by Game of Thrones. A black scarf should be enough. Leather accessories work as Medieval-themed clothing.
- Adobe Lightroom and Adobe Photoshop
Step 1: Light and camera settings
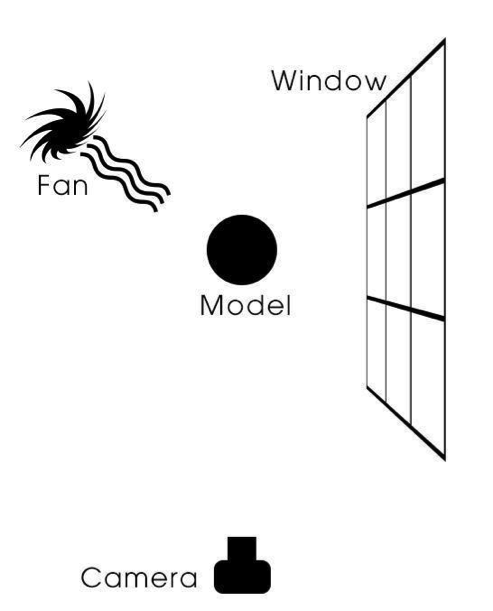
Place the stool next to a bright window with white curtains. The curtain will serve as light diffuser. The background can vary—it can be light or dark. Here, we will use a light background.
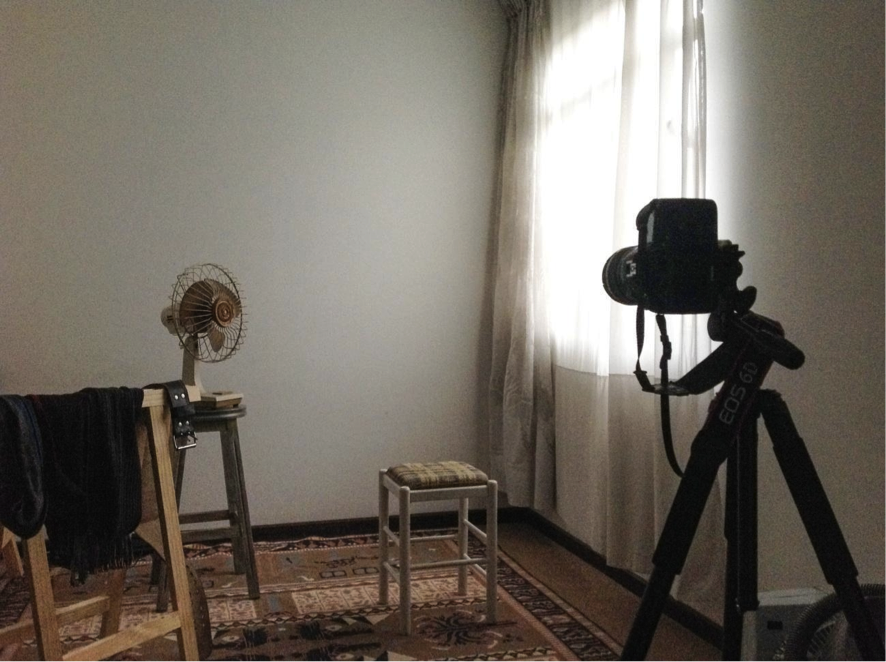
If the model has long hair, you can use the fan. To freeze the movement, the camera settings need to be like this:
- Shutter speed: 1/500
- Aperture: F/4.0
- ISO: 5000 (May vary according to the intensity of light from the window. Look for the correct metering)
If the model has short hair, the fan is not necessary. The camera settings need to be like this:
- Shutter speed: 1/100
- Aperture: F/4.0
- ISO: 800 (May vary according to the intensity of light from the window, look for the correct metering)
The camera image can be adjusted to shoot in monochrome mode—it helps to create the composition and facilitates the photometry.
Step 2: Capture and direction
Prepare the model with the clothes and accessories. You need to only focus on the top of the bust and neck. Leather accessories, earrings, and necklaces can look like Medieval clothing.
Directing the model is very important because his or her expression will influence the final result. With the model beside the window, frame the portraits at the bust. We will crop it later. The ideal positioning of the model’s face, is straight forward with a slight tilt to the side of the window. Ask the model to vary the face tilt, chin higher, chin lower, eyes higher, eyes lower. During this entire process, take several shots. These little variations will help to find the best angle for each type of face.
A tip to get good expressions from your model? Ask him or her to try to remember the past problems of their lives. Remember, the expression needs to be strong, enigmatic, worried, charged. Pay attention to their eyes during this process. They are responsible for the emotion behind the portrait, and must be well-focused.
For models with long hair, position the fan at the height of the face, midway from the side and the back of the head. The goal is to get a few strands of hair, fluttering in front of the face. The focus needs to be maintened in the model’s eye, so the strands will be slightly blurred, giving the effect of depth present in the original posters.
Step 3: Editing and Post-processing
Using Lightroom, select the photo with the best expression.
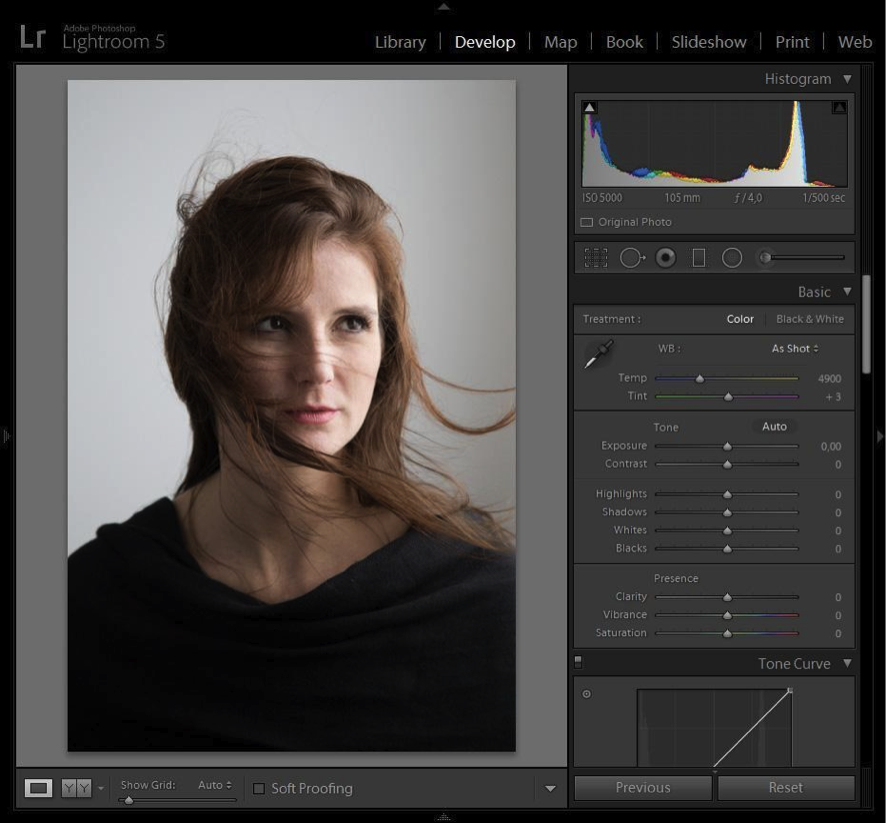
RAW file
Covert the photo to black and white. Make the exposure equalizations, if necessary, and make a pretty closed crop on the face. Crop part of the forehead and one side of the face. Follow the Rule of Thirds to compose.
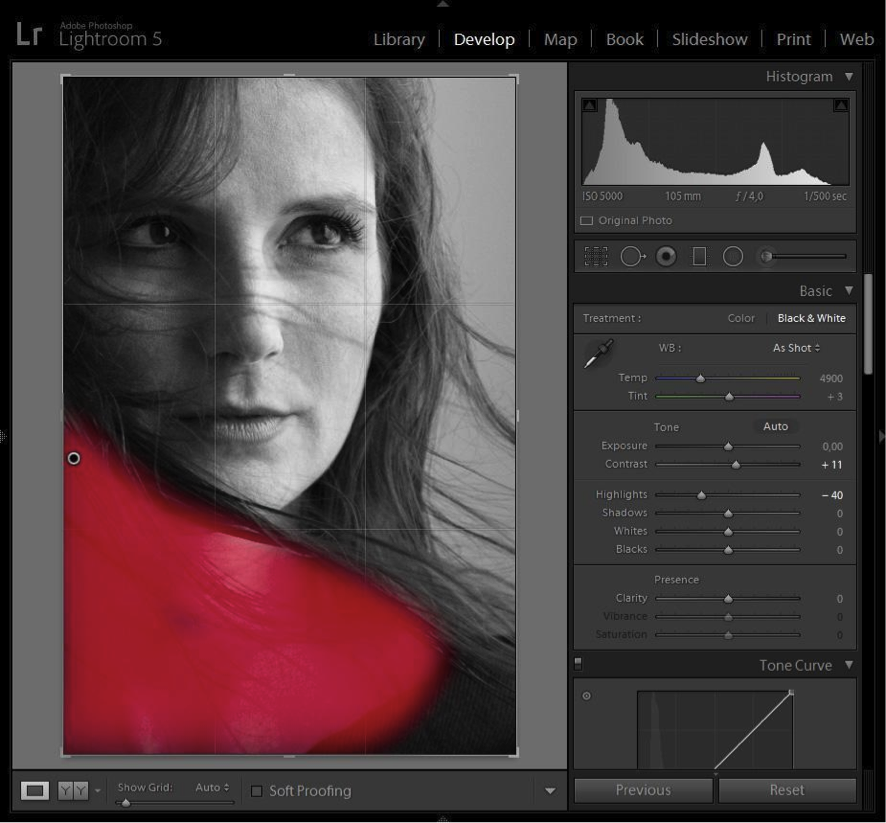
To highlight the face, use the brush to darken areas such as the neck and bust.
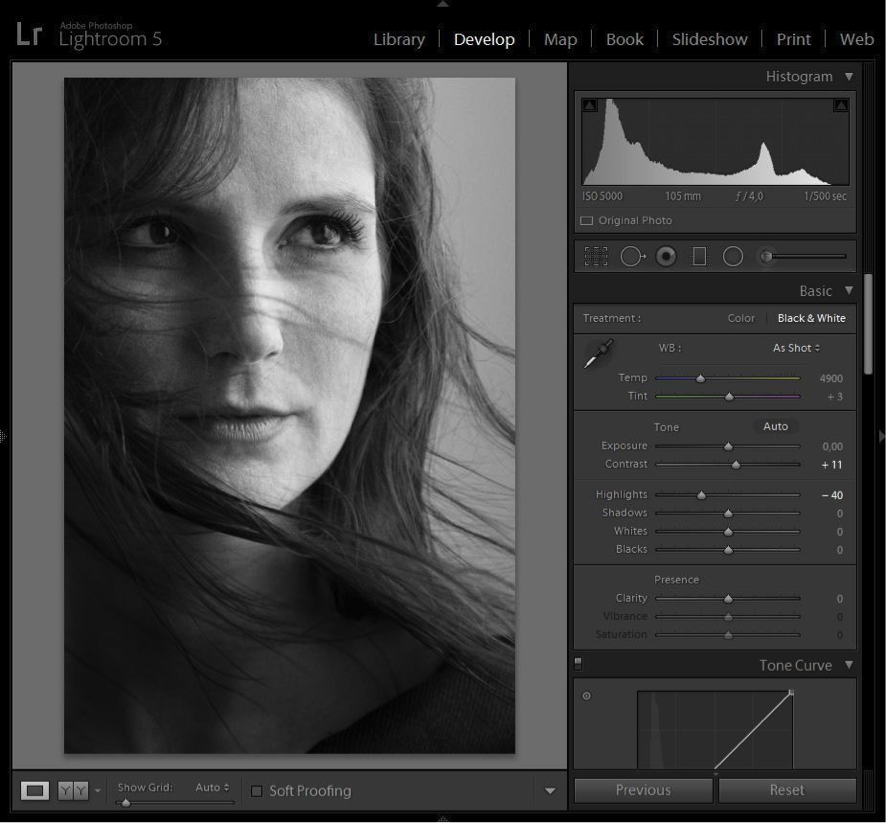
Final image in Lightroom.
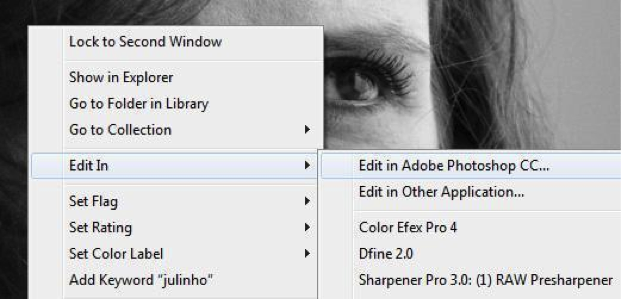
When you are done in Lightroom, edit the photo using Photoshop.
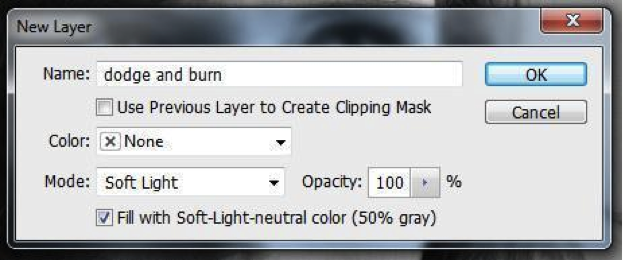
Create a new layer (Shift + Ctrl + N), change the blend mode to “Soft Light” and select the “Fill with Soft-Light-neutral color (50% gray)” option. Name it “dodge and burn”.
In this layer we will lighten and darken some areas of the photo. Select the “Dodge” tool, set range to “Midtones” and exposure to 8%. Select the “dodge and burn” layer, brush the eyes, iris and, if necessary, expression marks and dark circles, until you reach a satisfactory result.
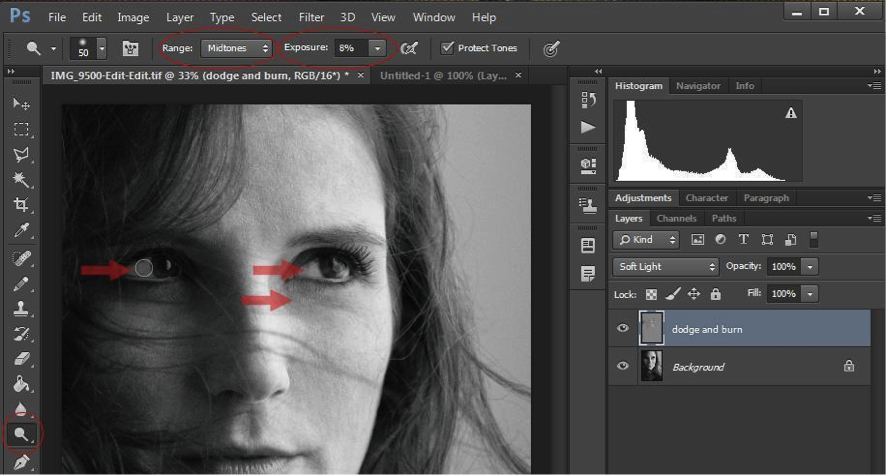
Eyes must be bright, but not too much, otherwise it will look fake.
Select the “Burn” tool, set range to “Midtones” and exposure to 8%. Now, brush the areas that need to be darkened, like side shadows, eyebrows, nose and around the eyes.
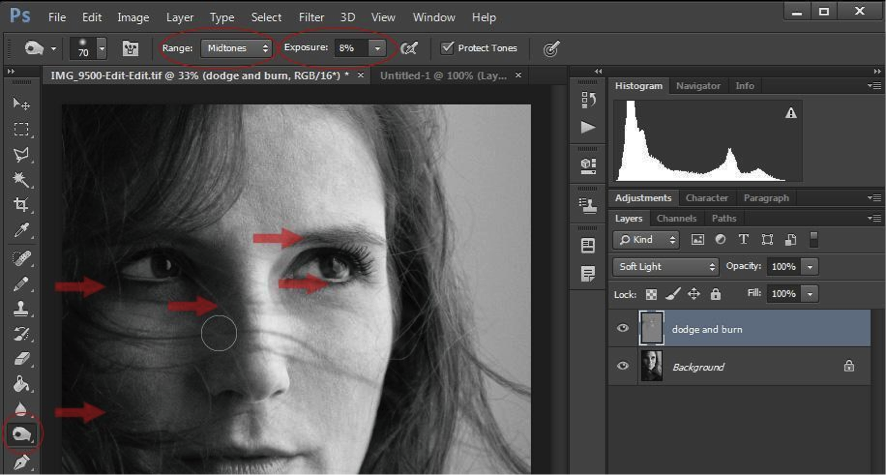
Darkened areas improve the photo’s contrast.
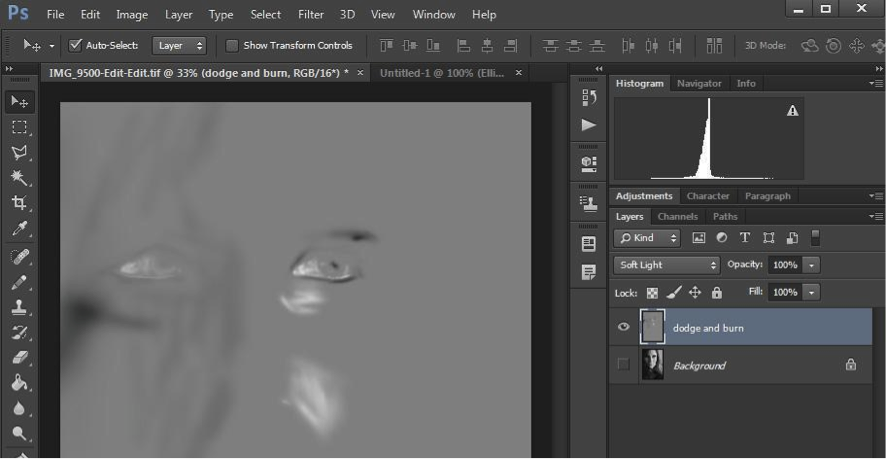
Hide the background layer to see the areas that were darkened and lighted.
Now we will create texture. To create the textures, we will use two different texture images. To find good textures images, Google “free grunge texture”. There will be a lot of free options.
For this tutorial, we will use these:
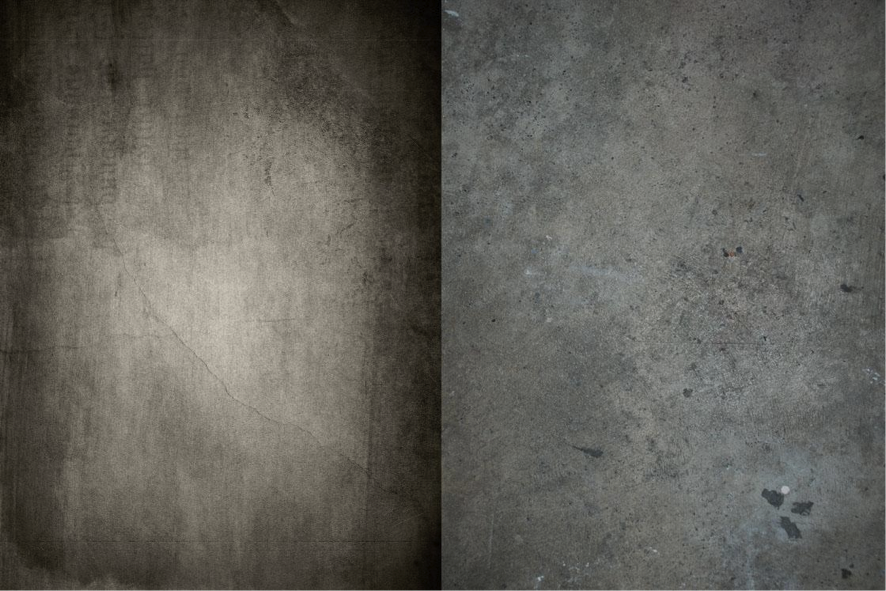
Links to download:
http://the.sand.free.fr/Textures/Grunge_texture_2_by_darkrose42_stock.jpg
http://cdn.sunroom.co.nz/sycha.com/wp-content/uploads/2010/03/concrete-921.jpg
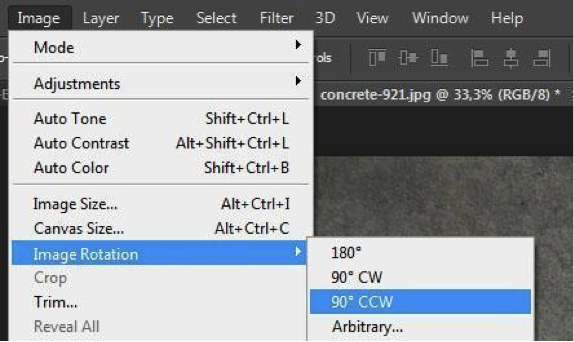
Open both images in Photoshop, rotate them to vertical orientation and convert them to black and white.
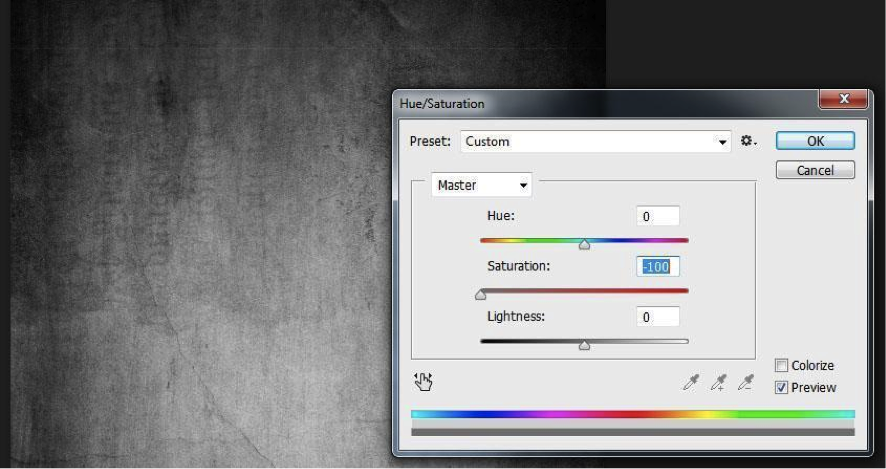
Ctrl + U
Drag both textures to the photo, creating a layer for each of them.
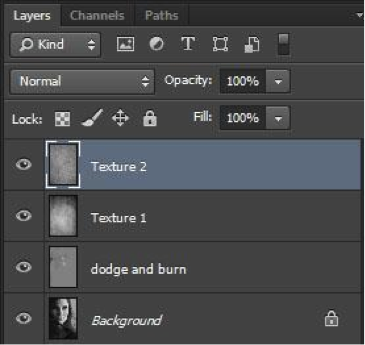
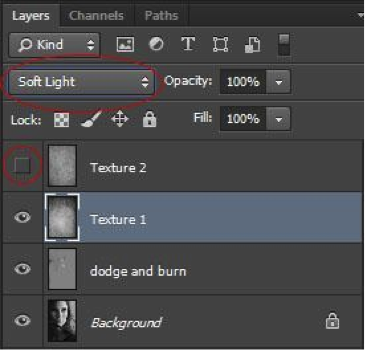
Then change the blending mode of both texture layers to “Soft Light” and hide the Texture 2 layer.
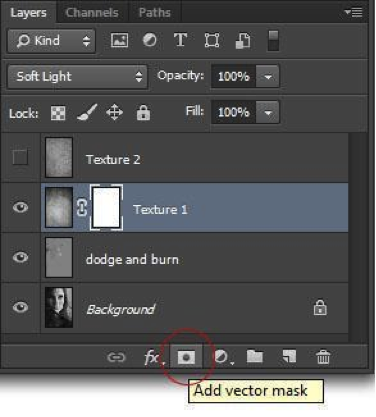
Add a mask on the Texture 1 layer.
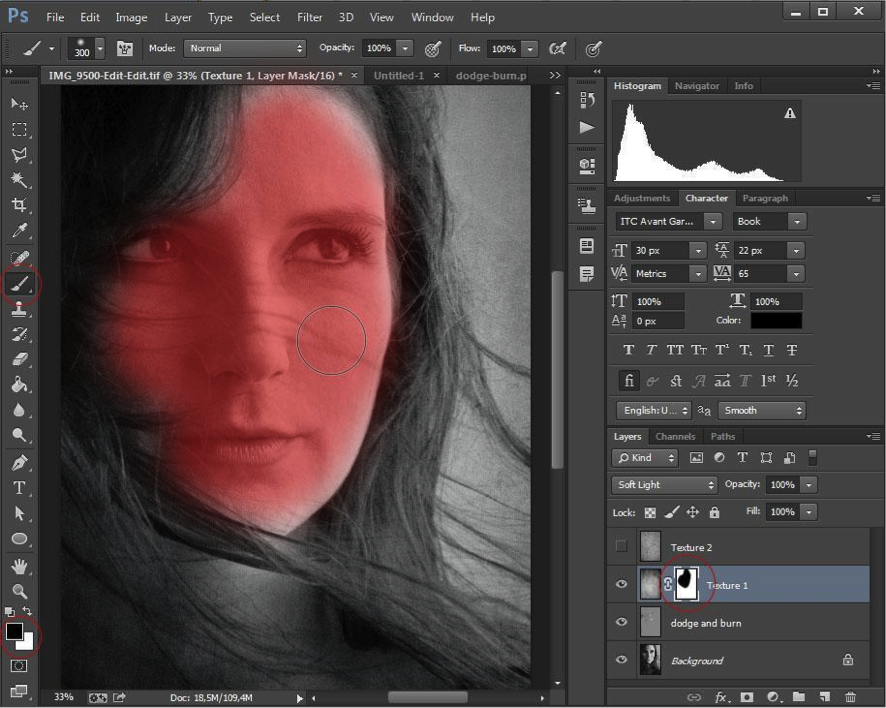
Select the mask and then select the Brush tool, set hardness to 0, select color black and brush the model’s face. The black color in the mask hides the content, so the face will not be marked by the textures.
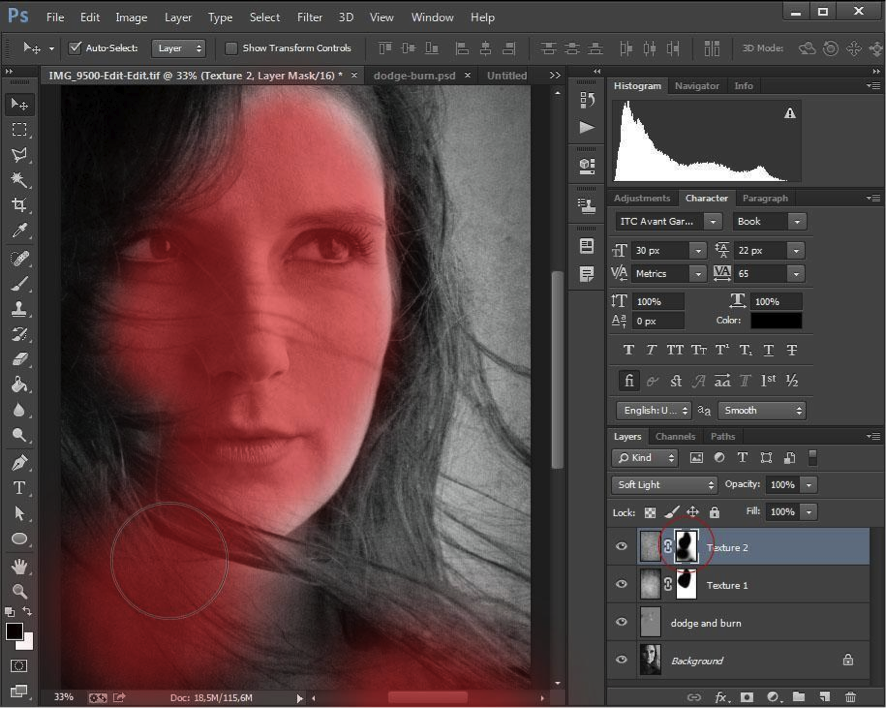
Repeat the same process with the Texture 2 layer. Brush different areas other than only the face in this layer, so the textures will blend in different parts, creating a rich texture.
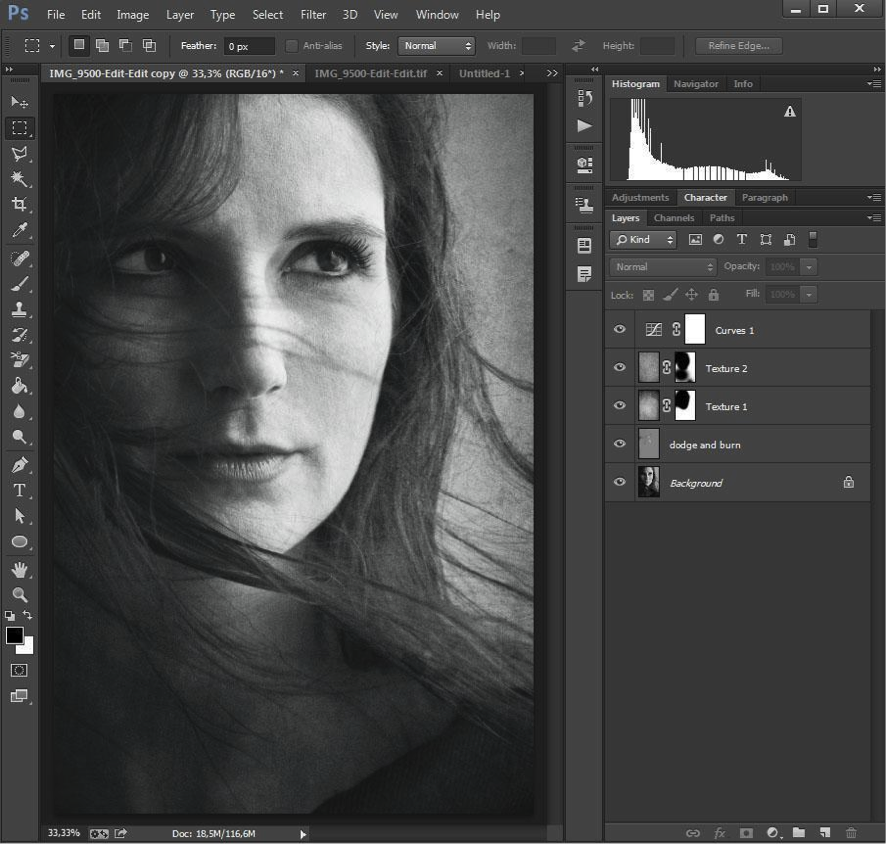
When you are done with the textures, create a “Curves Adjustment Layer”.
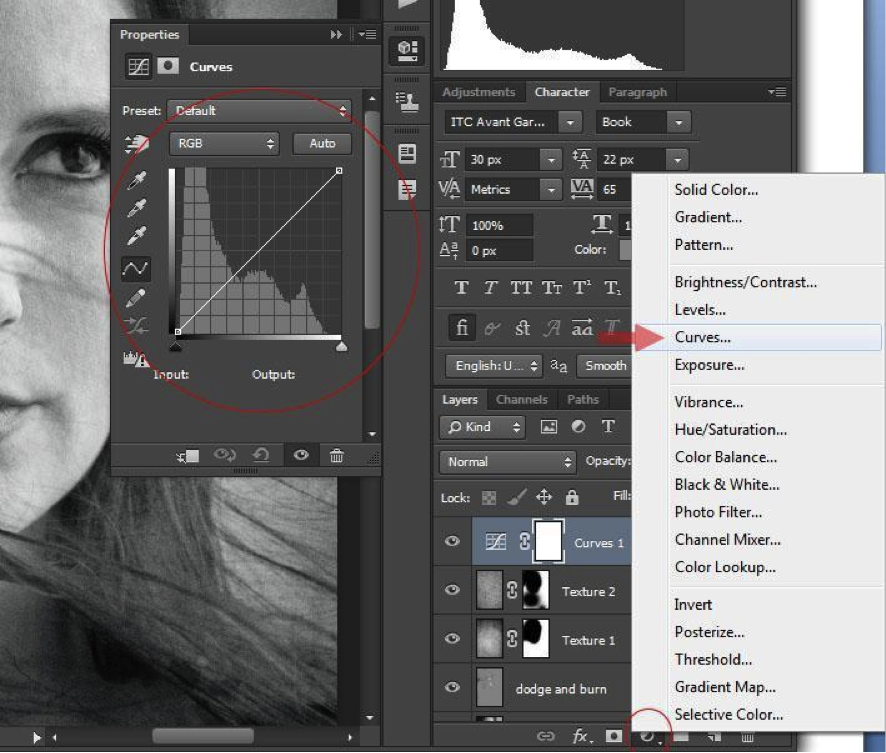
Adjust the curves to increase the contrast and eliminate the pure black, replacing it by a grey tone. For that, set the line curves like this:
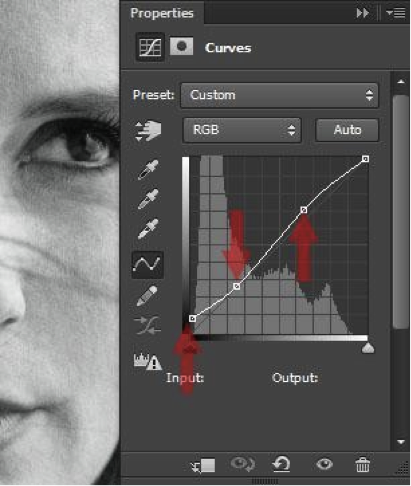
With this, we are done with the photo treatment. Now we need to only add the blood-inspired red detail at the bottom.
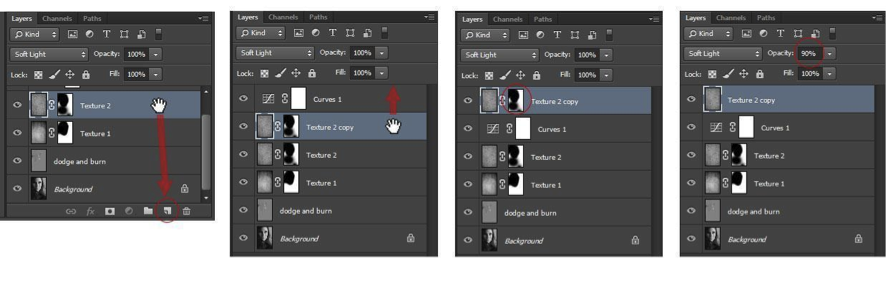
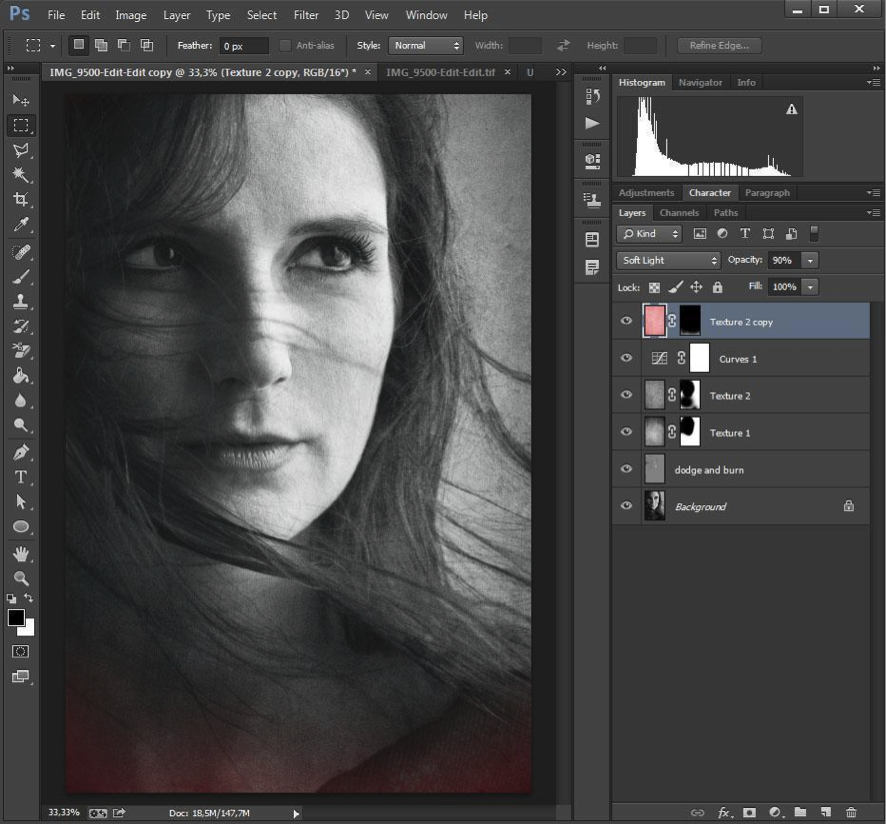
To create this blood-inspired red detail, we will use a copy of the Texture 2 layer. Click on Texture 2 layer and drag to the “Create New Layer” icon. Then drag the new layer to the top of all layers. Now delete the mask of this new layer, by clicking right button of mouse on the mask and select “Delete Layer Mask”. Change the opacity to 90%.
To give the red color to this texture, select the layer and adjust the “hue/Saturation”.
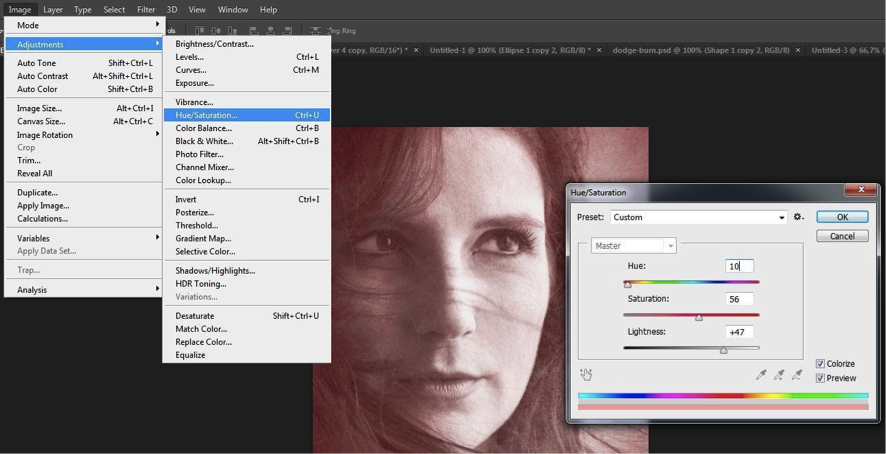
Now create a new mask on this layer and brush with black all the area that doesn’t need to be red. Keep only the bottom, create the shape as you desire with the brush.
To finish, with the red texture layer selected, select the “Brush“ tool and change the “Mode” to color, with opacity:50%, brush the edges of the red texture with light orange color.

The final result:
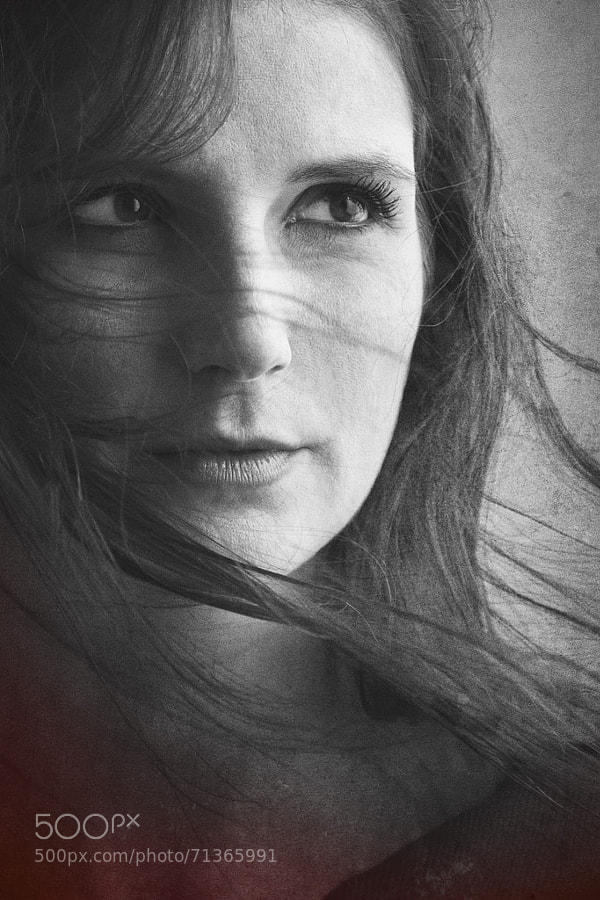
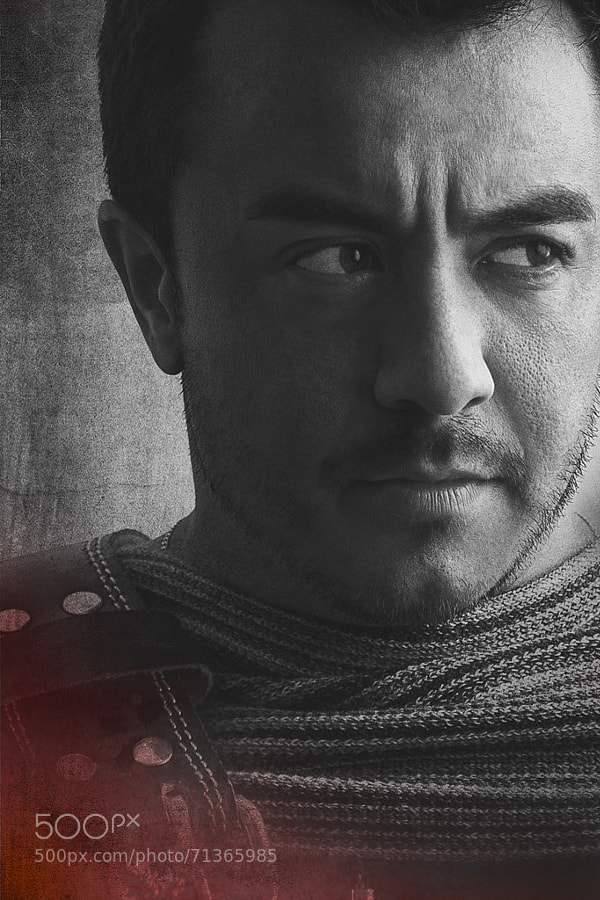
After you finish this editing, you can use the same file to personalize other photos. Just change the masked areas of the textures to suit each portrait. Here are some more examples:
To see more of his work, follow Rodrigo Capuski on 500px and thumb up his Facebook Page. You can also visit his creative photography studio website, Nadalin Photography.
Got questions for Rodrigo about this tutorial or his work? Comment below!


Leave a reply