An educator and nature photographer based in Portland, Oregon, Michael Bollino has spent much of his adult life exploring the natural world through adventure and travel.
Over the past decade, a growing interest in photography has quietly become the main driving force for these explorations. When he’s not immersing himself in nature he enjoys epic weiner-roasts with his family, strong coffee, and hoppy beer.
You can find more of his work on 500px, his website, blog, Facebook, and Google+.

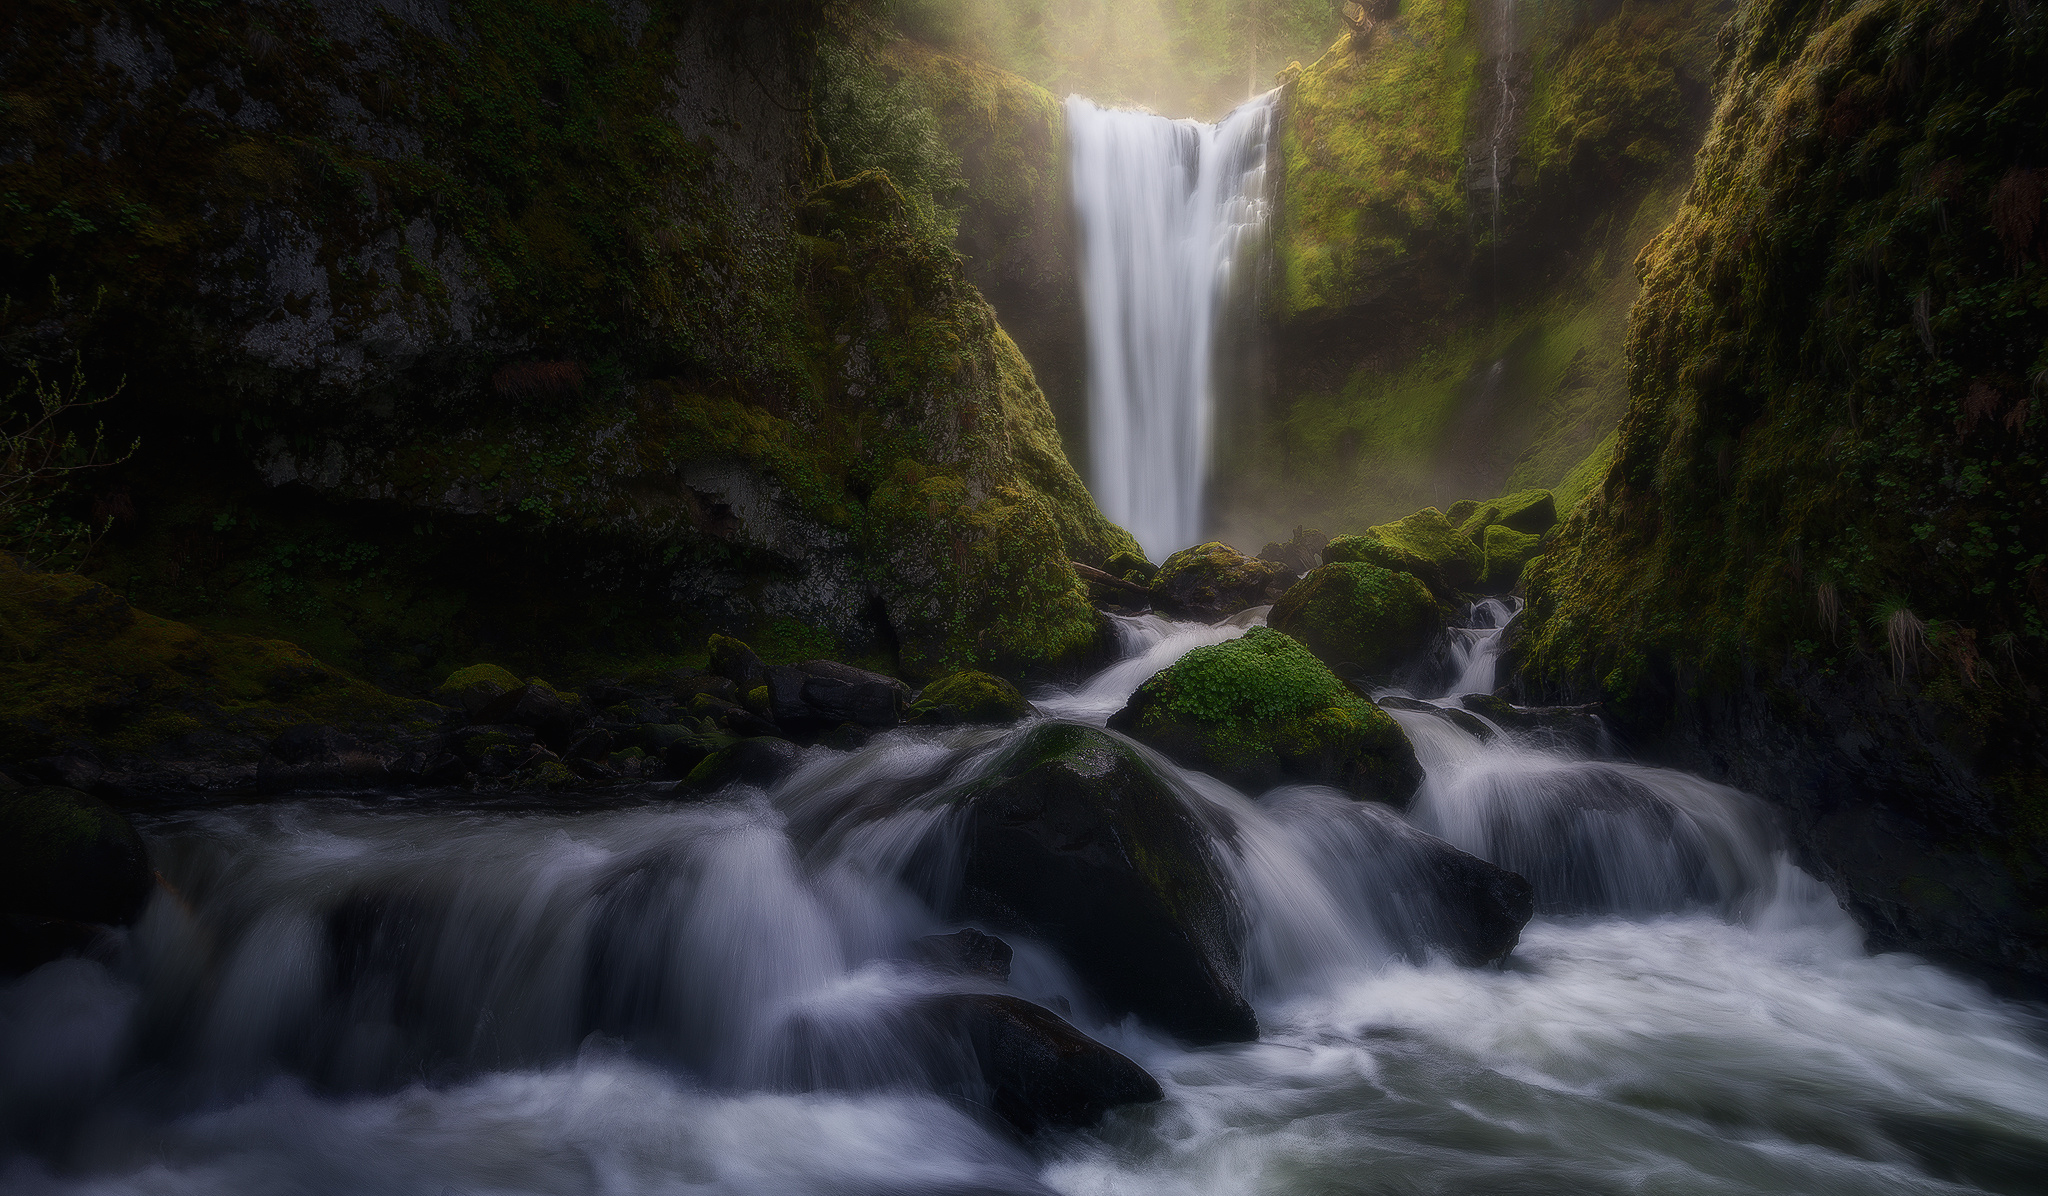
The month of May is upon us and this means springtime waterfall shooting is in its prime. Photographing creeks and waterfalls is one of the more enjoyable aspects of nature and landscape photography. If the sky is lined with a nice layer of reflective clouds, as it so often is here in the Pacific Northwest, then it’s possible to spend the entire day shooting falls and creeks—working a scene, experimenting, and dialing in compositions take on a meditative pace, a welcome respite from the hurried pressure I sometimes feel while shooting sunrise or sunset.
I refer to shooting waterfalls and creeks on cloudy days as “the low hanging fruit” of nature photography: place yourself and your camera in front of any beautiful waterfall during prime spring conditions and you are bound to come home with a worthy image.
However, this certainly doesn’t mean capturing creek and waterfalls is just a matter of showing up and releasing the shutter. There are several challenging factors the uninitiated find themselves unexpectedly contending with.
Here in the Pacific Northwest creeks and waterfalls swell with spring runoff, fed by melting mountain snow and the heavy downpours which frequent the area. You can probably imagine the effects of this large volume of water plummeting several dozen or even hundreds of feet over a waterfall. The weight and force of this downward pressure creates a billowing wind-driven cloud of fine mist with an uncanny ability to find the front of your lens. The onslaught can be relentless and aggravating for the ill-prepared.
I’ve taught and spoken with enough visiting photographers to realize many underestimate and are surprised by the challenges of shooting in these conditions. So I’ve compiled a few tricks and considerations I’ve amassed from the past eight years of the Columbia River Gorge waterfalls each spring.

1) KimWipes are your best friend: Forget about traditional lens cloths. Leave them in your bag. KimWipes are hands-down the best way to quickly and effectively clear water droplets, spray, and fog from the front of your lens. When I first tried them I was in complete awe of their moisture absorbing ability.
I usually grab a handful and use them as wad instead of individually, wiping frequently between exposures. Between wipes, be sure to place them in a dry dirt free pocket. One good use for your large lens cloth is to drape it over the front of you lens after wiping with Kimwipes. The cloth will act as a shield against spray until you’re ready to shoot your next frame. KimWipes are cheap and easy to purchase online. Two boxes containing 560 total wipes cost me less than $10 dollars and are still going strong two years later.
2) Shoot multiple frames in intense spray situation: If spray is bad, and you find yourself unable to come away with one completely drop-free exposure, don’t worry. Just shoot several frames, wiping the lens clean between each exposure. Replacing a drop on an image is easily done in post-processing by blending in a clean section from one of the extra exposures you shot. A few frames is usually all it takes to ensure you come away with a drop-free image.
3) Put your ball head’s degree markings to good use: When the spray is insane, and wiping the lens free of droplets under an unrelenting barrage of spray doesn’t provide a nano-second of relief, take note of the EXACT degree marking on your ball head, then swivel the ball head away from the direction of spray. You can now safely wipe it clean.
After wiping, drape a lens cloth over the lens front and rotate it back to the original degree marking. Spray usually comes in waves and there is usually a lull at some point. Be patient, and be ready to fire the frame off quickly. You will want to have manually prefocused before rotating to wipe.
4) Experiment with shutter speeds: Spending a few minutes fine-tuning your shutter speed is a little appreciated aspect of creek shooting. After I decide upon a composition, I fire off a few test frames at various shutter speeds (usually between ? and 1.5 seconds) to come upon the setting which renders water texture in the most appealing way.
My personal taste is for moving water to retain texture and detail rather than the veiled uniformity longer exposures produce. If the light is low, don’t be afraid to increase your ISO to increase your shutter speed to get the effect you want.
After finding the optimum shutter speed, I recommend shooting a long series of a dozen or more exposures. You will notice a dramatic difference in patterns and textures from one frame to the next. There’s always one exposure which holds more impact than all the others. Here’s a gif of unprocessed exposures I captured on a recent trip to Spirit Falls in Washington State:
5) Check your histogram for hotspots in whitewater: It’s surprising just how quickly the highlights in water can begin to clip. Make a habit of checking your histogram religiously, paying particular attention to the blue channel.
Again, you may want to dial back the exposure to ensure everything’s in check. You can then blend in the darker exposure over the areas with blown highlights while post-processing. I find peace of mind in making sure everything’s in check before leaving a composition.
6) Think “Get the water texture I want, then freeze foliage”: Forests are naturally darker shooting environments and often longer shutter speeds are called for. After capturing the water the way you want, zoom in on your LCD to about 50%, scanning the frame for moving foliage and/or vegetation.
If your foliage is not static, take one last exposure at either a higher ISO setting or with a slightly smaller aperture setting, if you can maintain an adequate depth of field. This dedicated foliage exposure can then be blended with the water exposure in post-processing with little difficulty.

So, there you have it! There are many other techniques out there which I’ve experimented with over the years, but this list comprises the core of my inner thinking whenever I’m out shooting creeks and waterfalls.
Hope you learned something and are able to get out there and put this information to good use!


Leave a reply