
Sarah Marino is a landscape and nature photographer from Colorado. In addition to grand landscapes, Sarah’s portfolio also includes a diverse range of smaller subjects including plants, trees, and abstract natural subjects.
Sarah is the co-author of three well-received ebooks on landscape photography, including Forever Light: The Landscape Photographer’s Guide to Iceland, Desert Paradise: The Landscape Photographer’s Guide to Death Valley National Park, and Beyond the Grand Landscape: A Guide to Photographing Nature’s Smaller Scenes.
Website: www.naturephotoguides.com/sarah
Ebooks: www.naturephotoguides.com/ebooks
Facebook: https://www.facebook.com/SarahMarinoPhoto
Instagram: https://instagram.com/sarahmarinophoto
This article was originally published on Nature Photo Guides and is being republished on 500px ISO with express permission from Sarah

A fellow photographer recently contacted me for some tips on how to be more successful in identifying and photographing small scenes in the field. This photographer is very talented at taking photographs of grand landscapes but shared that they could use some help with identifying and photographing smaller scenes. This experience is common since taking photographs of smaller scenes does require the development of some different skills and a shift in mindset when compared to pursuing grand landscapes. And, since we receive similar comments and inquiries fairly often, this seems like a good topic for a blog post.
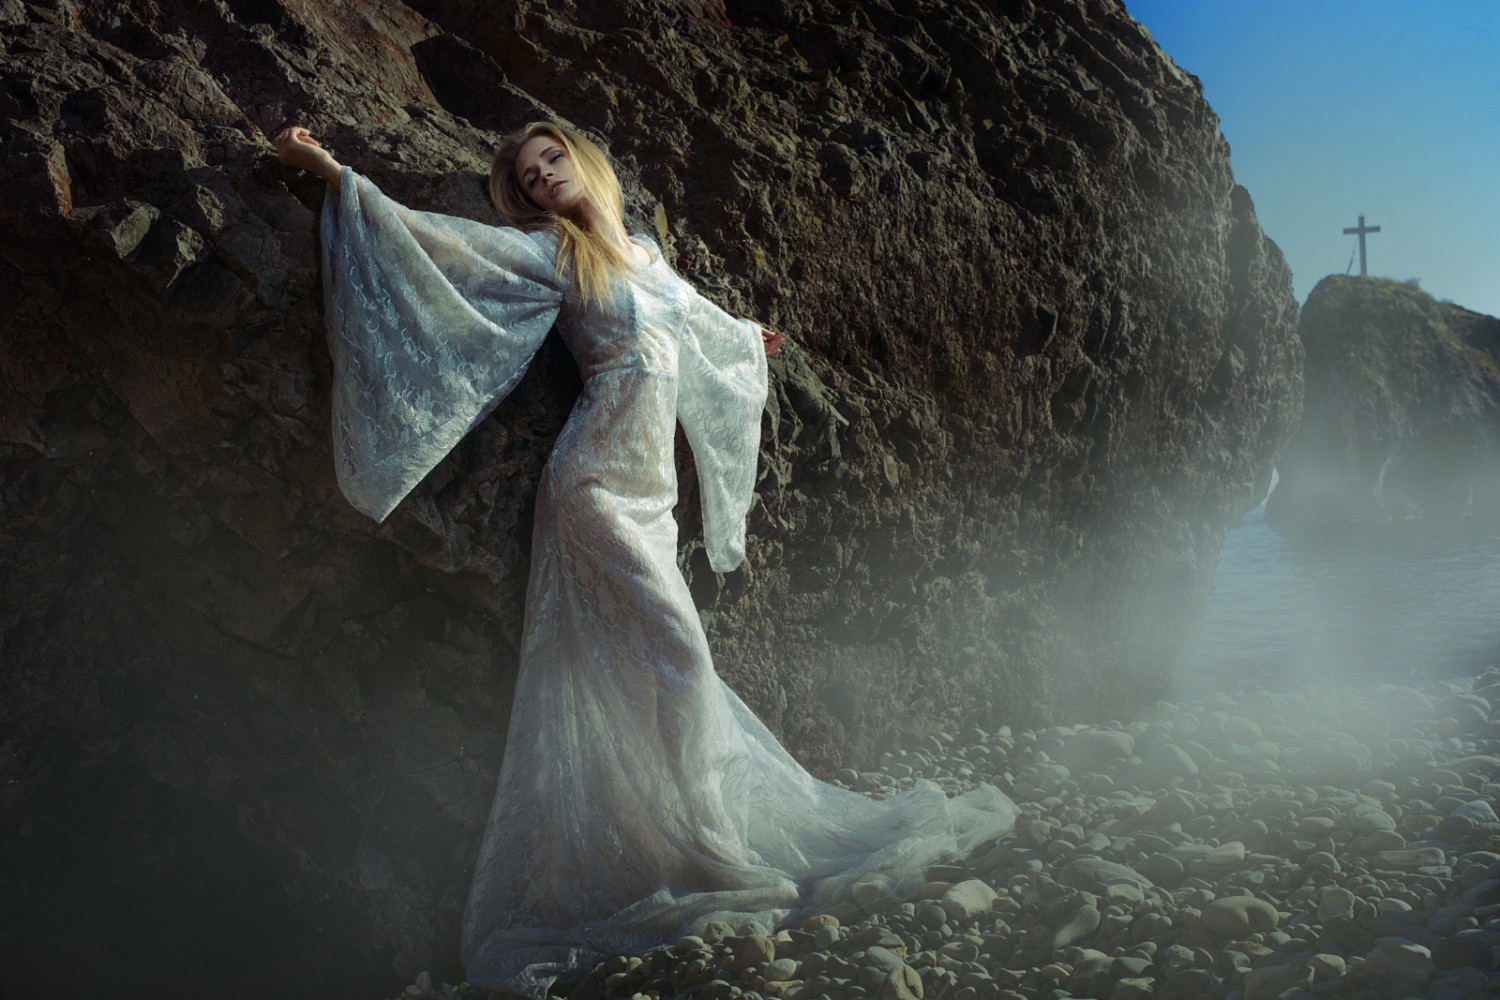
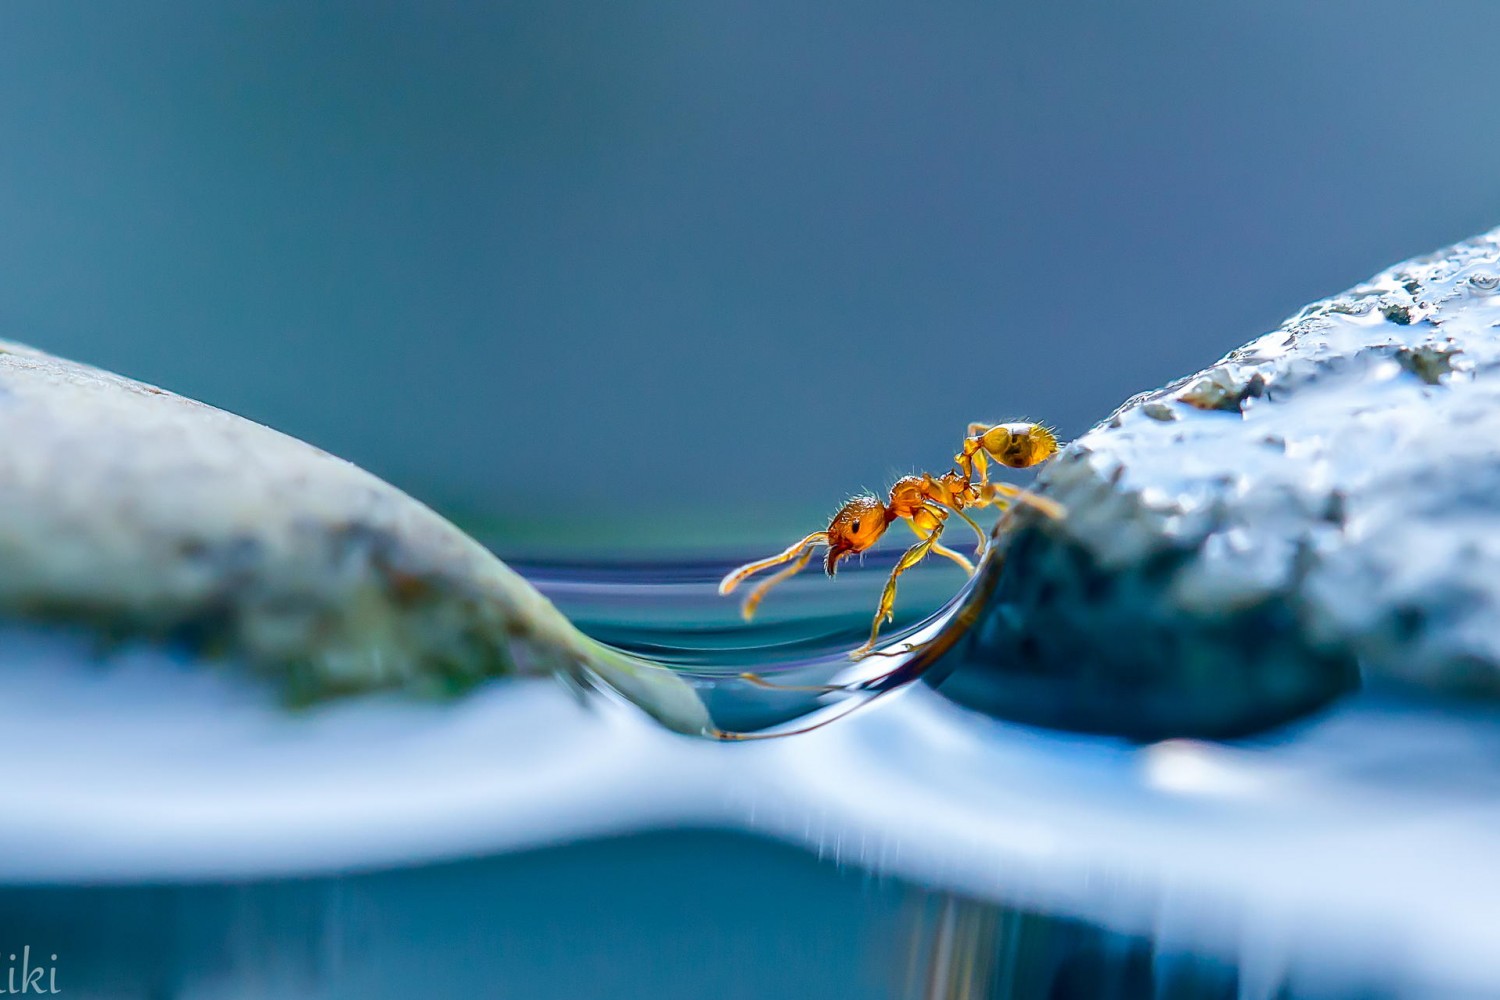
For the purposes of this post, smaller scenes include intimate landscapes, abstract subjects, patterns, textures, and artistic portraits of plants. Such photographs often, but not always, encompass a narrow field of view, usually lacking the sweeping nature of a grand scenic and focusing instead on the arrangement of the smaller details of a landscape. Such photographs also often rely less on the literal qualities of the subject (like trees or a plant) and instead focus on more abstract qualities like lines, curves, patterns, and textures. Photos that fall in these categories are generally crafted to convey a particular mood, emotion, or observation with a degree of intimacy, understanding, or closeness.
One of the joys of photographing smaller scenes is that subjects abound in any natural area, ranging from your back yard or local park to the most scenic of national parks. This makes photographing smaller scenes accessible when other types of landscape photography might not be productive or possible. Adding these types of photographs to your portfolio can also add depth since such photos help tell more of a story about a place than a grand landscape often can on its own.
Here, I summarize seven tips to help landscape photographers improve their ability to photograph smaller scenes and share some photographs to illustrate the concepts.
#1 – SPEND TIME LOOKING FOR PATTERNS, TEXTURES, AND DETAILS
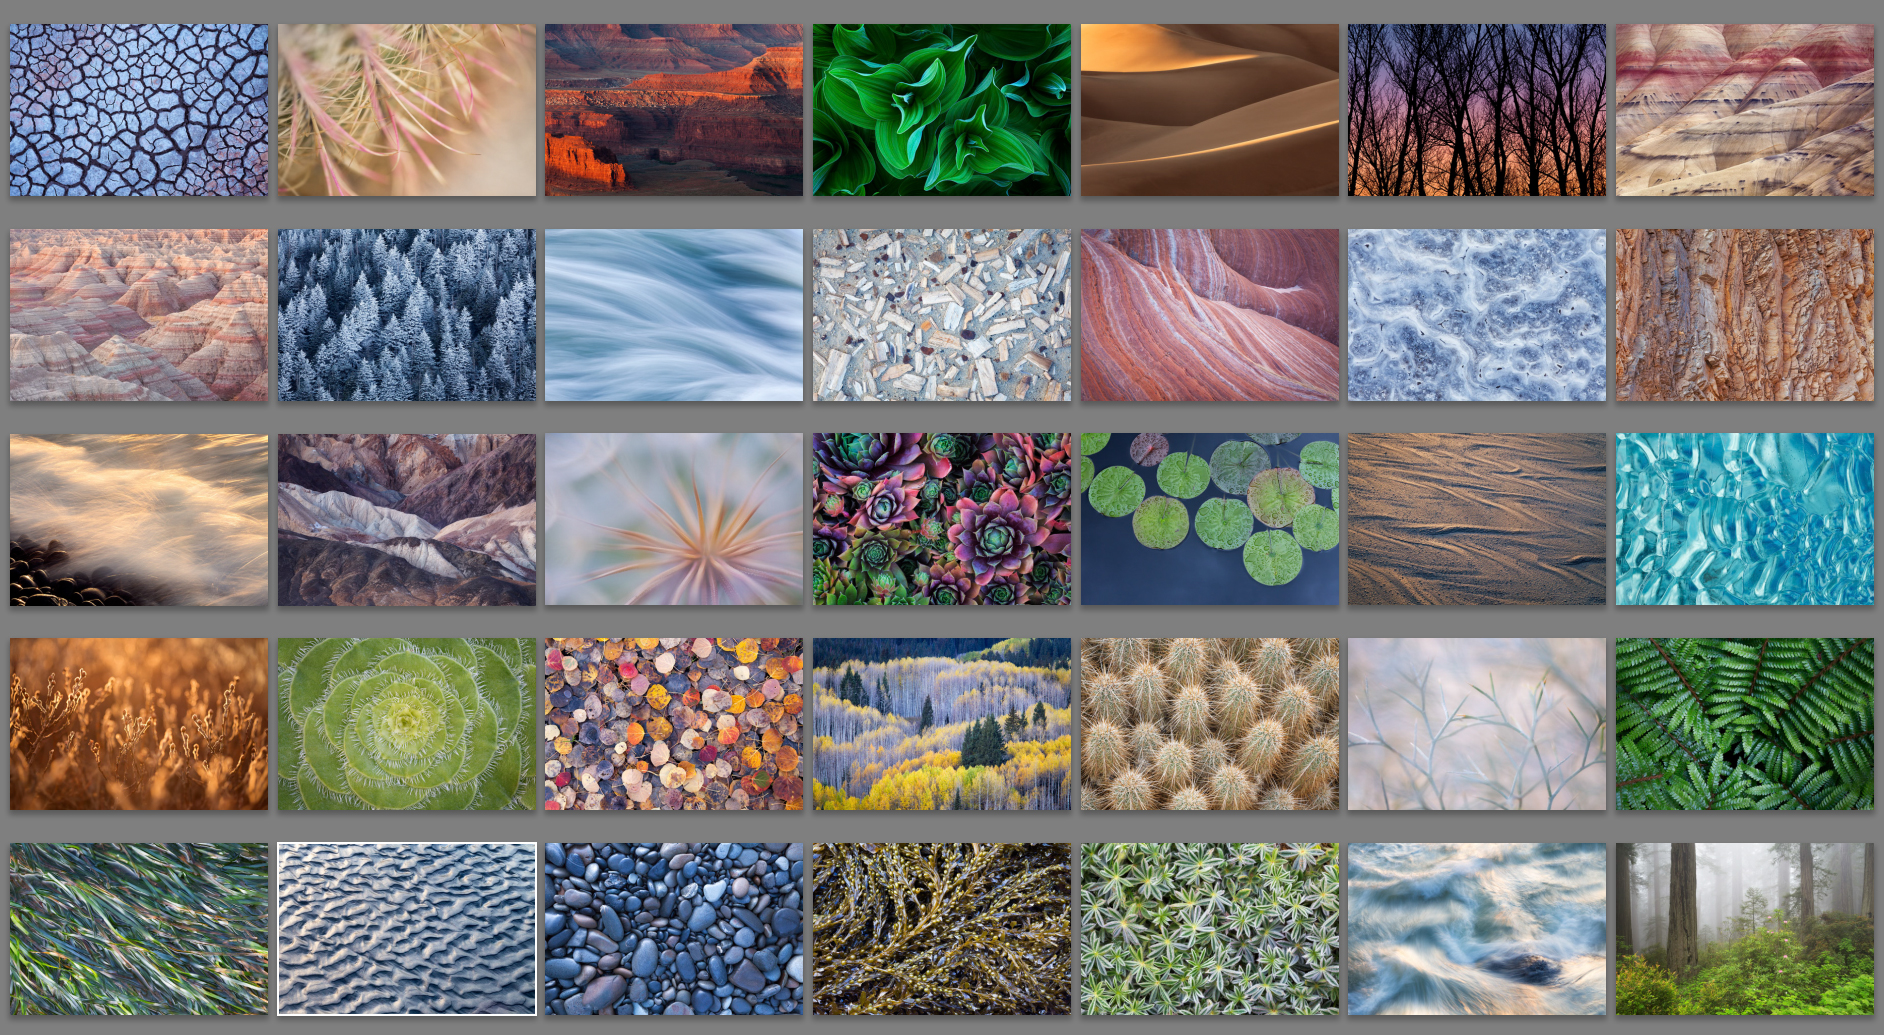
Just as photographing grand landscapes takes significant time and the development of specific skills, so does photographing smaller scenes. The first step is finding subjects, which are everywhere once you start looking. One of the best ways to improve your ability to identify smaller scenes is to dedicate time for exploration. The image above features a selection of some of my photographs of smaller scenes to help demonstrate the broad range of subjects, many of which are common in places visited by landscape photographers. For example, a subject as common as tree bark Or rocks can become an interesting abstract subject when light, textures, colors, and patterns come together.
For landscape photographers who want to become better at taking these kinds of photographs, plan to arrive at your next sunset destination a few hours early. Without taking out your camera, wander around for at least thirty minutes simply looking to identify potential small subjects. Look up, look down, and seek out details, both large and small. Let’s say you are photographing in a mountainous setting. Look for subjects to isolate with a telephoto or macro lens. Take time to notice patterns in the trees. Look at the bark, the lines of the trees, and the shapes and patterns of the leaves or needles. Take time to study the variety of plants and look for interesting details. Maybe you see some colorful grasses. Explore the rocks in the area. They might be covered with colorful lichen or have an interesting texture that might translate well to a photograph. Look around for interesting lighting conditions. This is the kind of visual exploration can help you identify possible subjects like those featured in this post.

#2 – SET ASIDE TIME TO EXPERIMENT AND SLOW DOWN
I honed my skills for taking photographs of smaller scenes by spending a lot of time at our local botanical garden. The ability to wander around without grand landscapes competing for my interests allowed me to develop a sense of what can make an interesting subject and how to work with varying types of light. By setting aside this kind of time and setting no expectations for the results, you can experiment extensively, learn what works, adapt after failures, and start honing your skills.
In taking another piece of advice from later in this post, I also often leave my tripod and camera bag at home (or at least in the car). While not having a full kit with me is a constraint, there is also a lot of freedom that comes with photographing with nothing more than my SLR and a macro lens. While I might not be able to technically execute some photos (when using a smaller aperture and longer shutter speed, for example), I find it easier to embrace experimentation if I don’t have all of my other gear to fall back on. When I know I cannot pull out my tripod to take one sort of photograph, I experiment with new things to see if I can find a different way of seeing using the tools I have at hand.
If you are out in the field waiting for sunset or after sunrise, you can also take an hour and try making photographs of smaller scenes by limiting yourself to one or two focal lengths that you might not frequently use (try 50mm, 100mm, and 200mm as a places to start). Choose one or two subjects and take many different kinds of photographs of them so you can learn about what approach might work best. While some of your initial photographs might feel like failures, these kinds of constraints and experimentation can help you learn.
Whereas sunsets and sunrises move fast, taking photographs of small scenes is often a slow and contemplative process. It takes time to see and explore the details of a place. Be prepared to take your time and try experimenting with different technical approaches, including varying focal lengths, shallow and deep depth of field, and different shutter speeds if working with a moving subject like water. Embrace the slow pace as one of the key elements of success in crafting these kinds of photographs.

#3 – EMBRACE LOW DEPTH OF FIELD
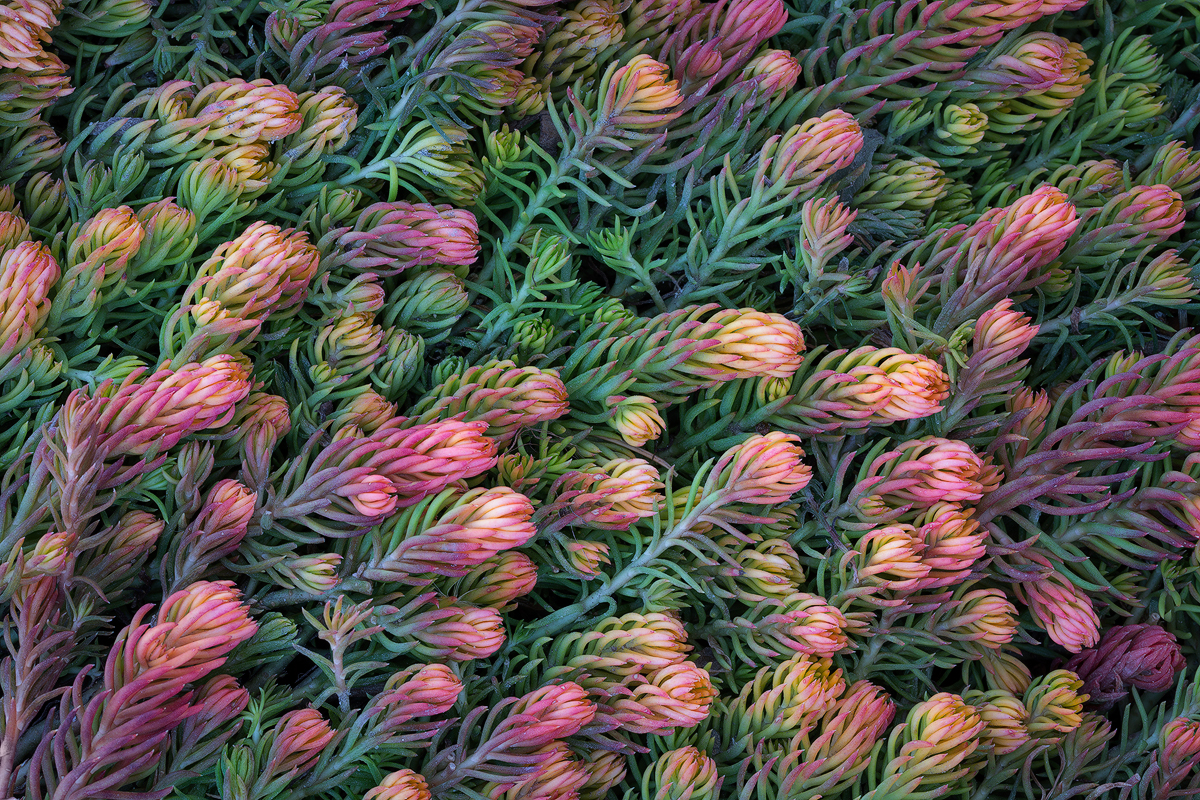
In landscape photography, sharpness throughout an image is almost always considered a key technical requirement. Getting past this mindset is one of the most essential skills in developing a better eye for smaller scenes, especially when photographing natural subjects like plants up close. With my 100mm macro lens at its smallest aperture (f/2.8) and its closest focusing distance, the depth of field is incredibly shallow, meaning that many elements of a subject are going to be rendered out of focus. This lack of focus can help take a mundane subject and create an abstract rendition that you cannot see with your eye, often simplifying the subject in the process.
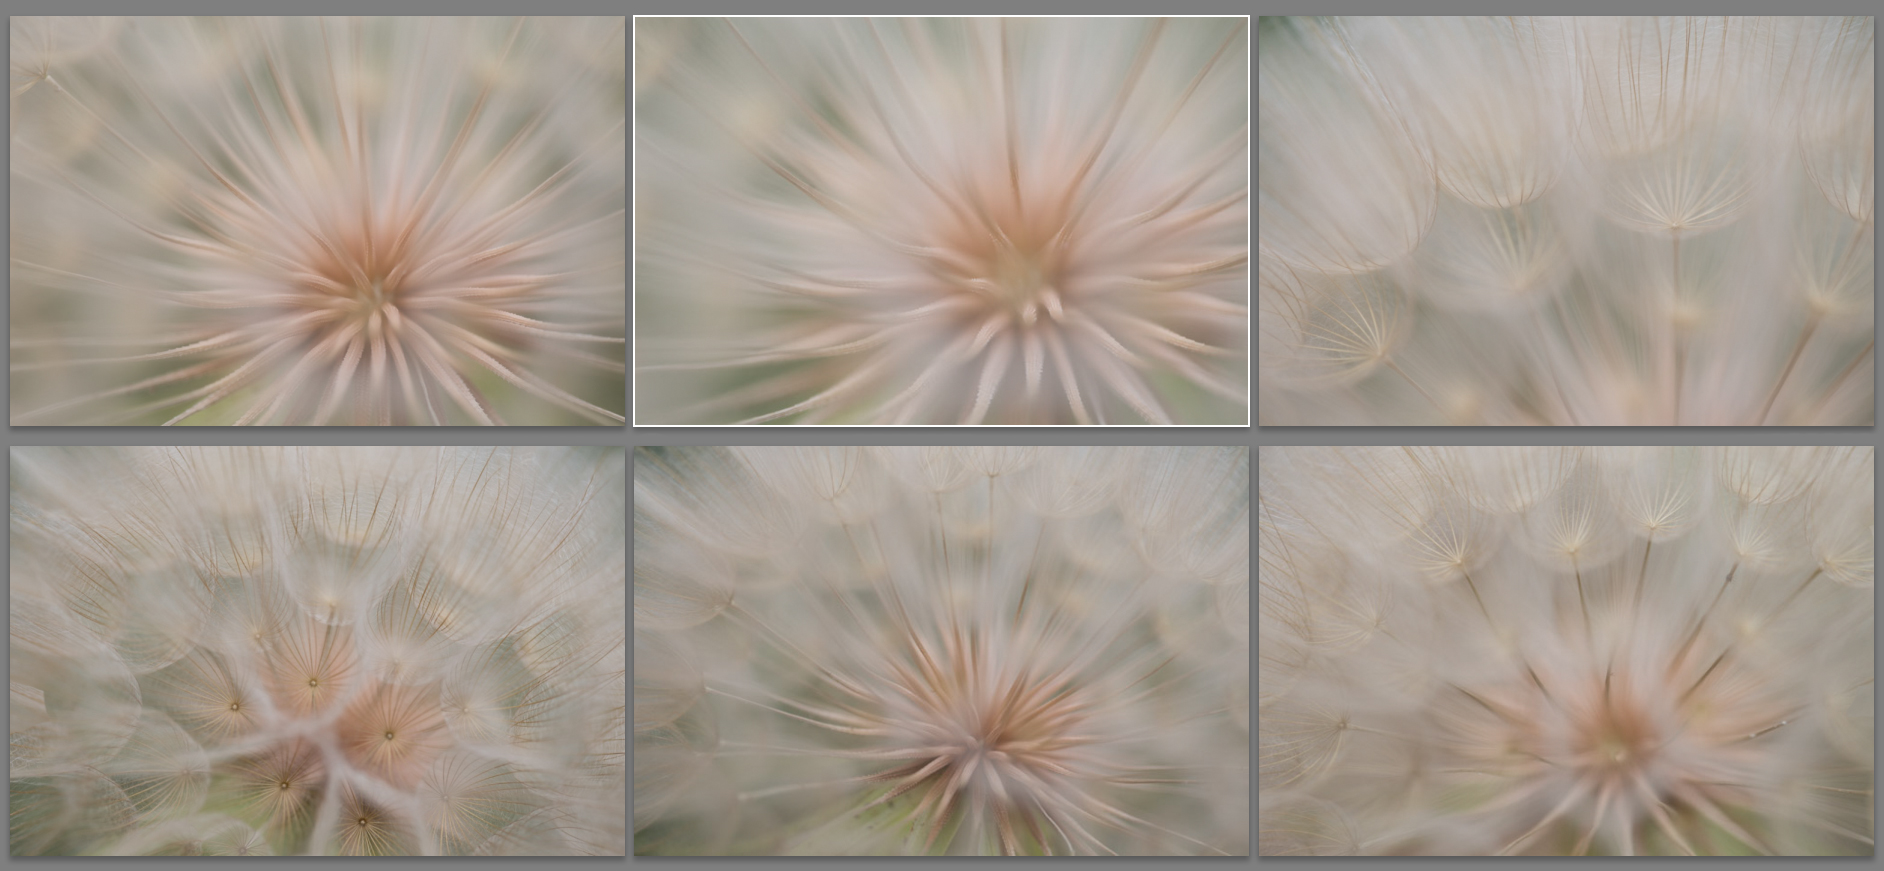
Take this series of photographs of a large seed pod (all unprocessed RAW files from a different day than the finished file above). At first glance, this subject seems like little more than a weed. In getting much closer and using very shallow depth of field (like f/2.8 or f/4.0 depending on the lens), I am able to render many parts of the plant out of focus, which allows the resulting photograph to focus on the lines, curves, and colors of the plant. This series of six files shows some examples of how tiny changes in depth of field and focus point can completely change the character of the resulting photograph. When photographing these kinds of subjects, moving your focus point just a bit in each direction can help you explore many different views on the same subject.
My favorite of the series is the one with the white frame (top middle). The curves bring elegance, I love the soft colors, and there are almost no distractions. While some of the other photos also have strengths, the lines are not quite as interesting to me and some of the photos have some unappealing elements, like the bottom middle photo. In that example, there is too much going on and some leaves with brown spots are evident along the lower edge.
At least for me, it took time to embrace low depth of field and figure out how to use out of focus elements as a compositional tool, so be patient and experiment a lot. It can be helpful to start experimenting with plants that have natural radiating or repeating patterns, as these can be more forgiving subjects. And, once you have some files to review, start noticing the elements that help create the strongest photographs and revisit your subjects with the intent to apply what you learned.
[twentytwenty]
 [/twentytwenty]
#4 – DITCH THE TRIPOD, AT LEAST TO START AND GET CLOSER
A tripod is an essential tool for photographing grand landscapes but can get in the way when seeking out smaller scenes. While a tripod is sometimes necessary when using smaller apertures for greater depth of field, I almost always start out in exploring a subject without my tripod and sometimes handhold my camera while taking photos. This gives me the freedom to move around, lay on the ground, and look foolish to any onlookers. This kind of freedom allows me to experiment with shallow depth of field, like shown in the photos above, without having to move around a cumbersome set up. In natural settings, the light is often bright enough to get good results when handholding your camera and photographing at large apertures. While using a tripod in these cases could increase the technical perfection of an image, I find that it often gets in the way of my creative execution.
If I want to photograph something with more depth of field and sharpness throughout, I still start without a tripod. I try different angles, get a sense of how close I want to be to my subject, and take some test shots all before setting up. I find that this approach allows me to experiment more, reduce frustration in having to repeatedly fix an awkward set-up, and get a better result.
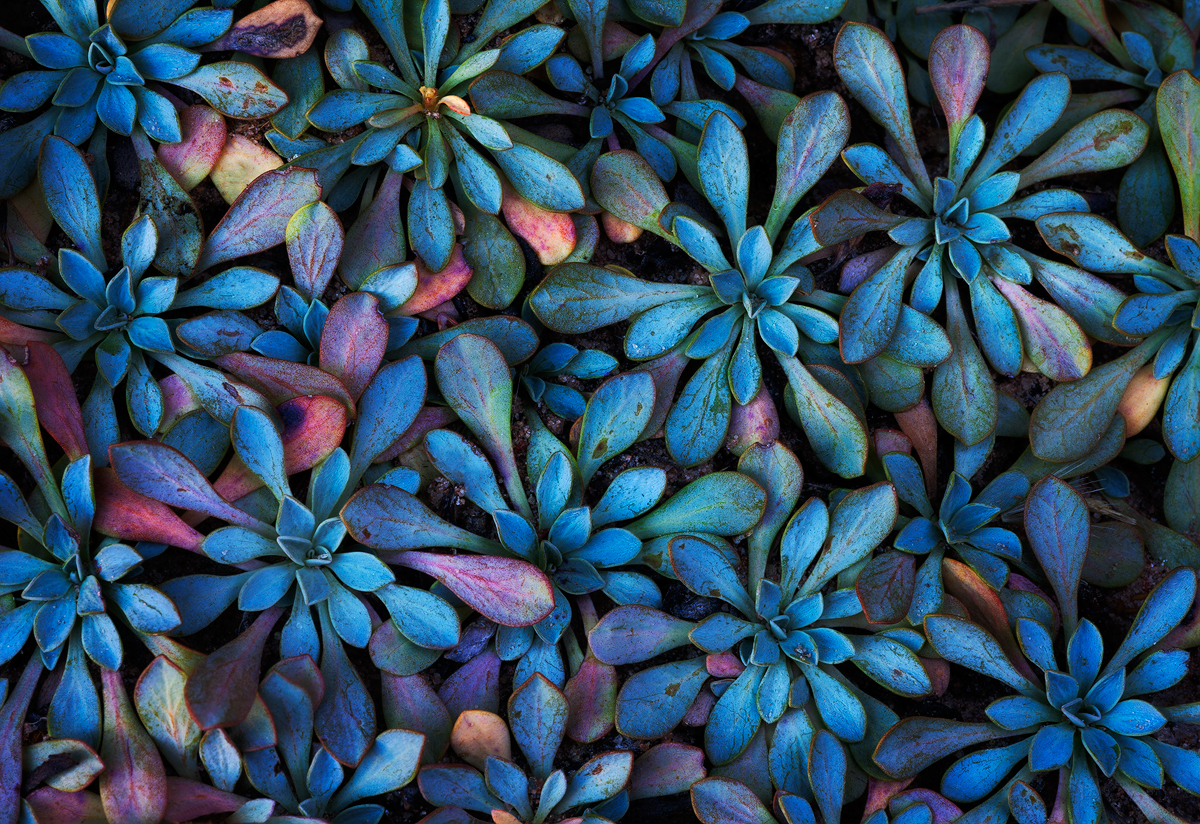
Some tiny subjects, like small plants, have all kinds of fascinating details up close and removing the surrounding distractions can help in creating a far more compelling image. So, get close – like VERY close. Experiment with photographing a small subject right at your lens’s minimum focusing distance. In the example above, viewers are often surprised to hear that the individual rosettes are about the size of a pencil eraser. And, to demonstrate how getting close can eliminate distractions, simplify compositions, and transform a boring subject, here is a snapshot of the same type of plant (different specimen than the subject of the photo above, but still illustrative).
#5 – ALL LIGHT CAN BE GOOD LIGHT
Landscape photographers can be light snobs, unwilling to even take their cameras out of the bag if the light doesn’t look promising (as in dramatic and colorful). For smaller scenes, all kind of light can be productive and, if your subject is small enough, you can easily create your own lighting situation with reflectors and shades. The shift in mindset about what makes for “good light” is critical for landscape photographers who want to try their hand at smaller scenes.
When looking for small scenes to photograph, consider looking for these lighting situations:
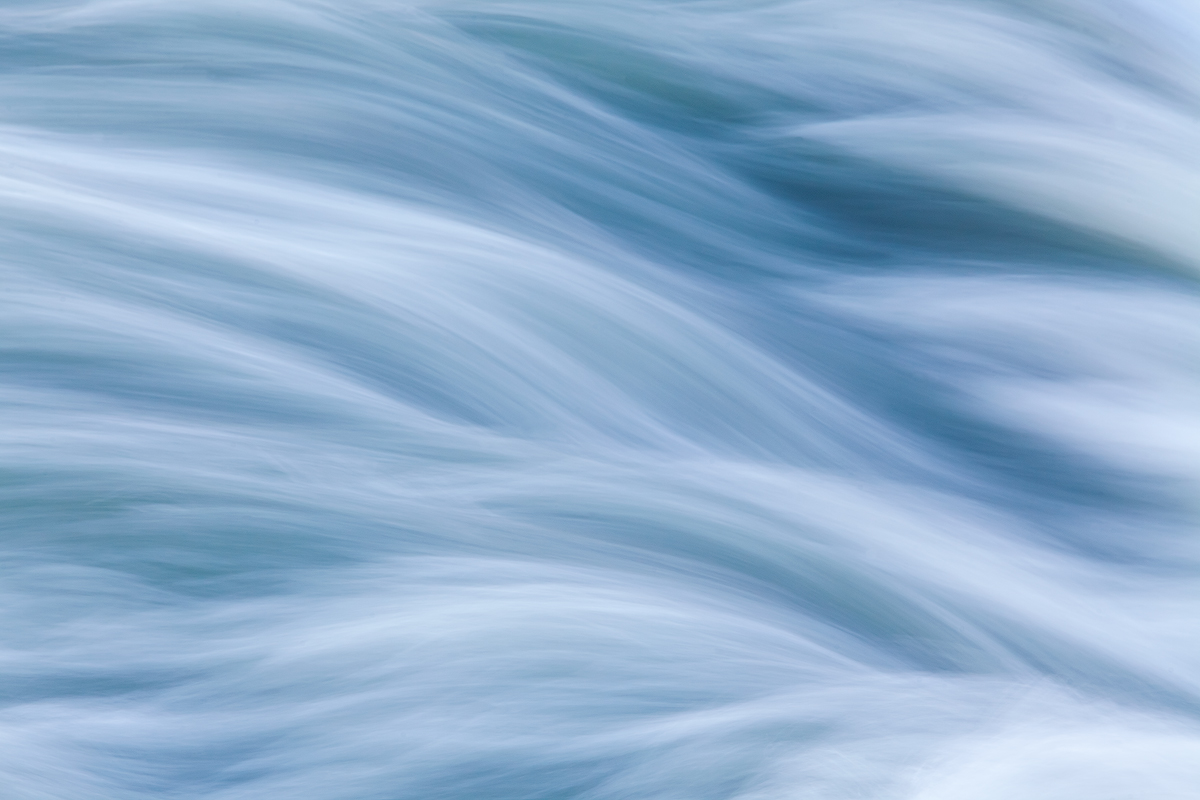
Translucence: light shining through the subject, like translucent plants or waves.
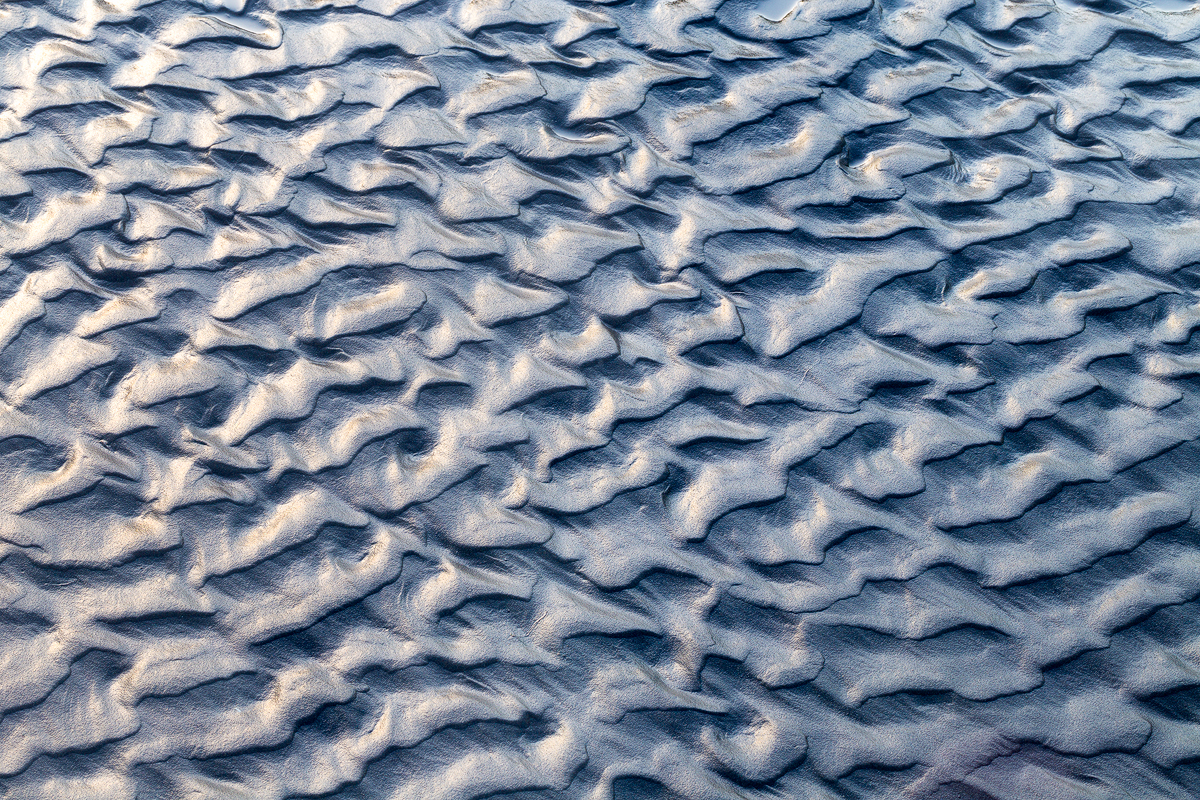
Reflected light: colorful light from a light source is reflecting onto your subject, like sunset light reflecting onto a wet surface like sand or rocks.
Backlight: light that comes from behind your subject, often lighting up the edges.
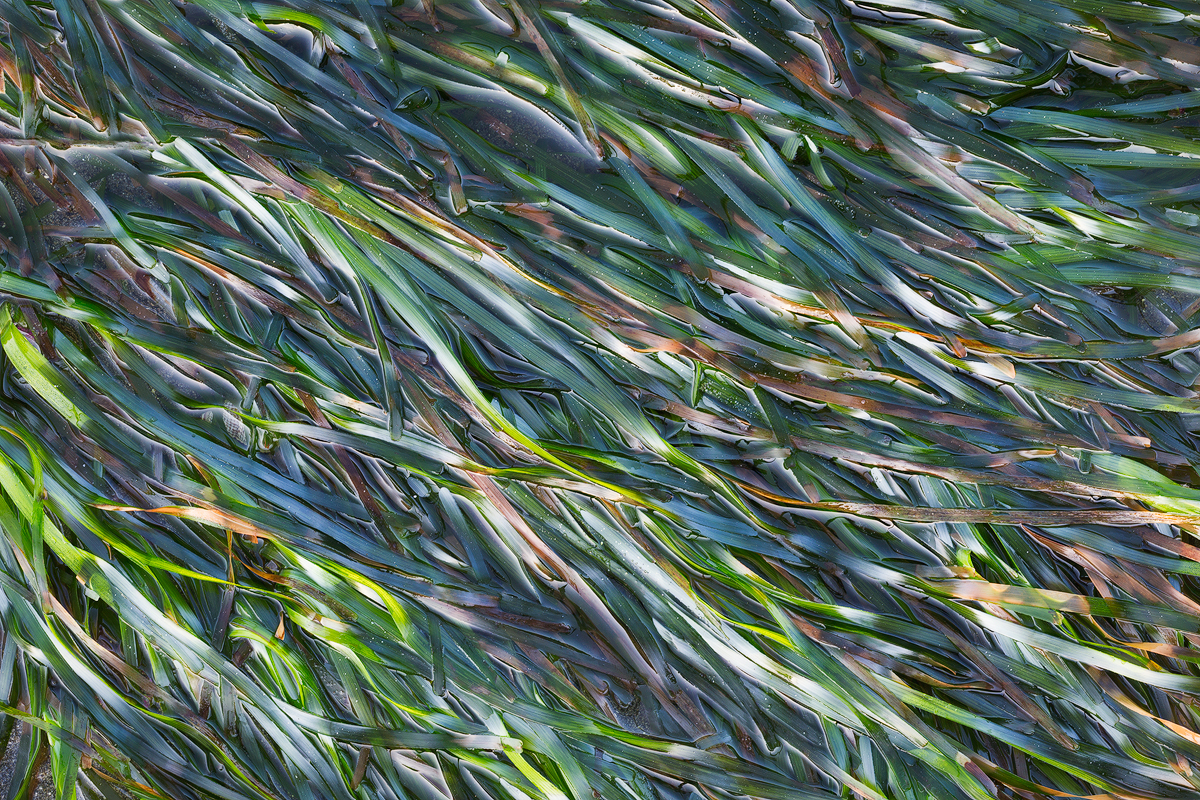
Side light: light coming at a subject from the side, often when the sun is low in the sky. This kind of light can emphasize textures and add depth.
Soft, flat light: indirect light that can minimize shadows, highlights, and strong contrast.
Direct light: strong, sometimes harsh, light that can emphasize contrasts, highlights, and shadows.
All of these different lighting scenarios are represented in the sample of photos at the top of this post. Take a few moments to identify the types of light used in some of the examples to help learn how you could take advantage of similar lighting situations the next time you are out photographing.
#6 – LOOK FOR FLAT SUBJECTS
I often get questions about how much post-processing I need to do on photos like those included in this post, especially those with sharpness throughout. My answer is usually very little. Complex processing, like extensive depth of field blends, do not appeal to me so I look for subjects that I can capture in one file (or maybe two when something special comes along). Using careful technique, a tripod, patience, and live view, I find it pretty easy to get sharpness throughout with smaller apertures like f/22 for mostly flat subjects that look best with a deeper depth of field (few to no out-of-focus elements). At least for my needs (which includes making some larger prints) and with my equipment, the difference between f/22 for a single file and multiple blended images at some other more optimal aperture is minuscule and not worth my time.
The key is identifying mostly flat subjects, like those shown in this post, and then setting up your camera on the same plane as your subject (so your sensor is parallel to your subject). Once you are set-up, using zoomed-in live view and depth of field preview together to check and adjust your focus can help create tack sharp, high-quality files. I know that pixel peepers will disagree with this approach but I would rather have very good files to process than skip making photographs because I do not want to spend the time on processing. And, if I doubt the sharpness in the field and feel good about the subject, I may take both approaches – creating a single file at a small aperture and creating a second set of files for a simple depth of field blend so I can select the best option later.

#7 – INVEST IN A MACRO LENS
If you are serious about learning to take photographs like those featured in this post, investing in a dedicated macro lens can be worthwhile. I am not big on buying gear for gear’s sake but sometimes a specialized piece of equipment is essential in realizing your photographic goals. While work-arounds like magnifying filters and extension tubes can result in good photographs, I personally find that the simplicity and ease of using a high-quality lens designed for close-up work makes the most sense.
In my case, I use Canon’s 100mm f/2.8 L macro lens and find that this focal length works perfectly for the subjects that interest me most. This lens is lightweight so I can bring it along all the time, it is extremely sharp even at smaller apertures, and it has a close focusing distance that allows me to get right up to my subjects. Any comparable macro lens with similar specifications will help make it possible to take photos like some of those shown here, specifically those that feature very close-up views of very small subjects. I do not use any fancy gear, like focusing rails, since I like to keep my kit simple.


Leave a reply