Lightroom is not only great for organizing and cataloging all your pictures in an easy and clear way, but it is also full of helpful tools that can help you develop your files and make your pictures look great with just a few adjustments.
Before I go any further, everything I do to the RAW files in Lightroom can also be achieved with Adobe’s CameraRaw. Settings and tools are the same as those used in Photoshop, and you can surely obtain the exact same results.
Of course, not all pictures require the same processing, but there are three things I always keep in mind when developing an image with Lightroom.
1. Crop your photo
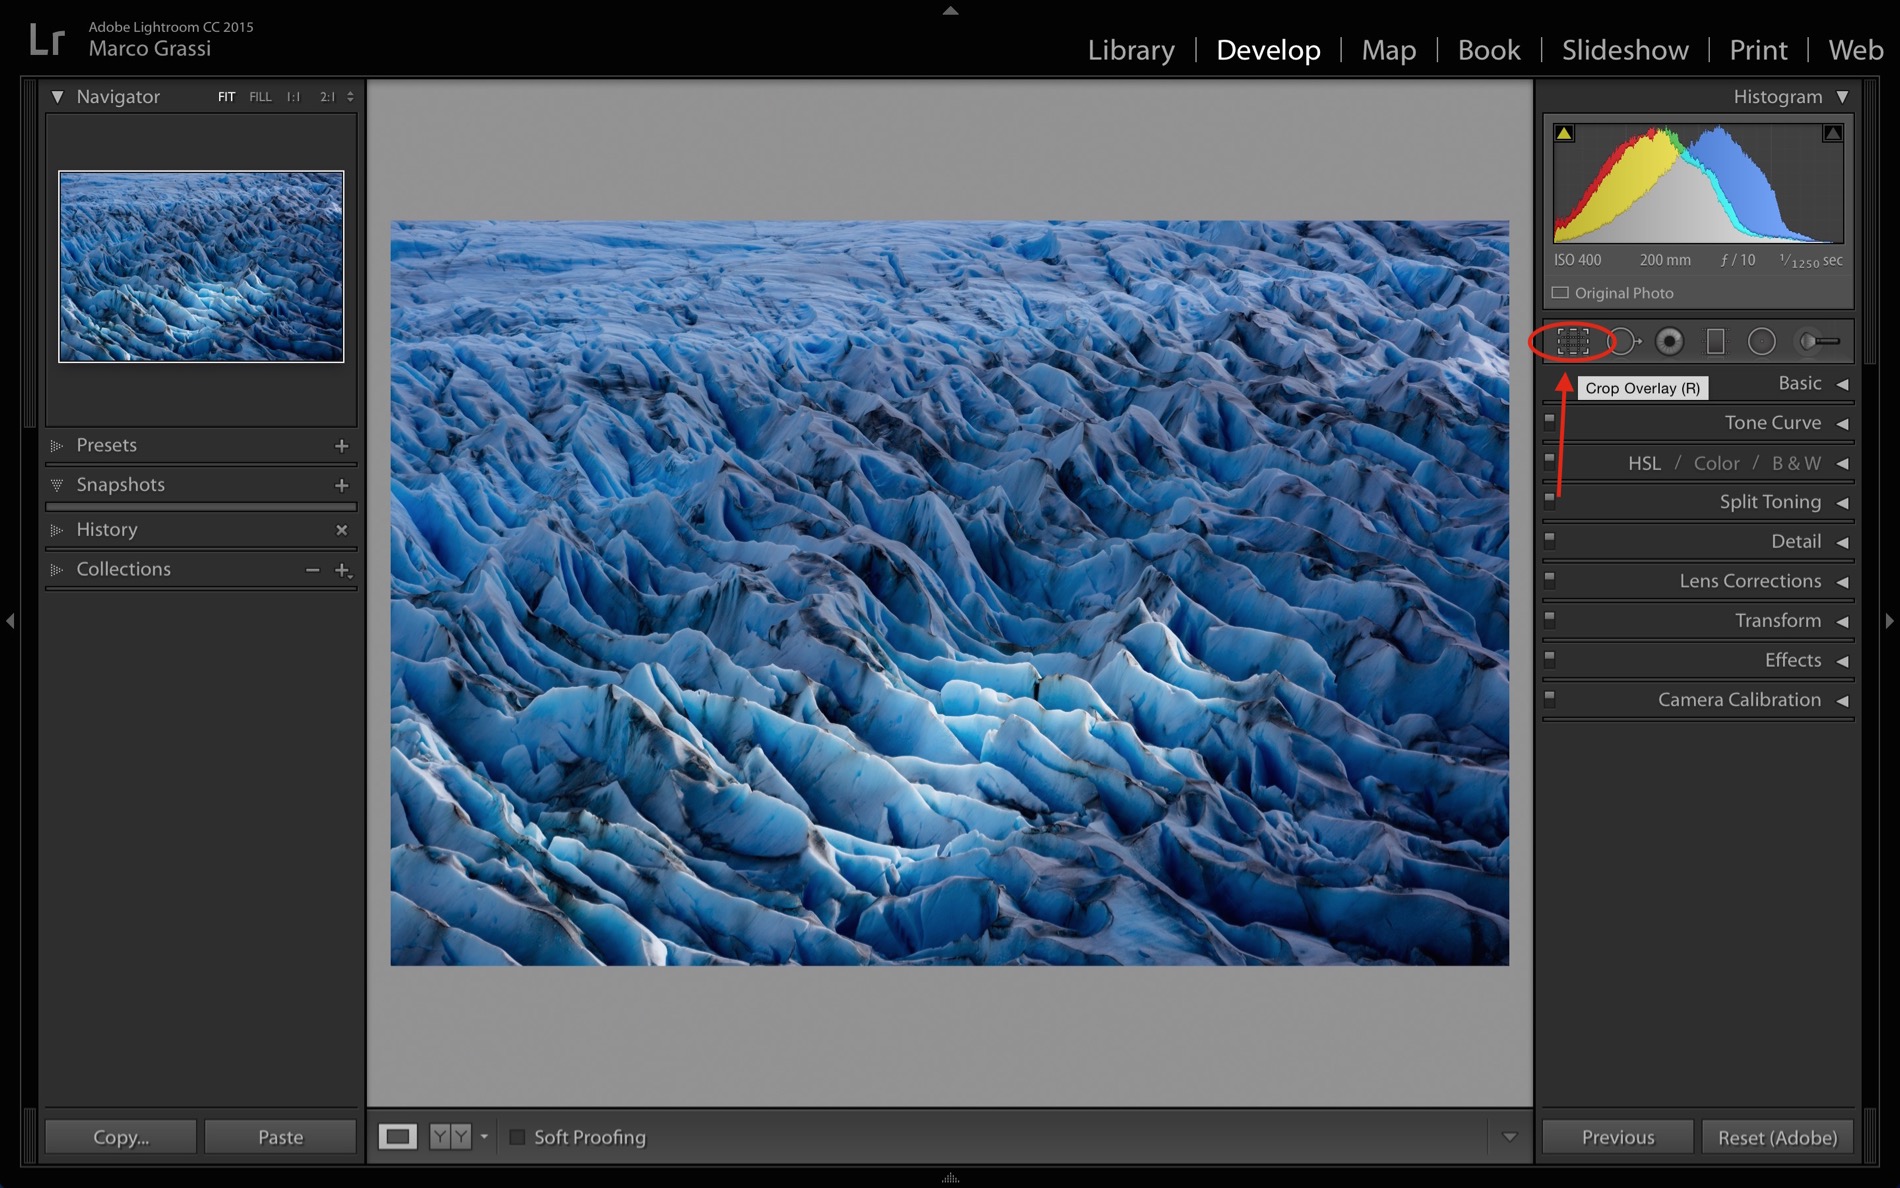
It doesn’t apply every time, but when looking at your image on a bigger screen (i.e. laptop), you might notice distracting elements in the scene and want to crop those out. Or you might have been unable to get the shot you wanted because of your lens’ limited focal length. Or maybe a cropped version of the image works better than the original picture. Remove unnecessary elements from the scene and try different framing to see what works better for you.
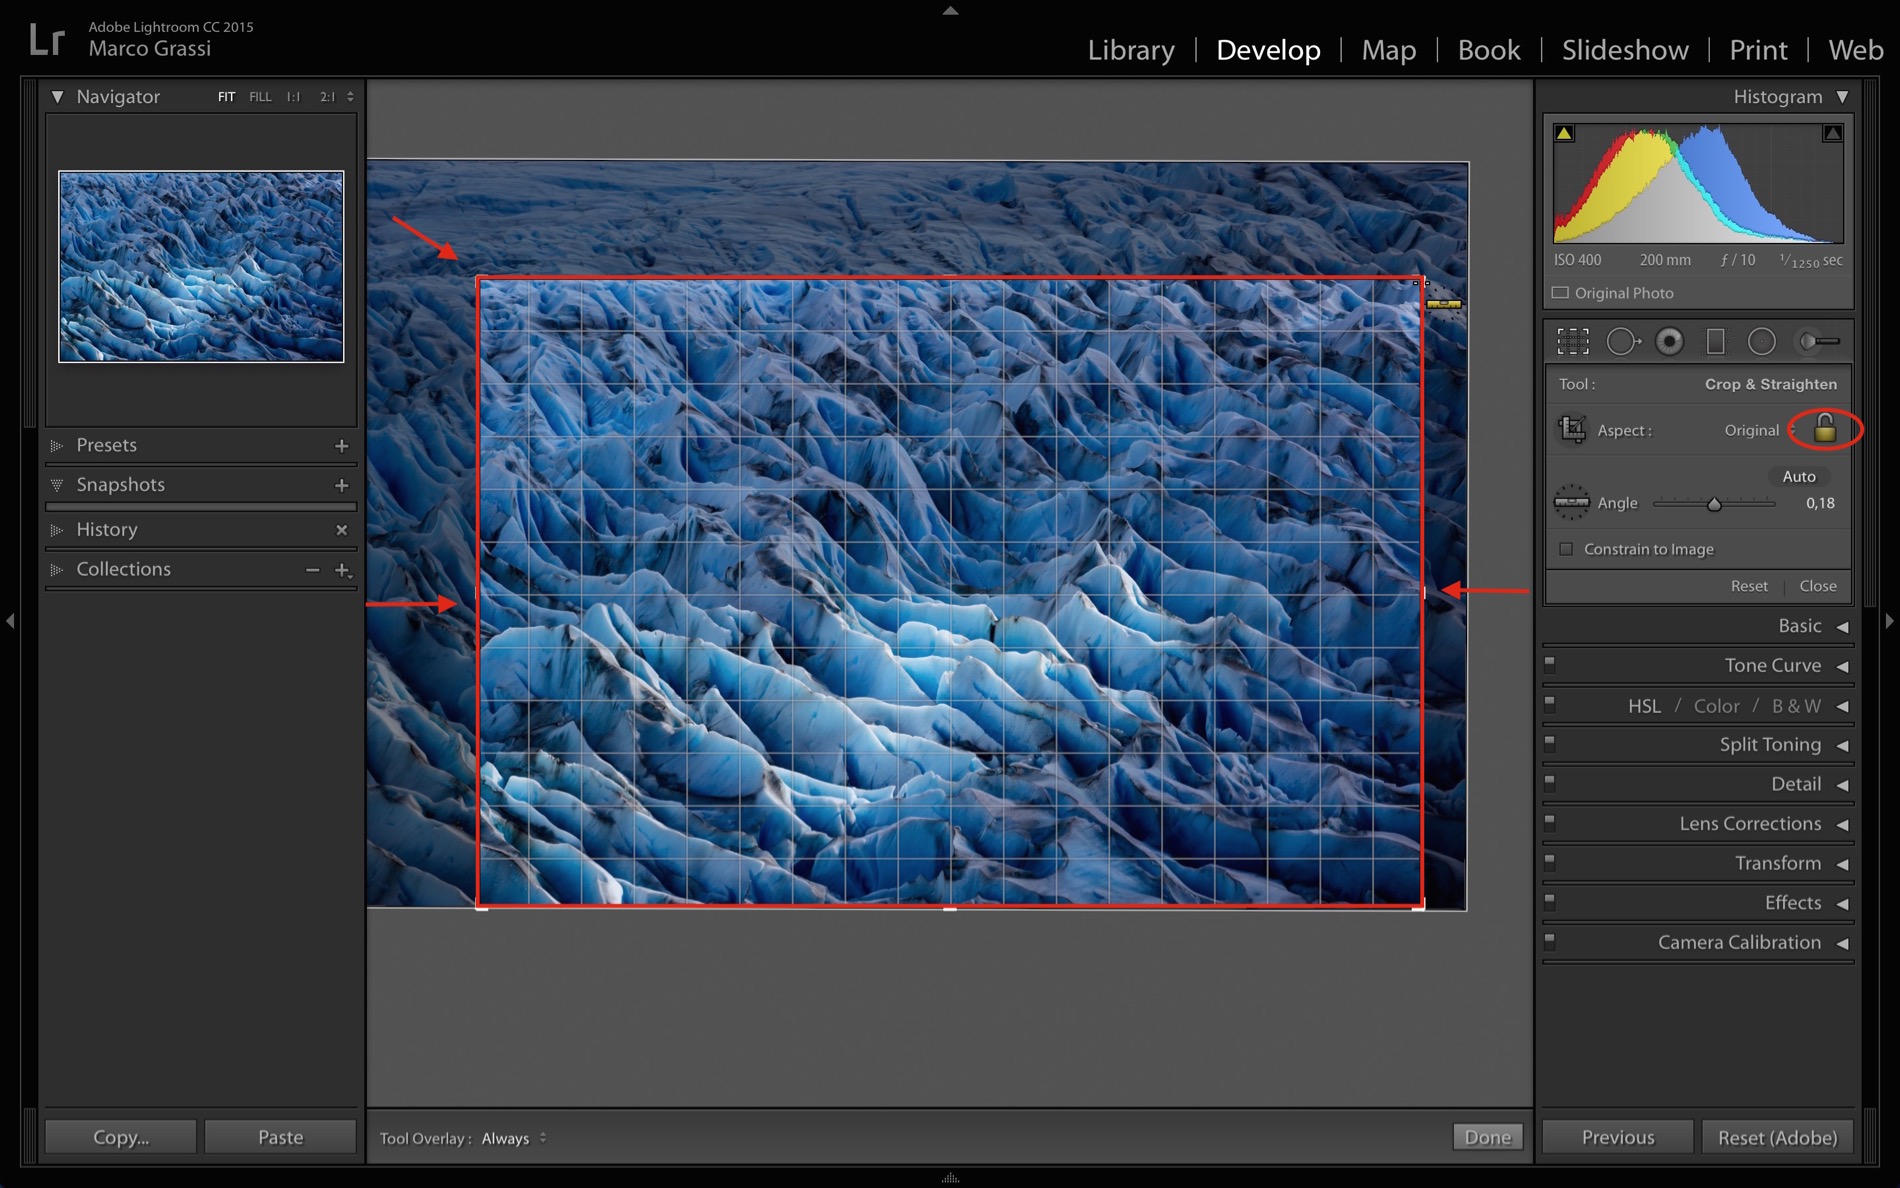
Pro tip: When cropping my images, I always unlock the locker in the panel in order to be able to freely frame the picture the way I want it. If I wish to keep its original aspect (i.e. horizontal) instead, I keep the “Shift” key pressed while cropping.
2. Remove dust spots
Changing lenses while in the field is something we all do when shooting landscapes. It doesn’t matter how carefully we clean our gear, dust often finds a way to get into our sensor and generate unwanted spots in our pictures. While the image might look good from afar, there could still be visible dust spots once it is zoomed in on the computer.
When traveling for long periods, this is a very common issue for me—one that I usually fix with Lightroom. The process is very simple.
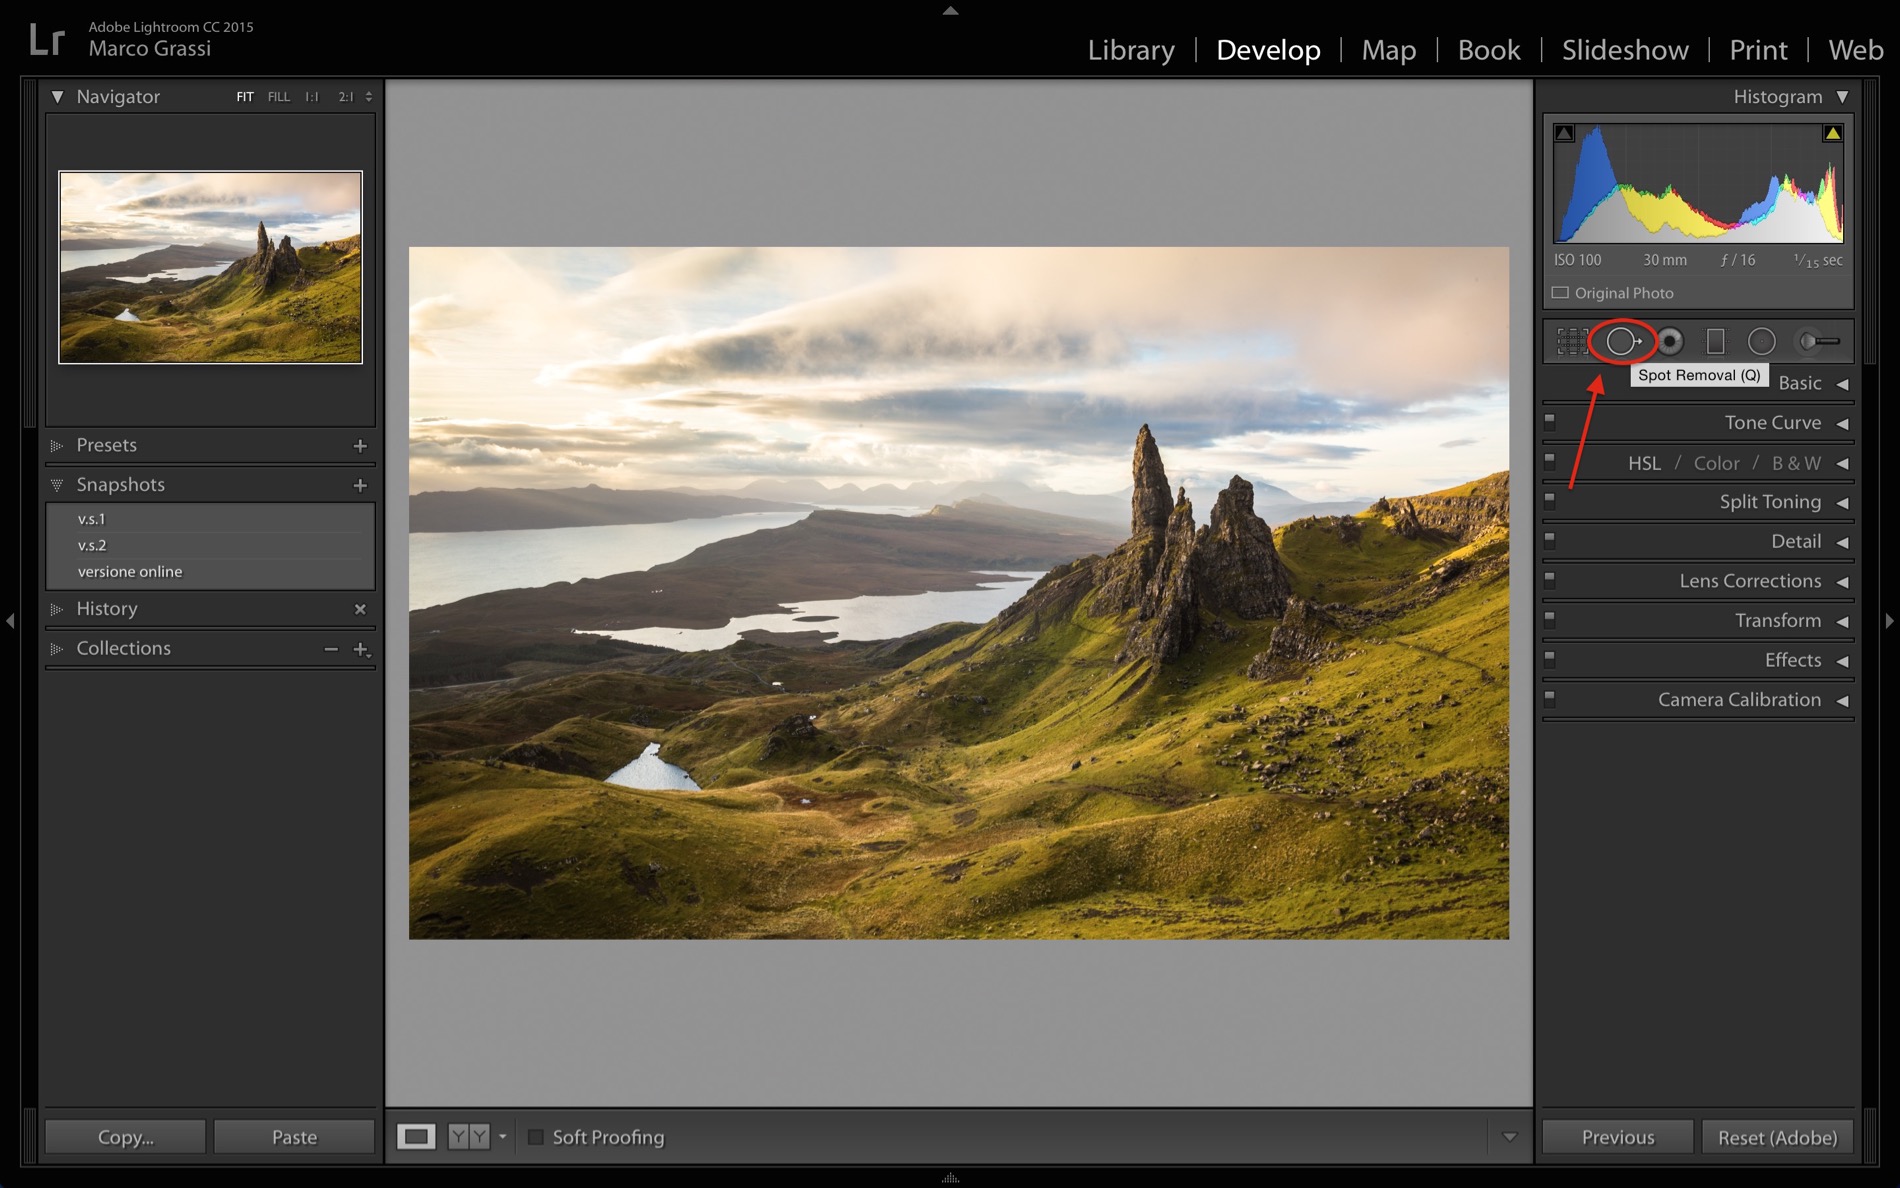
First, you have to select the “Spot Removal” tool (shortcut: Q) from the right side panel.
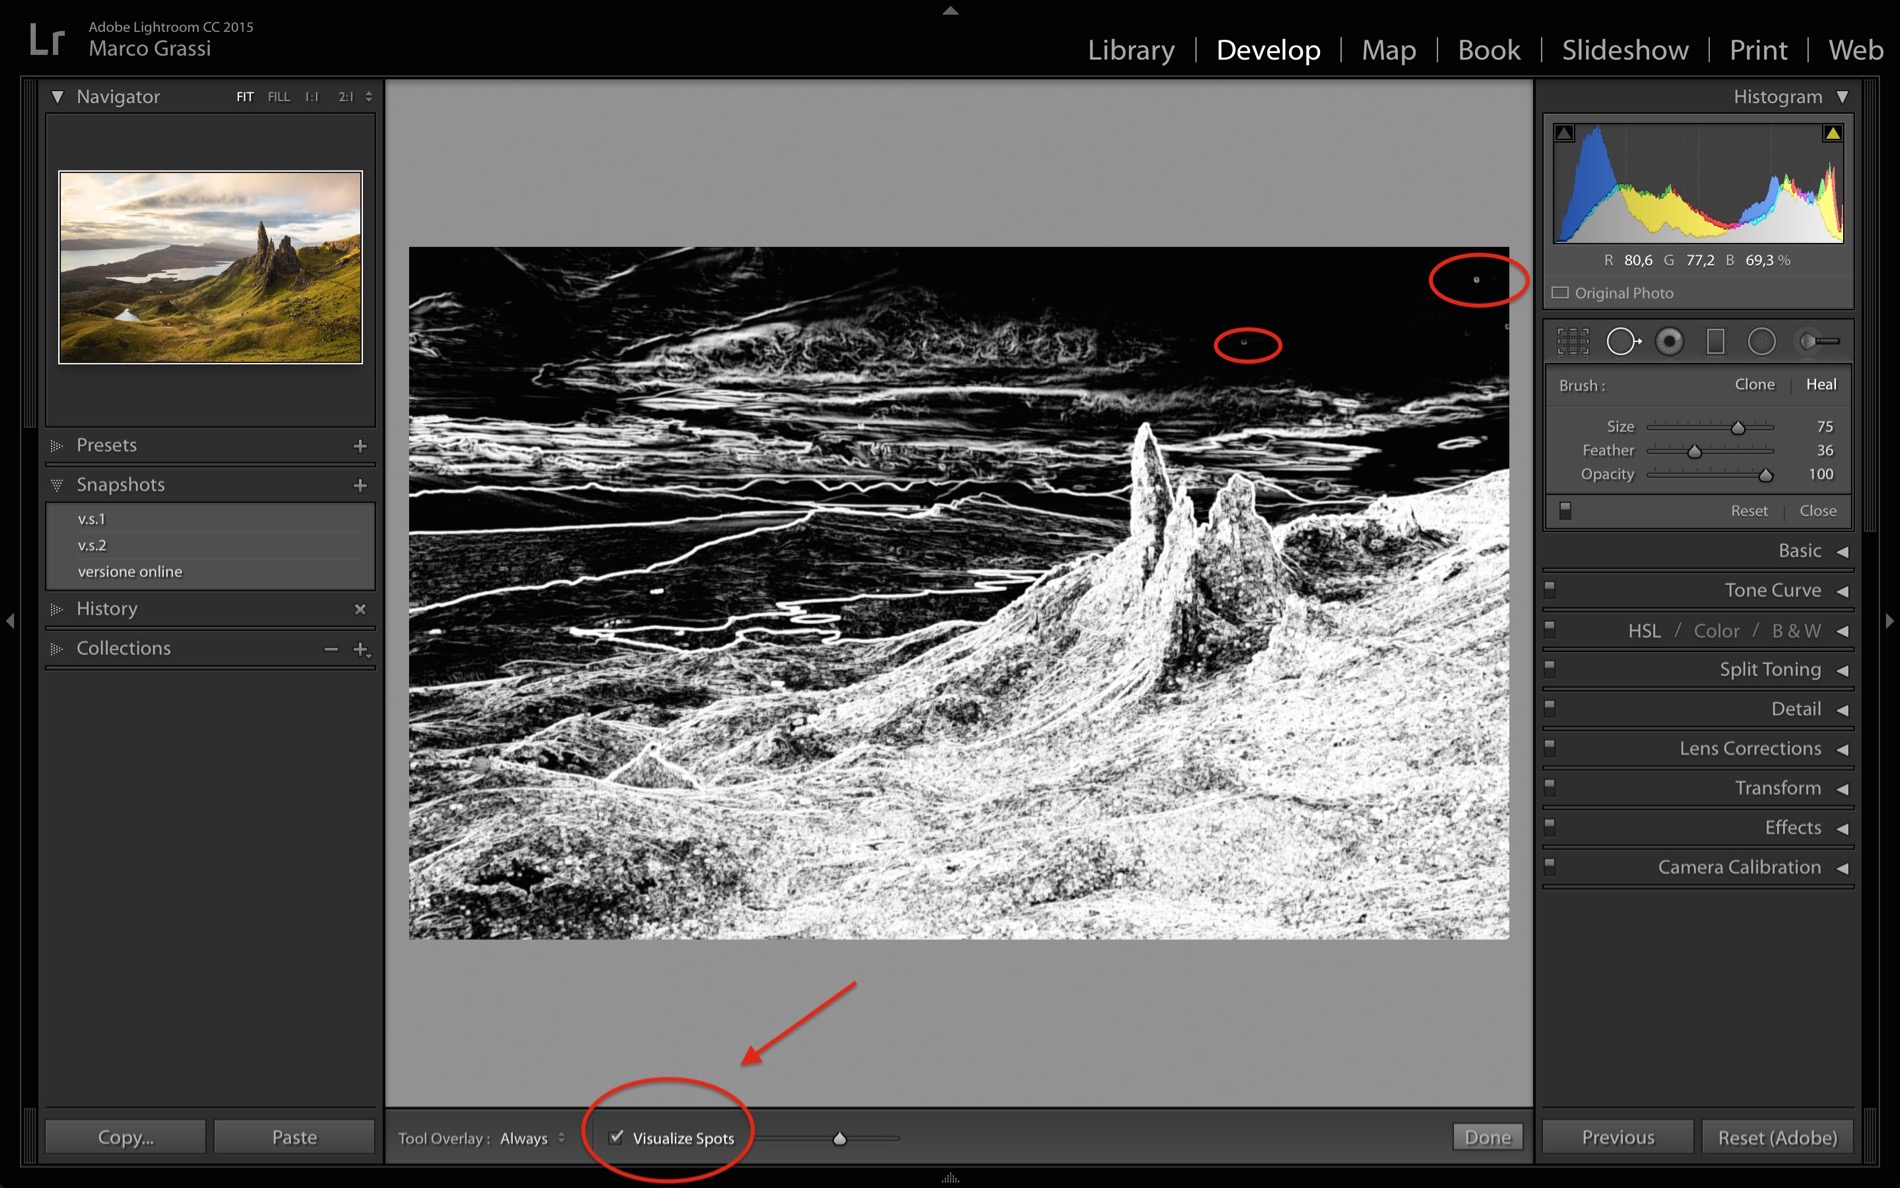
Then, you need to flag the “Visualize Spots” bar at the bottom (shortcut: A), which will turn your picture into a black and white negative version. By moving the slider up and down, you should be able to see if there are any dust spots.
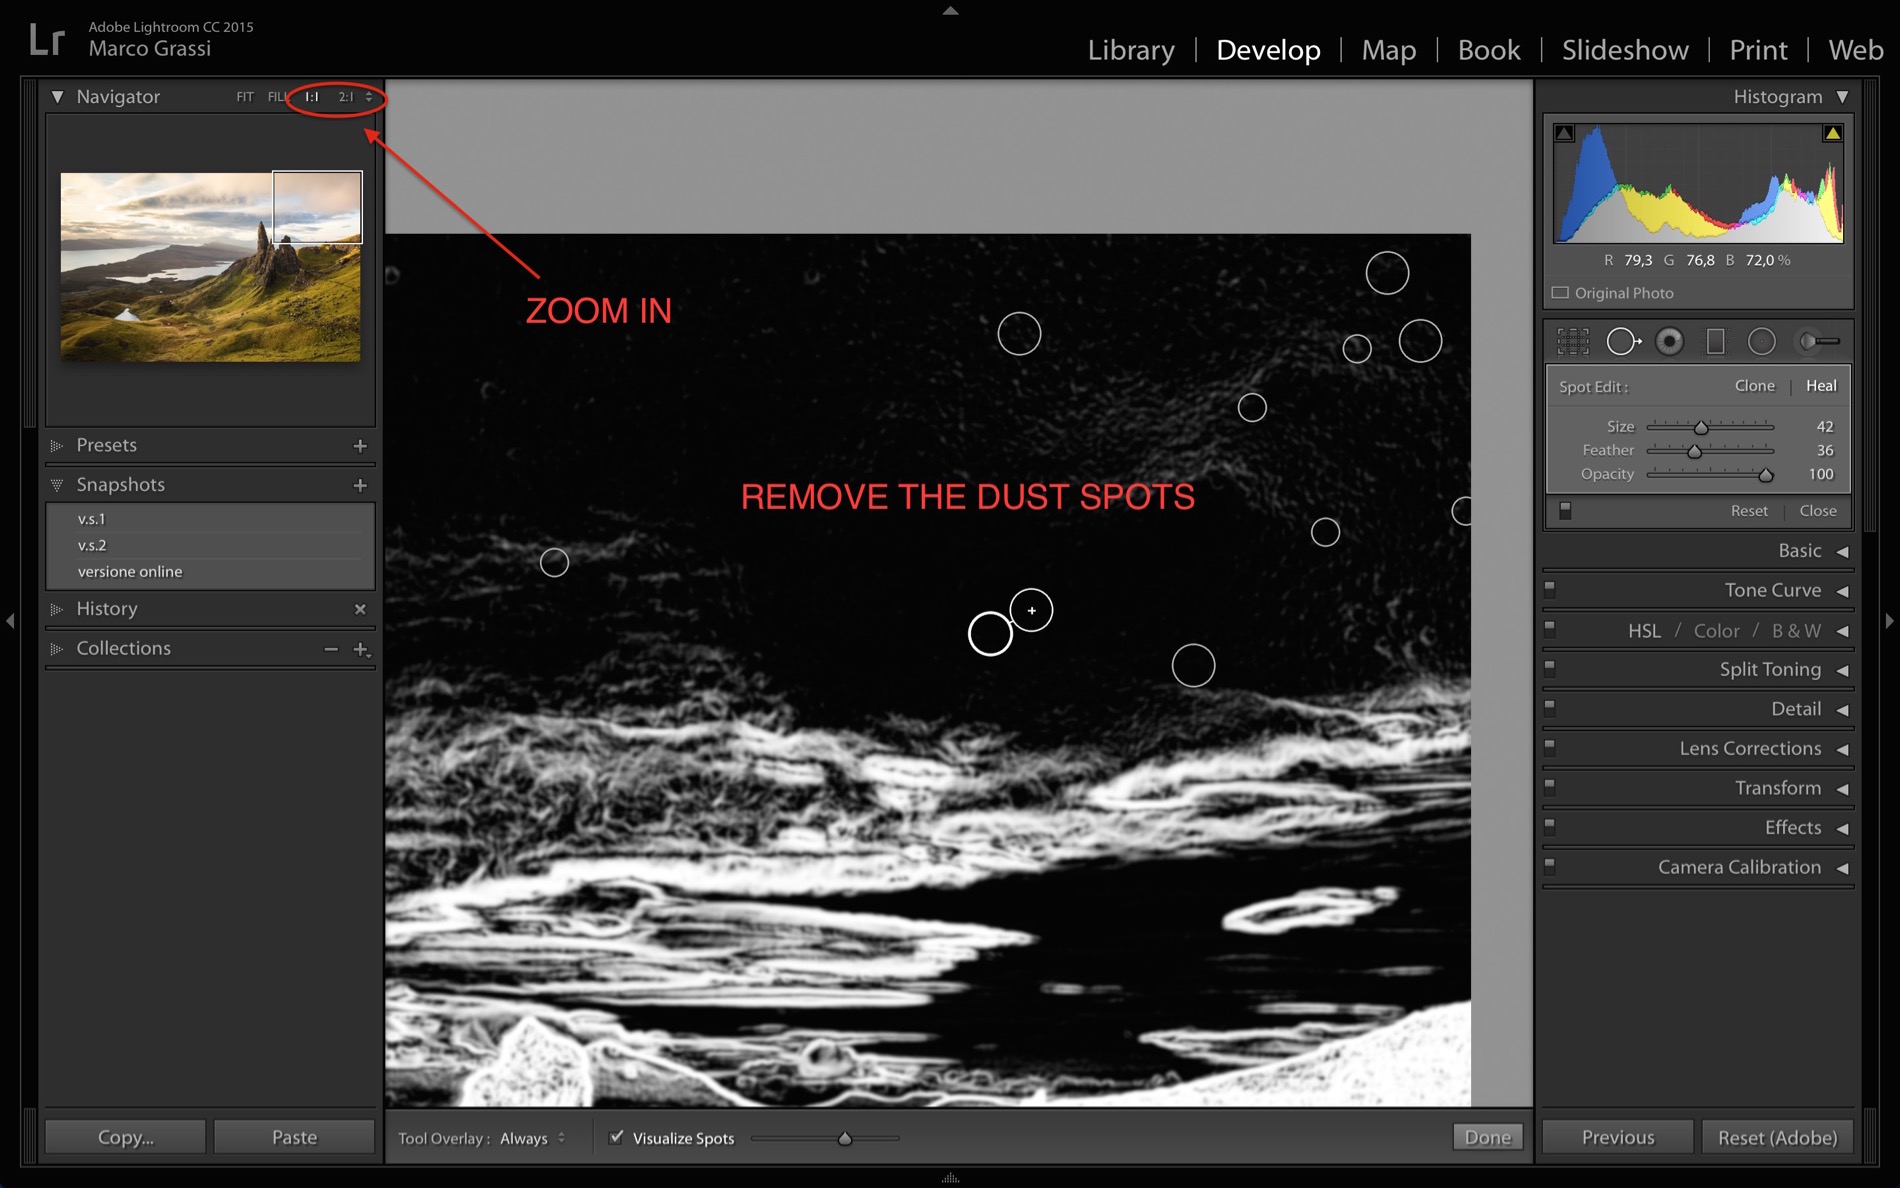
You can also zoom in to 100% by clicking 1:1 on the navigator panel on the left to have a closer look. Once you find a dust spot, all you have to do is to resize the “Spot Removal” tool accordingly and click on the spot you wish to remove.
Pro tip: If you use a small aperture, the depth of field will be deeper and the dust will be more visible on your image. You can reduce the amount of visible dust when you’re still in the field by shooting at a wider aperture like f1.4.
3. Add a Graduated Filter
The “Graduated Filter” is a great tool that allows you to make local adjustments to your images. Let’s say, for example, that the sky of your picture is too bright and you want to underexpose it a little bit. You can easily achieve that by using this tool, without altering any other part of your image.
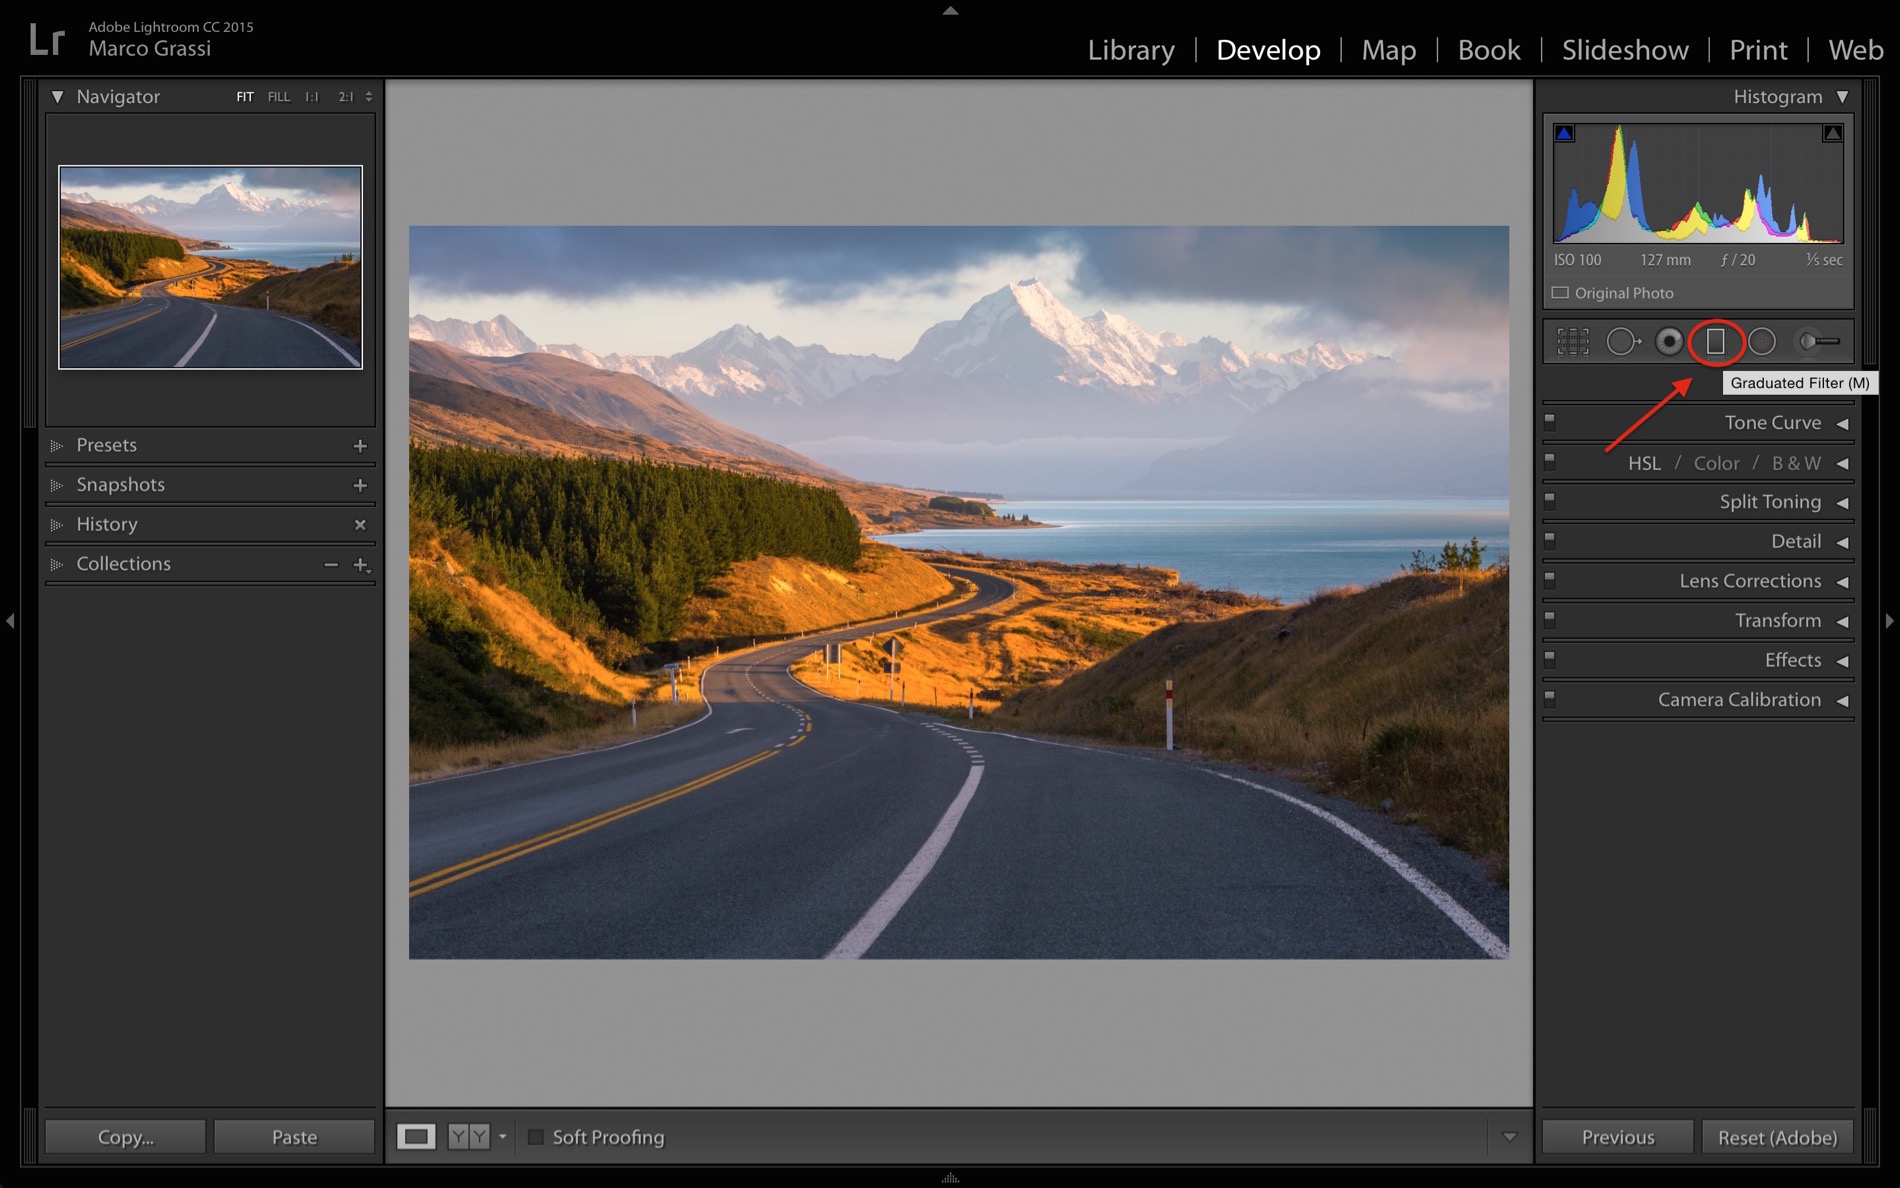
Go to the right side panel and select the “Graduated Filter” (shortcut: M).
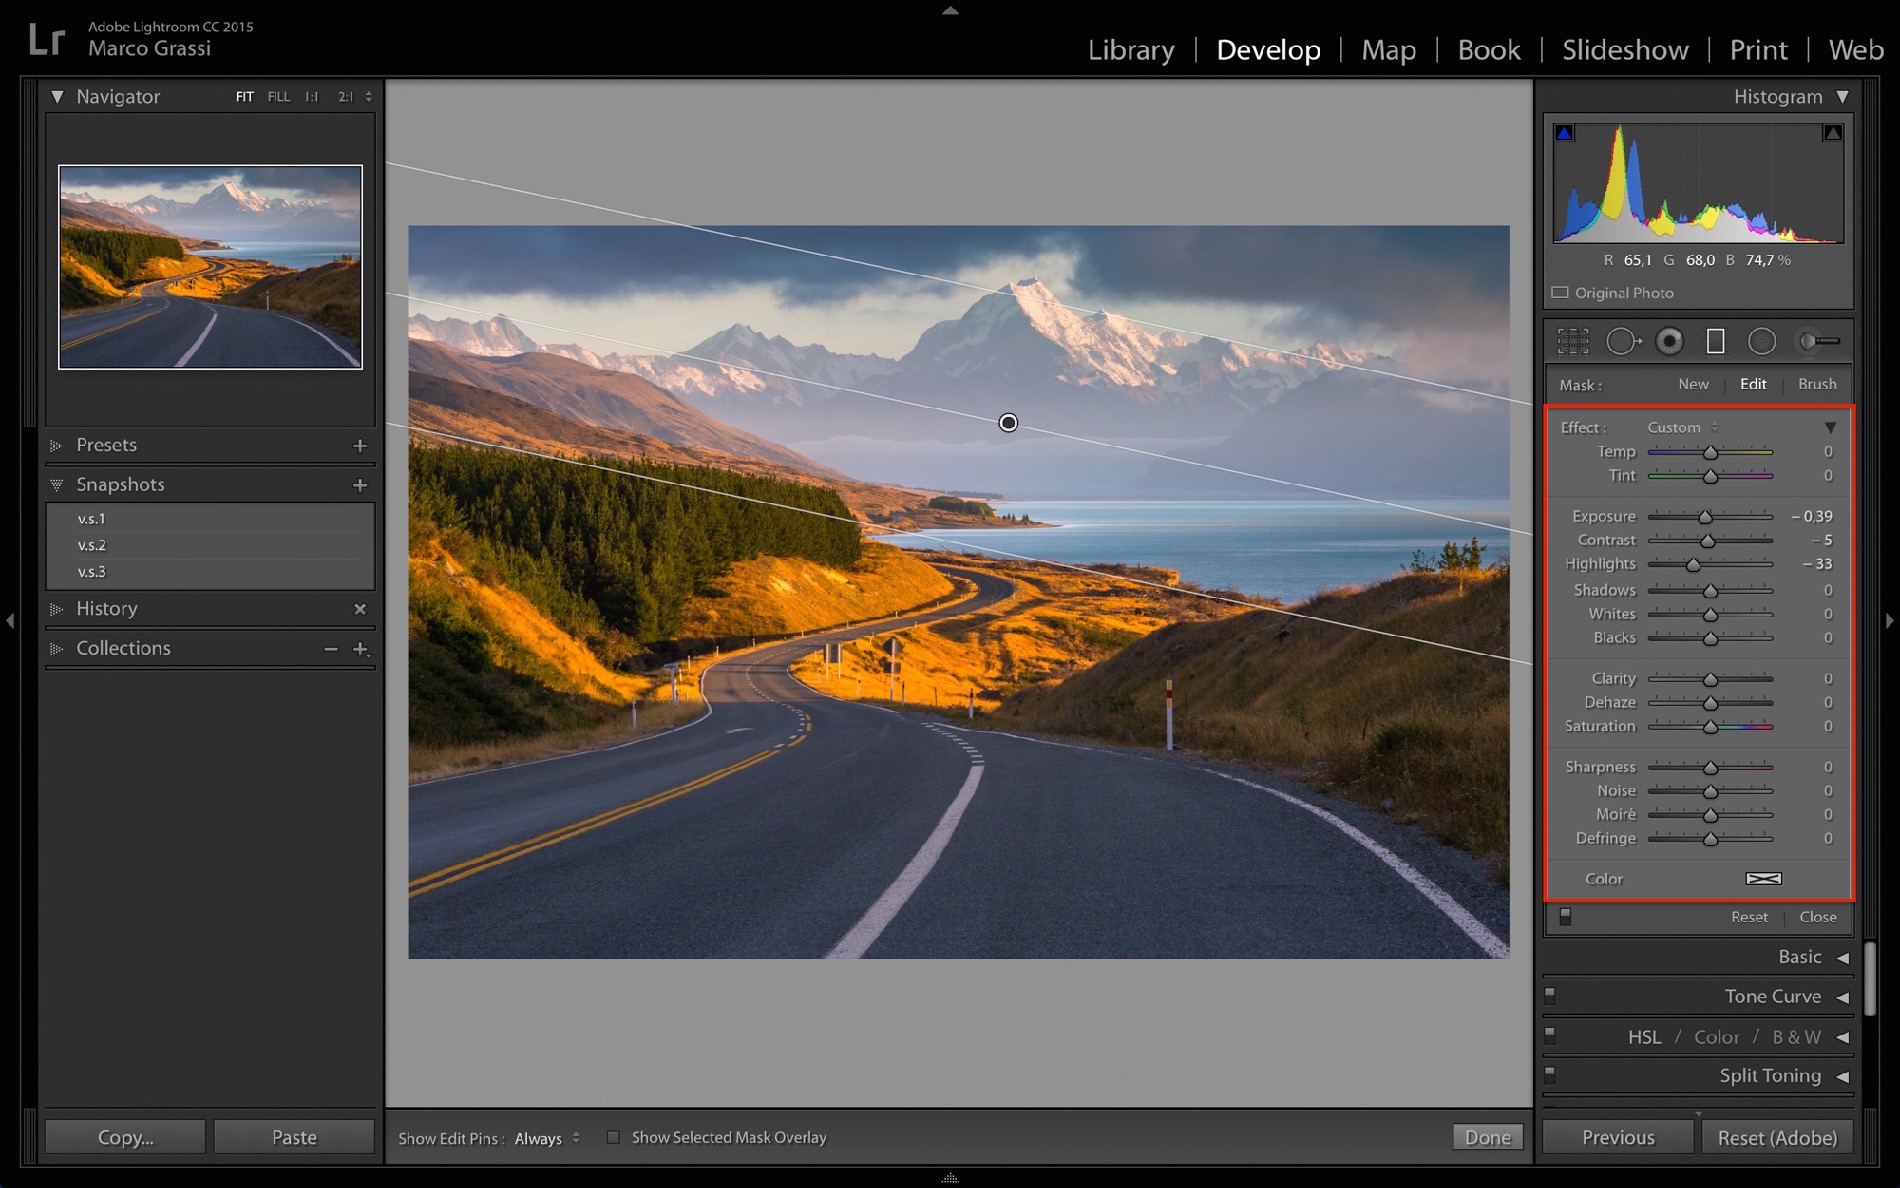
Drag the filter on the portion of the picture that you intend to adjust. Once it’s correctly placed, you just need to adjust the values (exposure, contrast, highlights…) according to what you like and what final effect you wish to obtain.
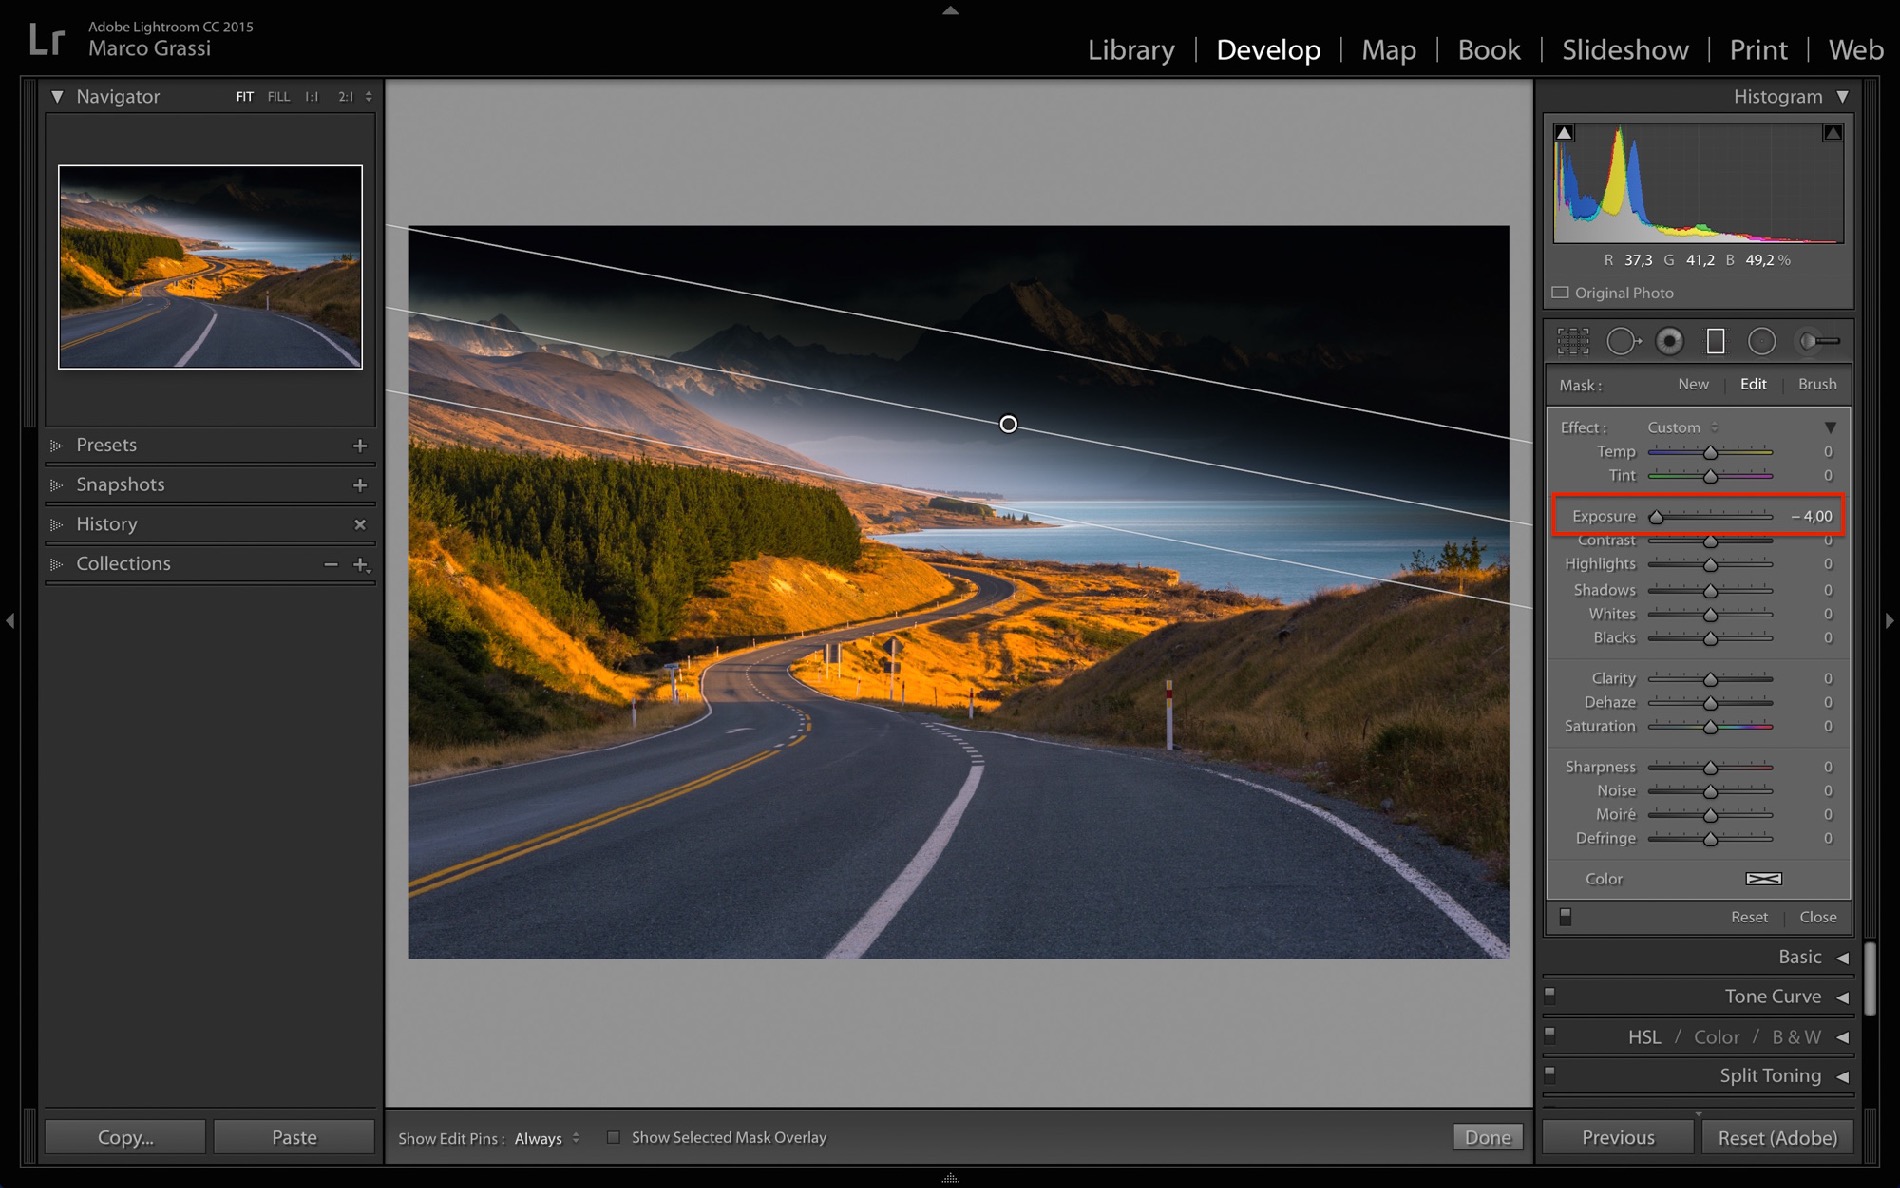
Pro tip: Before applying the graduated filter, change the value of the “Exposure” on the right side panel in order to be able to easily see which area of your image it will affect.
About Marco Grassi
Marco Grassi, a 500px Ambassador, is a self-taught and award-winning photographer focused on landscape and travel photography. His amazing pictures aim to inspire people to travel more and see those dreamy places themselves.
Links
500px: 500px.com/marcograssi
Website: MarcoGrassiPhotography.com
Instagram: @MarcoGrassiPhotography
Facebook: Facebook.com/MarcoGrassiPhotography
Leave a reply