From the sun-drenched summer beverage shots of Florentina Olareanu to the minimalist stylings of Priscilla Ong and whimsical creations of Juj Winn, the 500px community continues to elevate the field of product photography with unconventional, outside-of-the-box thinking.
Whether they’re spending hours carefully arranging “flying” objects in the studio or rushing outside to capture a blink-and-you-miss-it moment of perfect natural light, they go above and beyond to make magic for their clients. In this guide, we’re sharing some behind-the-scenes secrets to help you give your product photos that “wow” factor.
Fishing line
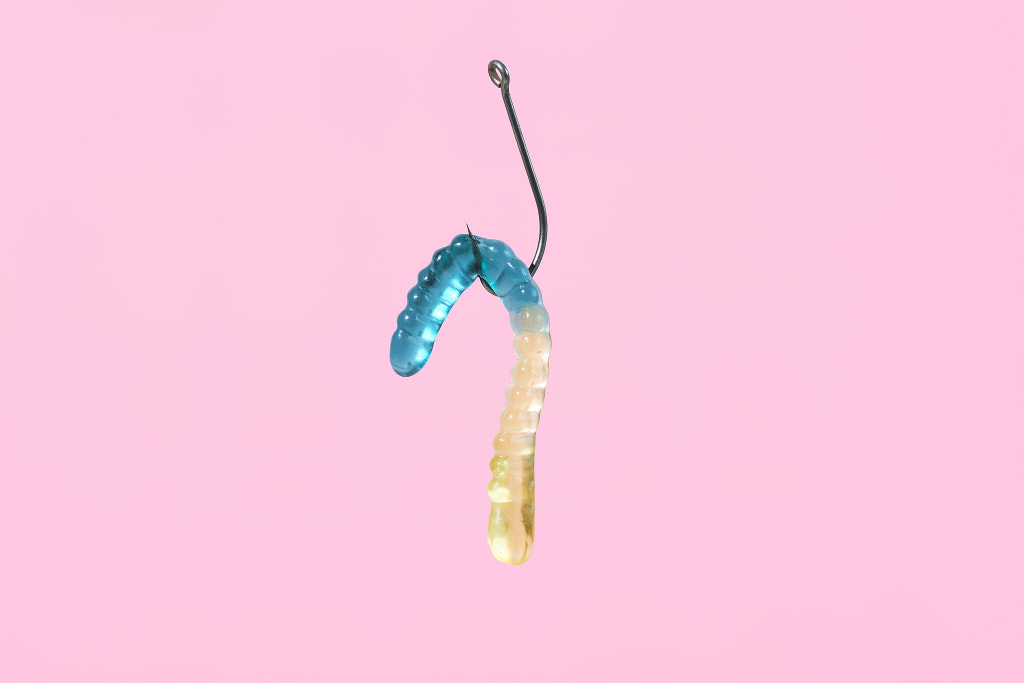
Fishing line is perfect for creating the illusion of objects suspended in mid-air, as the Singapore-based still life photographer Priscilla Ong did when creating this Hooked on Candy-themed shoot. She used a clear line, tied to a c-stand above. This concept works well with all sorts of products, including jewelry, tableware, and more. Just remember to edit out the line in Photoshop.
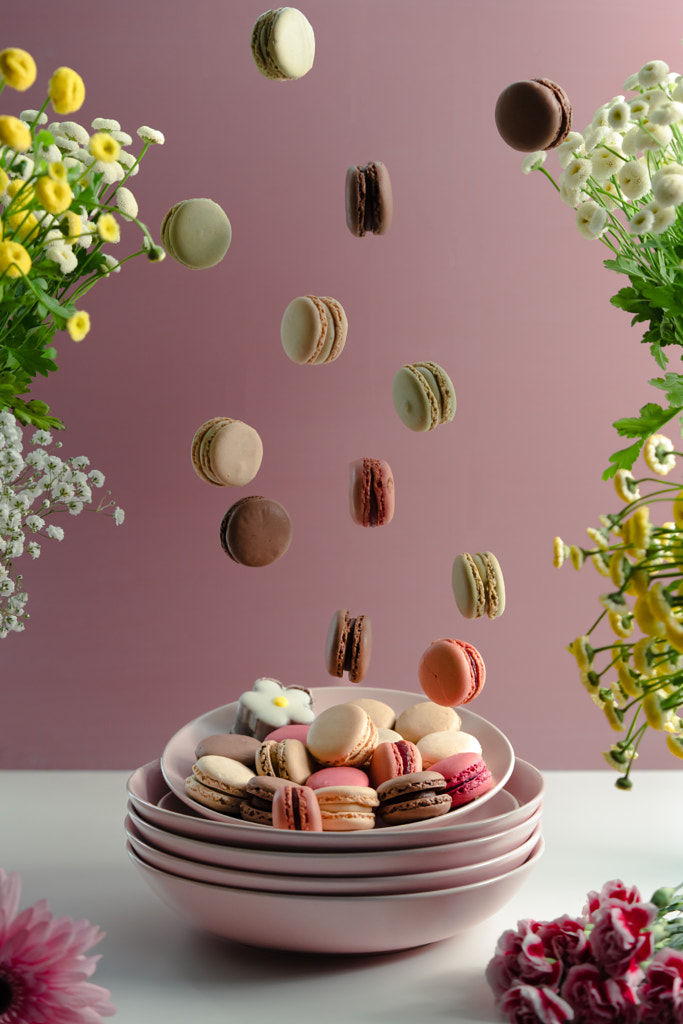
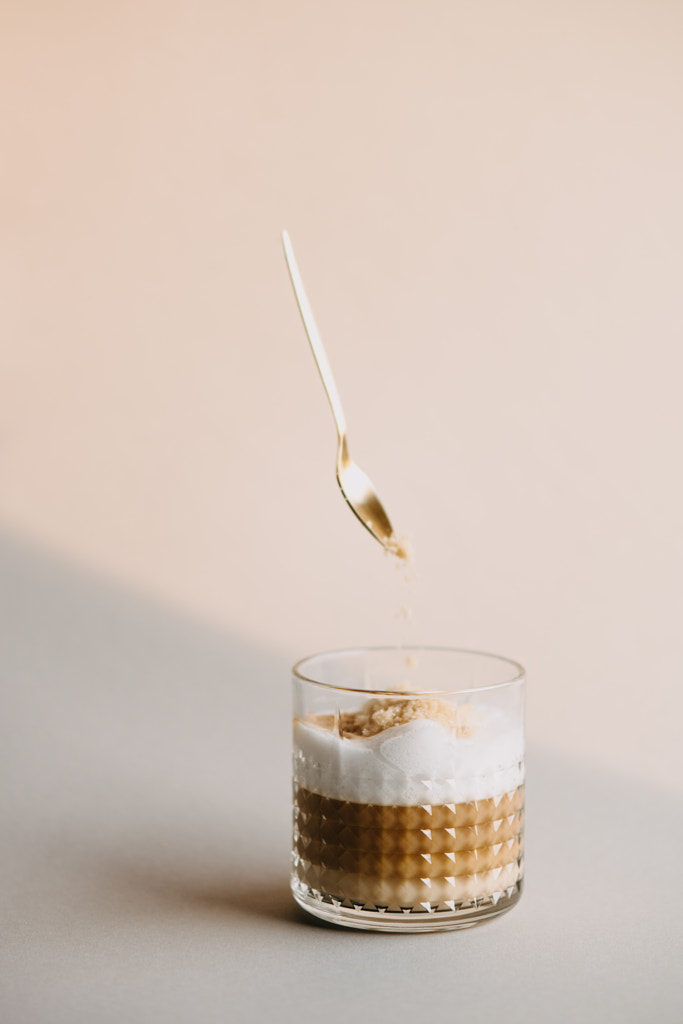
If you don’t have any fishing line on hand, other materials might work: to make the macaroons “fly” in the photo above, the artist Fouzia Khan used very fine string. Florentina Olareanu, on the other hand, used floss to create the floating spoon below.
Wooden skewers
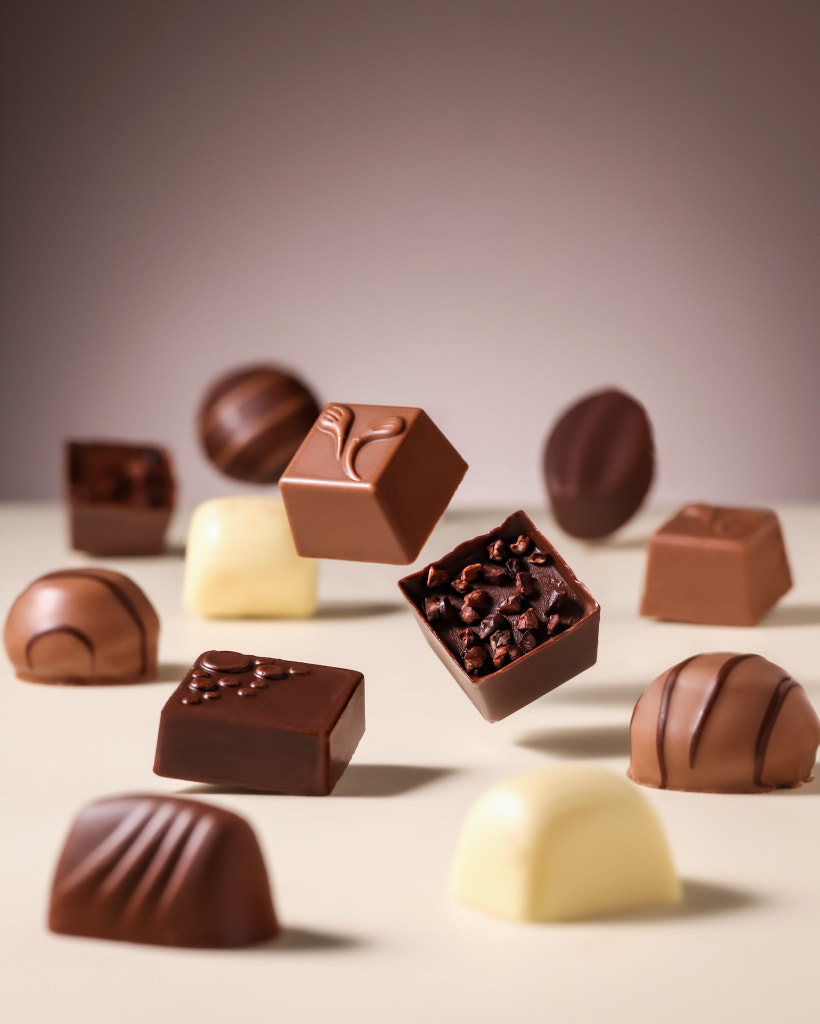
If you need objects coming in from the sides rather than falling in from above, you can use wooden skewers to place them exactly where you want them (without getting your hand in-frame). That’s how the photographer Galigrafiya created the hovering candies in this shot, positioning the chocolates at just the right angle before removing the wood skewers in post.
(On other occasions, Galigrafiya has opted for transparent plexiglas sticks, which you can employ in a similar manner. Choose what works based on the size and shape of your product.)
Sticky putty
If you want objects to stay in place, especially at an angle, you can use a powerful museum putty or sticky tack to keep them from moving or falling. Just place it strategically so the camera can’t see it.
Playful shadows
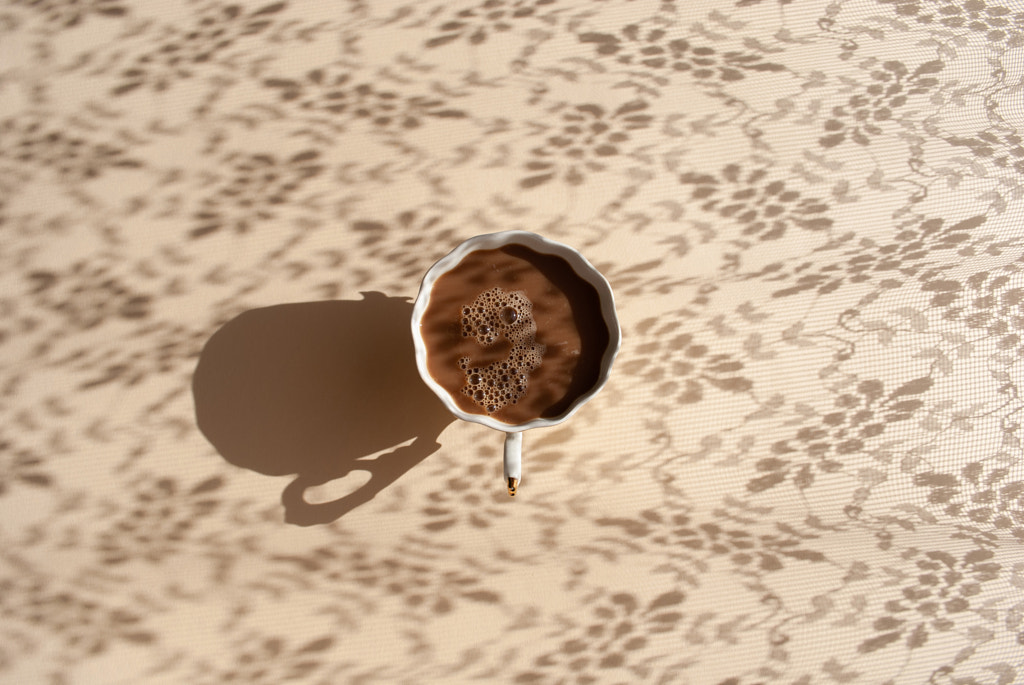
You can use everything from paper cutouts to cut lace to cast shadows across your background and elevate a product shoot. For this one, the Ukrainian photographer Iryna Shevchuk actually used openwork tulle for a romantic, delicate vibe.
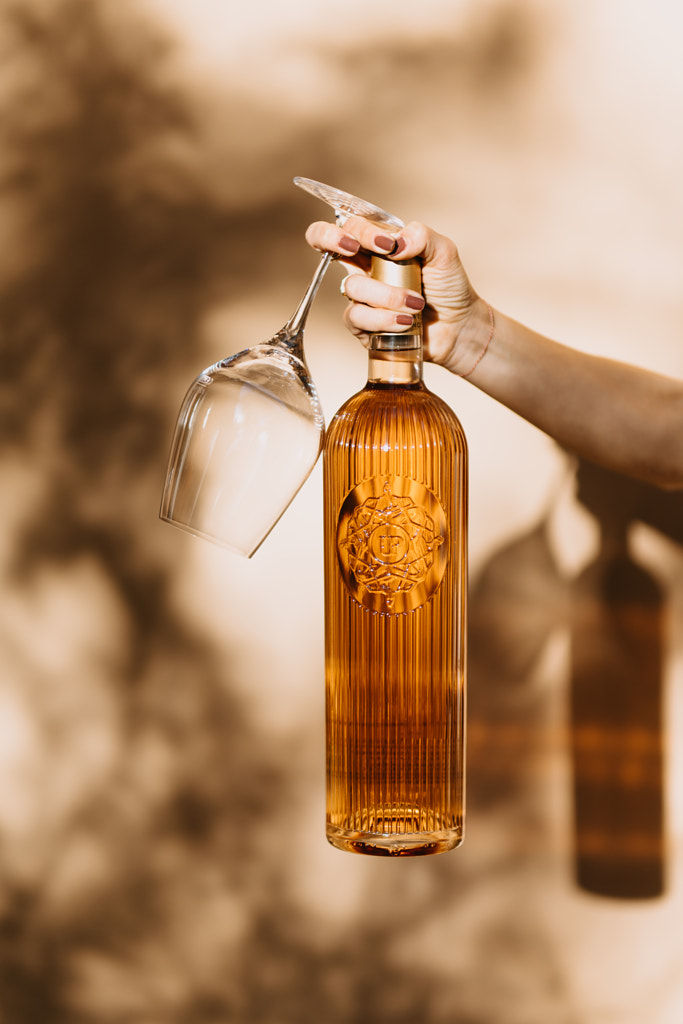
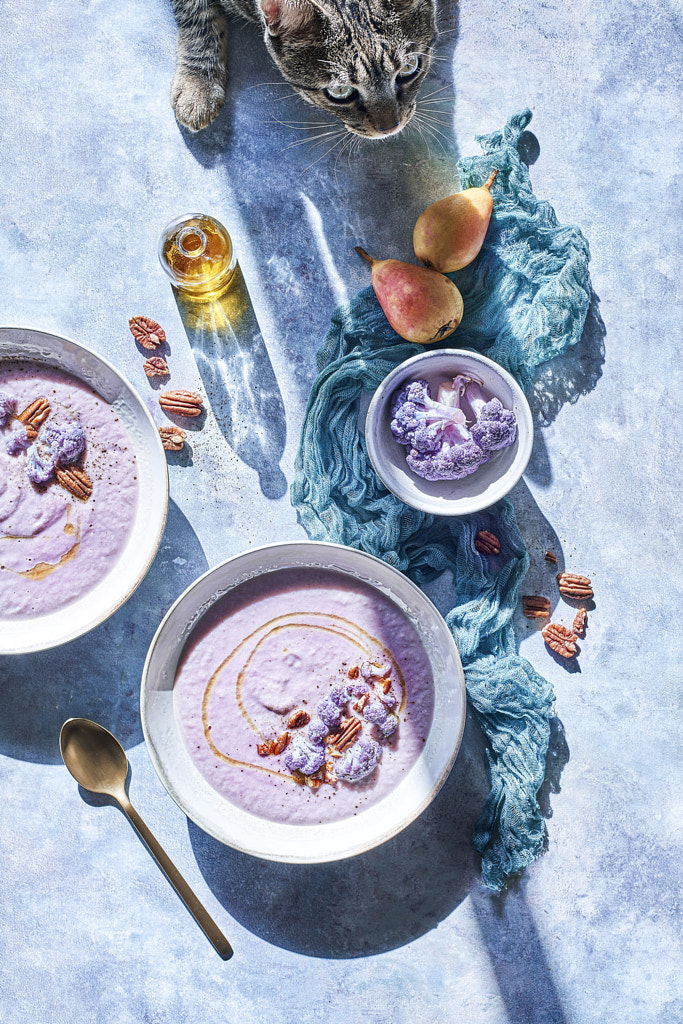
The shadows of palm leaves and other types of foliage are an especially popular choice for creating a tropical atmosphere, no matter where you are. For the wine shot below, Florentina Olareanu relied on harsh natural light to get that summertime feel, which she describes as reminiscent of an Italian vineyard.
Cardboard boxes
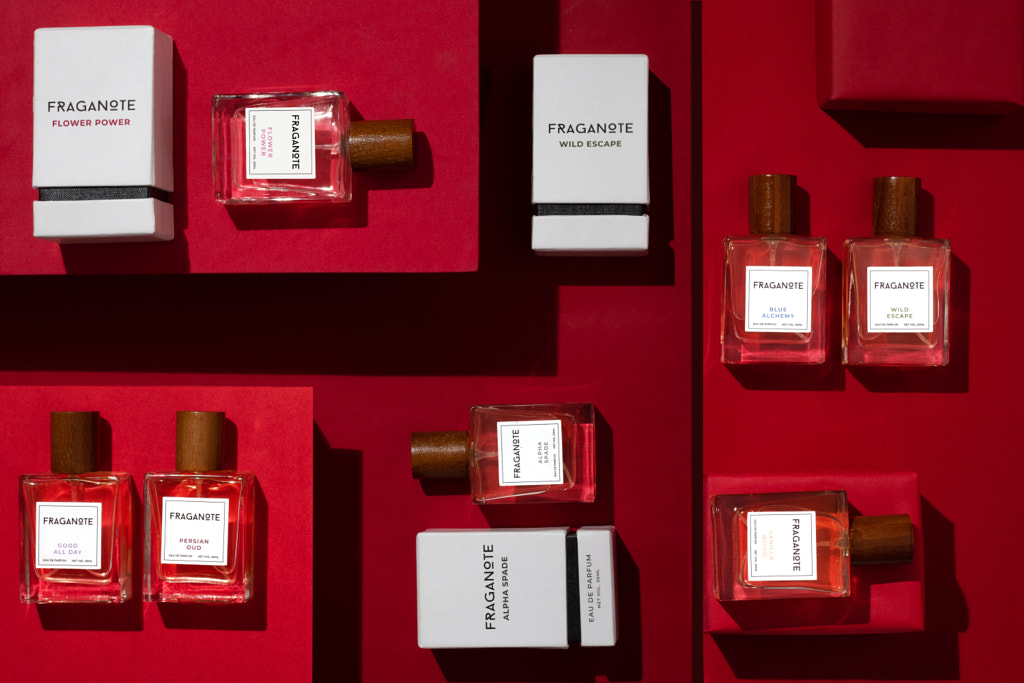
PA Creative Studio, a product photography studio in India, has used boxes of various shapes and sizes throughout their work to create depth and intrigue. Believe it or not, this setup wasn’t created with custom-made platforms from a prop shop; it’s made of small cardboard boxes and charts (paper and foam) in shades of red, perfect for that luxury aesthetic.
Textured tiles
This hack initially rose to prominence on TikTok. Instead of investing in super expensive furniture or large backdrops, consider grabbing some tile samples from Home Depot or Lowe’s (choose the right size to fit the product). You’ll use one as your background and another as your base, mimicking the look of a luxury countertop.
Fake ice and glycerin mix
Feel free to embrace the classics: acrylic ice from a prop shop will last longer than real ice, and a half-and-half water and glycerin spray will create the same refreshing mood as natural condensation. Fake ice and beverages look especially nice when backlit. You don’t have to limit your use of these items to beverage shots alone; consider refreshing skincare campaigns, for example, or sunscreen for summertime.
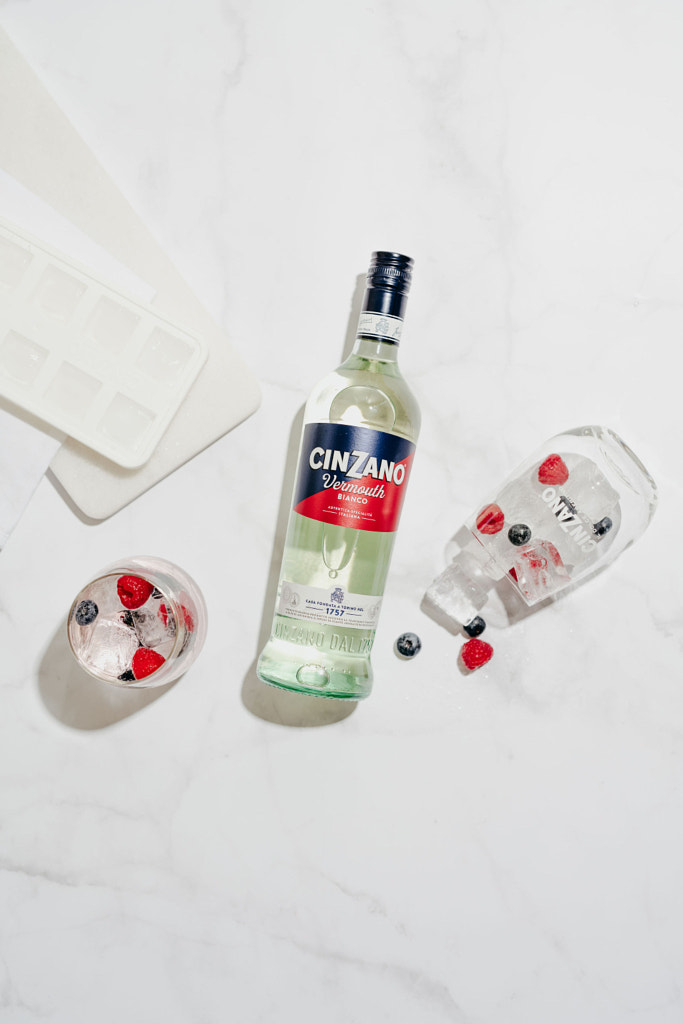
Colorful ice cubes
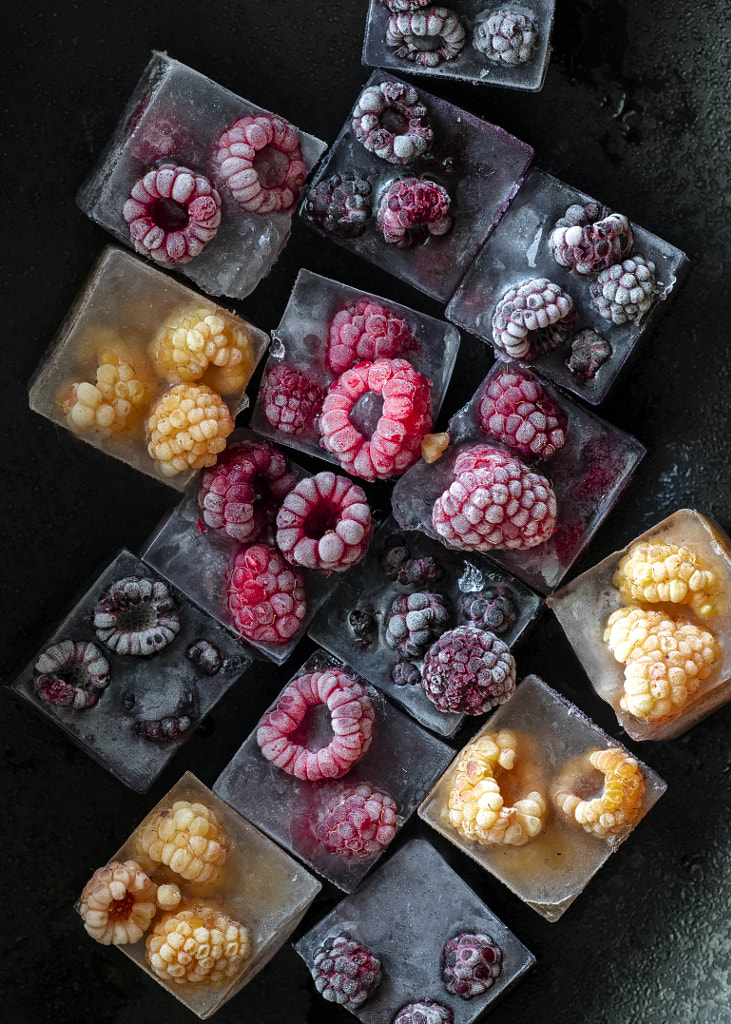
If you’re using real ice, consider introducing some color by adding fresh flower petals, berries, or even herbs before freezing. Consider the ingredients in the beverage you’re shooting if you’re looking for ideas.
DIY background
Ana Gómez, a photographer, food stylist, and educator in Madrid, has painted some beautiful backdrops in various colors. She used canvas fabric, sponges with different textures, black and white paint, a color chalk paint, putty to create more texture, and spatulas. Work in layers to create the best effects.
(Check out our guide to DIY backgrounds here.)
Paper in “3D”
To create this 3D illusion, Frameseeker, a photographer in Vietnam, cleverly used three different colors of paper, cut into precise shapes. It’s a fun and smart way to shoot a minimalist flatlay that looks like it was made in a three-dimensional space.
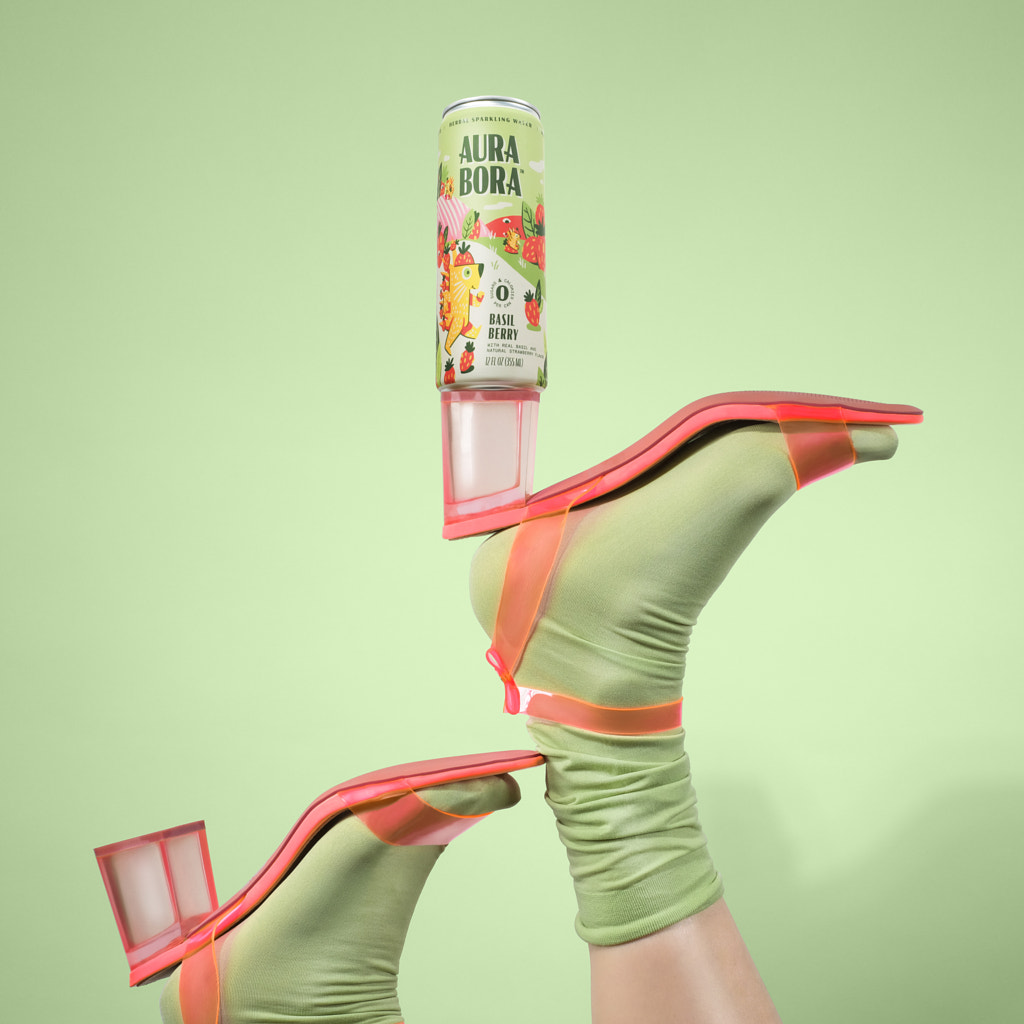
Mirrors
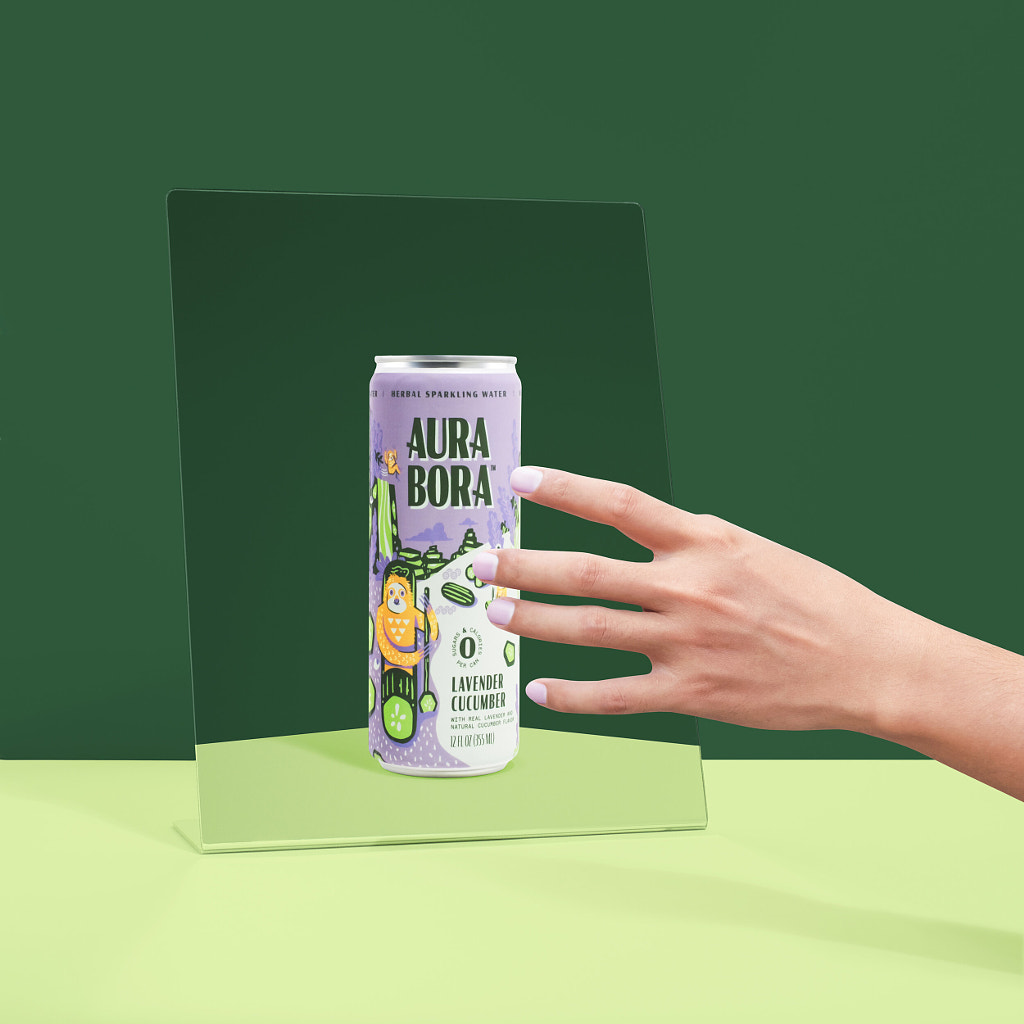
A reflection can instantly add depth and interest to product shoots. Consider only including the mirror image of the product, rather than the product itself, for a touch of surrealism, as Juj Winn did in this creative sparkling water session.
Another option is to place your product directly onto a mirror so that it’s reflected from below; in that case, you’ll include both the product and the reflection. You can buy mirror stands/platforms specifically for this purpose at prop stores; these are especially popular when shooting for cosmetics brands.
(In recent years, it’s also become trendy to bring a mirror outside and place your product on top of it, positioning it so that just the clear blue sky above is in the background.)
Acrylic trays
Prop stores also carry clear acrylic trays for splash or water-themed product photography, so you don’t need access to a pool or beach to get the look. Simply take some pale blue seamless paper, place the tray on top, add a shallow layer of water, and put your product on top. It’ll create the illusion that the product is floating in much deeper water.
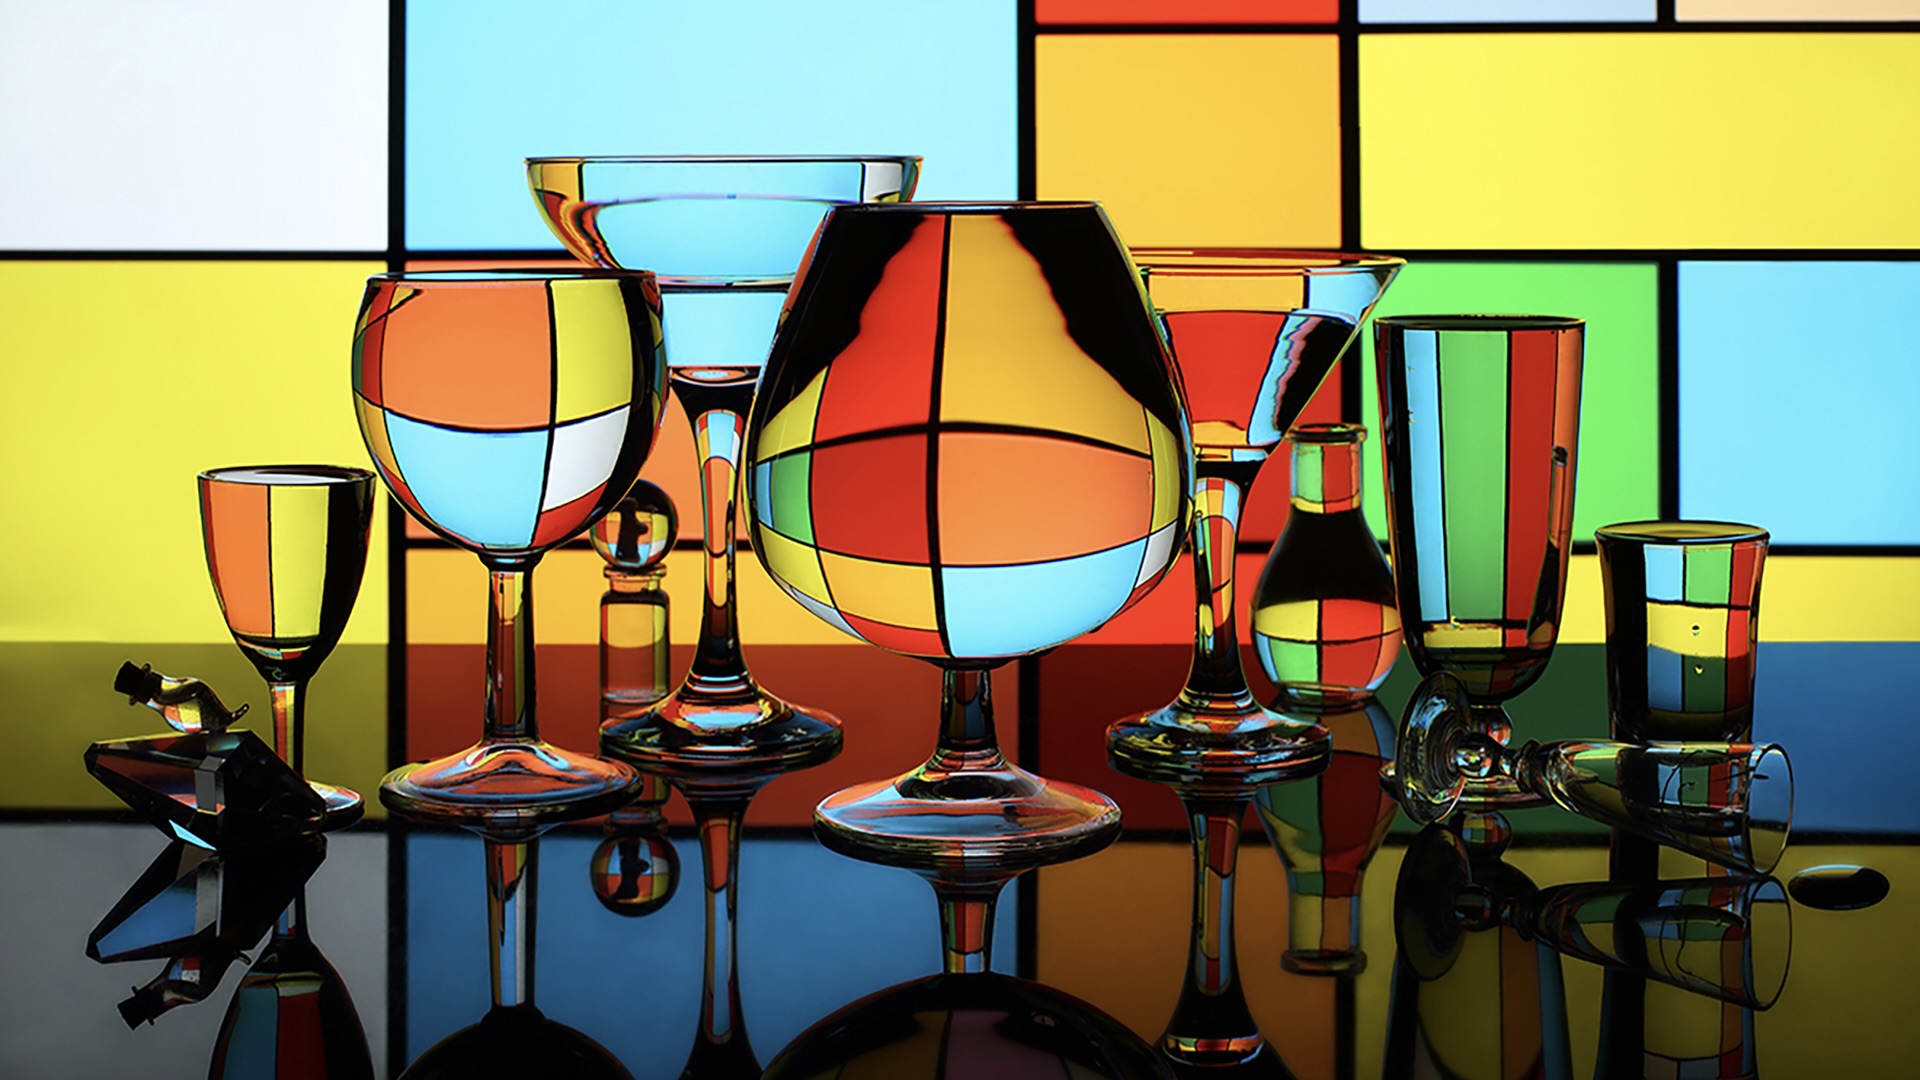
Computer monitors
Victoria Glinka, a photographer based in Israel, drew her own vibrantly hued digital backgrounds in Photoshop. From there, she opened the files in full-screen mode on her monitor (she says you can also use a TV) and placed some clear glasses in front of that background. “Your monitor will be the background and the source of light at the same time,” she explains. Turn out all the other lights in the room, and take your shot. Simple but genius.
Color gels
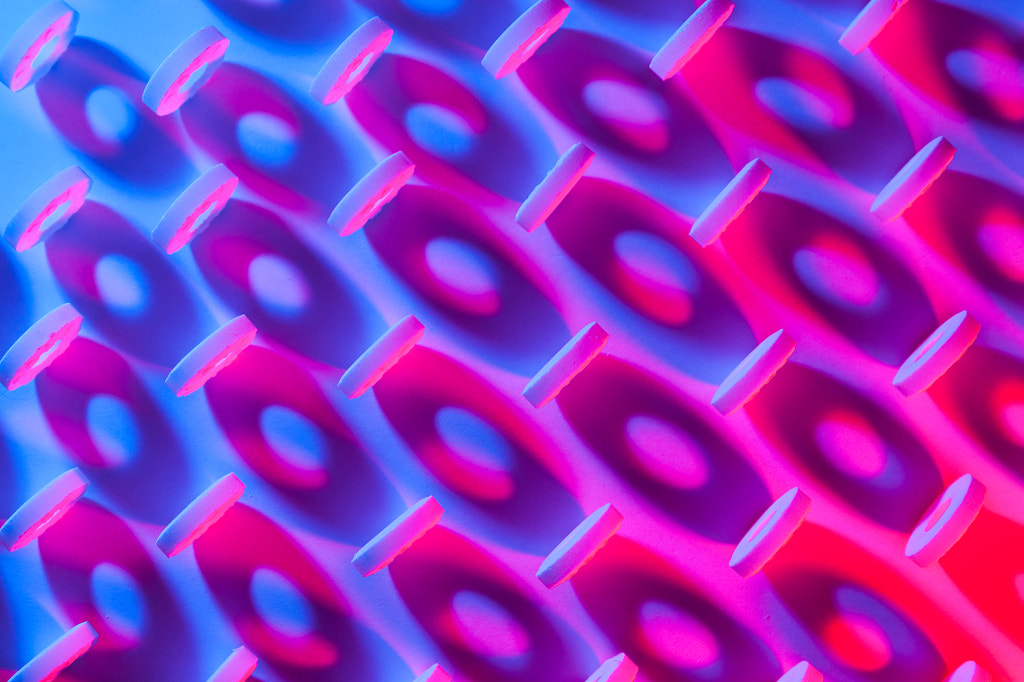
Pair a flash with a color effect gel for a futuristic, neon vibe. To create this still life, Ibrahim Alsamnan gelled two flashes (blue on the left, red on the right) to amp up the drama.
Light painting
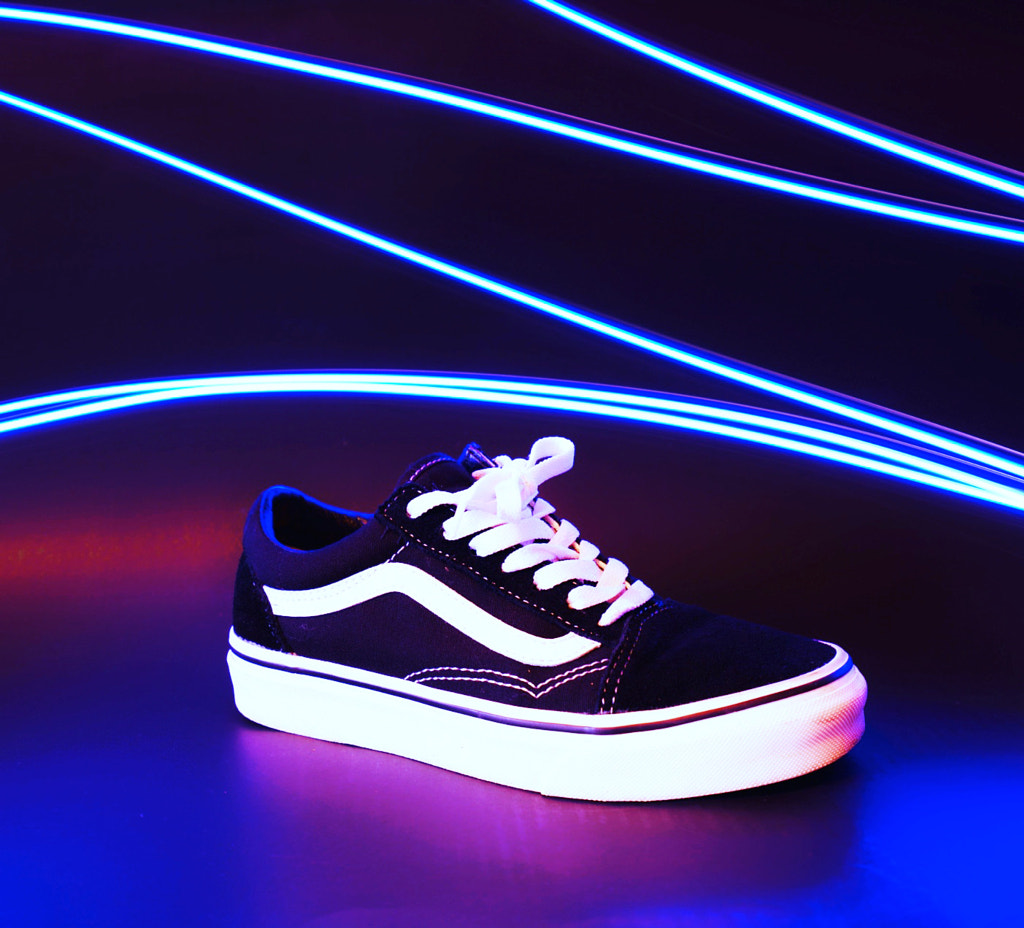
To get the look, try moving a colorful light wand around your product as you use a long shutter speed. This technique works best with a black background and no external light sources aside from your main key light and the light painting wand itself. Experiment with movements and speeds to see what works with your product.
From the beautifully simple to the elaborate and meticulous, we hope we’ve inspired you to approach your next client shoot with fresh ideas and a renewed sense of creativity. If you try any of these hacks in your product photography, be sure to let us know in the comments!
Not on 500px yet? Sign up here to explore more impactful photography.
Leave a reply