Jimmy McIntyre is travel photographer. He is currently undertaking a two-year project in Asia—writing two photography guidebooks for China and South Korea. He has taught digital blending workshops in four continents, and he also offers online courses. You can download his free Easy Panel for Photoshop program, which will create Luminosity Masks for you at the click of a button. But if you’d like to take your Luminosity Mask mastery to a new level, check out his comprehensive Luminosity Masks Tutorial below.
The Basics of Luminosity Masks
by Jimmy McIntyre
One day, in the hopefully not-too-distant future, we will carry with us a camera so light and compact that younger generations will laugh at the way we once lugged huge bricks across vast distances to capture a timeless moment. In this camera may also lie a sensor so powerful that the richness and size of the data in a single RAW file would make our modern day computers explode every time we exported one into Photoshop. With this new technology, for me, would lie the holy grail—the ability to capture the dynamic range of light in any given scene with a single file.
Modern cameras aren’t too far from that now. However, since we still aren’t there yet, we photographers rely on various post-processing measures to increase the dynamic range held within our final images. More often that not, this involves blending multiple exposures. A whole market of HDR software has sprung up to satisfy just that need. While many of these programs are superb, there’s nothing quite as clean, in my experience, as being able to blend your exposures manually in Photoshop. One of the most effective ways to do this is through the use of Luminosity Masks.
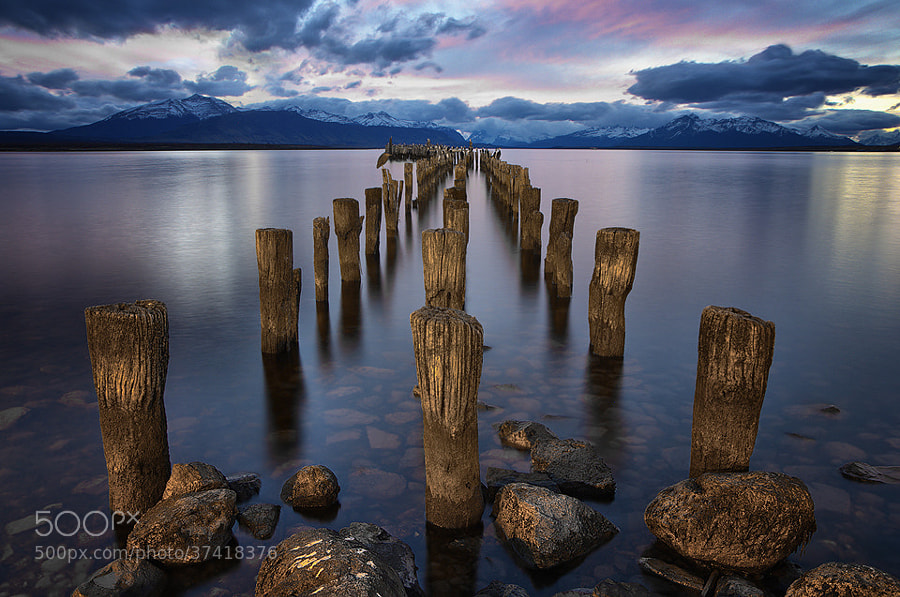
 2 blended exposures using Luminosity Masks and one long exposure
What are Luminosity Masks?
Luminosity masks, also known as Luminance Masks, are a way of making advanced selections in Photoshop based on luminosity values. For example, let’s say we are looking at a beautiful sunset shot in Photoshop. We’ve exposed for the foreground so rather typically the brightest part of the sky is over-exposed. We were smart enough, however, to take a second, darker exposure, this time exposing for the sunset. All we need to do, in theory, is smoothly blend the area of the sun into the brighter exposure where that same area is blown out. In Photoshop, there are many ways to make selections, but in this particular example, Luminosity Masks would allow us to select the over-exposed area because it targets luminosity values (i.e. the brightness of an area), and smoothly blend in the darker exposure.
Below is a recent shot from Petra in Jordan. I needed to blend multiple exposures to regain the information in the lanterns on the ground, which were previously blown out.
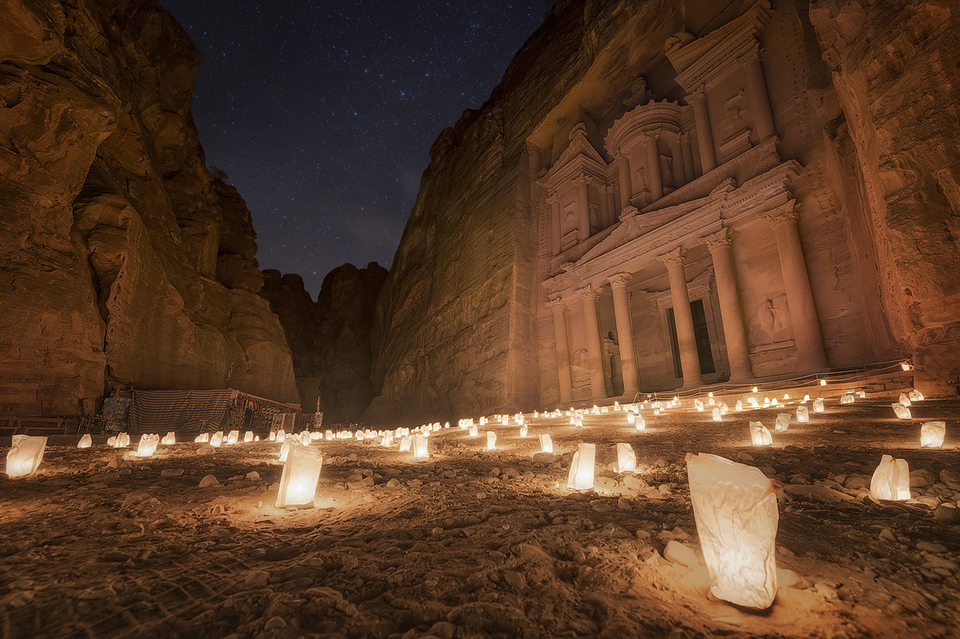
Petra, Jordan
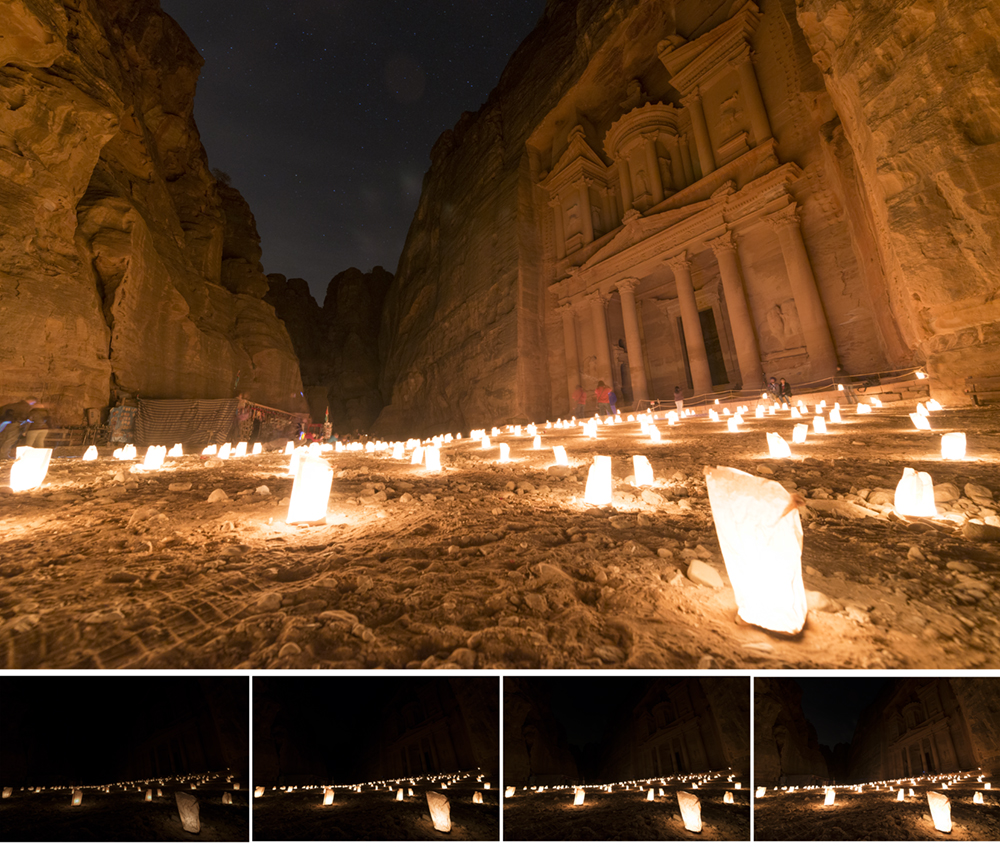
And below are the original exposures that I used to arrive at the final image. As you can see, with my base exposure I blended in four lower exposures to recover the detail. Naturally, I did a lot more work before I arrived at the final image but this is undoubtedly one of the most important steps in the workflow. If you’re curious to know how I removed the tourists, I have a tutorial on my blog with a great, simple technique.
How do I get Luminosity Masks?
Luminosity Masks live within your Channels palette, to the right of your Layers palette in Photoshop. But you have to create them first, which is a rather time-consuming process. Fortunately, there are various sources on the Internet where you can download pre-created Luminosity Masks action sets that do all of the work for you. I have an 18-point action set on my blog, which you can download for free here: Luminosity Mask Action set.
Once you have them downloaded, import the actions by extracting them from the .zip file and double clicking on the file. Or you can go to the Actions panel in Photoshop, click on the top right menu and choose Load Actions (See Example Image 1 below). A little later on, I will explain to you how they are used. For now, feel free to keep reading and resist the temptation to play with them!

Example Image 1
When you load the actions, a list of 18 masks will appear, going from Brights 1-6, Darks 1-6, and Midtones 1-6 (as seen in the image below). That which is white will be selected completely, while that which is black will not be selected. The tones in between will be selected depending on how bright they are. Each of these masks represent a possible selection, and as you move onto more advanced forms of Luminosity Masks, multiple masks can create an even more specific selection!
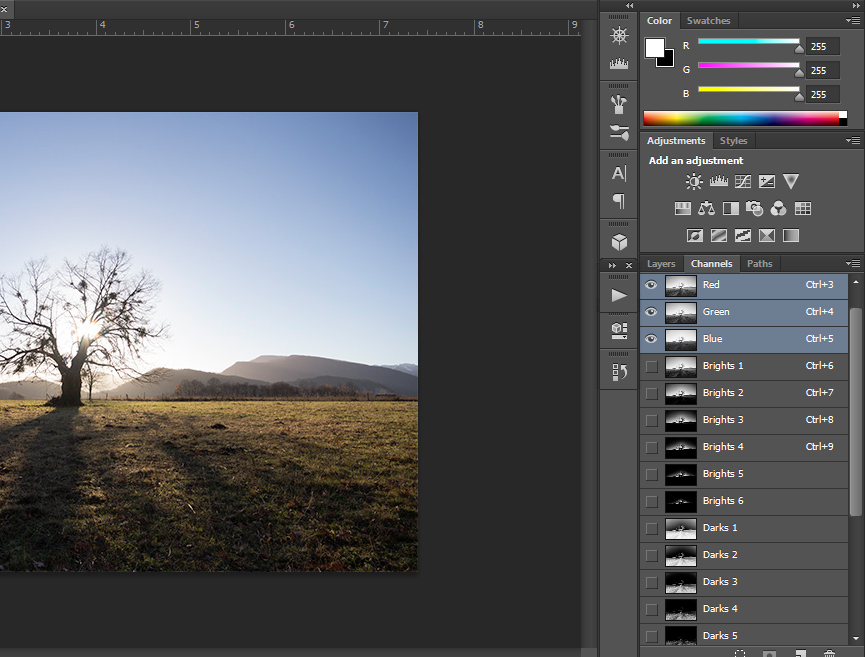
Luminosity Masks
How do I use Luminosity Masks to blend exposures?
There are many ways to implement Luminosity Masks in Photoshop, and how you do it generally depends on the image you’re working on. I’m going to take you through a very basic tutorial on how to recover an over-exposed area using just two exposures in Photoshop.
These are the two exposures I’ll be working with:
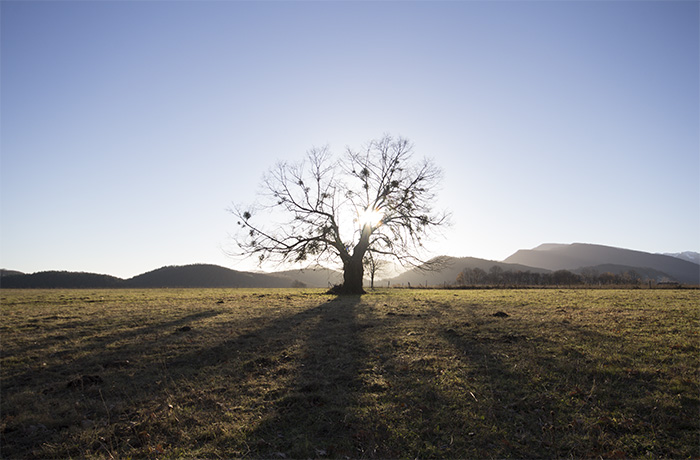
Normally exposed

Under exposed
1. I import the two exposures into Photoshop. I place the normally exposed image on the bottom and the under-exposed on top. Then I create a black layer mask for the under-exposed layer, rendering it invisible, exactly as you see in Example Image 1 above. Then I un-check the eye, just left of the underexposed layer thumbnail in the Layers panel.
2. I go to my Actions palette where it says JM Luminance Masks. I click the arrow next to that and an option that says Generate Luminance Masks will appear. Choosing that option, I then press the Play button and generate the Luminosity Masks.
3. Once Photoshop has finished working, I go to the Channels panel. Looking through the masks, I’m searching for a mask that has the over-exposed area in the base layer completely white. This is because, everything that is white will be selected. My goal is to select the blown out area in the bright exposure so that I can then blend in the darker exposure. In this case, Brights 3 is the mask that I’ll use. The brightest area is white, with a smooth transition of tones as we move away from the over-exposed area.
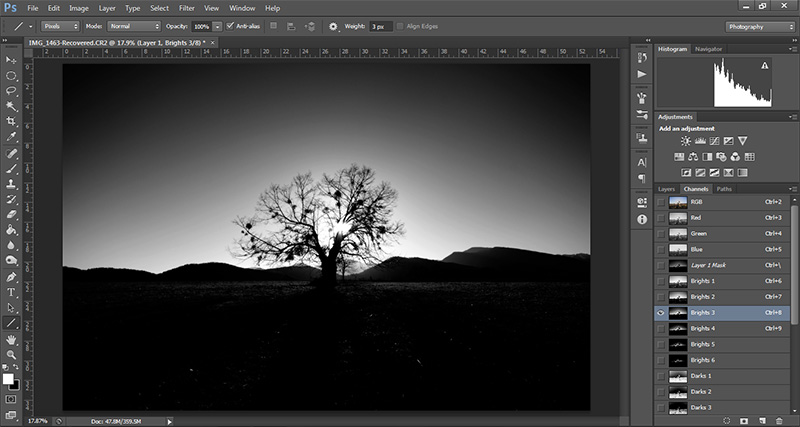
Brights 3
4. I hover my mouse over the Brights 3 thumbnail and press the left mouse button while holding ctrl (or command on a Mac). A stream of marching ants now appear that represent my selection. I then go to the Layers panel and back to my original exposures. I press ctrl + h, to hide the marching ants. I re-check the eye next to the under-exposed thumbnail to make it visible for the masking process.
5. With the under-exposed layer selected, I then click on the black mask next to it. I select the Paint Brush tool and a large brush. I reduce the brush opacity down to 50% and begin painting over the over-exposed area that was selected through the Luminosity Mask.
6. Since the selection I chose was correct, I don’t have to be careful about painting outside of the over-exposed area. Surrounding areas are unaffected, which is why Luminosity Masks are such a powerful tool when blending exposures.
7. After only a few seconds, the blown out area has been completely recovered. And the transition between the two exposures is extremely smooth. The blending process is finished!
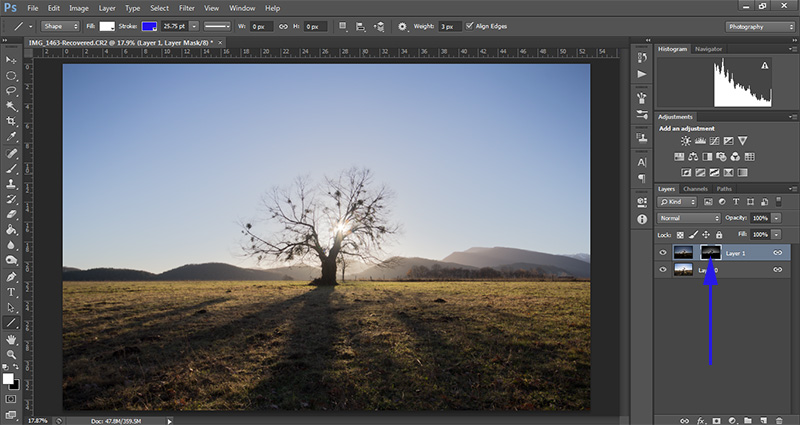
The final blend and the mask created
To conclude…
If this is your maiden voyage into the world of Luminosity Masks, I’m going to guess that you’re reasonably confused right now—I know I was when I first started using them.
Yet, with each triumph in this digital blending art form, you gain the confidence to explore these complex tools further and refine your own workflow around them. After a while, you start to wonder how you ever worked without them.

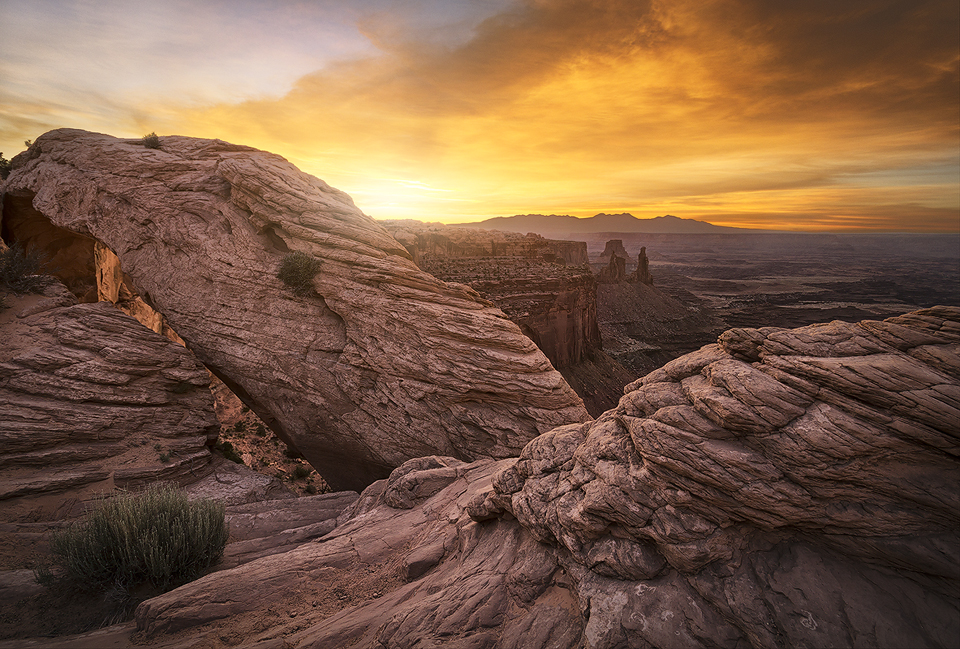
Mesa Arch, 3 exposures
For those who are curious, I have a large selection of free Digital Blending Tutorials on my blog that could make the learning process a lot simpler. I also have a free beginner’s video course on Photoshop, for those who are really confused. I hope you found this information useful!
Want more to see more of his handy tips and HDR photos? Follow Jimmy McIntyre on 500px, Facebook, or Google+!

You Might Also Like These Articles:
- 4 Advanced Uses Of Luminosity Masks For Creating Beautiful Images
- 50 Surreal Night Sky Images Of Every State In The USA
- 35 Mobile Photography Tips For Taking Better Smartphone Shots
- This Photographer Captures Moody Street Photos Of London After Dark


Leave a reply