Dina Belenko is a creative still-life photographer from Russia and incredibly successful 500px Marketplace photographer. Her artistic images capture magical stories behind everyday inanimate objects.
In this tutorial, Dina shows you how she shot her photo “Autumn Inside” and literally made it rain all over her composition in the studio. It’s super easy and makes for a beautiful (if messy) shoot. Read on to find out how to do it yourself!

Autumn is a perfect season for still life photography—with its colorful leaves, extremely orange persimmon, hot drinks, red apples, pumpkin soup, and wild grapes. Every local market and park is a ready-made vanitas.
Plus, the weather is always perfect! I don’t usually like rain, but autumn rain is a pure inspiration. So let’s bring a bit of autumn rain to still life photography and take the opportunity to make something beautiful.
1. Props and Gear
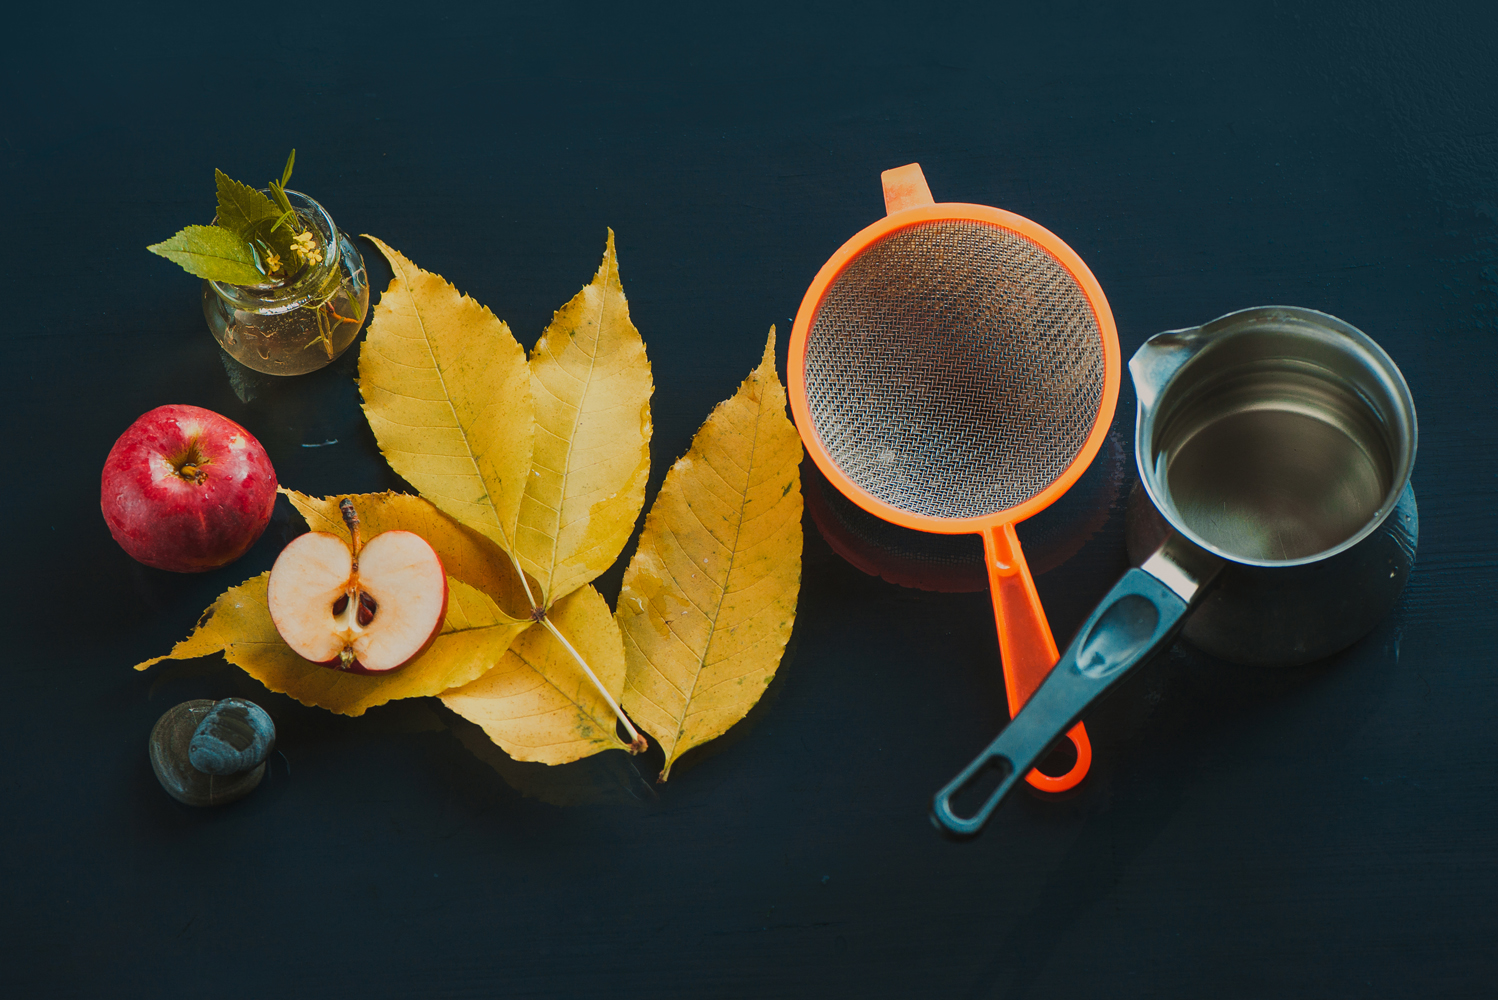
The equipment we’re going to use is extremely simple: still life objects (any signs of autumn that’s not afraid of getting wet), a kitchen strainer, a small jar (like a coffee turk), and a solid splash-proof background.
Also we’ll need a large softbox, reflector, and, as for any splash shooting, a tripod and external flash.
2. Lighting
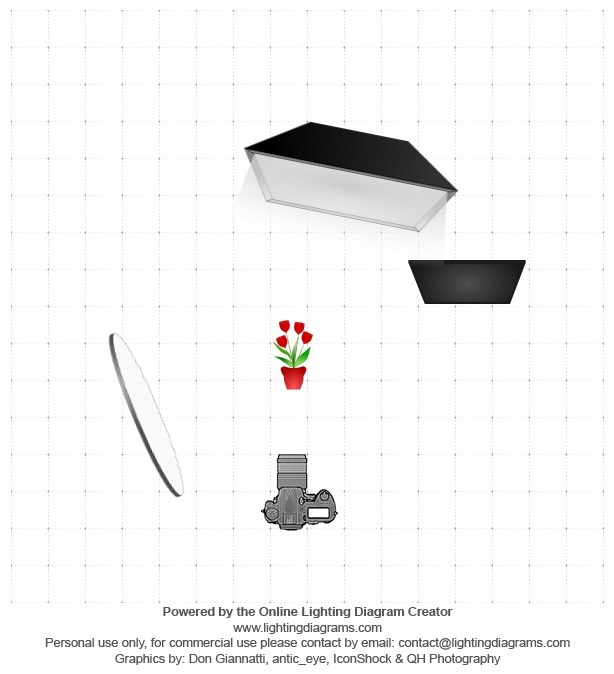
I wanted my light to look natural, so I took a large softbox (my favourite is the Westcott 43″ Apollo Orb) and put it behind my background, slightly on the right side.
Inside it, I set a typical speedlight adjusted to shoot splashes: low power (1/8 up to 1/128 power provides a very short pulse that will freeze the motion of liquid) and RPT mode, which allows it to take a few shots in a row.
There also was a reflector at the left and a small black panel to cut some of the light on the right top angle of the frame.
3. Test
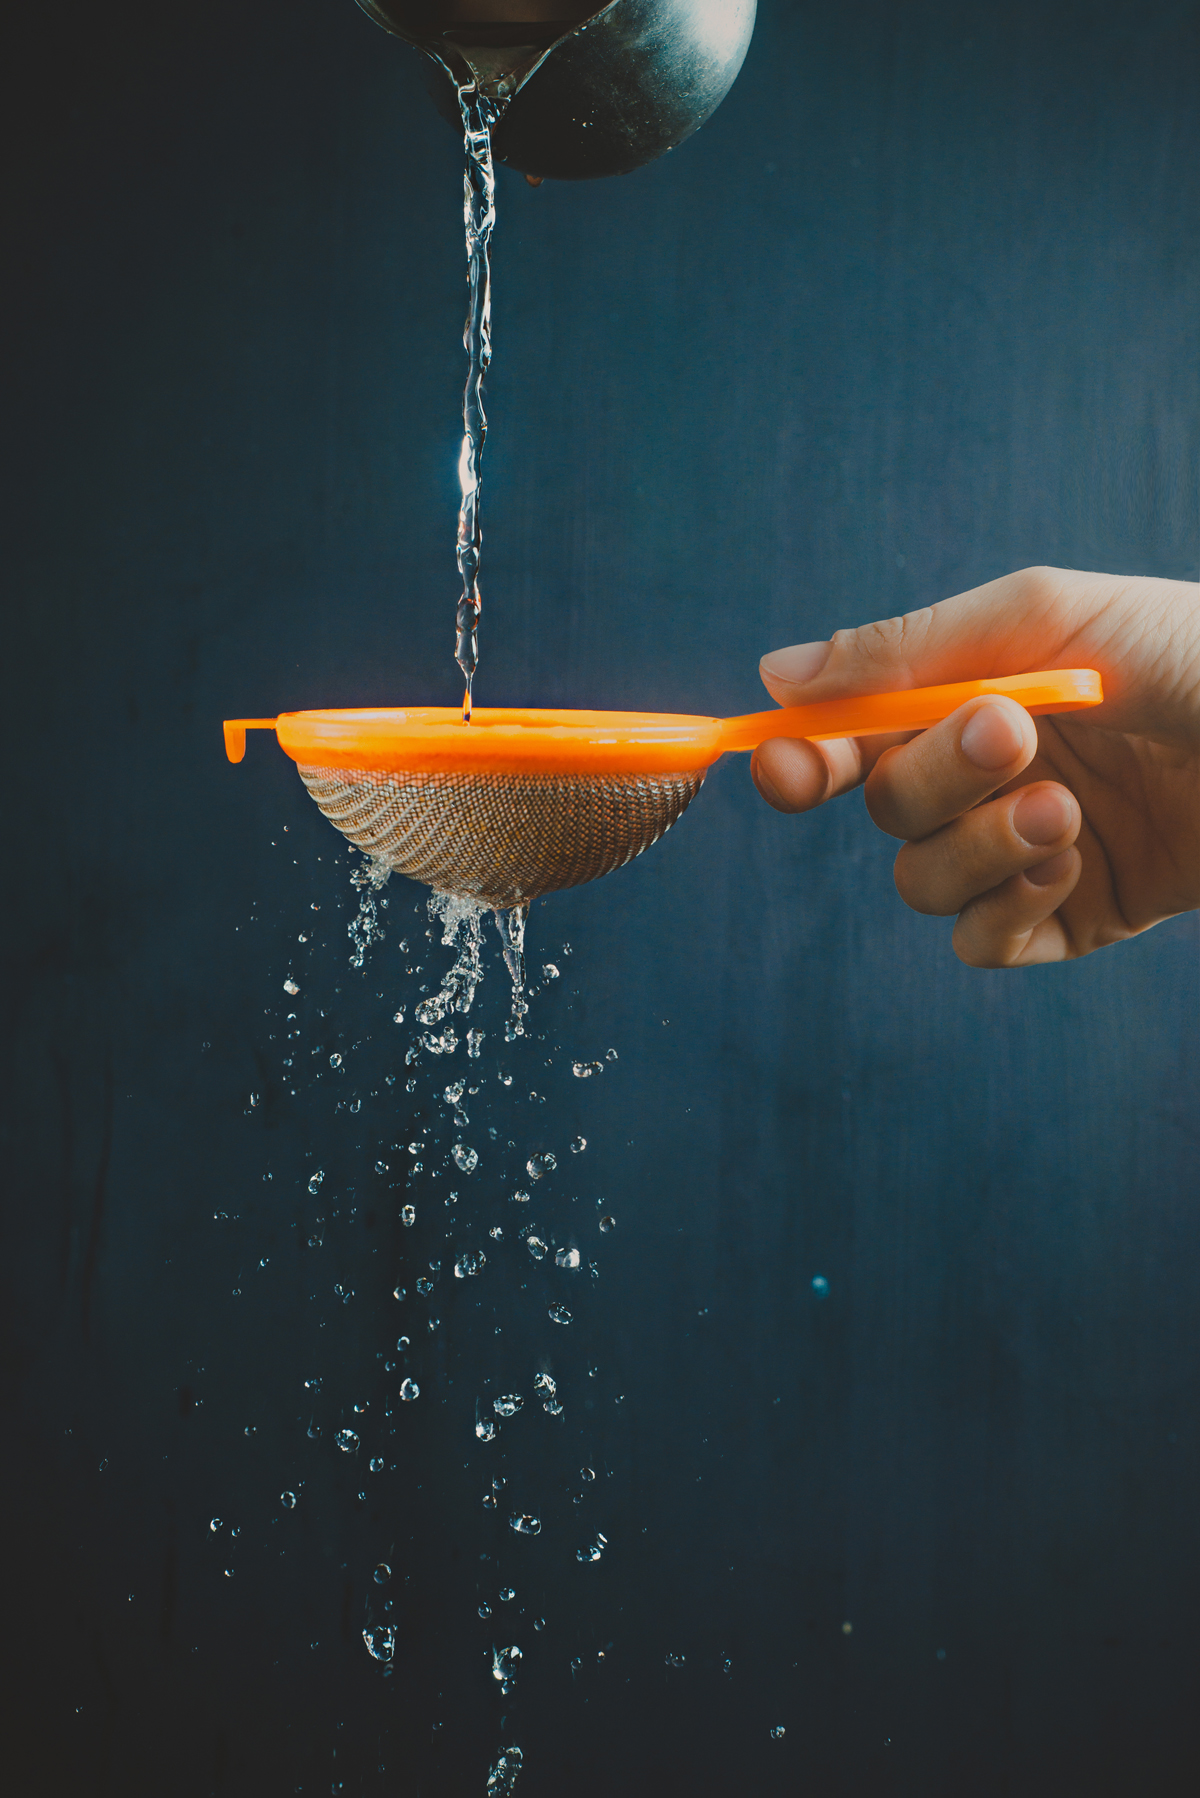
I highly recommend capturing a test shot before pouring water onto your neatly arranged still life, just to be on the safe side. I found that the nice and easy way to create a rain effect is to pour water through a strainer. This way the flow will be scattered and we can have some small, beautiful drops.
4. Shooting
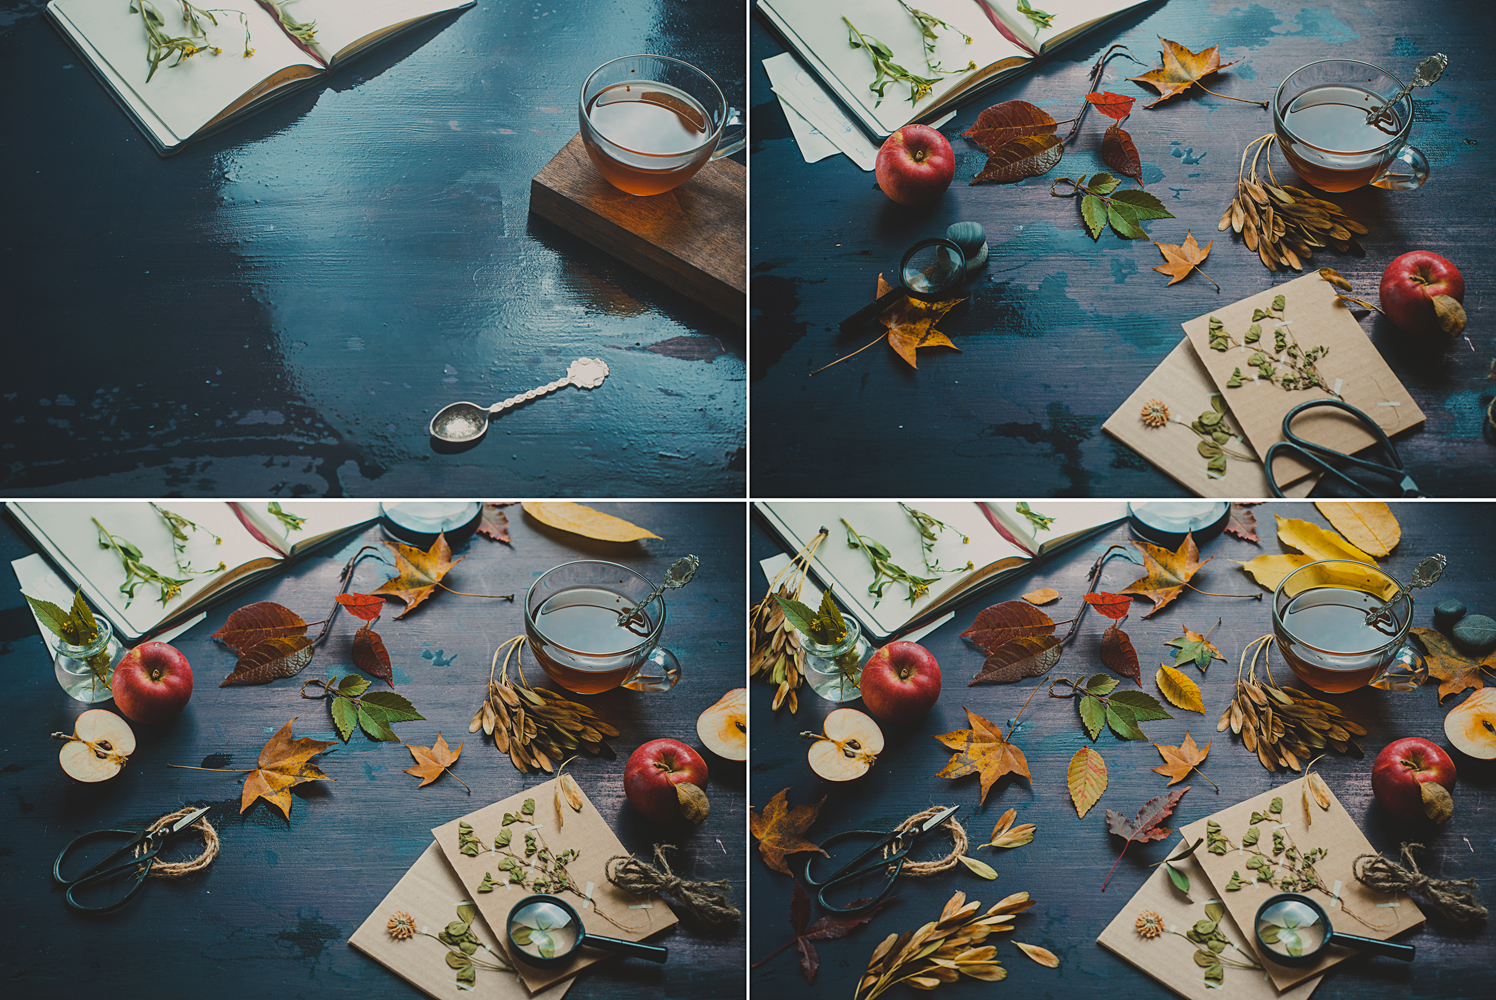
If you’re satisfied with your test shot, it’s time to arrange a final composition.
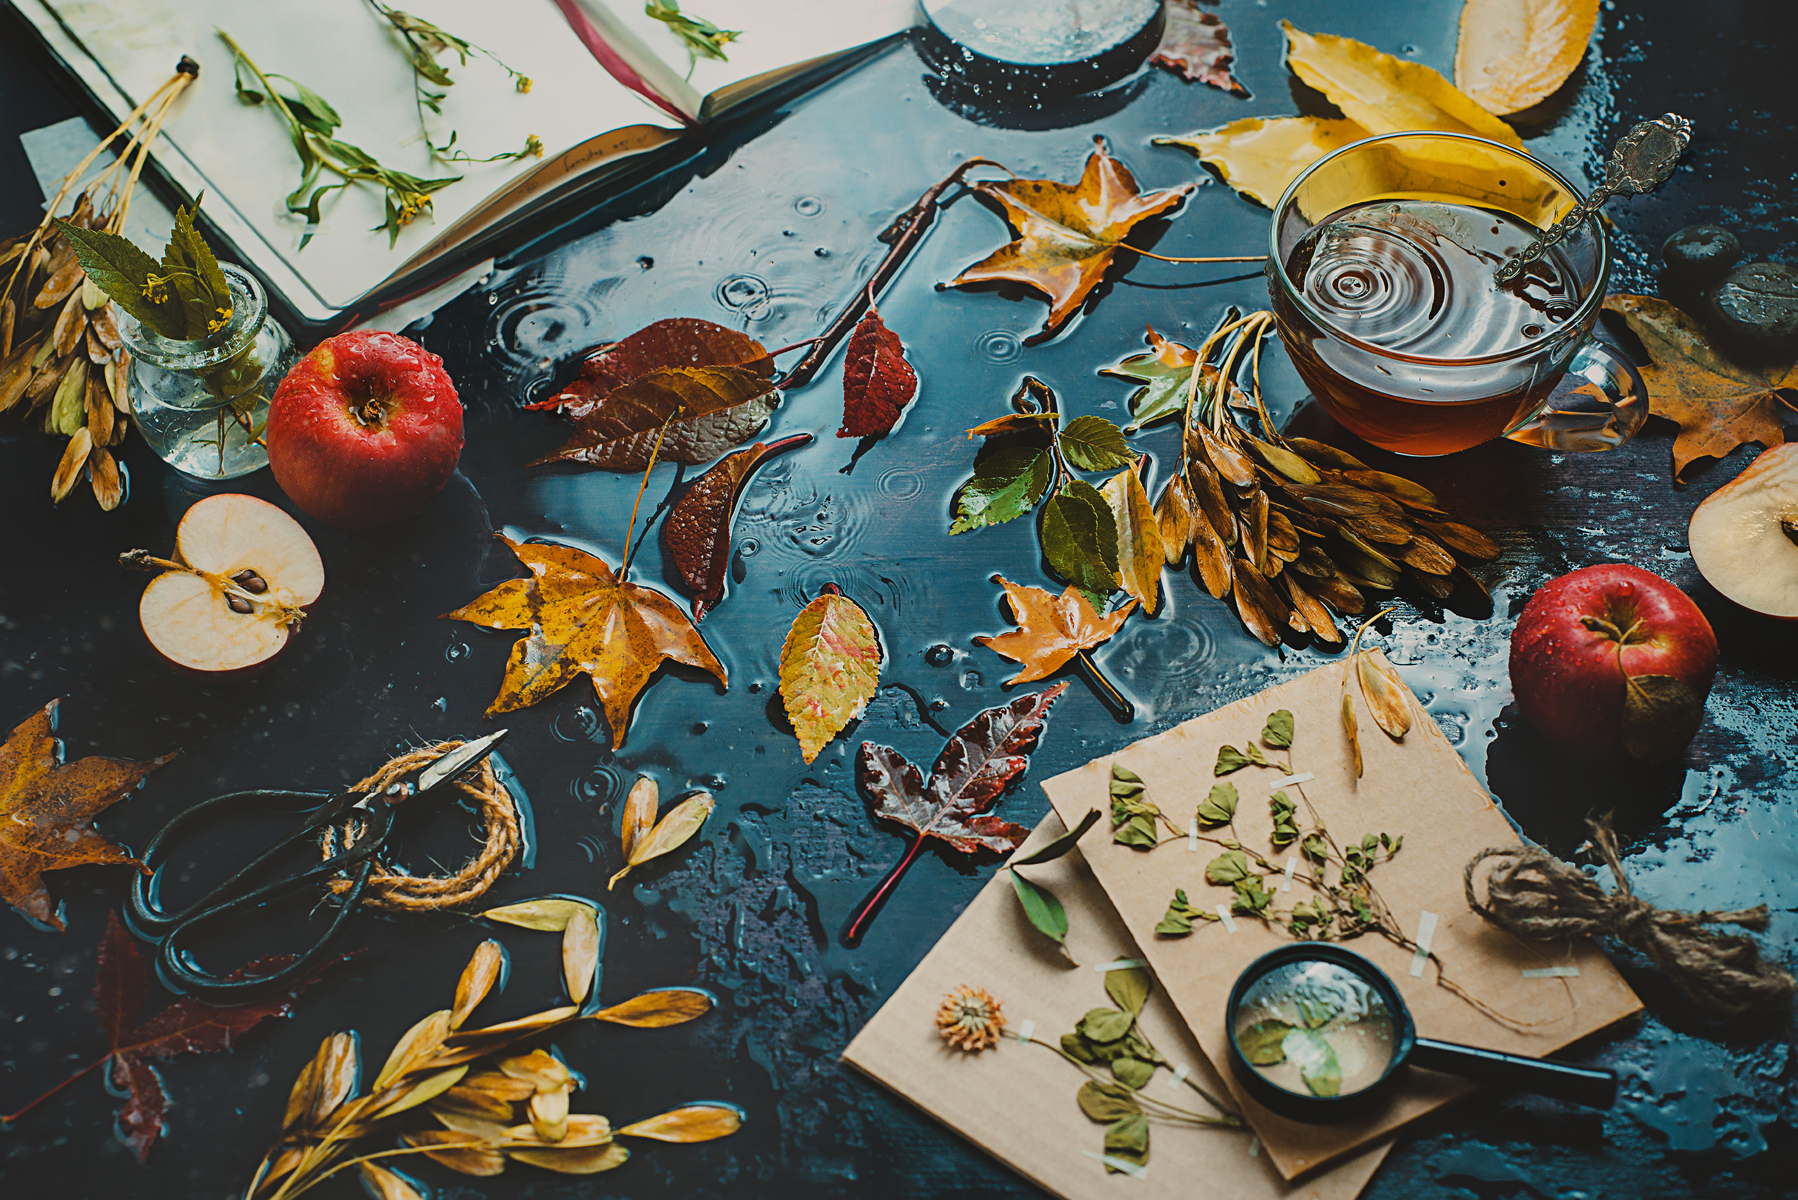
In my case it was easier to start with relatively big objects (like the sketchbook and tea cup) and go from them to the lesser details. Keep in mind that water will probably make a bit of mess and change your composition slightly, so leave some space for rain drops and chaos.
Now, let it rain! Pour water through a strainer and make a series of shots. Be careful with electronic equipment and have fun.
5.Post-processing
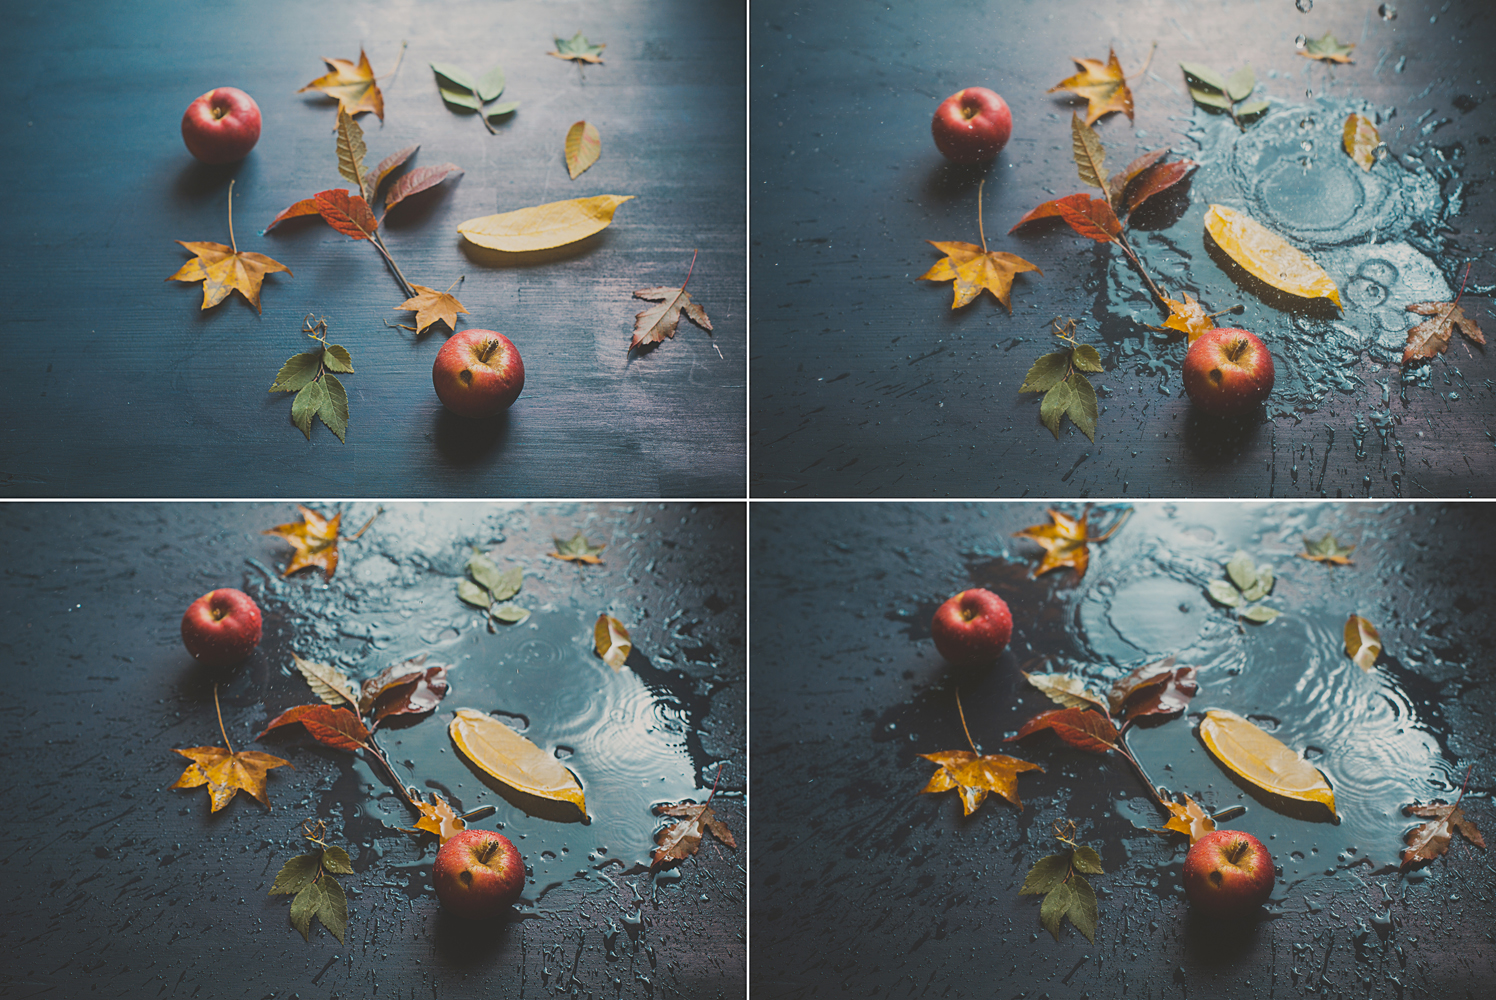
Choose the shot you like most. It may be perfect already or you can add a couple of drops here and there, adjust colours, and touch up the contrast. And voila, you have a bit of autumn preserved forever. It’s as simple as that!
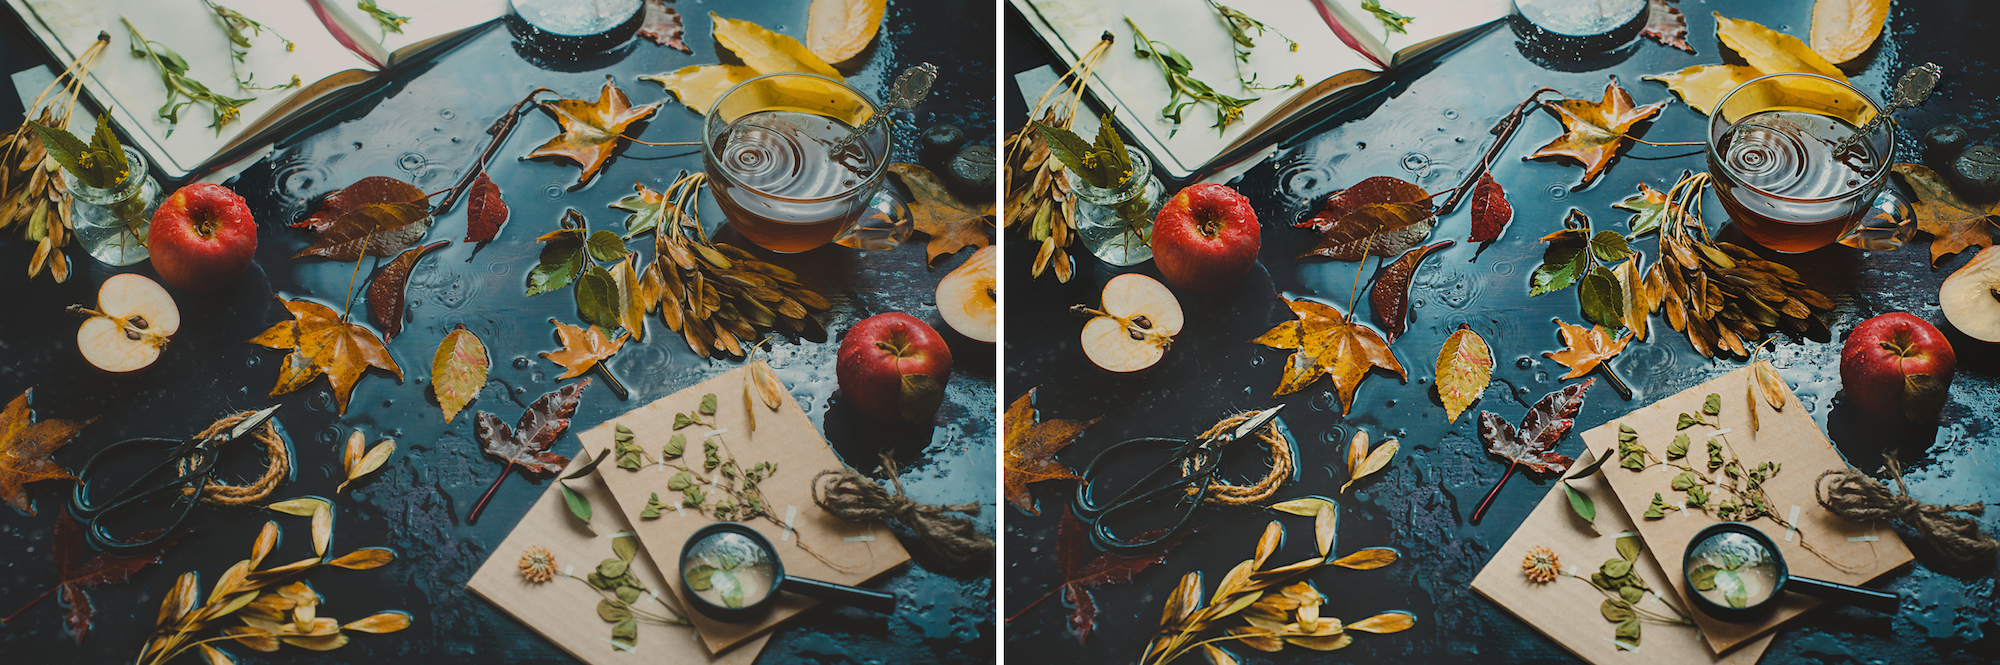
Here’s the before-and-after for Autumn Inside:
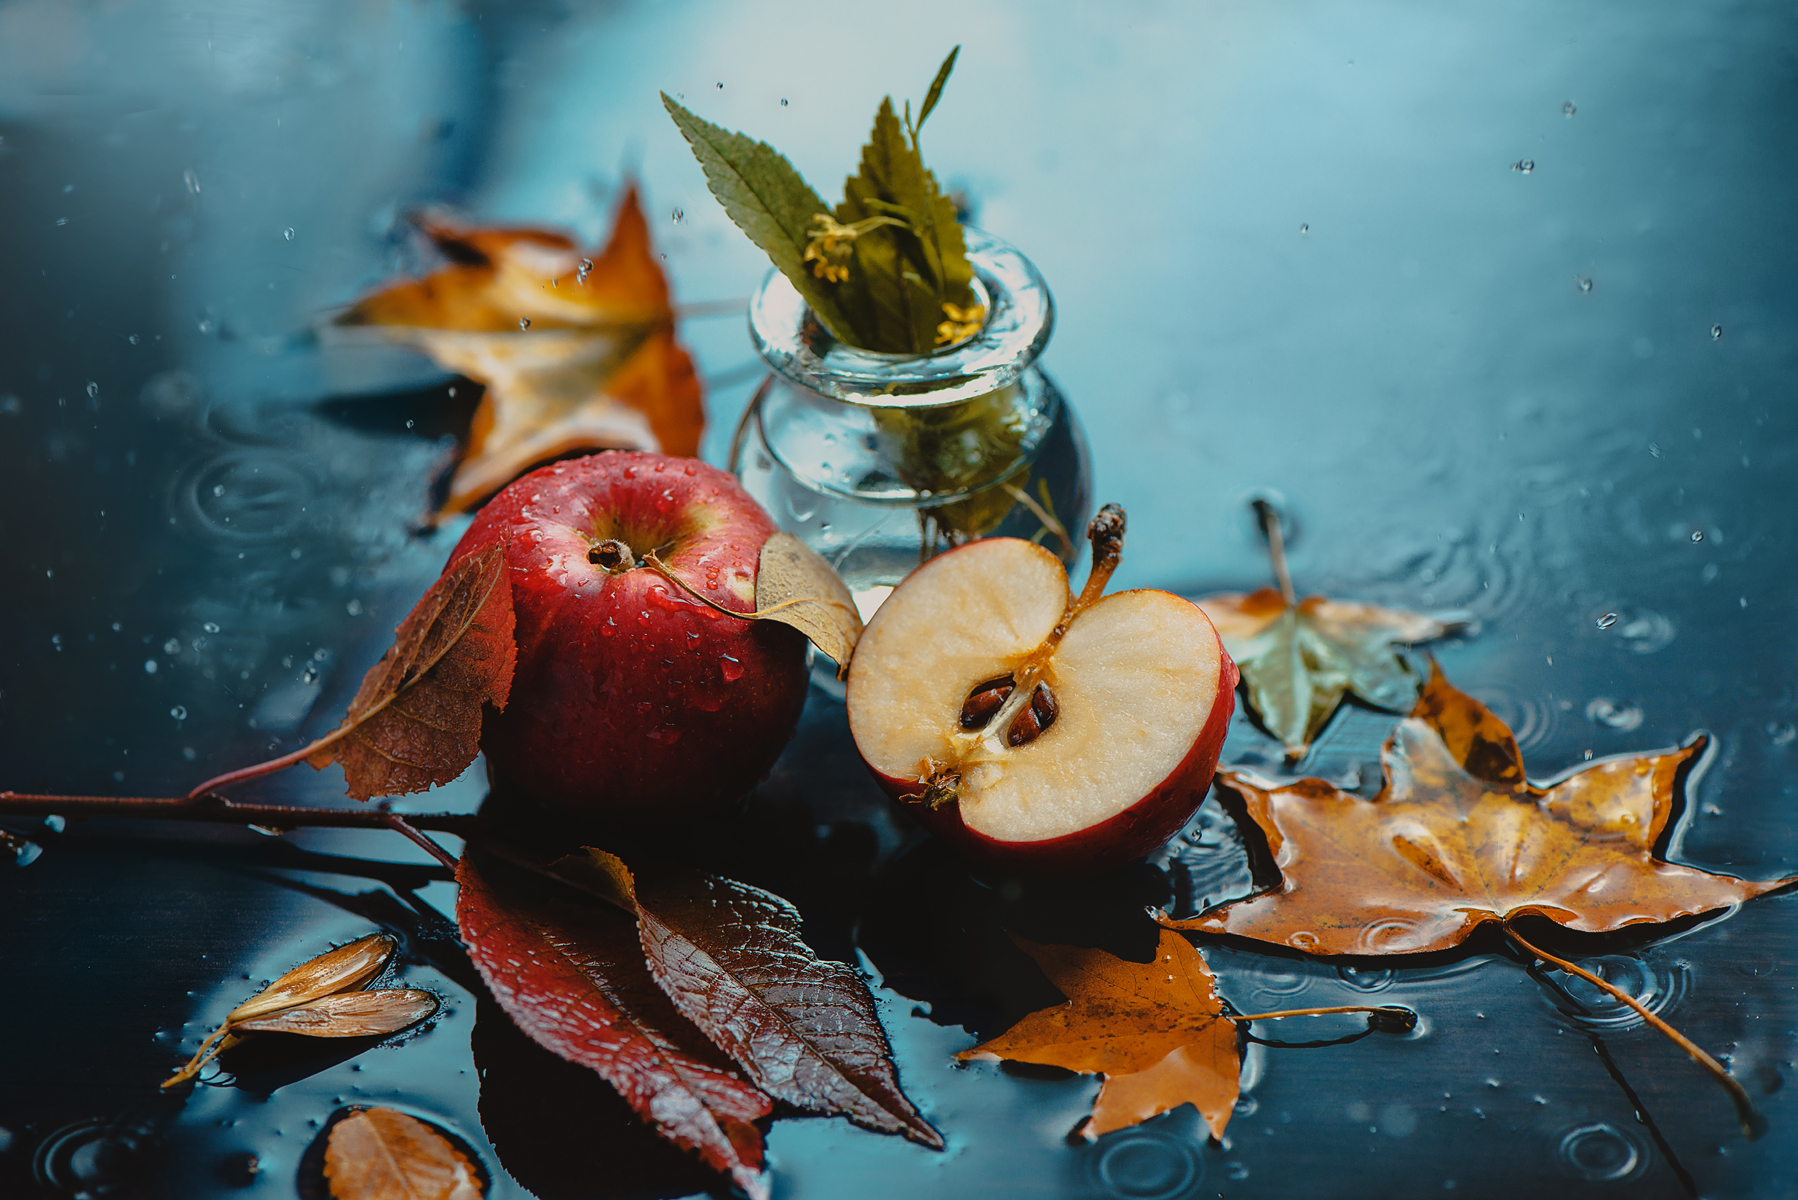
Here are the final photos:
Hope you’ve enjoyed the process. Stay inspired and good luck!


Leave a reply