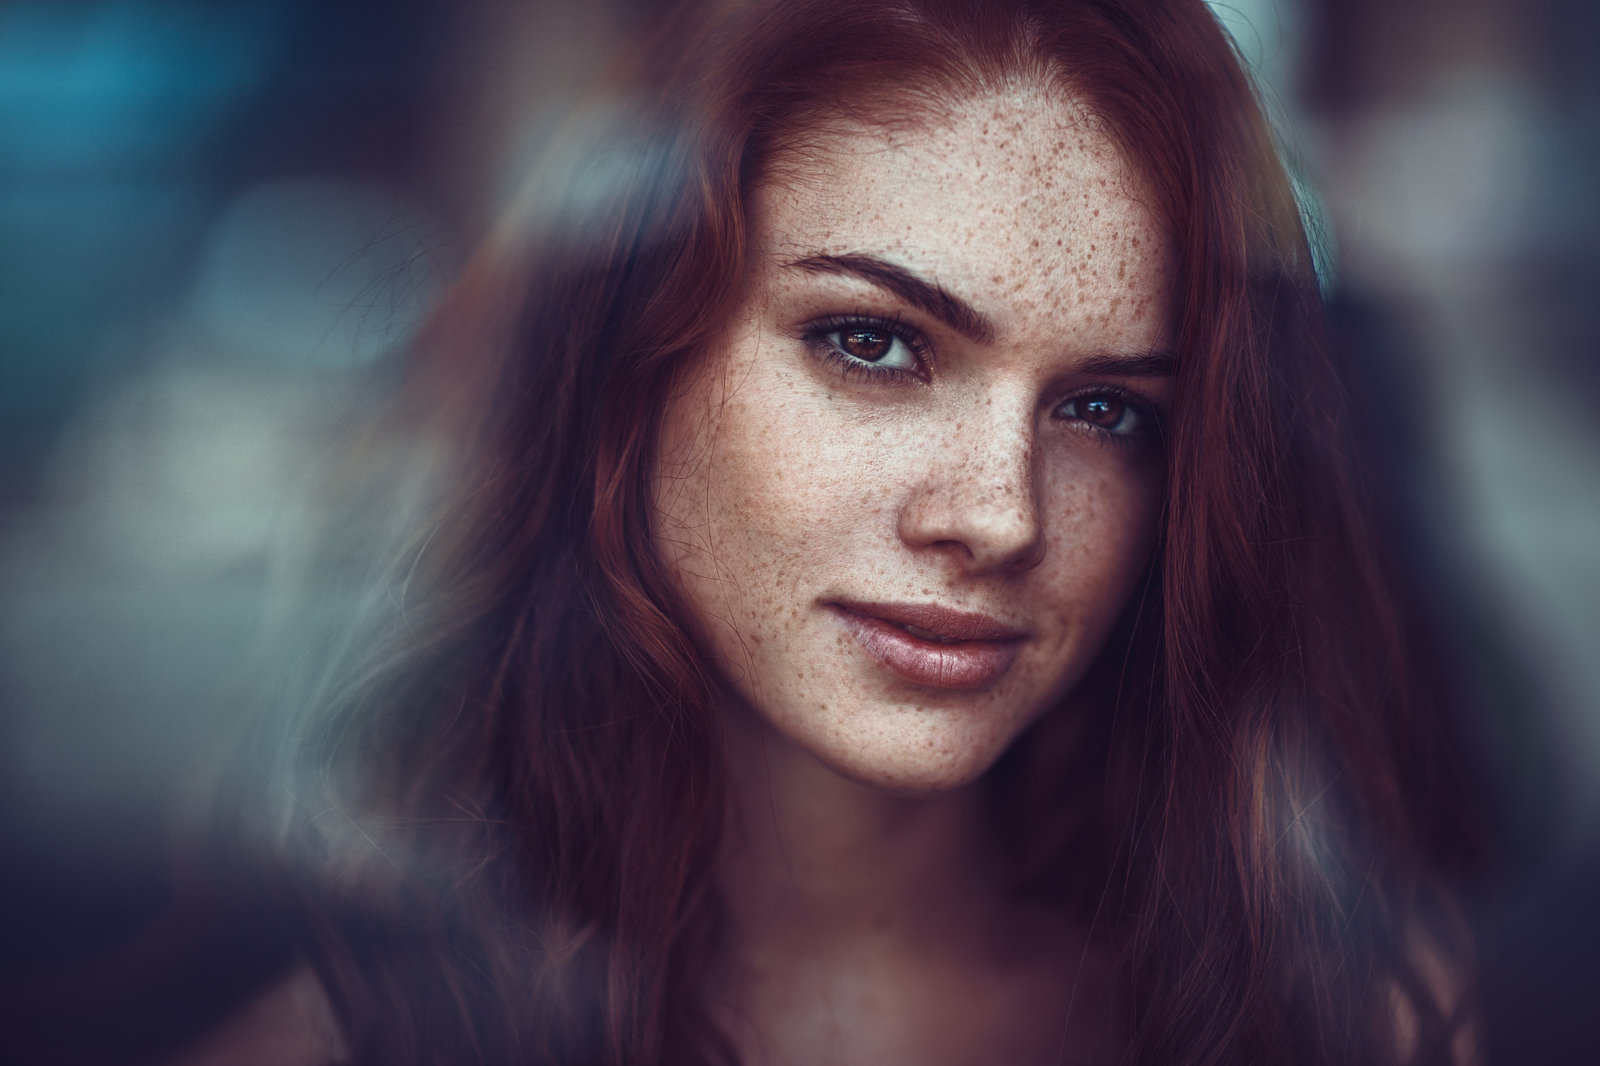
PortraitsBySam is French portrait photographer with a distinct style that often has his images at the top of the 500px Popular page. Whether he’s in the studio or outdoors, he has a gift of putting his subjects at ease and capturing natural, genuine expressions.
You can find more of his work by following him on 500px, visiting his website, or showing him some love on Facebook.

In this post I want to share a combination of little techniques than can be used to emphasize freckles. All these techniques can be combined and mixed to get anything from nice and soft freckles, to more extreme results according to your goal.
To understand how to deal with freckles, it’s first obvious but important to realize that each freckle is a little area that is darker than the rest of the skin, they are usually more visible in summer but they are present all year. Since freckles are darker areas, the idea is to increase the contrast between the lighter part of the skin and darker parts (the freckles) to make them stand out.
Here’s the crop of a SOOC correctly exposed shot in studio:
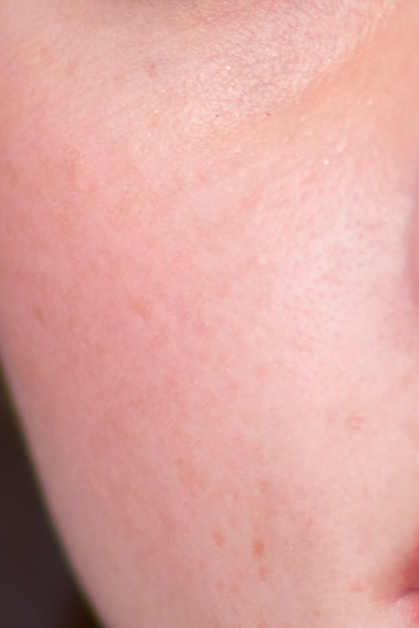
The first thing to know is that the more exposed the skin is, the less visible the freckles will be.
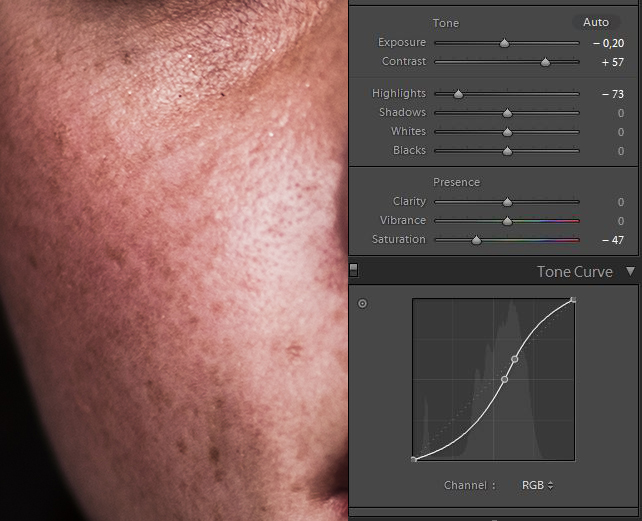
So you can first underexpose the skin in Lightroom, globally or locally (with a brush) depending on the rest of your file, by dropping exposure and highlights. This will give more visible texture to your skin:
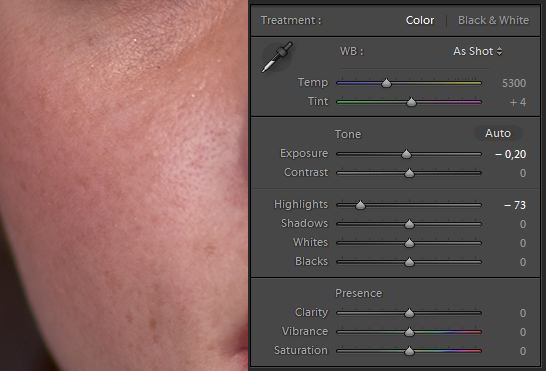
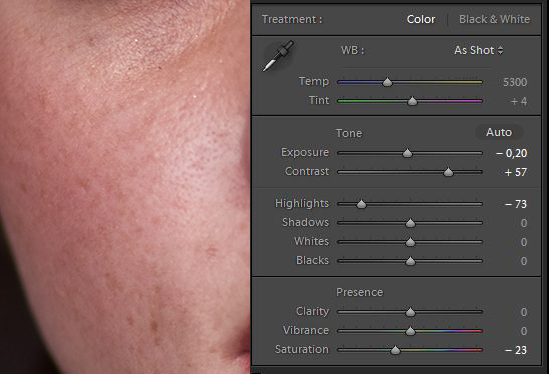
You can then increase the contrast, but keep in mind that this increase will also affect saturation, so you will need to lower the saturation.
Still in Lightroom, you can use the curve tool with more precise action on the picture. On the top left of your tone curve, click on this tool, and then wherever you move this tool on the picture indicates you where you are on the curve.
You can move your mouse cursor on the picture on a light part of the skin, click and then move your mouse cursor up. This moves your curve up too.
You can then move your mouse cursor on the picture on a dark part of the skin (freckle), click, and then move your mouse cursor down. this moves your curve down too.
As you probably already understand by now, this increases the contrast between the light parts of the skin and the freckles. Since you increased the contrast, you may need to decrease the saturation again. I deliberately chose extreme settings here to show you the power of this tool on freckles:
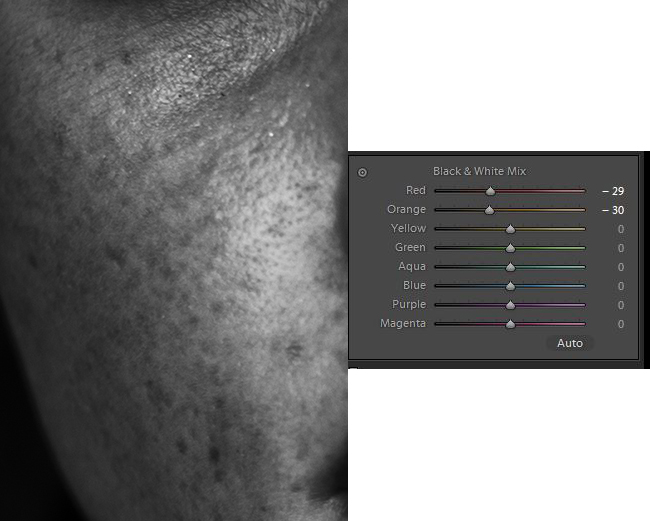
If you work in black and white you can decrease the value in the red and orange channel for even more freckles to appear:
I don’t generally use clarity to emphasize freckles because I usually don’t like the result, but it can be something to explore for clarity lovers.
As a conclusion, this can also be used in Photoshop for more precise results using layer masks (so as to have settings which apply only to the skin and not to the whole picture) or luminosity mode (which doesn’t affect saturation).
These are some techniques to start with, and there are certainly many more (dodge and burn techniques for example… maybe the subject of a future tutorial…). Don’t hesitate to share yours as a comment below!


Leave a reply