
I met Julia in the year 2000, and that’s when our photo journey began. I constantly thought about how cool it would be, to not be tied to a workplace and to be able to perform all sorts of tasks at will. By accident I found out about iStockphoto and began to study this area. That’s when I bought a camera and together with my wife Julia, we started taking pictures step by step, learning this great medium.
Portraits and Food is what we photograph and it’s a weird combination. But hey… we’re here to do what we love right? I love to create simple portraits of people in studio, I prefer not to call it “fashion”. Once we tried to photograph food only and shortly realized that it was a wrong course to take. You shouldn’t compromise and instead just photograph what you love. The story of “The Sea” photograph is one of the confessions of our love for portraiture photography. Hope you will enjoy the tutorial.

Step-By-Step
Without a doubt, one of our images always tends to attract more attention than the rest. The creation of this photograph was executed like none of our others to date. We love to create portraits yet we seldom ever think about the specifics of the shoot beforehand. This is largely because we never know what the mood and/or nature of the model might be. Therefore usually we leave that part to the moment when we meet with the model. Yet this image, I saw it in my head a long time before we created it. We call this one, “The Sea“.
We decided to create a step by step ‘tutorial’ of how we did it and attempt to convey the lighting and the overall technique behind getting the shot. We have prepared preview images of each step of the way, in order to explain how to work with the light in the studio — so that you may visualize and comprehend the process much better than simply through text alone. This is the studio setup that we’ve used, you can recreate it in a studio or at home.
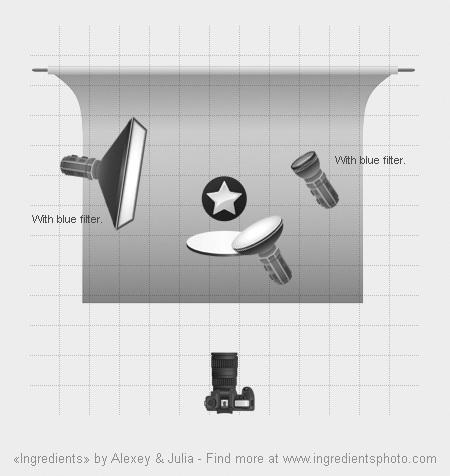
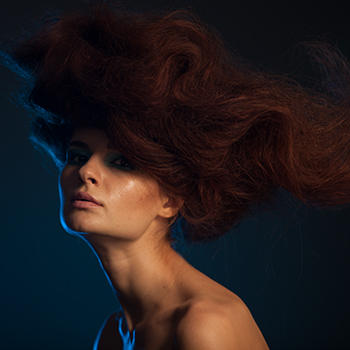
STEP 1: First Light. The Key Light
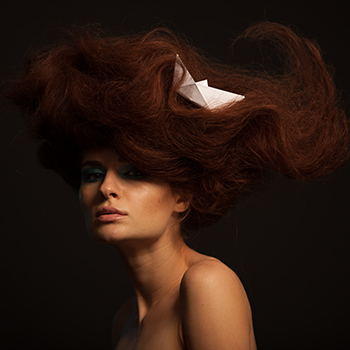
For the key light, we used a beauty dish from the left side of the model, positioning it very close to her and placing a a soft diffusing tissue onto the beauty dish. It’s always the same process— first you need to see and test the placement of your main light and what it looks like. So take a test shot or shots, as many as you need until you are happy with the light.
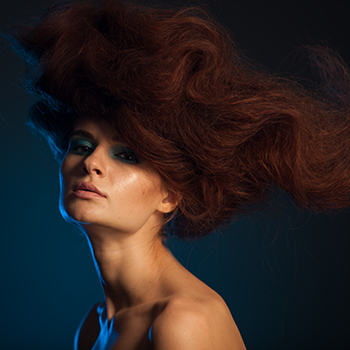
STEP 2: Second Light. Background
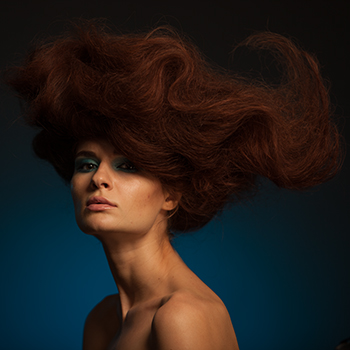
As you can see from the image above, we used a gray charcoal background. I will be honest, I love that color so much that most of the portraits I shoot, I do with this colour background. In fact, it’s my addiction (well one of them 🙂 ).
To add a bit of blue to the background you can use colour filters that you attach to your lights with a clip. We have directed a second light with a blue filter, set at 120° degrees and bouncing off the wide-angle reflector and onto the background — creating a sort of the ‘night sky’ effect behind the model. In the image below you will notice that the dark part is at the bottom rather than at the top, so before the final shot we moved it above in order to achieve the desired effect.
STEP 3: Third Light. Contour Light
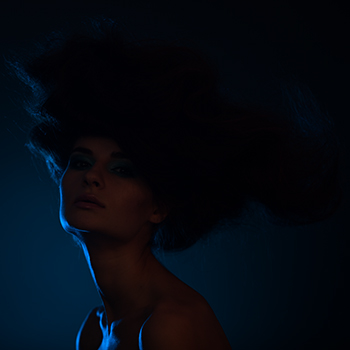
To the right of the model and roughly one step behind, we have place our third but not final light — a long stripbox with a blue filter. Before the setup, I would recommend to turn off all other light sources for better comprehension of the light environment and for more accurate control of this specific light. Then when you’re ready, simply turn all the lights back on and shoot. These are the results:
STEP 4: Balance Shadows (White Reflector)
As you can see in the image below, the abundance of hair drops a significant shadow onto the eyes of our model. We could have changed the position of the key light but that would alter everything that we have set up so far; therefore in this case, we cannot move it. Instead we chose to work with a white reflector.
A white reflector will usually help you in situations when you need to “rescue” an area from being too dark, so we will need to find a good place to position the reflector. Keep in mind that you don’t want your model moving and helping out (hence changing the position and setup you’ve worked so hard on!) so it’s always better to ask someone else to help out. Also make sure that it is someone who will understand how to execute exactly what’s needed.
STEP 5: Fourth Light & Long Exposure
Now we need to setup one more light (our final light) – the one that you will “draw” with during the long exposure time. For this task we used a stripbox light but, you can accomplish the same effect with any other continuous light you have available (even try your phone). Our source was the modeling light from the stripbox, the one with the blue filter. Remember that one? However, the final result was achieved mixing the use of the main light and a very low power of the blue stripbox light.
Now when you’re happy with your light setup, let the fun begin!!! Setup a long exposure on your camera, start with something like 1 second, be sure that your studio is 100% dark and there is no other lighting — only the light that you’re using on the model and start shooting and shaking your camera in all possible creative ways that you can imagine during the exposure time. From the left to the right, from up to down, shake it, wave it and then shake it some more!
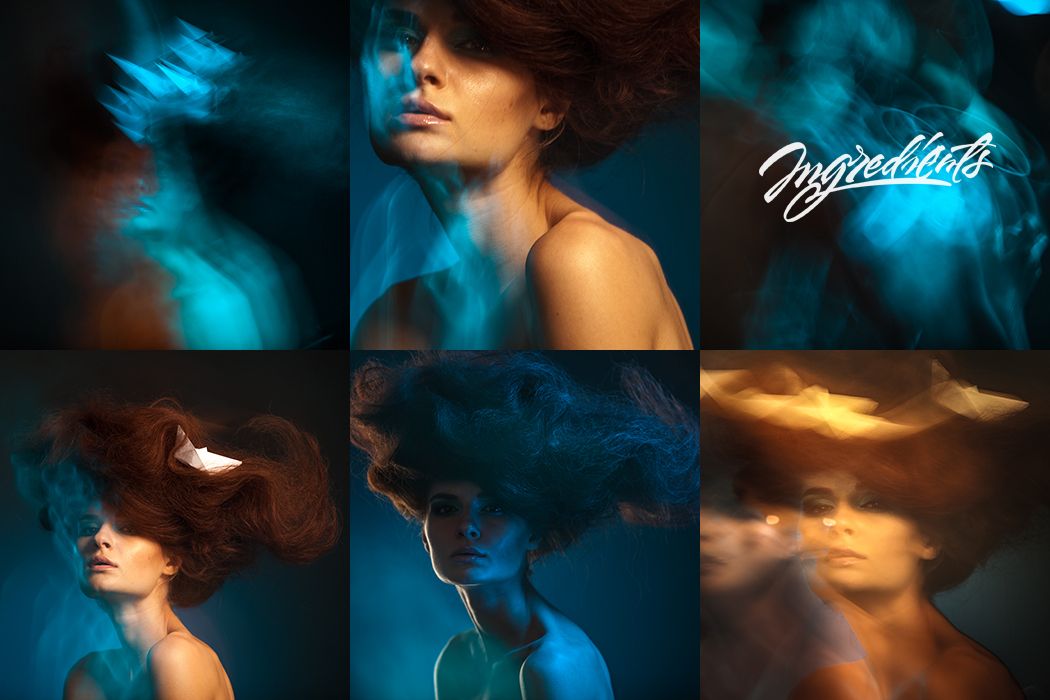
Here are some other RAW examples from our experiments:
Final Image
The final image that you pick depends on what you’re looking for and what you need at the moment. We were shooting for commercial purposes on this day, so we were looking for very good quality and focus. However, I really like many other versions from that day! I hope you enjoyed that little story behind one of our images and that it will push you to go and shoot something new and cool! Experimentation is all that you need. Good luck! Here is the final result with colour correction and retouching:
Thanks for reading! Hope you enjoyed this awesome tutorial, for more tutorials browse the blog and check out highly recommended How to paint a ball of light, Long exposure photography and Magic of Oil & Ink tutorials.
If you’d like to see more photographs by Alexey & Julia take a look at their 500px profile, where you can add them to friends, follow future uploads, and even buy one of their photos. To get in touch with Alexey & Julia just leave a comment below. Don’t be shy and say hello 🙂


Leave a reply