A few weeks back, 500px asked me if I’d be interested in contributing a tutorial to the company’s blog. Specifically she was interested in how I create one of my “balls of light” images. Always up for a bit of nighttime fun, I agreed, and we (me, my wife Heather and my husky Kai) set out to produce a photograph for the 500px Blog during the full moon on June 4th.
I figured it wouldn’t do to produce the ball of light in my front yard, so we headed for the high country about two hours southwest of Denver, Colorado. We traveled to the tiny hamlet of Grant and, from there, drove up to Guanella Pass. Leaving our car behind, we climbed from the parking lot at 11,500 feet to the top of a nearby hill at approximately 12,000 feet. From there, we had jaw-dropping views of Mt. Bierstadt, one of Colorado’s celebrated Fourteeners, and a variety of other nearby peaks.
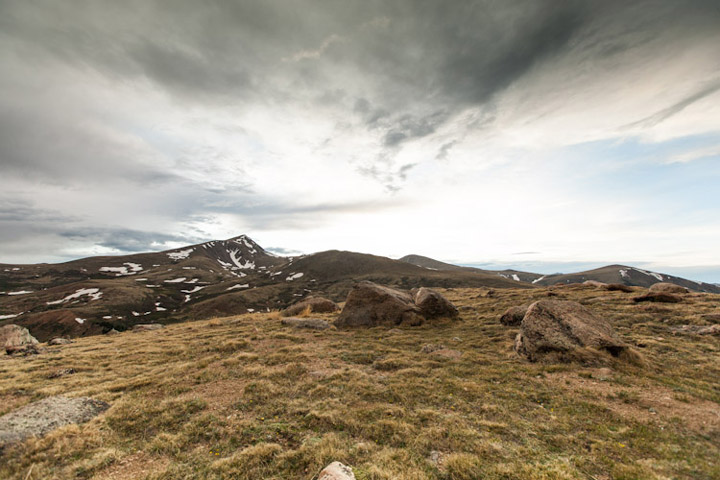
One of those peaks was Square Top Mountain, pictured below. I framed the shot in the remaining daylight, planning to place the ball of light between the two boulders that appear toward the right side of the frame.
A Storm Coming
Unfortunately, the weather didn’t clear as we had hoped. In fact, it became worse. After seeing rapidly approaching storm clouds and worrisome lightning strikes on nearby ridges, we decided to abandon the plan and hike back to our car. Quickly. By the time we reached the car, it was completely dark, and we had solid cloud cover. There was no full moon in sight.
What to do? Well, I’ve always thought that a person makes his or her own luck, so with that in mind we stopped at a waterfall on the way back to Grant for one more try at our ball of light.
A Ball Of Light Painting
So, what is this “ball of light,” and how can you create one? The simple answer: light painting. And it can be done in different ways. The most popular way is to take a light source, put it on a string that you swing around in a circle with your hand while rotating your body in its own circle (making sure that the lowest point of the circle is always in the same place). I’ve seen varying forms of this done; from LEDs connected by wires to a battery pack, to flashlights tied to a rope. I’ve never cared too much for doing it this way; it doesn’t seem very exact, and quite frankly, it’s a lot of work.
I figured it would be much more practical to put daylight-balanced LEDs on a 5-foot pole that’s fastened with a bolt to a second pole that’s resting vertically on the ground. You can then move the 5-foot pole in the needed circle and, to suit your purposes, you can vary your turning speed and the angles of your lights to the camera. It’s also a lot easier on the wrists!


Great Advice
When setting out to shoot balls of light, and when light painting in general, you should wear black clothing otherwise you risk showing up as a ghost in your image. As the camera can only record light, your chances of appearing in your photo are reduced greatly by wearing black.
In addition, a full moon offers the best opportunity to shoot a ball of light; it will allow you to see the surrounding area in the final image. Depending on how long your exposure is, your image might even look as if it was taken in the daytime.
During this project, however, cloud cover nixed our hopes for the full moon. Since it was completely dark, I decided to light-paint everything I wanted to show in our photograph. I’ve prepared a three-minute video, and I’ll go into the details after you’ve seen the movie:
Getting Technical
Now, let’s begin with the technical details:
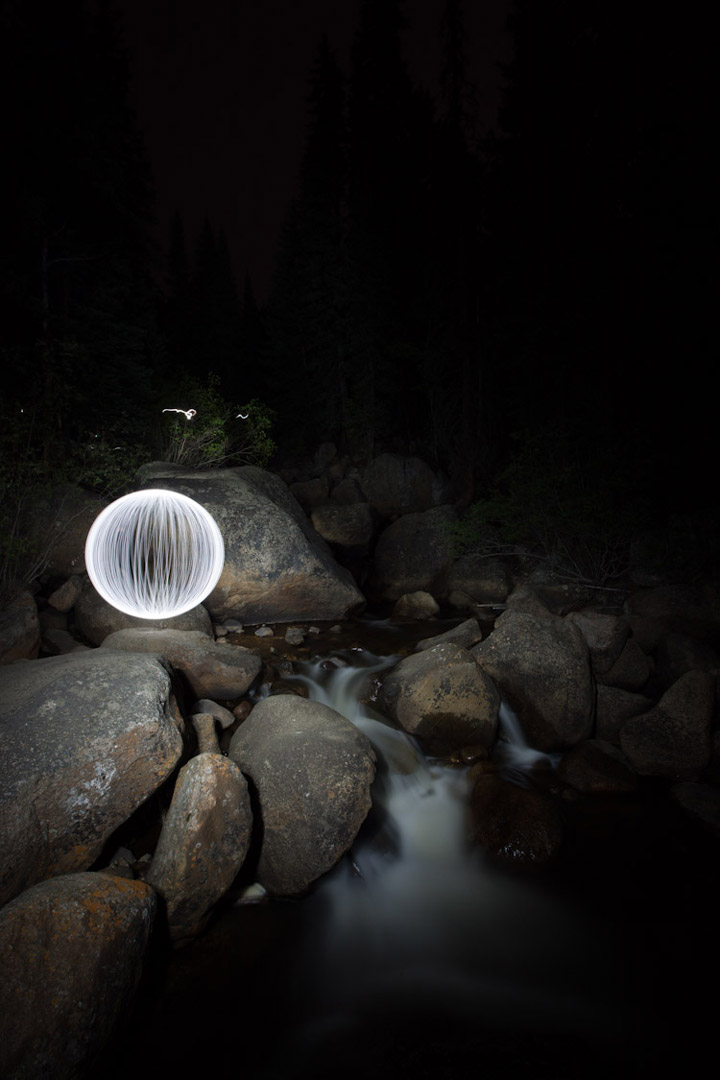
As I noted in the video, the exposure was 1024 seconds — nearly 18 minutes at f13. If we’d have had a full moon, my exposure probably would have been closer to 40 minutes at f/13, without the light painting. I found that f/13 gives me good sharpness with my Canon 16-35 lens at 16mm, and it’s a good f-stop for the high-powered LEDs that I use. I chose ISO 100 to minimize the digital noise. You’ll have to experiment a bit to see what works best with your camera and light sources.
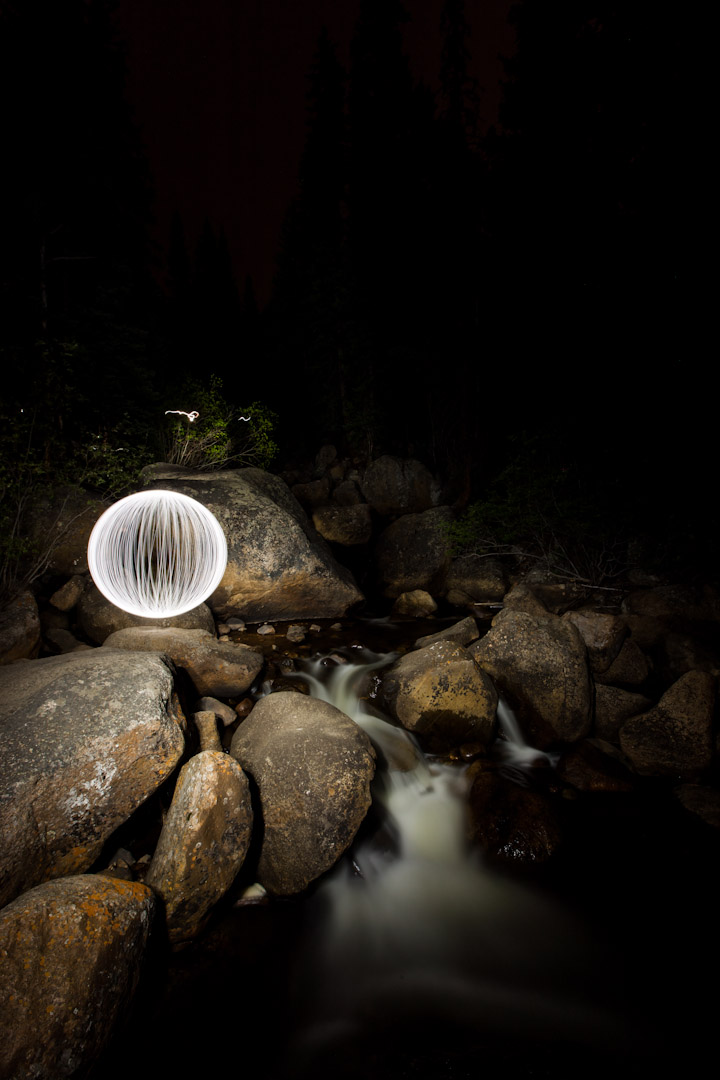
Here is a raw capture with absolutely no retouching or corrections done:
Post Production
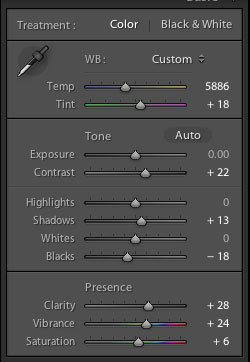
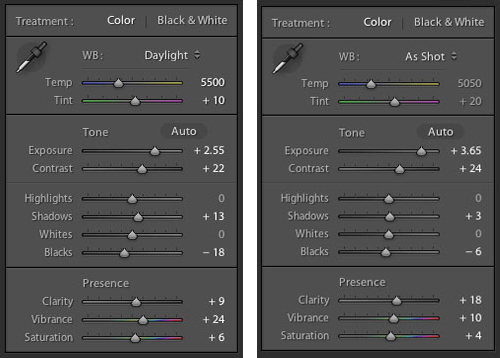
I knew I had to do a bit of post-production work to get the image to look good, so I captured it in RAW. After importing the file into Adobe Lightroom 4, I adjusted the image with the settings seen above.
My results:
Next, I created two virtual copies in Lightroom, to which I applied the following settings:
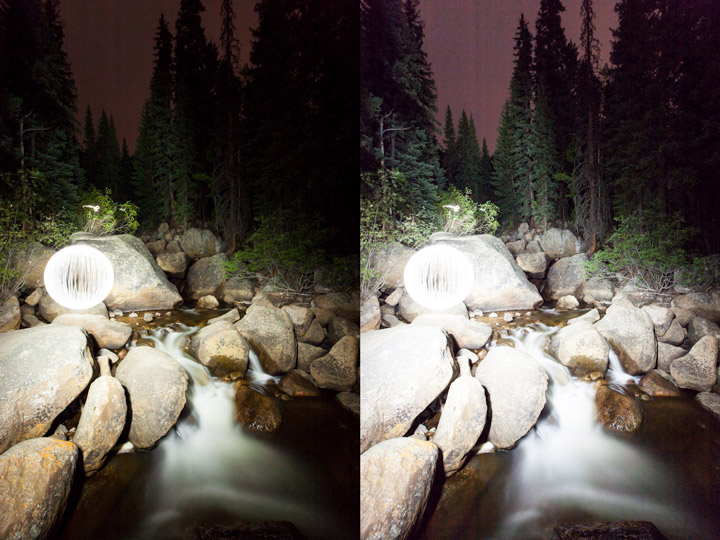
My efforts yielded these two files:
Sandwiched Shots
Why create three different files? Remember how I “painted” the three different areas in the video? My intention was to combine the three different images in Photoshop into one, as the “raw” file did not have the apparent tonal range needed. As you see, the image above on the right has been pushed 3.65 stops to show detail in the far trees.
Of course, if I had taken more time to “paint” the trees, or if I would’ve used a stronger light source/higher ISO, I wouldn’t have had to push the original file and sandwich the different exposures together. However, with light-painting, it’s difficult to know when enough is enough; there are so many variables.
At any rate, here’s what the three images combined looked like after I “sandwiched” them together and erased from each the components that weren’t needed for the shot. Basically, I created an HDR file by selectively erasing the elements of each file that were too bright and/or too dark.
Now there is detail all the way up to the far trees. The advantage of painting the light during the exposure and later in post-production is that you have complete control over the image. If you can visualize the outcome, you can formulate a plan and then selectively illuminate the parts of the image that you want the viewer to see. You’ll be able to direct his or her eye throughout the image.
Swapping The Sky
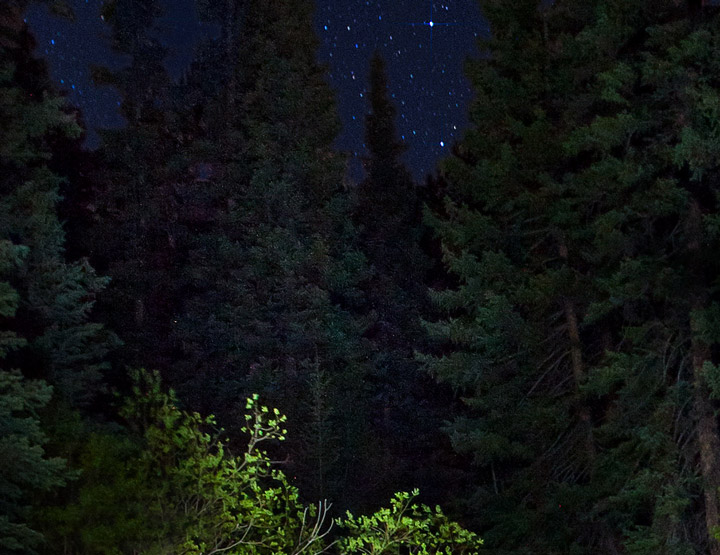
There are still a few issues to deal with, however… most importantly, the ugly sky. Leaving it black wasn’t an attractive option, so replacing it was the best thing to do. (Hey, this is art, not the news… anything goes!) For the sky replacement, I decided to use an image I had done a couple of weeks prior and not too far away from this location. Here it is:
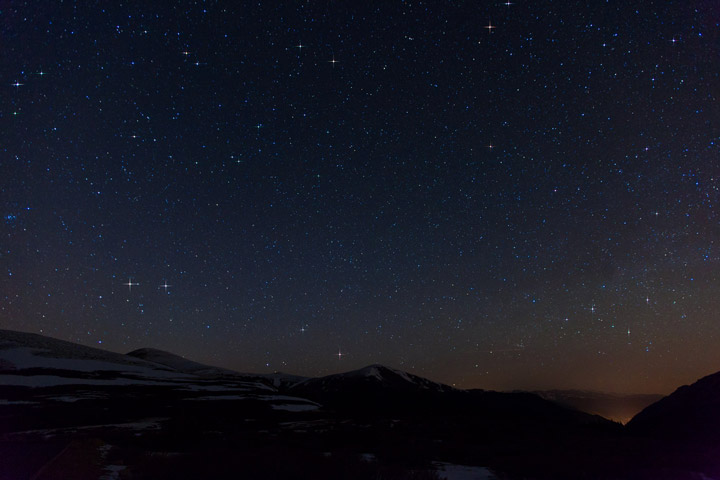
This one was photographed at ISO 1600 for 30 seconds at f/2.8. The twinkles of the larger stars were done through a Photoshop action created by Pro Digital Software.
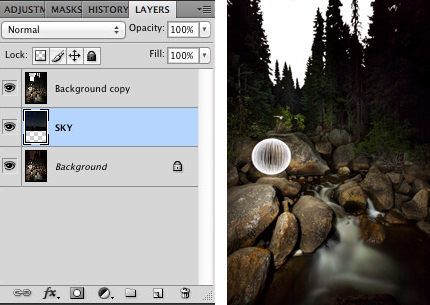
To replace the sky, I made a copy of the original layer, then I slid this image between the top and bottom layer: Then I erased the “ugly” sky on the top layer:
Last Minute Cleaning
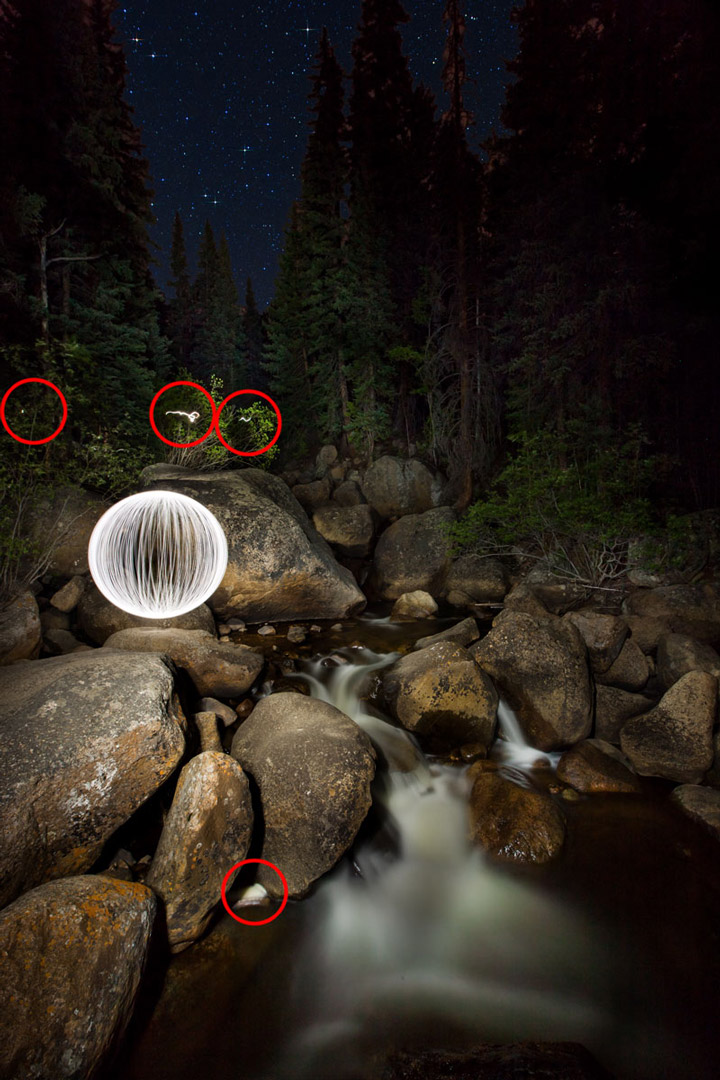
Admittedly, I had a few minor things to fix aside from “dusting” the image. I had a few spots of light pollution to clean — see the red circles below, where my head lamp showed up. There also was some foam buildup at bottom center left that I didn’t like.
Finally, I did a bit more color correction of the rocks and water, ran it through Photoshop’s noise filter, sharpened the image and adjusted the levels to where I thought they should be.
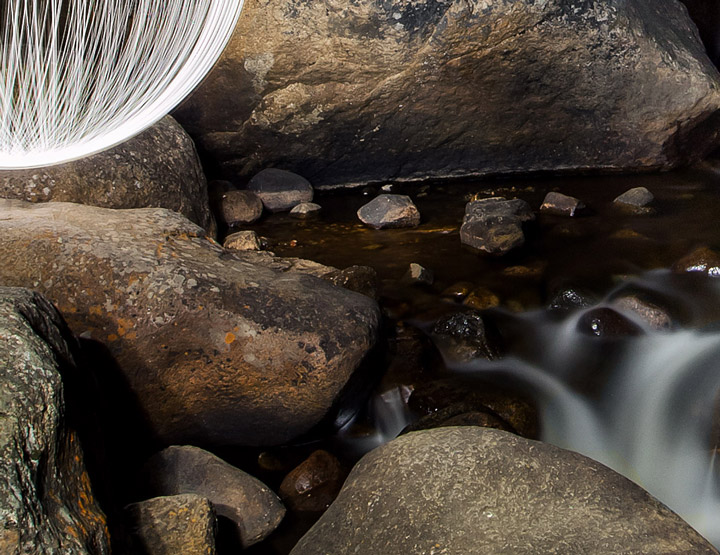
Close-ups And A Comparison
Here are a couple of different crops at 100% so you can see how the image held up after being pushed to its limits:
Here’s a side-by-side comparison with the original “raw”capture:
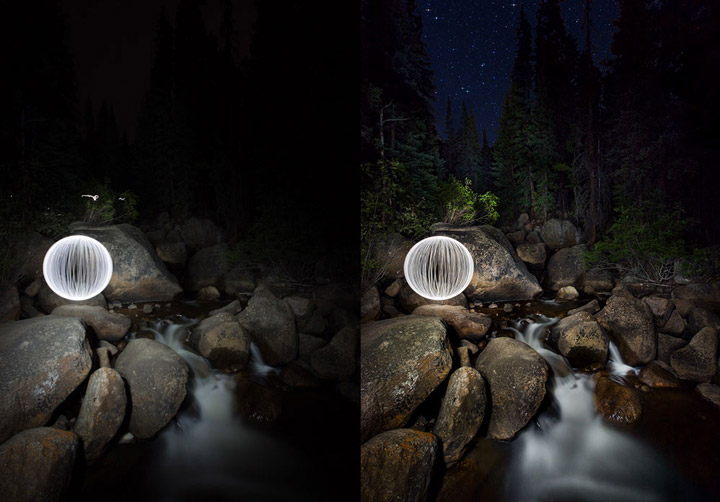
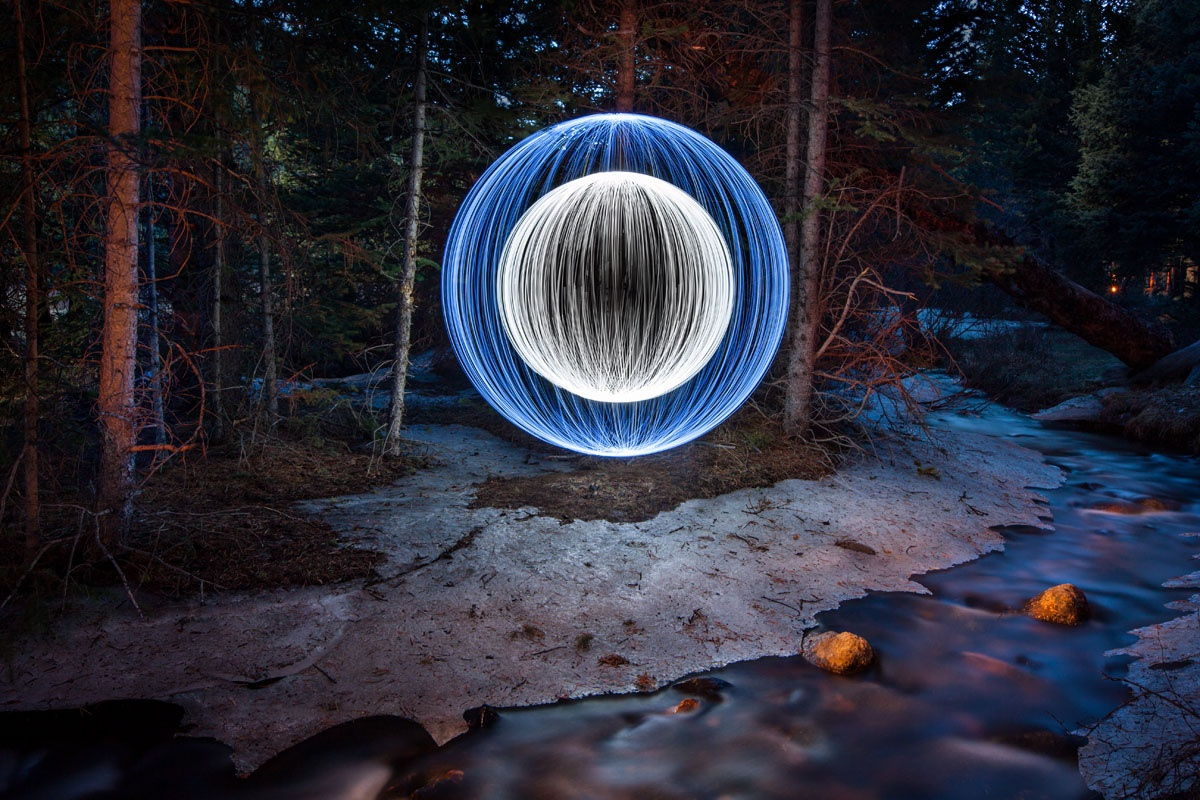
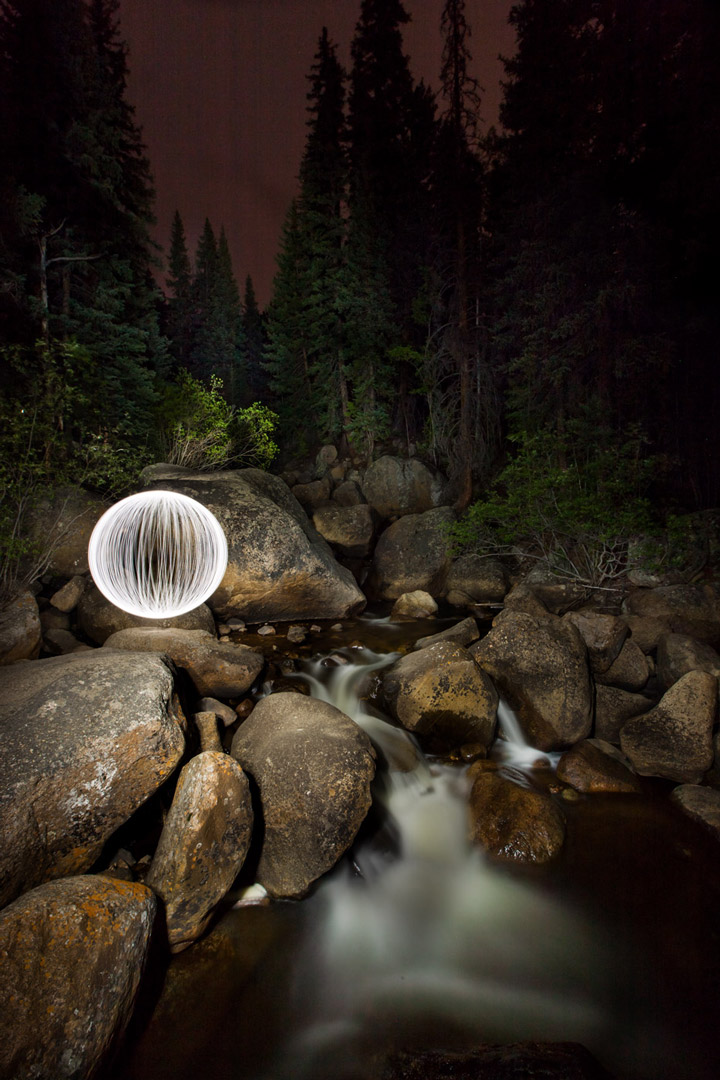
And here’s the final image:

I hope this was helpful and that you liked the image. If you did, please feel free to vote and/or comment on it here. If you have any questions, I will do my best to answer them right here on the post.
Big thanks to Richard (and Heather and Kai!) for trekking into the hills at night to create this awesome orb shot for us! If you’d like to give it a go yourself there’s a tutorial on how to make your own orb tool here. And if you do create an orb of your very own make sure you upload it to 500px and post the link in the comments!


Leave a reply