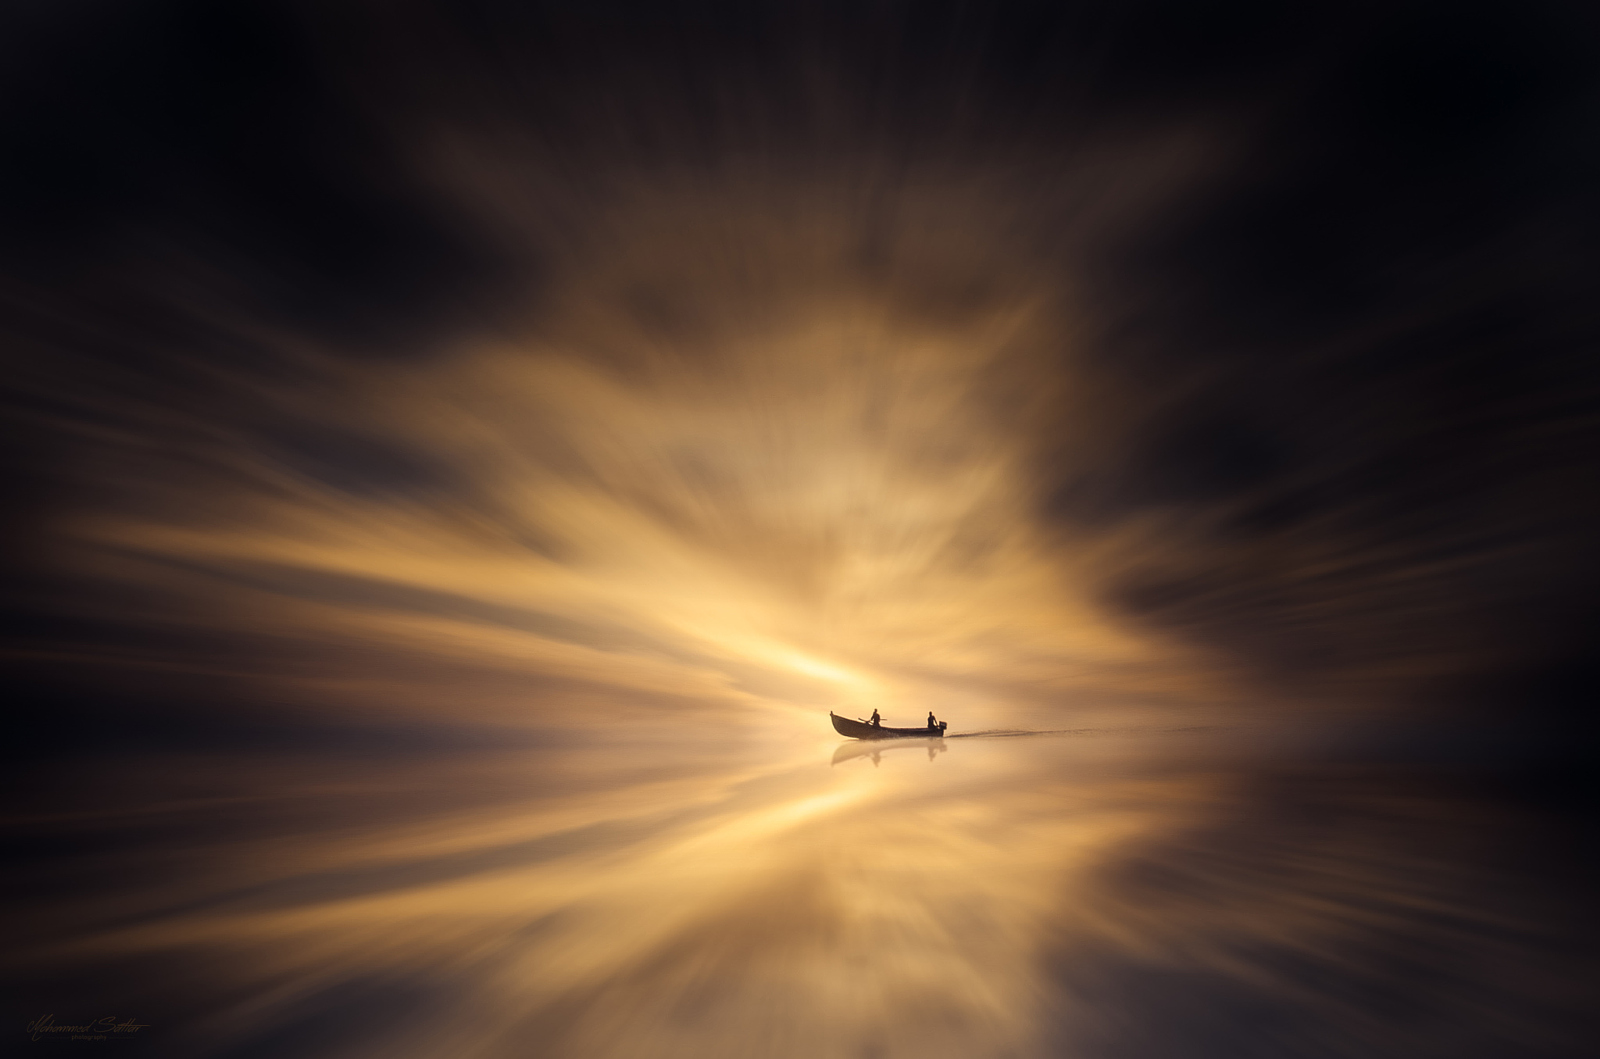
Editor’s Note: Ever since photographer and retouching master Mohammed Sattar‘s photo “A Dream” was selected for Editors’ Choice, he’s been flooded with requests for a “how to” tutorial. Well, he’s delivered!
So, without further ado, here’s how this photo—which was created entirely from a single frame—was captured and processed in Photoshop and Lightroom.

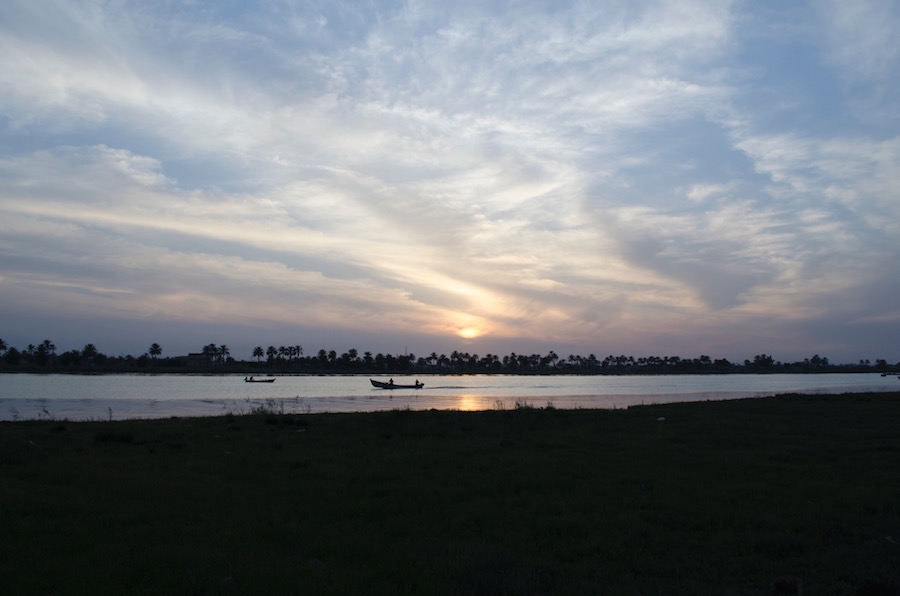
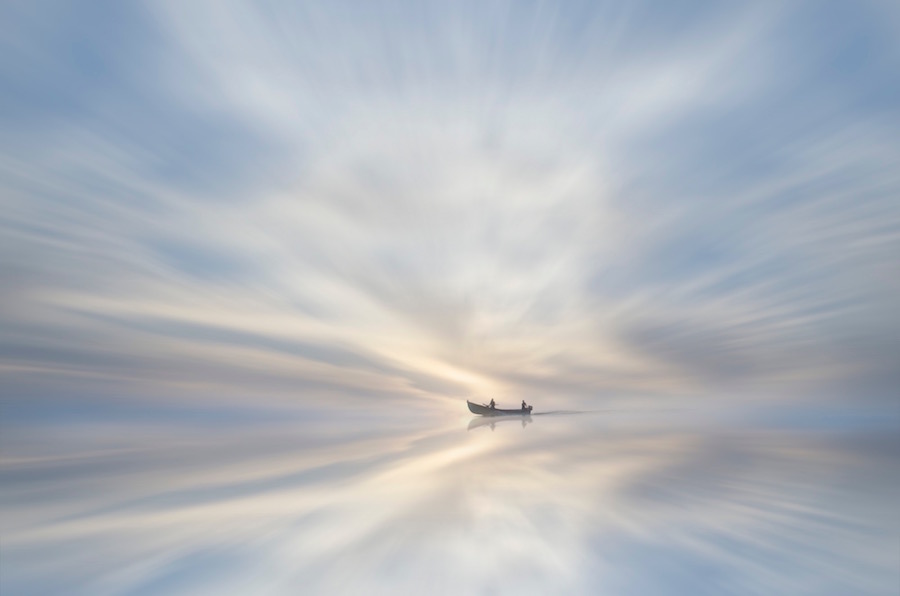
My Editors’ Choice pick “A Dream” is a single photograph as shown below, edited in Photoshop.
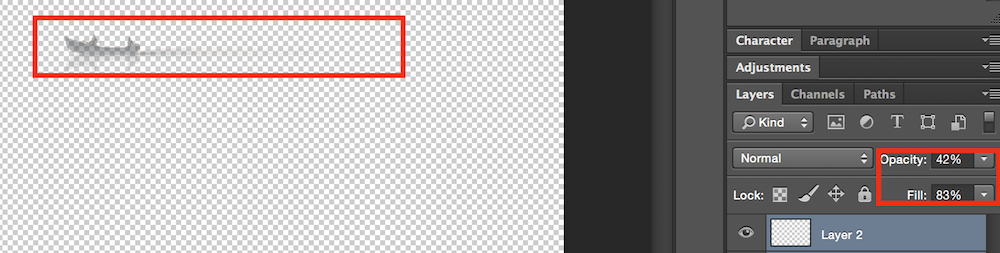
First, I extracted the boat from the image using the “Pen Tool,” put it in new layer, and adjust the Opacity and Fill as shown below:
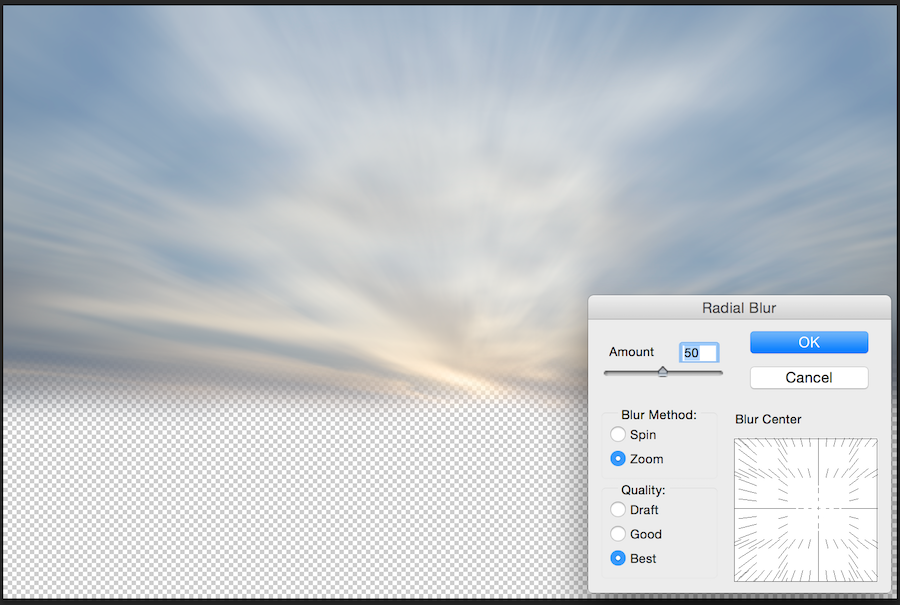
Next, I applied a “Radial Blur” to the sky, adjust the amount to 50, chose “Zoom” for the blur method, and “Best” for the quality. As shown below:
Third, I made a Photoshopped reflection by creating a duplicated layer for the sky part and rotating it 180° to complete the reflection.
1. Create reflection:
2. Rotate 180°
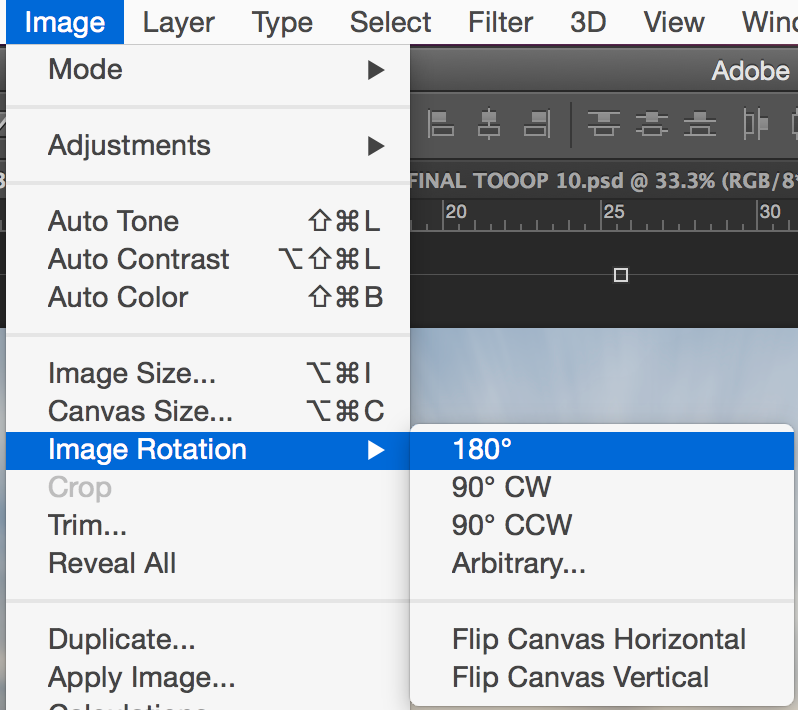
3. Result:

Finally we add the boat back in to get the image below, and the time has come to move over to Lightroom.
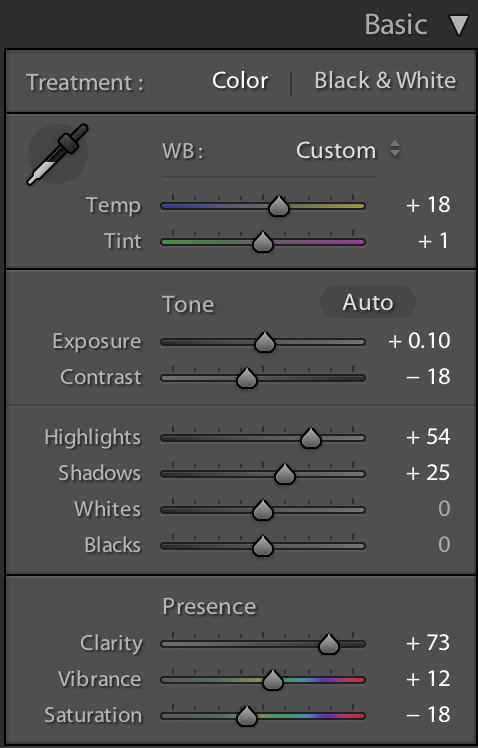
In Lightroom, I adjusted the Temperature, Tint, and Contrast as shown below:
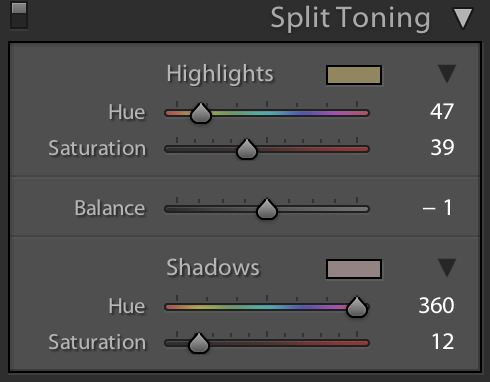
Then I adjusted the Split Toning as shown below:
Finally, I used some masks to adjusted some specific spots on the background, leading to the final result, uploaded to 500px and selected for Editors’ Choice!
Here it is one more time, from original image to final shot:
[twentytwenty]
 [/twentytwenty]


Leave a reply