Practical Photography is the world’s best camera and editing skills magazine. Whether you’re an absolute beginner, seasoned enthusiast or budding pro, you’ll find all the techniques, ideas and inspiration you need to take your passion to the next level. Visit practicalphotography.com for more expert tutorial videos. Subscribe to the print or digital edition here. Claim a free digital issue of Practical Photography magazine here!
Recompose and sharpen images for frame-filling results without a massive telephoto
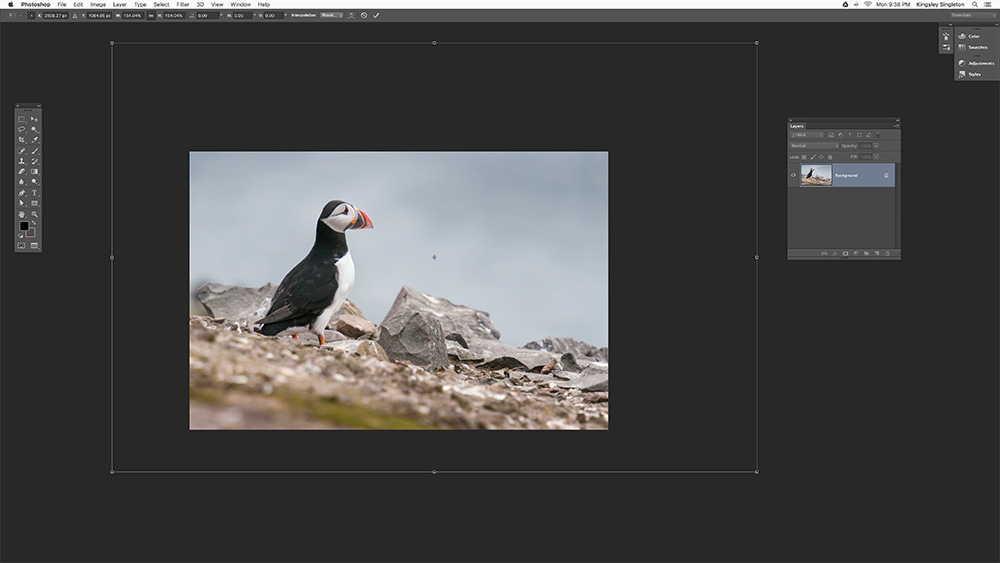
For striking results, wildlife shots often feature the subject large in the frame, and that usually means shooting with telephoto lenses. A 70-300mm can often be enough, but if the subject is small you can still struggle to reproduce it large enough. Does that mean that you should give up? No, you just need to enlarge and sharpen the pic in the right way.
The trick is to enlarge the subject just enough to make it dominant, but not so much that you lose quality through the interpolation process (rather than cropping, here we’ll keep the dimensions of the image the same). Some softening during interpolation is unavoidable, but adding sharpness using a selection compensates and returns the detail where it’s needed, ignoring out of focus parts (and avoiding making digital noise any more pronounced). This technique works best on shots with a clean, defocused background, but you can make your selection with the Polygonal Lasso Tool too. And if you have Photoshop CC 2014 or higher, try Select>Focus Area instead of the Magic Wand Tool, as this is an excellent new feature.
First, watch the video below. Then, read on for a step-by-step tutorial!
1. Enlarge the picture
Go to Select>All (Ctrl+A), then Edit>Free Transform (Ctrl+T). In the Options bar set Interpolation to Bicubic Smoother, which is best for enlargements. Click the chain-link (Maintain Aspect Ratio) icon and drag the corner handles outwards to enlarge. Try not to go too far beyond 160%. To recompose, click and drag within the enlargement. Hit Return to make the enlargement, then go to Select>Deselect (Ctrl+D).
2. Make a selection
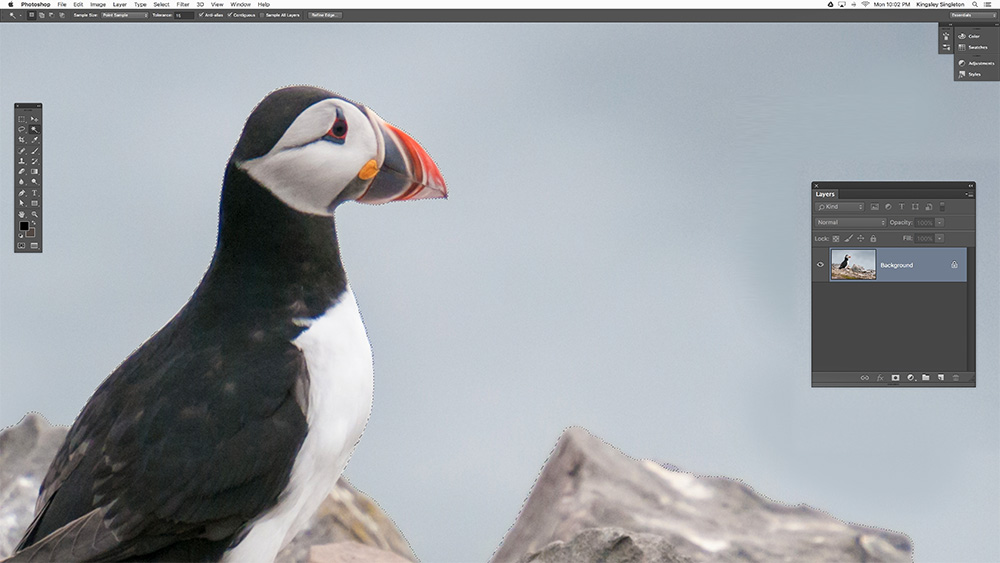
For an easy selection of the subject here, pick the Magic Wand Tool (W), and set its Tolerance to a low number like 10, 15 or 20. Tick the Contiguous options and click on the blurred area behind the subject to start the selection. Hold Shift and repeat until everything you want is selected. Next go to Select>Inverse (Ctrl+Shift+I) so that the non-blurred parts are now selected.
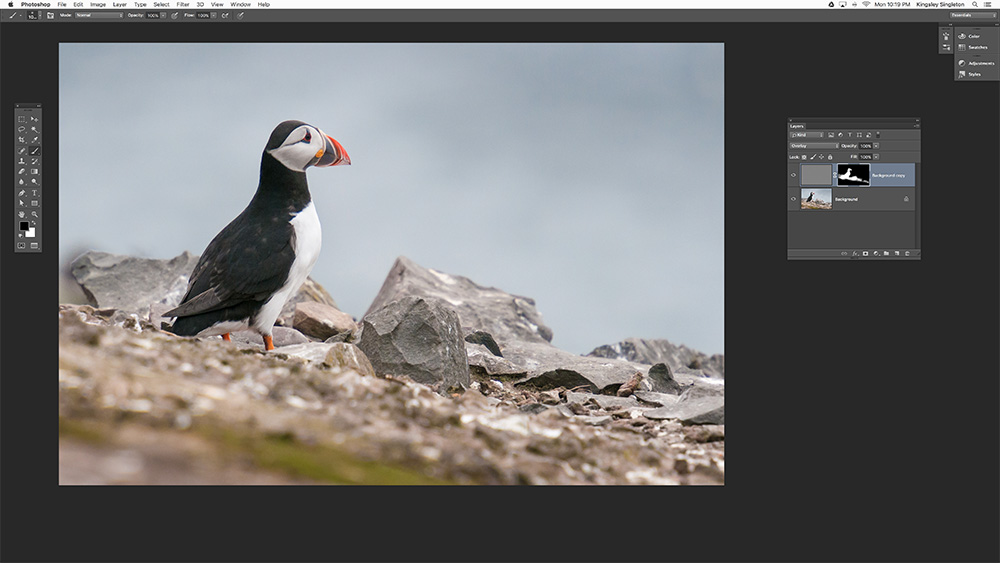
3. Improve the selection
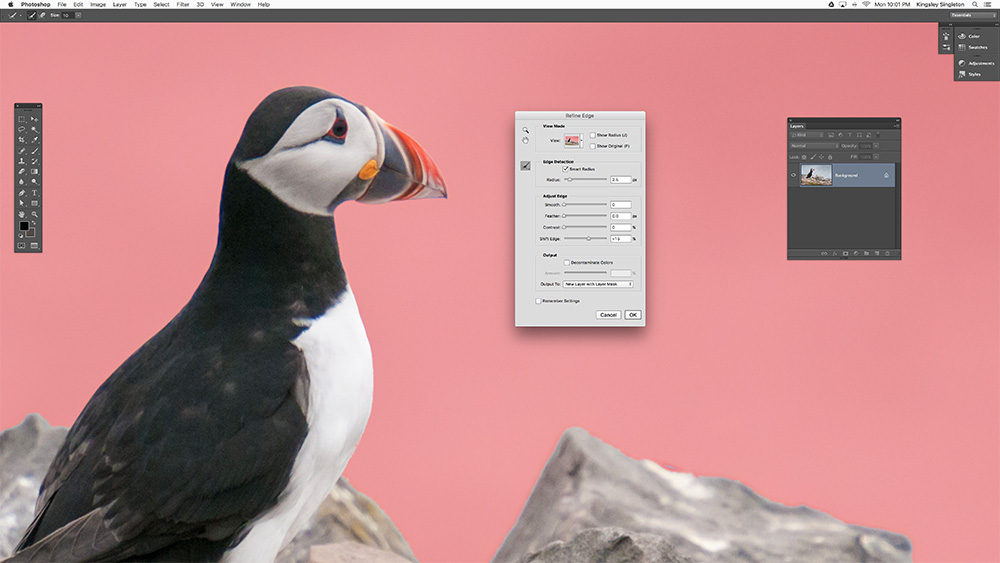
Click Refine Edge in the Options bar and under Edge Detection tick the Smart Radius box, increasing the Radius slider until the edge looks good. Use the Shift Edge control to expand the selection slightly if required. You can also paint over any awkward parts with the Refine Radius Tool, which is especially handy when the subject has a furry or broken outline. Finally, under Output To, set it to New Layer with Layer Mask.
4. Add the sharpening
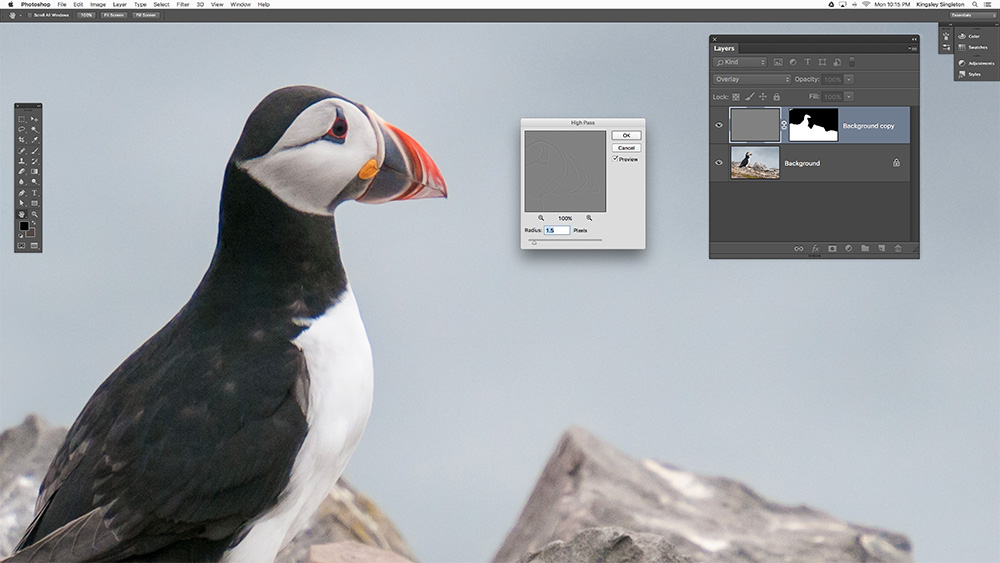
Click the Background Layer’s visibility icon back on and, with the Background Copy Layer active, press Ctrl+Shift+U to desaturate it. Notice that only the unmasked areas are turned to black & white. Now go to Filter>Other>High Pass and set the Radius so the edges are clear without looking ‘fringey’ – low settings like 1px or 2px are best. Click OK. Finally, in the Layers palette click Normal and set the blending mode to Overlay.
5. Refine the sharpening with a mask
Now, making sure the Background Copy Layer’s attached mask is active (click it to see a frame around it), pick the Brush Tool (B) and set Black as the Foreground Color (press D, then X), and, using a large, soft-edged brush, paint over any parts of the image where you want to further hold back the sharpening effect. For a better view, Alt-click the mask and you’ll see it full size. Alt-click again to go back.
6. Duplicate to increase the sharpness
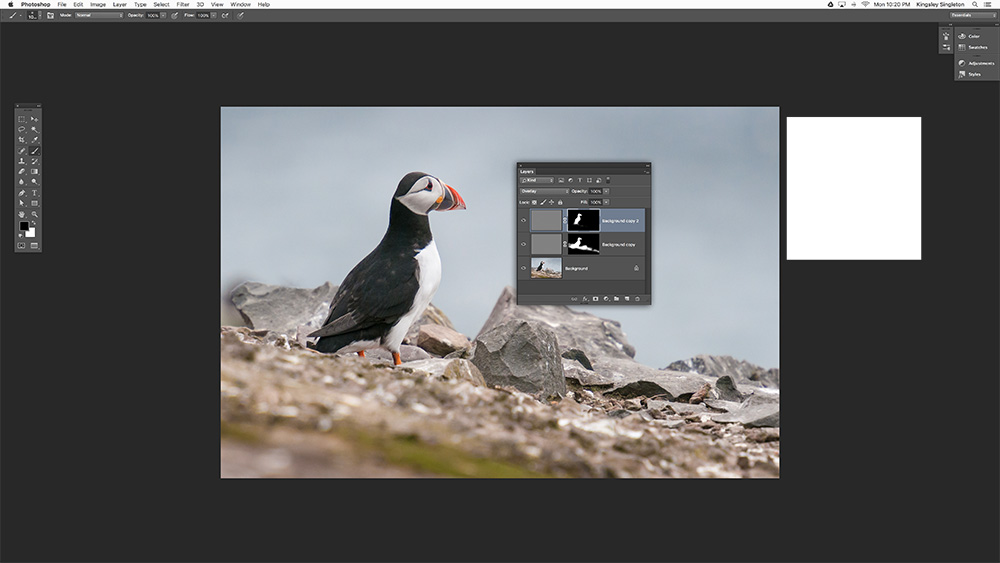
You can duplicate the Background Copy Layer to increase the effect – just press Ctrl+J, or go to Layer>Duplicate Layer and hit OK. The new Layer copies the mask so you can make further changes to that. Try further restricting the sharpening effect by lowering the Brush’s Opacity to 20% and painting black so the sharpening is just on the subject’s eyes and head. Finally, go to Layer>Flatten Image.
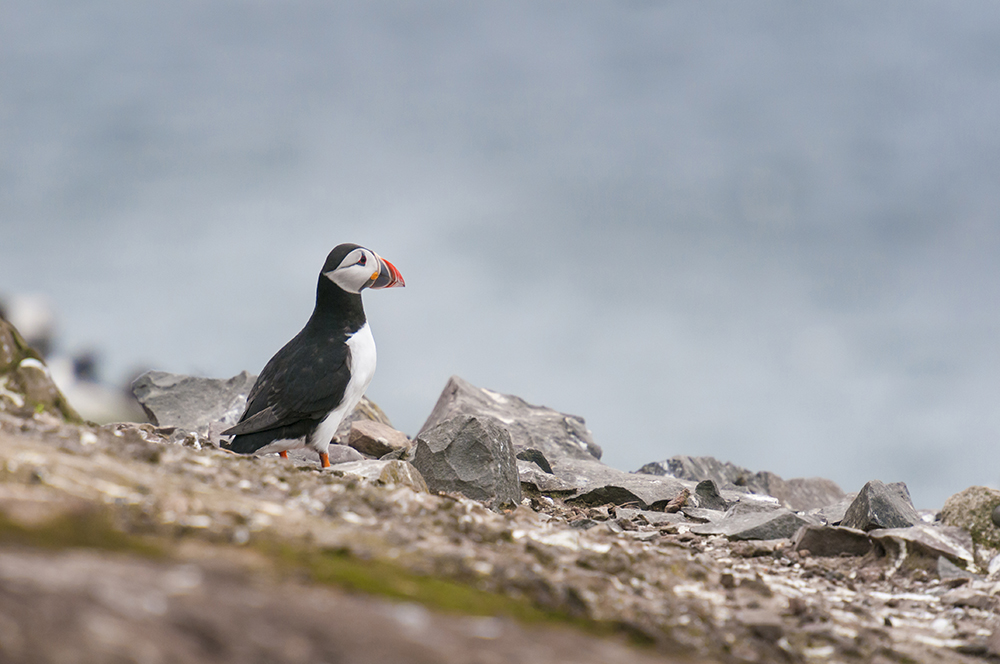
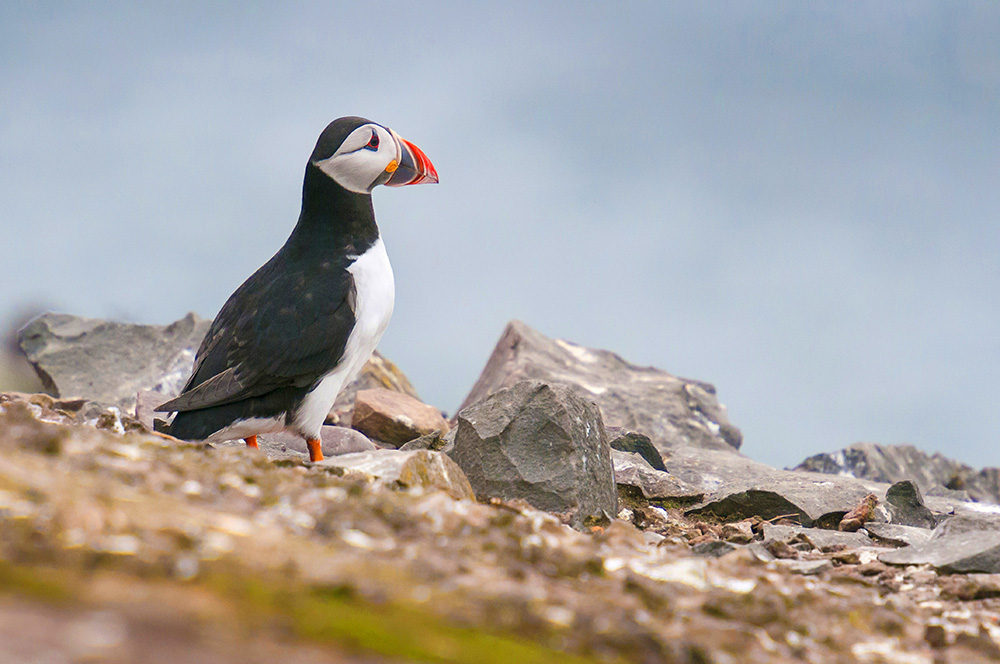
View the Before & After here:
 [/twentytwenty]
Have any questions on this tutorial? Drop them in the comments or share your own tips for correcting images with mixed lighting sources in Photoshop.

Leave a reply