Alexandria Huff is a studio portrait photographer based in both San Francisco and rural Oregon, where she teaches lighting workshops and takes close-up portraits in a chiaroscuro style of everyday people.
She is a Marketing Coordinator at BorrowLenses.com, an advisor for anti-theft service Lenstag.com, and has been writing for 500px since 2013. Her work can be found here on 500px and on her website.
Take a reluctant subject, add a shy, inexperienced photographer and you’ll have a fine example of awkward chaos. I can’t make you less shy but there are tricks to help keep your shoot from having a tepid start. If you have zero practice in model direction, the following tricks will improve your game.
I am going to share with you some of my duds that preceded my final shots from my personal collection. They will demonstrate to you that A) getting “the one” is a process with a lot of false starts and B) even experienced photographers have to experiment.
1. Trickery
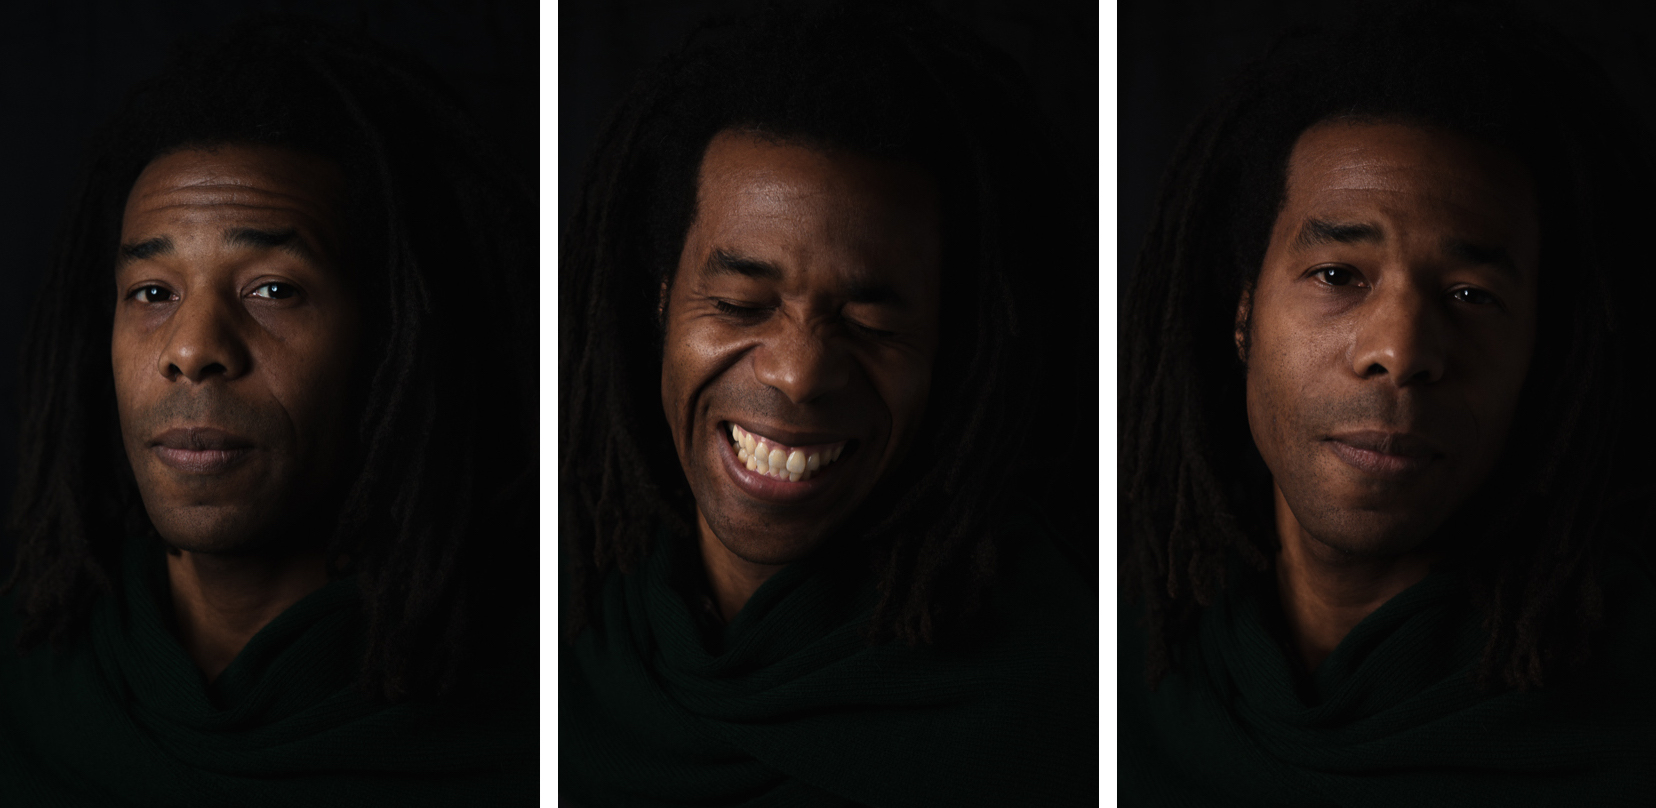
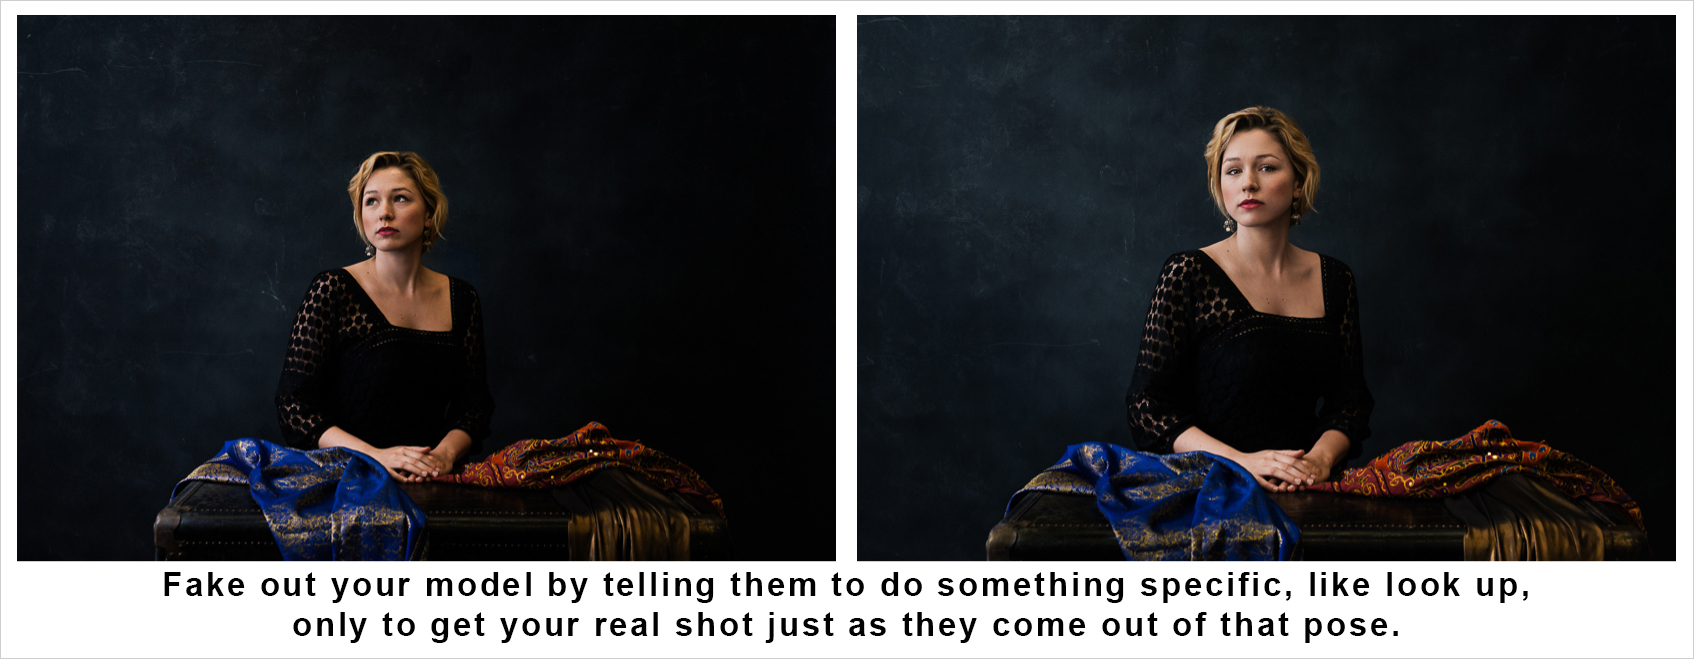
I use this on almost everyone (and now they know so I need to come up with something new). This is great for subjects who want to pose but you don’t want them to look too stiff. Simply give your subject a pose to perform, like looking up to the sky, and take some shots. When you finish, they relax. Hurry and take more! People often look their best just as they are coming out of a pose. The shots you take while they are “posing” are total throw-aways.
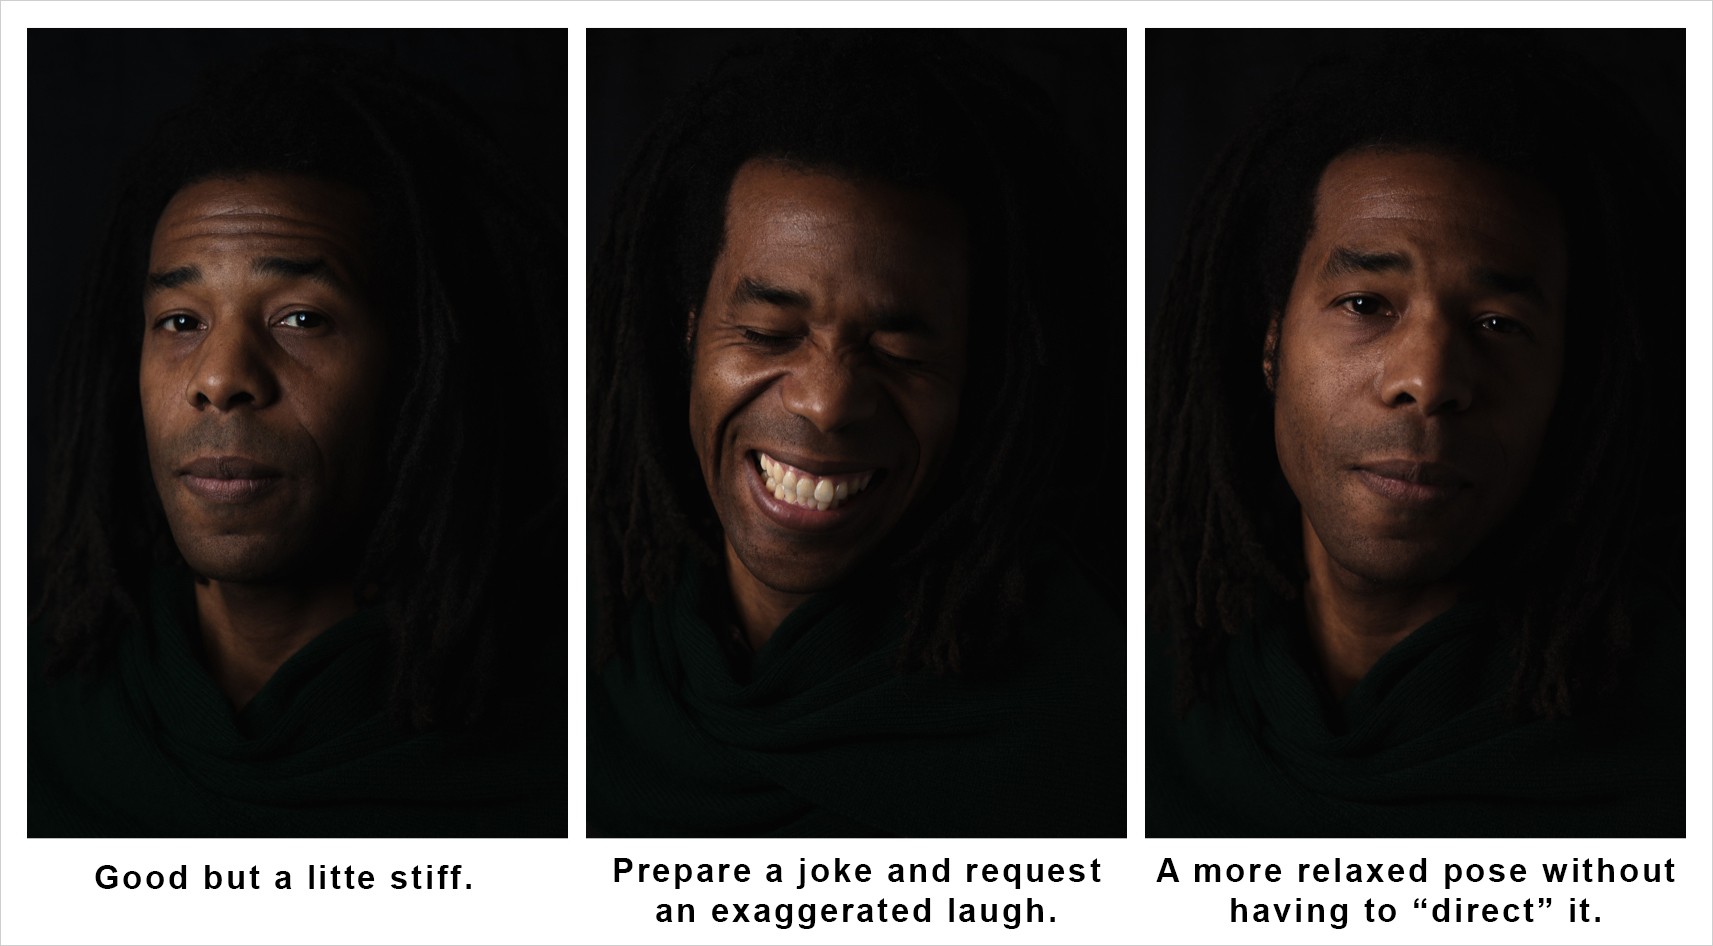
The same thing can be done with laughter. Since my subjects sometimes feel like they must sit very still, I tell them ahead of time that I am going to tell them a joke and that I want them to laugh harder than I deserve.
I have found that if I don’t tell them my plan, they stifle their laugh in an effort to be polite. Tell them to let loose—it will help you! Then the real shot will be taken just as they compose themselves when there is moisture in the eyes and a more relaxed look.
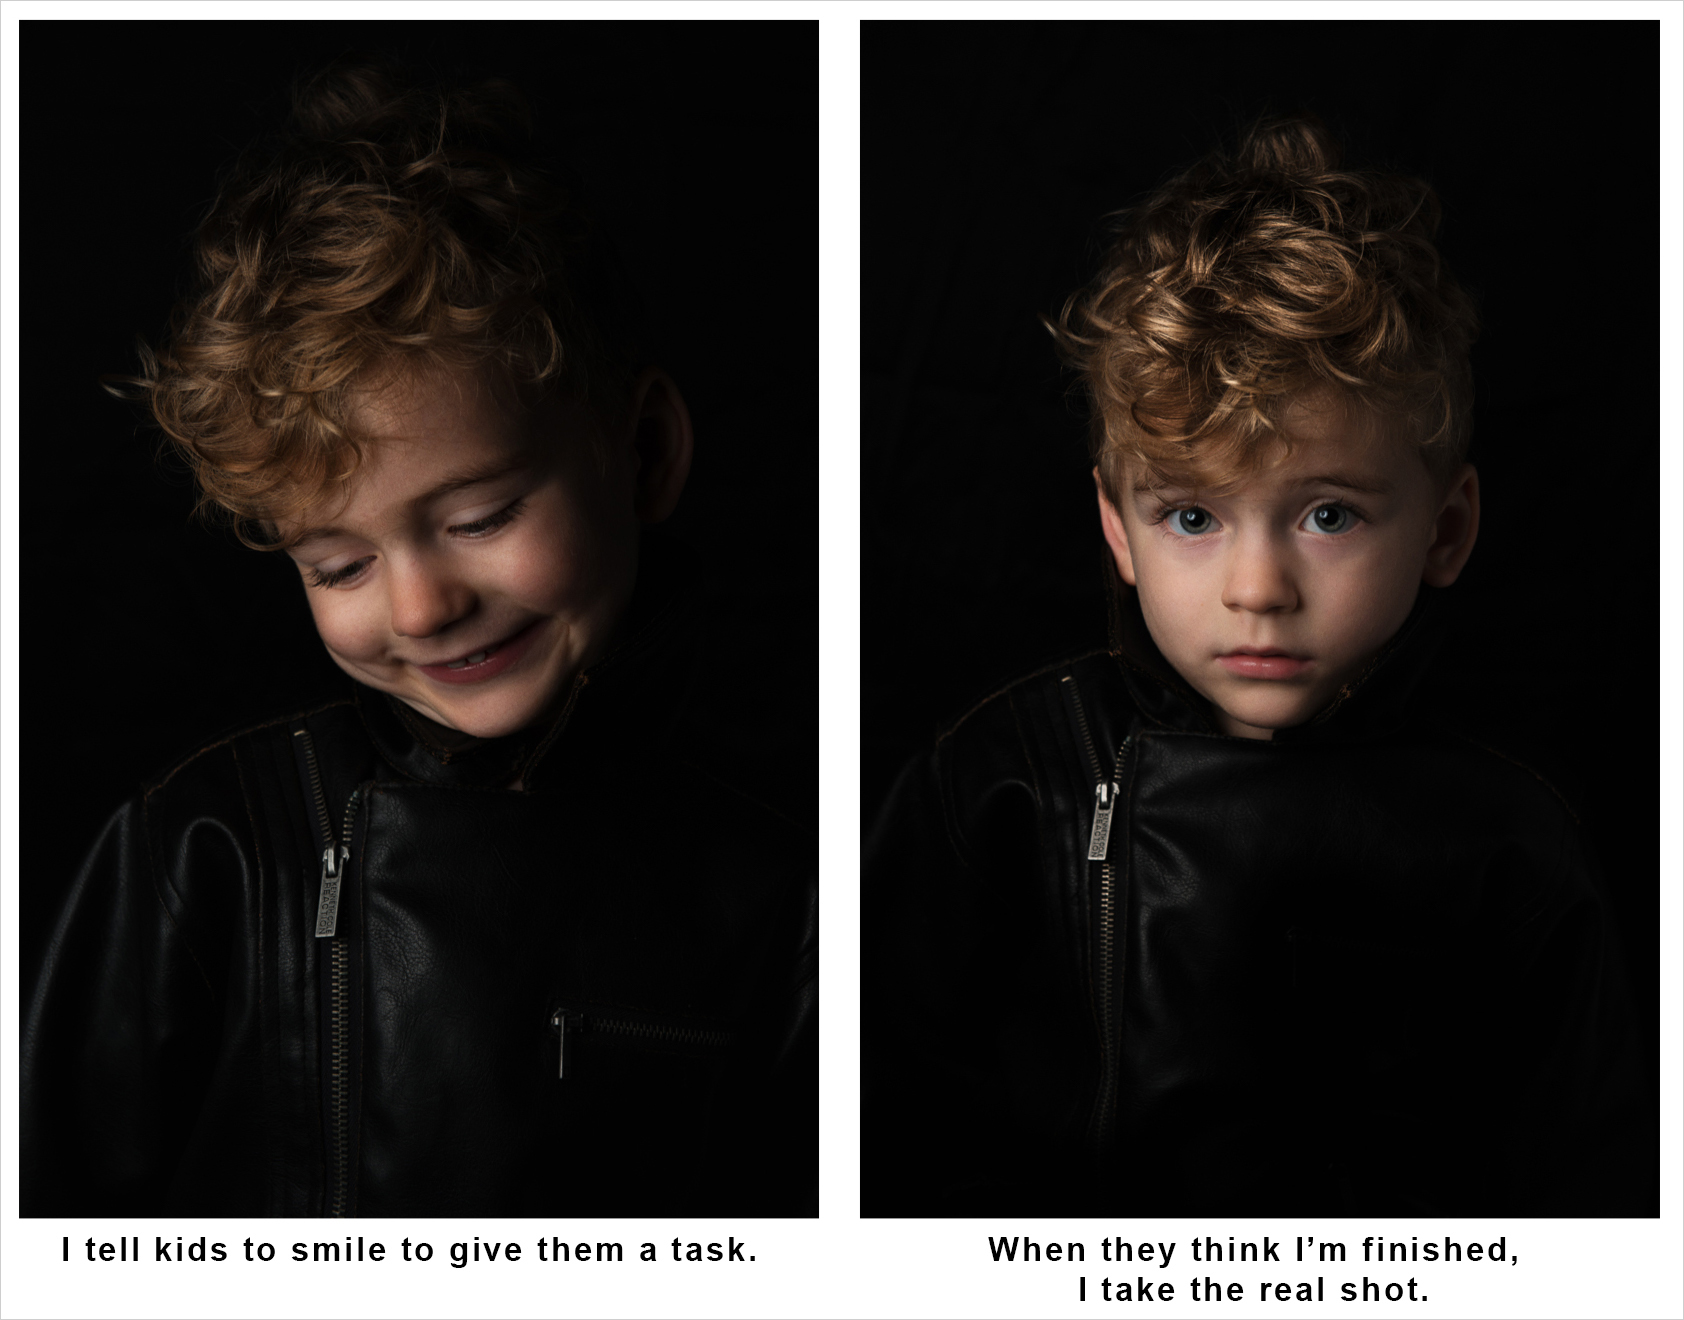
Trickery is especially useful on kids, who are really good at concrete (and exaggerated) directives but can’t possibly do the kind of subtle expressions I am after on command. So I will tell them to smile nice for me—something they are used to hearing from parents—but the keeper shots are usually the ones when they think they are done posing.
2. Tasking
I deploy “tasking” on a subject whenever I feel like they simply need something to focus on, especially if they are a little nervous or camera-sky. Kids usually need a task while sitting for a portrait.
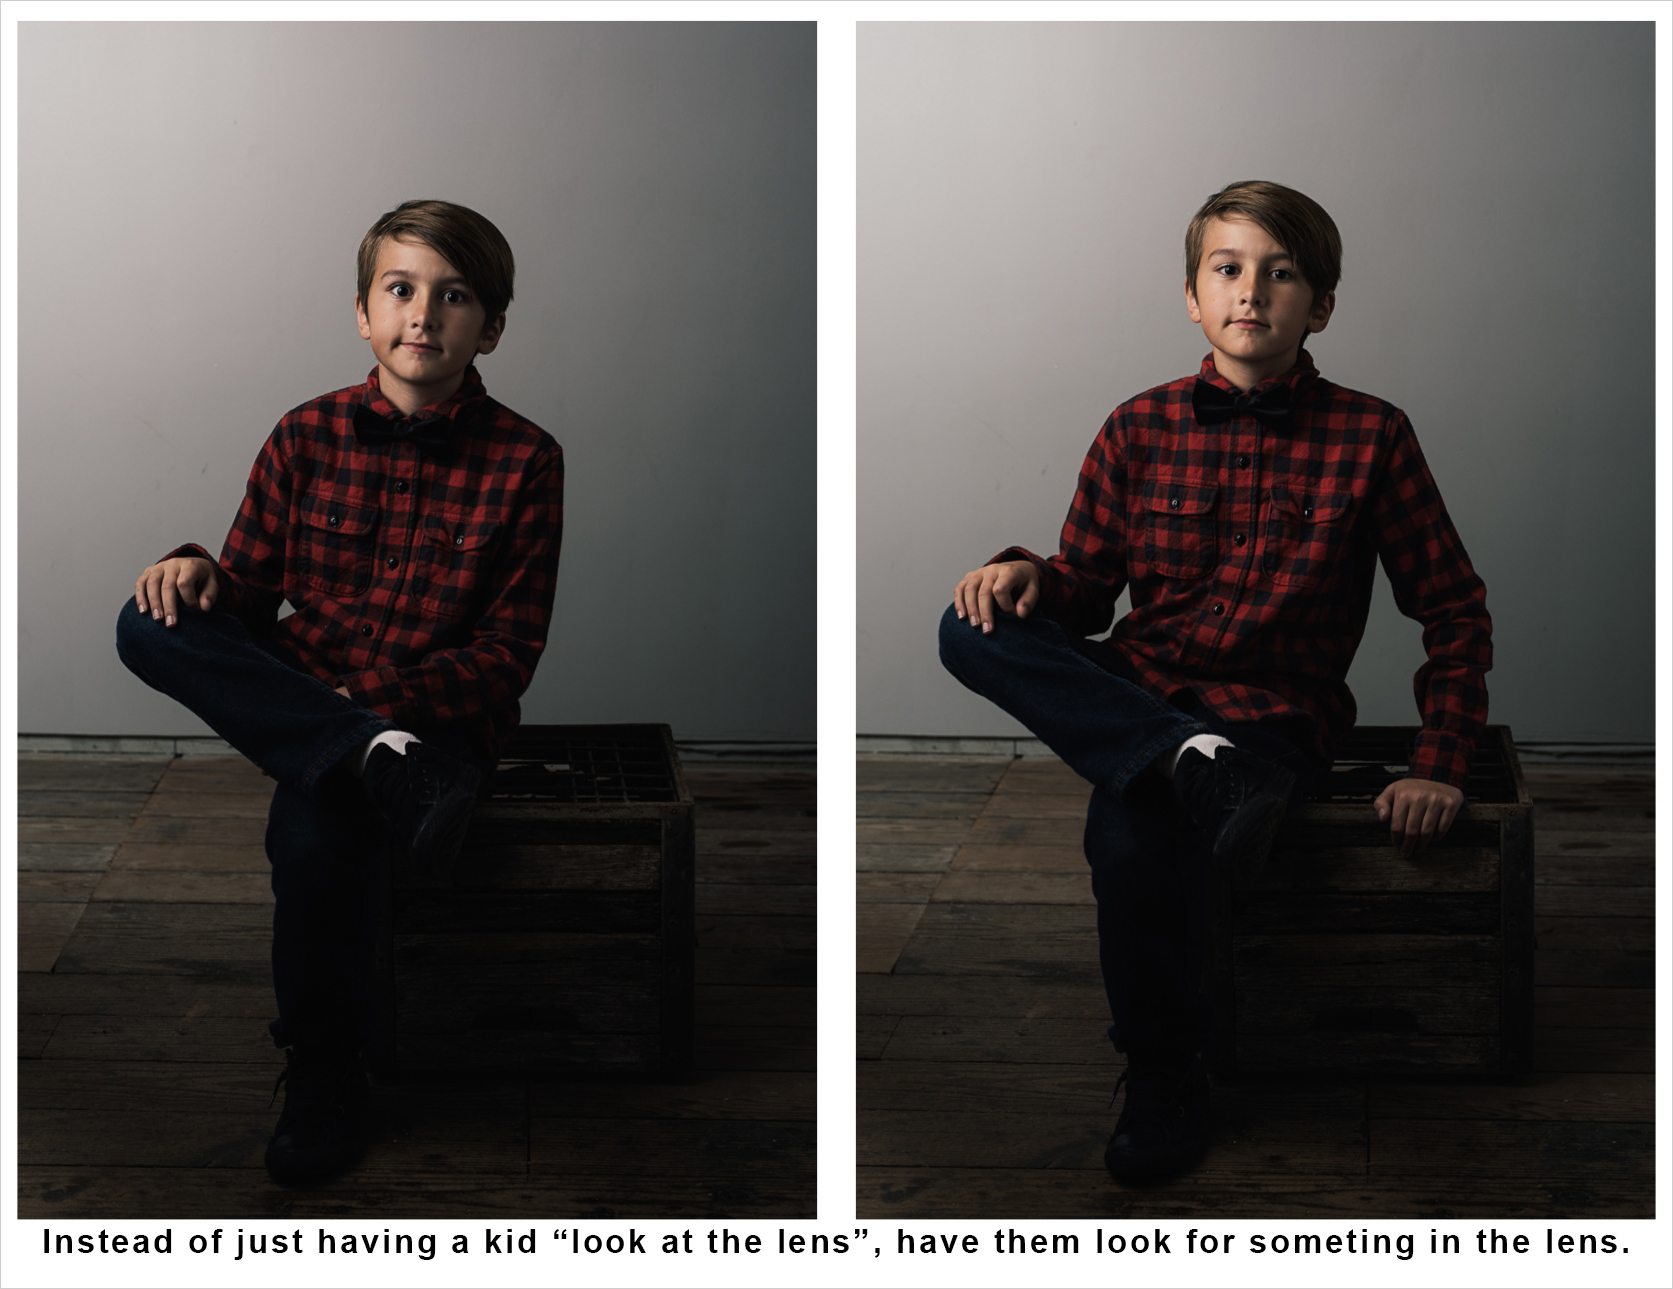
Kids have a way of being very literal with direction. Tell them to sit and look at the camera and you get stiff, unnatural results with those exaggerated “I’m looking at you” eyes. I try not to tell kids to look at me or “look at the camera” (it’s tempting because we’ve been hearing it our whole lives).
Instead, I give them something to do, like “look at this lens and try to count how many things you can see reflected in it.” For close-ups, I’ve captivated kids by showing them how the inside of the lens moves (that is actually how I got this shot).
For adults, I give more direct direction. Like kids, many adults will plop down in front of the camera and simply look at you. I will then ask them to lean into me slightly and gently glare, or squint.
“Glaring/squinting” is my not-fancy way of saying “Peter Hurley’s squinch” or “Tyra Banks’ smize”. Look these up later if you don’t know what they are. It’s actually more than just glaring and very useful.
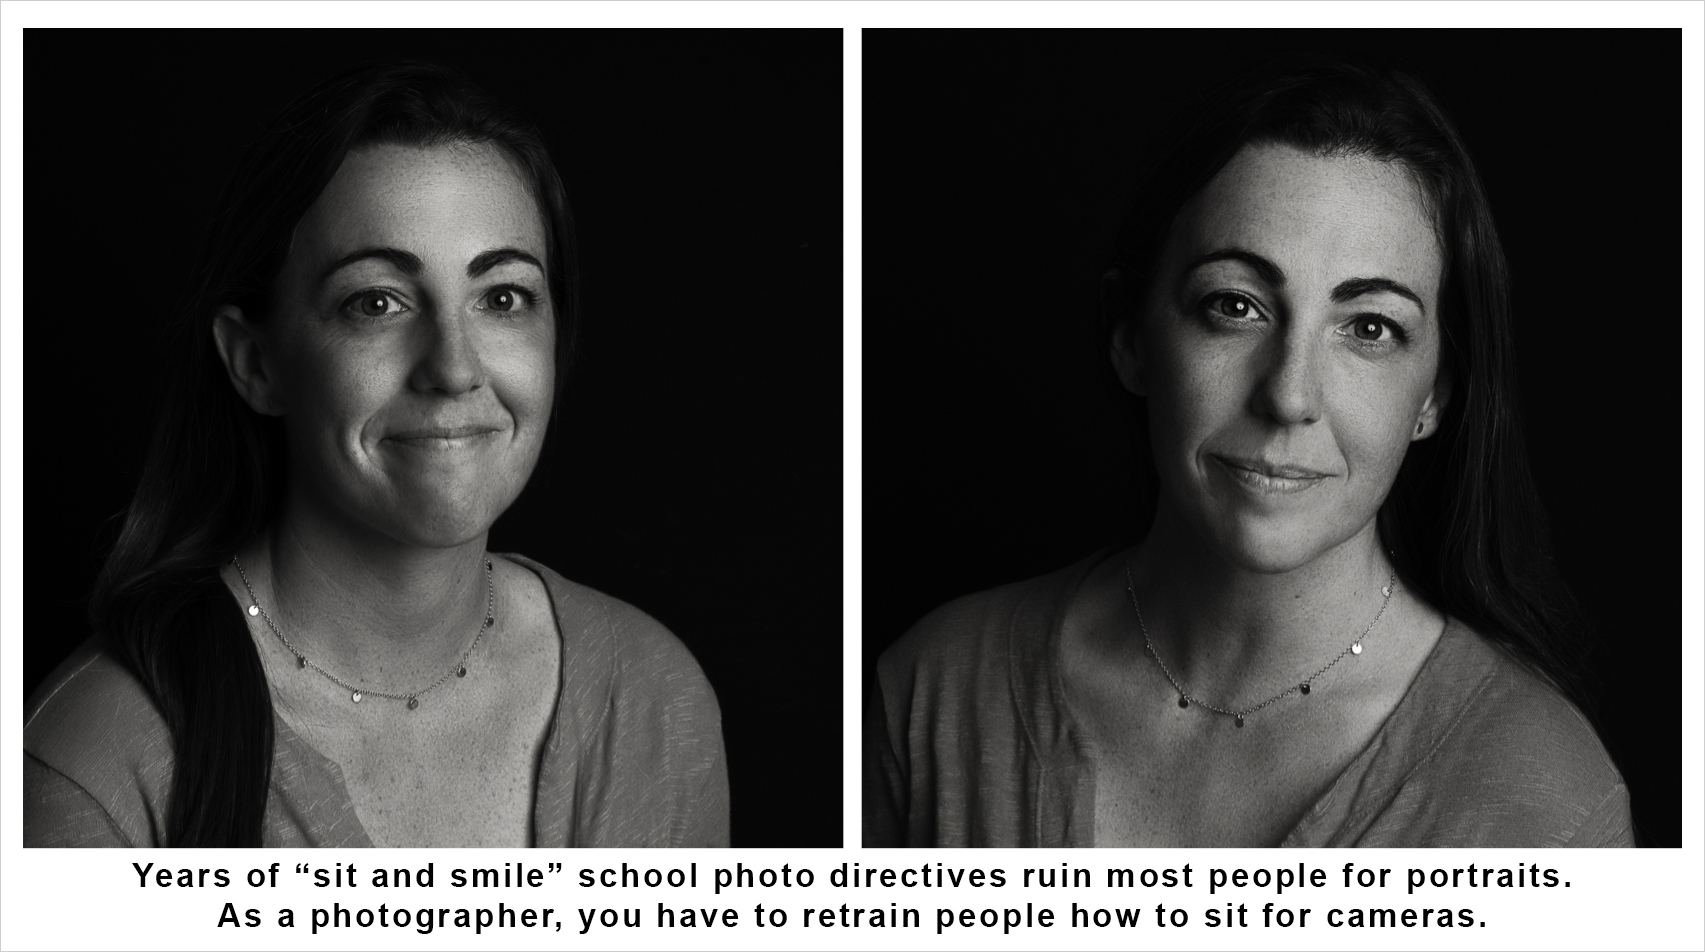
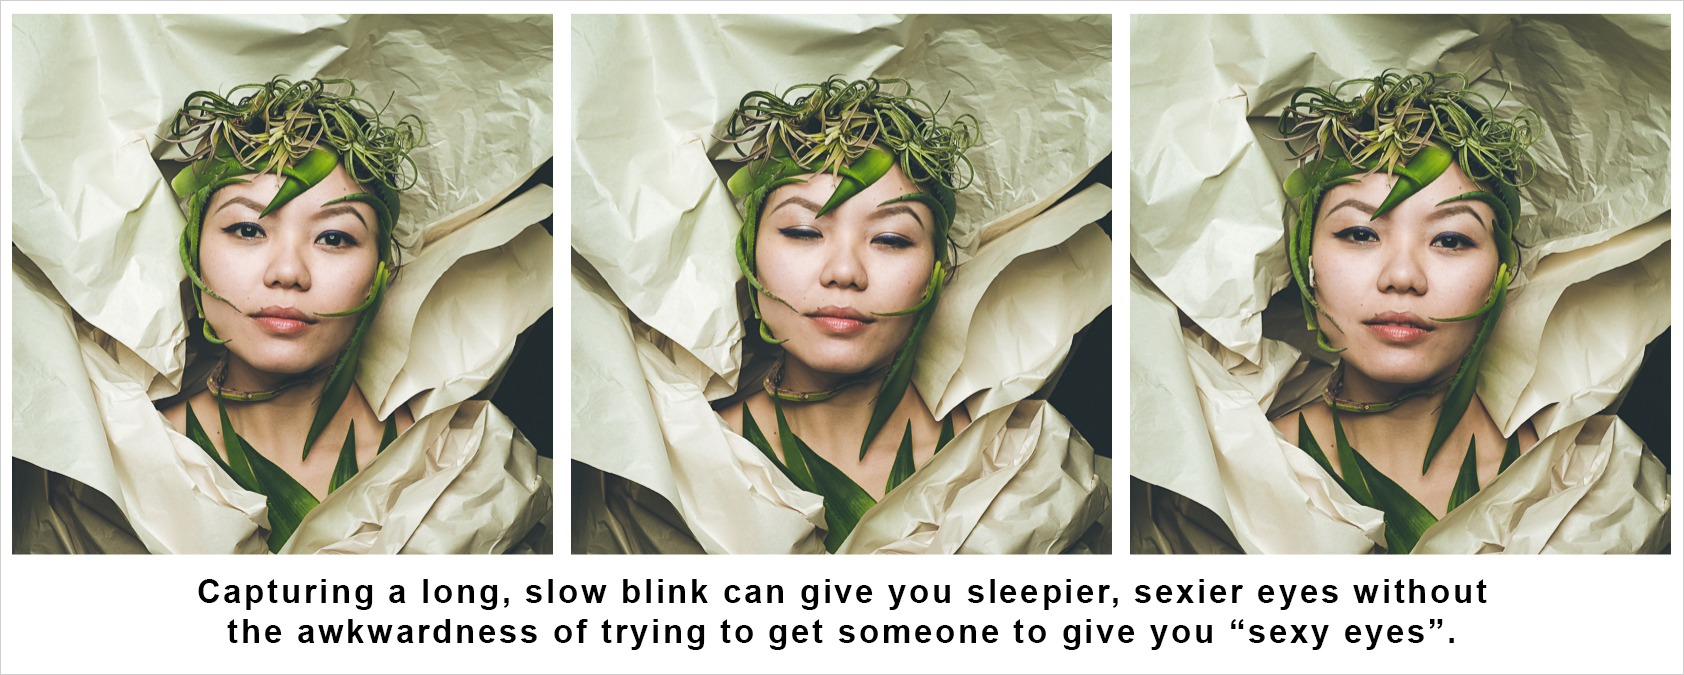
If your subject is having trouble with “glaring”—or “bedroom eyes,” as some people call it—ask them to close their eyes, count to themselves, and then you take a few shots as they are opening their eyes (especially useful for the bright-light sensitive).
Or just ask your model to do a long blink.
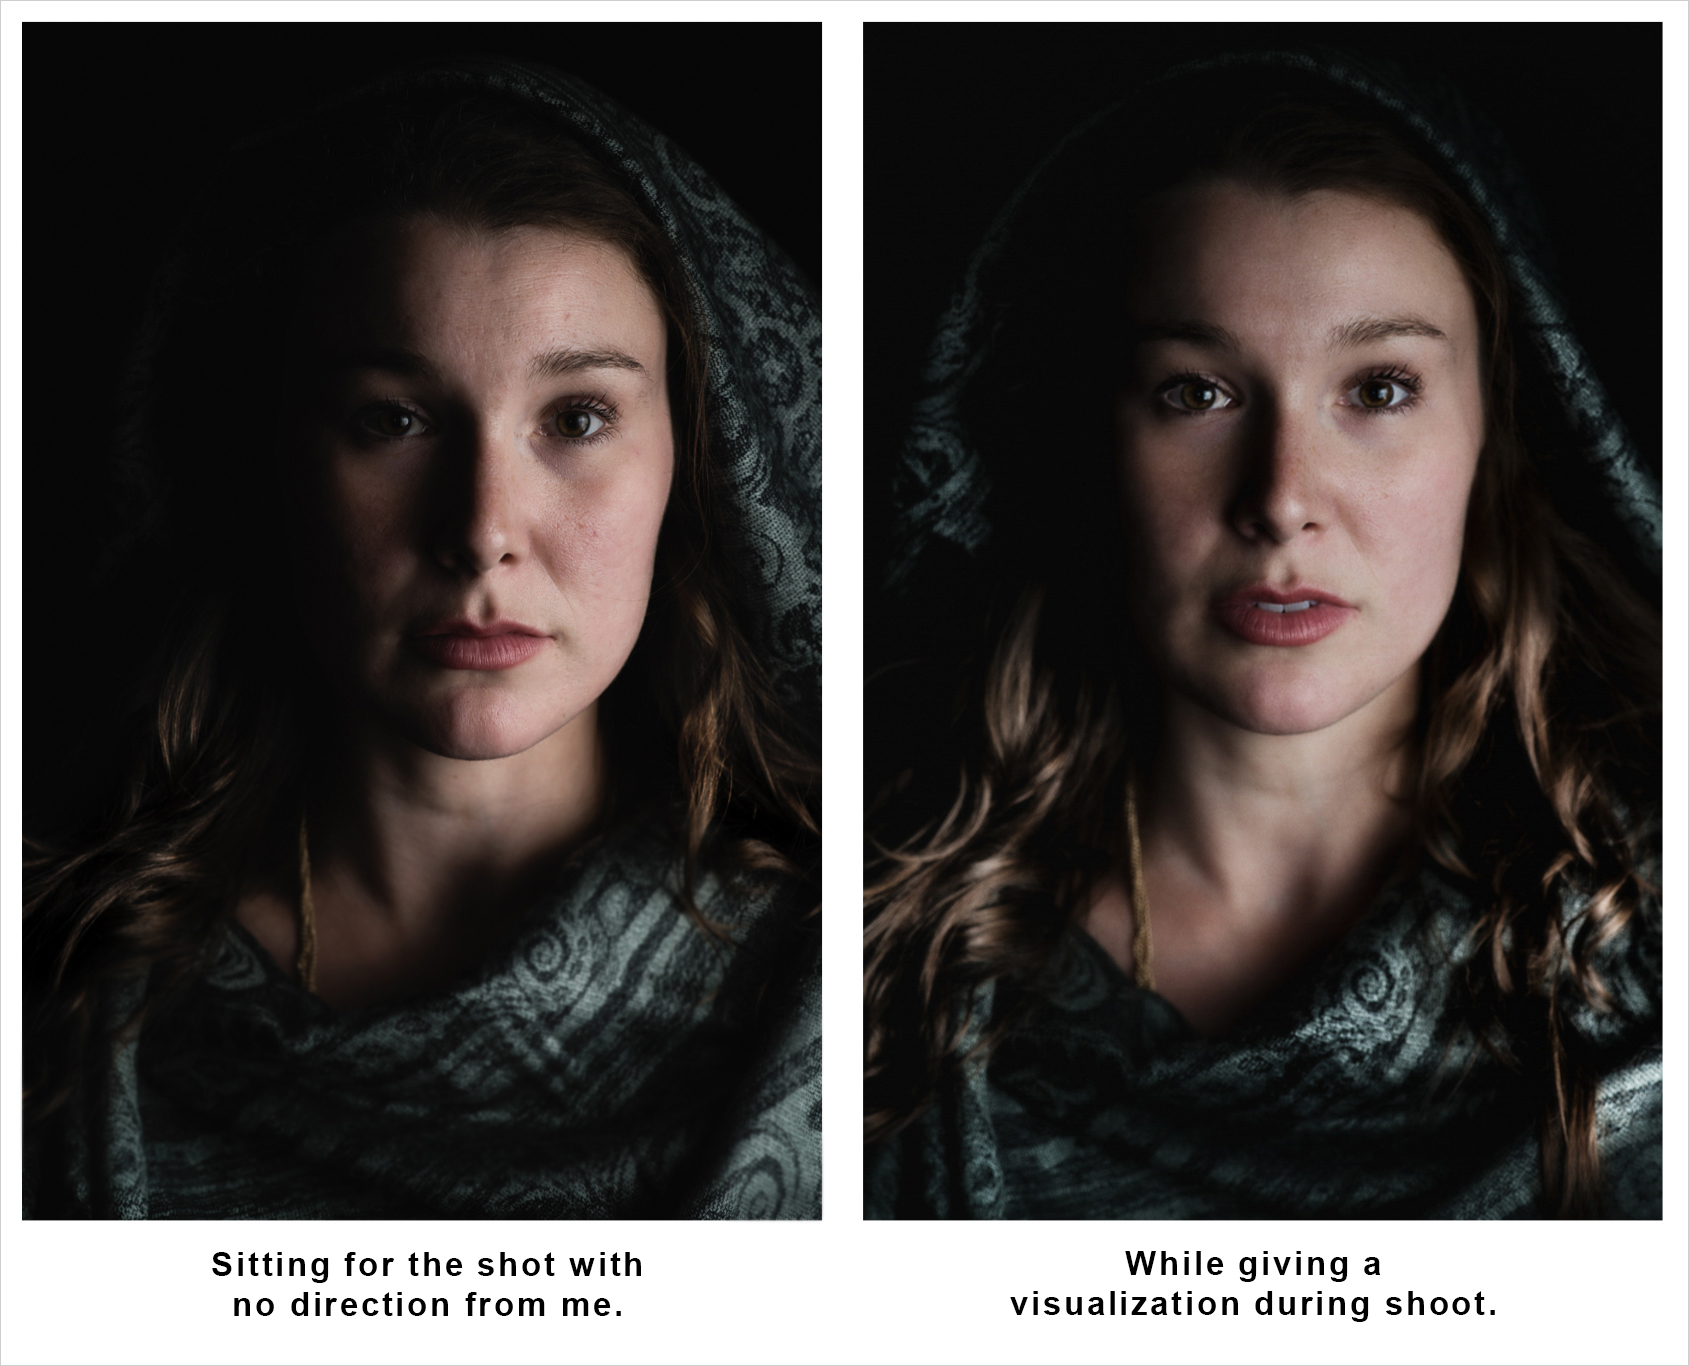
For the ambitious, tasking can take on role play. If a subject is up for it, I will ask them to visualize something (looking out over a vista from a mountain, rain in the distance, a barely visible goat in a field—ok, maybe not the goat).
For Clara, a stage actress, this kind of guided visualization helped produce something a little more interesting than how she initially sat for the shot.
3. Take Time to Acknowledge Improvement
When you’re a beginner, you’re not going to hit it out of the park. You’re just not. One of the quickest ways I built confidence was relying on my friends.
The first time I took a headshot as a favor to a friend, I was pretty proud of it. It was sharp, lit, and he looked at the camera. What more do you need? After a year of practicing the above tricks I took a new portrait for the same friend.
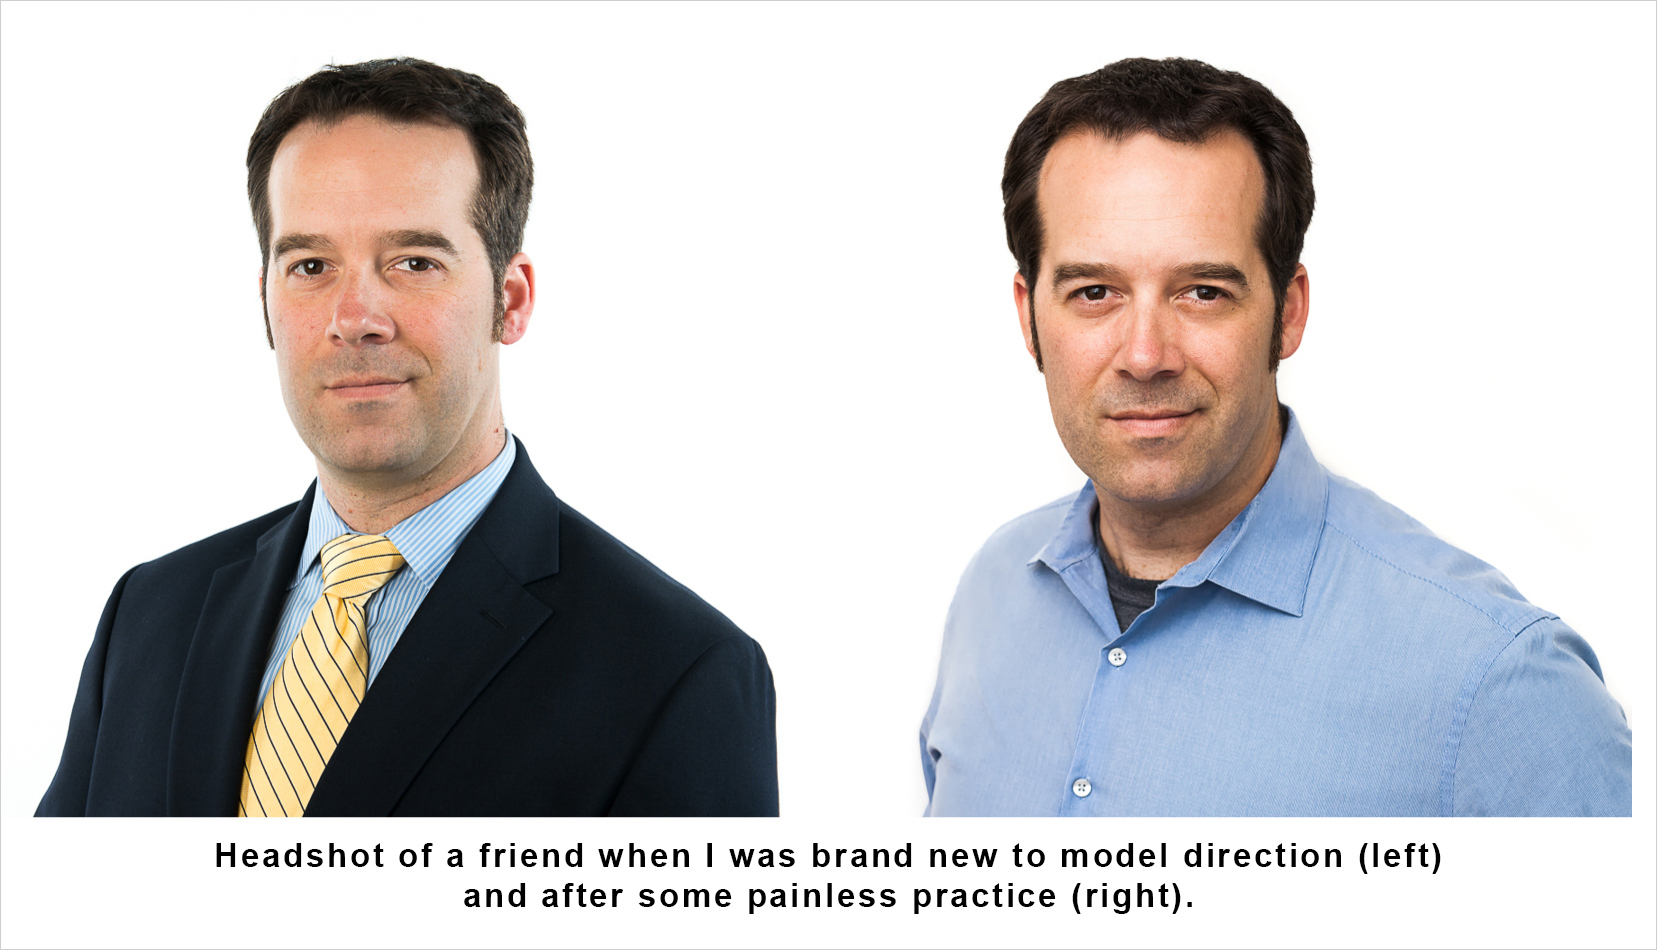
It is better, but I didn’t realize it was better until I compared it to the old one. Sometimes you don’t feel like you’re improving at all, especially if you continue to feel shy (I still do). Take the time to look at old photos of the same friends in the same conditions. You will see improvement and it will bolster you.
So when you’re at a loss during a shoot, remember some of the tricks above—they can help you transform a dud session into your new favorite portrait set.


Leave a reply