Ray Majoran is a photographer, and the CEO of Bark Communications and Radiant. He lives in southwestern Ontario with his wife Carolyn and daughter Adalai. You can see more of his work by following him on 500px, visiting his portfolio, checking out his and Carolyn’s website, or following him on Twitter.
This article was originally published here, and is being republished with express permission from Ray.
As an avid photographer who loves shooting the aurora borealis (more commonly known in the northern hemisphere as the northern lights), I sometimes get asked for tips. Being in southwestern Ontario, I don’t have the advantage that many high-latitude sky watchers have, so when the northern lights are out, I want to make the most of it! To save everyone some time, I’ve compiled a summary of everything I’ve learned since I started shooting them back in 2001.

A couple of quick things before we get started:
1. I enjoy photographing the northern lights, but I am by no means an expert in this field. I’ll give you my two cents, but there are other people out there that shoot the northern lights for a living.
2. Part of the reason that I’m not as qualified at shooting the northern lights as others is that I live at 42.9837° N in London, Ontario, Canada. This guide is created from the perspective of someone that doesn’t get the opportunity to see the lights on a regular basis.
Backstory
Back in October 2001, I became fascinated with the northern lights when my wife Carolyn and I were on a trip out west. We had seen the lights dancing in Alberta, but I was absolutely clueless on how to photograph them. On the plane ride back from Calgary (to London, Ontario), we watched the lights dance across the sky. It was an absolutely majestic night! (SpaceWeather.com still has photos in its archive from that October 2001 solar storm.)
When we got home from Alberta, all I wanted to do was photograph the northern lights. On November 5 (of that year), I got my chance! I went out with my Ricoh RDC-5000 8MB 2.3 megapixel digital camera and expected to capture something magical. Needless to say, I absolutely botched it.
From that point on, I made it one of my goals to become better prepared for the Northern Lights.
Understanding the Northern Lights

Capturing the northern lights has a lot to do with understanding them. Here is my best explanation based on the data I’ve acquired over the last 14 years:
Every 9 to 14 years, the sun goes through something called a solar cycle. A solar cycle is the ongoing (repeating) change in the sun’s activity and appearance (sunspots, solar flares, etc.). When the sun is at the peak of a solar cycle, it becomes very active. Our current solar cycle started in January of 2008, meaning that as of right now (March 2015) we are on the downswing of this solar cycle. A more active sun means more active solar wind heading towards Earth, which essentially is the cause of the northern lights—a continuous flow of solar wind hitting Earth.
Earth’s magnetosphere, a region above Earth’s ionosphere, protects Earth from solar wind. (Note: If this region wasn’t there to protect us, we’d be in big trouble. There would be no upper atmosphere, no ozone layer and probably no humans. The solar wind would likely blow every ocean, lake and river dry.) Long story short, when the solar wind hits Earth’s magnetic fields, it’s diverted around the planet… but some of it makes it through, particularly around the north and south poles. The solar particles that make it through the atmosphere are called the aurora borealis and aurora australis (a.k.a. the northern and southern lights).

The Best Time to See Them
As solar wind hits Earth, northern lights are formed. Northern lights are always occurring, but depending on location, daylight, cloudiness, moonlight conditions, etc., you might not actually see them.
One of the most common questions I get asked is, “What time should I go and see the northern lights?” The answer to that question is trickier than it sounds. Ideally, the best opportunity to see the lights is around midnight, but that’s not always the case.
Here are a few factors that affect when the northern lights get brighter:
1. Magnetic Field Fluctuation: Sometimes Earth’s magnetic fields fluctuate in power. When they do, they can create “open doors” to let solar wind through more openly. It’s not very well understood, but in and around equinoxes (March 20 and September 23 in 2015), the chances to see the northern lights increase substantially.
2. CMEs (Coronal Mass Ejections): CMEs (explosions on the sun) send mass amounts of electromagnetic radiation into space. When one of these explosions is directed toward Earth, it causes a geomagnetic storm, sparking auroras.
On rare occasions when a powerful CME hits Earth AND the magnetic field is weakened, northern lights can be seen as far as Texas and even closer to the equator.

Increase Your Odds of Seeing the Lights
Photographers don’t just end up being in the middle of nowhere in the wee hours of the night. We have data! Here are five essential tools that I use to determine when the northern lights are going to hit.
1. I get email alerts about 30 minutes in advance from AuroraWatch. You can sign up here. If you’re south of Toronto (about 43.7°N), only ask for the Red Alerts. You won’t see anything less. (Note: If you’d like to get a little more serious and pay for SMS alerts, SpaceWeather.com has a great service as well.)
2. I watch the real-time Aurora map from NOAA. If you’re above the red view line, there’s a good chance you’ll see them.
3. I monitor the 3-hour Planetary K-index from NOAA… If it’s above 6.3K AND it’s past dark AND it’s clear outside, there’s a good chance you will see the northern lights.
4. I have an iPhone app from Aurora Forecast. It’s very helpful.
5. I follow the Facebook feed from Aurora Alerts by Soft Serve News. They provide updates every 30 minutes as well (as to what the next 30 minutes be). Again, watch for 6.3K or higher. If you see something magical over 8.0K, get the kids out of bed and go for a drive.
One huge caveat to all of this is weather and moonlight conditions. If it’s completely overcast outside, ignore all of your alerts—it’s not going to matter since you won’t be able to see the northern lights. Additionally, if you find yourself in a lunar cycle where the moon is full (or close to it), viewing the lights may be severely obstructed.

Where to Go
Simply put, go where it’s dark. When I receive an alert (and I’m not sound asleep), I drive as far away from the city as I can. For high-latitude residents, this isn’t as much of an issue as sometimes the lights can literally be on top of you, but for people like me (who live further south), you’ll want to get as remote as possible.
Generally speaking, look north, but that’s not always the case. Solar wind can fluctuate at the drop of a dime so pay attention to east, west and right above you.
One thing that’s often overlooked (and I often end up scrambling with) is—try and pick an interesting spot beforehand. Drive around during daylight hours and look for interesting trees, farmhouses, etc. that would make a good foreground for the lights. If you’re thinking about walking into a field, make a visual note of obstacles, holes, etc. Then, go back at night (on a non-northern lights night) to see if your intuitions were correct (i.e. there is no major light pollution, no angry barking farm dogs, etc.). Pictures with good foreground subjects (i.e. buildings, trees, water reflections, mountains, very still people, etc.) are always more interesting than shooting into a flat field.

How to Shoot Them
Every person’s gear is going to be different, but there are some common tips that I believe can prove valuable to everyone:
1. Prepare Well
I know it sounds silly, but you’d be surprised at the number of people who run out to shoot the northern lights in the winter time without a jacket. Plan accordingly! Pack warm clothes and make sure you have everything you need (charged batteries, cables, lenses, coffee, more coffee, etc.). It would be a shame to get out there, just to realize you missed capturing the best light show of your life because you weren’t prepared. (Also, use the restroom beforehand.) 🙂
2. Provide Stability
Shoot with a tripod, and if possible a remote shutter release. If you lack a remote shutter release, a quick trick that I’ve found is to set your camera timer (to ~2 seconds). That way you can press the shutter release button and move your hand away from the camera (not causing it to jiggle).
3. Choose the Right Settings
The key to capturing the northern lights is long-exposures. Essentially, you are letting light build on your camera sensor. Settings are critical. My general rules are as follows:
- Shoot as low an ISO as possible (ideally 100 – 400 ISO)
- Shoot as low an aperture as possible (ideally f/2.8 – f/4.0)
- Keep your shutter speed between 6-12 seconds.
You will have to adjust according to light conditions. If the auroras are brighter, you will be able to get away with a lower ISO. If they are weaker, you may have to increase your ISO to 800. In my experience, anything higher than 800 and you’re going to start getting “fake stars” due to camera sensor noise.
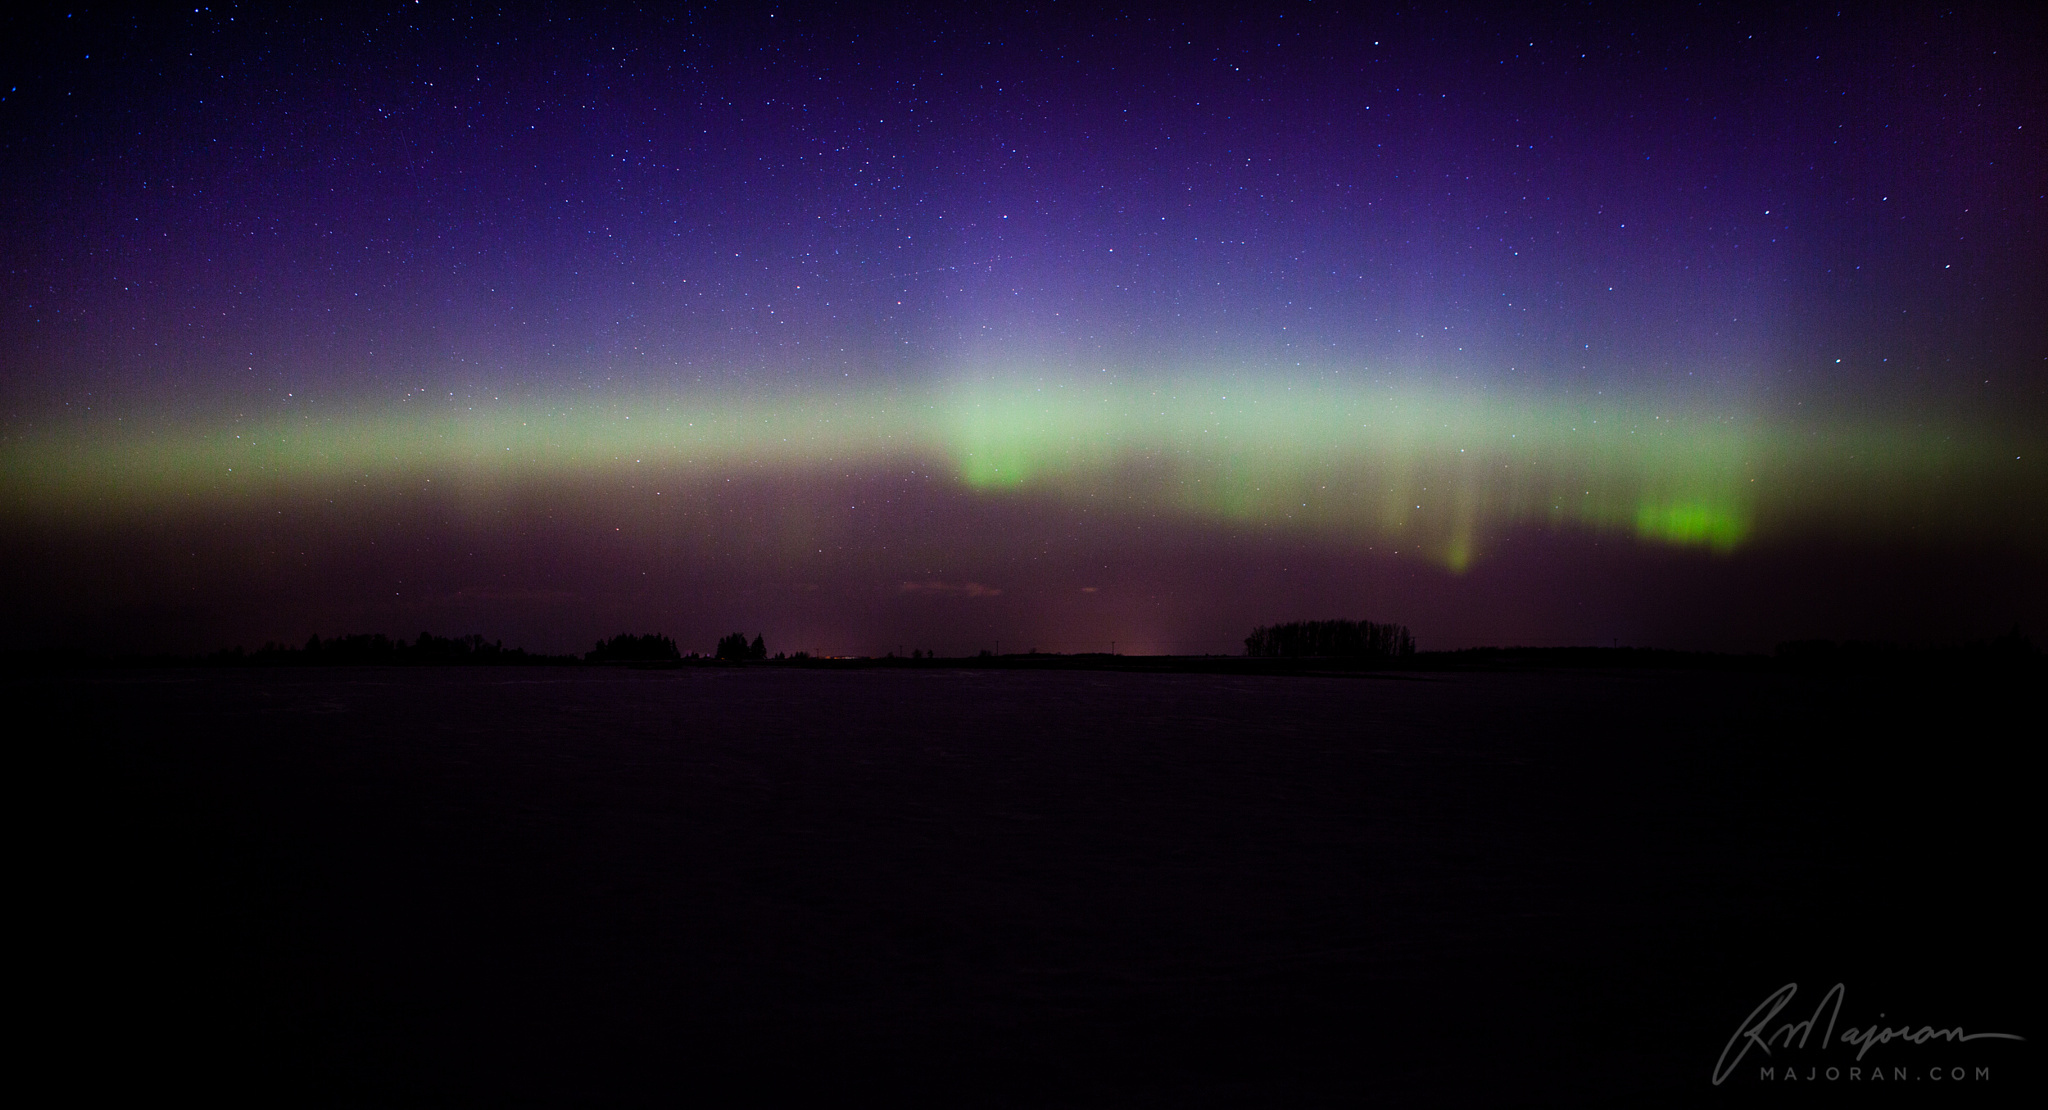
The lower the shutter speed, the more you are going to see the lights dance in your photos (i.e. 8 second exposure). The higher the shutter speed, you will see more of a northern lights blur (i.e. 15-30 seconds). Note: Sometimes the blur effect can be cool as well and is the only viable option in a weakened geomagnetic storm. The following image is a good example of that…

Here are a couple of situational examples…
If the lights were powerful, I’d aim for the following settings:
- 100 – 400 ISO
- 6-8 second exposure
- f/2.8 – 4.0
If the lights were weak, I’d aim for the following settings:
- 400 – 800 ISO
- 8-16 second exposure
- f/2.8 – 4.0
If your lens isn’t capable of shooting as low as f/2.8, you may have to increase your ISO or exposure time to compensate for light.
Another thing you’ll want to consider is what format to shoot in. Personally, I like to shoot in RAW format so that I can process the photos later. Others prefer to shoot in JPEG format, which essentially means that your camera processes the photo for you. RAW format files give you more flexibility with tones, shadows, exposure, white balance, etc.
As far as camera bodies go, let me just say this: As it relates to shooting northern lights, your lens is far more important than your camera body. A low-priced Canon EOS Rebel or Nikon D3300 will take a phenomenal northern lights photo with the right lens and settings.
My personal setup when shooting the northern lights is as follows:
- Camera: Canon 5D Mark III
- Lens 1: Canon 24-70 f/2.8L USM
- Lens 2: Canon 14mm f/2.8 II USM
- Tripod: Manfrotto 496RC2
- Wireless Remote Shutter Release: Vello Wireless Shutterboss
If you’re looking to take video time lapses of the northern lights, the same rules apply. You will NOT be shooting a traditional video; instead you will be taking a series of photos in succession (on a tripod) and piecing them together afterwards. So imagine taking 500 eight-second photos and importing them into a video-editing suite afterwards to bring it all to life. Five hundred photos would equal a 21-second video (at 24 frames per second). Some cameras have built in time lapse functionality, but for most, you’ll need to invest in a remote shutter release with time lapse capabilities.
There’s lots of software that can help you put together time lapsed videos. Simply Google, “video time lapse software” for more info.

4. Get Focused
When you’re standing on a dirt road and it’s pitch black, one thing you’ll realize is that it’s tough to find focus. The last thing you’ll want to do is take a bunch of amazing pictures, just to get home and find out that they’re all blurry. So how do you find focus in the dark? I’ve often heard photographers say to set your lens to infinity focus, which is sort of true, but even that isn’t perfect (as many lenses don’t have accurate line markers for what infinity actually is).
The best way I’ve found is to locate a bright star in the sky (or a light on a farmhouse… or a light on a cell tower) and focus on that. Once my camera grabs focus, I immediately switch the lens from AF (auto-focus) to MF (manual focus). I don’t touch the lens again for the rest of the night (unless I feel that I’ve jarred it when I switch locations). Another (smarter) way to do this would be to find focus on a far off object in the daylight before your trip. Then switch to MF and don’t touch it. 🙂
5. Post-Process
After you’ve shot all your pictures, you’ll want to consider post-processing. If you were to talk with most professional photographers, this is the critical distinction between a good photo and a professional photo. Post-processing offers you the ability to make critical adjustments (i.e. brightness, contrast, white balance, etc.) to your photos. Personally, I use Adobe Lightroom. It’s worth its weight in gold.
And finally…
6. Have Fun
Part of the experience in northern lights hunting is the adventure: the journey down dirt roads, hiking into a field, sharing the time with friends, etc. Don’t forget to realize the amazing thing that’s happening right in front of you. Take it in and enjoy it!

Final Thoughts
I hope this article has been helpful to you in your journey to capture the perfect northern lights photos. As I said at the beginning, I’ve still got a lot more to learn… but what I have learned, I’m happy to share with you!


Leave a reply