Throughout the decades, the sister art forms of dance and photography have intersected in inspiring ways. In the 1930s, the legendary photographer Barbara Morgan established a professional collaboration with the dancer Martha Graham that evolved into a lifelong friendship. The photographer Jack Mitchell worked with Alvin Ailey’s dance company for more than thirty years, beginning in 1961. In the 1970s, Arnie Zane began his career as a photographer before going on to become a world-renowned choreographer.
With viral dance trends ranging from Renegade to Say So taking over popular culture, perhaps the 2020s will mark yet another critical turning point in the history of dance, and we have no doubt that the next generation of dance photographers will be there to capture it all. Here are just a few simple tips for collaborating with dancers to create unique and unforgettable images.
Immerse yourself
As a dance photographer, it can help to become a specialist in a specific style (e.g., contemporary, tap, or ballet portraits) so that you get to know the players within that niche. Attend some classes yourself to learn the basics, or ask to shoot behind-the-scenes for a dance company in your area. If you can collaborate with an individual dancer or company on a long-term basis, even better.
Learn the terms and steps that define your style so you can better communicate with your dancers. The more time you spend within this world, and the more people you meet, the better you’ll get at photographing your style’s unique gestures, poses, and movements. Some are all about the feet, for example, while others are all about the hands.
Consult your dancer
Dance photography is a collaboration between two artists, so make time to sit down with the dancer (plus crew, choreographer, etc.) on your team to set goals and expectations. Ask about the essential shots you’ll need to capture the specific type of dance, whether it’s jazz or hip-hop. You can even make a playlist for the studio based on the music they like.
Martha Swope, a prolific photographer of dance and theater in New York City from 1957 through 1994, famously had a routine of attending rehearsals and familiarizing herself with the choreography of the dancers she photographed. If you can attend a rehearsal, take advantage of the opportunity. If not, you can still watch videos of your dancer in motion.
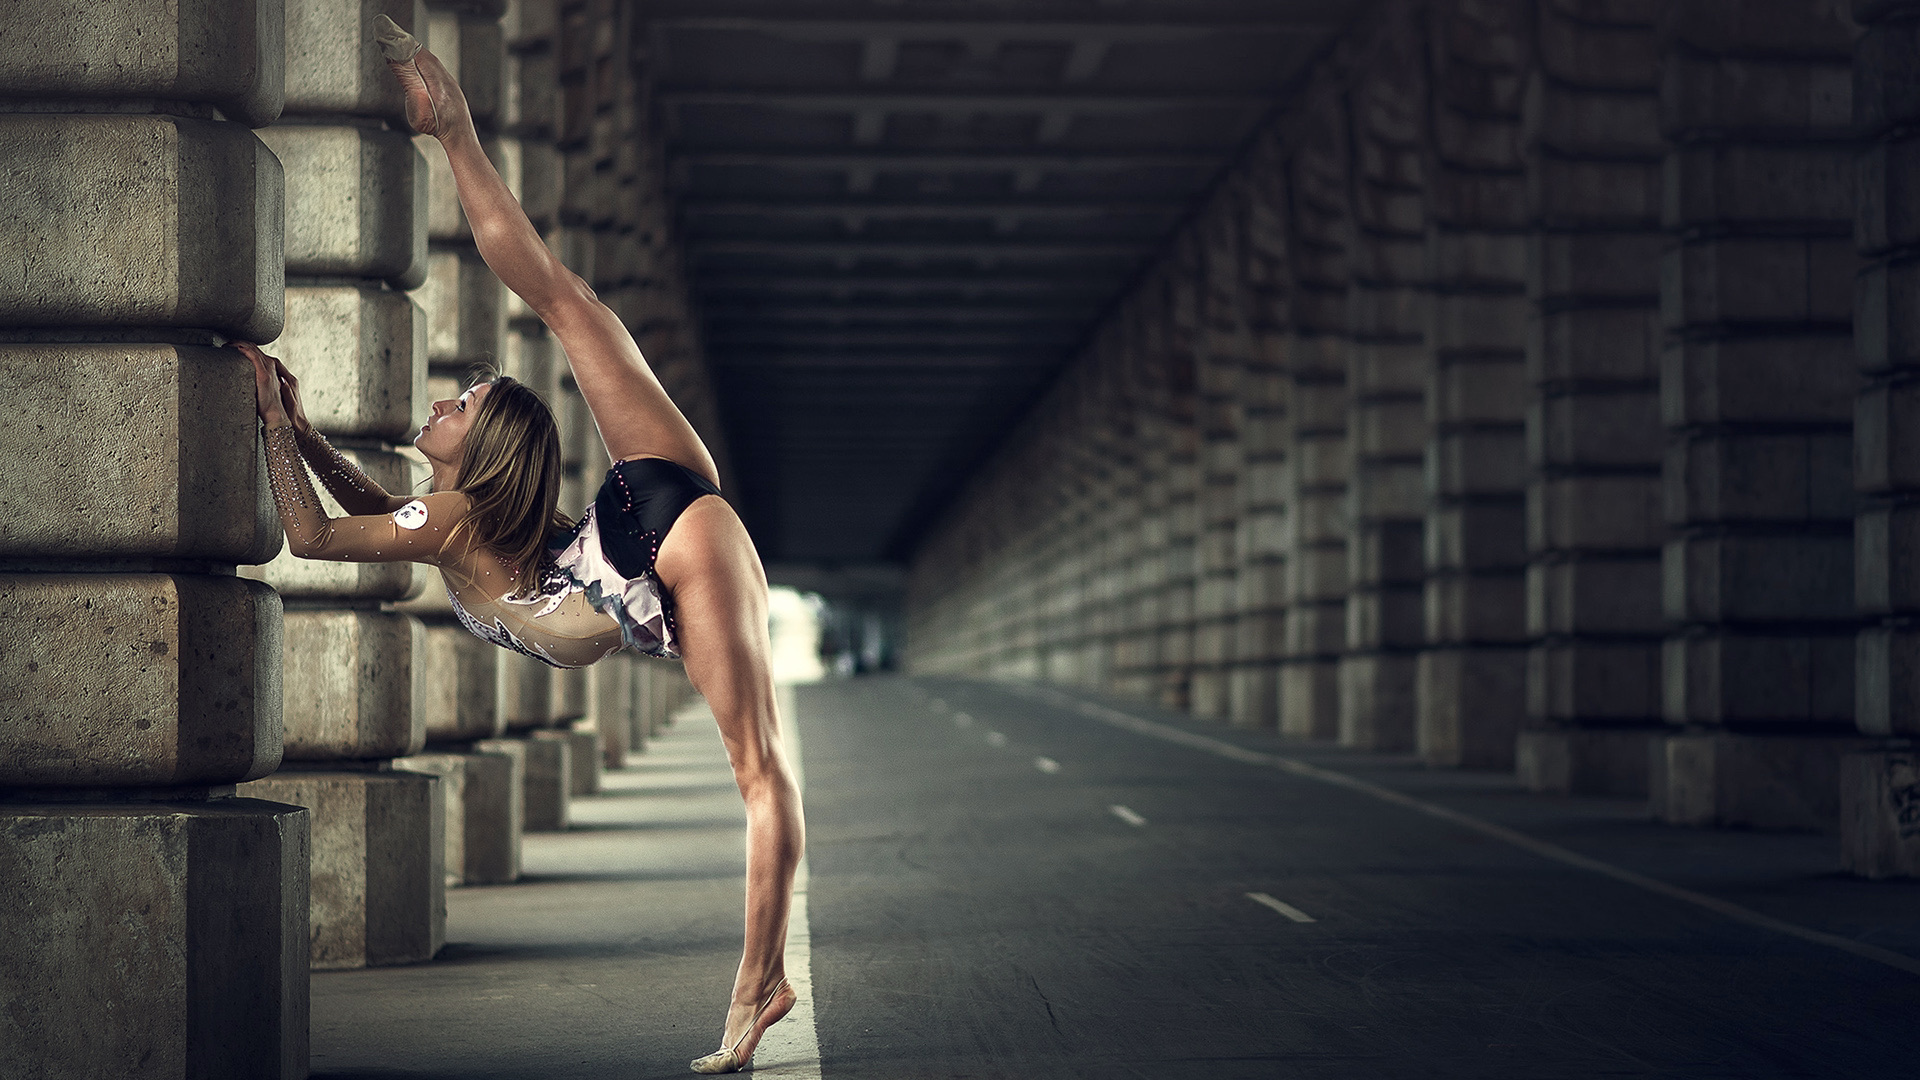
Scout your location
In some cases (e.g., a recital or stage shoot), you might not have a lot of freedom to determine your location, so you have to make the best of what you get. If you are photographing a concert, see if you can talk with the lighting director to get a feel for what settings you’ll have to use. Explore the space and take plenty of test shots to determine what works and what doesn’t.
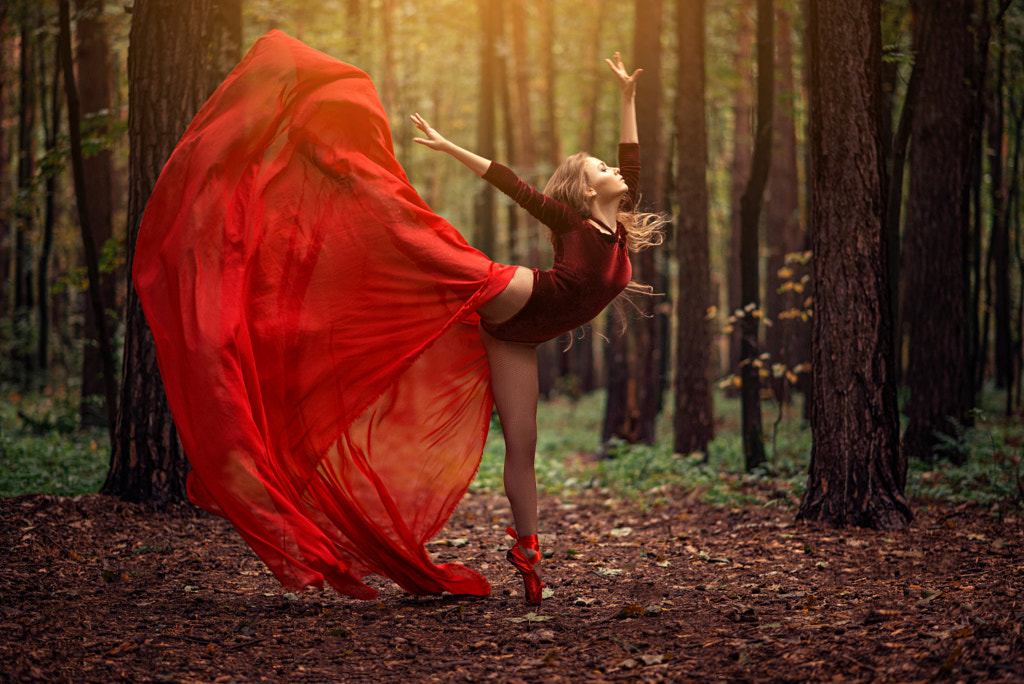
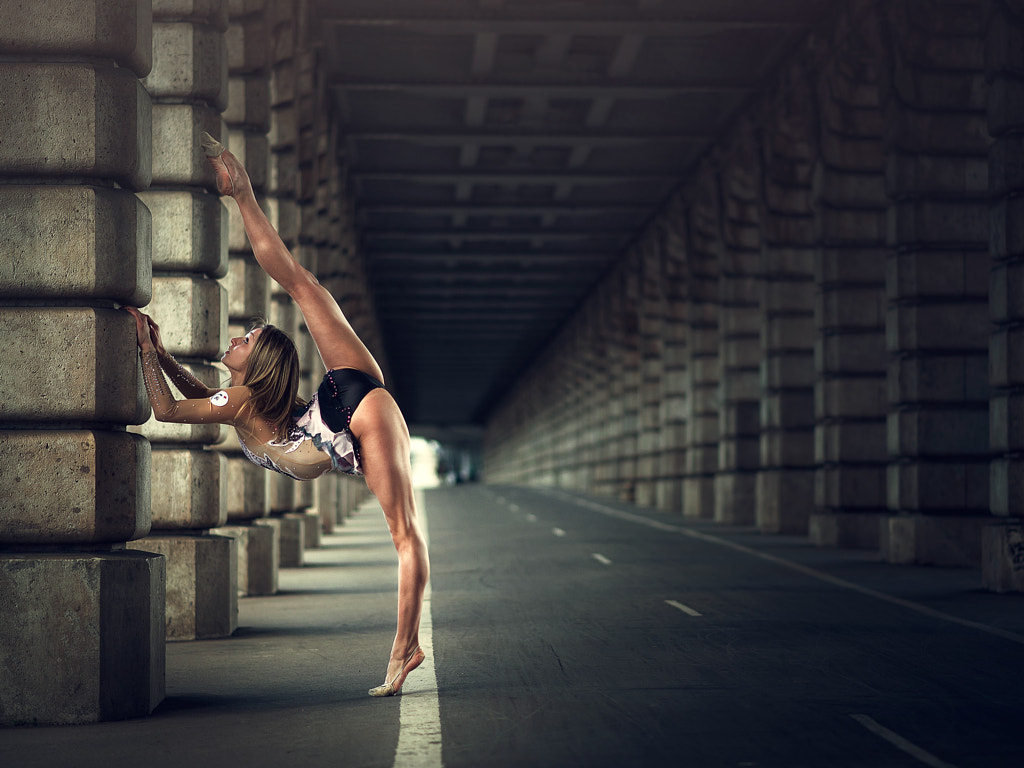
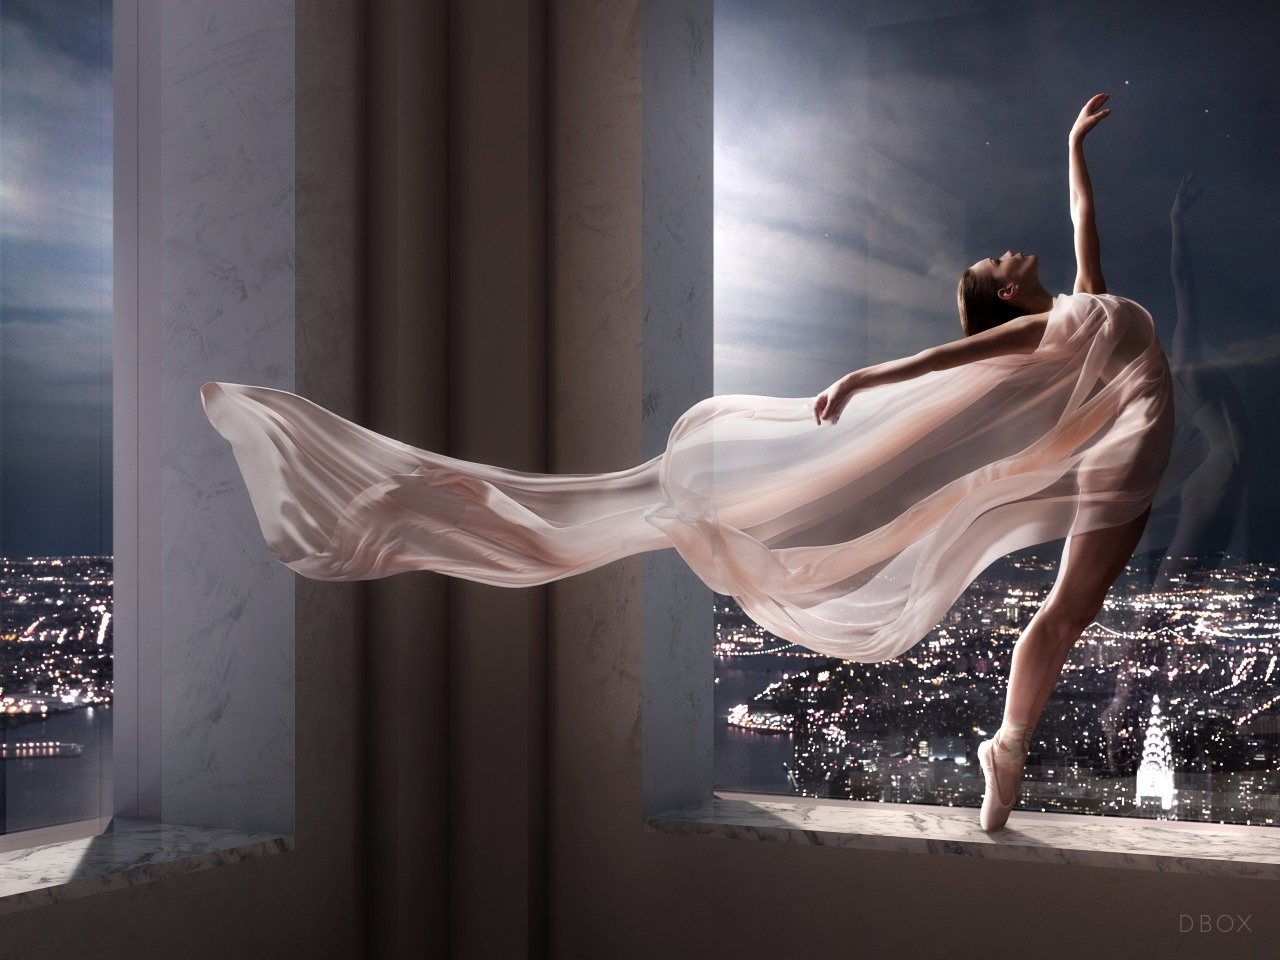
If your location is flexible, ask your dancer for ideas and input, and consider places that capture his or her personality. Ballet originated in the lavish courts of the Italian Renaissance, and hip hop dance was born in the bustling streets of New York City in the 1970s, so the setting for your shoot might vary depending on the style. Maybe you have access to a ballroom or stage, or perhaps you find a vast landscape or colorful city block to complement your dancer.
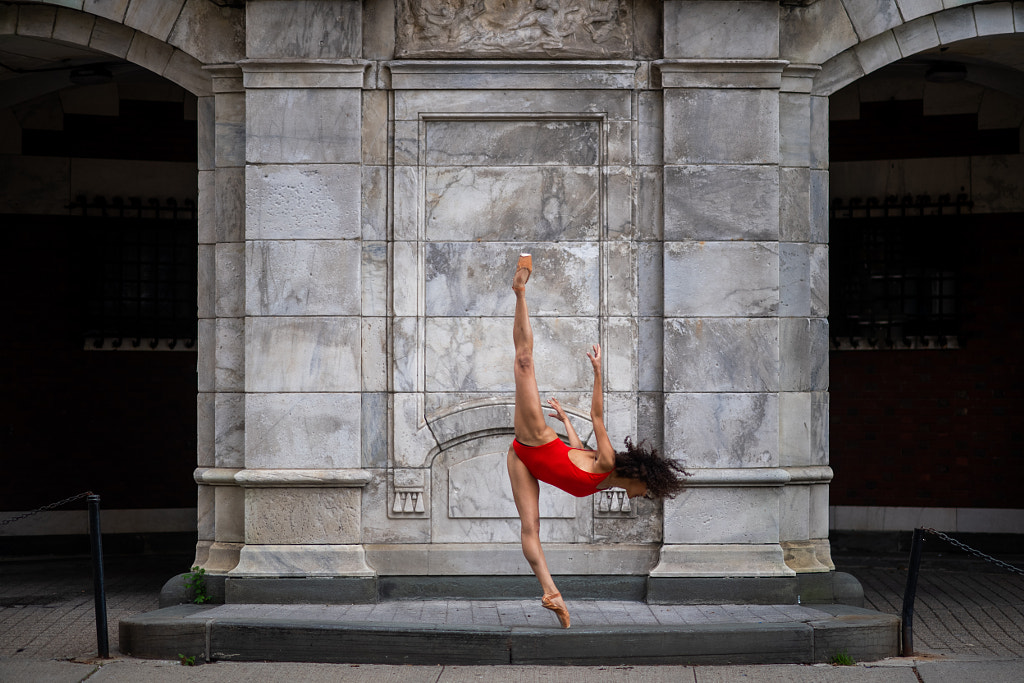
Whatever location you choose, make sure the dancer has enough space to move! If you’re shooting outside, check the weather and lighting conditions. As always, the golden hour works well for pretty light. If you find your background is on the busy side, you can use a wide-open aperture to blur it into abstraction.
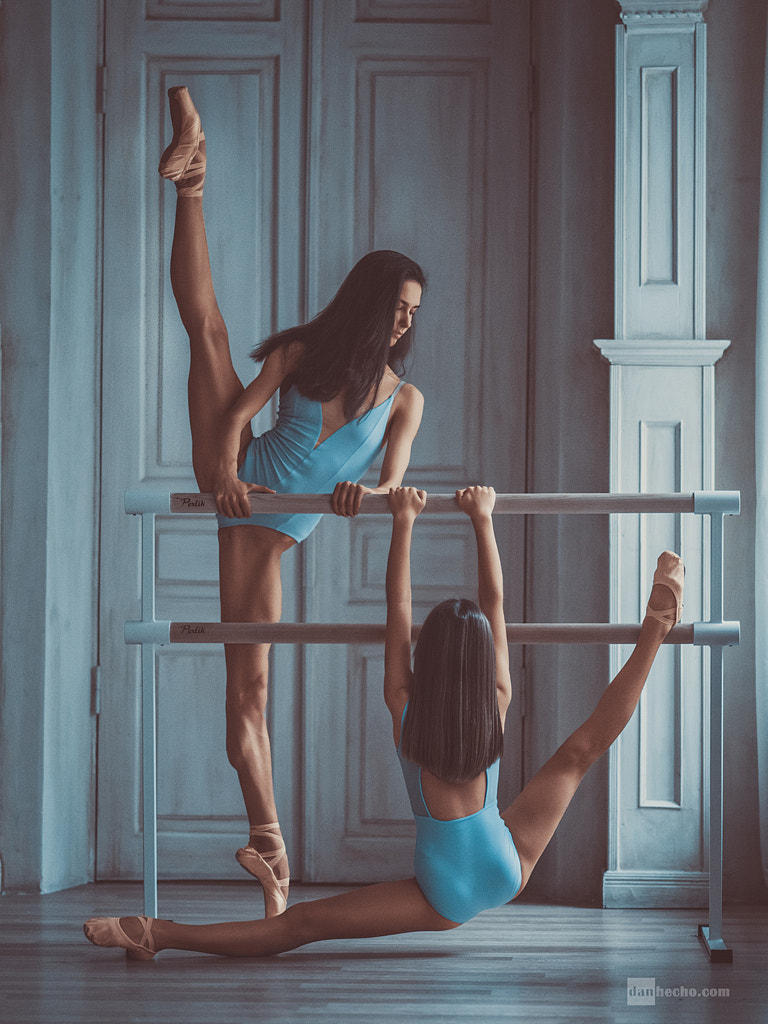
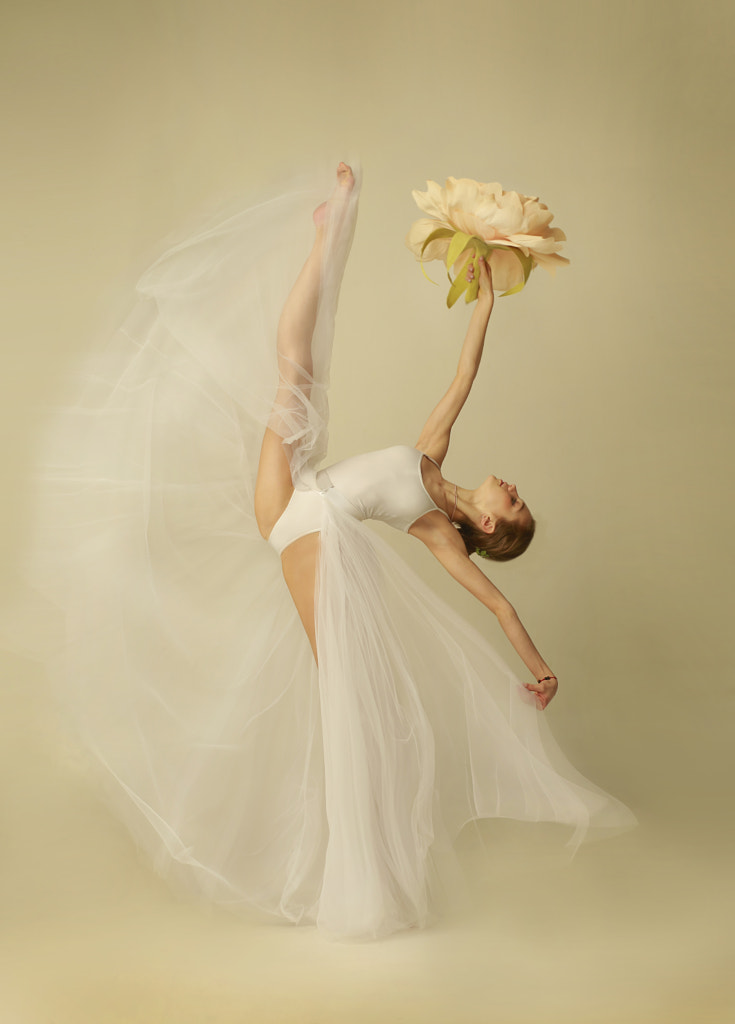
Plan your wardrobe
The consultation with your dancer will also be key in deciding wardrobe options for the day of the shoot. The most important factor is choosing pieces that allow your subject to move naturally on set, so invite their input here. They’ll know what’s comfortable, and you’ll know what looks good on camera, so decide as a team how the dancer will dress—tap shoes or pointe shoes? Leotard or joggers? Bun or ponytail? Lightweight, flowy fabrics are always popular in dance photography for conveying movement. Your color choices will also depend on your location and background, as you want the dancer to stand out from the scene.

Repeat the same routine a few times
Instead of asking your model to hold the same position for a long period, have them go through the same routine multiple times. That way, they never lose the natural flow of the dance, but you’ll also know when to press the shutter to capture the right moment. Ask them to show you the steps that make up the routine and break it down for you beforehand.
Master your shutter speed
Shutter speed is arguably one of the most important camera settings when it comes to dance photography because motion is the key ingredient to any memorable shot. Creatively, you can go in a number of different directions. First, you can use long exposure photography to blur your dancer and create a dreamy, abstract atmosphere as they move about the frame. You can also do the opposite and freeze the dancer in place, mid-jump or mid-gesture, with a fast shutter speed.
Note: The above tip applies to natural, continuous lighting conditions (say, outdoors). Shutter speed does not matter nearly as much if you’re shooting in the studio with strobes, an approach that will give you more control and precision. In that case, you’d use a short flash duration rather than a short shutter speed to stop the dancer mid-air. It’ll be that flash duration—not the exposure time—that freezes the action.

Share your photos in real-time
The dancer will know the correct placement of their feet and hands, so they might be able to spot errors you miss. For that reason, we recommend checking in with the dancer throughout the shoot. If you’re in the studio, shoot tethered. Discuss what they like and what they’d like to improve, and keep the atmosphere open and collaborative. In that vein, don’t forget to provide water and snacks and give your dancers breaks between setups.
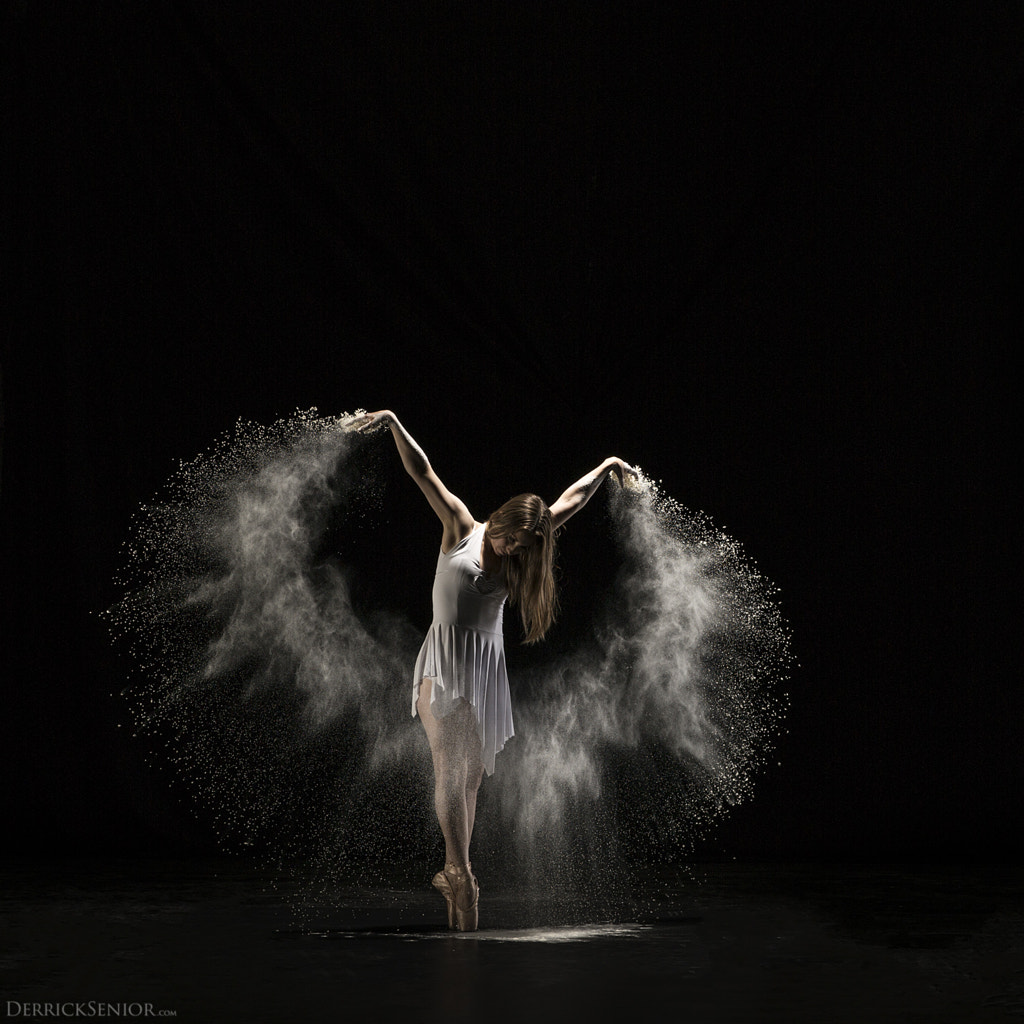
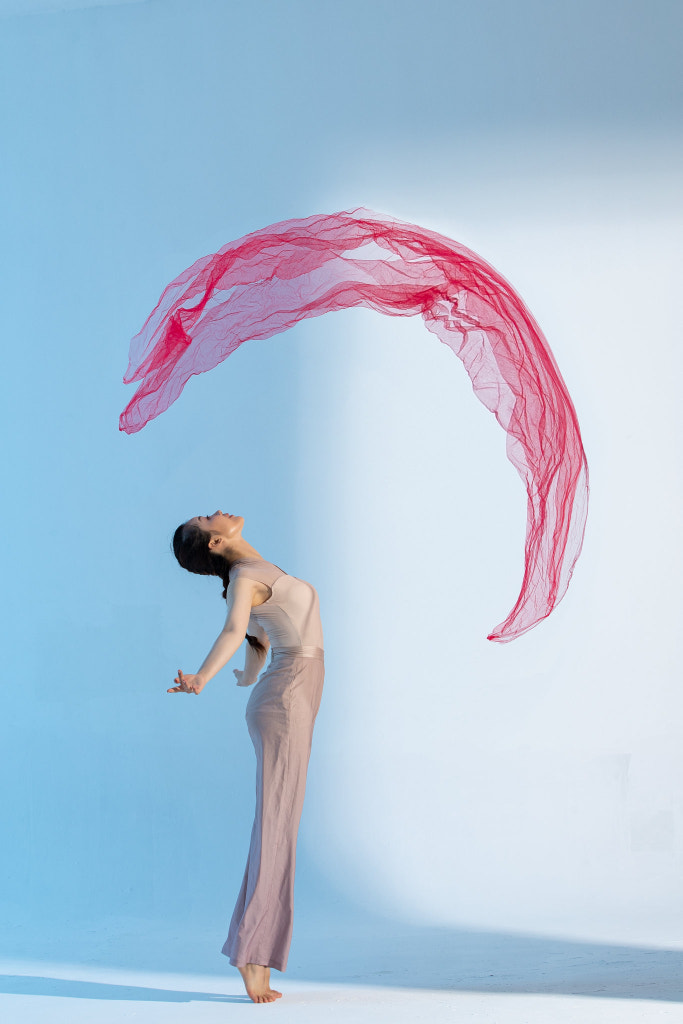
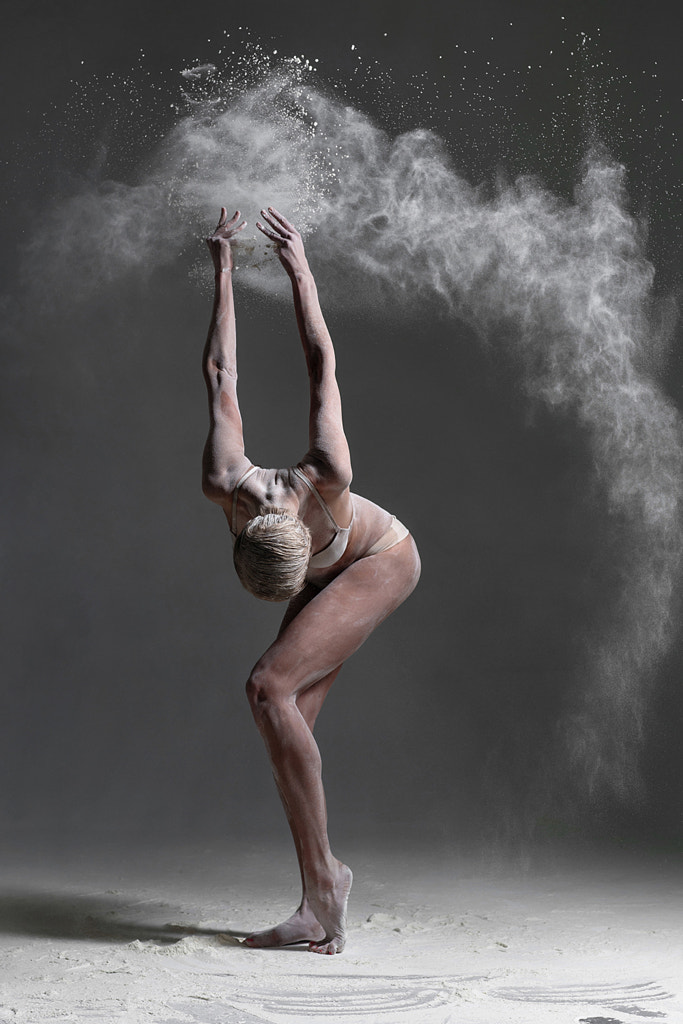
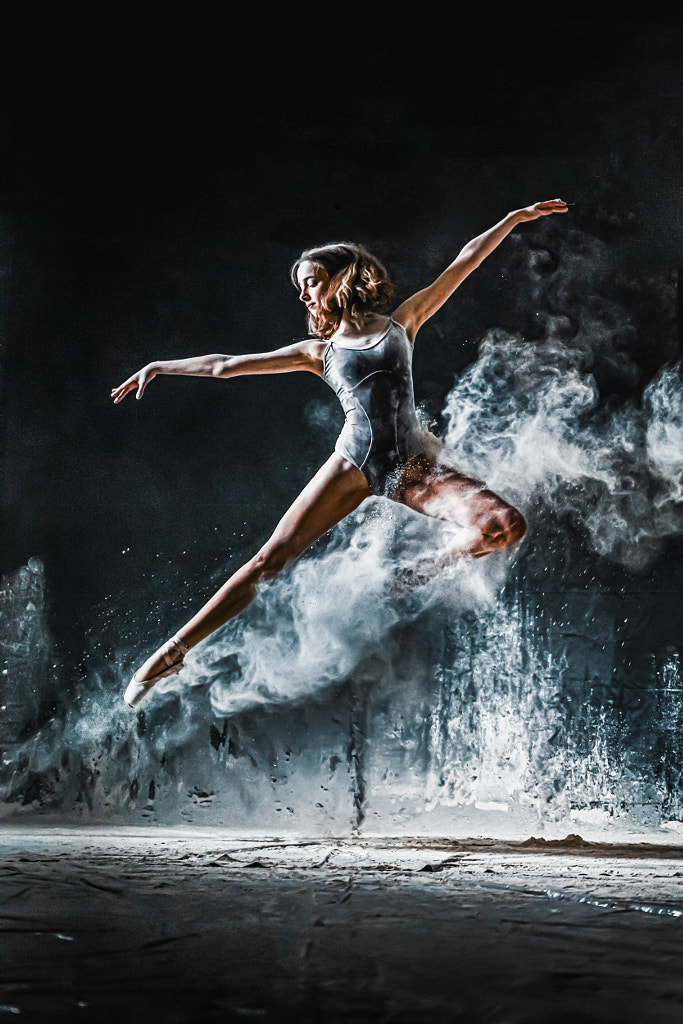
Play with powder
Like fabric, powders can create a sense of movement around your dancer, even if they’re frozen in place. Flour is a popular choice; in this case, you’ll want to use a black background to contrast with the white powder and a spacious, well-ventilated location. It also helps to have an assistant to throw the flour.
For these kinds of shoots, your best bet is to employ high-speed techniques using flash units; beginners can check out Derrick Senior’s guide to flour dance photography here to see how he does it. Prepare to make a mess (set down a tarp first), and clean up after yourself when you’re done. Other elements used to suggest motion, besides powder, can include water and paint.
Get moving
The dancer isn’t the only one who’ll move around the set or stage. To get dynamic shots, move around your model. Bend down or seek higher ground. Find new angles and ways to incorporate your dancer’s face, feet, and hands. Switch up your backgrounds.
Take as many photos as you can from a variety of perspectives. That way, you’ll have more to choose from and the best chances of getting some keepers. Martha Swope, the iconic dance photographer we mentioned earlier, used to take hundreds of photos per session, but she only released the perfect shots, in which every dancer flawlessly hit the mark.
Check out our quest and put these tips to the test:
Just Dance
Not on 500px yet? Sign up here to explore more impactful photography.

Leave a reply