The difference between an underexposed (too dark), overexposed (too bright), and perfectly exposed photo comes down to three factors: ISO, aperture, and shutter speed. ISO refers to your sensor or film’s sensitivity to light, and as we covered in a previous article, aperture refers to the size of the opening in your lens through which light enters. Here, we’ll tackle shutter speed, a setting that—like aperture—allows you to control how much light enters your camera.
“Shutter speed” and “exposure time” may be used interchangeably, as they both describe the period of time in which your camera’s sensor (or your film) is exposed to light.
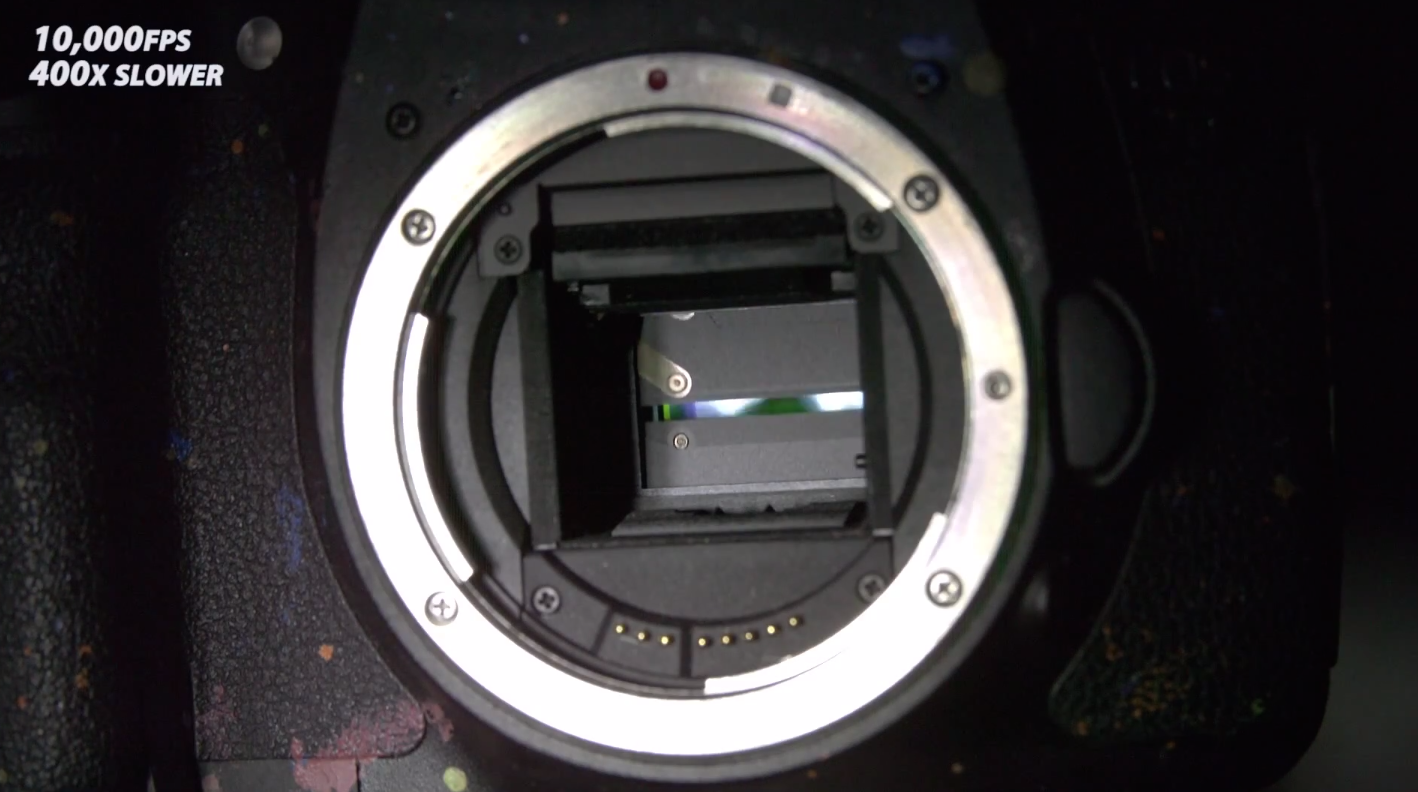
Today’s shutters can be mechanical or electronic. A mechanical shutter is a physical device that—like a curtain on a window—opens or blocks light from hitting your sensor or film. An electronic shutter, on the other hand, powers your sensor on or off to control the exposure.
Regardless of the type of shutter you use, your shutter speed will determine the amount of light hitting your sensor. With all other things being equal (aperture and ISO), a longer shutter speed will let more light into your camera for a brighter photo, while a shorter one will result in a darker photo. A shutter speed of 1/125 of a second, for example, will let in twice as much light as a shutter speed of 1/250 of a second.
If you’re working indoors in low light, for example, you might need to implement a longer shutter speed to avoid underexposed photos, but if you’re shooting outdoors on a sunny day, you’ll need a shorter shutter speed to prevent pale, overexposed images.
Low-light conditions might require a longer exposure.
Your camera measures shutter speeds in seconds and fractions of a second. Depending on whether you’re using a DSLR or mirrorless camera, you might find this setting displayed on your LCD, viewfinder, or back screen. Sometimes, it will be displayed as a fraction (e.g., 1/125, 1/250, etc.), and sometimes your display will save space by using shorthand (e.g., 125, 250, etc.). They both mean the same thing.
If you’re shooting in auto mode or aperture priority, your camera will “choose” your shutter speed for you to produce a proper exposure (not too light, not too dark), but you can control this setting by switching to manual mode or shutter priority.
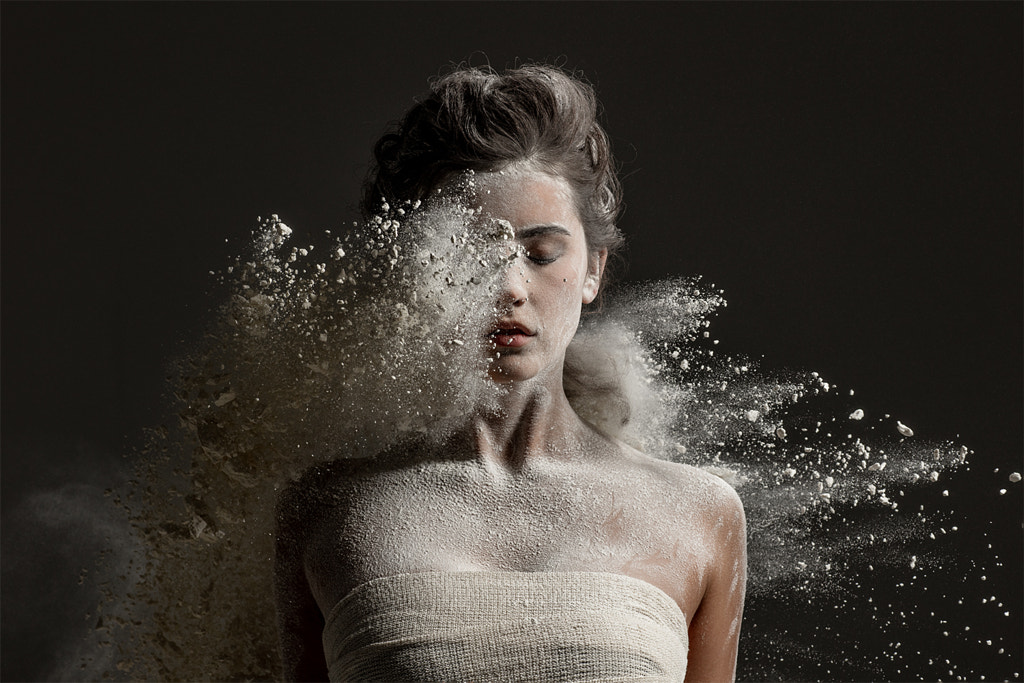
Shutter speed is essential to getting a proper exposure, but things get interesting when we consider how it affects more than just brightness. When you use a longer shutter speed, you’re brightening your shot, but you’re also changing the way you capture movement. If you’re shooting a moving subject, like a bird, an athlete, or even stars in the sky, and you keep your shutter open for a long time, you’ll end up with motion blur. Instead of sharply defined objects, your camera will capture a blur, a streak, or a trail.
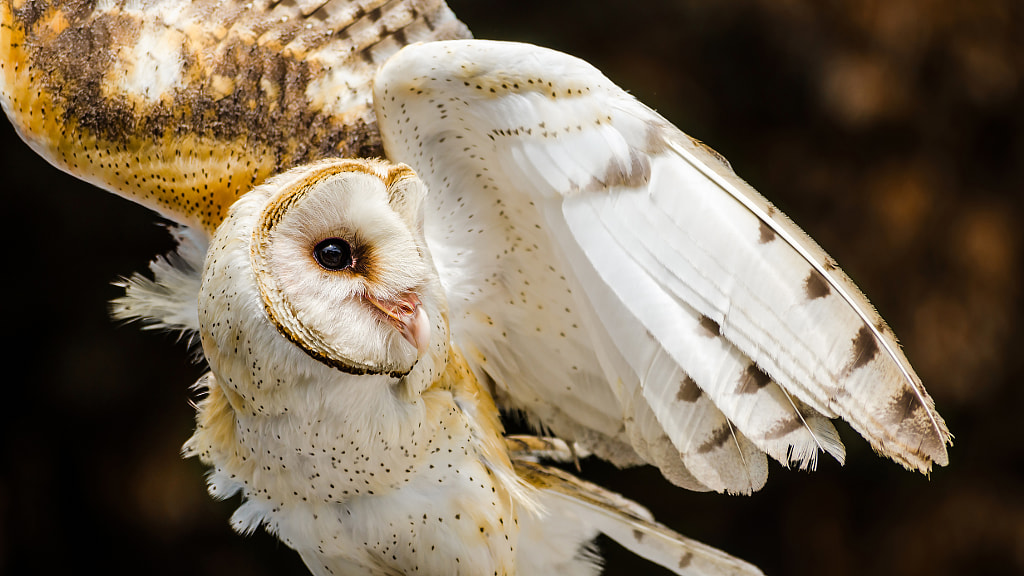
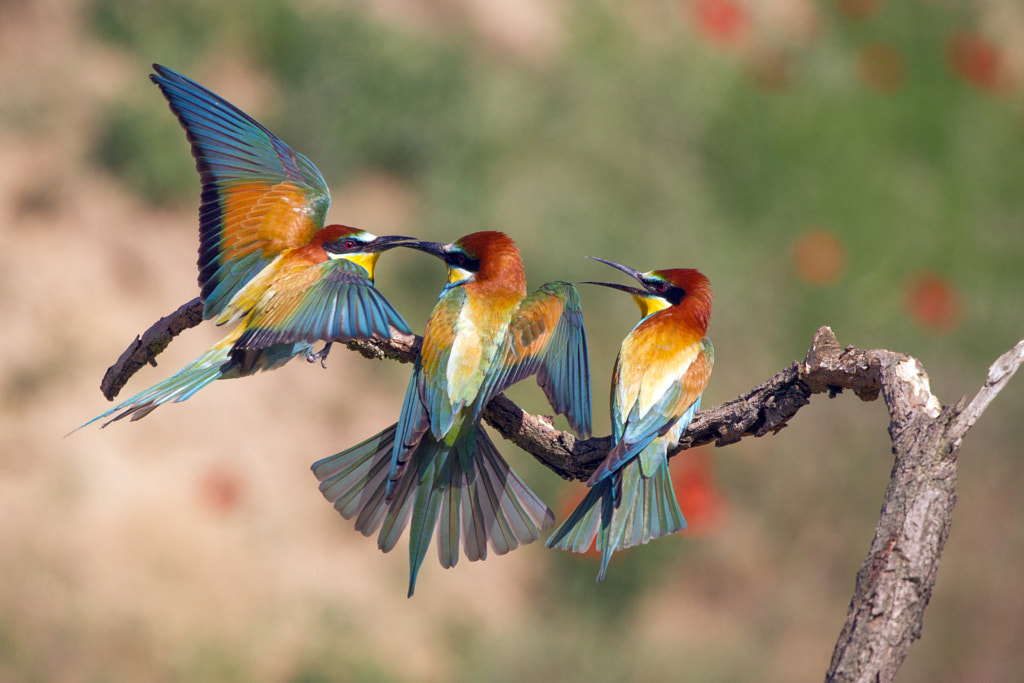
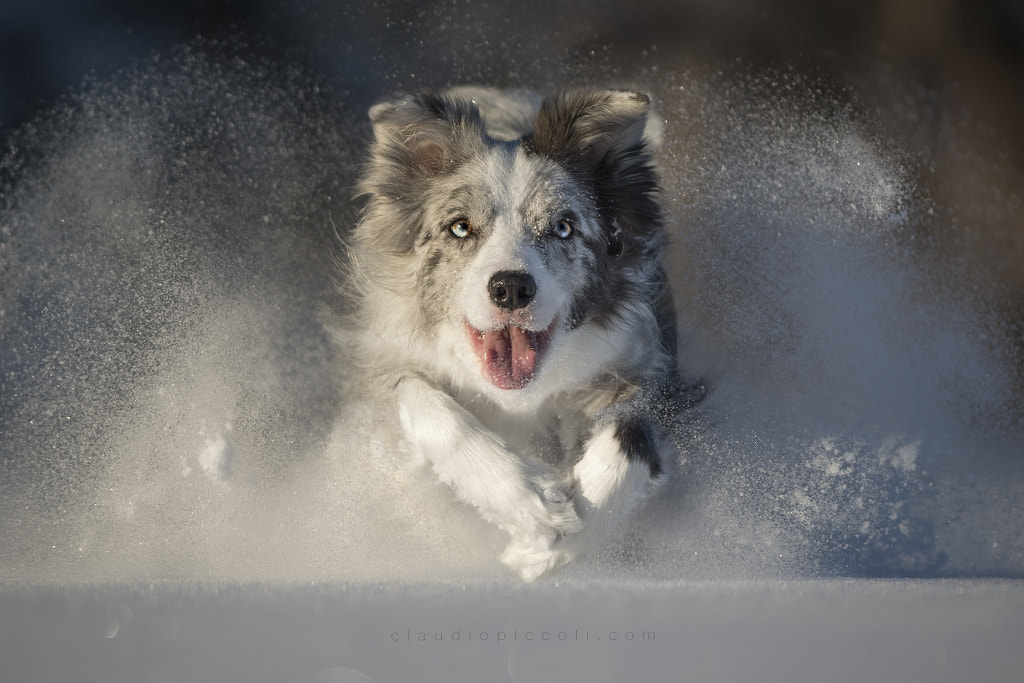
Use a fast shutter speed to freeze motion.
One easy way to think about shutter speed is to consider early cameras; in the 1800s, exposure times were long, so subjects had to remain perfectly still in order to be captured on film. If you look at Louis Daguerre’s 1839 photo of the busy Boulevard du Temple in Paris, you’ll notice that there are only two people visible: a shoe shiner and his customer. Other people moved in and out of the frame, but they moved quickly, and since Daguerre used an exposure time of a few minutes, they didn’t show up in the photo.
A fast shutter speed prevents motion blur.
If you want to “freeze motion” or capture a subject that’s moving quickly, you need a shorter exposure time. Fortunately, today’s cameras can capture photos at speeds of 1/4000 or 1/8000 of a second, allowing us to see phenomena that are imperceptible to the human eye—and likely unimaginable for early photographers like Daguerre. For wildlife and sports photographers, high shutter speeds are critical; keep your shutter open just an instant too long, and you’ll blur the action.
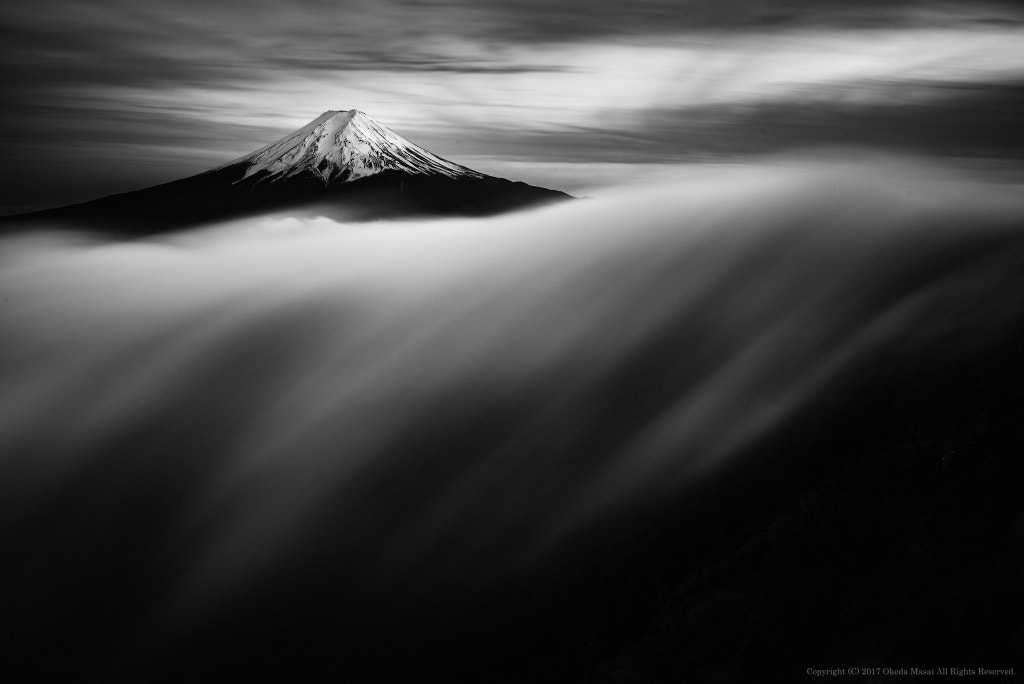
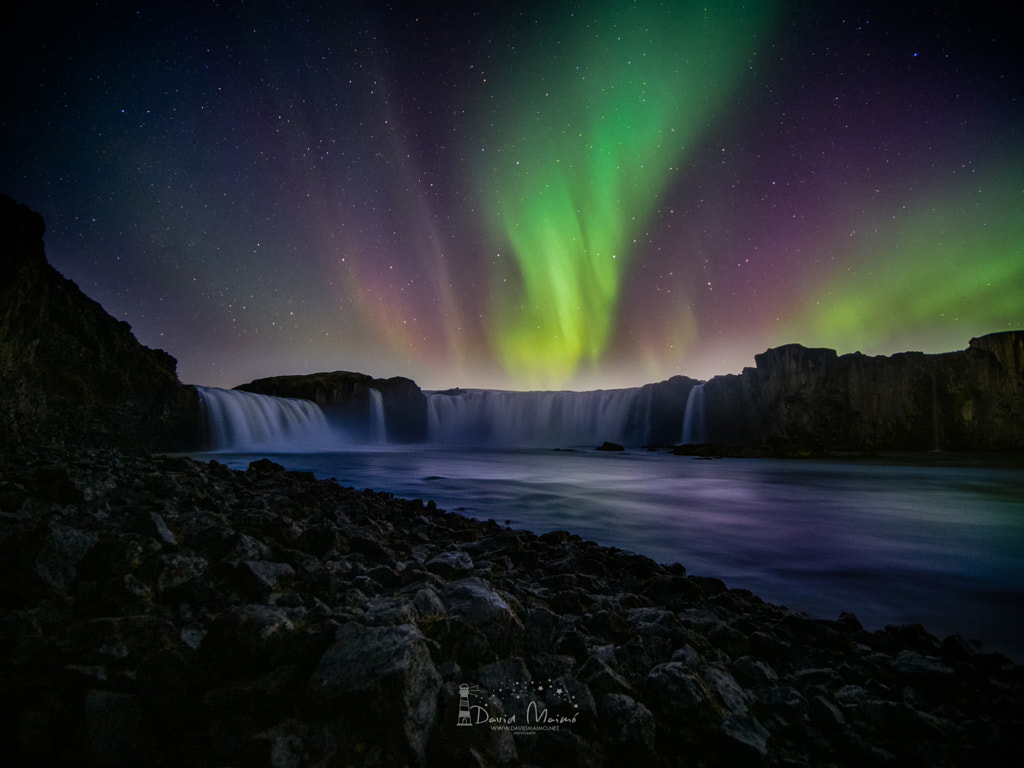
A longer shutter speed is often used in landscape photography.
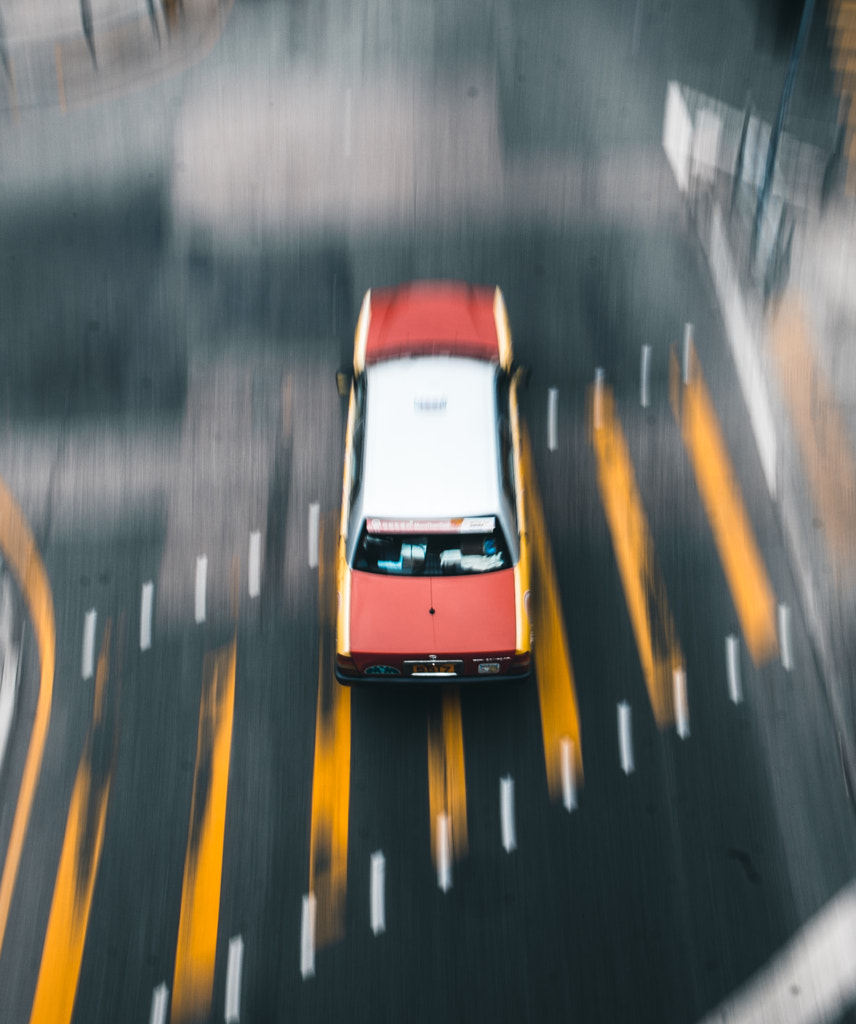
Of course, blur isn’t always something you want to avoid, and it can be an important artistic decision. Landscape photographers, for example, sometimes prefer that ethereal, “milky” look when working with waves and waterfalls, and they achieve it with an intentionally slow shutter speed. Similarly, photos with light trails require a shutter speed that’s long enough to chart the movement of the stars across the sky—or cars across a road.
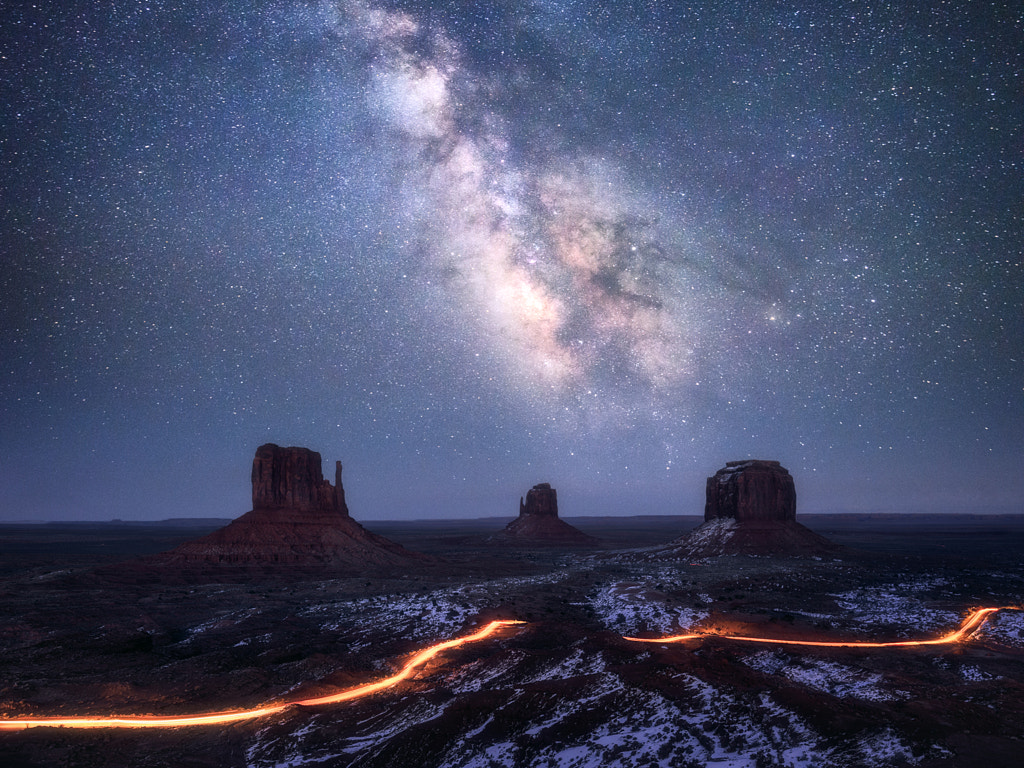
Use a longer exposure time to create light trails.
A shutter speed of about ¼ or ½ of a second is generally considered slow, but most cameras can handle longer ones of up to 30 seconds—and more if you use a remote trigger.
When working with long exposures (slow shutter speeds), a tripod is a must-have. Even if you want to capture motion in your photos, you don’t want to record camera-shake, and it’s impossible to keep the camera completely steady when shooting hand-held.

As a rule of thumb, you’ll need a tripod or some sort of stabilizer at any shutter speed that’s slower than the inverse of your focal length. Longer lenses require faster shutter speeds, so while you might be able to get a sharp image at 1/60 of a second using a 50mm lens, a 100mm lens might necessitate a shutter speed of about 1/125 if you’re shooting hand-held and don’t want blur.
If it’s bright and sunny outside and you want to get that “milky,” long-exposure seascape look we discussed earlier, keep in mind that you run the risk of overexposure due to how much light you’re allowing into the camera. To counteract that effect, you can use a neutral density filter to reduce the intensity of the light.
Finally, we touched briefly on the difference between mechanical and electronic shutters, but there are a few variables to consider when using each one. Of course, a mechanical shutter makes noise because it’s a physical component that moves, while an electronic shutter is silent. Electronic shutters also tend to have a faster frame rate.
On the other hand, mechanical shutters tend to have better (or faster) flash synchronization than electronic ones. If you’re using an electronic shutter, you also might notice some lateral distortion or skewing with fast-moving subjects or banding with artificial light. Each type of shutter has its own benefits and drawbacks, so it’s worth experimenting to see what works for you.
A high shutter speed allows you to capture details in fast-moving subjects.
As with aperture and ISO, any change in shutter speed will have a direct effect on your exposure, so if you change one corner of the so-called “exposure triangle,” you’ll need to adjust one or both of the others to compensate for it. If you want an image without motion blur, for example, you’ll need a faster shutter speed, and accordingly, you might need a wider aperture to let in more light.

Understanding these three elements and how they affect one another will give you more control over how your photos look, and that’s not just important from a technical perspective but also a creative one. Fast shutter speeds are usually associated with sports and wildlife photographers, and long exposures with landscape photographers, but there are no rules when it comes to experimenting with shutter speed. You can use it to create cool blurring effects, or freeze motion with crystal clarity—the choice is yours.

Not on 500px yet? Sign up here to explore more impactful photography.

Leave a reply