Ignacio Palacios is best known internationally for his travel and landscape work. He has been continuously travelling around the world since 1998 but since he came to Australia in 2008, he has focused on photographing landscapes and using digital imaging techniques to produce more creative and fine art work.
His images have been published in photographic magazines and books all over the world including National Geographic, Australian Geographic and Lonely Planet Guides.
To see more of his work, follow him on 500px, visit his website, or check him out on Facebook. This article originally appeared in Australian Photography Magazine and is being republished here with express permission.
I have been photographing rock pools since I came to Sydney in 2008, but it’s only since February 2013 that I set myself a project to photograph every ocean pool in Sydney, publish a book, and exhibit the photos.
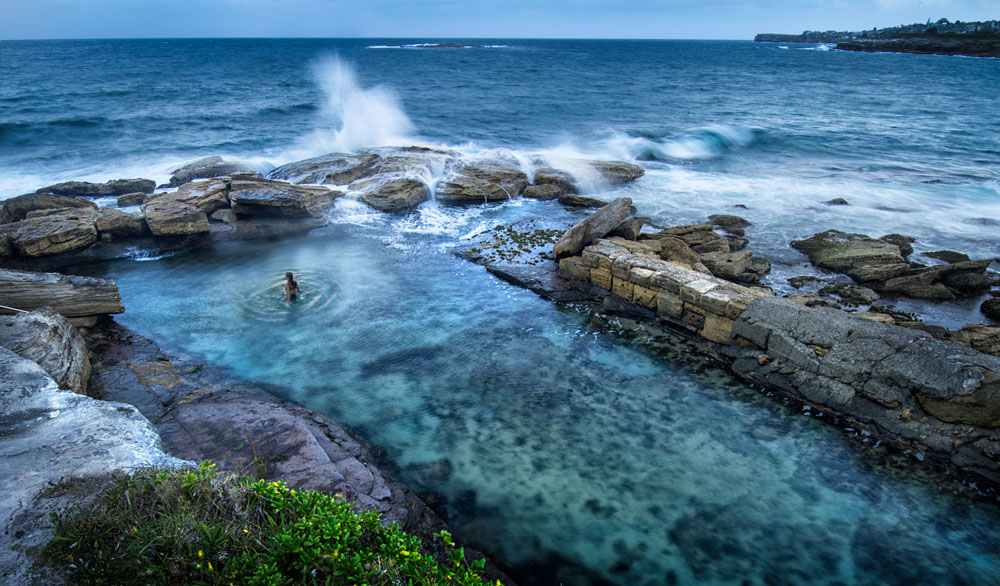
Sydney’s coastline and harbour have a series of beautiful rock pools that have been cut into the base of cliffs and rocky headlands. Nearly every Sydney beach has one ocean pool which is usually located at the southern end, to give swimmers some protection when the southerly winds bring cold air and big seas. Some were built by wealthy people in the 1800s, others by convicts. They come in all sizes and shapes and each one has its own colourful history and interesting anecdotes.
I have been living in Sydney for five years and have seen beautiful photographs of these rock pools from other photographers but I always wondered why no one had ever published a book about them. After a few months of intense shooting, I think I might have found the answer: it’s hard work!
One of the challenges is being in the right place to shoot when the light, tide, swell, and weather are just right. In photography, the best light occurs around dawn and sunset. High tides and big swell are also desirable conditions. Even with the best planning, sometimes it just doesn’t work out!
My passion for swimming and photography was the catalyst for this project. When I was young I was a swimmer in a small local swimming club in Spain and when I came to Sydney I hadn’t swam seriously for 20 years. In October 2009, I settled at Dee Why beach and loved the sound and the smell of the ocean, the breaking waves, and the Australian beach culture. I soon discovered that Australia is the most swimming-crazy country in the world and I became crazy about it too!
1. The Best Light
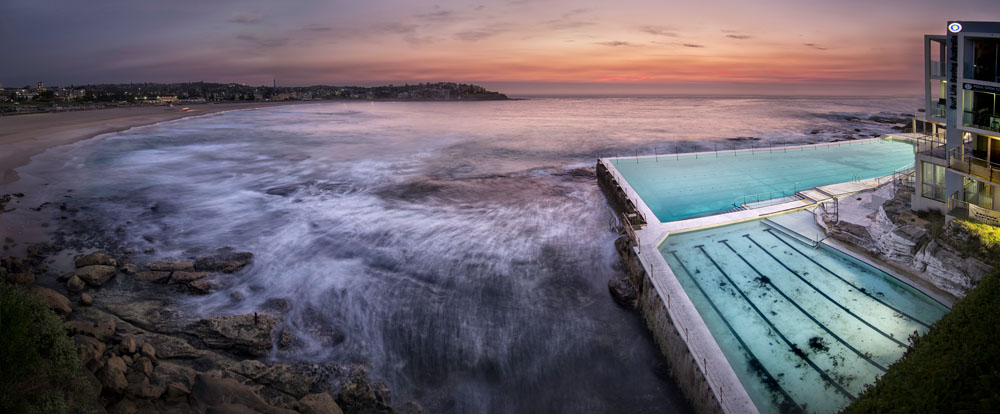
I have photographed all of Sydney’s coastal rock pools at sunrise and sunset. Pre-dawn sunrise is my preferred time to photograph as it’s really good in terms of light. During sunrise (and regardless of the weather conditions), there are always a few swimmers and that can add some magic to the photos.
Early in the morning before the sun is up or late at night after the sun has set you can also forget about using filters.
You have to arrive early at a location to find a good composition. Once the sun has begun to peer over the horizon the colours change very quickly and it is less dramatic. In winter you might only have a few minutes before you lose that mystical soft light.
The light at sunrise and sunset is always the best but in some rock pools, sunrise might make more sense than sunset or the other way round.
It is worth noting that most of Sydney’s pools are illuminated by sodium vapour lights. I hate the colour cast produced by some of these lights and you will need to remove it in post-processing.
Nature is the best teacher and with time you will be able to see and predict when and where to expect specific types of light. There are no shortcuts with this. Only years of dedication and practice will give you this ability.
2. Understanding the Weather
Keep an eye on the sky and weather forecasts. Get into this habit and you will soon learn when not to wake up at 4:15 am or when not to miss dinner with your family.
The weather is complex and unpredictable and with some knowledge of clouds and weather patterns, you will be able to adapt and change location or subjects to photograph. I always check the weather forecast the day before and if it looks promising, I set my alarm. In the morning, if the sky looks good and I feel that there is potential for a great sunrise, I pick up the equipment and go. I normally only cancel if it is pouring rain.
Weather forecasts are not that accurate. I always say that getting a great sunrise is a question of statistics and perseverance! The more time you spend at a location the better photographs you will produce. To say that a different way, the more often you wake up early and shoot, the luckier you will get.
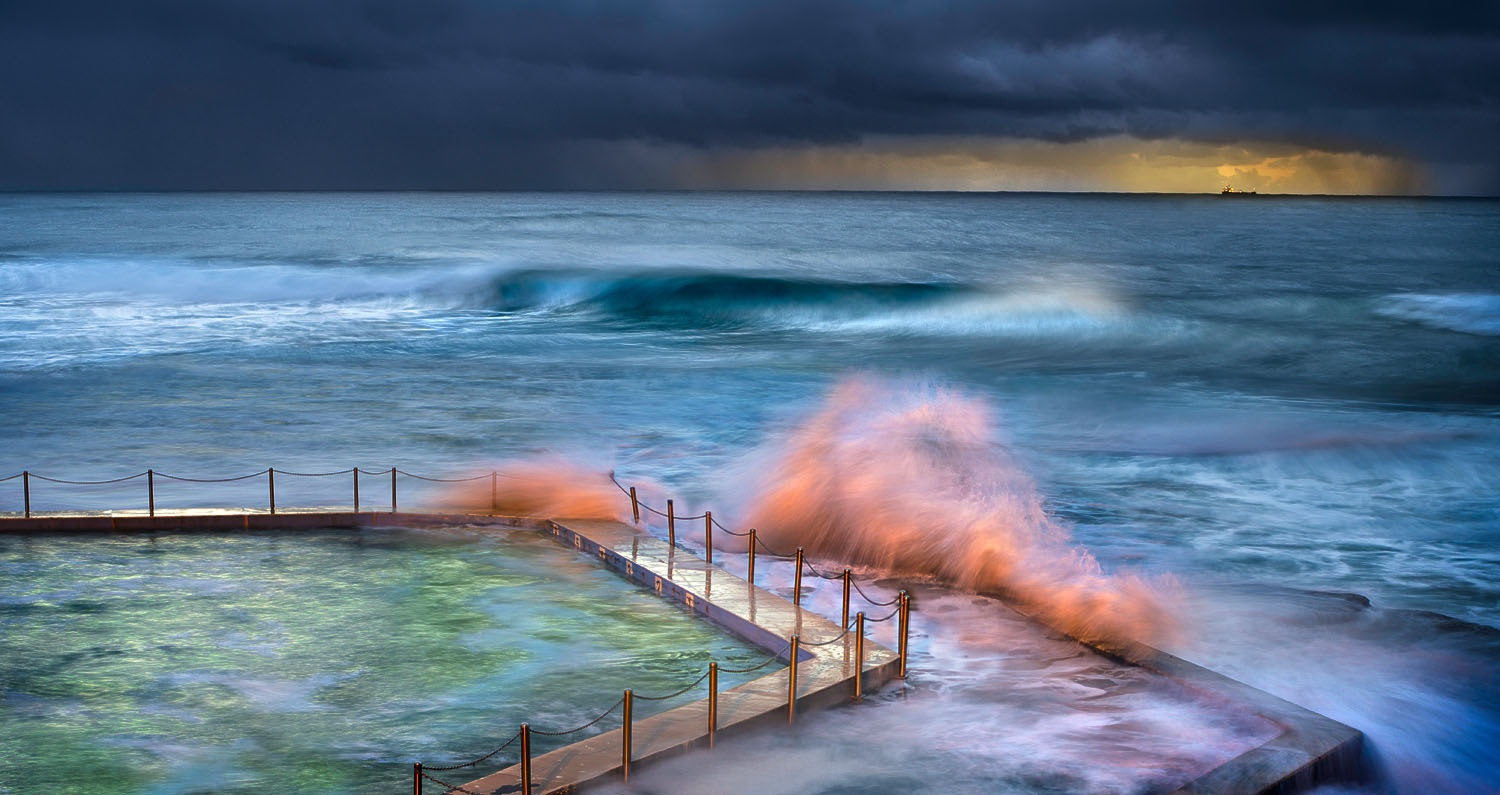
In any case, make the best of bad weather. Try to be ready and anticipate anything Mother Nature throws at you. Although unpredictable weather and big swell can make shooting landscapes a bit of a challenge, this is when you can capture some of the most dramatic and compelling photographs.
3. Swell and Tides
As well as checking the forecast and sunrise and sunset maps, make sure you check the tide and swell. Sea conditions will not only make a huge difference to your photographs, it’s important to know what to expect from a safety perspective. Sometimes it is too dangerous to access and photograph some of the pools at high tide from some particular points.
At sunset in particular I always tell my wife where I am going and if I change my mind I send her a text. It’s not fun having to climb a cliff in the dark with 10kg of gear on your back. Respect the sea and always be aware of what the tides and swell are doing. And keep a mobile phone with you in case you get into trouble.
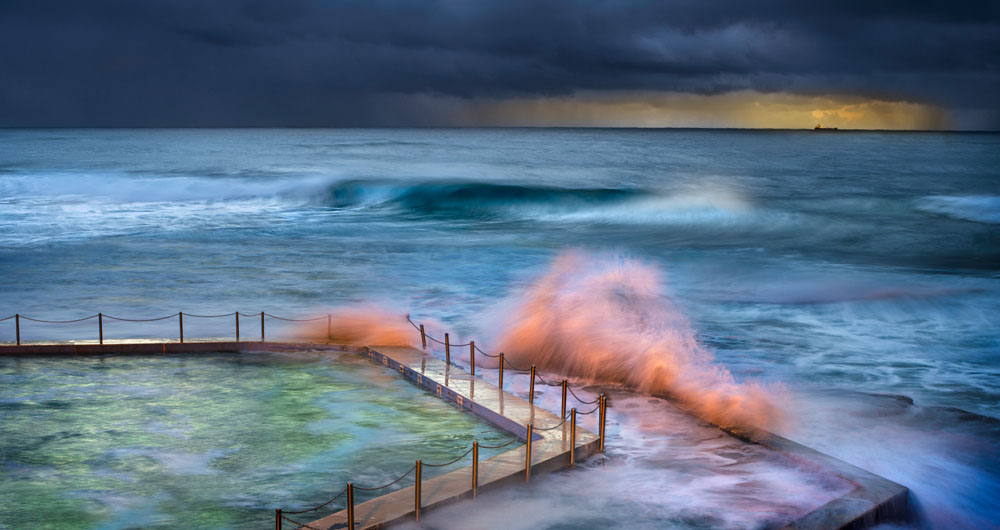
Mid-High tide is my favourite time to shoot when mini-waterfalls form around some of the most exposed pools. In some of the pools, when the tide is lower, rock shelves are revealed and there are lovely waves and water flow that surround the pool. I find that it is better to photograph some rock pools at low tide (Giles or South Maroubra for example) and others shine at high tide (such as Mona Vale, Avalon and Mahon).
4. Seasonal Changes
The seasons have a key effect on the way the landscape is illuminated. In winter, the sun’s trajectory is far lower across the sky and the lower angles mean very flattering lighting and longer shadows.
The seasons also have an important effect on lighting and air quality. Mist and fog can be used to drop contrast levels and poor air quality can actually benefit your photographs and create interesting visual effects.
For landscape photography, the winter months are my favourite. The coast is often wilder, the skies are more dramatic and the air is clearer, which means more visibility and clarity. Summer is my least favourite season, mainly because I have to wake up a couple of hours earlier!
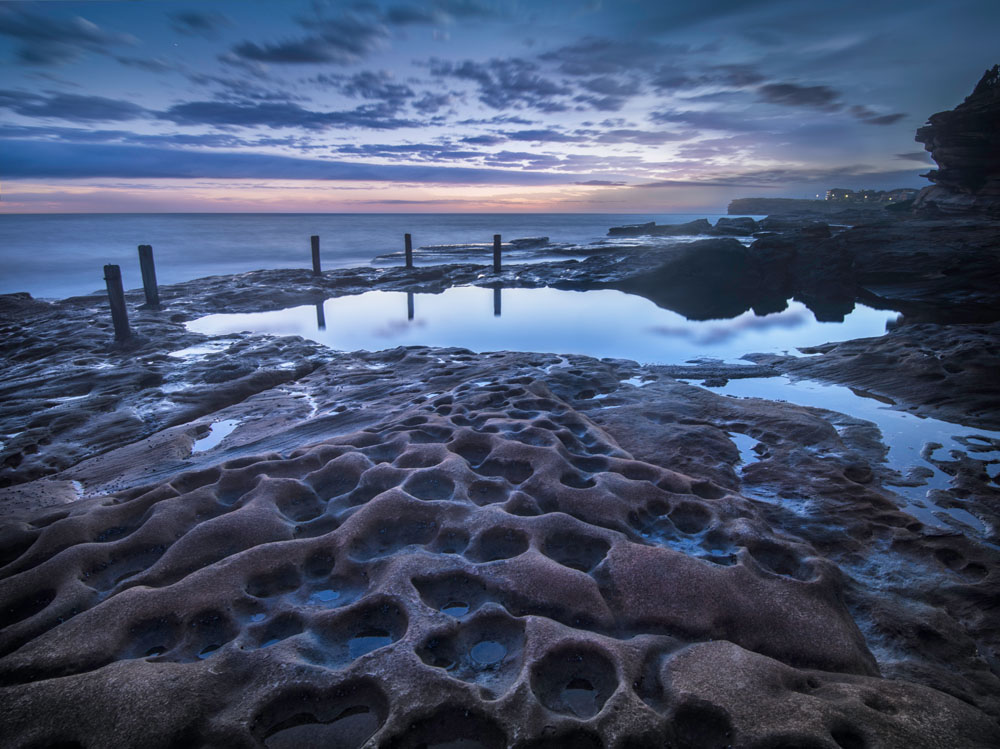
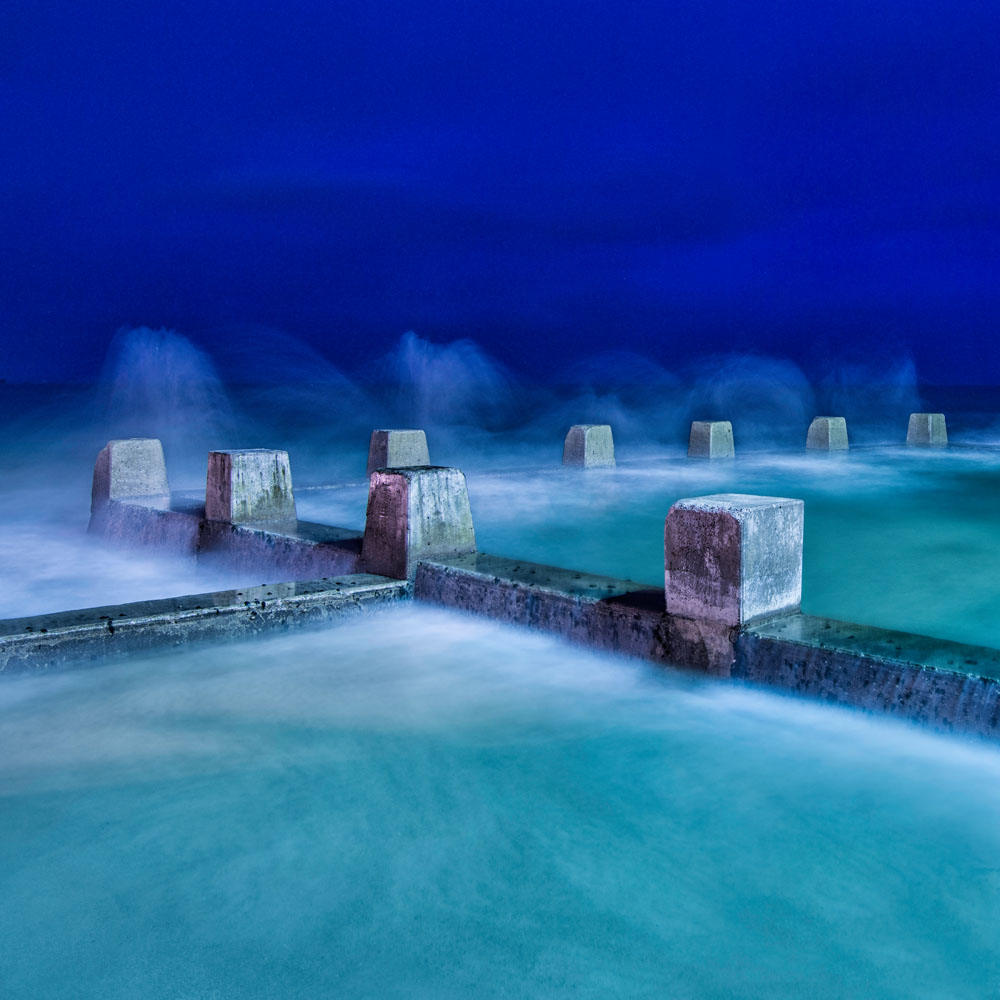
5. Slow Shutter Speeds
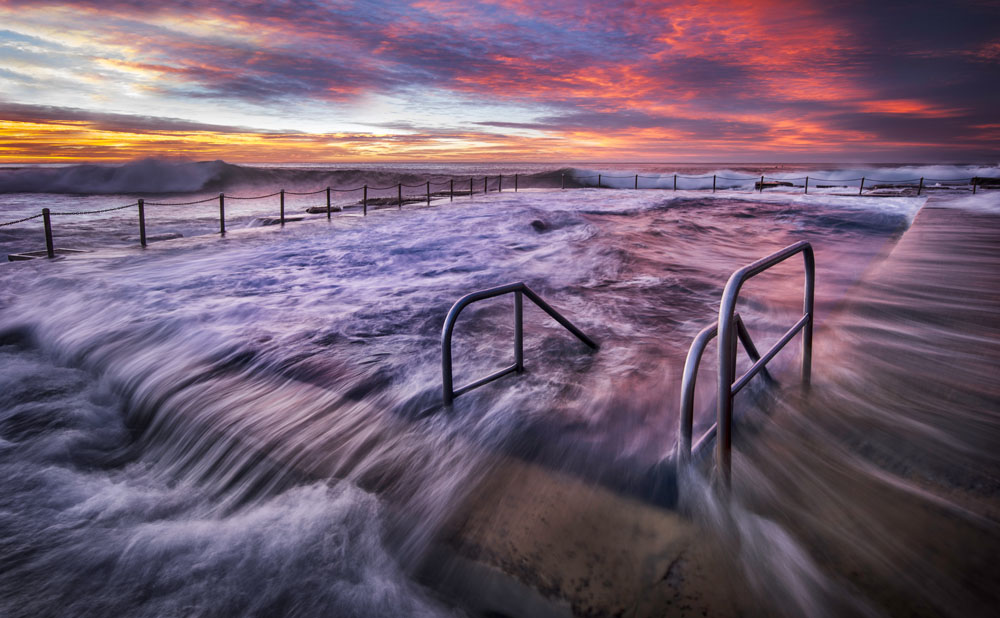
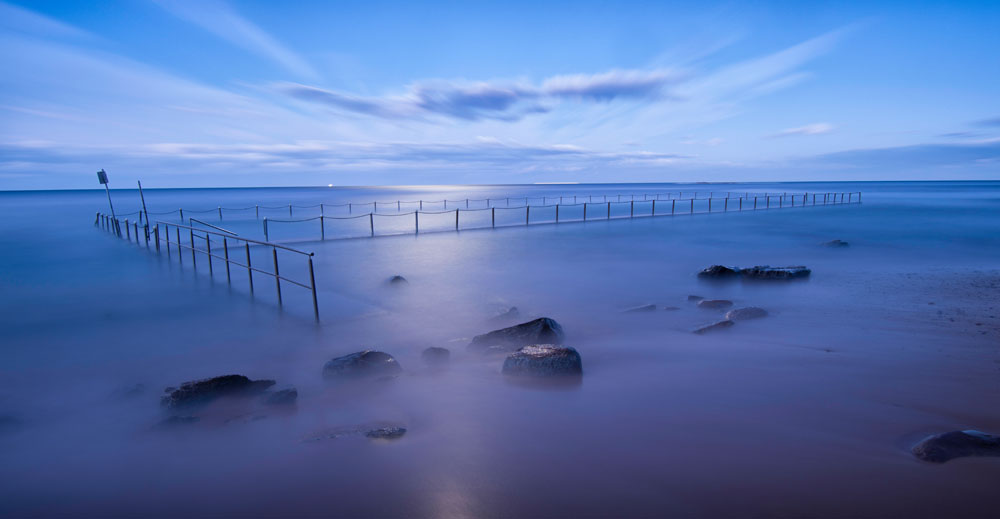
Water is an ideal subject when learning about shutter speeds. I love long exposures to blur the motion of waterfalls when I photograph along the coast of Sydney. An exposure of a few seconds will retain some detail in the water but if you expose for a few minutes the sea will take on a milky appearance.
If the exposure goes for a few hours and the sky is clear, you will be able to get star trails. You can also try to photograph the milky way and pinpoint lights of stars. They will require much faster shutter speeds and much faster film speeds. With the camera set at f/2.8 and high ISO and use the “500 rule”. This rules consist of dividing 500 by the focal length of the lens you’re using. So, if you have a 24mm lens on a full-frame camera, you will set your shutter speed to 20 sec. (500/24 = 20.83). If you’re working with a crop sensor camera be sure to account for the crop factor.
A tripod and a shutter release cable are mandatory. Put the camera in bulb mode for a few seconds or an hour and experiment with different subjects.
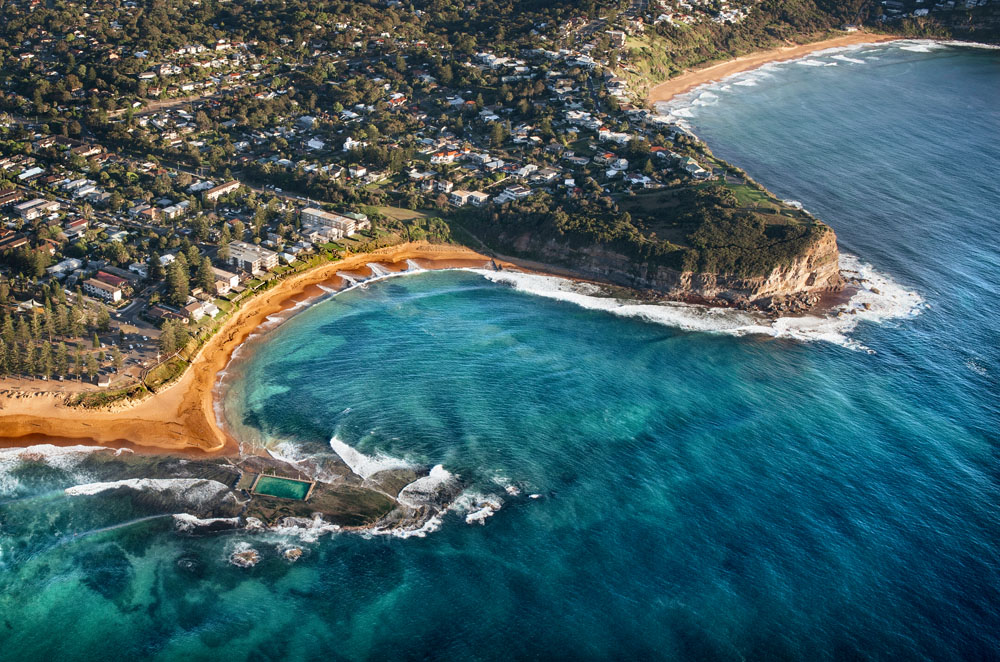
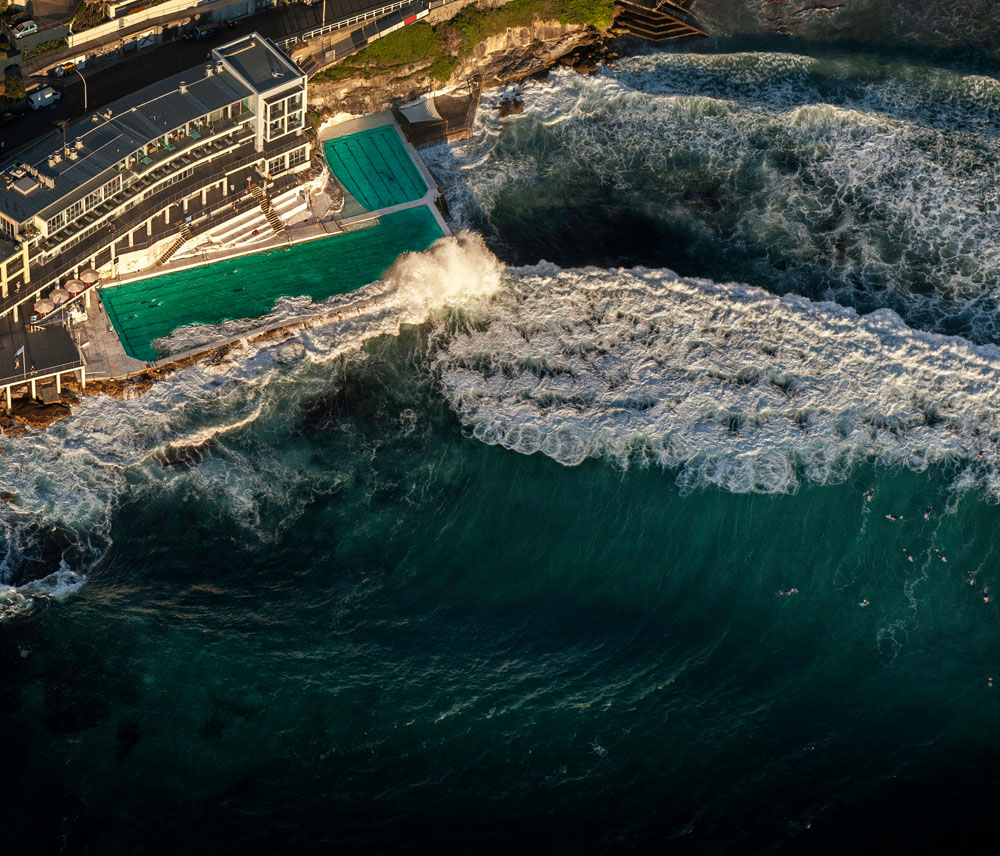
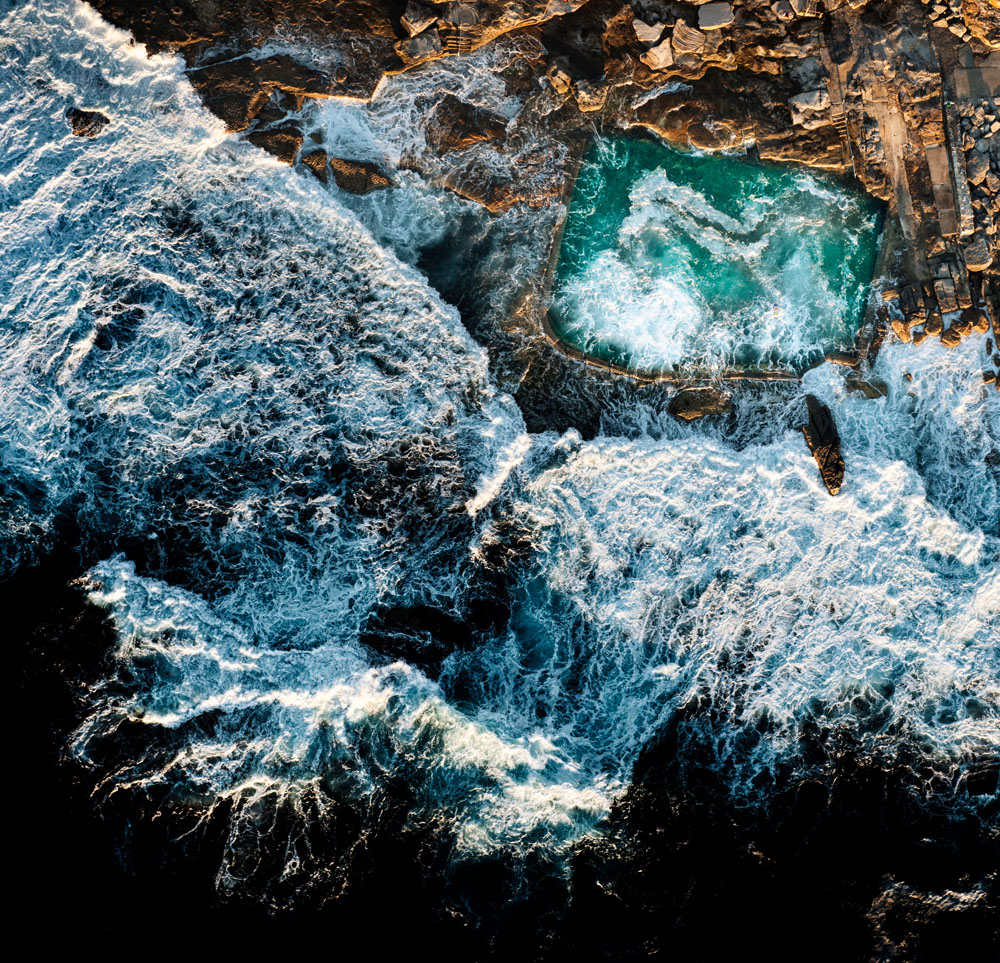
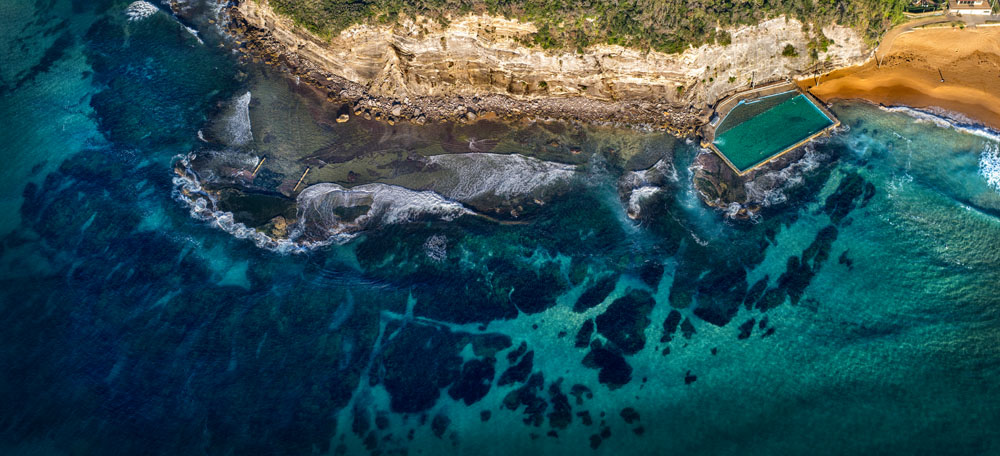
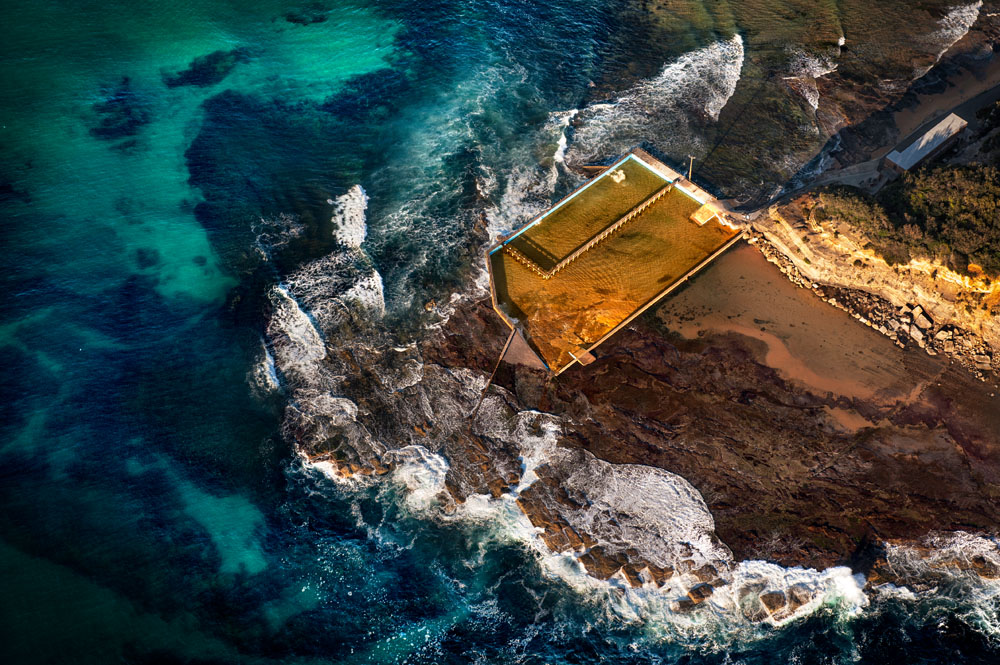
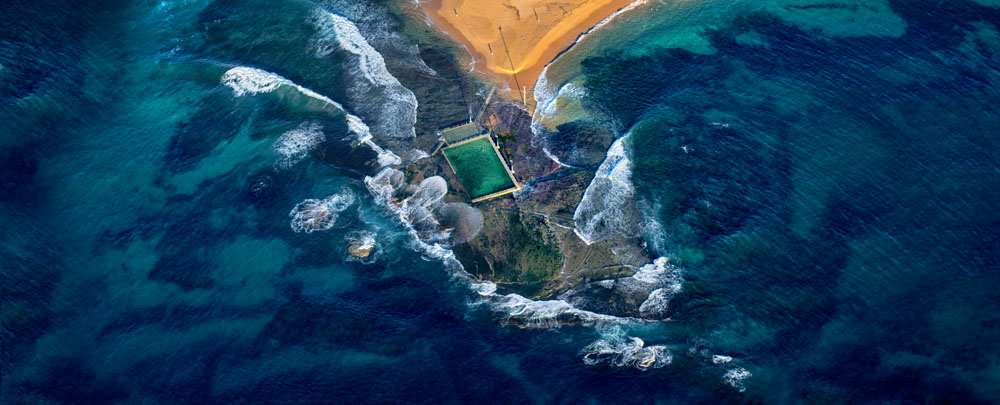
6. Aerial Photos
Aerial photography is an important photographic skill if you shoot landscapes, but it can be a bit tricky. From the air the world looks very different, and you can find a lot of interesting patterns and subjects that you can’t find from land. I love aerial photography, but to charter a chopper or a light plane is very expensive. A cheaper alternative is to photograph from a cliff with a long lens. Sydney Heads offers some spectacular views but be safe and stay within the prescribed viewing areas.
A helicopter flight will cost you around $850/hour and it took me about 90 minutes to cover the whole length of the coast from Little Bay to Palm beach. Unlike photos that are taken from land, aerial shots can be taken in the middle of a sunny day.
With a helicopter, you can fly with your door removed and so the image quality of your shots will be better than if you shoot from a light plane. Also, from a helicopter you have more manoeuvrability to control what you want to shoot in terms of angles and heights.
The vibrations of the helicopter are quite significant and you need to hold your camera tight without exposing it to the wind from the outside.
If you can, take two cameras. For my aerial images, I took a medium format camera and a Nikon DSLR. I would also recommend you use a zoom lens on the DSLR. For me, it is better to sacrifice a little bit of quality for the convenience and flexibility of a zoom lens and the possibility of pushing the ISO to 400 or 800.
Due to flight restrictions you might not be able to fly after sunset so make sure that you take off early enough to cover the locations you want to shoot. At sunrise you don’t have such a problem, you are allowed to take off just after sunrise and then you will be able to stay in the air for as long as there is fuel in the helicopter. And that can be dangerous because if you are enjoying it too much, you might end up with a huge bill at the end of the ride!
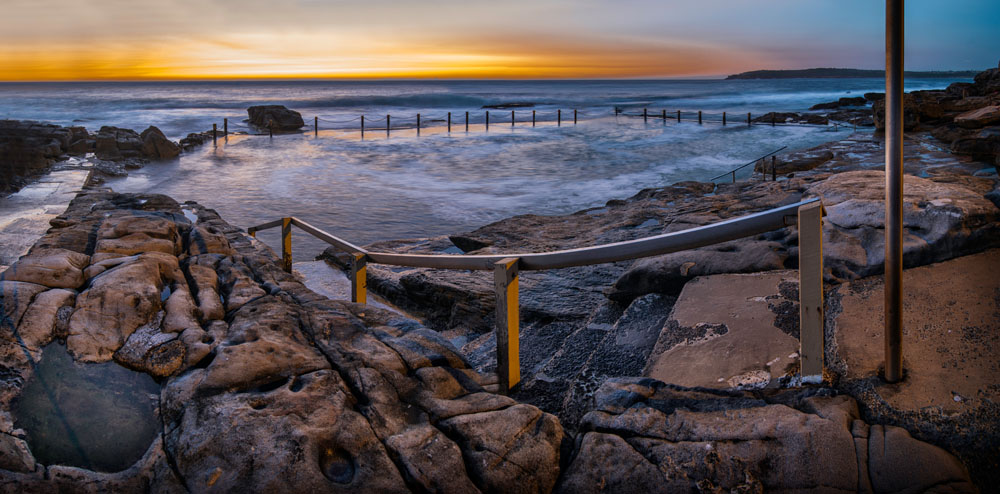
7. What to Shoot
As well as the pool, beach and headlands, there are beautiful details around the pools such as stainless-steel rails, chains, stairs, and rusty outlet valves with make lovely features to photograph. Water flows can often be seen flowing out of the pool creating a multitude of mini waterfalls.
8. Camera Technique
A good quality tripod is mandatory in landscape photography. Remember, you cannot correct a blurred image in Photoshop.
Try to photograph in RAW as this will get you the finest image quality possible. The RAW file are uncompressed and their dynamic range (range of tones from black to white) is far greater than any JPEG file. This means that you can record more details in the highlights and shadows of your images and you will not have to worry about white balance as it can easily be corrected in Camera Raw or Lightroom.
I always shoot in aperture priority mode and I never go above f11. Each lens has a sweet spot and if you are looking for maximum image quality you should not push the aperture to f22 (or f32 in the case of medium format cameras) as this will create an optical issue called diffraction which will make the photograph softer. Therefore, although f22 will get you the maximum depth of field, using f9 or f11 actually creates a sharper photograph.
As you are using a tripod you should take advantage of the option to shoot at ISO 100 (or lower if your camera allows). I always overexpose a little bit to shift the histogram to the right to capture more detail. I do this by using the exposure compensation +/- adjustment button.
9. Composition
You can follow the rule of thirds, the golden rule, leading lines, perspective, and framing techniques but you can also break those rules and create something completely different. For some photographers the only rule that works is less is more (too much happening in the photograph can look very untidy).
For me composition is the key element when it comes to getting great shots. The elements in the photograph should be balanced and have some space to breathe. Find harmony between the objects in your scene by moving around the rock pool. Think creatively about how to engage with the scene and find new angles and perspectives. These rock pools in Sydney have been photographed many times. To find something original can be tricky.
Cropping the image can help to make a stronger composition by removing distracting elements or creating a more powerful arrangement in the photograph (e.g. cropping into a square format).
But remember that composition is not just the organisation of objects and lines (such as clouds or water trails) in a frame. Colour, contrast, light and shadows are also an important part of the composition and can significantly improve your photograph.
10. Post-Processing
I admit I am not a purist and love retouching my photographs. I enjoy photographing in the field as much as I enjoy editing and creating them at home. It is true that brilliant photographs rely on unique conditions but those conditions are sometimes difficult to find and processing in software such as Adobe Photoshop is a good way to make corrections and enhance your photographs.
In my view all photographs need retouching. As a minimum, white balance, levels, contrast and sharpening should be optimised. Some images need more post-production than others but I go a step further to feed my curiosity and creativity and I push those pixels as far as I can without making my photographs look too artificial or unnatural.
There are many different techniques to achieve similar results. With Photoshop, you will not be able to transform a bad image into an amazing photograph but you will be able to turn an average image into a good one or a good well composed photograph into a great one.
I usually do some slight adjustments in Camera Raw and then I get a bit more creative with Photoshop and other editing packages such as NIK Software.
11. Convert to Black and White
Changes are free in the digital era and I often end up with several versions of the same image. Usually I create a black-and-white image and there are many techniques out there to convert colour images to black-and-white.
I normally use NIK Software to create a black-and-white version I like and then tweak it a bit further in Photoshop. Generally, I convert to black-and-white when the scene does not have a great deal of colour interest.
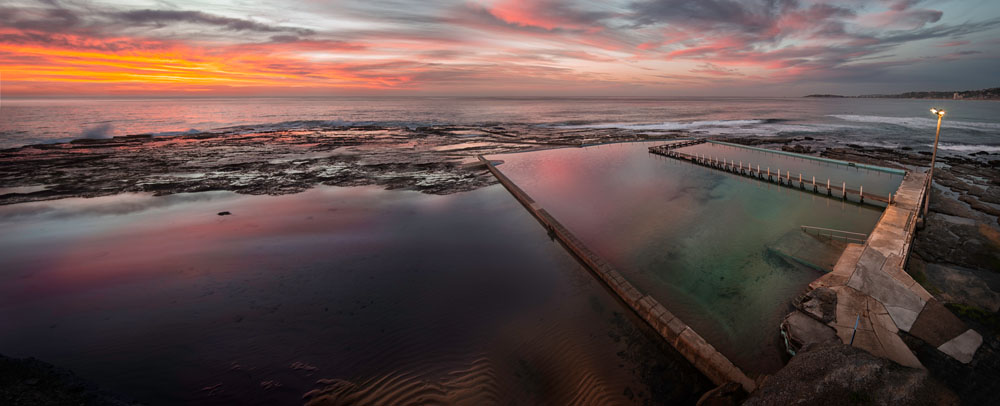
12. Shoot Panoramas
When shooting panoramas I set up the camera on manual mode and start shooting from the brighter end of the scene, making sure that I don’t clip the highlights in the histogram. If you leave the auto white balance setting on, you might have to correct it later in Camera Raw.
If you want to get a good panoramic photograph by shooting multiple overlapping images, and then stitching them together on the computer you should consider two important factors carefully:
First, keep the camera level as you pan left/right. This is critical otherwise when you stitch the images, the sea level will not stitch well and you will have to spend a lot of time correcting the horizon in Photoshop.
Second, if you are taking close subjects like rails or chains, it’s essential to eliminate image parallax error or they will not stitch well together. You can do this by positioning the optical centre of the lens over the point of rotation. To do this I use a Multi-Purpose Rail with integrated Clamp.

If you still have problems with horizons and distortion, you can post-process it in Photoshop using a tool called Warp (Edit > Transform > Warp). This normally resolves 50% of horizons for me, the rest, I have to manually clone to make them completely horizontal. Check all rails and chains as sometimes you will have to do quite a bit of cloning on areas where Photoshop or PT Gui cannot manage the alignment.
Once you open your RAW photo with Camera RAW, synchronise the photographs and open them up in Photoshop or PT Gui to create a panorama.
13. Which Lenses?
In landscape photography, changing your lens or focal length can have a huge effect on the makeup and mood of the photo. Wide angle lenses are very popular in landscape photography and will get you the big scene but sometimes, to isolate the point of interest and create images that reveal more details than can be seen with the naked eye, you will need a telephoto lens.
This will also flatten the perspective, making the foreground and the background appear closer to each other.
14. Which Filters?
Filters are very handy, specially for coastal and landscape photography. In my bag I always carry the following filters:
1. A B+W ND 3.0 to slow the exposure by ten stops (I use it to shoot a long exposure in the middle of the day). This filter factor is 1000x which means that only 0.1 percent of the light passes through it. Be aware that you have to focus and compose without the filter attached as once is adjusted you can barely see through it. I love using this filter on dull days. This creates a fantastic fine art feel to seascapes when shooting very long exposures. You can also use the Lee “Big Stopper” which reduces the light by 10 stops. Each filter will produce a different colour cast that can be corrected in Photoshop, but only if you shot RAW!.
2. A polariser filter. Polarisation occurs when the sun is right on top of you. With a polarising filter you can add drama to the sky and make it bluer (polariser filters cut the reflected light from particles in the air so the sky brightness decreases in relation to the clouds. This exaggerates the whites by darkening the blues, which increases both the contrast and the dramatic feel). They are also very useful for enhancing rainbows against a background. They also reduce the light by about one stop.
However, polariser filters do not work well with wide angles. It causes an effect called ‘over polarisation’ and produces horrible vignetting. I use the polariser to make the sky bluer when the sun is on top of me or to remove/reduce glare and reflections.
3. To reduce the intensity of the light, I use a neutral density (ND) filter with a 3 or 4 f-stop reduction for photographs taken after sunrise (or just before sunset) when the light is becoming a bit strong. They are useful to soften the flow of the water for waterfall scenes and seascapes. A graduated ND filter (GND) has the same effect but will only alter one half of the image as they prevent the sky from becoming overexposed when using longer exposures.
However, I don’t use filters very often and I normally take a few exposures that I merge in Photoshop.
UV filters were almost mandatory for film cameras but digital cameras are less sensitive to ultra-violet light and using a UV filter on a digital camera is pretty much useless and may actually adversely affect image quality.
You can stack up to four or five filters but be aware that the colour cast will be more intense and, if you stack low quality filters (plastic), image quality will be affected. If you decide to stack filters, use the slim versions of these filters. They cost a bit more but make a big difference, in particular when you use a wide angle lens.
15. Extra Gear
For panoramic photos I found it very important to have a shutter release cable. The window of opportunity to shoot at sunrise and sunset is just a few minutes so you have to work fast, especially when you are shooting a panoramic. I found that a shutter release cable helped me get the job done neatly and quickly. It is also mandatory to use the bulb mode for very long exposures!
You should bring a headlamp when you have to find your way to a lookout or clamber over rocks when it’s dark. Also, for safety, always take your mobile phone with you and let someone know where you are. Some of the cliffs are dangerous and there is a risk that you could get stuck at a pool between tides.
You should bring sandals and a change of shorts as often you find yourself wading around in knee-deep water to get the right angle on some of the mini waterfalls. It gets cold in winter so be sure to bring a jacket if you are shooting around sunrise/sunset and be prepared to have your feet go numb standing around in cold water.
16. Favourite Rock Pools
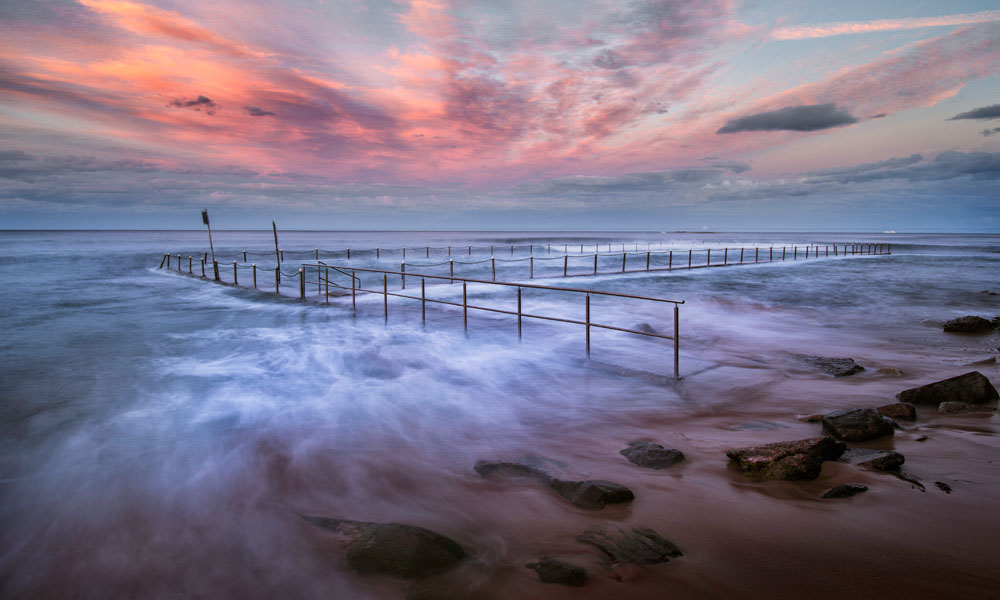
There is something about Mona Vale and North and South Curl Curl that make them very interesting to photograph. They are very natural. Avalon, Newport and Freshwater rock pools are also very interesting visually.
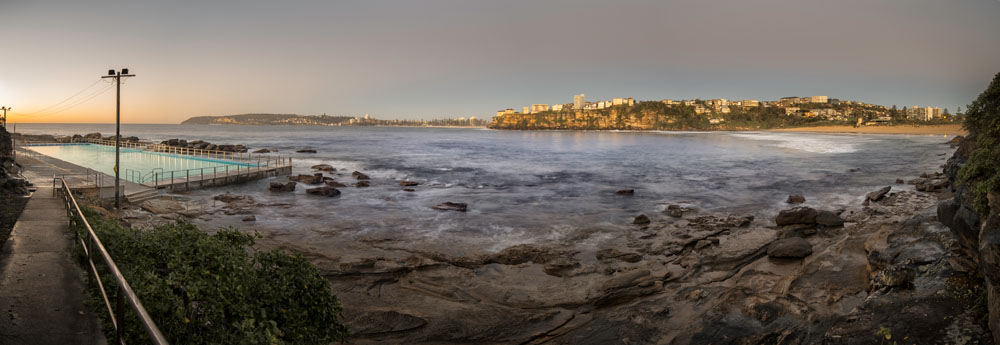
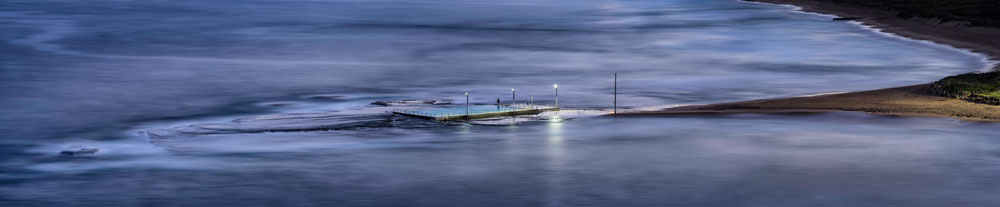
Mona Vale is on the tip of a sand spit between two beaches. When the tide is high, the pool is surrounded by the ocean making it look like an island. When the tide is lower and there aren’t waves crashing over the pool, the surface of the pool takes on a glassy tranquil look.
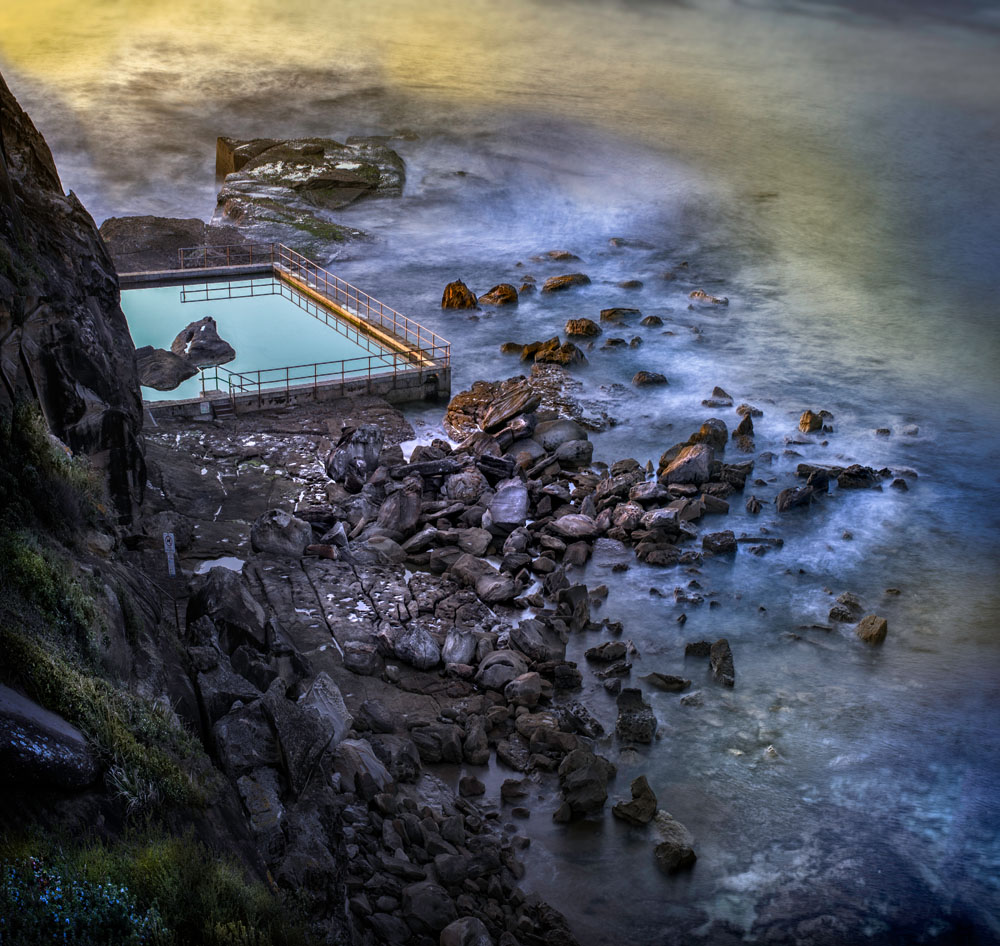
The easiest way to access North Curl Curl Rock pool is via a path from the car park. The views from the cliffs of Curl Curl beach and its pool are spectacular. At high tide it is a bit tricky to access the pool but you can take breathtakingly long exposure photographs from the cliffs on the way to the pool.
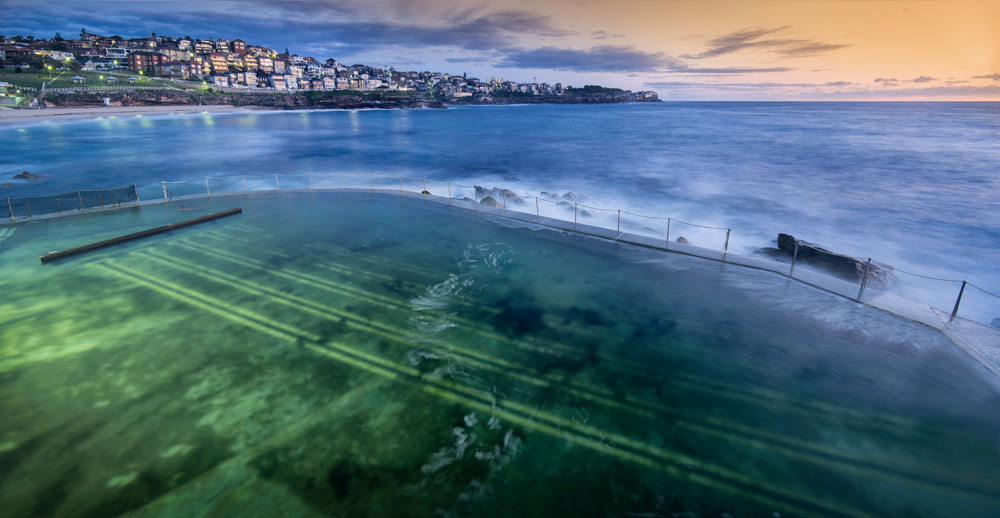
In the Eastern Suburbs I find Mahon rock pool (in Maroubra) and Bronte baths very photogenic, as well as Giles in Coogee.
Want to see more of Ignacio’s amazing Sydney Rock Pool imagery? Check out his book of rock pool photography by clicking here and support a fellow 500pxler!


Leave a reply