Practical Photography is the world’s best magazine for photographers who want to improve their camera skills. Whether you’re an absolute beginner, seasoned enthusiast or budding pro, you’ll find all the skills, techniques and ideas you need to take your passion to the next level. Their September issue is out — subscribe at greatmagazines.co.uk/pp now!
This technique uses Layers to build a simple but effective multiple exposure look. To kick things off for this Practical Photography tutorial, start with a single portrait image.
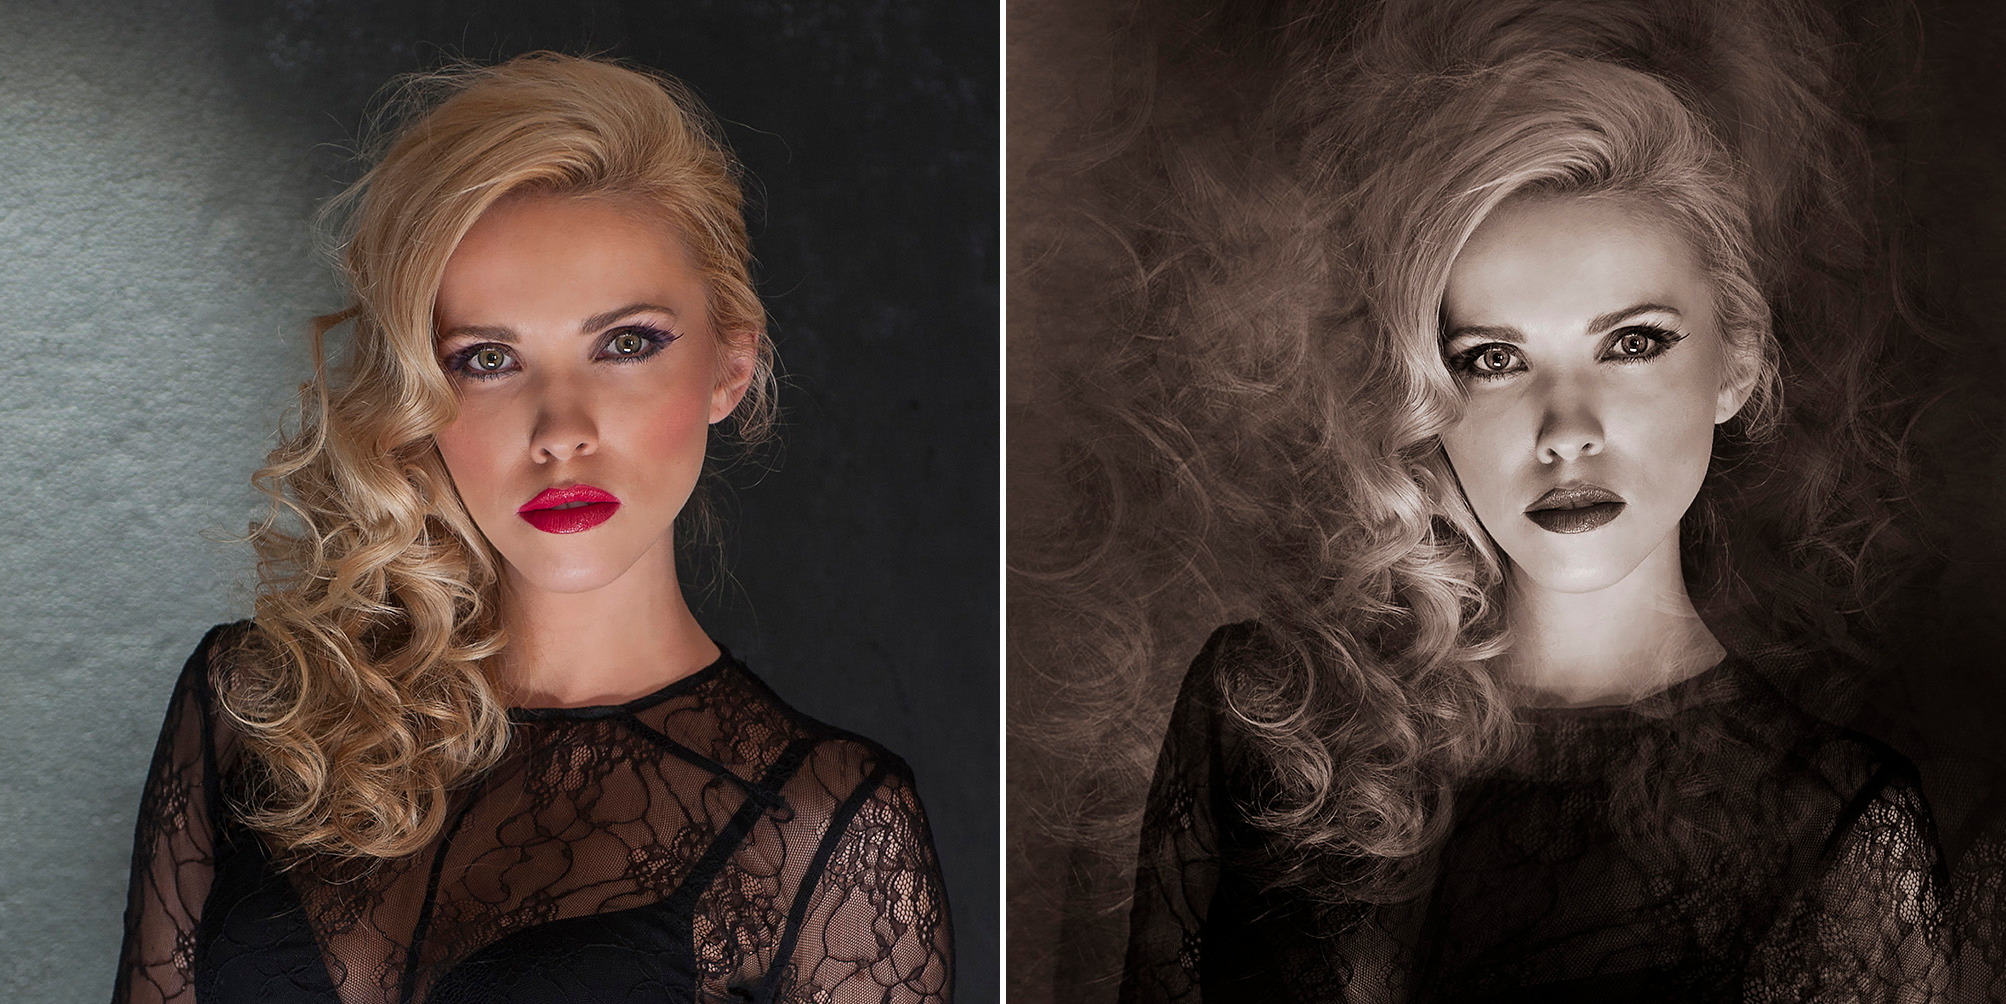
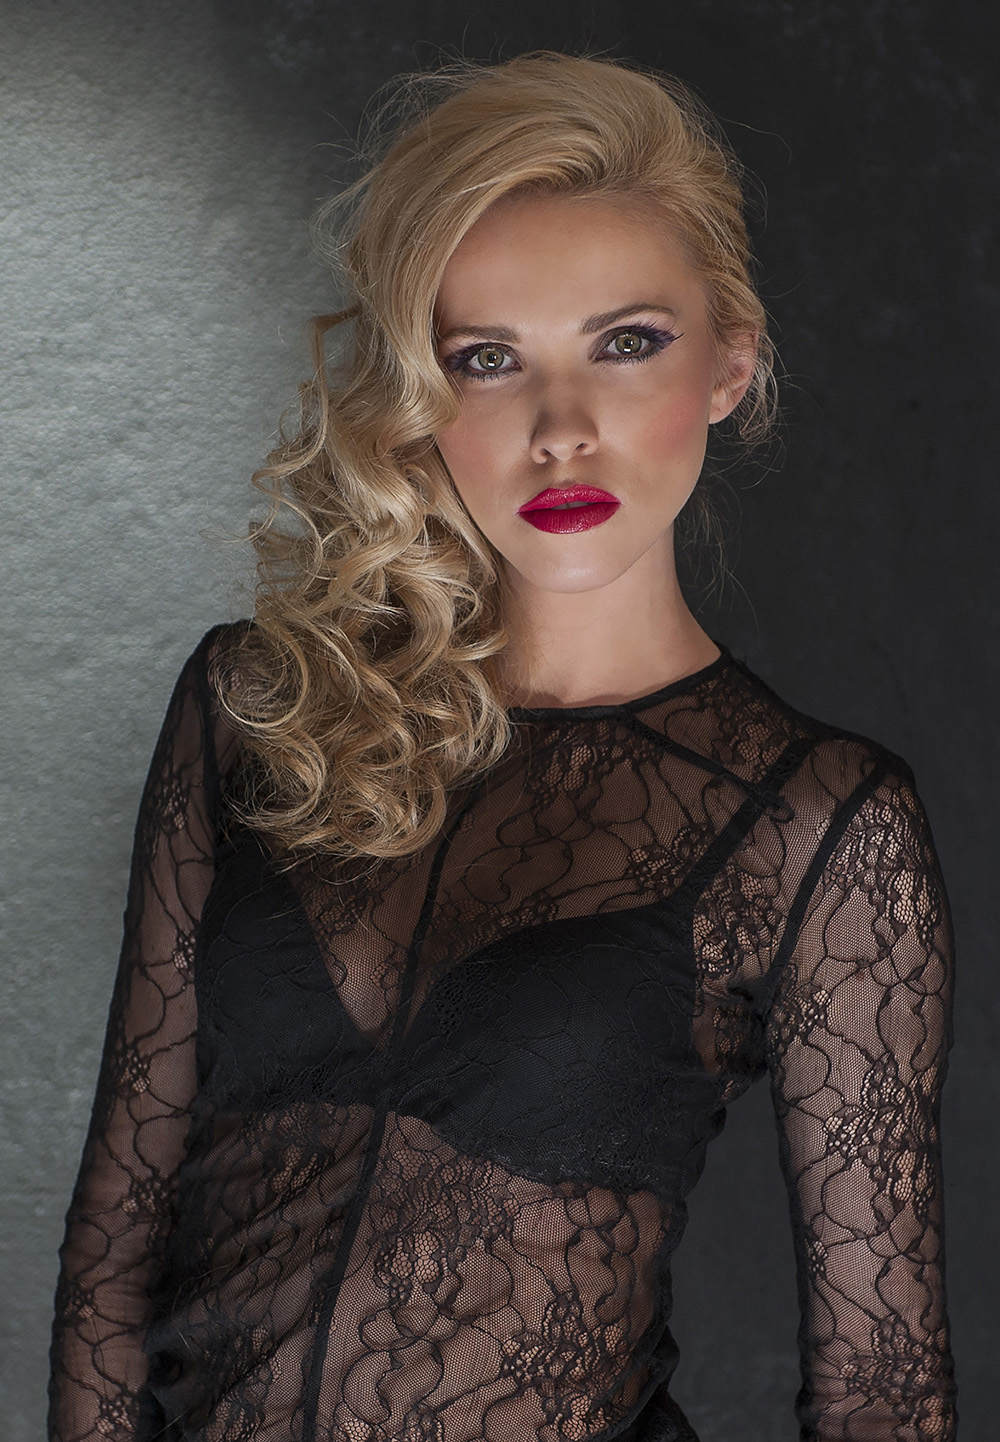
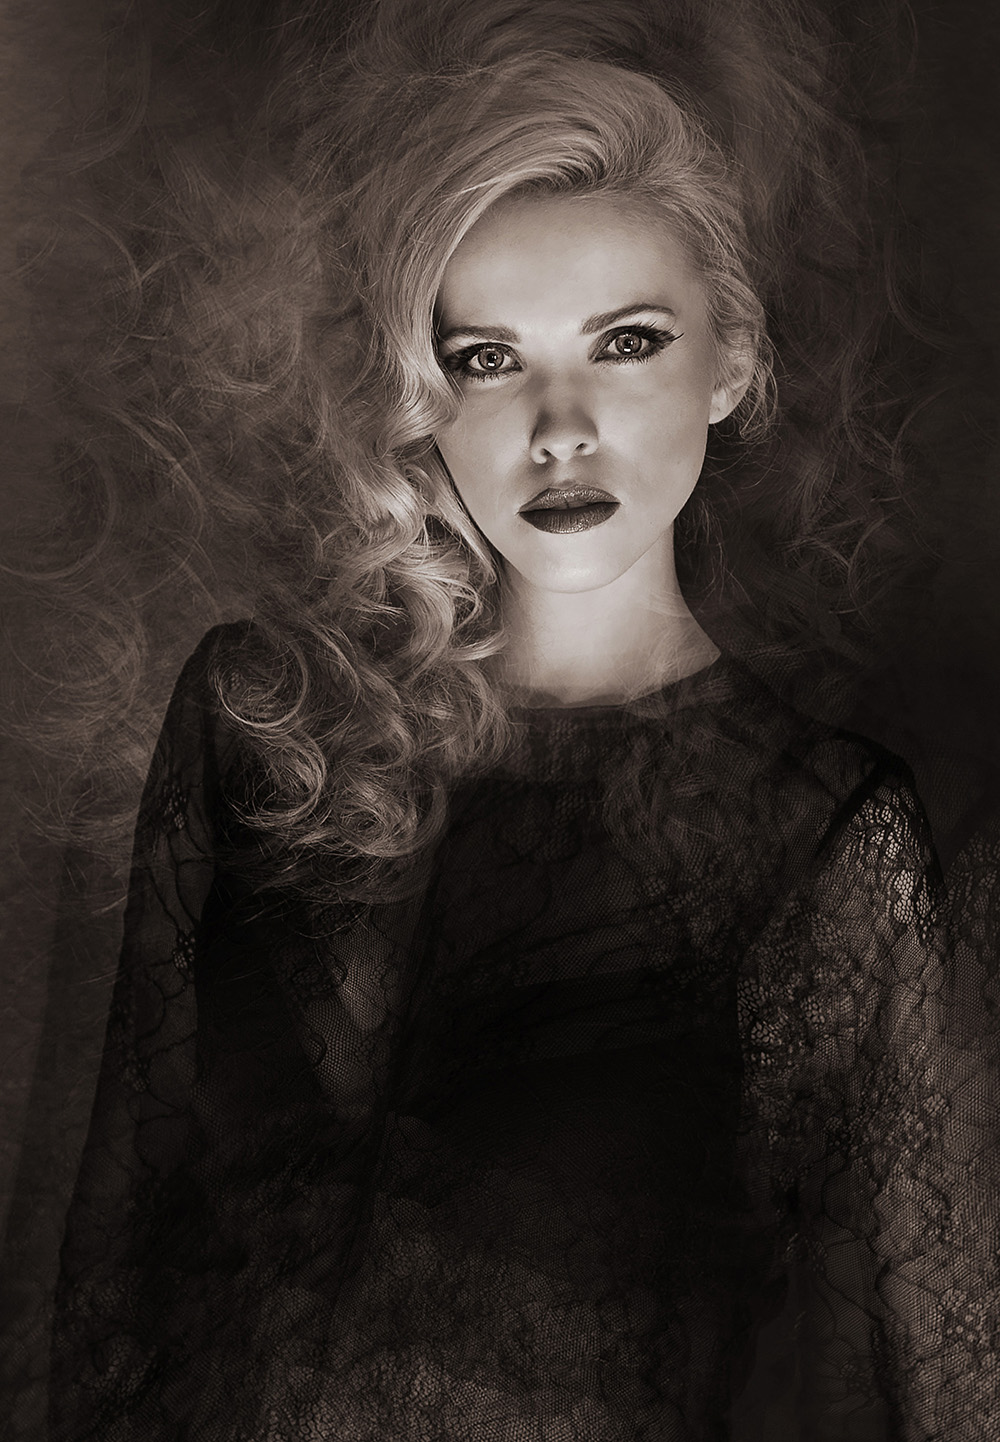
Sometimes the shot you take is just the beginning of the creative process, and here’s a good example. Starting with a solid, but not very exciting studio portrait, this technique can quickly produce something much more interesting — a rich, textured image with a very distinctive, artistic look.
While the finished version looks complex and the process uses several different tools in Photoshop, it’s something you can do quite quickly. Importantly, it’s also an effect that’s achieved by hand, so it has a natural, photographic look. In fact, you could create this look in the traditional darkroom with sufficient time and expertise, Photoshop just makes it easier.
To create the multiple exposure effect, the most important tools are the Layers palette, Layer Opacity, and the Free Transform Tool. These functions help us to duplicate the original image so that multiple versions of it exist within a stack of Layers. The Opacity and position of those Layers are then controlled so that they work with the original. Finally, Layer Masks are used to keep the focal point – the subject’s face – clear. The toning effect in the final step is optional, but it does finish the image off well.
Give this technique a try, then use the basic idea as a starting point for your own compositions and see what kind of images you can come up with. Watch the video tutorial below and follow along with the step-by-step tutorial.
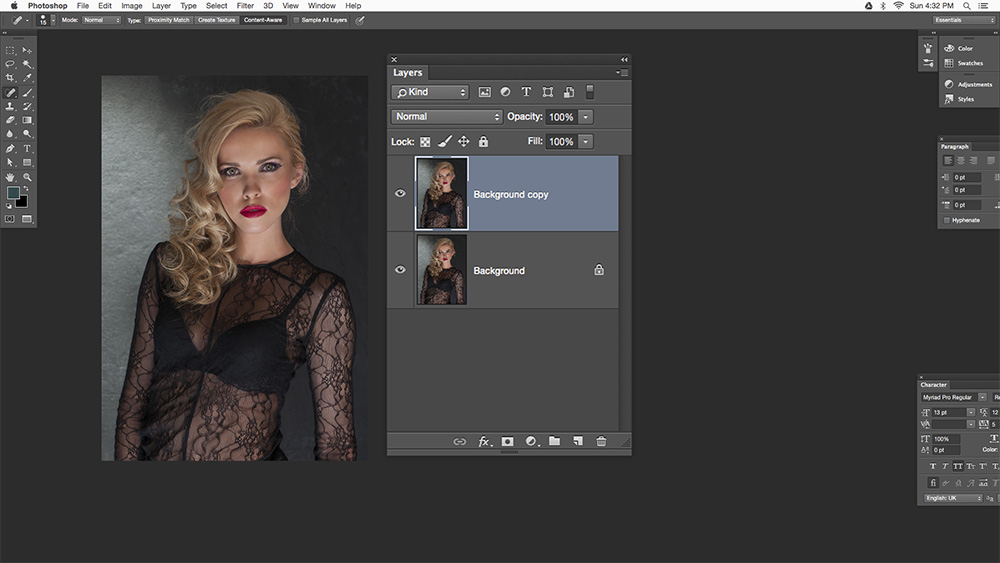
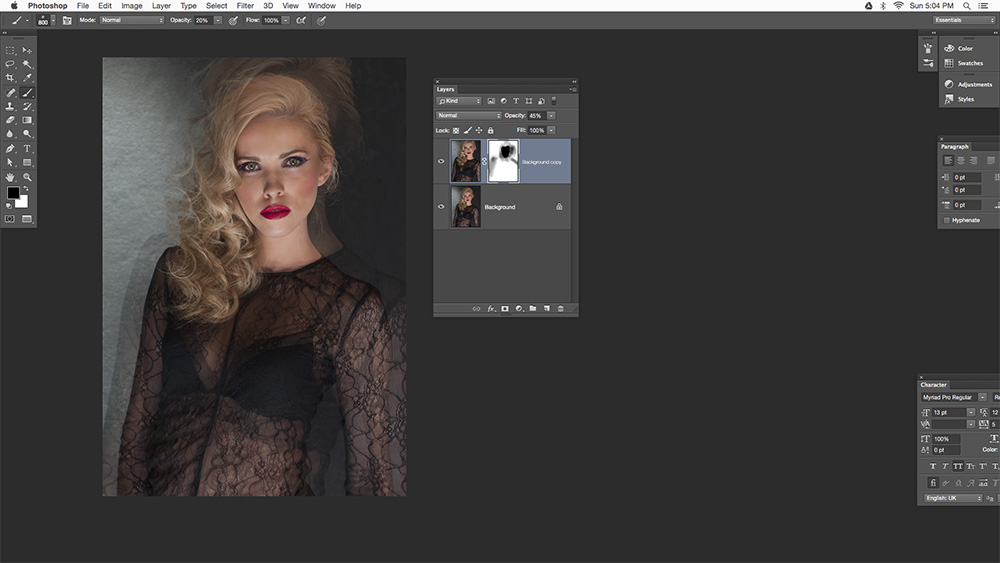
1. Make a copy of the original photo
Open the photo you want to apply this effect to using File>Open or Ctrl+O, then bring up the Layers palette with Window>Layers. In the Layers palette, you’ll see just one Layer to start with called the Background Layer. Make an exact copy of this Layer by going to Layer>Duplicate Layer or Ctrl+J. Rename the Layer if you want or just hit OK to call it Background copy.
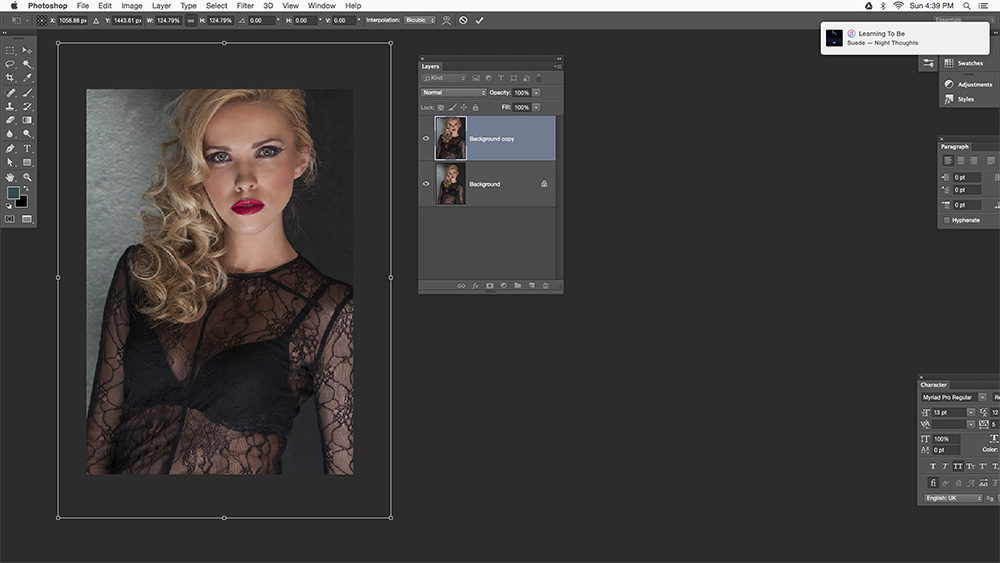
2. Resize the new Layer
The new Layer should be highlighted by default in the palette. If not, click it. Next, go to Edit>Free Transform (Ctrl+T) and a bounding box will appear around the image. You can click and drag the handles to resize it but to constrain the dimensions, click the chain-link icon in the Options bar at the top of the screen. Alternatively, hold Shift as you drag. Enlarge to about 120% and click the tick or hit Enter/Return.
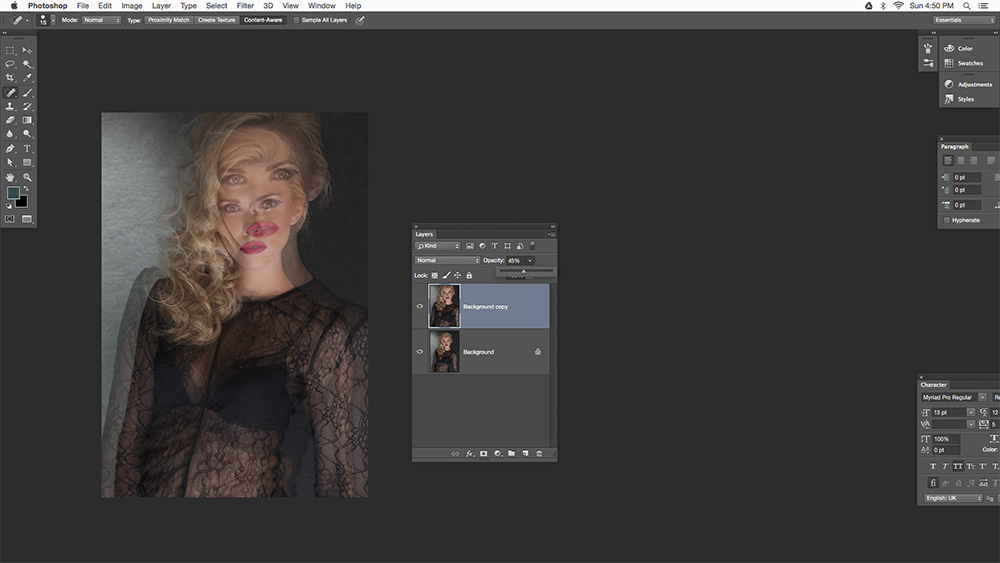
3. Lower the Opacity
In the Layers palette, you can control the Opacity of any Layer except the Background. This allows the Layers below to show through. The Opacity runs from 0-100% and for this technique, it should be set to a middling 40-50% so the images seem to merge. To do it, just click on the downward-facing arrow next to Opacity and use the slider. You can also type a number into the box, then hit Enter.
4. Mask the effect
Make sure the Background Copy Layer is still highlighted and then go to Layer>Layer Mask>Reveal All, or click the Add Layer Mask icon at the foot of the palette. Now pick the Brush Tool (B) and press D then X to set black as its color. Paint onto the subject’s face to mask the Layer and show the original through. In the Options bar, lower the Brush Opacity and paint again anywhere else you want to mask the Layer.
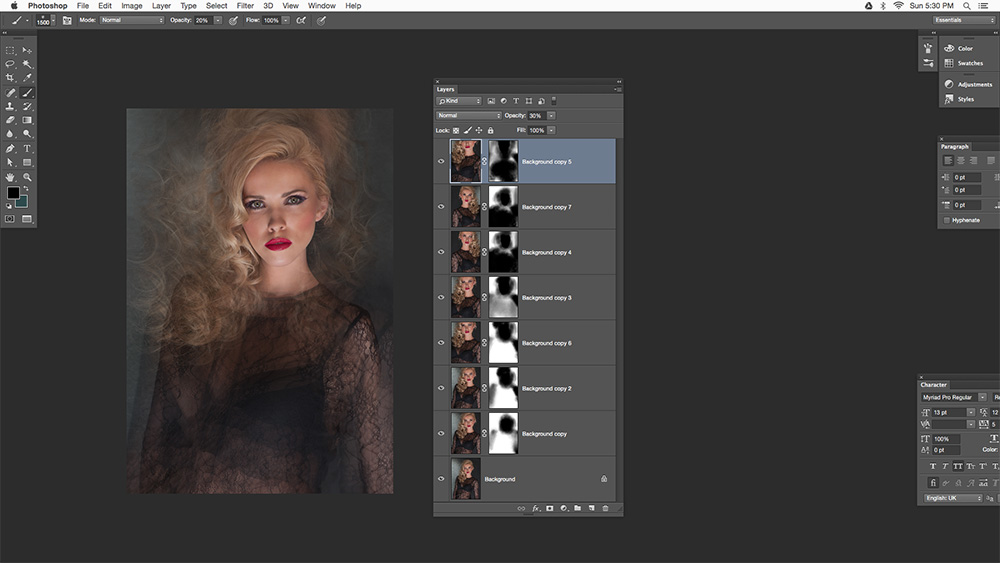
5. Build the effect
Add more Layers, essentially repeating Steps 1-4, but to stop it looking repetitive vary the size, position and refine the Opacity of each – you can even flip them using Edit>Transform>Flip Horizontal. To do it, with the Background copy Layer still highlighted, press Ctrl+J to copy it, then Ctrl+T to enter Free Transform, dragging within the box to move it. Add more Layers and masks until you’re happy. I used seven Layers in this example.
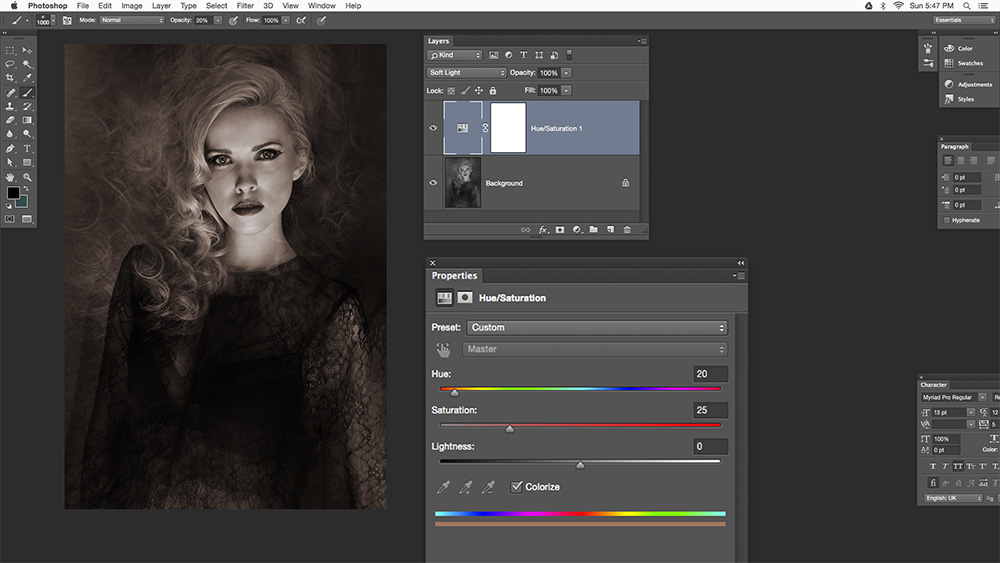
6. Add a toning effect
Go to Layer>Flatten Image to return to a single Background Layer. Next, press Ctrl+Shift+U to desaturate the image, then go to Layer>Adjustment Layer>Hue/Saturation. Click the Colorize box, then set the Hue and Saturation sliders to a warm sepia (20 and 25 were used here). In the Layers palette, click Normal and choose Soft Light from the list of blending modes, then go to Layer>Flatten Image to finish.
View the Before & After here:
 [/twentytwenty]
Have any questions on this tutorial? Drop them in the comments or share your own experience creating a multiple exposure image in Photoshop.

Leave a reply