Full Disclosure: This interview was written by Macphun, a proud sponsor of the 500px Fujifilm Global Photo Walk.
Amanda Quintenz-Fiedler is an avid photographer, educator, and writer whose entire life revolves around photography. She’s worked as a commercial and corporate photographer in the past, but is currently focusing her efforts on fine art. She also regularly contributes to several online photography publications such as Digital Photo Pro, Rangefinder, Photographer’s Forum, and the Macphun blog.
Getting images out for others to see and appreciate is what 500px is all about. Serge Ramelli has taken this philosophy to the extreme, using every mechanism at his disposal to get his images, techniques, philosophies, and even his own face out into the world.
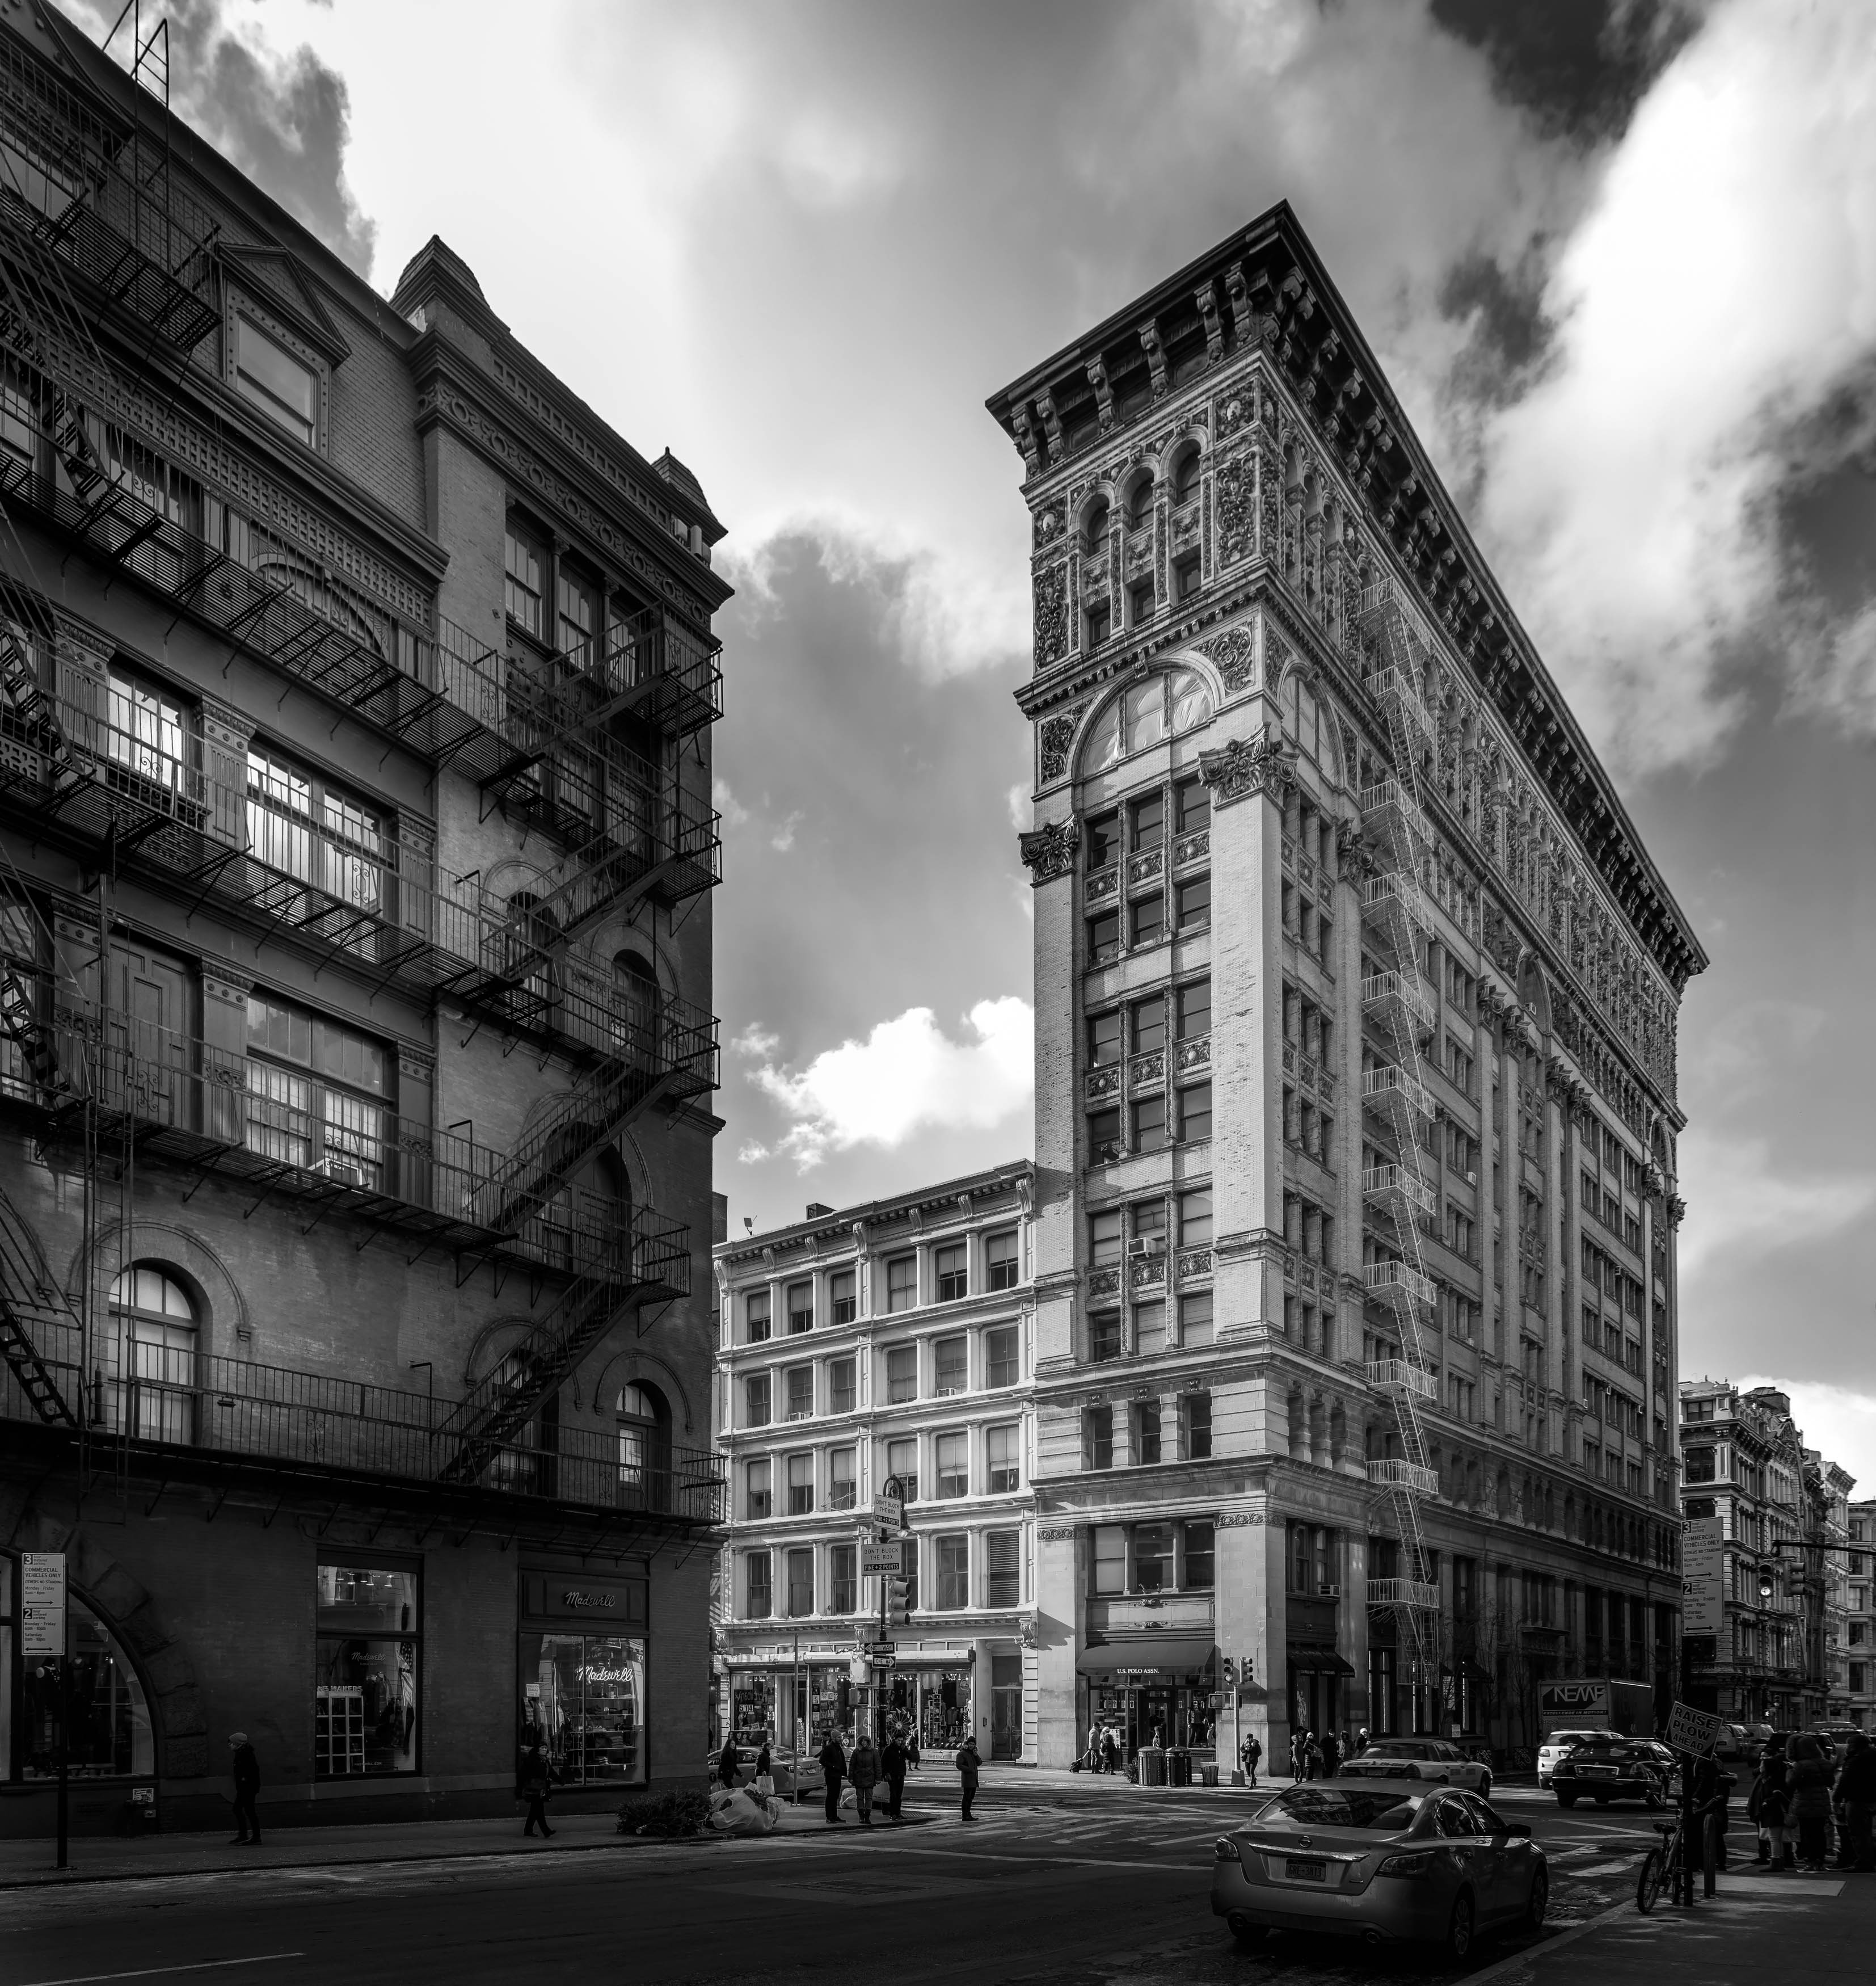
And everything paid off in a big way when he was approached to turn his images of Paris into a stunning coffee table book along with a request that he photograph New York in a similar way for an additional book. In his story we find inspiration and some excellent advice.

Serge fell in love with photography when he was a first exposed to the medium by his father. He always loved drawing and design and found that photography was the medium that allowed him to create the kind of visual impact he wanted to make. He decided to start studying photography in every way that he could—with books, tutorials, and speaking with other photographer friends.
“I spent about thirty hours a week just studying photography.” Serge explains. “I went from nothing to everything just like that. I had found a way to create with this medium of photography.”
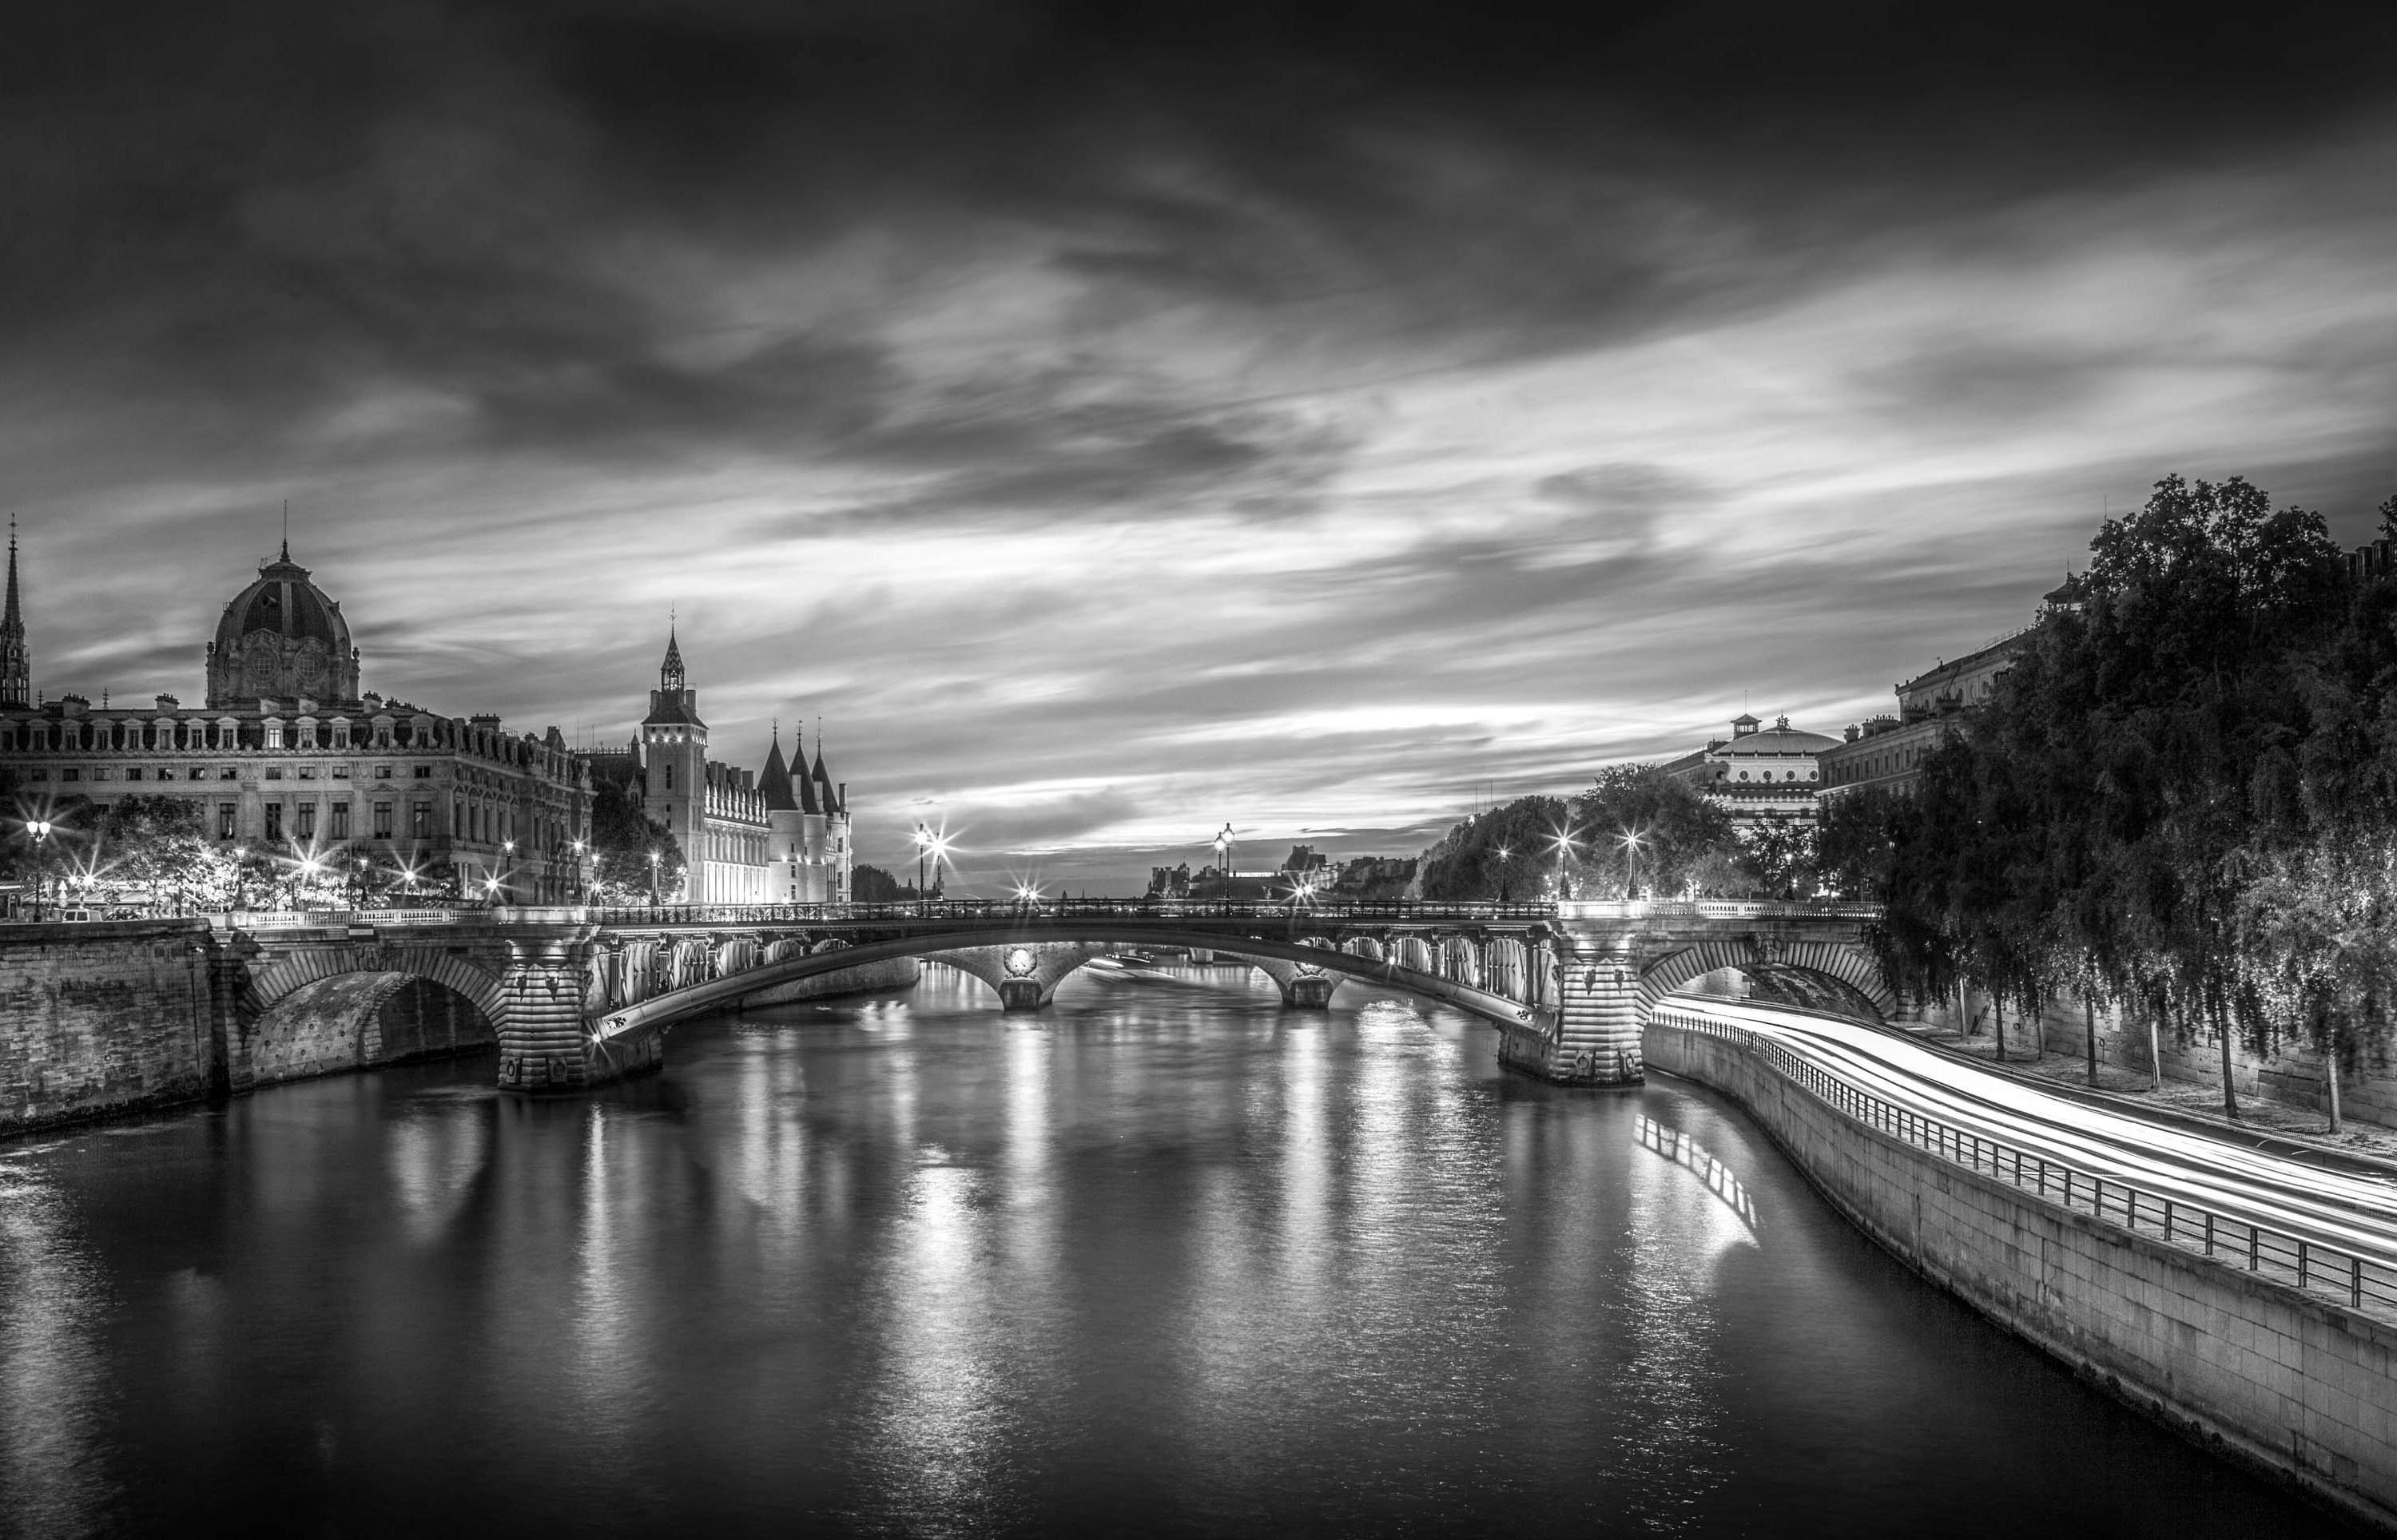
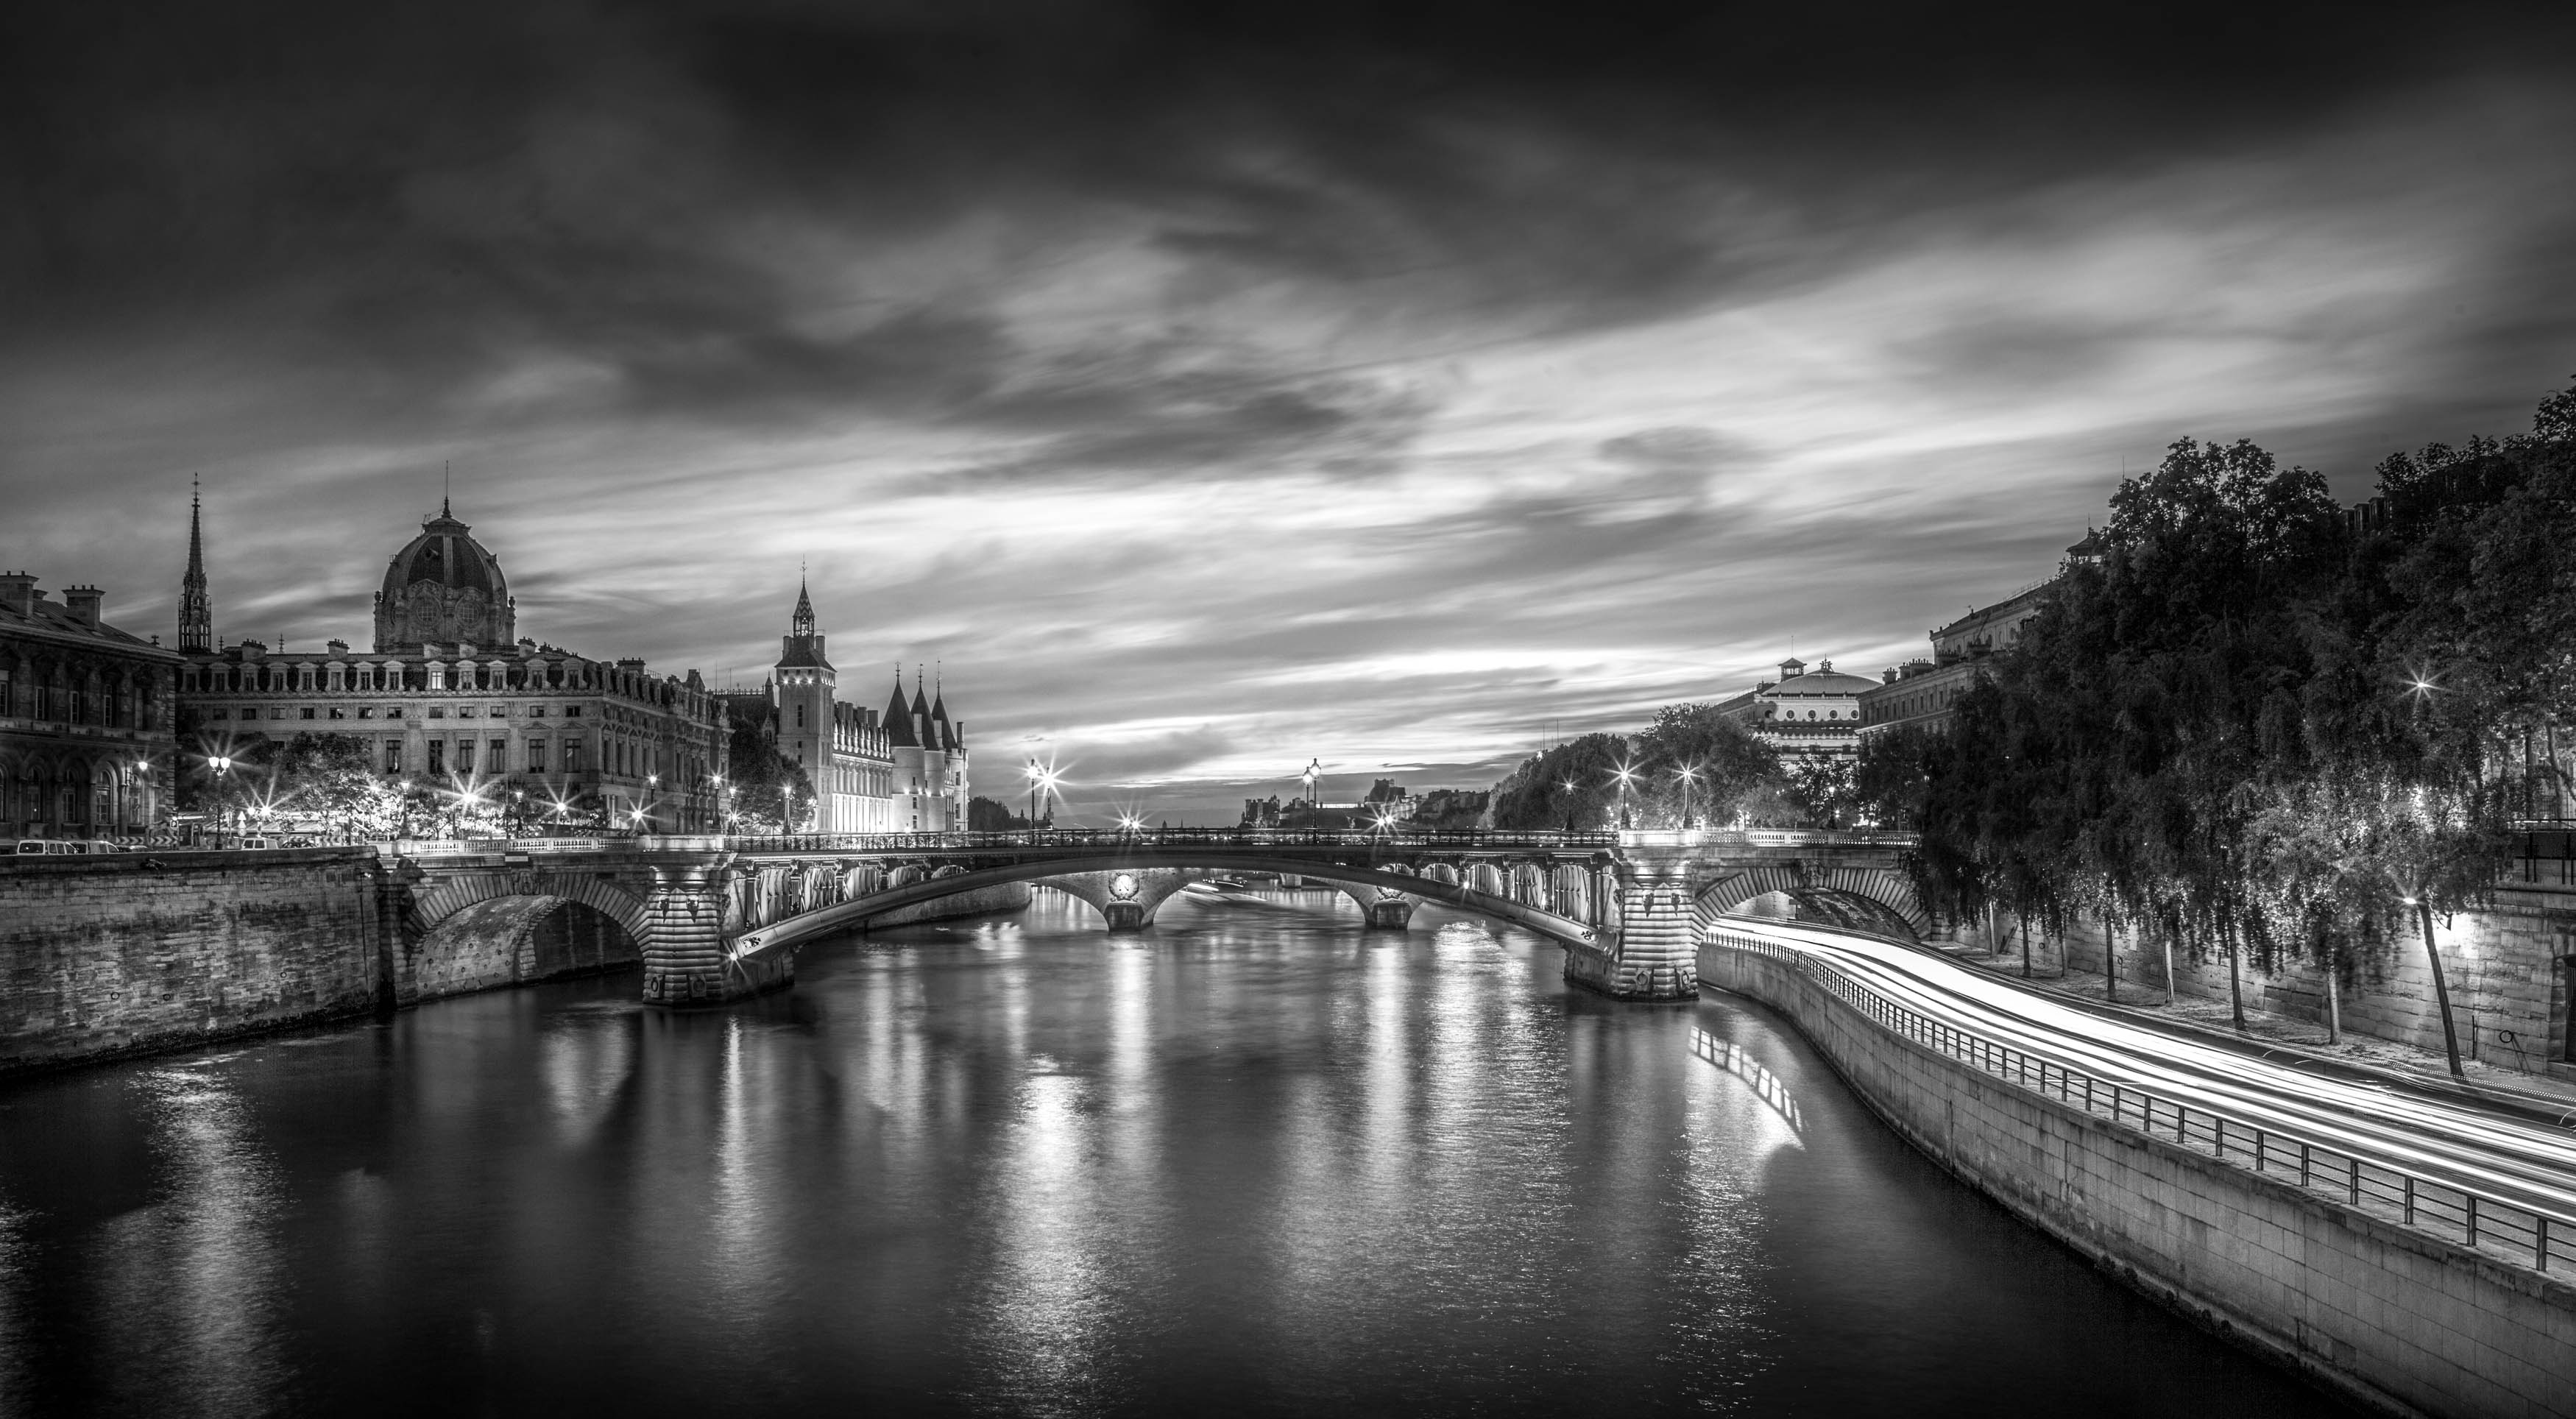
At the time, he was a salesman in Paris, and in his after-hours time, he started to capture compelling images of his beloved city. Over a nine-year period, he explored the city, finding images of both landmarks and hidden courtyards all over the city.
With his efforts to get his images, and his name, out into the world he posted his images on 500px, created photography, Photoshop, and Lightroom tutorials in Europe and eventually his own YouTube channel and a deluxe bundle of tutorials that you can purchase from his site for even more education.
When we caught up with Serge, we asked him for a run down of the process he used on his two new books so that we could share it with you.

Serge Ramelli’s Workflow
My ideal workflow to shoot a cityscape is as follows:
1. When I did my New York book I was walking hours per day so I needed a camera that was very powerful but super light. So I did the entire book with the Sony a7R: very light mirrorless but still 36 million pixel camera, then only one lens the 24-70mm, because I was forcing myself to not shoot too wide. I wanted my photos to have a more natural feeling, I had one ND filter and a very light Gitzo tripod. With that set up I could walk for hours without the burden of heavy gear.
2. Then I find the proper foreground, middle ground, and background on a New York subject… and there are plenty. Finding the foreground is always the hardest thing for me. But once I do, I put on a ND filter if it is before sunset, I always like to have a few seconds of exposures to get an extra contrast between clouds and buildings. If it is after sunset I close my aperture over f/13 so that I get a star light effects in the city lights.
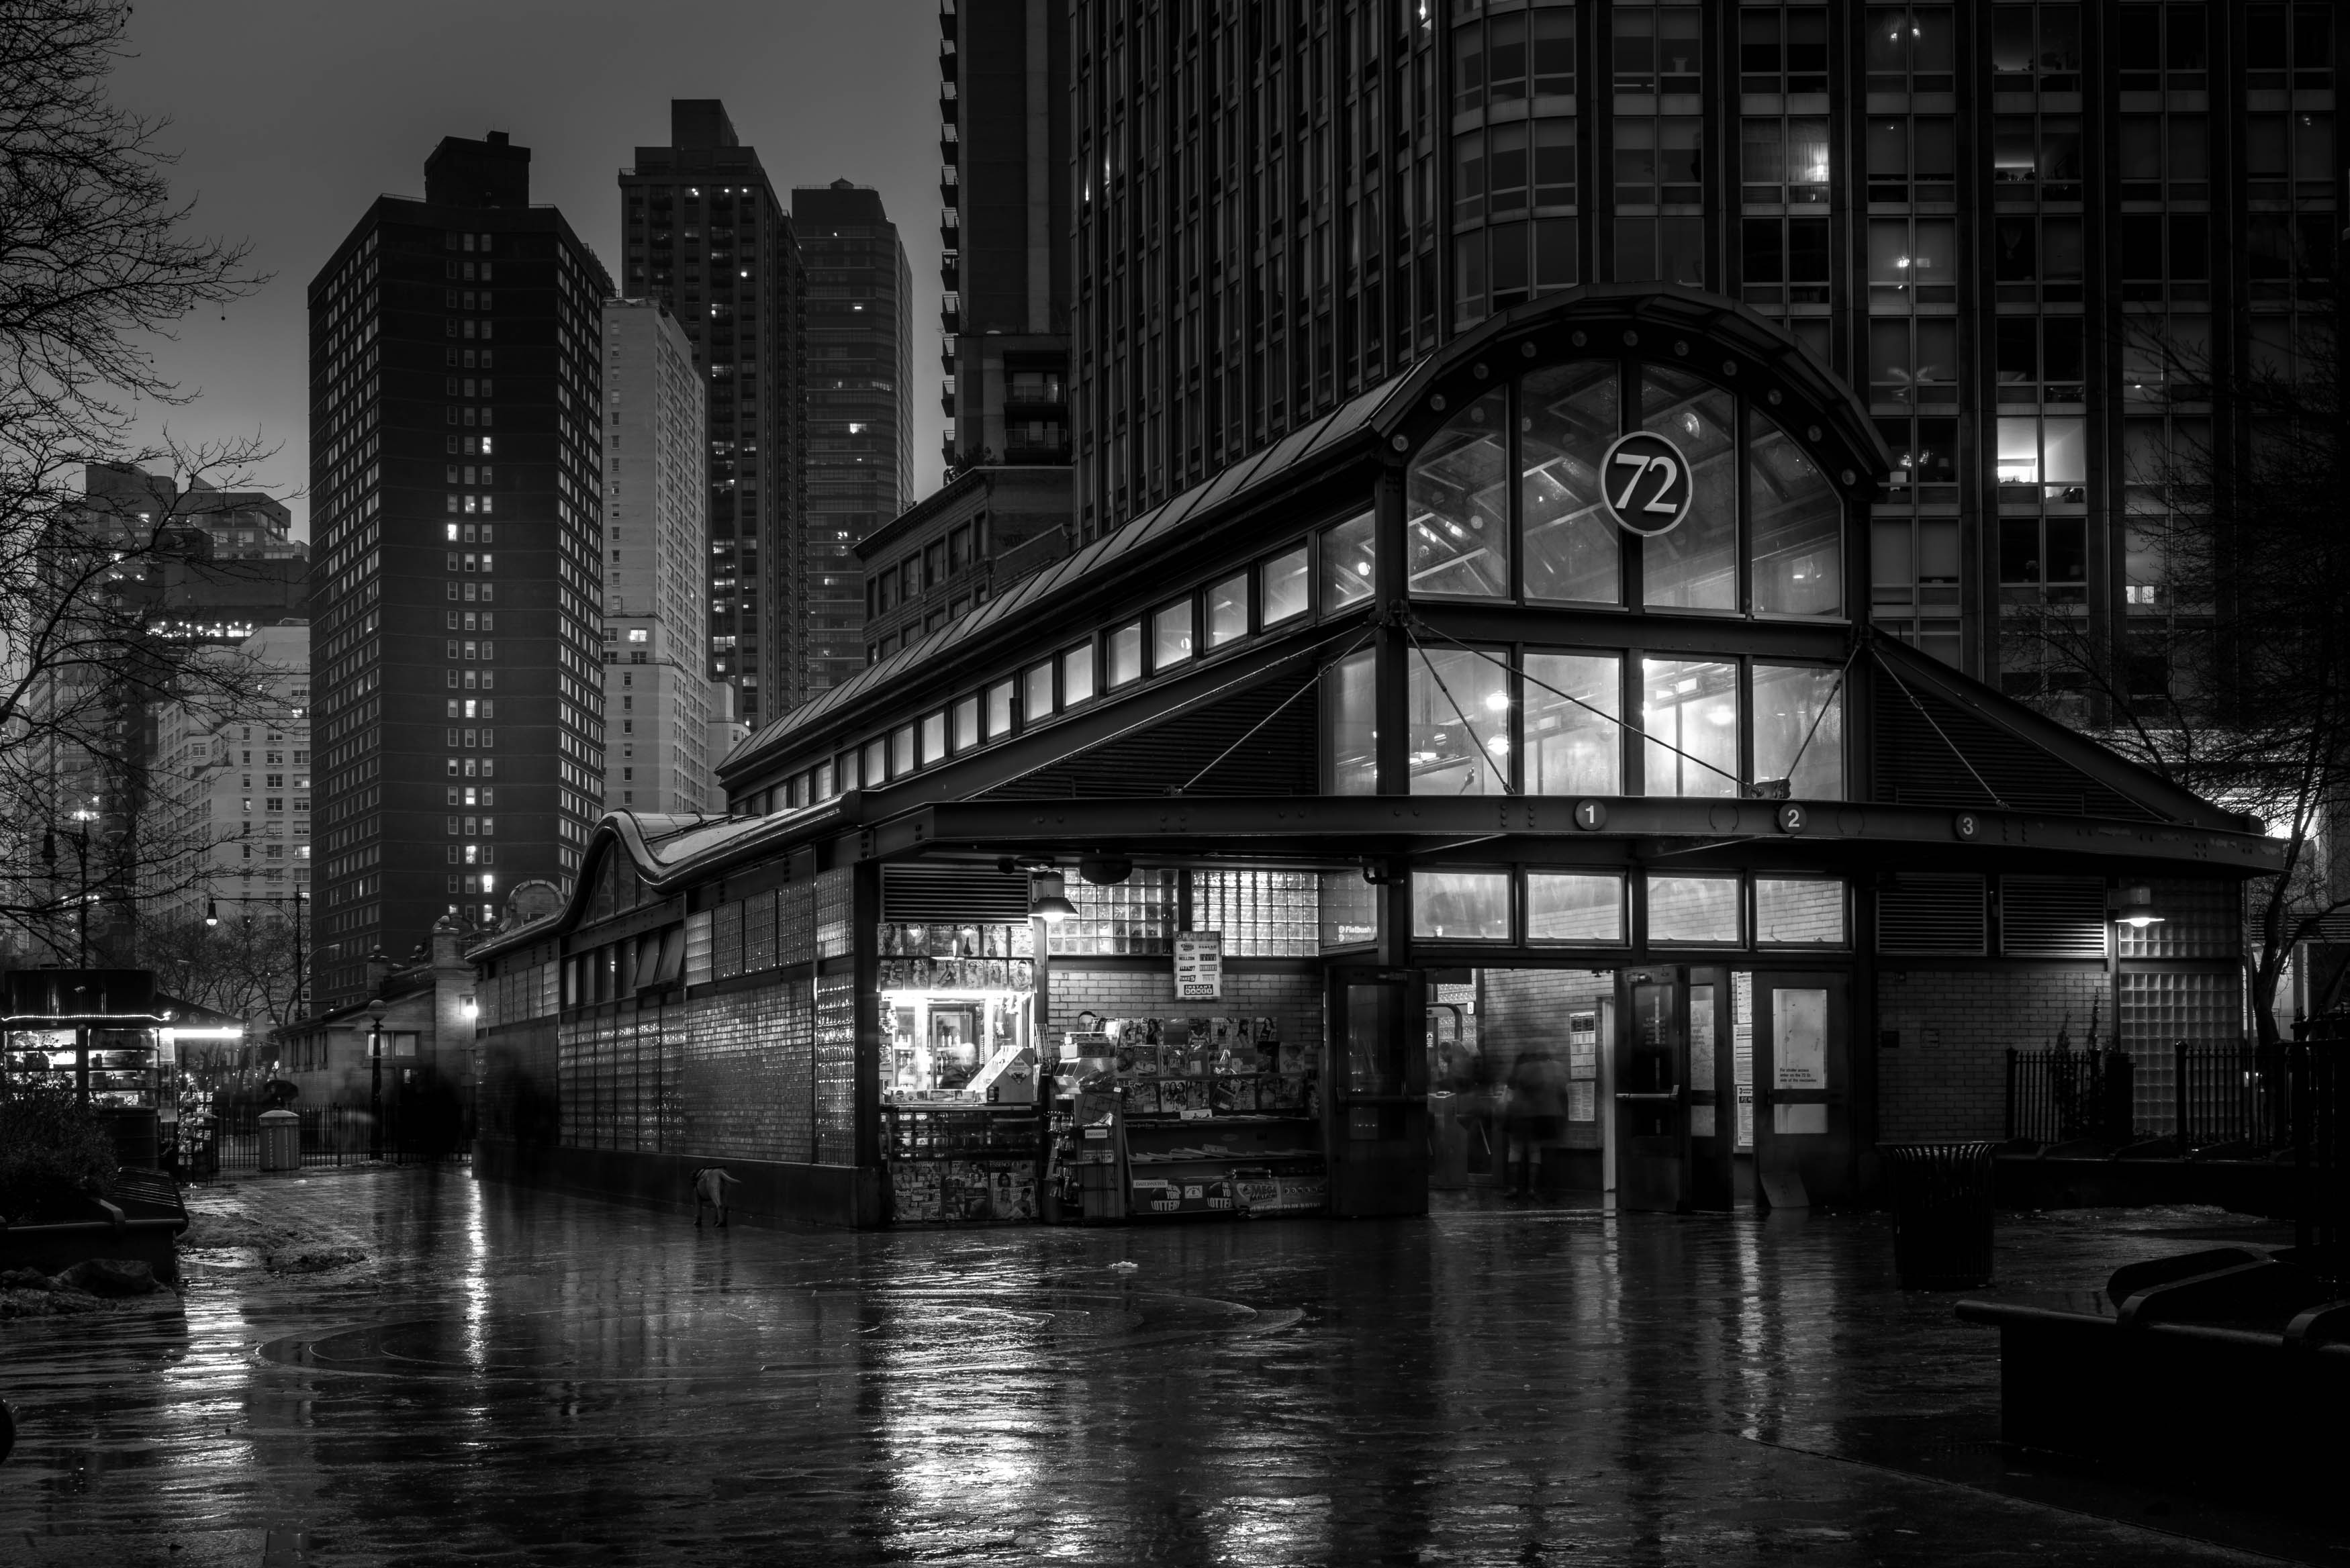
3. I do basic retouching in Lightroom to fix contrast and lens distortion.
4. I then go over to Macphun Tonality Pro and I work by layers. My basic layers will be the basic black and white look.
5. I then create an HDR layer and use the classic HDR presets in Tonality Pro, but then I only brush it at an opacity of 20% to have a stronger contrast between a very detailed building and the smooth clouds.
6. I then do a glow layer and I use the glow preset and do the same thing here, I only add a bit of glow in the sky to make a contrast with the layer above.

7. I then do a dodge layer with a brush where I will dodge only some parts of the photo using the Tonality Pro smart exposure.
8. I then do another layer for burn and do the same thing with a brush to darken some parts of the photo.
9. I then usually do a final retouch layer with all the last minute retouch.
If you want to think of an example of this check out this tutorial:
We love Serge and his work and are proud to have him as a walk leader for the 500px Fujifilm Global Photowalk on the 26th of this month and as a Guest Editor for the month of September. And Serge seems to like us (and you!) too.
For the remainder of September, Serge is offering his premium course in a special package at $99 instead of $347, but for that you have to enter the code 500px at check out at this link.
Editor’s Note: As an added bonus, and because you guys are awesome, loyal 500pxers can get a free copy of Macphun’s Intensify at this link! And if that’s not enough, you can download a free trial of Tonality Pro—the app Serge uses to post-process these awesome cityscapes—by clicking here. Get on it!


Leave a reply