Practical Photography is the world’s best magazine for photographers who want to improve their camera skills. Whether you’re an absolute beginner, seasoned enthusiast or budding pro, you’ll find all the skills, techniques and ideas you need to take your passion to the next level. Their August issue is out—subscribe at greatmagazines.co.uk/pp now!
Actions are one of Photoshop’s best features and will change the way you edit forever. In this tutorial, Practical Photography magazine shows you how to create and record a stylish retro technique as an Action.
There are some effects that we love to apply to most of our images. It’s part of creating our own visual style to help make our shots stand out from the crowd.
The problem with this approach is that some techniques take a few minutes to apply. And when you’re working with a large selection of images, processing suddenly becomes a laborious task. So in these situations it’s best to record techniques as an Action. These can then be played back at the click of a button to apply the desired effect.
Recording Photoshop Actions is a simple process, so to make things interesting we’re going to show you how to create an amazing retro effect using Gradient Adjustment Layers. The advantage of using the Gradient Adjustment Layer is that it applies the same effect to all images regardless of size, so the action will work with all images.
Before you begin, make sure your image is already open. If you begin recording before you open an image, the process of opening a specific image will be recorded.
First, watch the video below. Then, read on for a step-by-step tutorial!
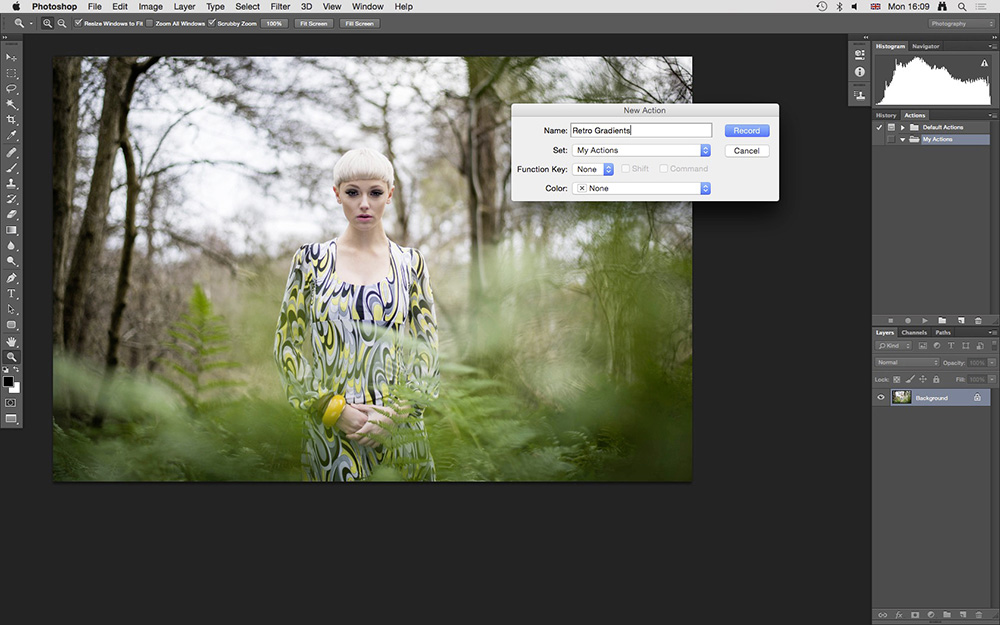
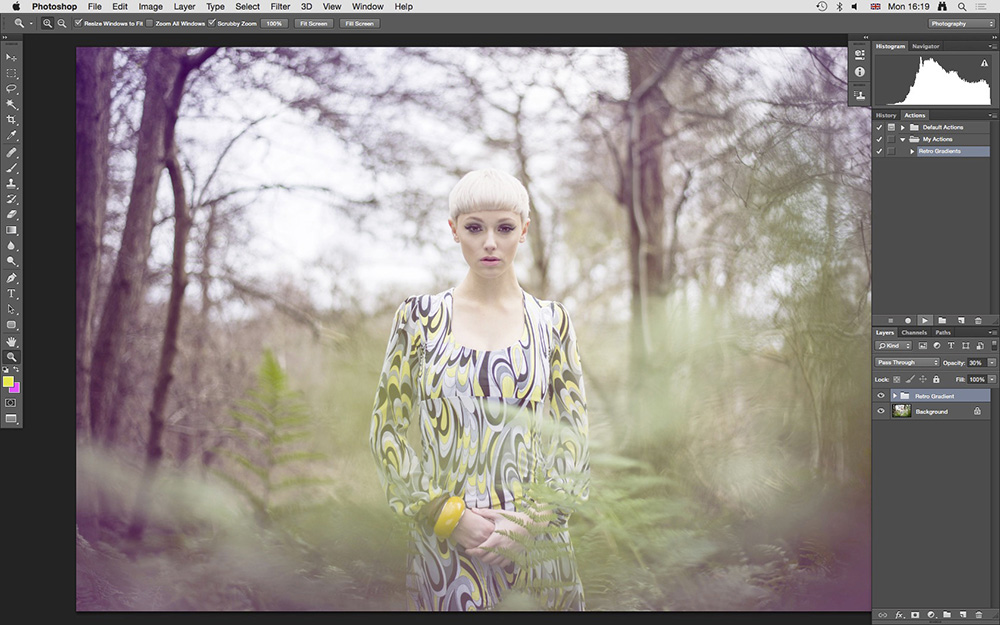
1. Prepare to record Actions
To get started open an image in Photoshop and look for the Actions tab among the panels on the right-hand side of Photoshop. If it’s not there, go to Window>Actions and the Actions panel will appear. At the bottom of the panel, click on the folder icon. This creates a New Set. Call it ‘My Actions’. Click OK. Now click on the icon to the right of the folder to create a New Action. Call it ‘Retro Gradient’, and hit Record.
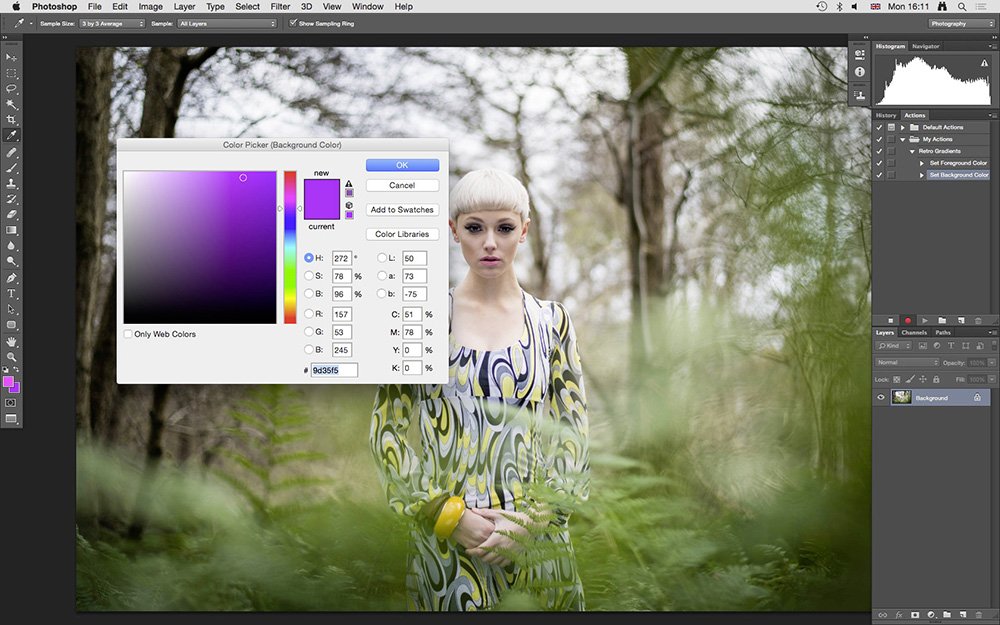
2. Set foreground and background color
On the Tool panel close to the bottom you’ll see two squares, where one sits just over the other, that represent the foreground and background colors. Left-click your mouse on Set foreground color, select a bright pink and press OK. Next left-click on Set background color, select a midtone purple and press OK. You’ll see these steps are being recorded on the Actions panel.
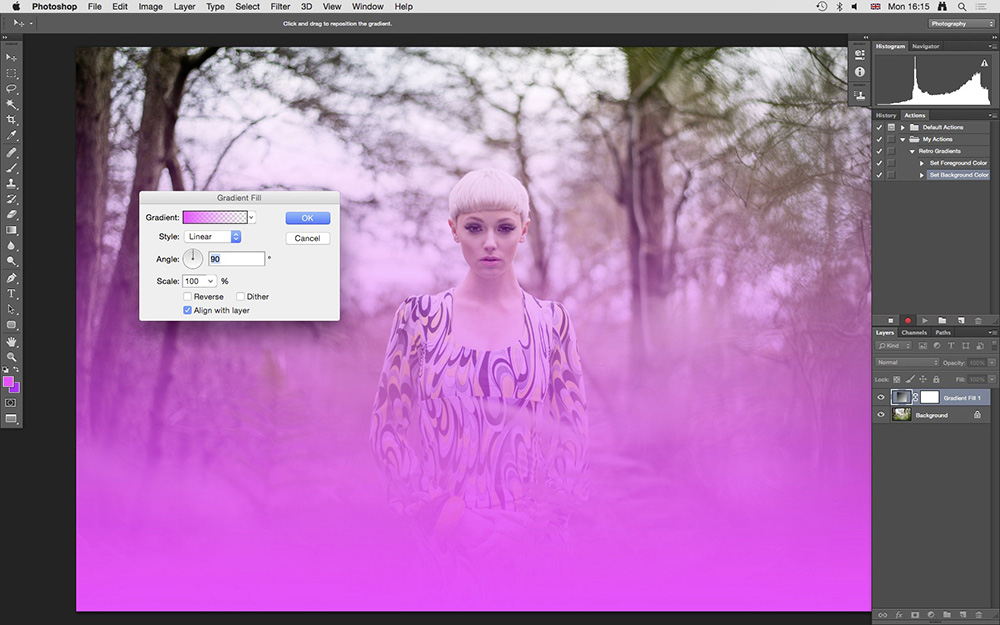
3. Create Gradient Adjustment Layers
Go to the bottom of the Layers panel and click on the New fill or adjustment layer icon (the half-black/half-white circle). From the list of options select Gradient. The default options are what you need, so when the dialogue window opens hit OK. Press X on the keyboard to switch the foreground and background colors, and create a second Gradient. For this one make sure the Reverse box is checked.
4. Reset color for a Radial Gradient
Click on each of the Gradients created in the last step one at a time, and set blending mode that’s set to Normal by default to Screen. It’s a drop-down menu at the top of the Layers panel. Left-click your mouse on Set foreground color, select bright yellow and press OK. Now create a third Gradient, but this time set the Style to Radial, and scale to 190%. Set the blending mode of this gradient to Overlay.

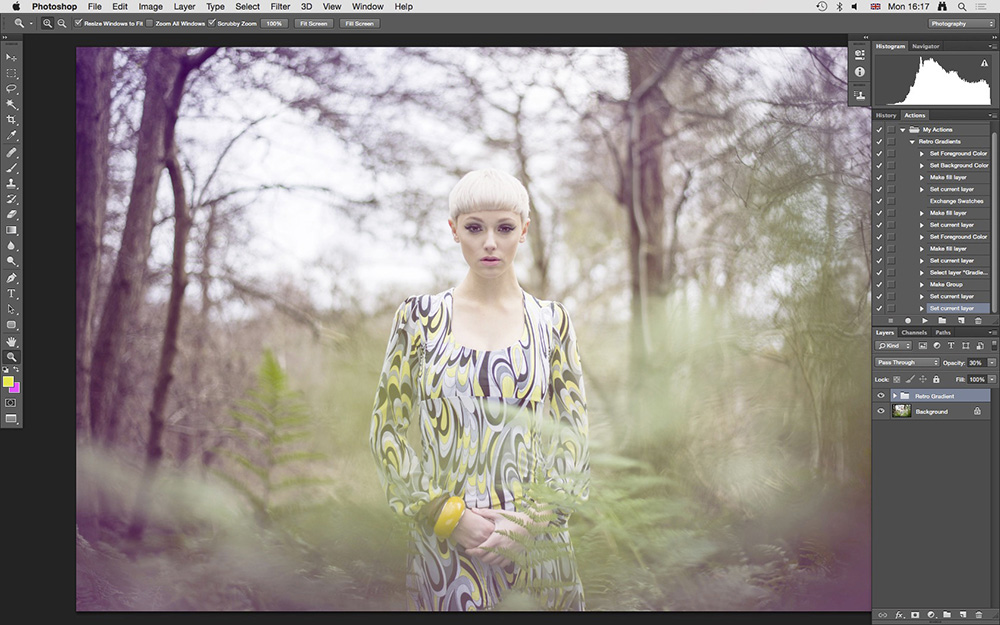
5. Group your Layers
The Layer at the top of the stack will be active and highlighted blue. Hold down Shift on the keyboard and left-click on the Gradient that sits above the Background Layer. Now hold down Ctrl+G to group these Layers. Double-click on the group and rename it ‘Retro Gradient’. Now click on the Stop icon on the Actions palette, which looks like the stop button on a stereo. This will stop the Action from recording.
6. Play your new Action
Left-click on the folder you just created on the Layers panel by dragging it to the dustbin at the bottom of the panel. Now on the Actions panel scroll to the arrow next to the name of the Action you just created, and click on it to collapse all the steps of the Action to tidy everything up. Now left-click on the Action so it’s highlighted, then click on the Play button at the bottom of the panel to run the Action.
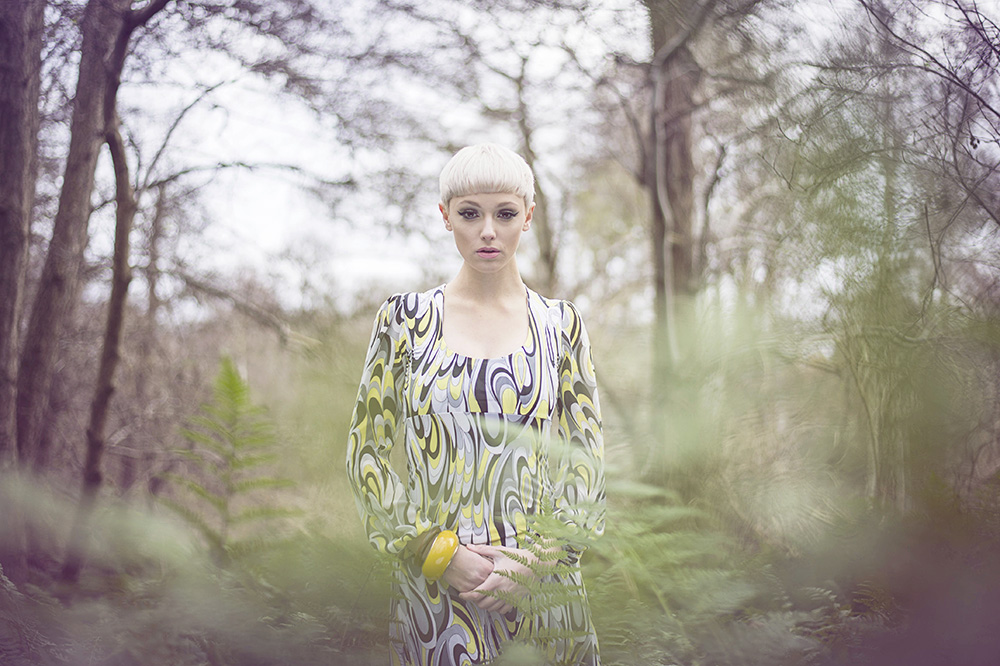
BEFORE & AFTER
[twentytwenty]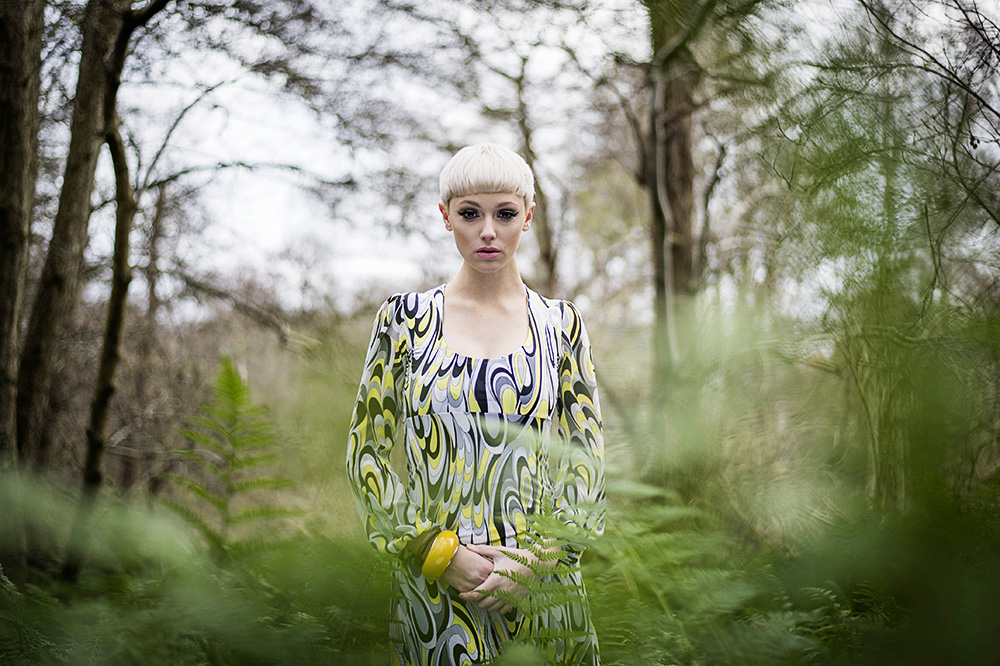
 [/twentytwenty]
We hope you found these tips useful! If you have any questions, feel free to drop them in the comments.
Practical Photography‘s new August issue is out now. Don’t forget to check it out for more tutorial and tips to enhance your photography!
Leave a reply