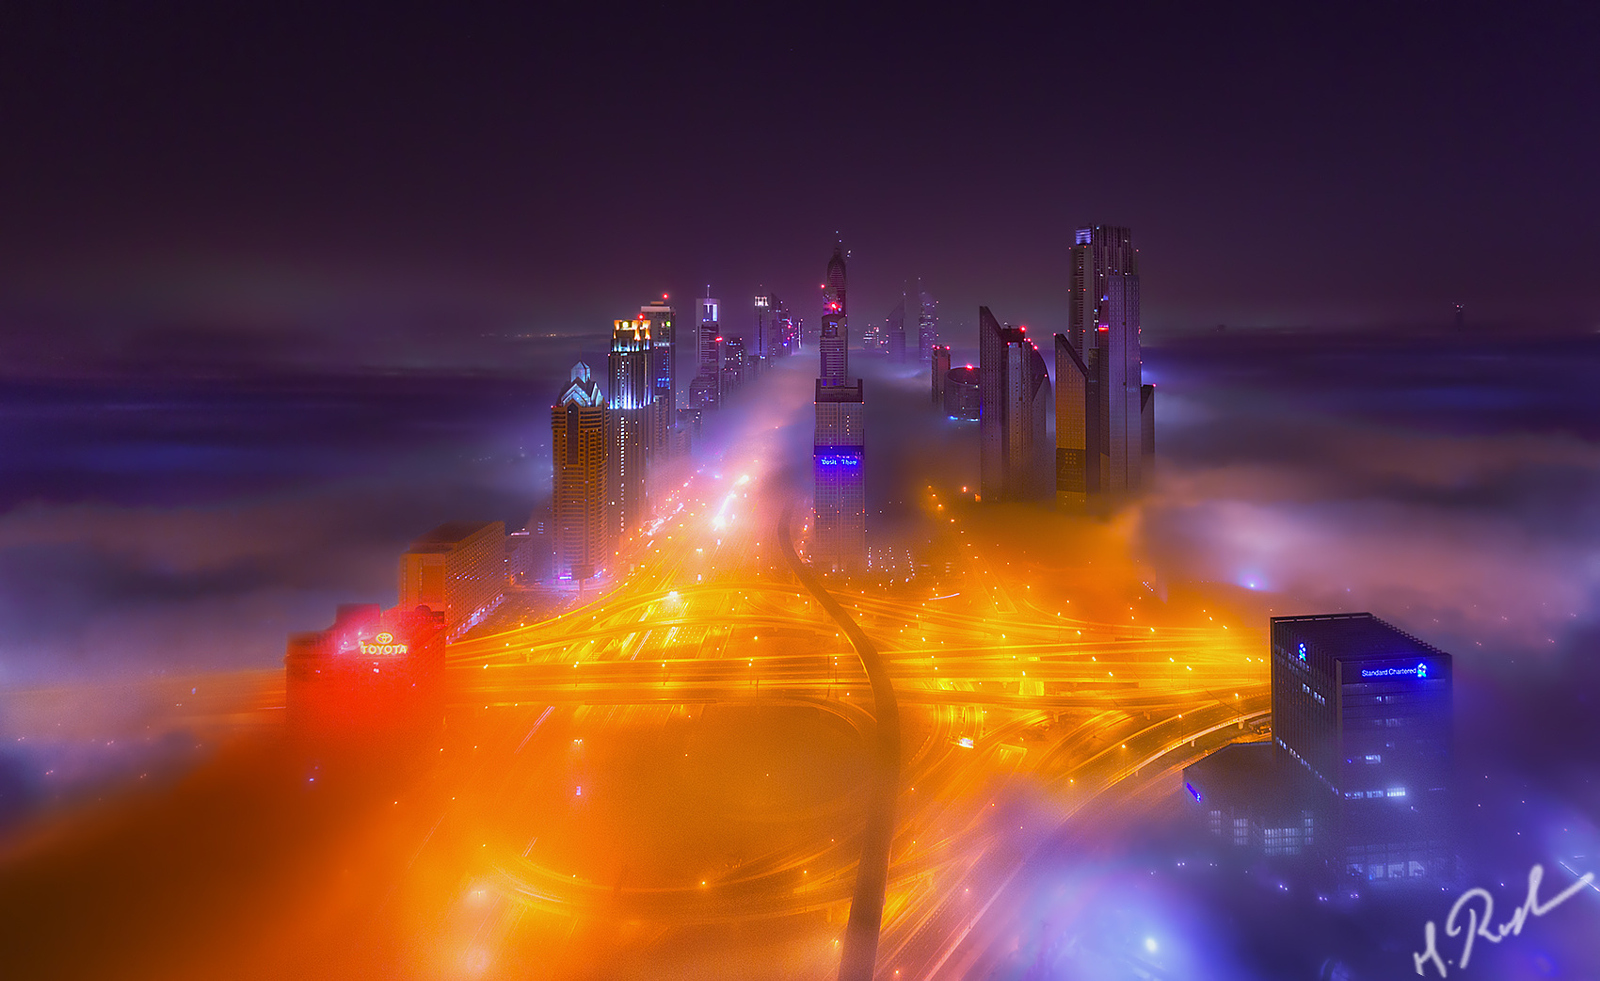
Mohammad Rustam Azmi is an award-winning Indian photographer based in United Arab Emirates. He discovered photography in 2013 after getting inspired by other famous cityscape photographers. He shoots cityscapes, rooftops, architecture, and landscapes, and loves traveling to new places to meet local photographers. He is a finalist of HIPAA 2014, and took home the Silver Award for the Cityscape Category in 2015, and was featured in a few international magazines. In this tutorial, he’ll share his best tips and tricks for creating beautiful cityscape images.
1. Gather as much information about the location before your shoot.

Try to gather as much information about the location and its vantages points. The best website for reference is 500px and Google. Try to contact local photographers for their guidance on the best locations to go. The Photographer’s Ephemeris app is the best app to keep track of the sun’s position for sunrise and sunset.
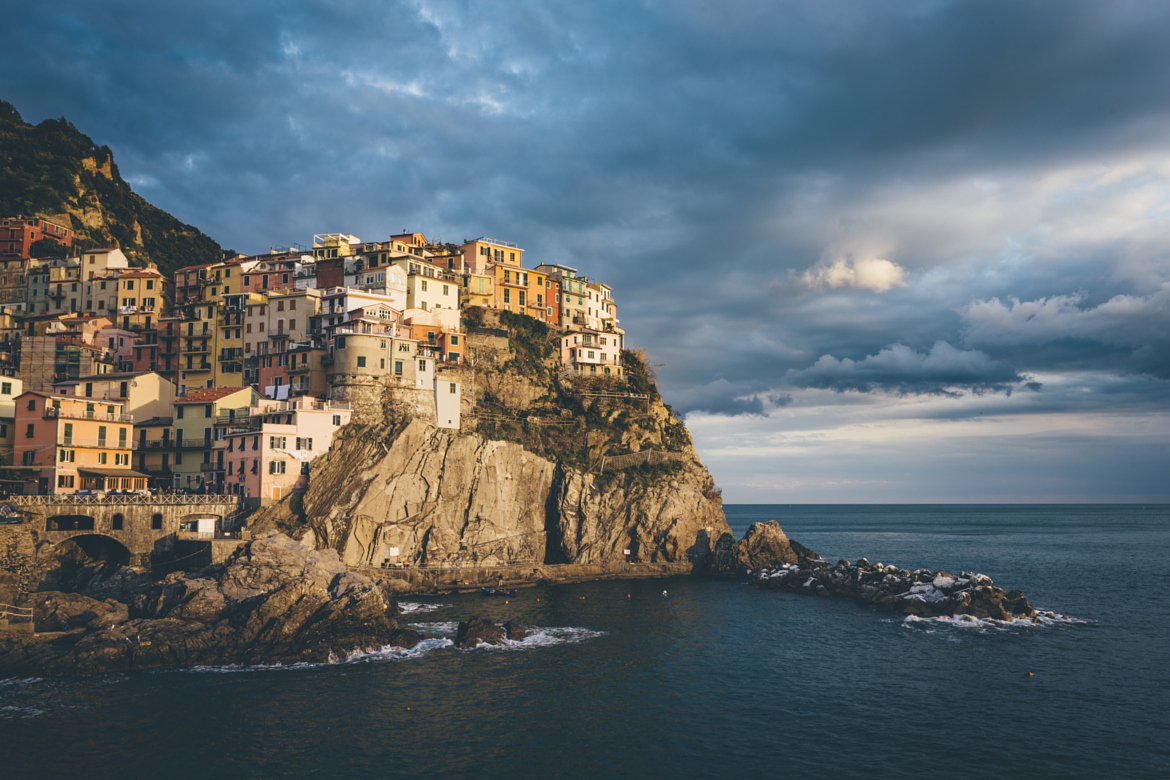
2. Carefully consider Composition.

Composition is most important factor in photography. It is recommended to have a tilt-shift lens for architectural or cityscape shots, but any ultra wide angle lens, such as Nikon 14-24mm f2.8 or Canon 16-35 f2.8 will do the job. I personally shoot with 17-40 f/4 lens at aperture mode, as it gives me the freedom to shoot fast during sunset or sunrise. It’s better to shoot at the sweet spot of the lens, which is mostly around F/8 – F/11. Most of the time, a single exposure is not enough. You need to use multiple exposures like HDR from 3 brackets to 9 Brackets. You can use Photomatix to blend them, or you can manually blend those exposures in Photoshop to get the best and natural results. Finally, the verticals should be straight—no one wants to see a curved or distorted tower. In Lightroom or Adobe Camera RAW, this can be corrected with a click of a button, though sometimes you have to correct it manually, which could be a pain. Always shoot in RAW, as it produces 14-bit compared to 8-bit jpg. It also has more information and detail compared to jpg.
Processing
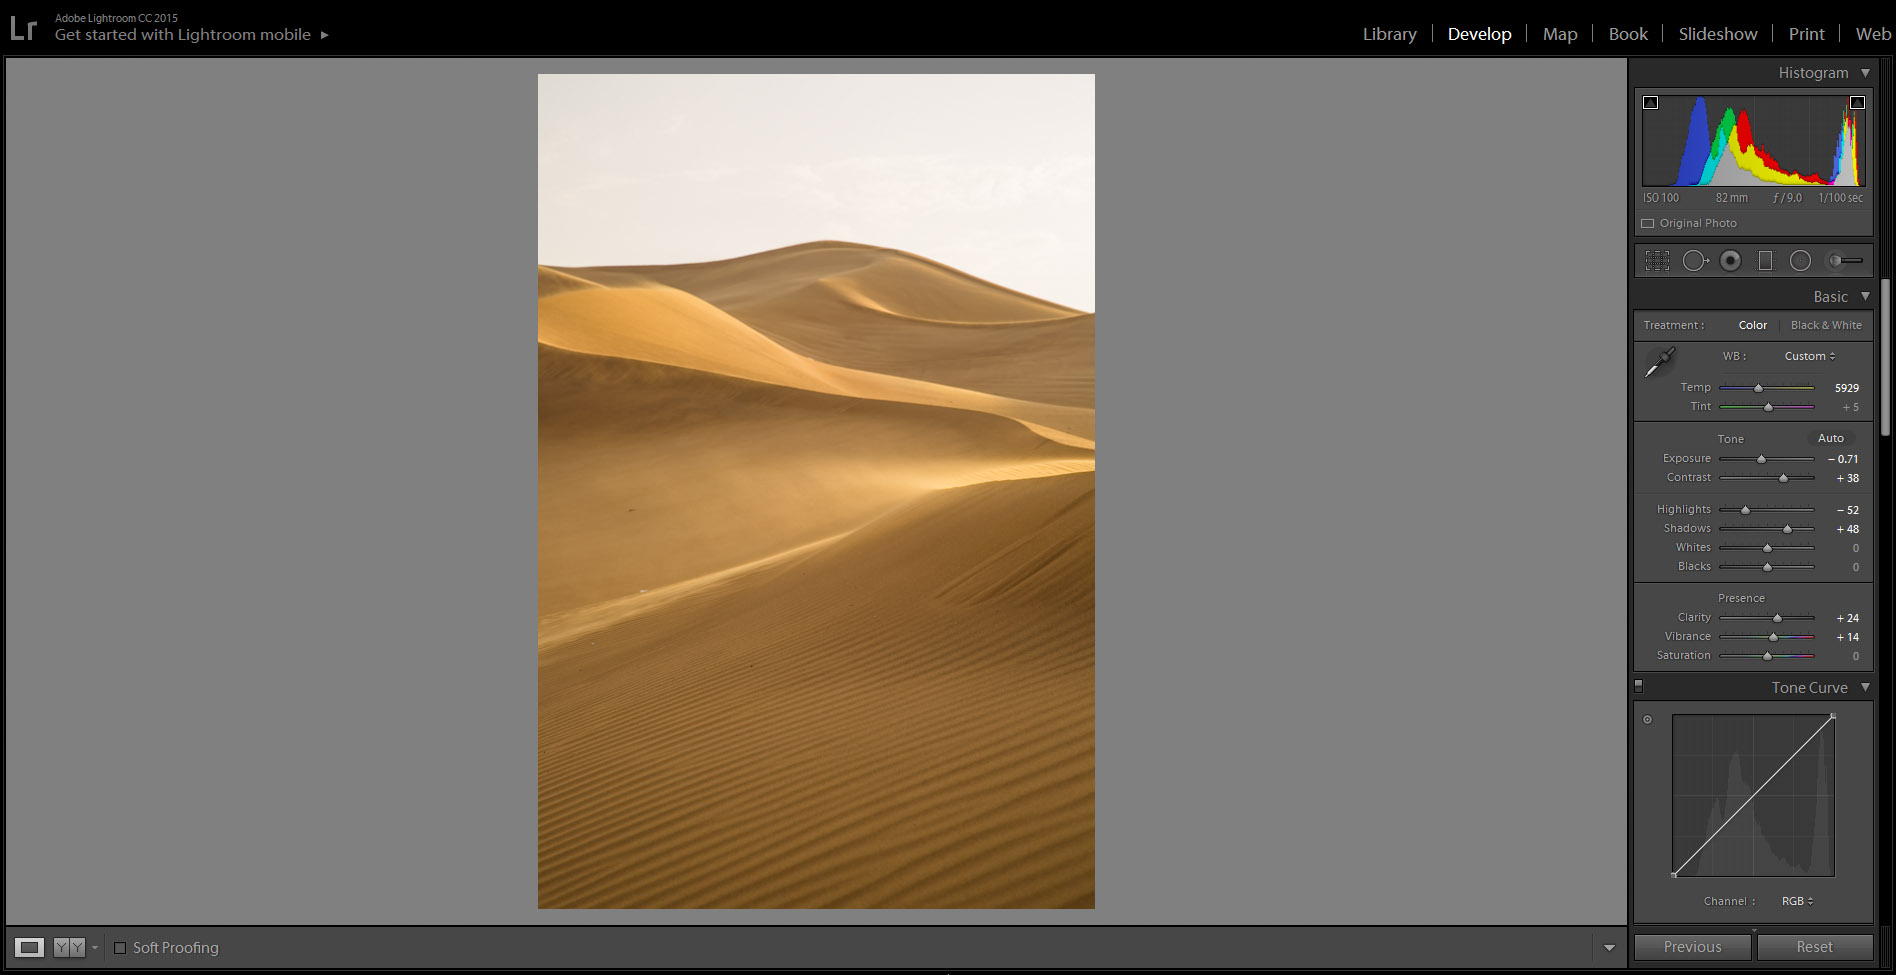
3.1 Make some basic adjustments.
Adobe Lightroom is the one of the best softwares for processing the RAW file. It is really easy, as all the adjustment sliders are accessible. Lightroom or Adobe Camera RAW are the two best programs for initial processing such as highlight, shadows, HSL, lens corrections, and detail before exporting to Adobe Photoshop.
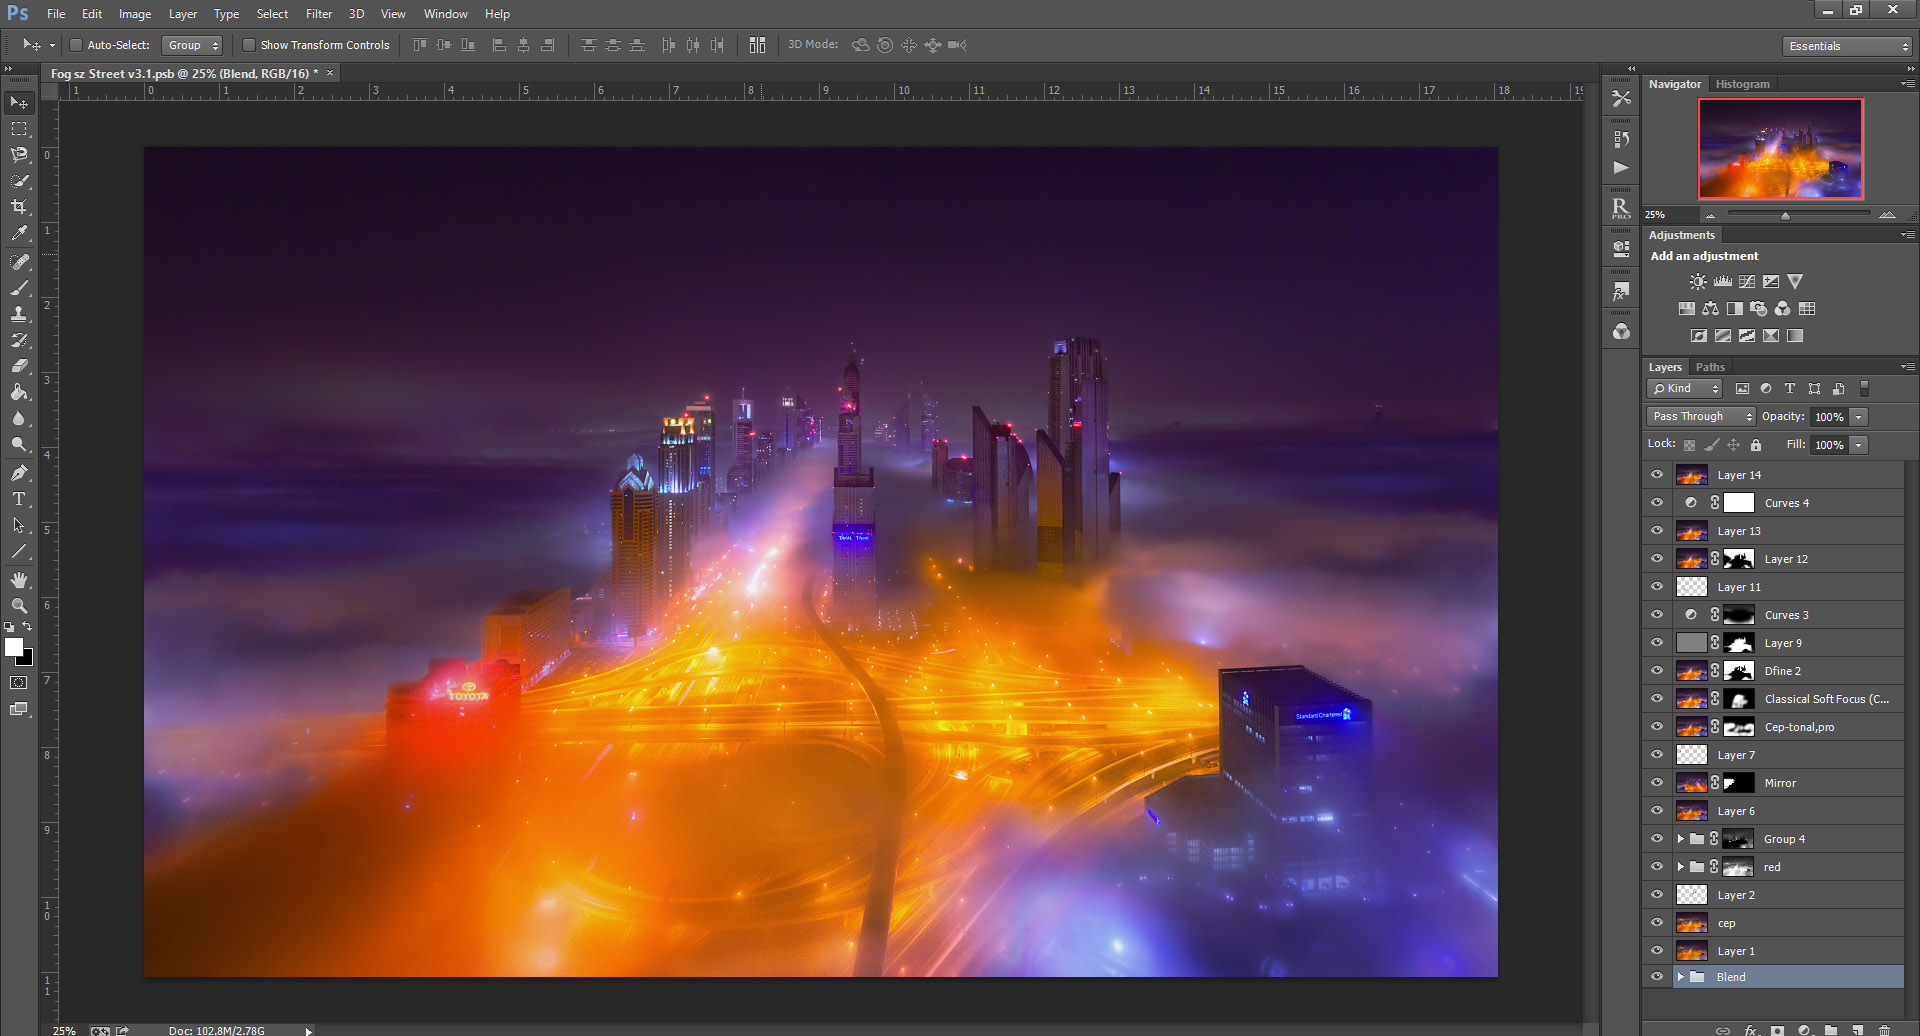
3.2 Use luminosity masks and adjustment layers.

After doing basic adjustment in Lightroom and export multiple exposures to Photoshop, I use luminosity masks to blend multiple exposures together. Luminosity masks can be created manually, or you can get the Raya Panel by Jimmy Mcintyre or TK PANEL 4.0. After blending the multiple exposures, you can create an amazing effect using adjustment layers (Curves, Levels, Photo Filters, etc.) or Nik and Topaz Filter. My personal favorite is Nik Colorefex Pro4, with its great filters like pro contrast, tonal contrast, color contrast, detail extractor, and brilliance/warmth. Adjustment layers are really powerful tools you can use. They can help you get create an effect in specific areas. For example, if you want an orange tinge effect in your image, you can increase this with an adjustment layer. Just use the Photofilter in orange filter, then use the black brush to remove the effect where it’s not needed. All the adjustment layers can be used in a similar way to get the desired effect. Nik and Topaz Lab Extensions are must-have.
3.3 Use Dodge and Burn to create the mood you want.
There are many ways to create a Dodge and Burn layer. The easiest way is create a new layer, then go to edit fill- content 50% grey, and then change the blending mode to soft light. Use the brush tool with lower opacity—one black and another white, or any desired color—to create a 3D effect. Black will darken the image, and white or any desired color will lighten the image. You can learn more from Jimmy Mcintyre‘s tutorials here on 500px ISO and YouTube.
3.4 Put some final few touches with DeNoise and sharpening.
The final steps are DeNoise and sharpening. After using some filters, adjustment, and touchup, you tend to see Noise showing up in the image especially when you produce sky and water. The noise should be removed before printing or before uploading to any social website. There are a lot of amazing third-party software for removing noise out there. My personal favorite is Nik Define—it’s very easy for removing noise. Topaz DeNoise 5 is also another great option. The next step is to sharpen your main subject. The best and easy way is to use Nik Colorefex 4 (Detail extraction). Just be careful to not overdo it. Another way to sharpen your image is to use the High Pass filter. Just make a copy of your final layer and go to Filter > Others > High Pass. Then use the radius around 2.5-5. Next, change the blending of the layer to soft light or vivid light mode. After that, just adjust the opacity accordingly, and mask it wherever it’s needed. Finally, you can now resize and export your image to the web, or save the document for printing.

Hope you found these tips helpful to your workflow!

To see more of his work, follow him on 500px, Facebook, Twitter, or visit his website.
Leave a reply