Ignacio Palacios is best known internationally for his travel and landscape work. He has been continuously traveling around the world since 1998 but since he came to Australia in 2008, he has focused on photographing landscapes and using digital imaging techniques to produce more creative and fine art work. His images have been published in international photographic magazines and books all over the world including National Geographic, Australian Geographic, and Lonely Planet Guides. To see more of his work, follow him on 500px, visit his website, or check him out on Facebook.
The Orton effect gently blurs your image to give a dreamy, luminous glow to your pictures. This technique is commonly used among landscape photographers.

I often apply the Orton effect to some of my images. There are a few different ways of creating this effect. In this article, I will show you the specific technique that I follow to apply the Orton effect to my images.
Creating the Orton effect in Photoshop is a very simple process. It only takes 4 simple steps. Read on!
Step 1 – Stamp all your layers on top twice
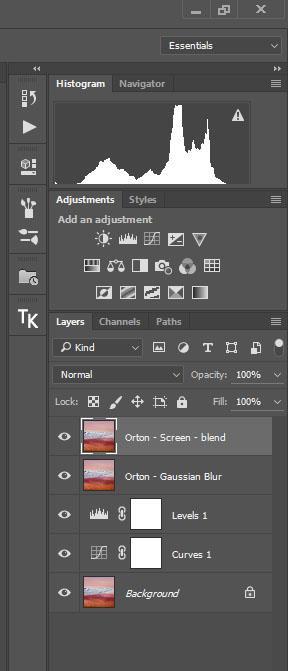
When you finish retouching your image, stamp all your layers on top with the following shortcut: Ctrl + Alt + Shift + E (or Command + Alt + Shift + E if you are a Mac user)
Step 2 – On layer One use Gaussian Blur and Blending Mode Multiply @ 70% opacity
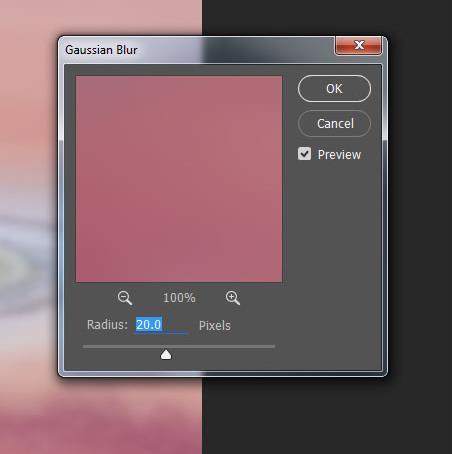
On the first layer created, apply a Gaussian blur. To do this, with Photoshop go to:
Filter>Blur>Gaussian Blur and apply a radius of 20. The radius you can choose mainly depends on the size of the image you are working on. With my files I normally choose a radius of 20-22.
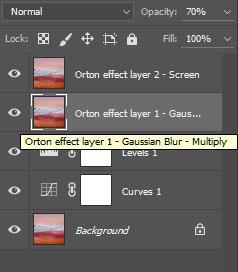
Then go the Blend Mode of this layer and change it to Multiply. Reduce the opacity of the layer to 70%.
Step 3 – Layer Two – Blend Mode: Screen

Now, work on the second layer that you had created in step 1 (this should be the one at the top of all your layers). On that second layer, all you have to do is to go to the blend mode and change it to Screen.
Step 4 – Masking
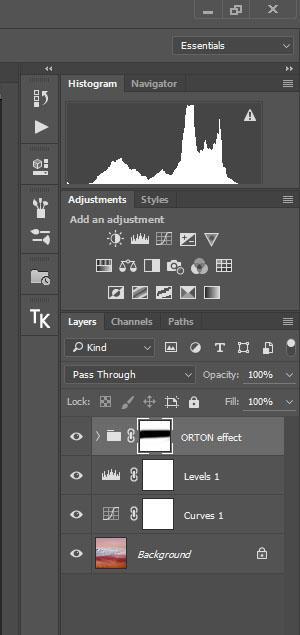
Now the Orton effect has been created to the whole image but you want to try to be selective and just apply the effect to some specific areas (such as the sky) as it can soften important textures and details of the image.
So to mask out of the areas you don’t want it to be applied group both layers using the shortcut: Control + G and then create a Mask.
Paint on the mask with the brush on the areas where you don’t want to apply the Orton effect.
Save the image as a TIFF file with all layers. That’s it! Simple, isn’t it?
Tip: Once you apply this effect some colors in, your image might became a bit saturated. Be aware of this and whether or not this effect is enhancing or degrading your image.
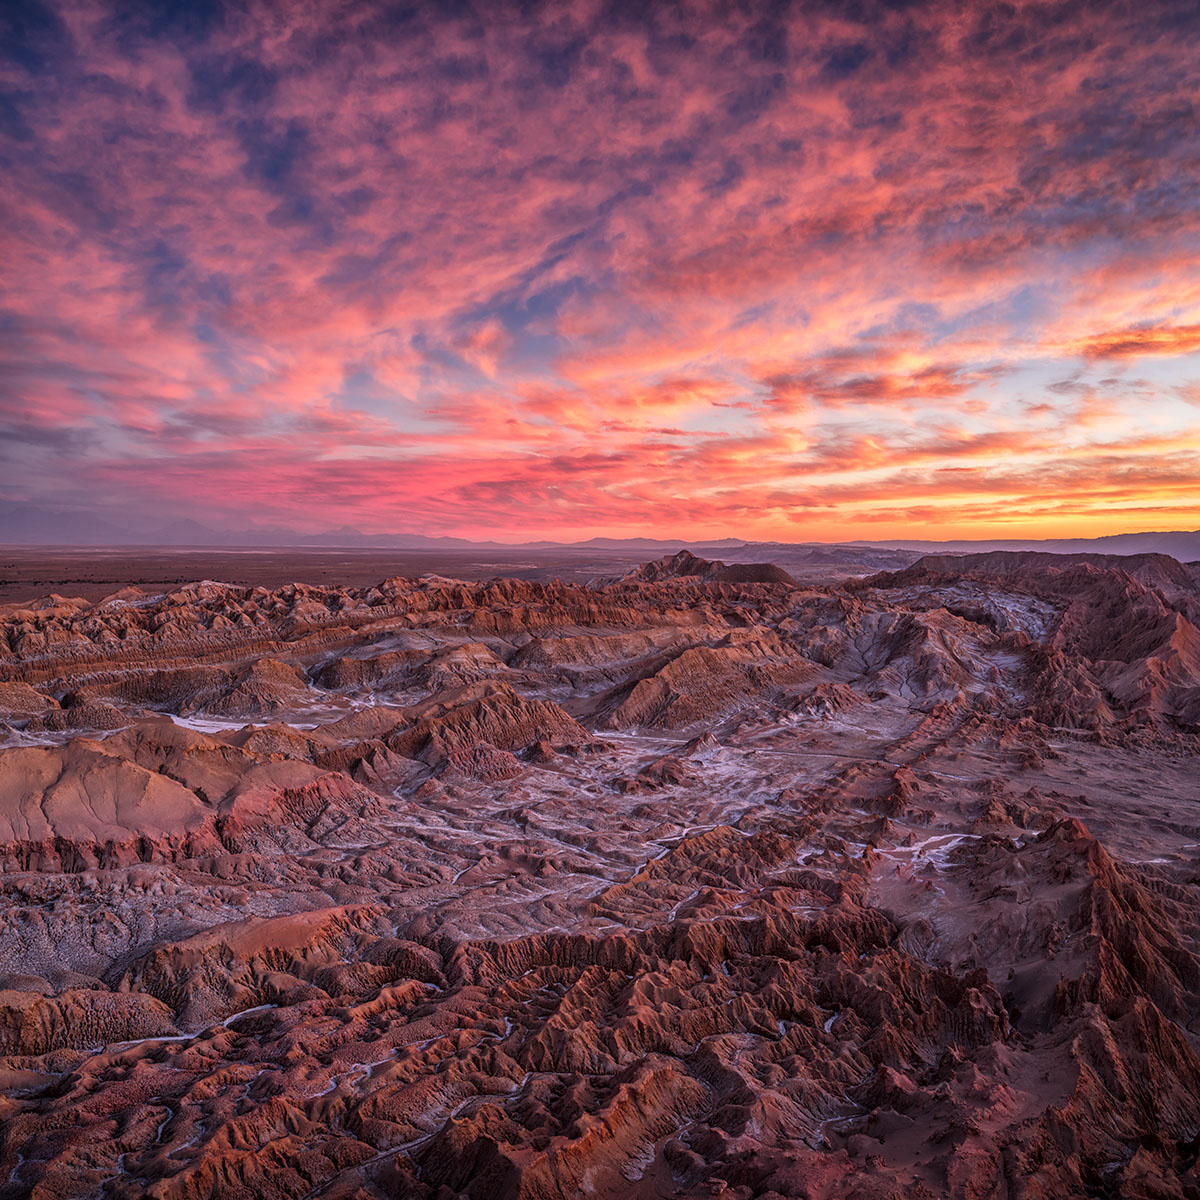
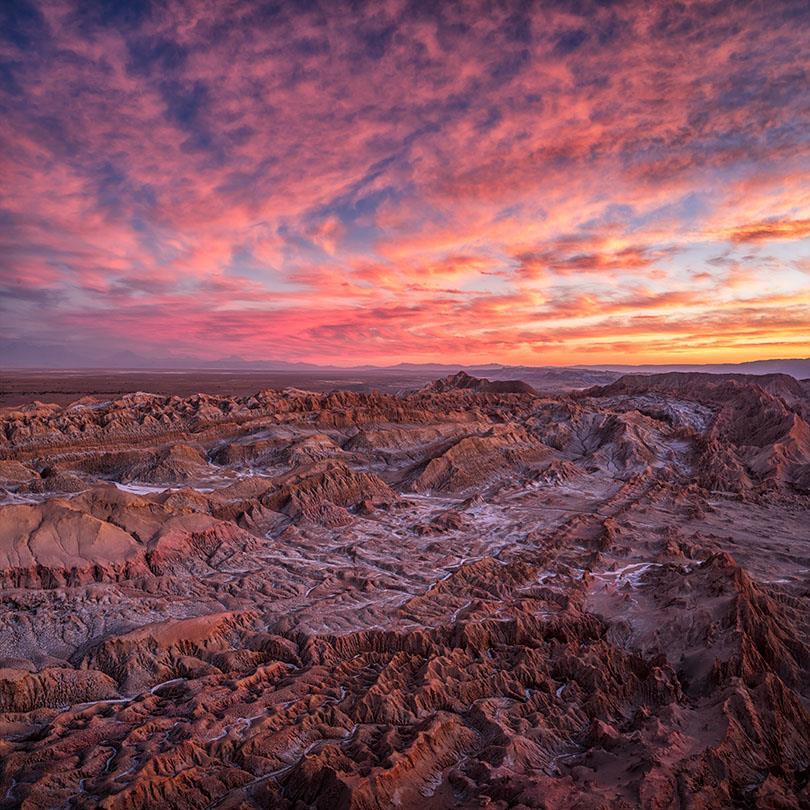
Although it might be a bit difficult to appreciate this on your computer screen or tablet, I wanted to include an image of my recent trip to the Atacama Desert with Luminous Landscape to show the before and after the Orton effect.
[twentytwenty]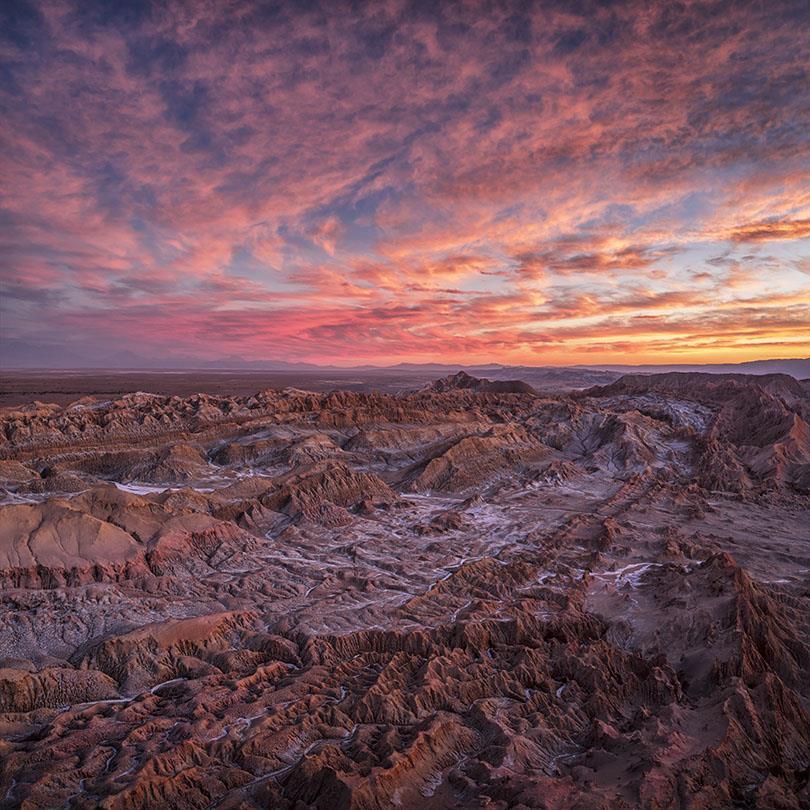
 [/twentytwenty]
Notice the blur and glow on the clouds on the second image? That’s the Orton! I normally use it for the clouds. But depending on your image, you can also apply it to sea waves, lakes, reflections, and more landscape elements. Have fun!
Leave a reply