Jimmy Mcintyre is a travel photographer, educator, and 500px ISO contributor. His photos have been published in local and national magazines, including the BBC. His online courses on digital blending and post-processing can be found in his official website. You can also check out the rest of his tutorials on 500px ISO here.
by Jimmy Mcintyre
HDR doesn’t have a great reputation. There’s no doubt about that. Simply typing ‘HDR photography’ into Google images will give you an idea why that’s the case.
Luminous bright greens, heavy noise, soft pixels, chromatic aberration, are all characteristics that one typically thinks of when we hear the term ‘HDR’.
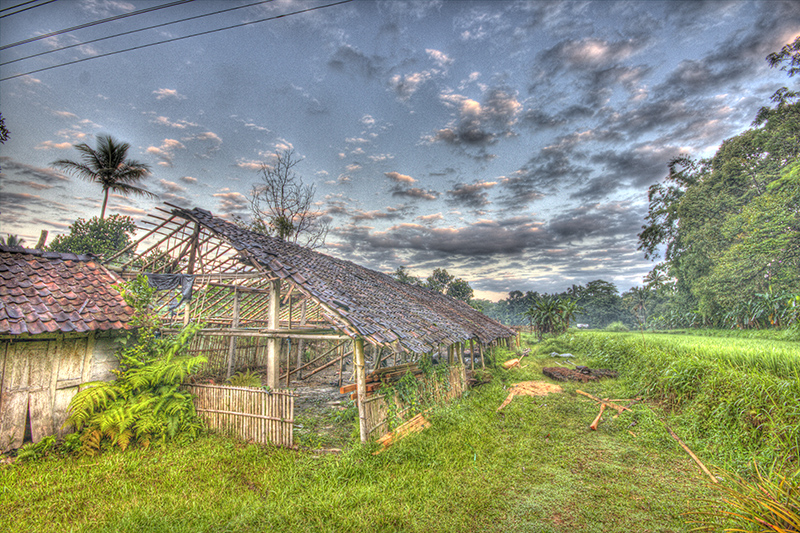
Stereotypical HDR – Jimmy McIntyre
Essentially, what we’re really referring to isn’t HDR photography, it’s tone mapping, a particular type of HDR. But not all tone mapping produces messy images. The results you obtain depend entirely on the software you use and the way in which you use that software.
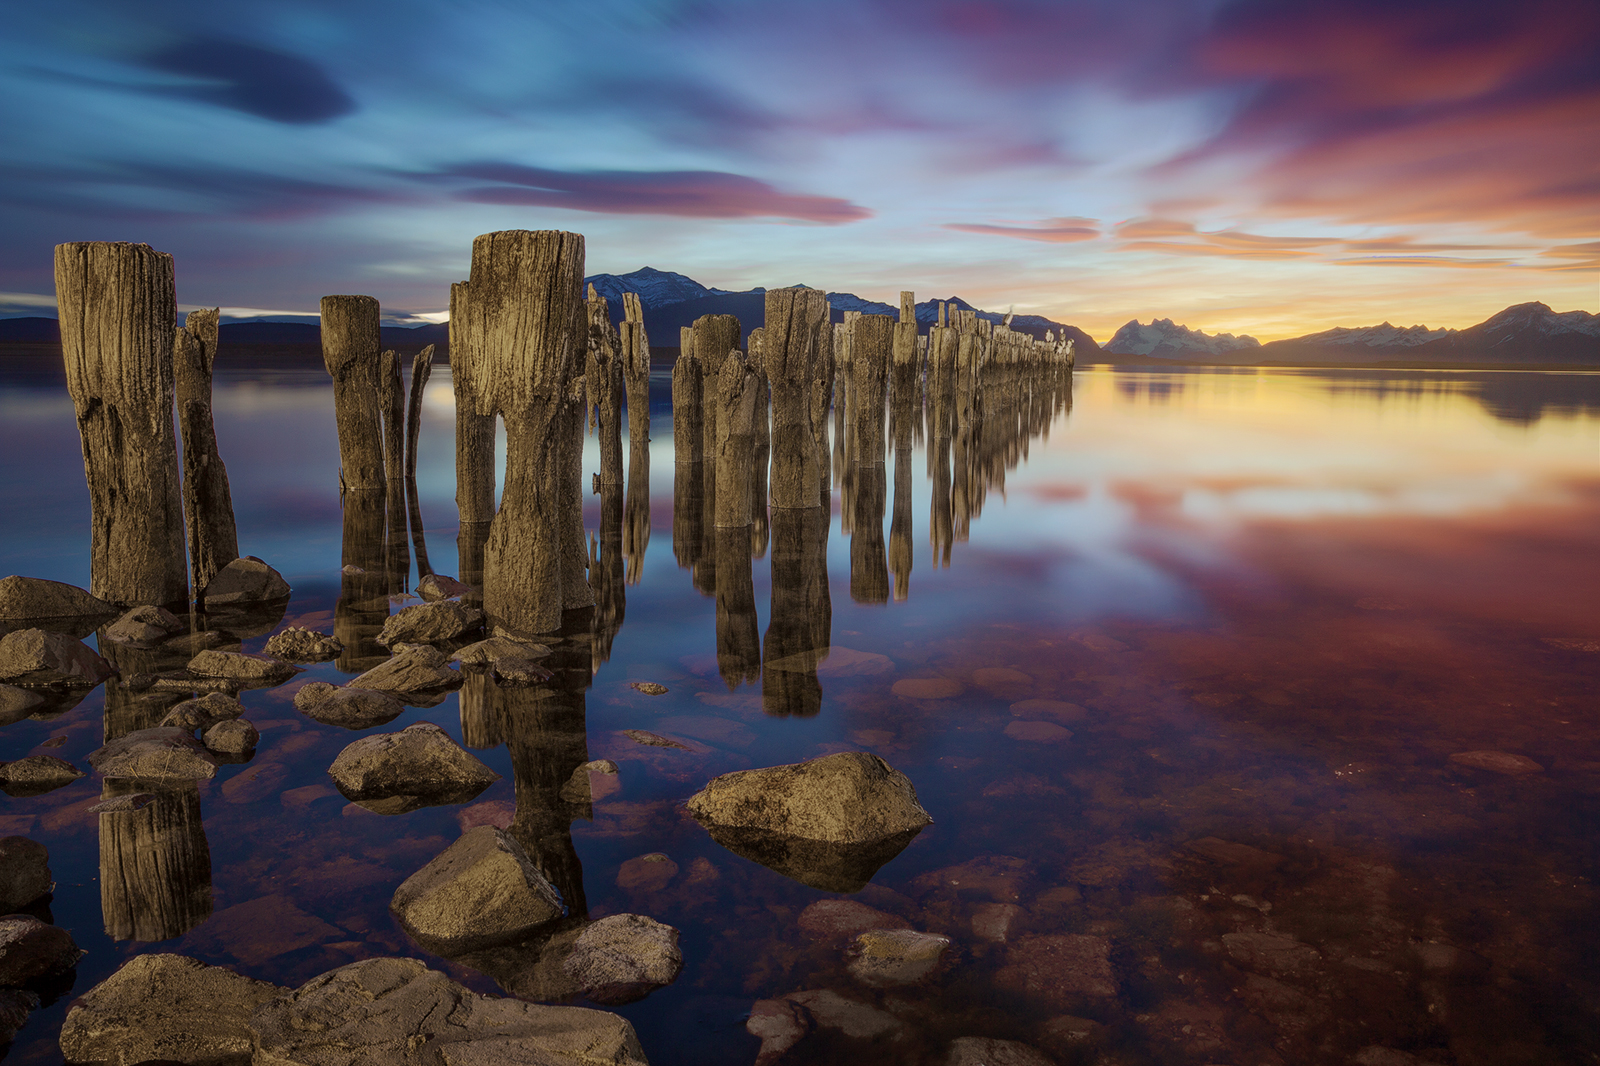
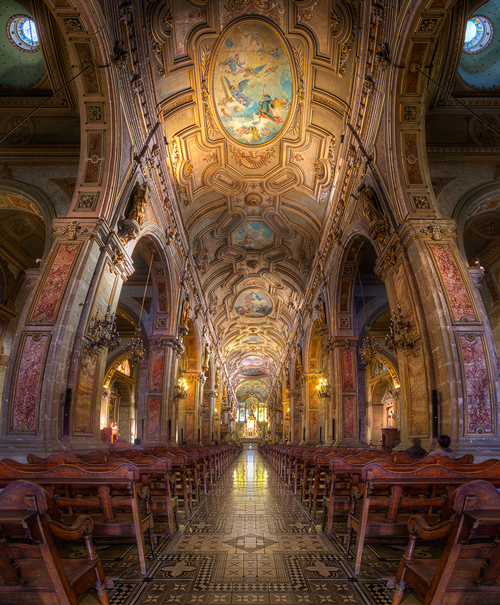
This is one of the last images I tone mapped, almost a year and a half ago:
Santiago Metropolitan Cathedral, Chile
In the world of HDR, there are many different methods of exposure blending, some of which help to create beautifully clean images, while others aren’t quite as tidy.
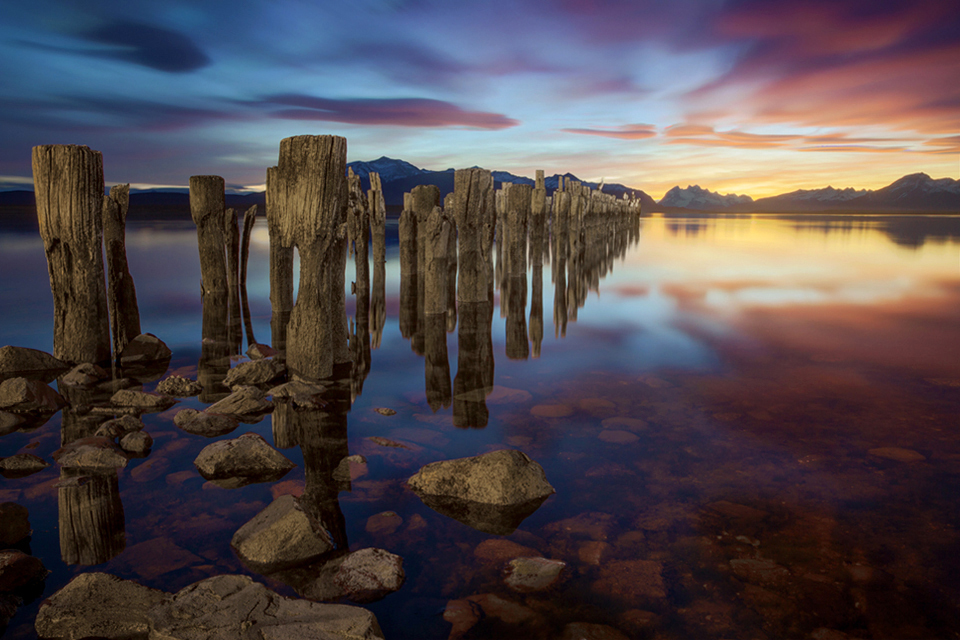
How to create natural HDRs without tone mapping
A lot of photographers use forms of digital blending to create clean, crisp HDR images. With digital blending we are taking the blending process into our own hands, and merging exposures manually in Photoshop. We do not alter our exposures in anyway, thus maintaining the natural coloring, sharpness and quality of the original image.
There are many different ways to blend exposures, but in this article, we’ll look at four: luminosity masks, the Rapid Blend If technique, gradient masking, and apply image.
Luminosity Masks
For me, luminosity masks are the pinnacle of digital blending. While far from perfect, as with all forms of HDR, there is no greater way to gain fine control over your workflow.
I’ve already a written a comprehensive beginner’s tutorial on luminosity masks for 500px.com, which you can see here: http://iso.500px.com/luminosity-masks-in-digital-blending/
Since you already have the above luminosity mask tutorial, I’m happy to show you another benefit of luminosity masks – they’re very flexible! Not only do they allow us to blend multiple exposures, we can also combine them with other HDR processes.
In the video below, I show you a full digital workflow on how to combine 32 bit HDR processing with luminosity masks to create a clean, balanced image.
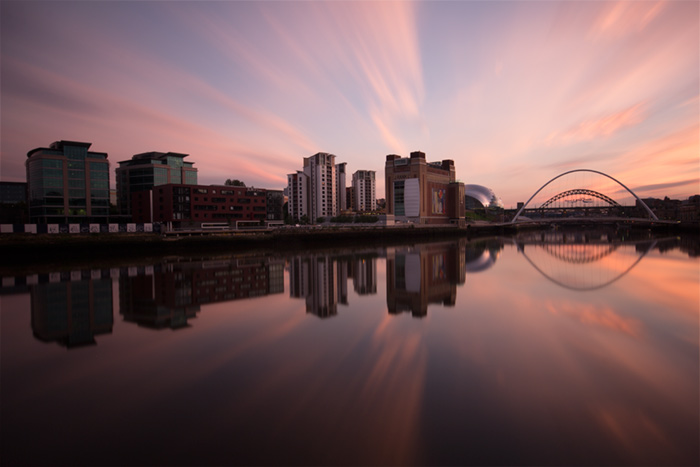
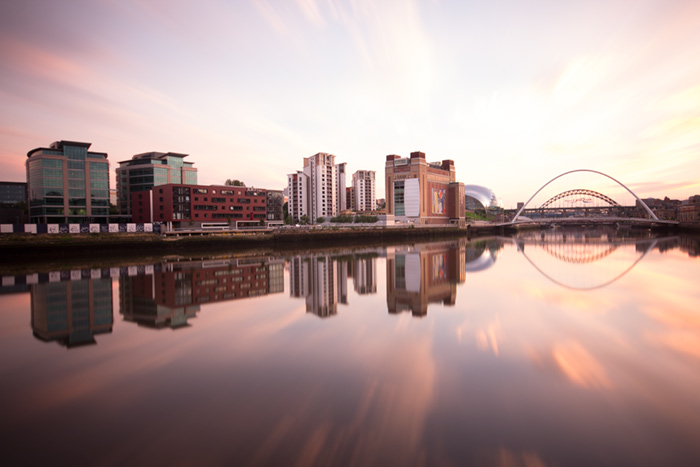
We’ll go from these two exposures:


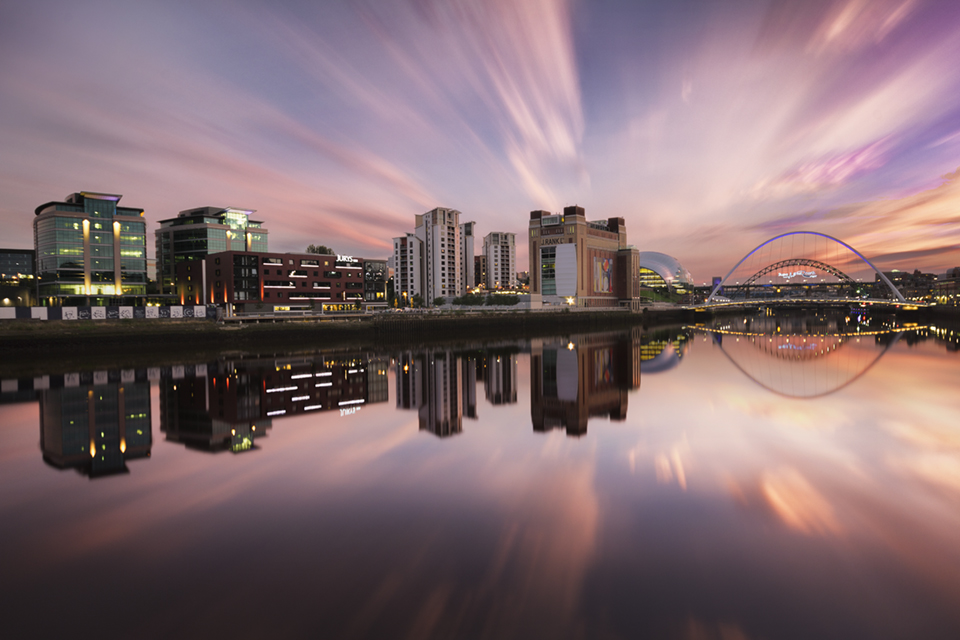
To this final image:
You can download my free luminosity mask actions here, which generate the masks for you: Free Luminosity Mask Actions
Please note, this is a slightly more advanced tutorial which assumes you have an understanding of both luminosity masks and 32-Bit HDR.
Video tutorial (For PS users with CS6, see this tutorial on 32 bit & ACR)
The Rapid Blend If Technique
I came across this technique last year while experimenting with blending adjustment layers in the Layer Styles dialogue. It came to me that we may be able to blend multiple exposures in the exact same way. I tried it, and sure enough it worked well. I searched the internet and couldn’t find any articles or tutorials relating to this technique.
I’m absolutely sure I’m not the first person to use this for exposure blending, but having so little information out there around it, I created a quick tutorial in the hope of adding another skill to your ever-growing arsenal of post-processing tools.
The Method
You can use as many exposures as you wish, but here we’ll keep it simple with just two.
Dark Exposure
Bright Exposure
1. Layer your images in Photoshop, placing the base exposure, or brightest exposure at the bottom.
2. Next, double click on the top exposure, to the right of the layer thumbnail. The Layer Style box will appear.

3. Now go down to Underlying Layer. Hold down Ctrl & Alt, or CMD and Option on a Mac, left-click on the arrow to the left, and slide it to the right. You’ll see that the arrow splits in half. Drag the arrow all the way to the right.

Press OK. This will have blended the two exposures. If the image is too dark, lower the opacity of the top layer until it’s bright enough.
We now have an image with a greater range of light. It is lacking contrast, but a curves layer and some local contrast adjustments will give it extra life.

Here’s a video tutorial if you prefer to watch by doing:
Things to watch out for when using the Rapid Blend If Technique
The reason I love using luminosity masks is that you can choose exactly where you wish to blend exposures. You have a lot of control.
With the RBI technique, we are making blanket changes across the entire image. Because of this, as you saw in the video tutorial, it can flatten contrast and details in your shot. Therefore occasionally it can take time to mask out the areas of your image you don’t wish to be affected by the blending process.
When blending in brighter exposures, use the same slider, Underlying Layer, but this time move the right-hand arrow to the left.
Gradient Mask

Gradient masking offers a great way of smoothly blending exposures, that in some way, replicates the affect of Graduated Neutral Density filters (GND).
Basically we’re creating a feathered mask, that has a smooth white-to-black gradient, which will make the blending process very natural.
However, as with GNDs, it’s important that you have a reasonably flat horizon when using this technique, otherwise you may end up with black edging.
The video tutorial below will show you how to blend two exposures using a gradient mask.
For those of you who prefer written tutorials, here are the steps followed in the video:
1. Layer your two exposures in Photoshop, with the darker exposure on top.
2. Select the top layer, and then create a layer mask by left-clicking on the square at the bottom of the layers palette, which has a circle in the middle. A mask will appear next to the Sky layer. With this mask selected, press Ctrl + I (CMD + I on a Mac) to invert it to a black mask. The Sky layer should now be invisible.
3. On the toolbar to the left, midway down, you will see the Paintbrush tool – Right-click on it to see the other options. Choose the Gradient tool.
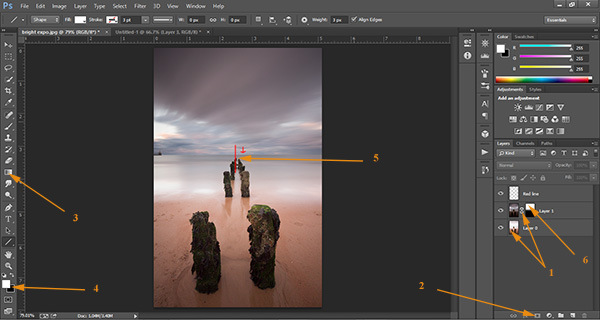
4. Move down to your foreground and background colors. Your foreground should be white, and the background black. This can be done quickly by pressing the small black and white icon to the left of the foreground colour. Now, moving upwards to just below the navigation menu, make sure the settings you have are the same as the ones in the image below.

5. We are now ready to create the mask. We have to draw a line from just above the center of the image, where the horizon is, downwards. This doesn’t need to be a big line. As you can see above, the distance from the top of the line until the horizon is about the same as the distance from the horizon to the bottom of the line. To draw a straight line, hold Shift and the left mouse button while dragging the cursor down. You will now see the over-exposed sky in the Ground layer disappear, to be replaced with the sky from the Sky layer!
6. If you look at the layer mask next to the underexposed thumbnail, it now has a gradient going from white to black. This is the feathered layer mask you just created.
Using Apply Image
Finally, I will leave the explanation and use of this great blending technique to the guys over at Phlearn.com!
I hope you found some of the tips in this article useful. HDR doesn’t have to be strongly processed, surreal, heavily saturated, etc. It can be a very basic process that restores the natural balance of light in your scenes, and leaves you with a clean, sharp image.
You can also follow my work at the following links:
My website
My Facebook page
My photography newsletter


Leave a reply