Ignacio Palacios is best known internationally for his travel and landscape work. He has been continuously traveling around the world since 1998 but since he came to Australia in 2008, he has focused on photographing landscapes and using digital imaging techniques to produce more creative and fine art work.
His images have been published in international photographic magazines and books all over the world including National Geographic, Australian Geographic, and Lonely Planet Guides.
To see more of his work, follow him on 500px, visit his website, or check him out on Facebook.
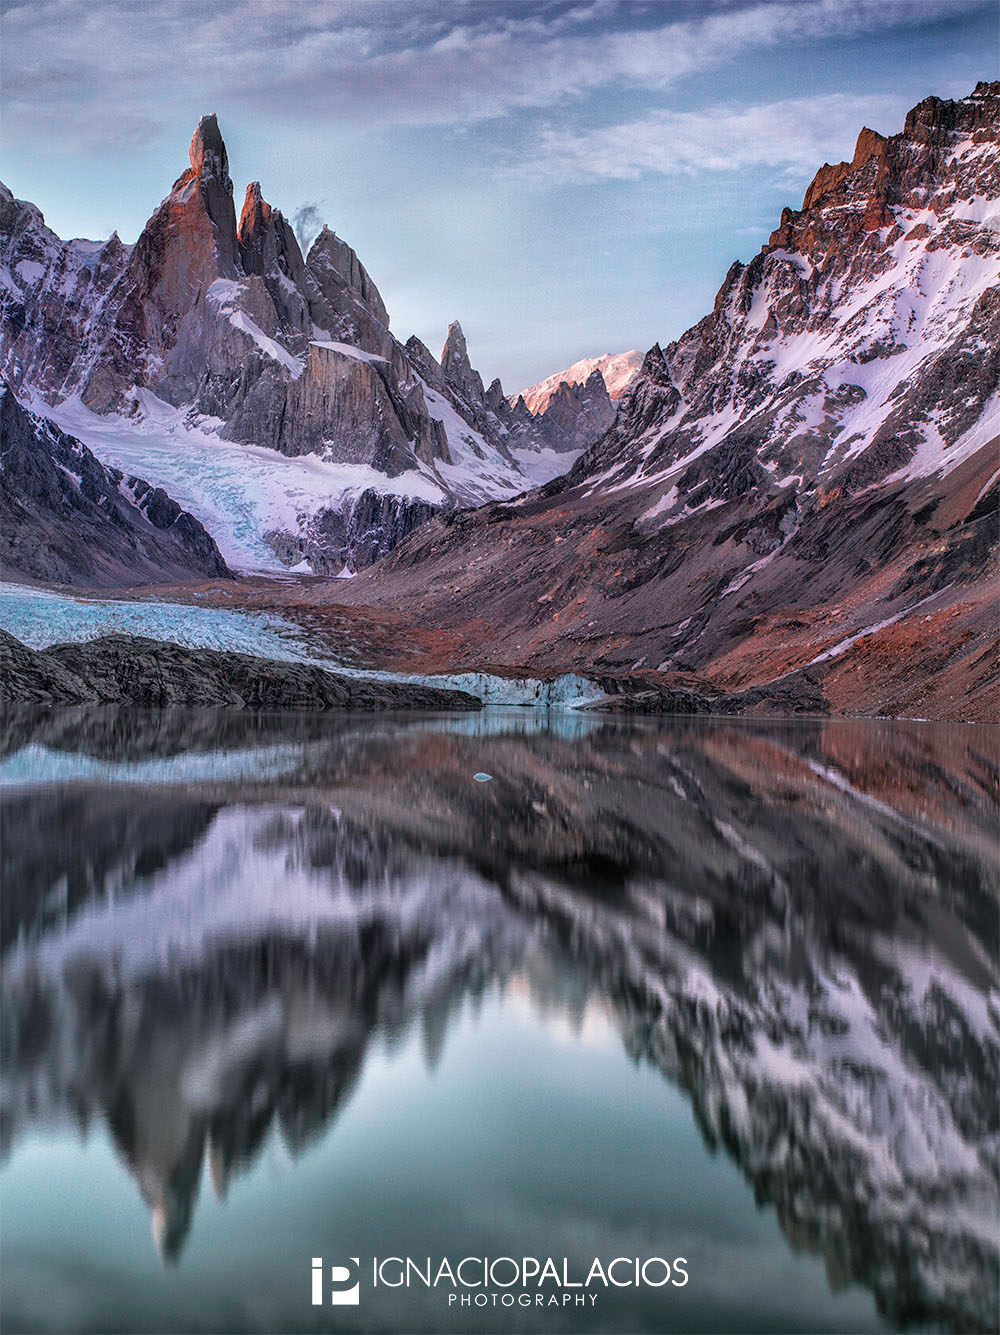
Cerro Torre is one of the mountains of the Southern Patagonian Ice Field in South America. It is located in a region that is disputed between Argentina and Chile, west of Cerro Chalten (also known as Fitz Roy). The peak is the highest in a four-mountain chain and the first time you see its peaks you can’t believe its beauty. The top of the mountain often has a mushroom of ice, formed by the constant strong winds, increasing the difficulty of reaching the actual summit.
This photograph was taken at sunset, which is not the right time to photograph this mountain (as the sun set behind the valley) but we only had one opportunity to shoot at sunset and one opportunity to shoot at sunrise. The climate around these mountains can be tricky, so I decided to give it a go and waited until it got dark. It was a good decision as, the next morning, it was all covered in clouds
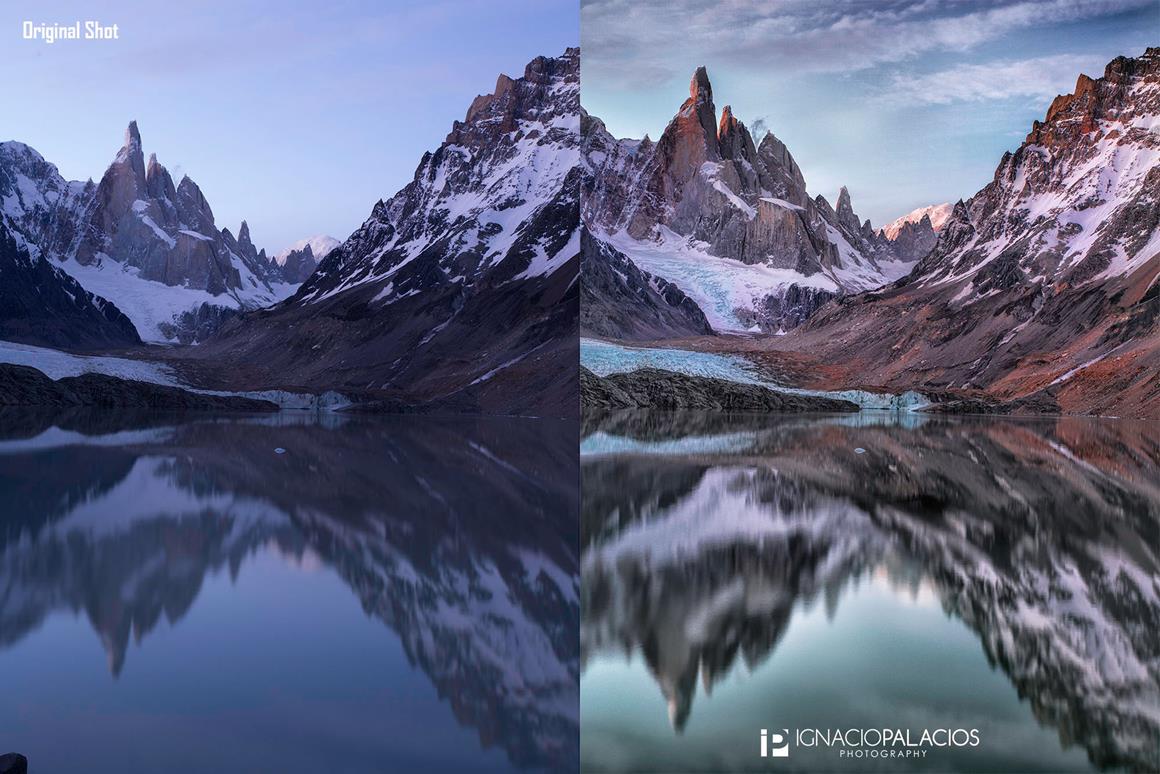
This is an example of a photograph which was not taken with the best light, but with a bit of post-processing you can improve it a lot.
Step 1 – The Capture
This was taken with the Pentax 645D and the SMC FA 645 55mm F2.8 AL [IF]. I also use a Gitzo GT1541T with a Markins Q3 Emille head. This tripod is perhaps a little bit light for a medium format camera, but I had a lot of gear to take and it did the job most of the time. The settings I used were 2.5 secs, f11, ISO 100.
From the original shot, you can see that the main changes are some tweaks to the white balance (corrected in Camera Raw 7.0), the contrast, color, and the height of the actual Cerro peaks (post-processed in Photosphop) and Nik Software. When I opened the photograph in my Eizo monitor, I just felt that the lens I used did not give the scale it deserves.
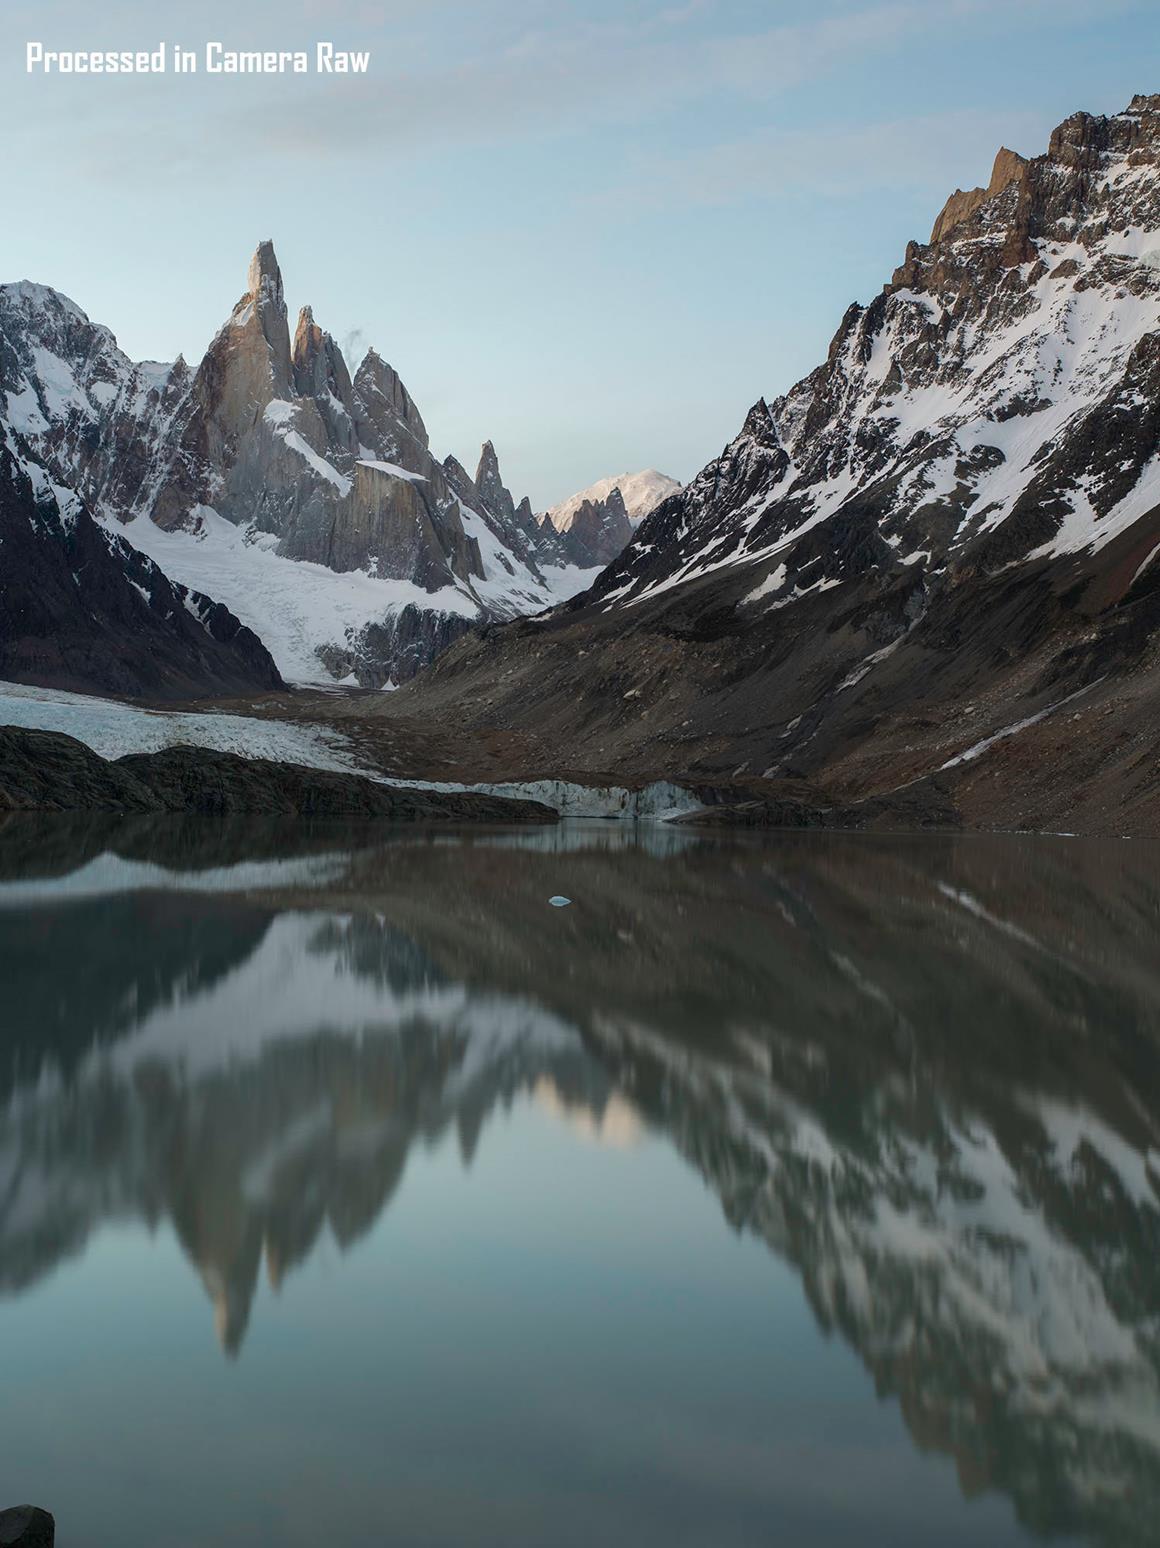
Step 2 – Camera Raw Post-Processing
The DNG file I got was a bit blue-ish, so the first thing I did was correct the white balance. I always correct the histogram of the camera, tweaking the exposure, contrast, highlights, shadows, whites, and blacks in the basic tools in Camera Raw 7.0.
As usual, I also applied some initial sharpening (settings: amount 50, radius 0.5, detail 100) and opened the photograph in Photoshop.
Now for my favourite part…. to play with Photoshop.
Step 3 – Post-Processing in Photoshop and Nik Software
Although I enjoy shooting for the pleasure of it and being in nature, I always shoot with a project or a target in mind. It could be to publish a book, to organize an exhibition, to enter a competition, to publish an article in a magazine, to build a portfolio, or to create an audiovisual presentation for my friends and family.
I find that when I have a target in mind, I strive to get a better shot and it makes me a better photographer. You also have to have in mind what do you want to do with your photograph when you are retouching it with Photoshop.
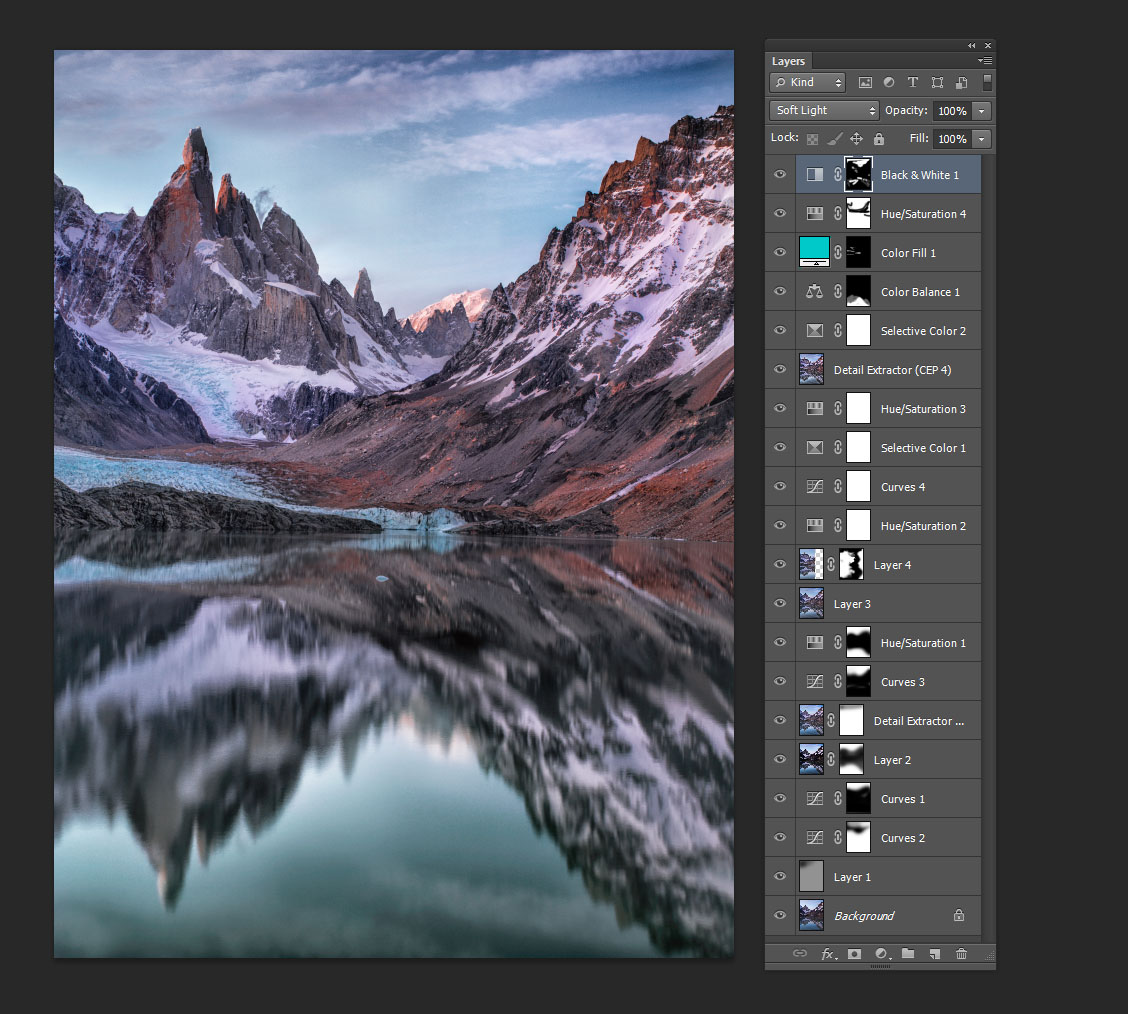
This image was created using 19 layers in Photoshop. You can see the adjustment layers I have used in Photoshop to create this image including the detail extractor filter of Nik software. Nik Sofware is a great tool but you have to be careful not to overdue it as some filters can create a bit of noise. This is fine if the photo is going to go on your website but not great if you are doing a large print.
I have changed the color of the lake slightly as this is how I saw it when I was photographing at that time. I have also added some color to the glacier (with a color fill adjustment layer) and some red to the mountains. This is the color they had a few hours before taking the shot when the sun was hitting them.
As I have said in previous articles, you can agree or not with what I do but for me post-processing is part of the creative process. This creative process in Photoshop is what I love doing and a great tool to see the world and show it in a way that I had not shown before.
Some call it digital art. It does not really matter, but the fact is that image manipulation and composites have been done for more than 100 years. Well-known names such as Oscar Rejlander, Gustave Le Grey, and Camille Silvy (just to mention a few) are actually called photographers and not artists in the books of history of photography.
The images that I create can be more or less processed and that depends on the initial capture, the end use of the image, and how creative I feel that particular day. I might create different versions of an image, one with just a few adjustments for photo stock purposes and another one more processed to fulfill my creativity or to send it to competitions where this type of editing is permitted.
Photography shows the world the way the photographer wants you to see it, and when I look at the world and I look at beautiful landscapes, I look at it to transform it in a photograph. Our camera can be better or worse, with more or less possibilities, but its lens will never be a substitute for vision.
Developing an image is an adventure and an experiment. For me, post-processing an image is a very creative, artistic, personal and fulfilling experience.


Leave a reply