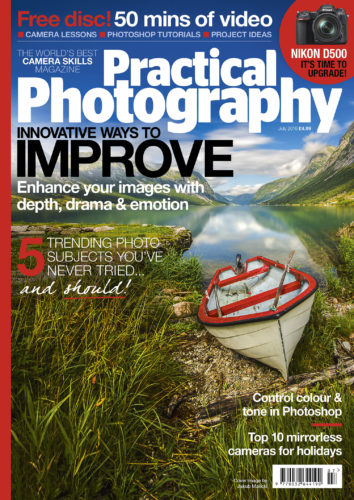
Practical Photography is the world’s best magazine for photographers who want to improve their camera skills. Whether you’re an absolute beginner, seasoned enthusiast or budding pro, you’ll find all the skills, techniques and ideas you need to take your passion to the next level. Their July issue is out—subscribe at greatmagazines.co.uk/pp now!
Once you’ve taken your portrait, it’s now time use some ingenious processing to transform your head and shoulders shot into a Victorian masterpiece. In just a few steps you can give your friends and relatives the haunted look we identify with 19th century photography.
The reason people looked so stern in Victorian portraits is because exposure times were quite long, around 1 minute, so they had to sit still with their head or neck held in a brace. The process was also only sensitive to blue light, so skin would reproduce darker and eyes often lighter. Along with high amounts of detail and sharpness, these are some of the characteristics that make the wet plate process so intriguing to digital photographers.
First, watch the video below. Then, read on for a step-by-step tutorial!
Here are the steps to replicating a Victorian wet plate portrait.
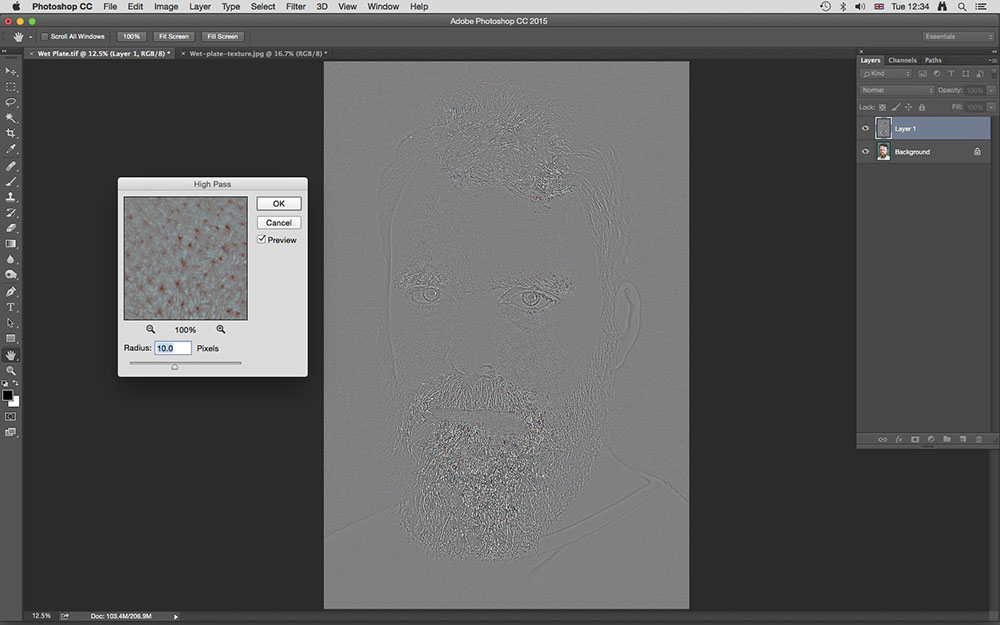
1. Apply High Pass sharpening
In Photoshop, open your portrait and download the ‘Wetplate texture JPEG you’ll find at photoanswers.co.uk/freegifts (February 2016). Click on the portrait, and press Ctrl+J to copy the Background to a new Layer. Now go to Filter>Other>High Pass, and set Radius to 10 Pixels. Go to the dropdown menu at the top of the Layers panel (set to Normal by default) and select Overlay from the list of options.
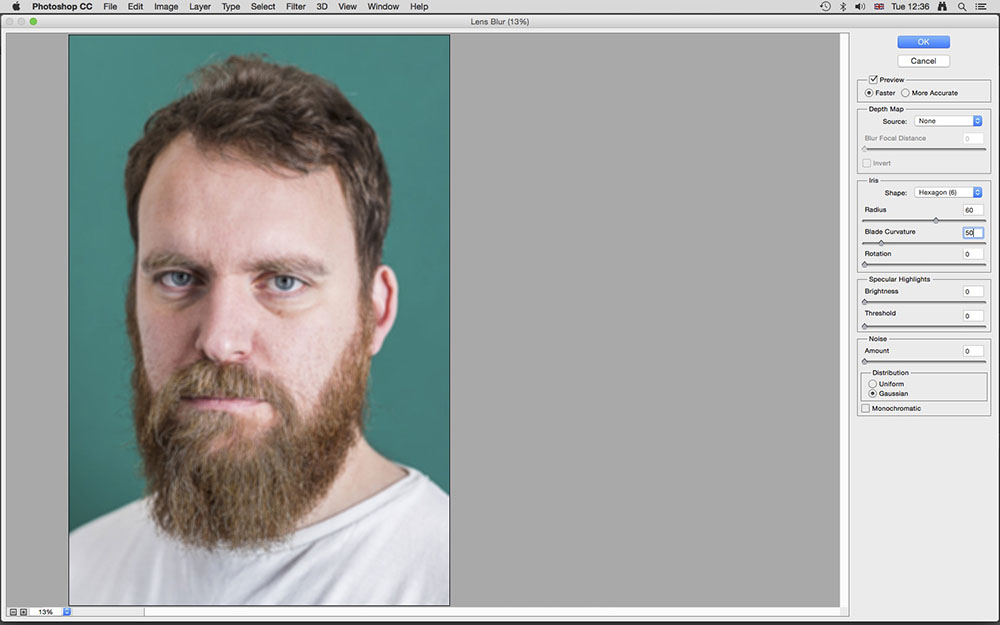
2. Blur a new portrait Layer
Hold down Ctrl+Shift+Alt+E to merge the two existing Layers into a New Layer. Then go to Filter>Blur>Lens Blur. When the dialogue window opens make sure all sliders are set to zero except Radius, which should be set to 60 and Blade Curvature to 50. Make sure distribution is set to Gaussian and hit OK. Next go to Filter>Blur>Motion Blur and set angle to 10º and Distance to 60 Pixels.
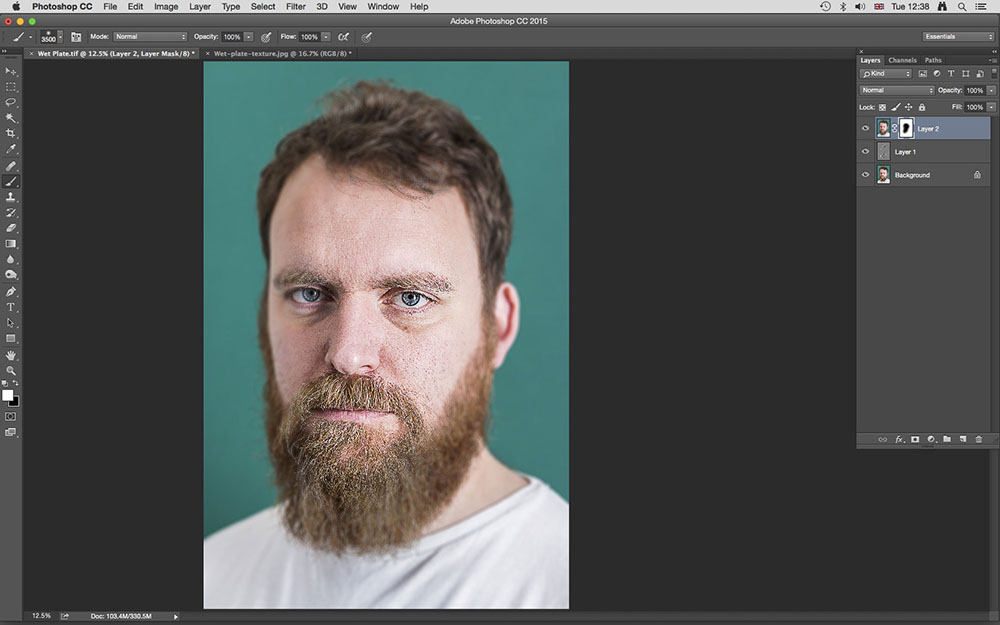
3. Add a Layer Mask
Click on the Add a mask icon at the bottom of the Layers panel. Press D to set the palette colours to black and white. Make sure black is in the foreground, if not press X. Press B for the Brush Tool, and select a large soft-edged brush from the menu above right of the Tools panel. Paint over the eyes, nose and mouth areas. If you make a mistake, press X to paint white over the area.
4. Use the Channel Mixer
Click on the Create new fill or adjustment layer icon at the bottom of the Layers panel and select Channel Mixer. When the window opens, click the Monochrome checkbox. Drag the Red slider to -100, Green to 0 and Blue to +200. Now drag the Red slider to the right until the skin is as bright as needs be. Blown highlights? Drag Green to the left. We used Red -65, Green -40 and Blue +200.

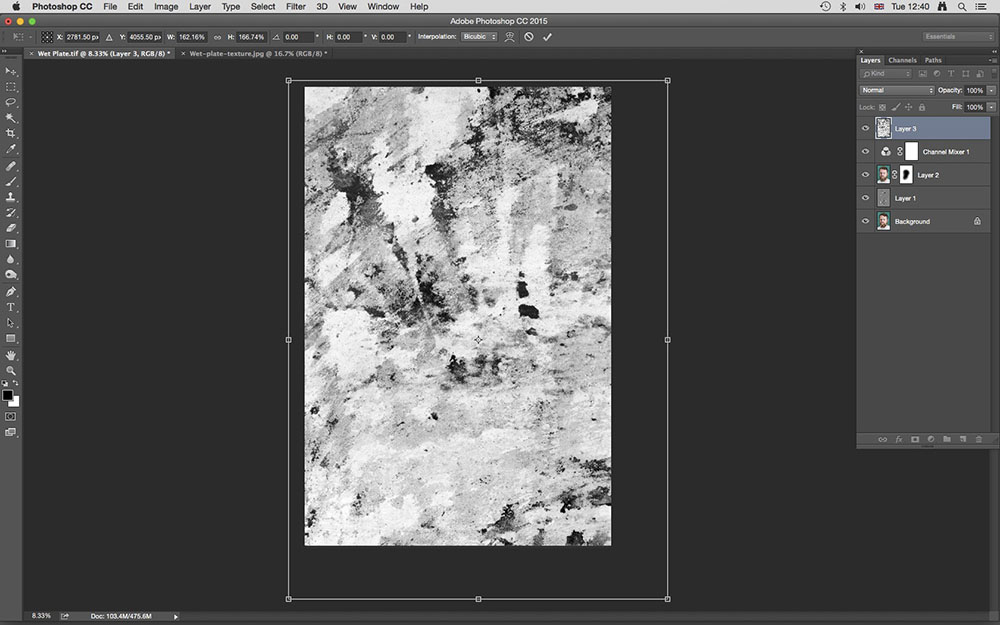
5. Copy and paste the texture
With the black & white conversion complete and detail almost popping out of the image, it’s time to add a texture to mimic chemicals and fingerprints on the plate. Click on the tab for the texture image and press Ctrl+A to Select All and then Ctrl+C to Copy. Click back on the portrait tab to make this image active, and press Ctrl+V to paste the texture as a New Layer.
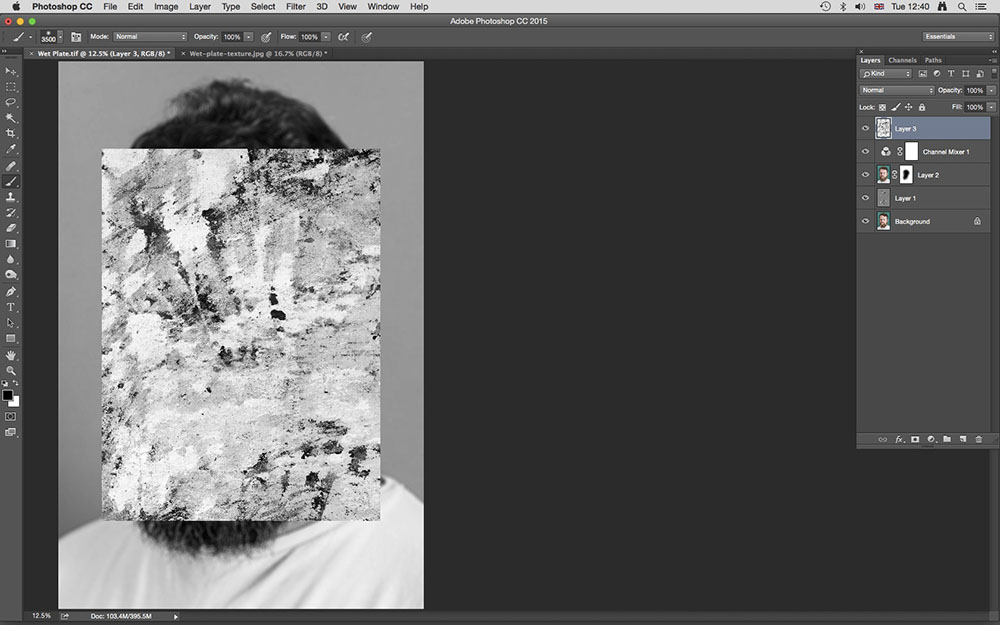
6. Resize the texture
The texture Layer should still be active from the previous step. Hold down Ctrl+T to Transform the texture Layer. When the bounding box appears, left-click your mouse on the smaller boxes and drag the texture out so it’s larger than the portrait below, then press OK. Now change blending mode from Normal to Screen. You’ll find the dropdown menu at the top of the Layers panel.
7. Duplicate and group Layers
We need to make a duplicate of the texture Layer, so press Ctrl+J. When the new Layer appears, press Ctrl+I to invert the Layer and then change the blending mode from Normal to Multiply. Next press Shift on the keyboard and left-click your mouse on the first texture Layer so both are selected. Now hit G on the keyboard to group the Layers before adding a Layer Mask.
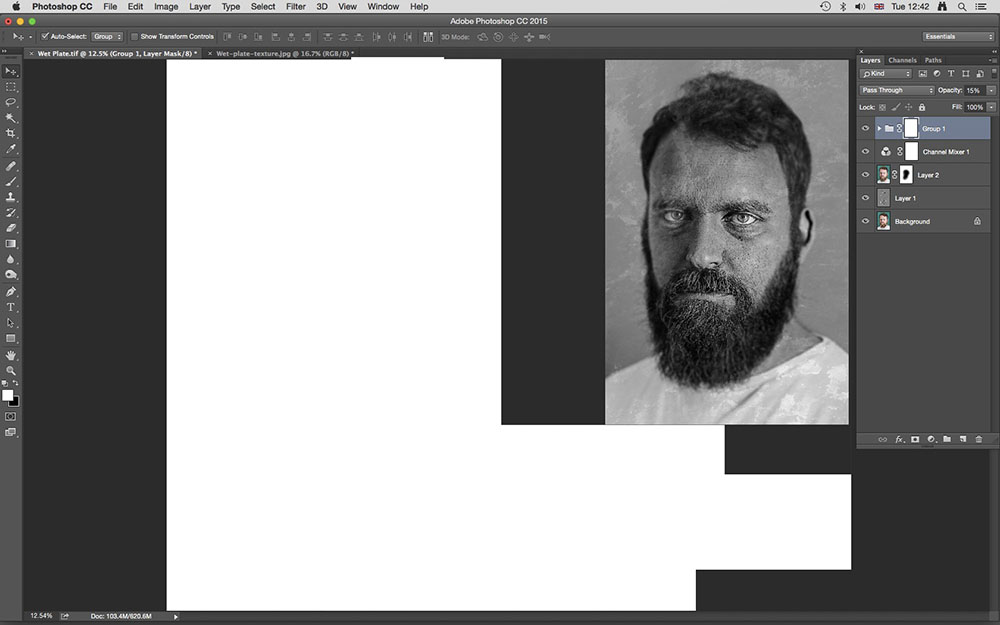
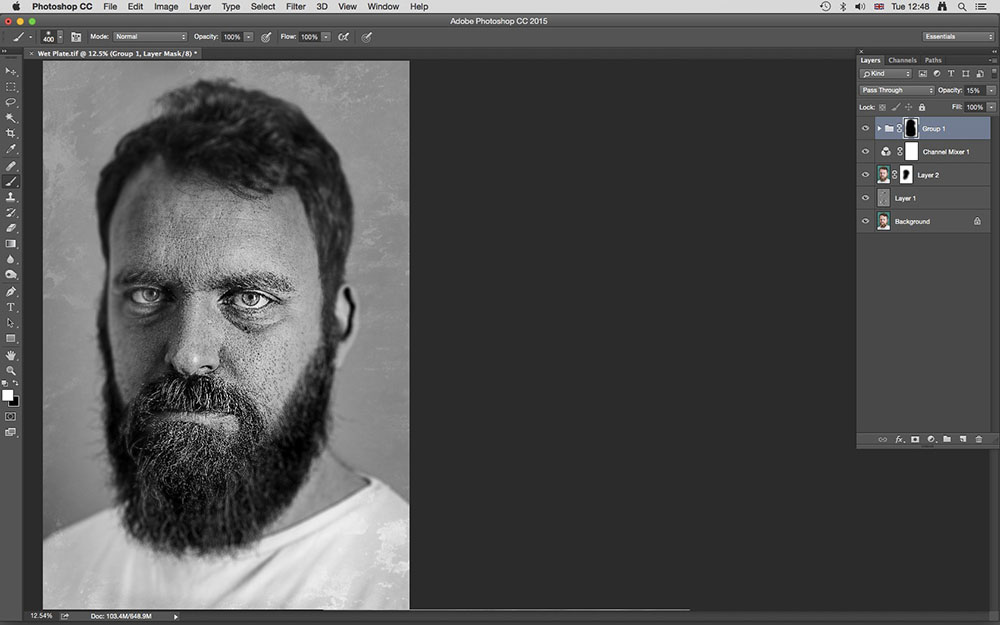
8. Mask out texture
Chemical marks and fingerprints were most common around the edges of wet plates, so we now need to mask the texture out of the central area of the image. Make sure black is in the foreground, and use a large soft-edge brush to paint over the central area of the shot. Use the left and right square bracket keys to quickly change brush size for more irregular edges.
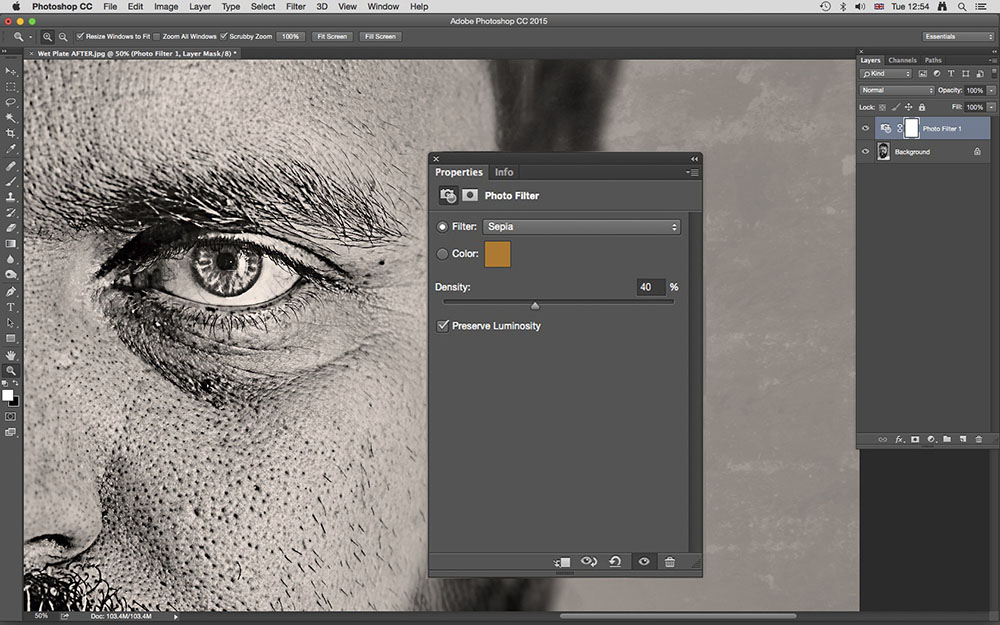
9. Sepia tone the shot
The final step in the process is to sepia tone the image to give it a genuine look and feel. If you prefer, you can miss this step out. But if you’d like a more authentic end result this will get you closer. Click on the Create new fill or adjustment layer icon at the bottom of the Layers panel. Use the dropdown menu next to Filter to select Sepia, and set density to between 25% and 40%.
BEFORE & AFTER
[twentytwenty]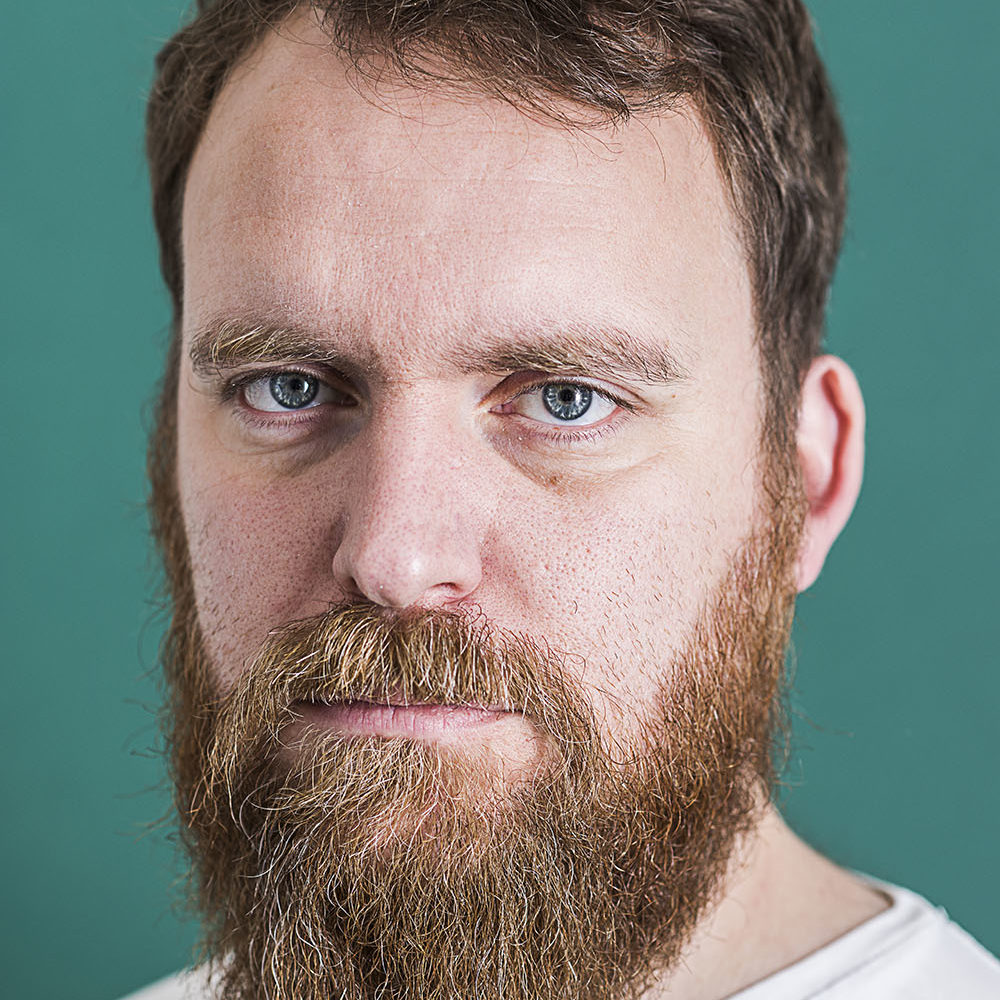
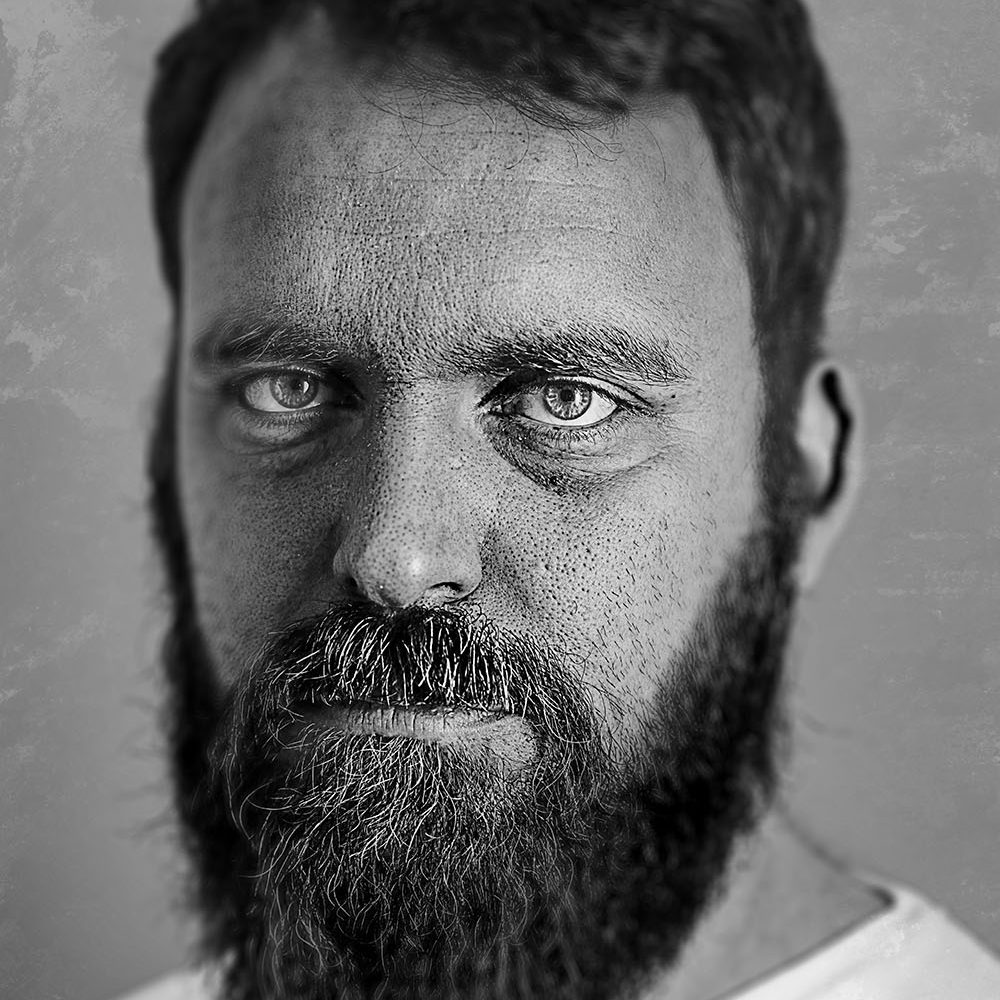 [/twentytwenty]
We hope you found these tips useful! If you have any questions, feel free to drop them in the comments.
Practical Photography‘s new July issue is out now. Don’t forget to check it out for more tutorial and tips to enhance your photography!
Leave a reply