Practical Photography is the world’s best magazine for photographers who want to improve their camera skills. Whether you’re an absolute beginner, seasoned enthusiast or budding pro, you’ll find all the skills, techniques and ideas you need to take your passion to the next level. Subscribe at greatmagazines.co.uk/pp
You’ve heard it all before, but there’s no getting around the fact that the best times to shoot landscapes are around sunrise and sunset. At these times of day, light is soft and dramatic, and the sky is often full of vibrant color.
The problem can sometimes be translating what we see to what the camera records, as often what looks fantastic to the eye doesn’t always translate into the final image. It’s not that the camera failed though, in fact the results are actually much more faithful to reality than we appreciate. But wouldn’t it be great to make the sky look just as good as it does in our memory of the scene?
Enhancing a sunrise or sunset is a forgivable cheat that no one will ever pick up on unless you tell them you’ve done it. By sampling color that already exists in the sky, this technique will add a natural-looking burst of color. And while you are cheating (albeit only a little!), it’s one of the most popular landscape techniques being used today.
So don’t let your sunrise and sunset shots fall short of perfection. Use this technique and get your images a step closer to the pros’ with vibrant glowing skies.
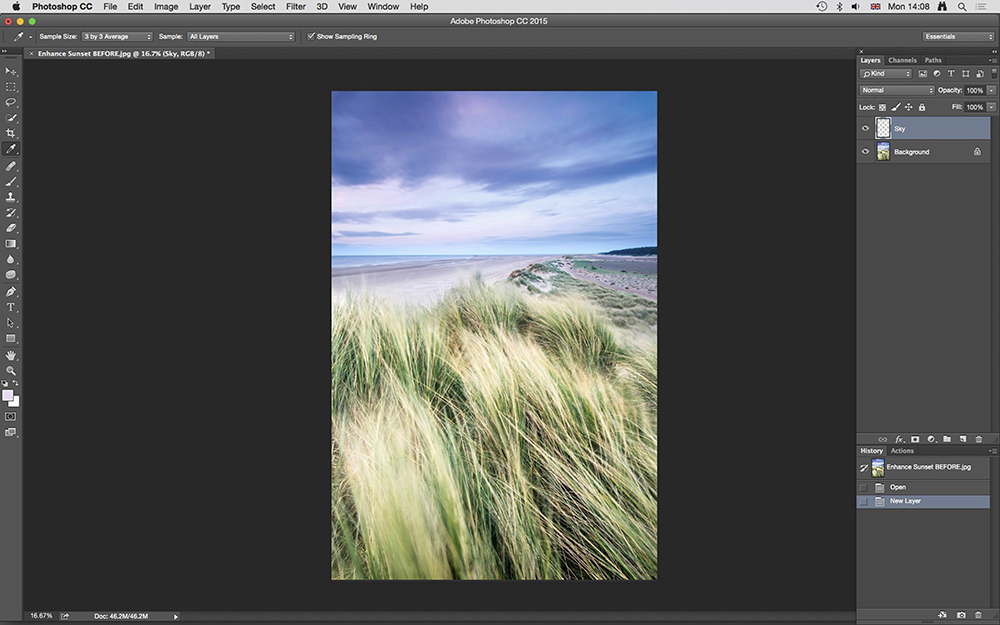
1. Create an empty New Layer
Open your sunrise or sunset image in Photoshop and hold down Ctrl+Shift+N to create an empty New Layer. Name the Layer Sky and hit OK. Press “i” on the keyboard to activate the Eyedropper Tool, and at the top-left of the Photoshop Window make sure Sample Size is set to 3 by 3 Average. Now left-click your mouse on the colorful areas of the sky to select a color that’s naturally present. We selected a light pink.
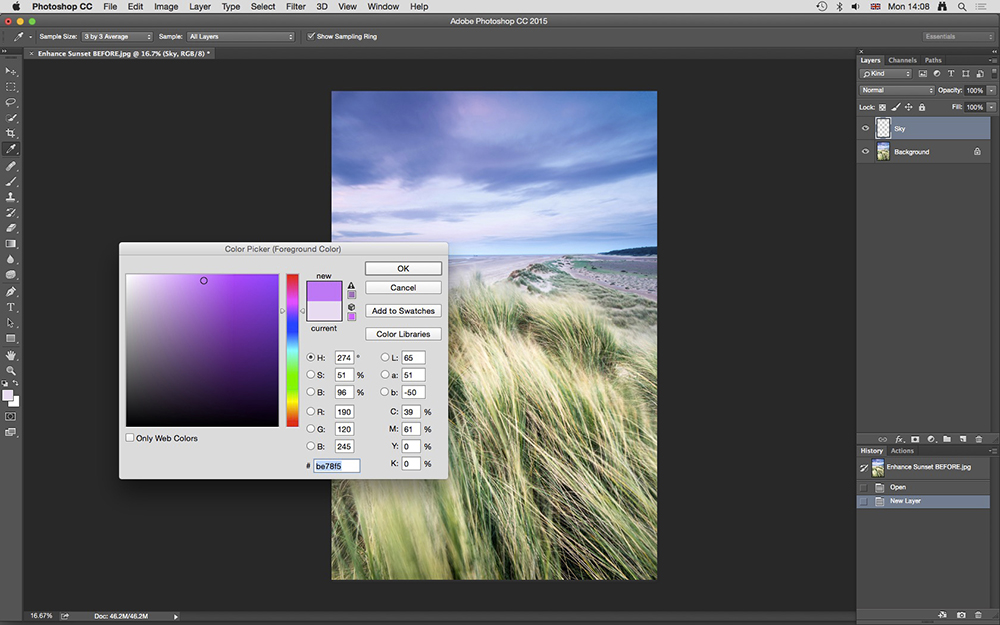
2. Select a complementary color
The color you selected will appear as the Foreground Color on the Tools palette. Double-click this to open the Color Picker dialogue window, and select a darker and richer tone of the color you previously selected. The reason for this is that we want to enhance the colors already present in the image for a natural end result. Adding new colors never quite works, so it’s best avoided.
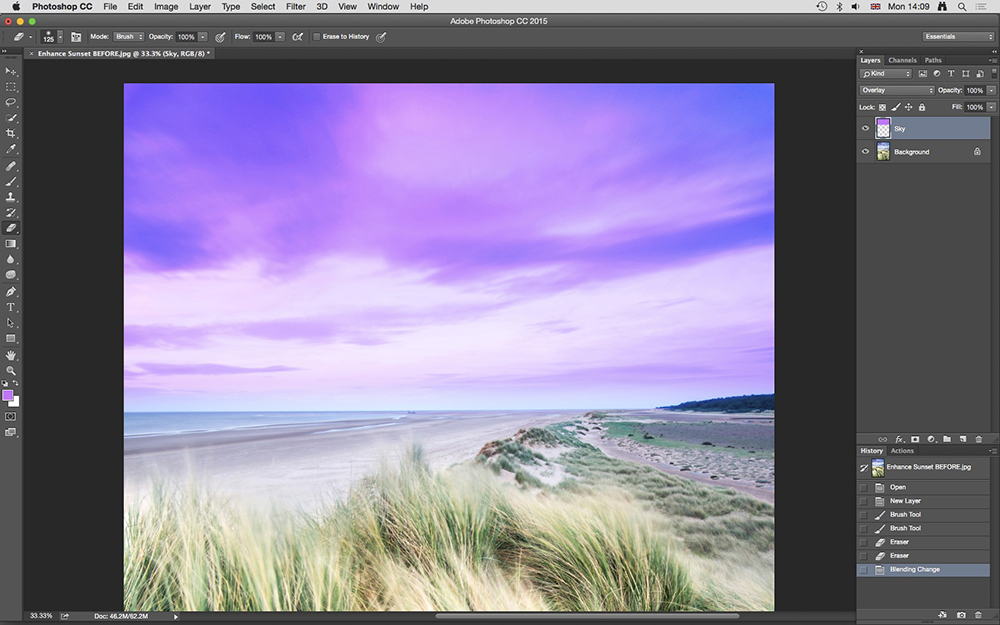
3. Paint over the sky
Press B on the keyboard to select the Brush Tool and set Brush Size to around 700px with a soft edge using the drop-down menu in the top-left corner of the Photoshop window. It’s to the left of the folder icon with brushes on the front. Press Caps Lock to show the brush as a circle. Now paint over the entire sky and use the Eraser Tool if you make a mistake. Change the Layer Blending mode from Normal to Overlay.
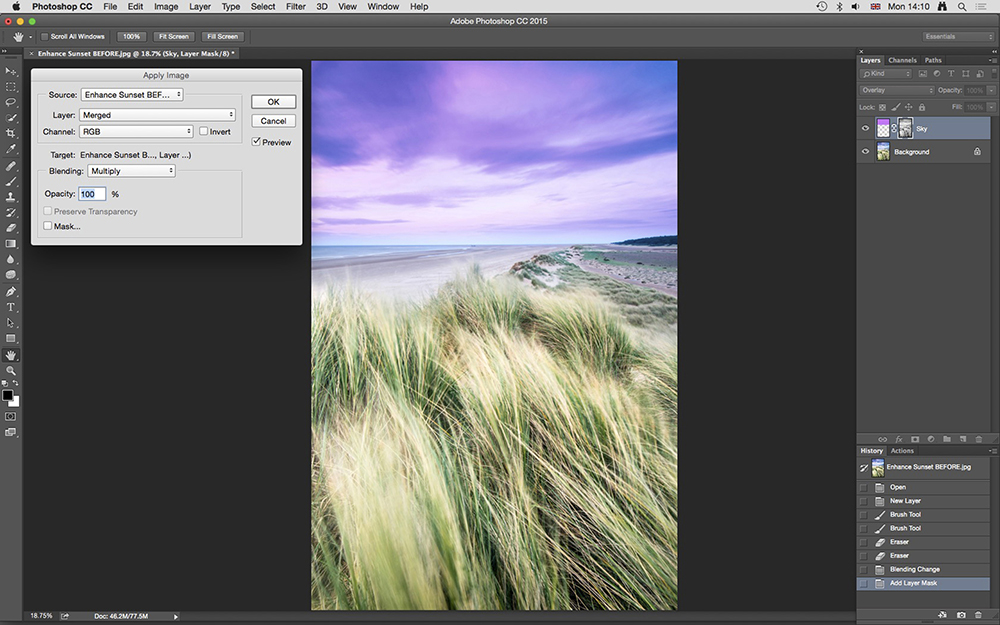
4. Use Apply Image to refine the Layer Mask
Go to the Layers palette and click on the Layer Mask icon—it’s the rectangle with a circle in the center. Next go to Image>Apply Image. The default settings are usually correct, but just make sure they’re the same as above, except for Source (this will be your own image). This will make the color focus more on the highlights and less on the midtones and shadow areas in the sky. Ues Apply Image as many times as necessary.
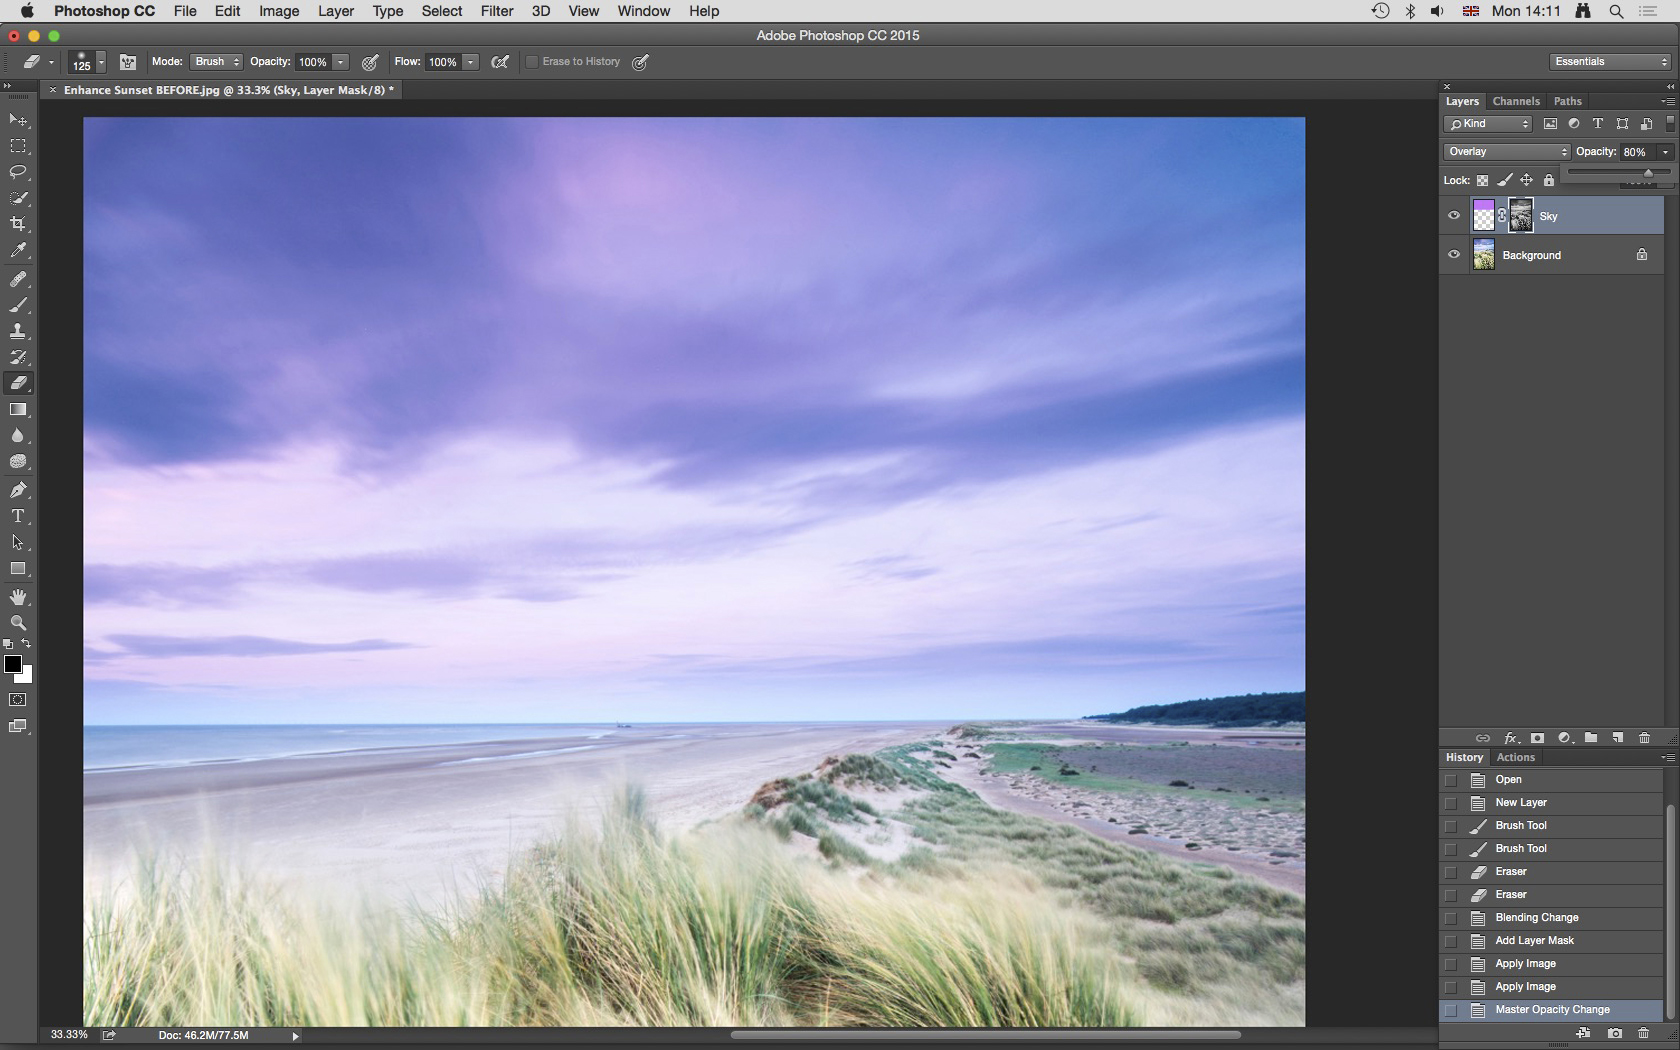
5. Fine-tune the Opacity of the Layer
At this stage you may be happy with the result you’ve achieved, so if you are you can save your image and move onto the next. But if you’d like to reduce the effect further, simply make sure the Sky Layer is active, and reduce the Opacity using the slider at the top of the Layers palette. If you do need to reduce Opacity, somewhere around 80% is most often just right. Too much of a reduction waters down the effect.
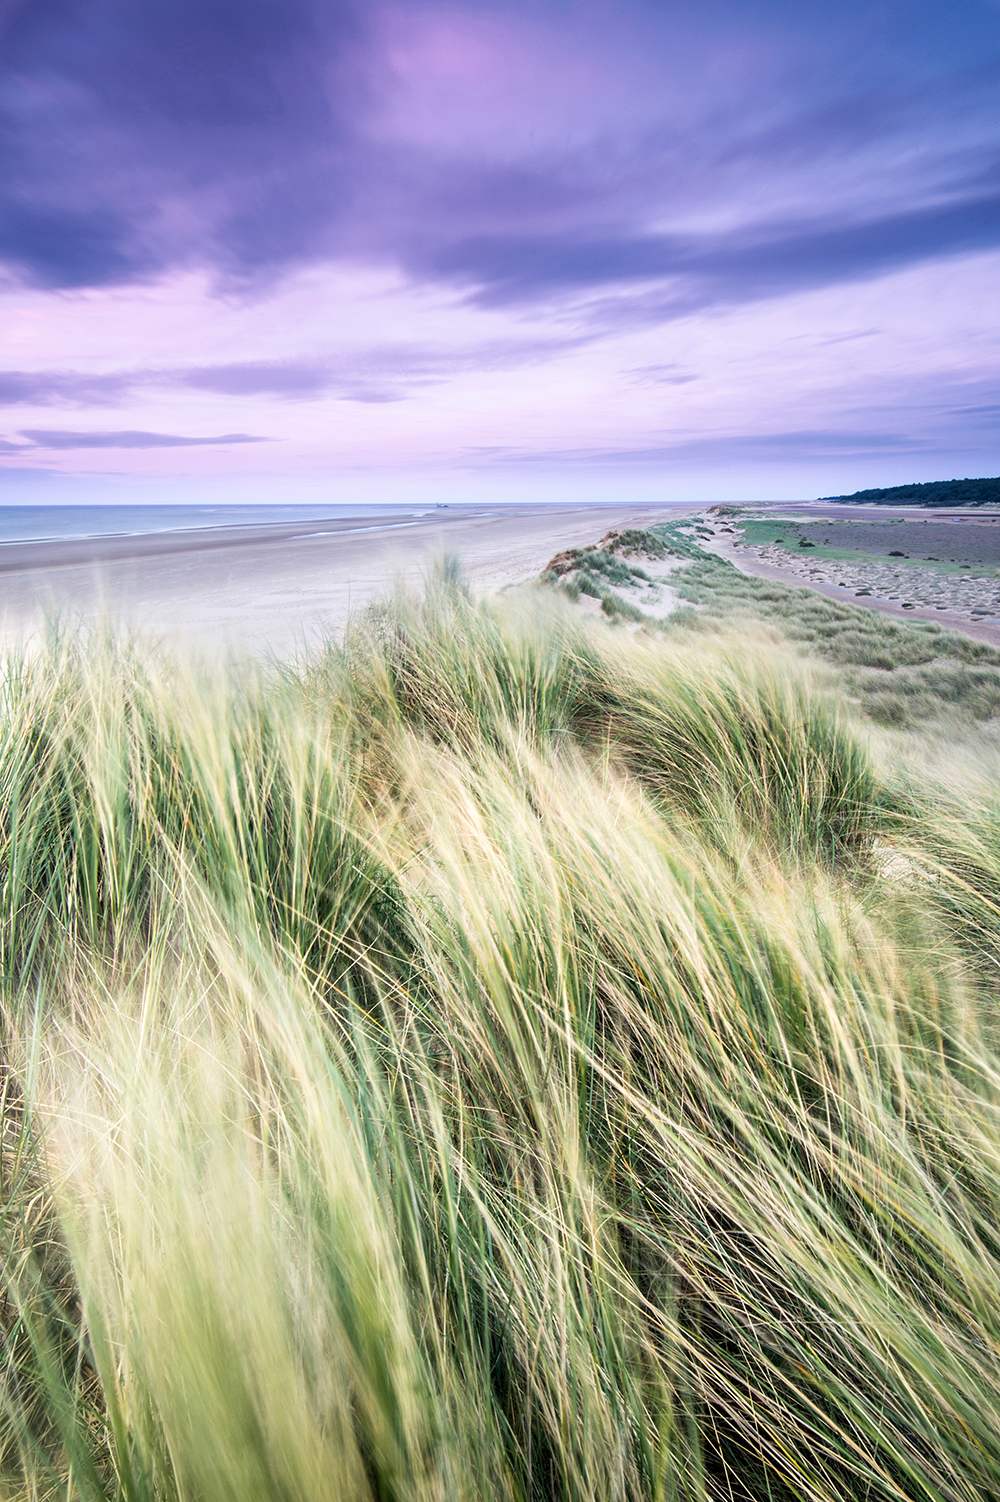
Here’s our Before and After:
[twentytwenty]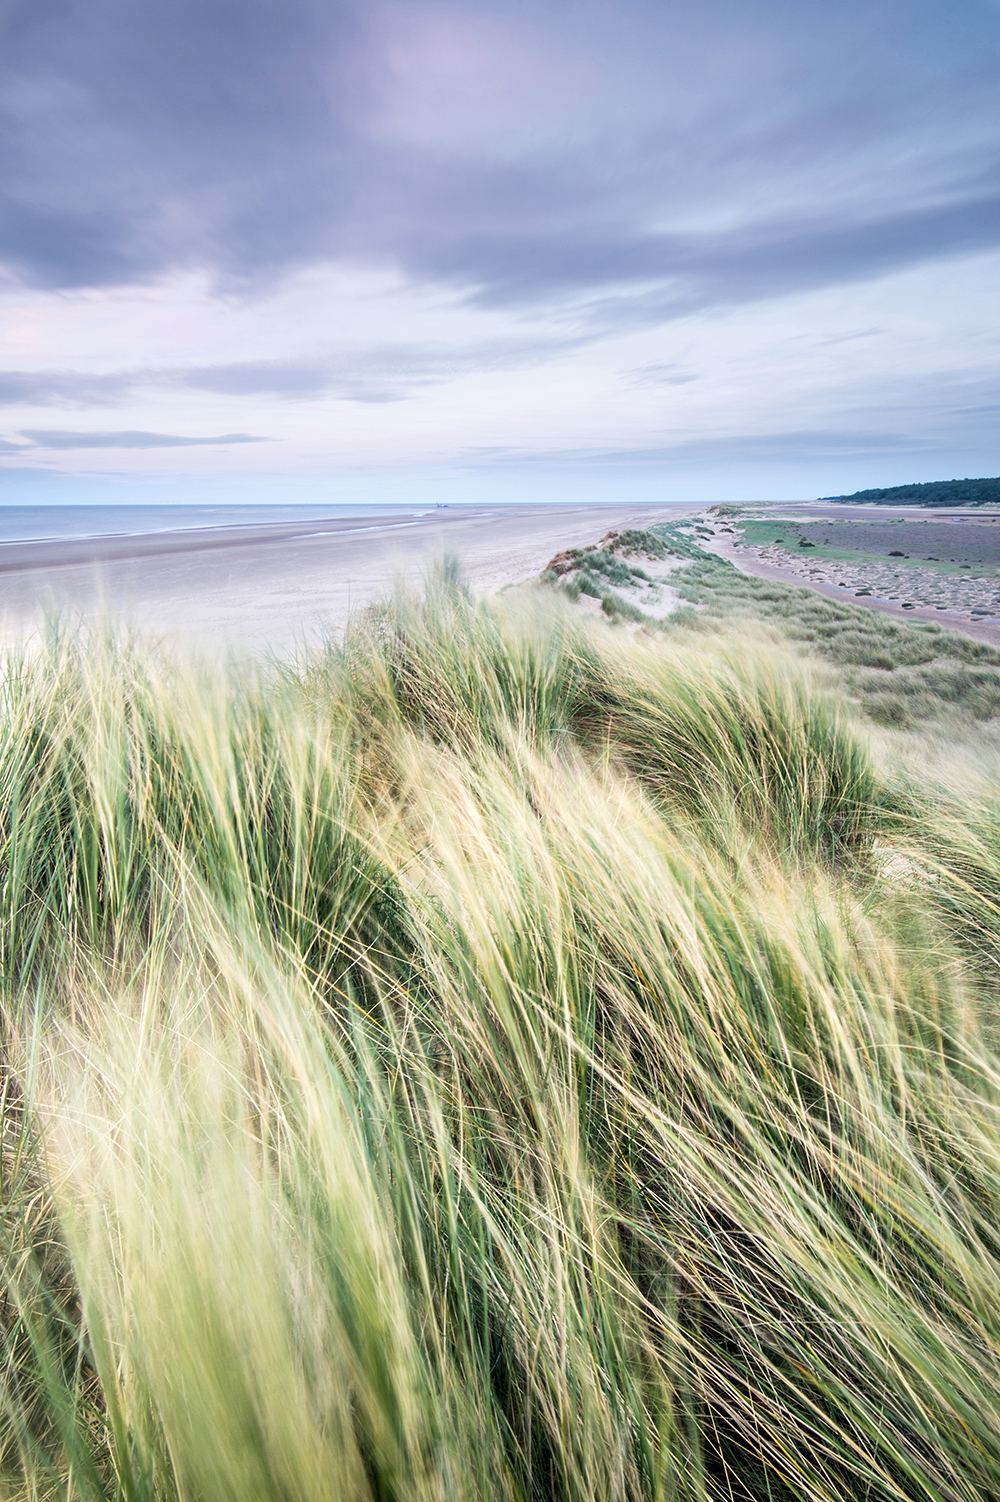
 [/twentytwenty]
We hope you found this simple Photoshop tutorial helpful! Remember, it’s up to you how strongly you want to apply this effect, but there’s nothing wrong with enhancing a photo until it looks as spectacular as the scene you remember in your head.
If you have any questions feel free to drop them in the comments. And don’t forget to claim a free digital issue of Practical Photography magazine here!


Leave a reply