Antoine Martin is a 20-year-old freelance photographer from Paris, France. He has been practising photography for four years, and was inspired to study the craft after picking up his father’s camera.
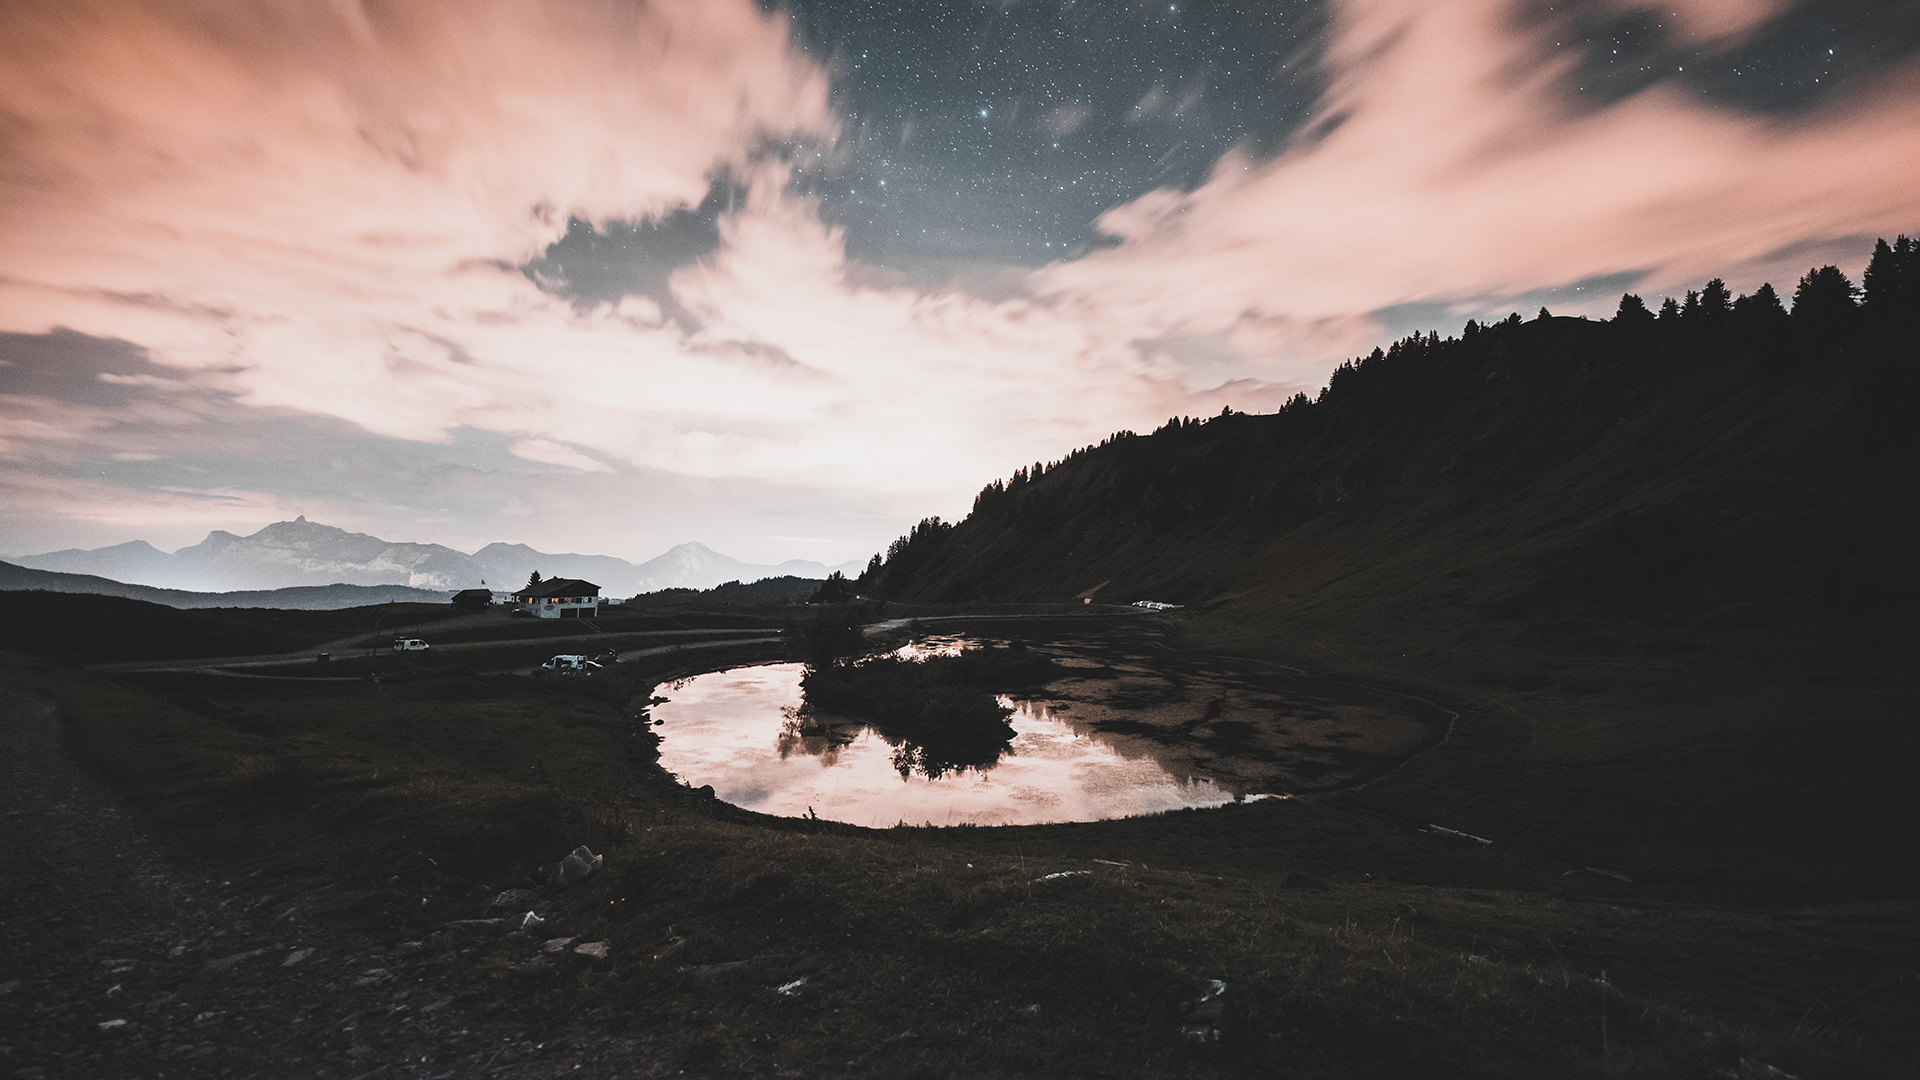
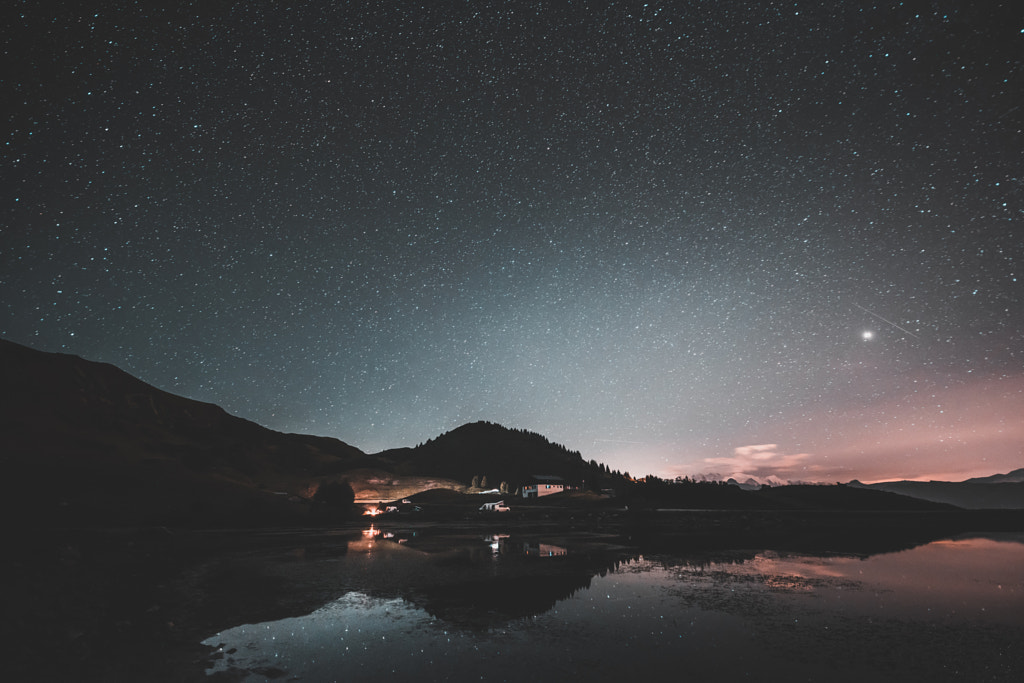
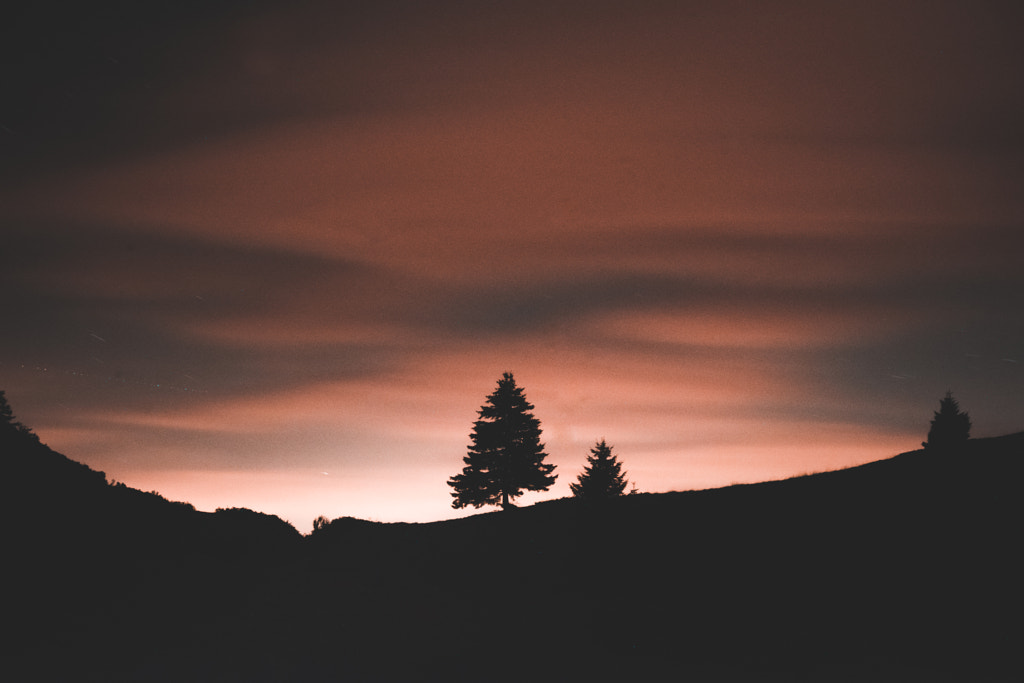
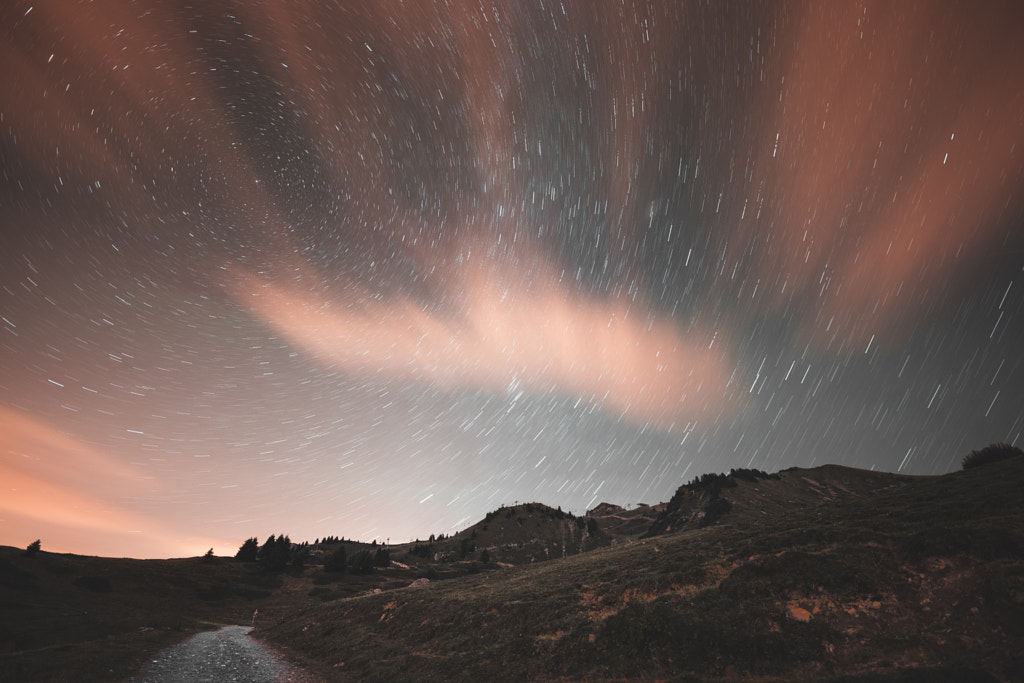
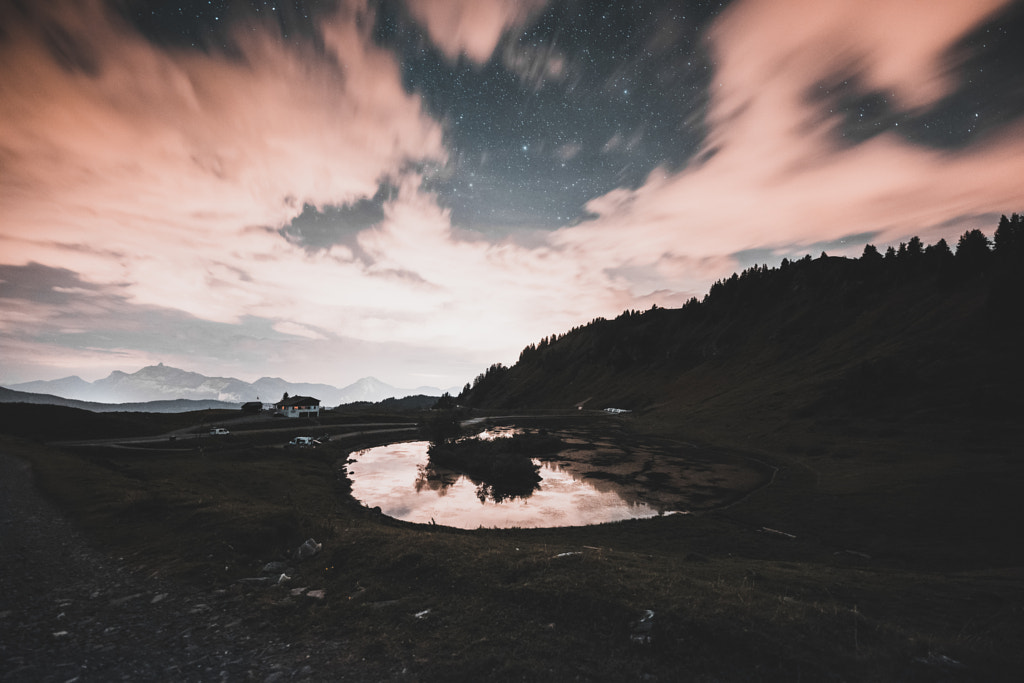
Capturing a vast and awe-inspiring night sky in detail can be time-consuming, but the result is well worth it. In this tutorial, I’ll walk you through how I shot my last series, capturing a night of shooting stars and breathtaking views in the French Alps, and share how to shoot your own nightscape.
1. Scout your location during the daytime
Location is vital when it comes to this kind of photography, as it’s important to ensure there is as little light pollution as possible (that’s why the mountains were perfect for my shoot). I would suggest you first scout out the place you’d like to shoot during the day to get the lay of the land, and compose a few possible scenarios for your shoot. Then pick out a few landmarks that you can use to help identify your composition later when you come back at night.
Once you are happy with your location, come back at night to shoot. Bring your tripod for your long exposure to capture the landscape and sky in crisp, amazing detail.
2. Choose a wide-aperture lens
For this shoot, I used a Nikon D810, a Sigma art 14mm 1.8, and a Nikon 24-120mm f4. It’s helpful to have a lens with a wide aperture to allow as much light in as possible while shooting the night sky.
For my manual settings, I opened the aperture as much as I could (in this case, to 1.8) to let in as much light as possible. ISO will help illuminate dark spots in your scene, but you don’t want to increase it too much because it will create a lot of noise in your image. I shot between 500-800 ISO with my Sigma lens, and then bumped it up to 2500 ISO for my Nikon lens because the aperture did not open as wide (f4).
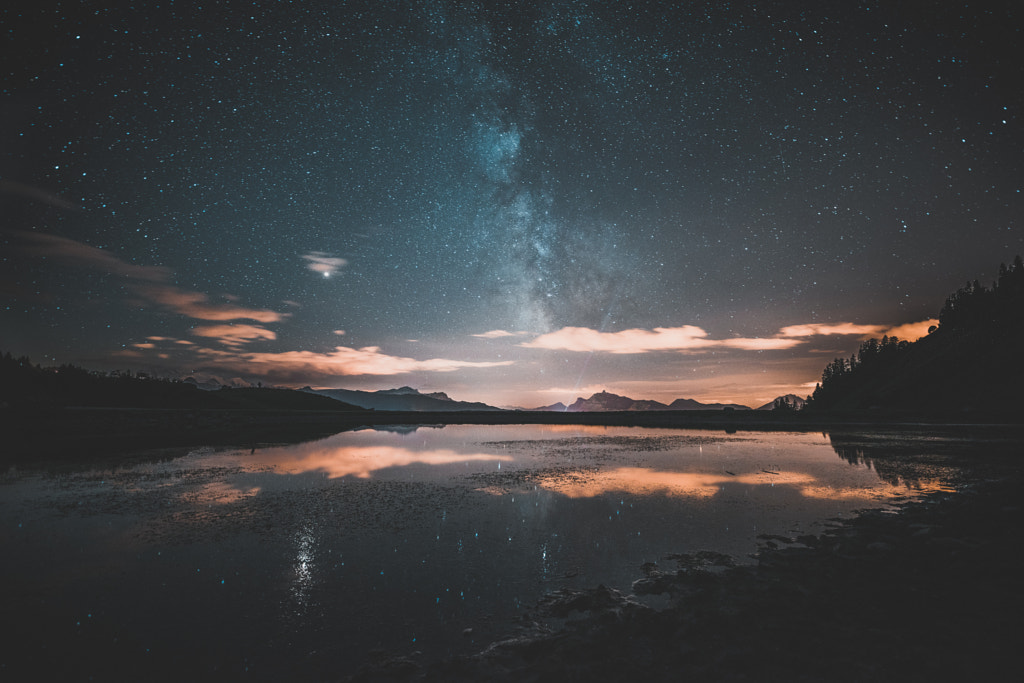
I then took a series of photos at different exposures, some lasting from 10-30 seconds. This made it possible to capture the Milky Way. The longer your shutter speed is, the more stars will be visible in your nightscape. This will also create movement in the stars in your image as they rotate around you in the night sky.
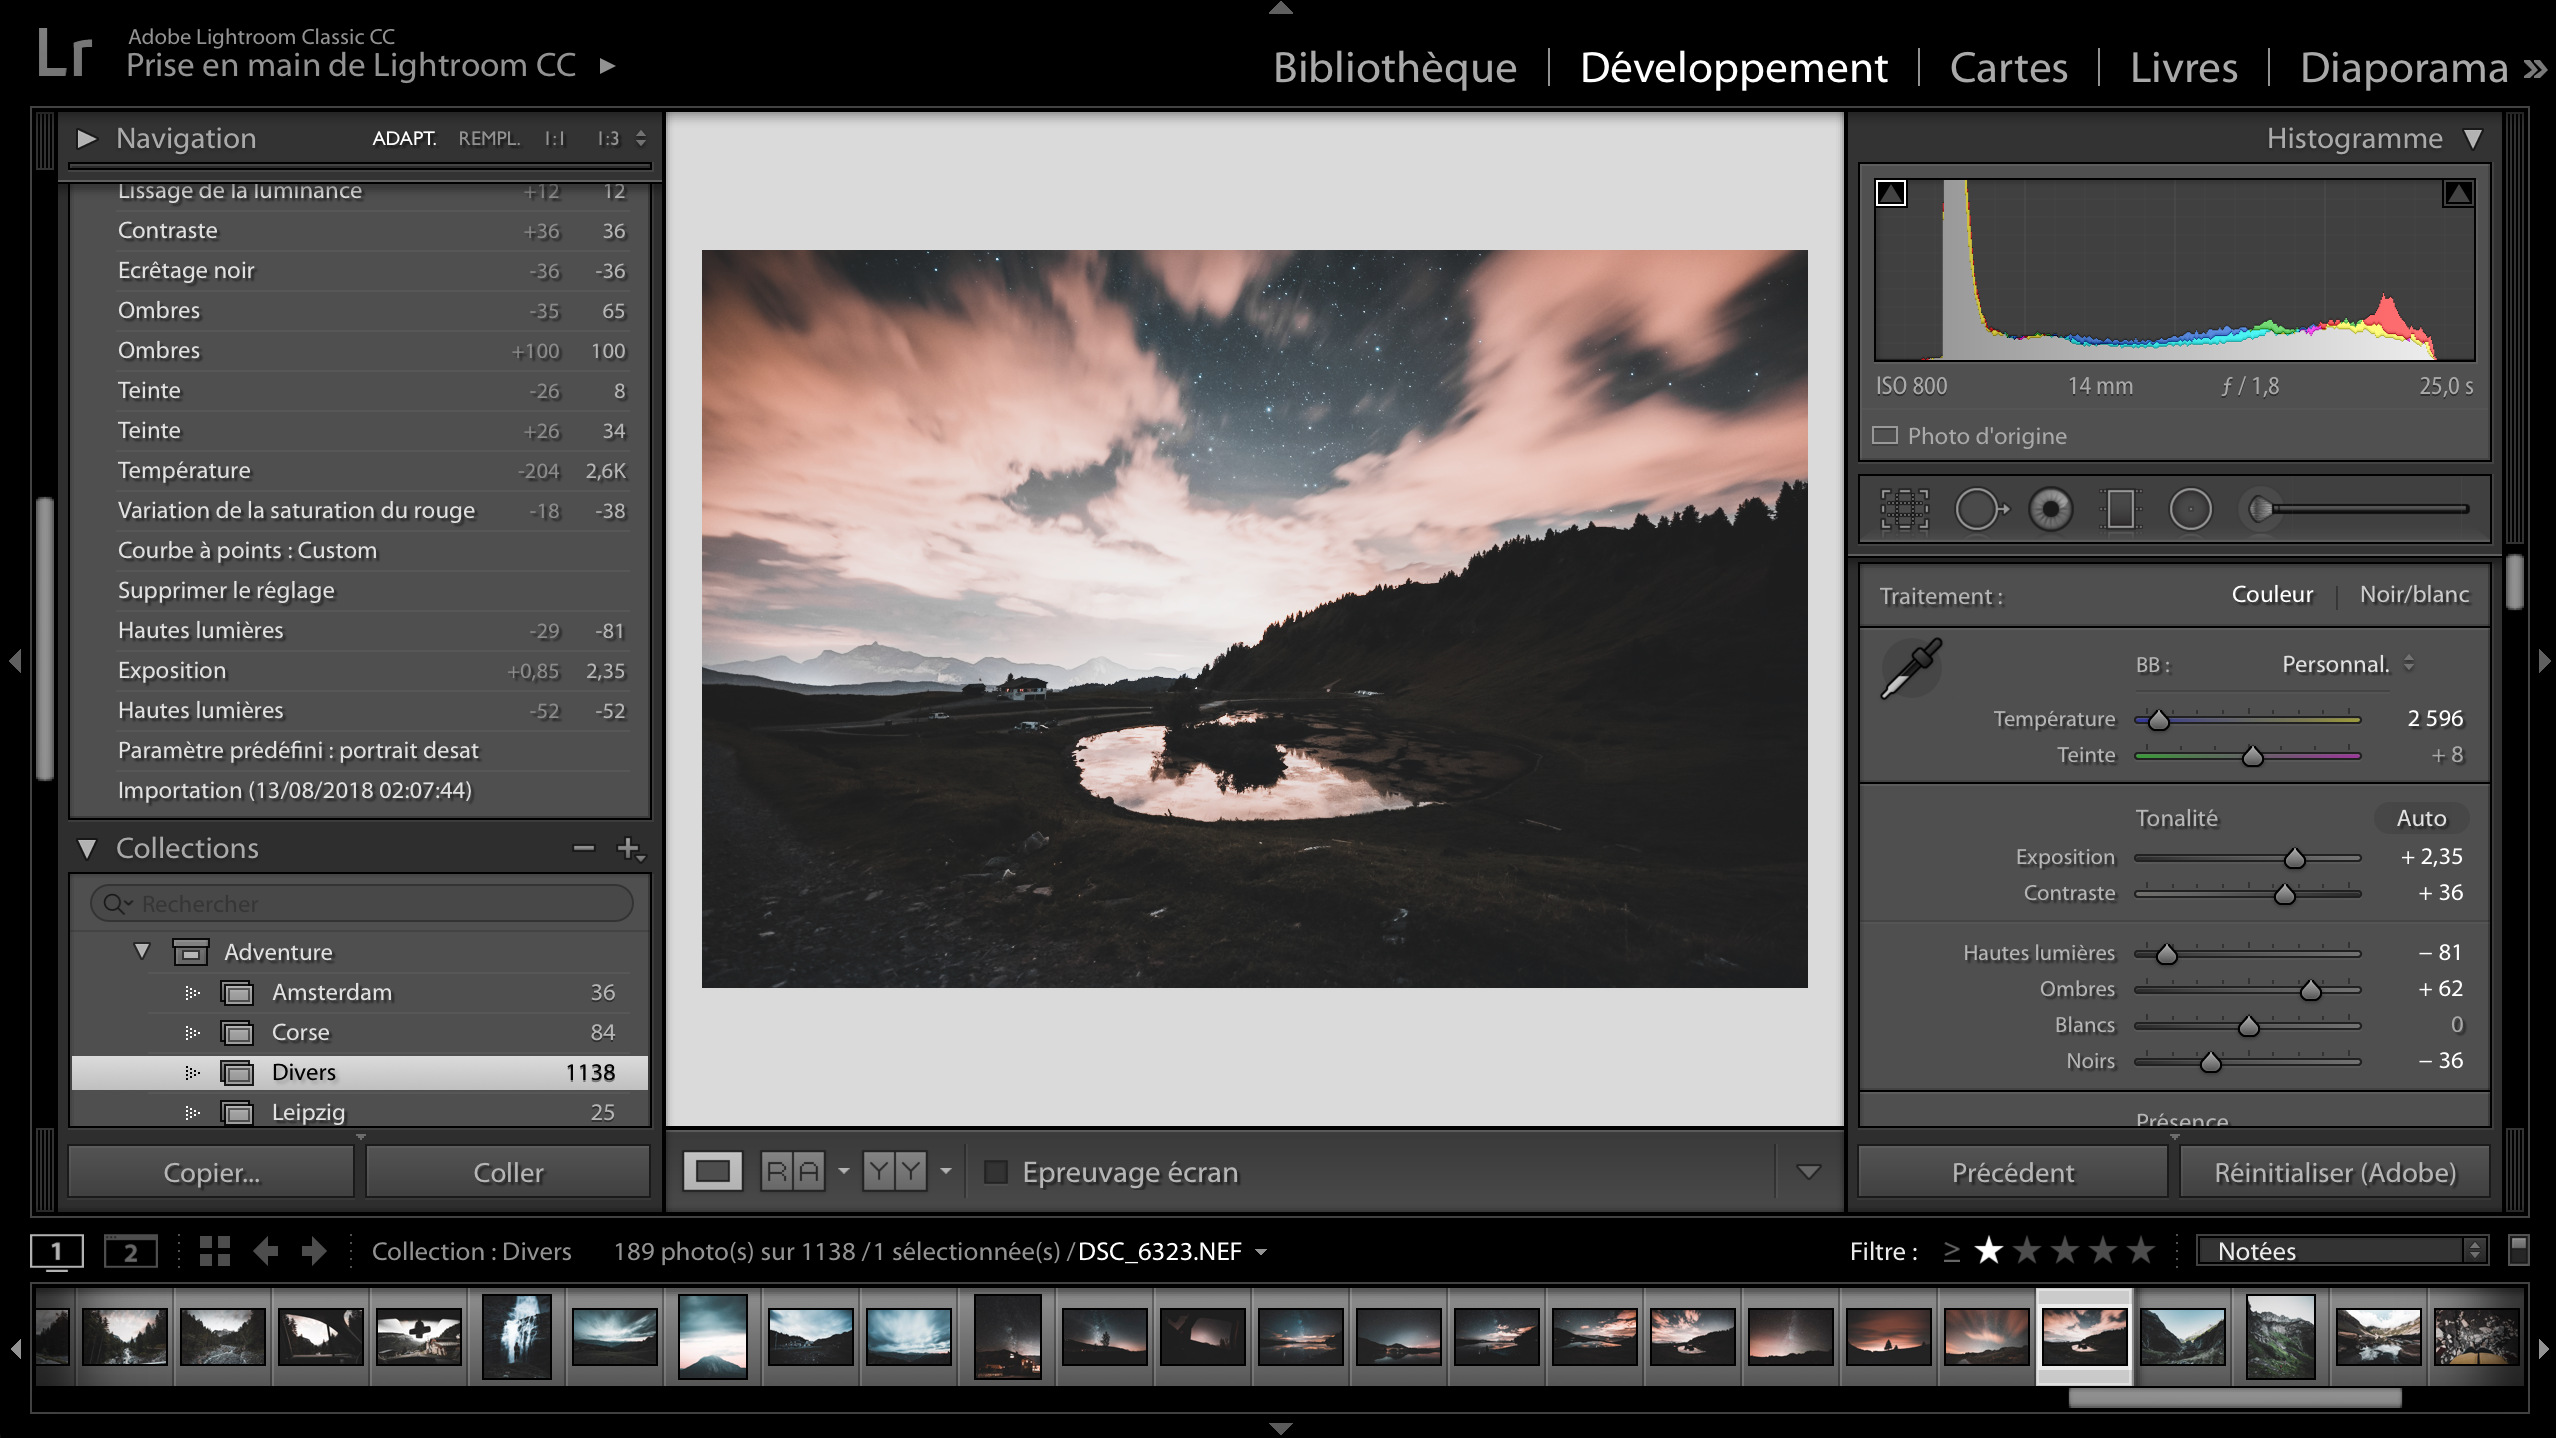
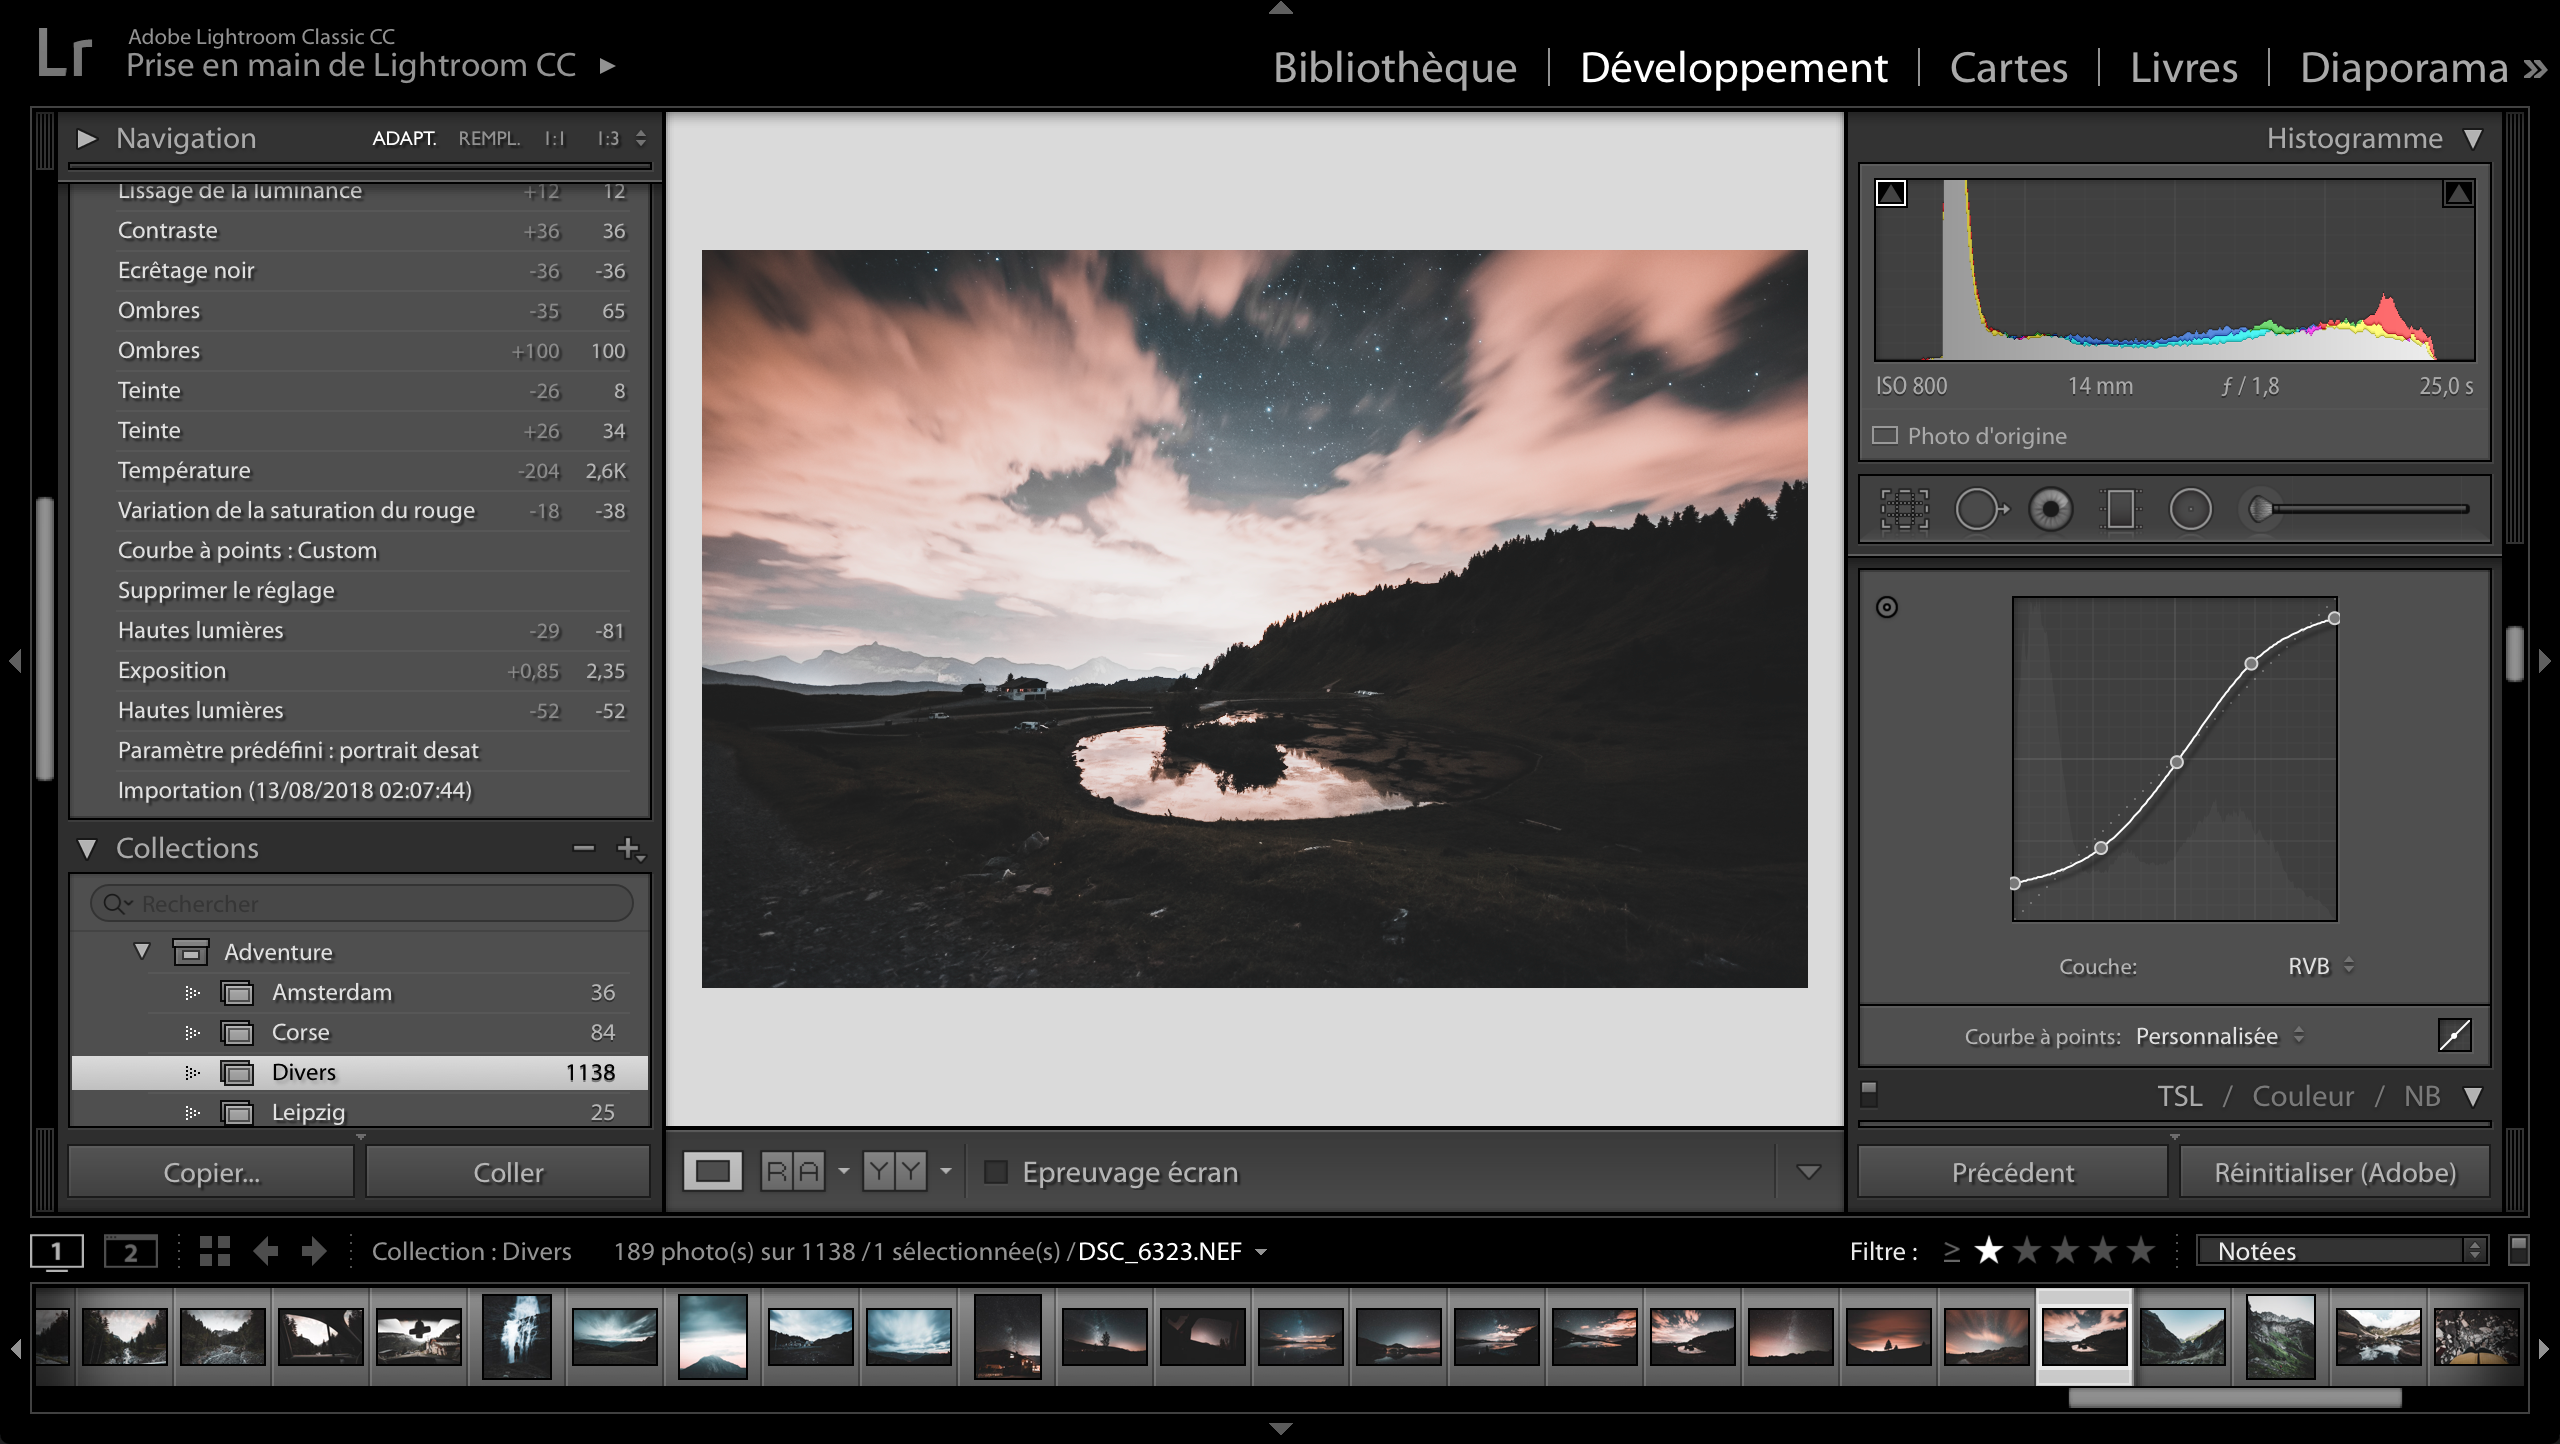
3. Stay true to your style in post-processing
I used Lightroom to edit this series. I wanted to keep the natural ambiance of the light, so I focused on highlights and on creating a nice contrast in the shadows, ultimately creating an ‘S’ curve in the ‘Tone Curve.’ I boosted the clarity slightly to make the stars and clouds pop within the image, and I desaturated some of the colors for a limited but strong color palette that felt true to my style.
Lightroom screenshots
1. Highlights and contrast adjustments
2. Color adjustments

3. Tonal ‘S’ curve adjustment
Have you tried any of the tips above? Share your nightscape photos and how you shot them in the comments below.
Follow Antoine Martin
500px: 500px.com/letshootit
Instagram: @antoinemartiin
Website: www.martinantoine.com


Leave a reply