Dina Belenko is a creative still-life photographer from Russia. Her striking images capture magical stories behind everyday inanimate objects. In this tutorial, Dina shows you how to take your tabletop photography to the next level by creatively capturing clouds of steam over coffee. It’s a perfect tutorial for the Fall and Winter seasons. Read on, and do try this at home!
Fall is here, and winter is coming! A hot steaming cup of coffee is one of the most reoccurring motifs in tabletop photography, but it continues to be tricky to capture, even if you’re not a beginner. So, let’s see how it can be done, step by step.
EQUIPMENT
The essential gear you will need includes two light sources and a tripod. You can use speedlights, LED, or even natural light. It’s the position of your light sources that matter. One light source should be placed behind the scene to light the steam, which is most visible and beautiful in backlight. Your other light source should be placed on the side to light the whole scene and add some volume.
Basically, you can use any gear you already have. In my case, it’s two speedlights (one with a snoot and other inside a stripbox), two black flags, and one small reflector.
As for the props, all you need is a coffee cup, some hot water, and a couple of additional items to make your still life shot more interesting—from obvious ones like cookies and chocolates to something related to steam and clouds like steampunk drawings or cloud formation schemes.
STEPS
Let’s get started!
1. Composition
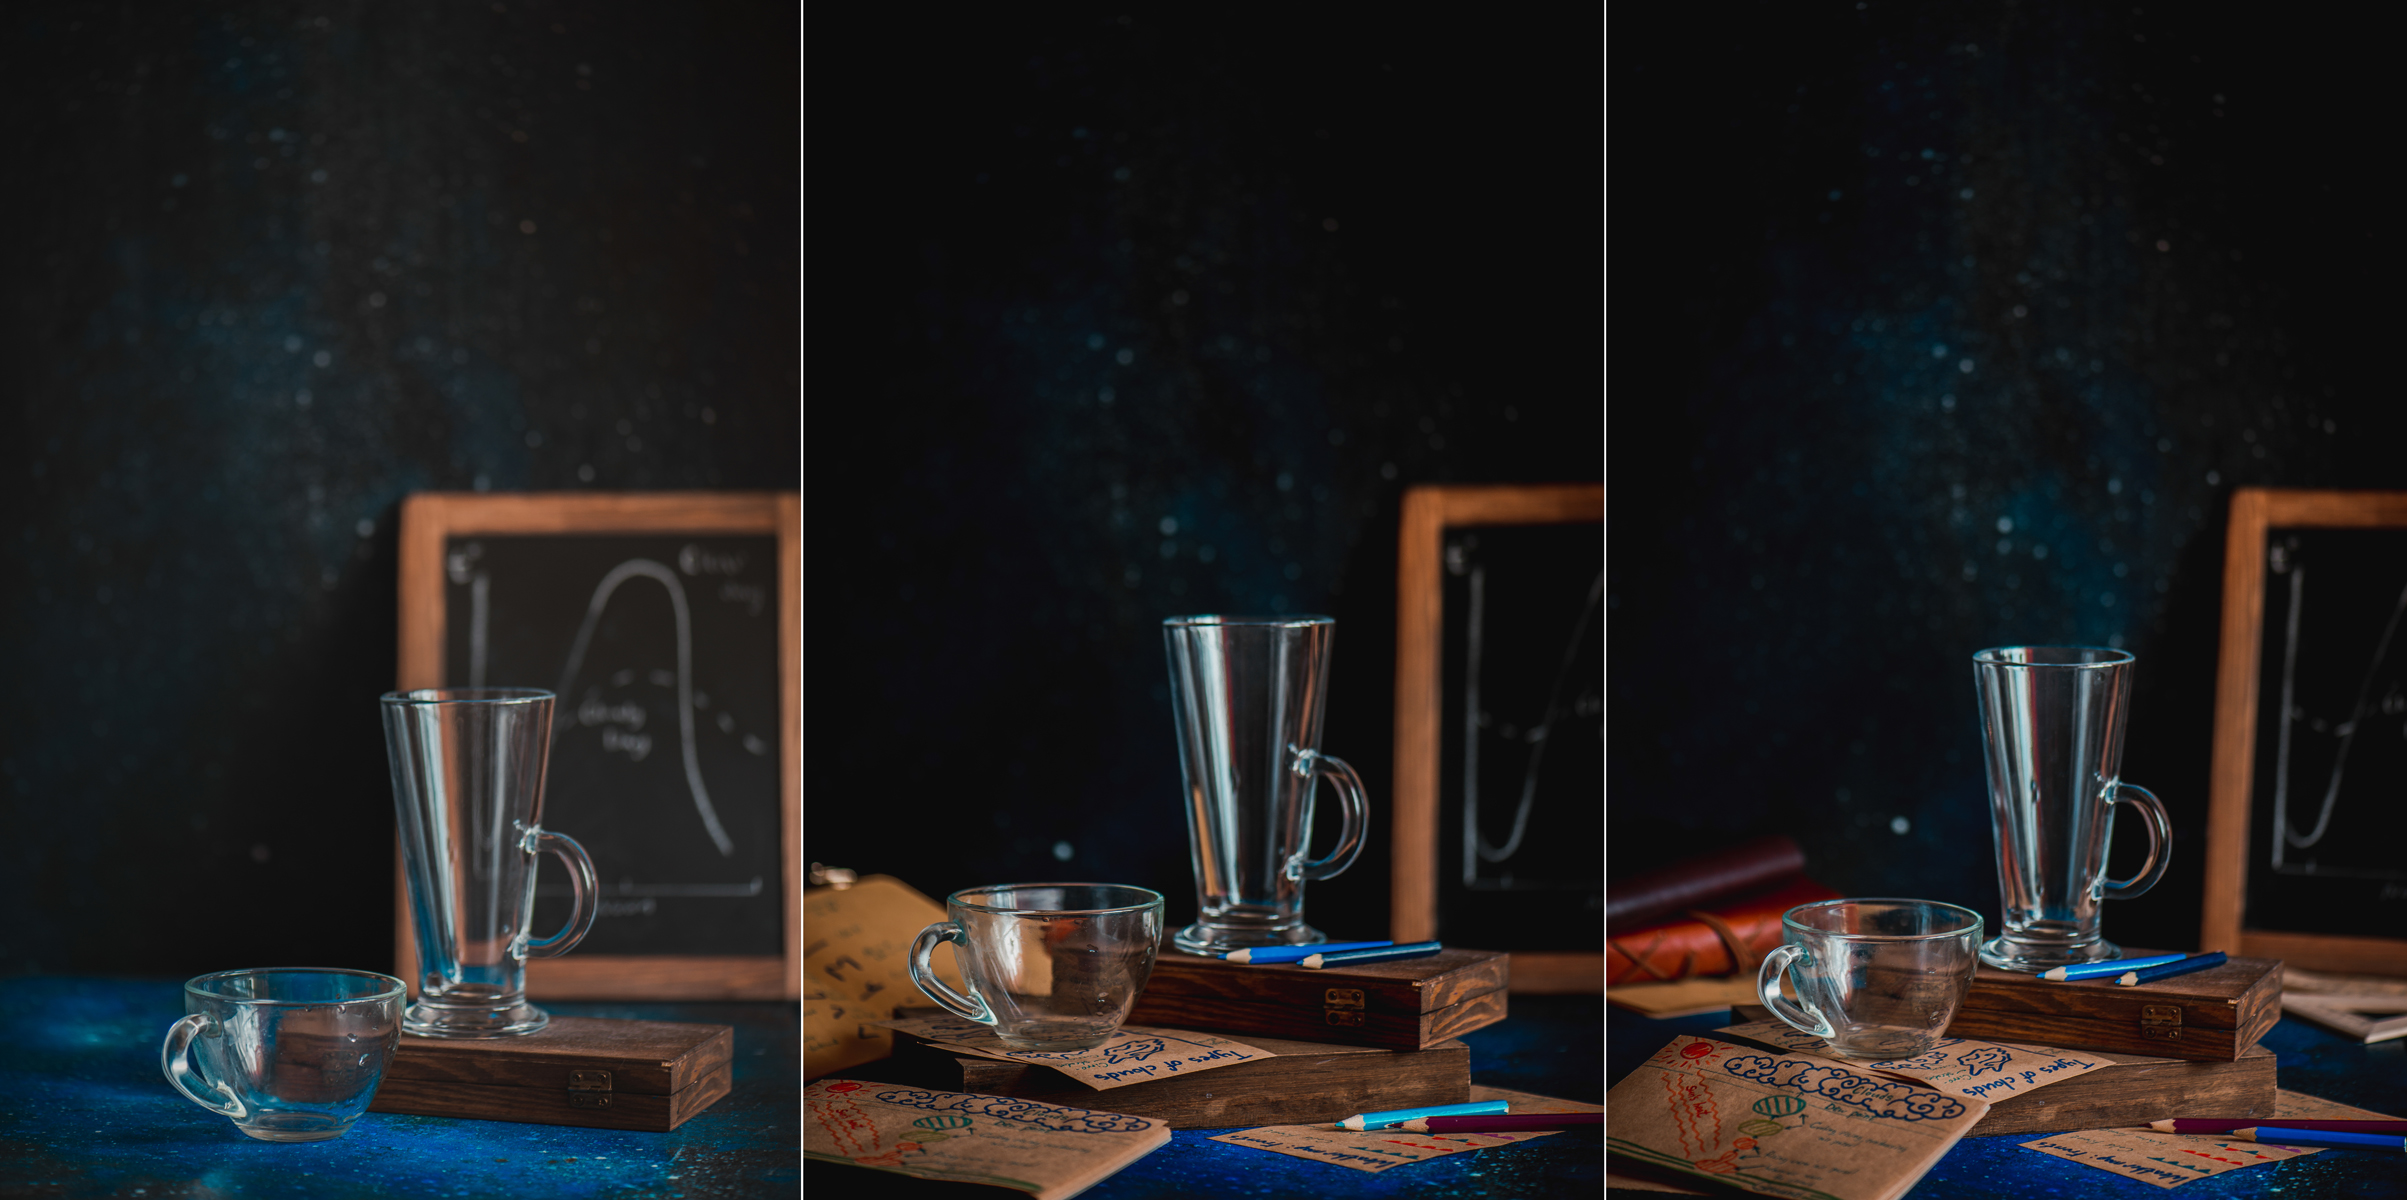
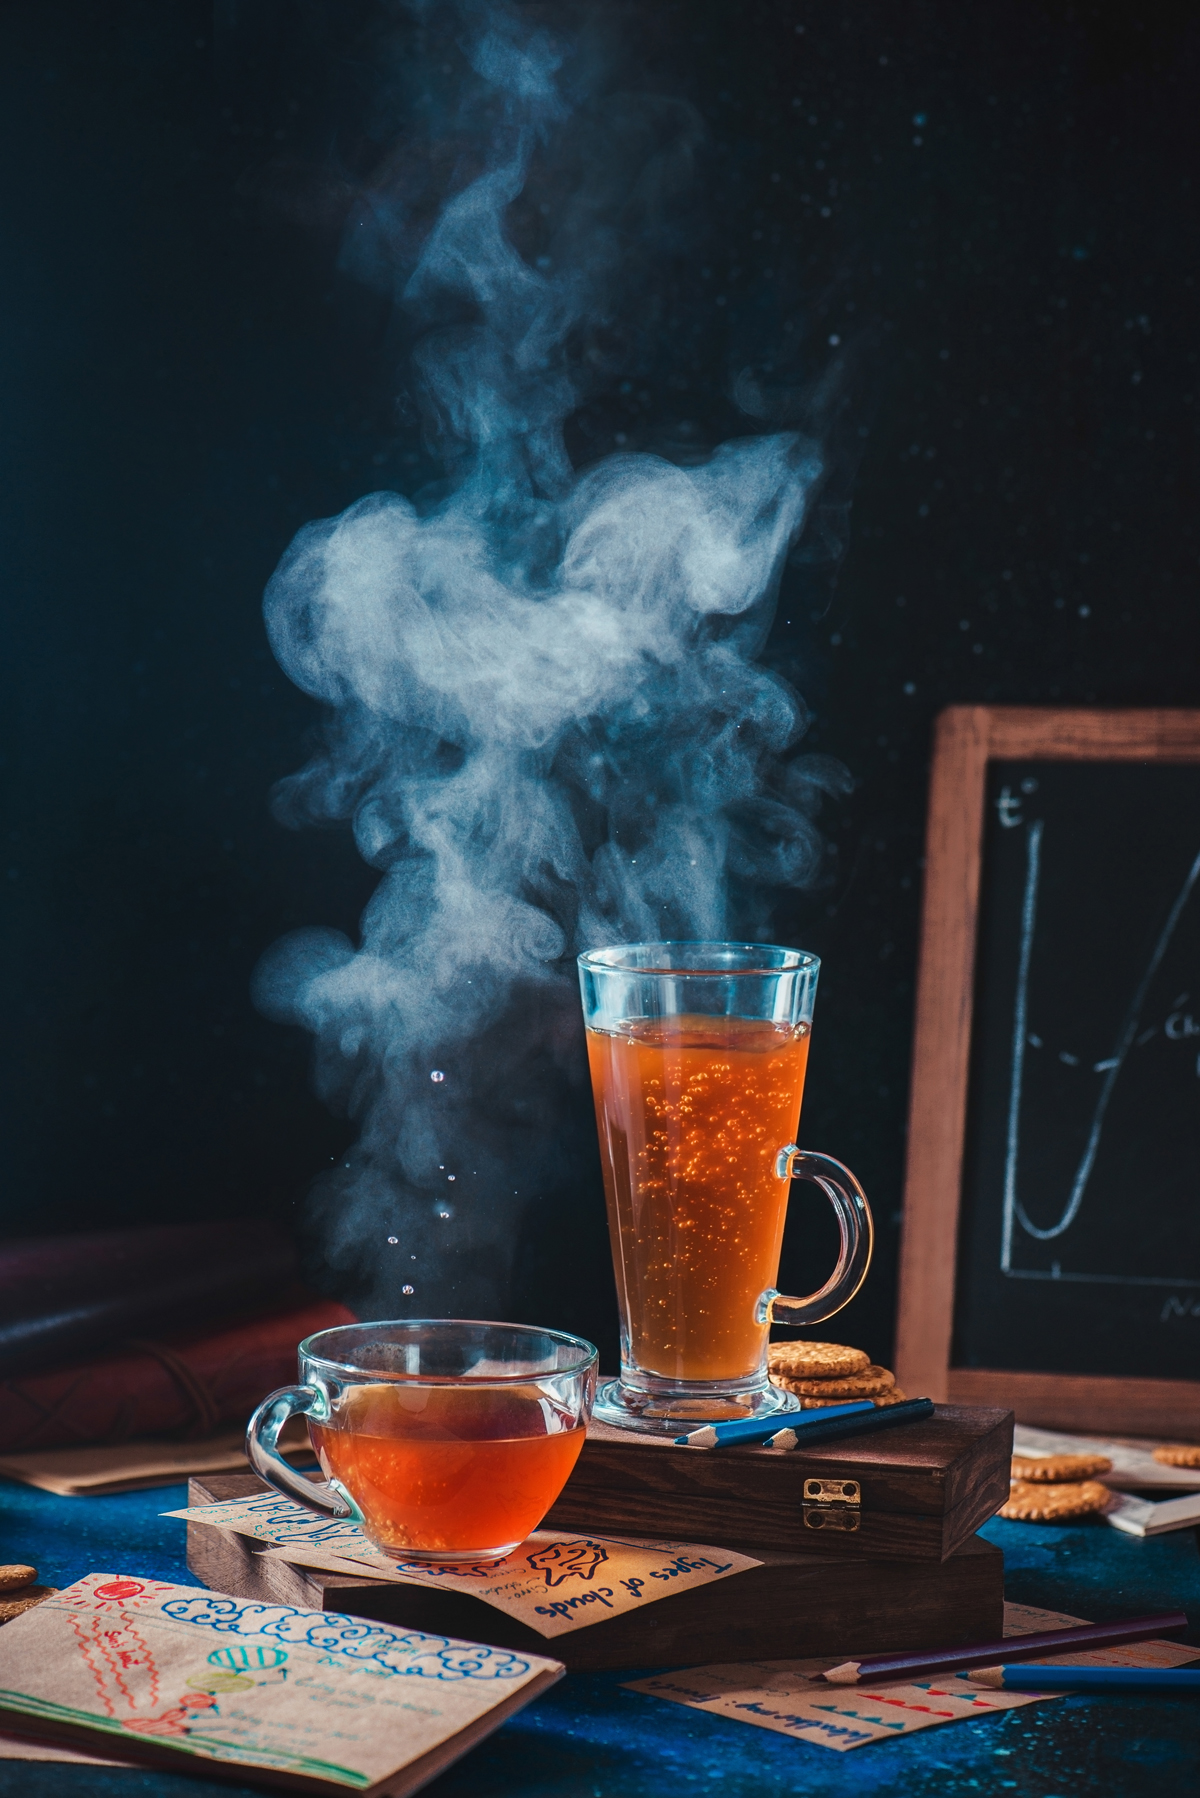
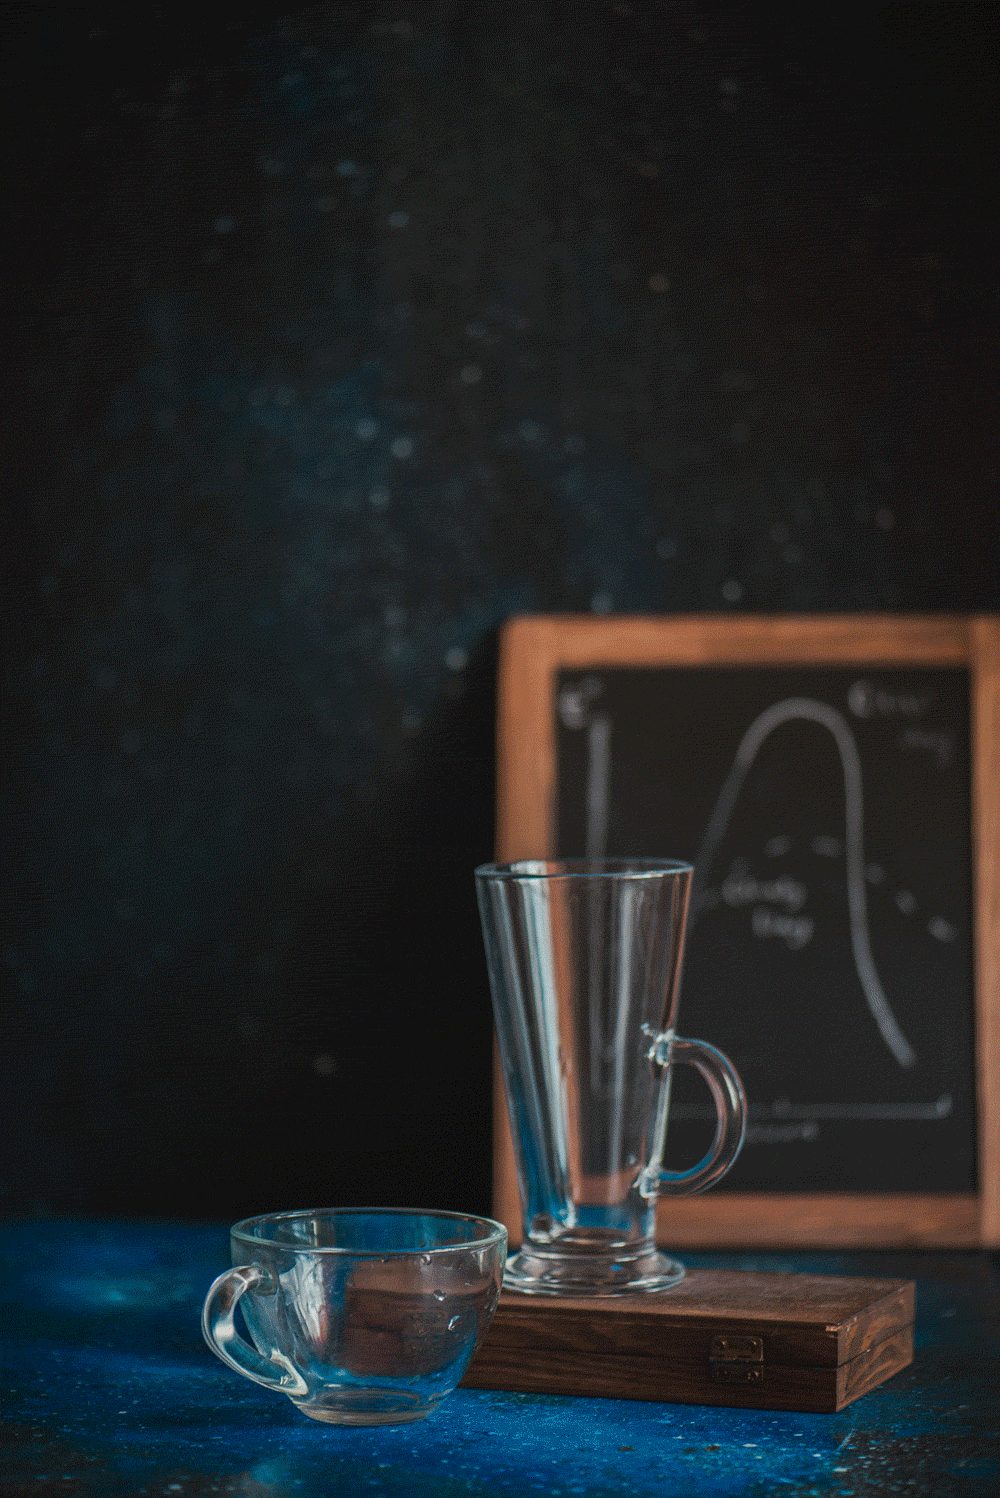
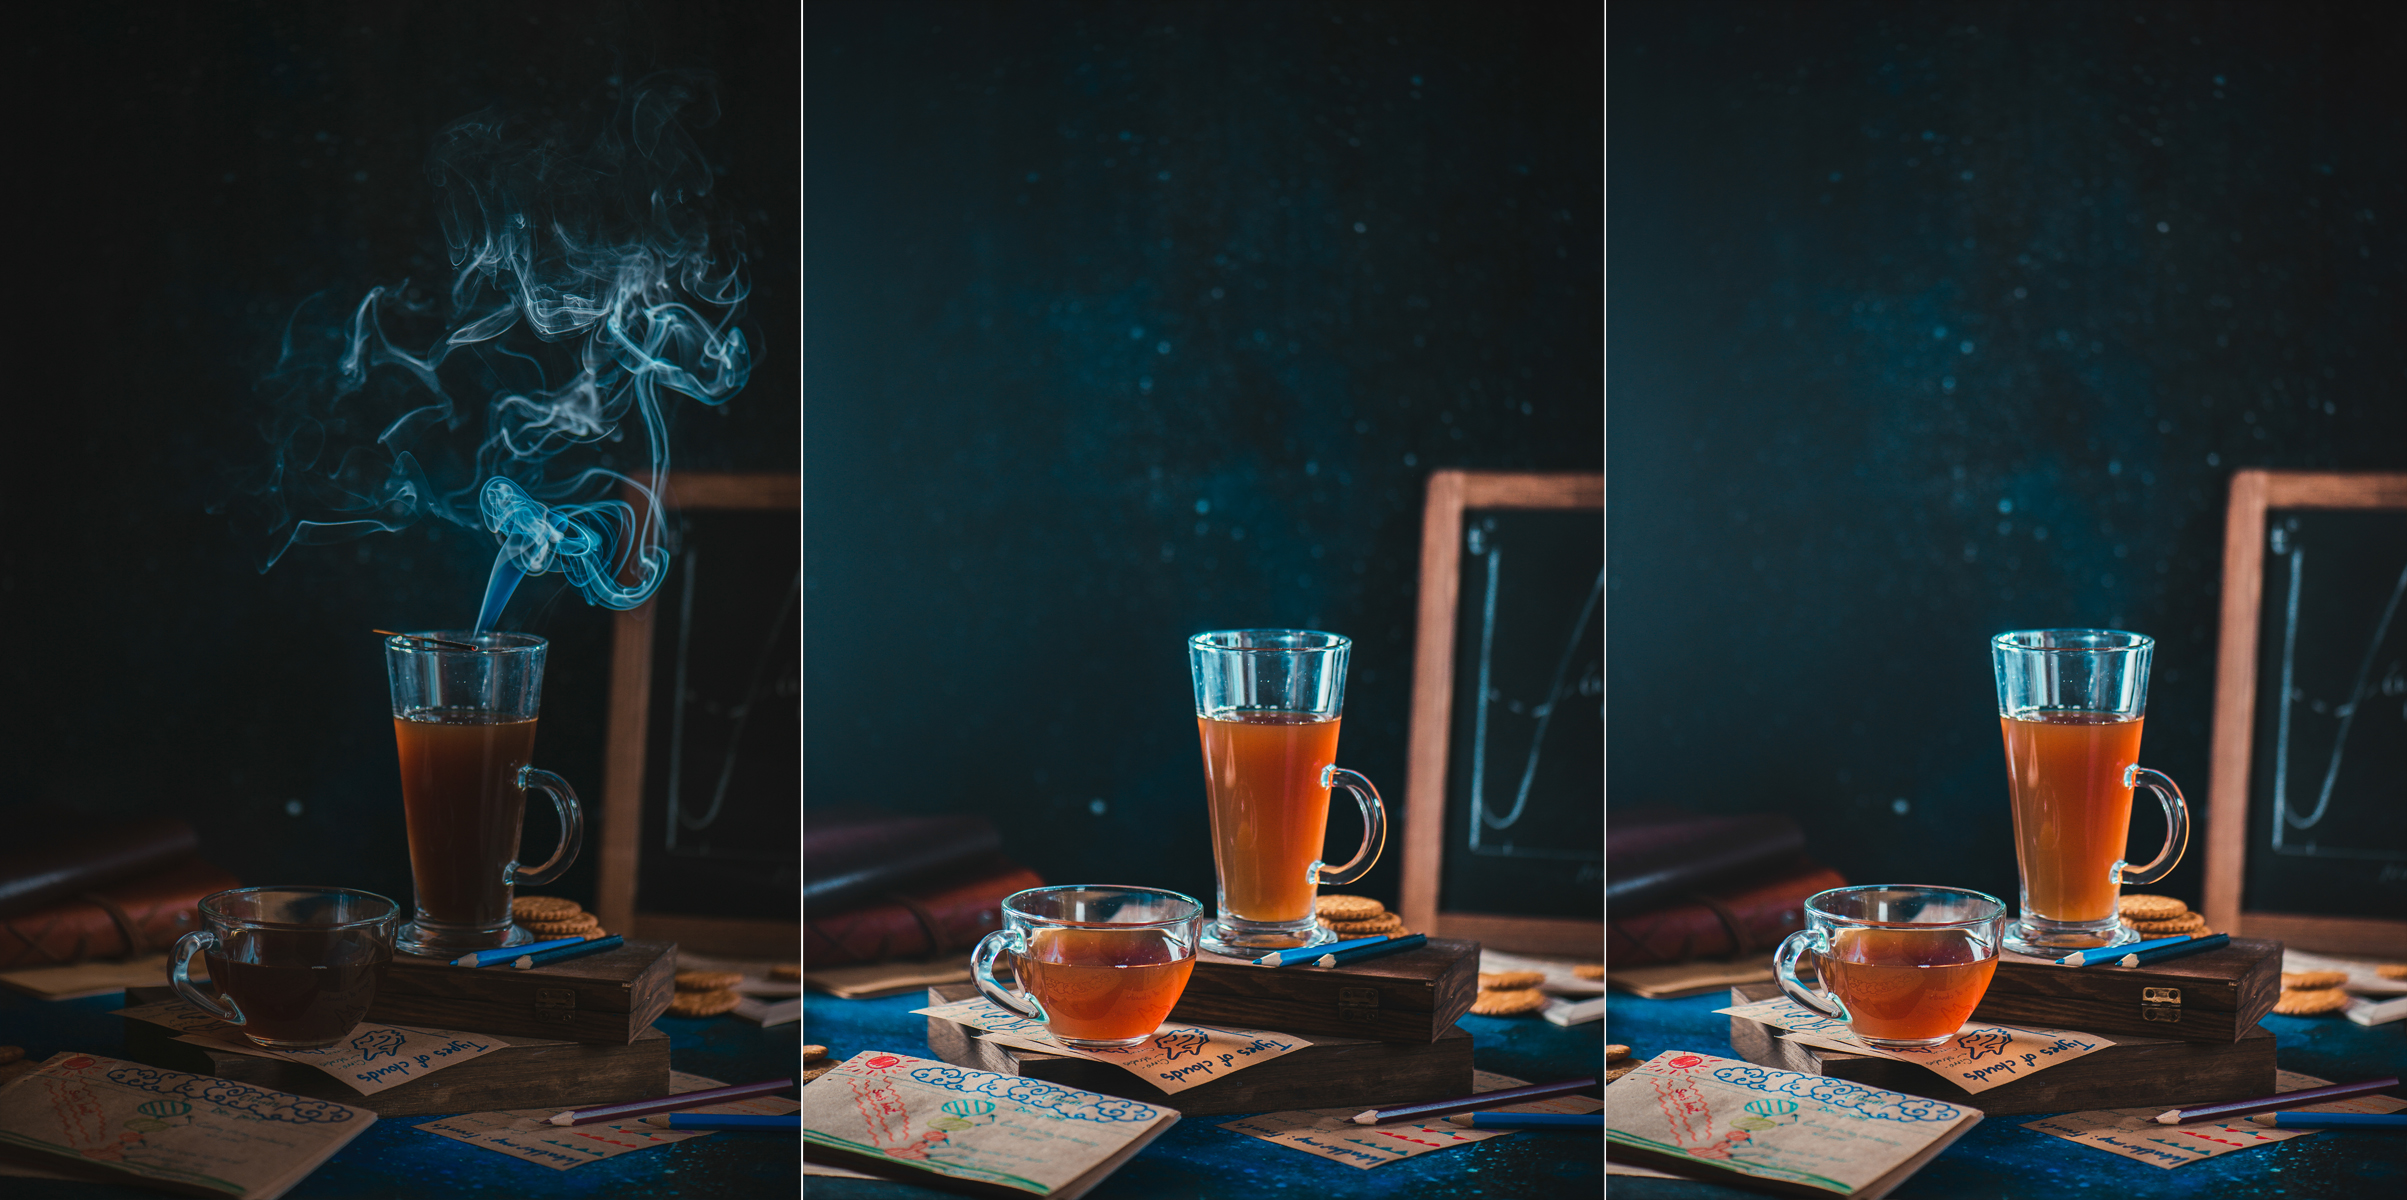
Arrange all the items in your still life scene into a simple composition, leaving some place for a rising steam.
2. First light
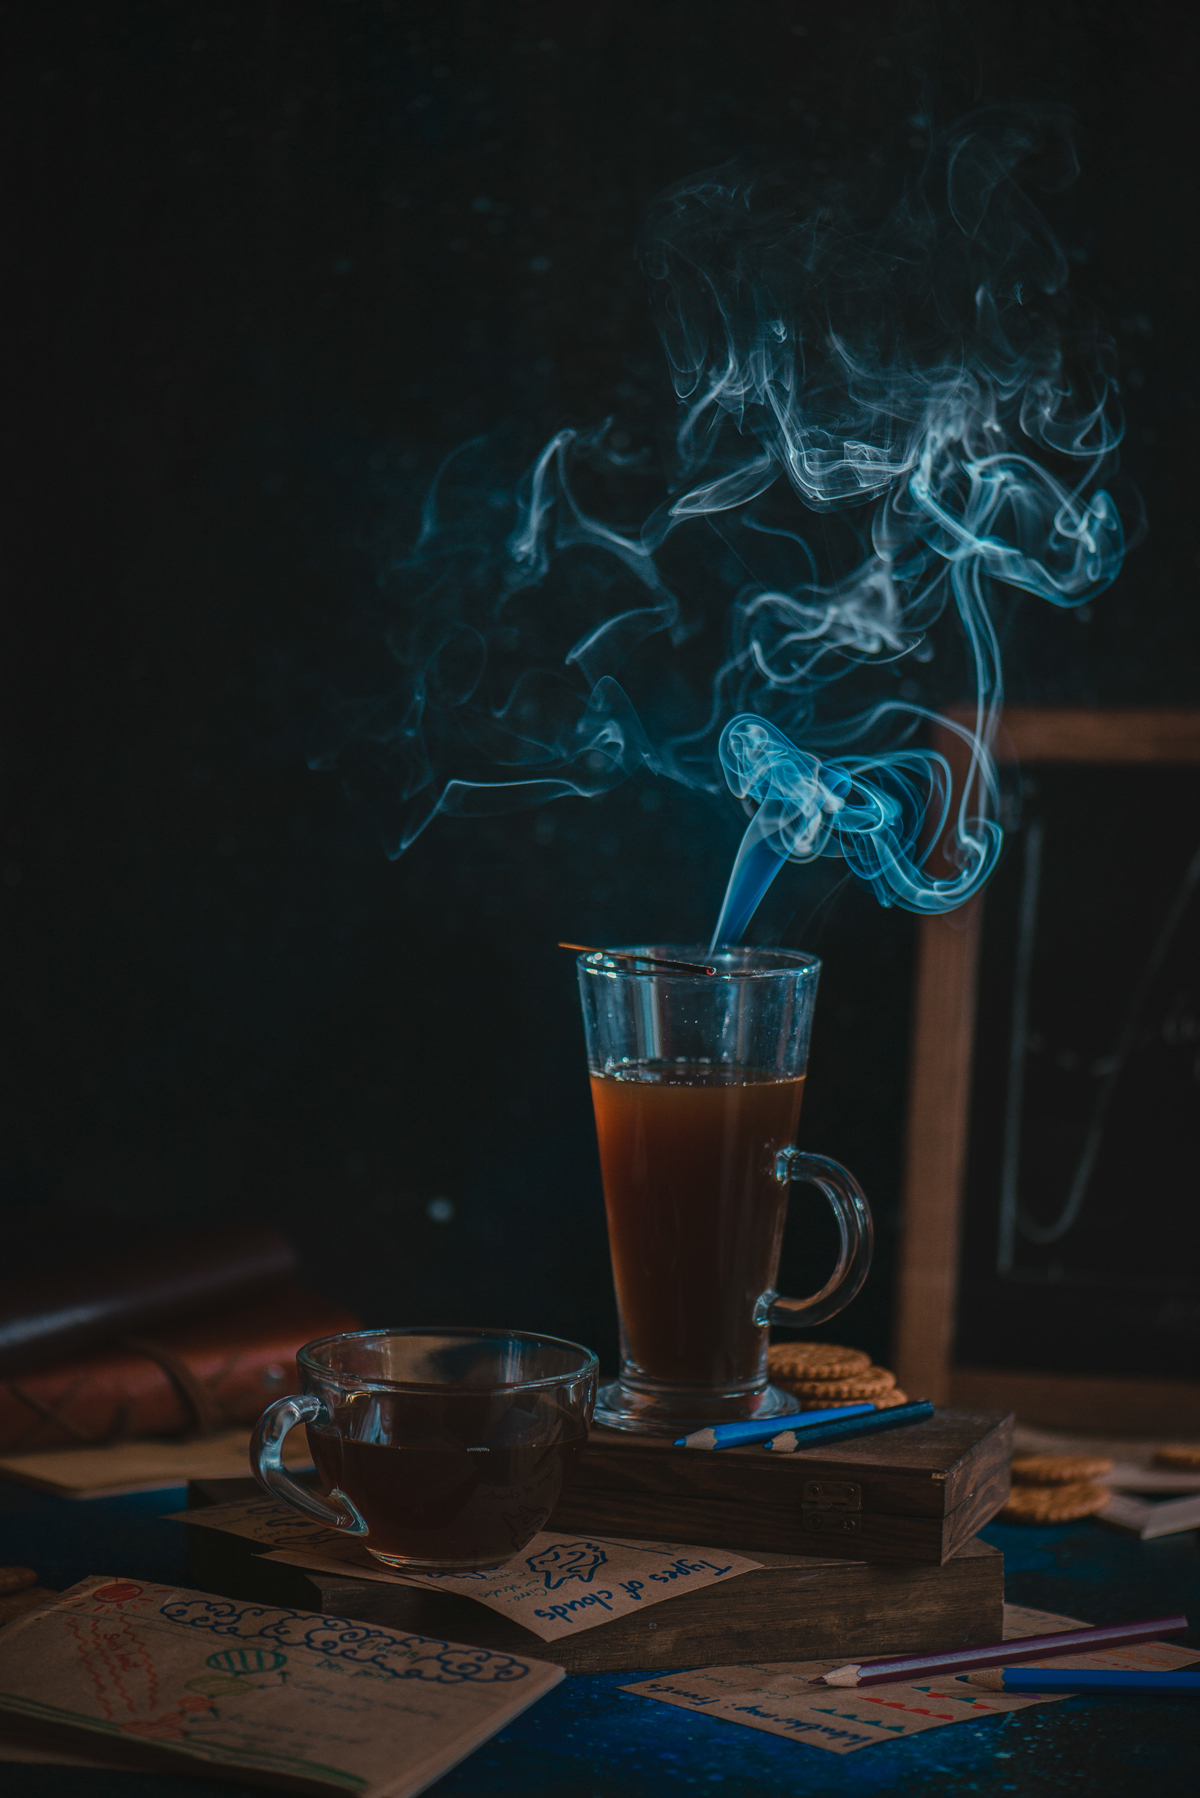
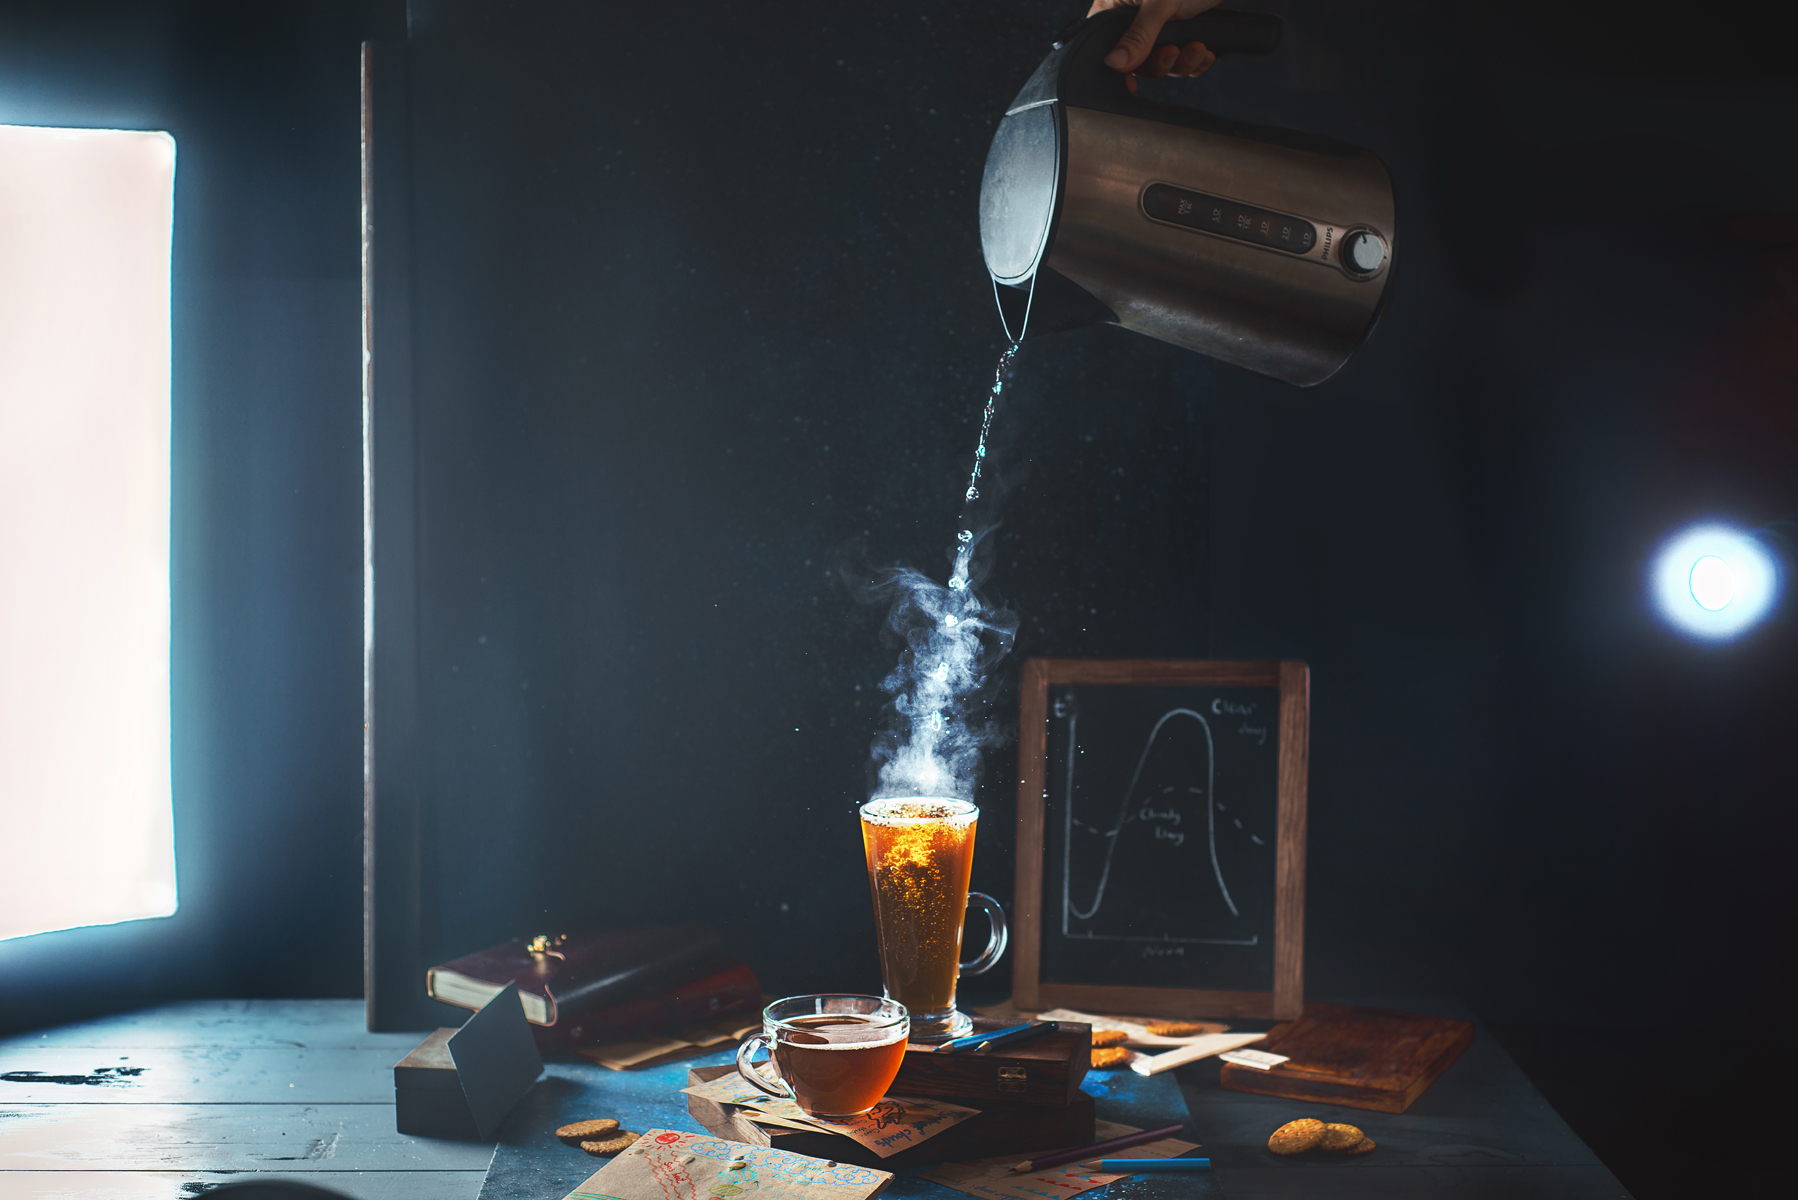
Set the first light source behind the scene in a way that it affects mainly the spot above the cup. This way, it will light the rising steam, but won’t interfere much with other items. If you’re using natural light (like a window), you can use it as a background as well, and let this backlight be your main light source. If you’re using speedlights (as I do), you may want to use a snoot to make the light flow narrower and emphasize the steam without getting unattractive highlights on the cup.
Since there’s no steam yet, put an aroma stick on the edge of the cup and make a couple of shots with a smoke. It lasts longer than steam, so it’s much more convenient for the test.
3. Second light
To add some volume and make shadows softer, set the second light source on the side. In my case, it’s a speedlight inside stripbox, set on the left side and slightly behind the cups (to make the coffee “glow” in your shot). If you’re working with natural light, just use a big reflector for this.
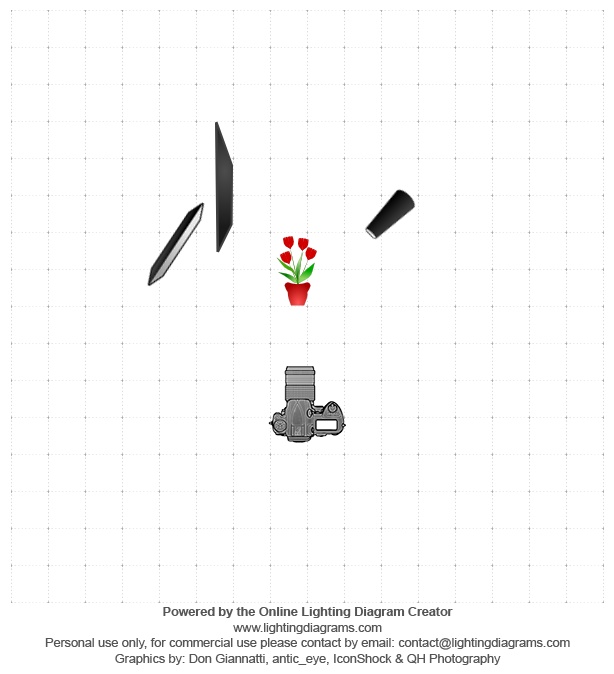
After that, you can make adjustments with flags: I used one between stripbox and background to make the latter darker, and another between stripbox and wooden boxes to darken distracting light spot.
That’s all. Now get ready to shoot!
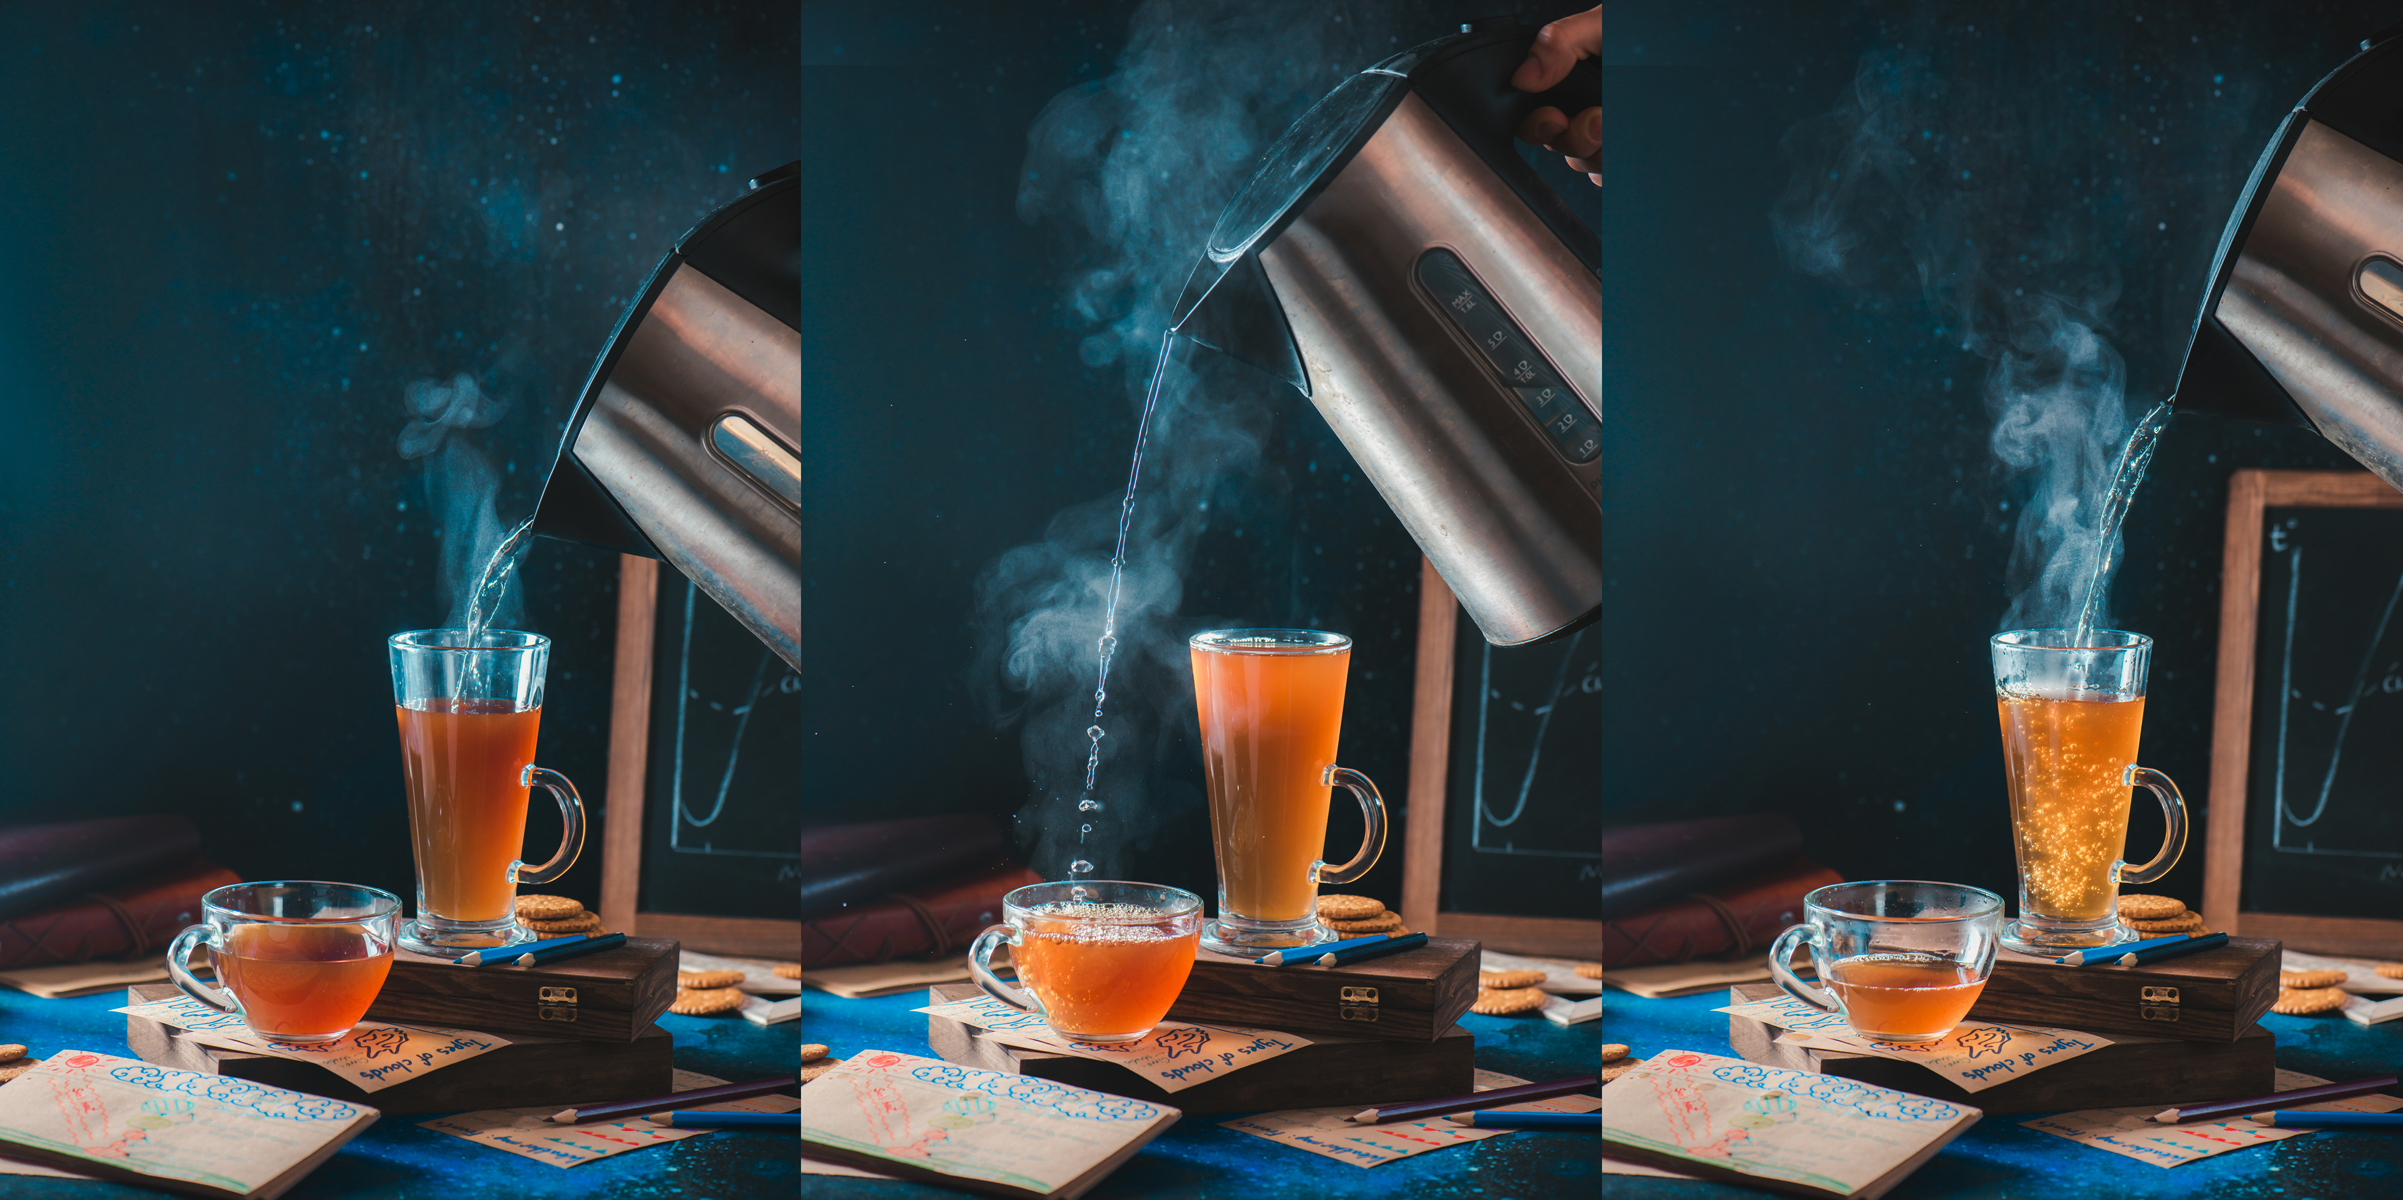
4. Shooting
If your cups are transparent and you’re working with speedlights, set them to a low power, so you can catch some bubbles and drops as well (low power — from 1/16 up to 1/128 — provides a very short pulse that will freeze bubbles and steam in motion). Also, in that case, your shutter speed would depend only on speedlights you use, so set synchronization shutter speed and adjust the aperture to get a well-exposed image.
If you’re using natural light, longer stutter speed (about 1/60 or even 1\10) would give you a blurry, but still beautiful look, and faster (about 1\400) would make the swirls more prominent. Choose the one you like best.
Set your camera on continuous mode, pour some hot water into a cup, and take a sequence of shots with rising clouds of steam.
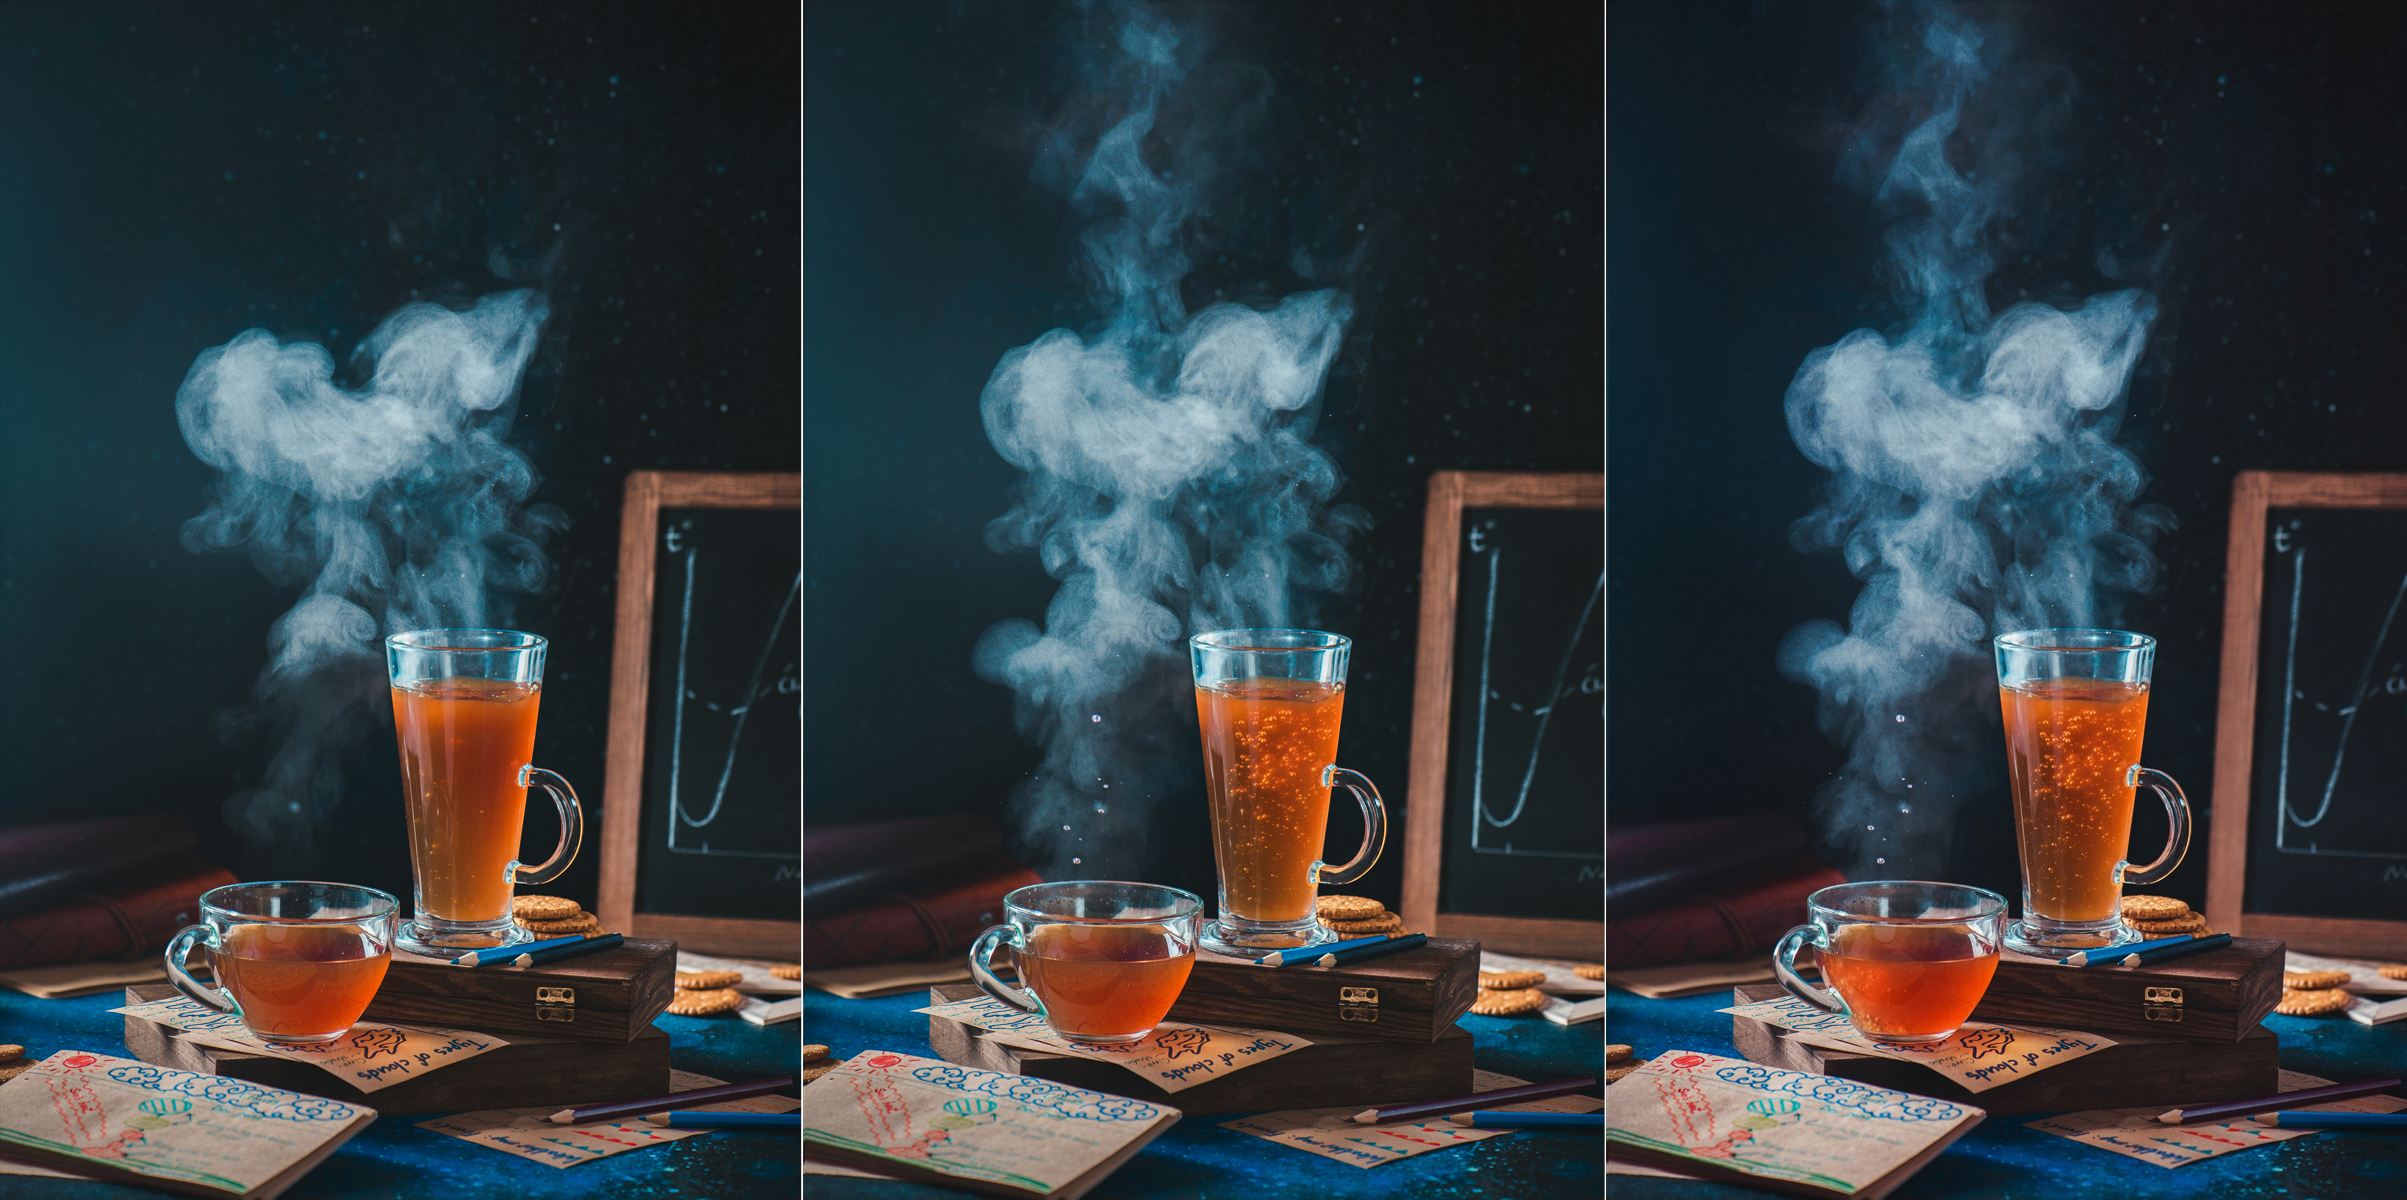
5. Post-process
Now, you can choose the best shot, and use it as it is. Or, you can choose several shots and combine them together. I combined two clouds of steam for two cups and added some swirls on the top.
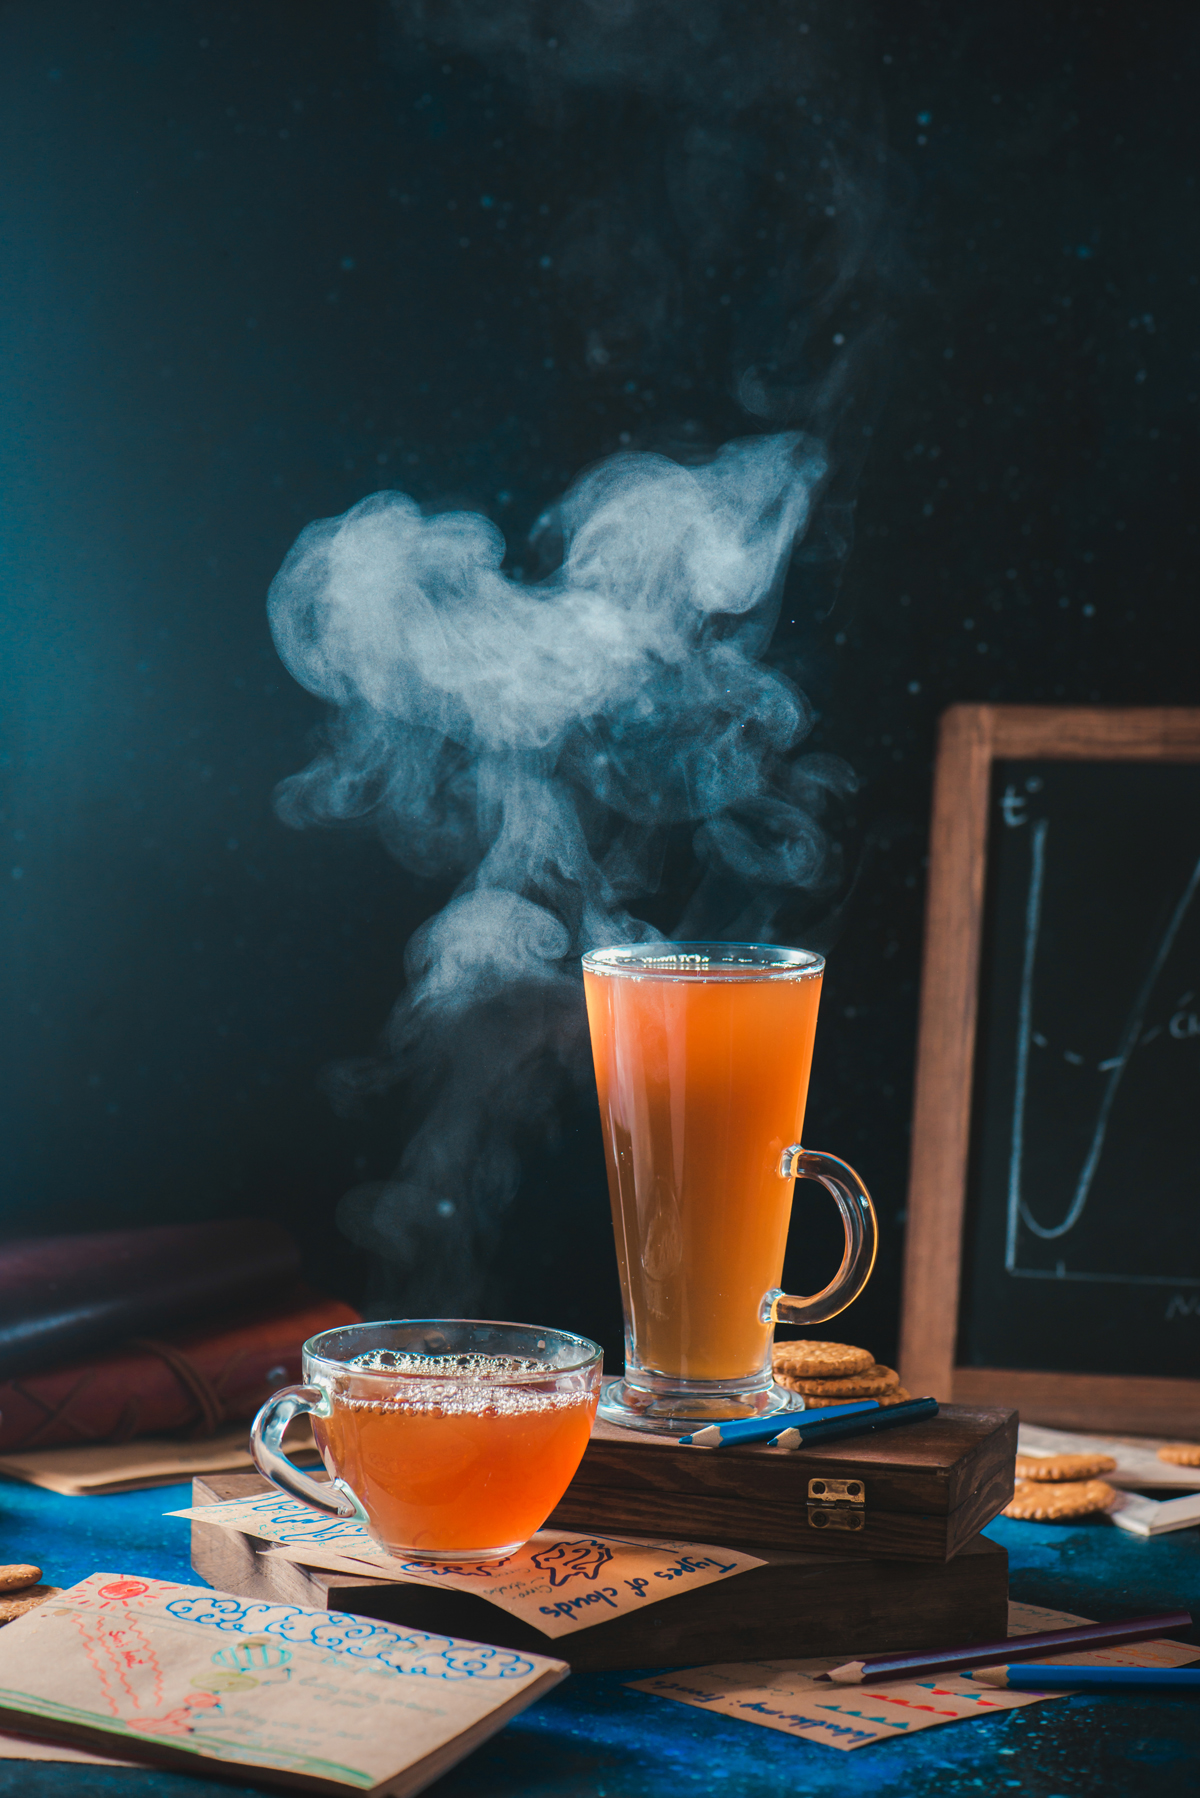
Adjust the colors and contrast. Remember not to oversharpen your image; particles of water vapor are much larger than smoke particles, so with excessive sharpening, they can look very noisy and unattractive.
That’s all! Now it’s time to tell your own stories with clouds, rainy days, tea and coffee.
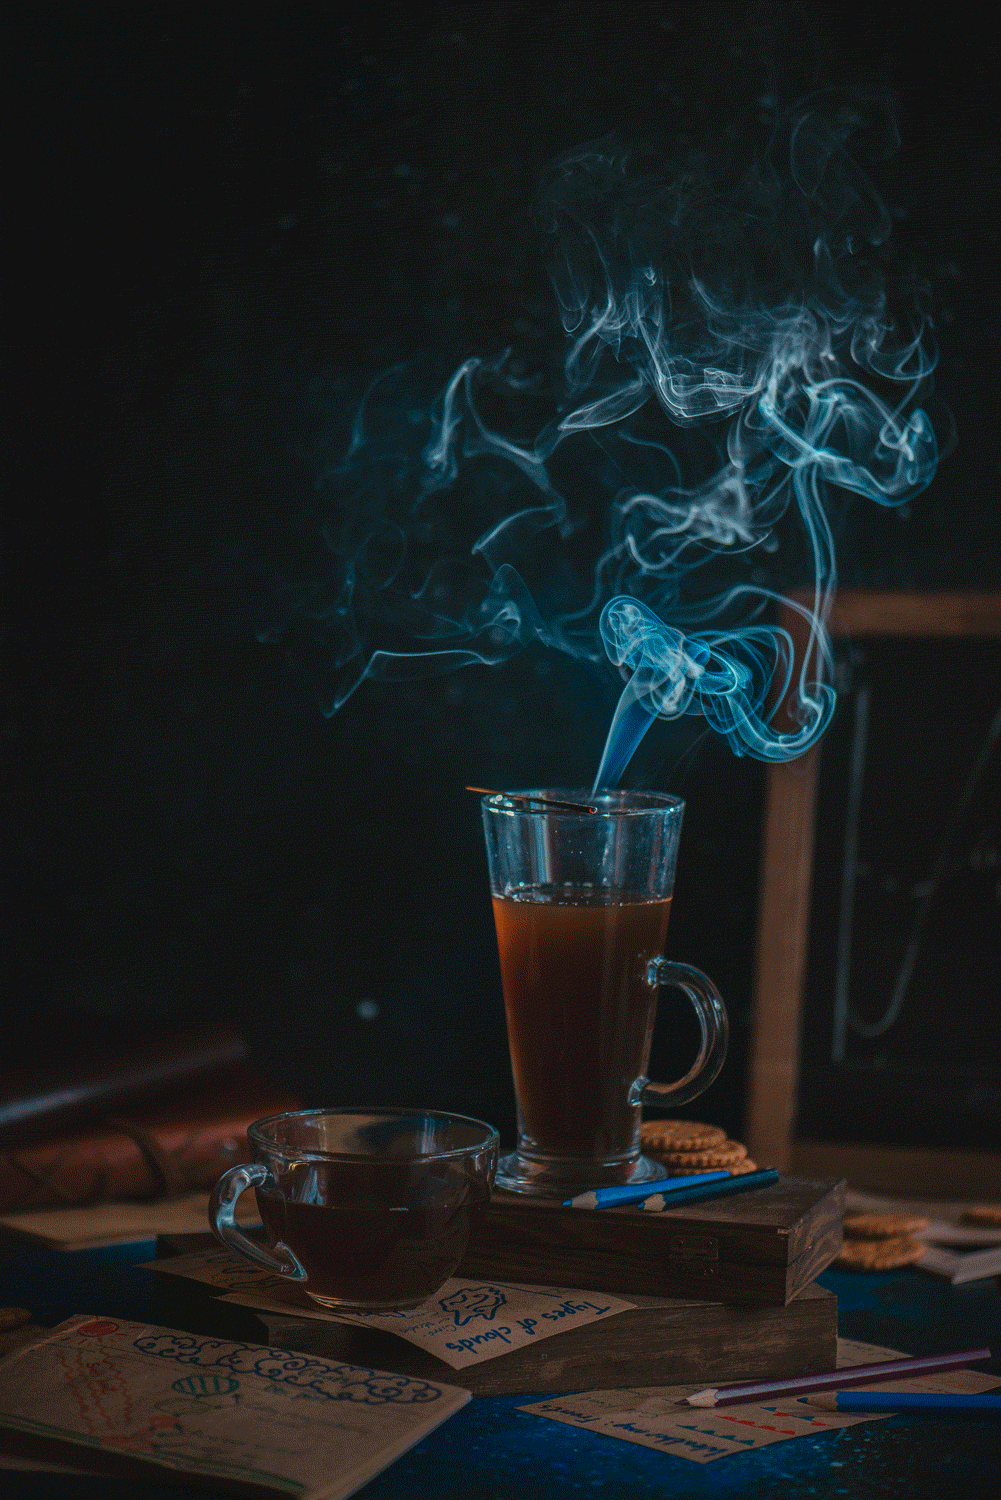
FINAL SHOT

Follow me on 500px and Instagram to see more of my still-life work. If you have any questions about my process, feel free to leave comments for me below!


Leave a reply