Editor’s Note: This post appears in The Lumoid blog, and is reposted here with their permission.
Lumoid is a band of creatives, photographers, and tech lovers offering a try before you buy service for the latest in technology from photography gear and drones to fitness trackers and audio equipment. They make it convenient and affordable to test drive the latest gadgets before committing to buy them. Lumoid is also a rental house for the best and latest in photography. Scroll down to get handy tips on how you can set up a photo studio, right in the comfort of your own home!
Photo studios are a terrific place to shoot high quality, professional looking images. They often offer a range of backdrops in different colors, with thousands of dollars of lighting equipment – all of which is moveable, adjustable and available at your fingertips. But, unfortunately, few of us actually have a fully functioning photo studio at our disposal, which is why we have to create our own. And the great thing is, it’s easier to do than you’d expect. You don’t need to be a professional photographer or own thousands of dollars of professional equipment to shoot studio photography. All you need is a camera, a few household items, a little space and a lot of creativity to set up your very own in-home studio.

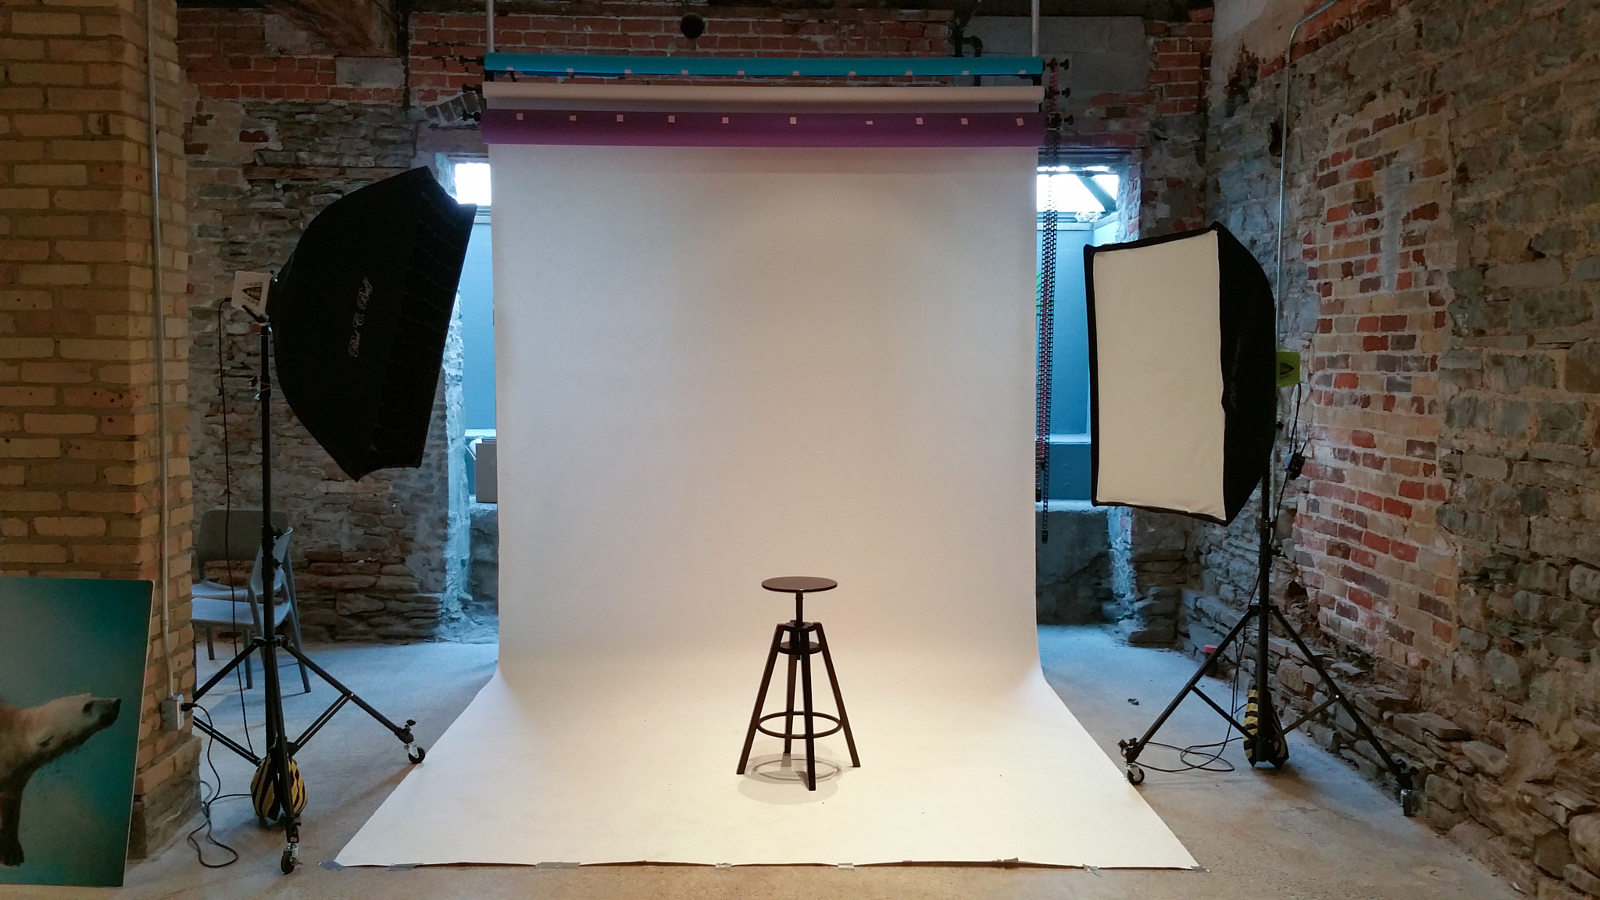
When setting up your studio, the first thing you’ll need is some open wall space – I recommend at least five feet across and all the way up to the ceiling. Depending on what you’re shooting, you might need more or less space across. Full body portraits or images with more than one person in them will require more wall space, while tighter portraits, product and food photography will require less.
The second item, or items, you’ll need is a backdrop. Depending on the color and state of your wall, this is really an optional item. One of my favorite ways to shoot in the studio is with a plain, white backdrop, so if you already have a clean, white wall, then presto! You’re ready to go! If you do want to add a splash of color or a more interesting backdrop, your options are endless. Use Command hooks or thumbtacks to hang up a tapestry, a thin bed sheet or a curtain of any color or pattern. If you’re going for a festive or themed shoot, you can tape wrapping paper to the wall for a more specific pattern or design.
The third item, and in my opinion, the most important item you’ll need, is a light source. This, again, can be any range of things. My favorite light to use is a tall, standing lamp with multiple, adjustable arms. This allows for a lot of variation in lighting intensity and placement. You can also use a desk lamp, a flashlight, a window or even candles – get creative. For more serious lighting, try an Alien Bee Essential Lighting Kit.
This is where the fun begins!

Grab a friend, and sit them in front of the wall. Make sure they’re at least a few feet away from the wall to create depth within the image. Try using a lens with a quick aperture like a Canon 50 1.2. Experiment with placing the lights at different heights and positions around your model’s face. Notice the way the shadows fall across their face and body. The closer the light is to your subject’s face, the more drastic the contrast and shadows will be. If the light is farther away, the shadow and contrast will become softer and more diffused, and will spread out over more space.

Experiment even more with different lighting techniques using a large piece of cardboard, or any other large, flat object. Use the board to block part of the light by placing it in between the light and your subject, which will cast interesting shadows over your subject’s face and body. You can also hold a white, or light colored board off to the side of your subject to reflect more light off of the board and back onto them. This is especially useful when you have few lighting options, and extra friends or roommates hanging around.

Want to shoot food or product photography? Grab a small table, preferably white, and place it between the wall and your light. You can use a placemat, tablecloth, cutting board, mirror, colorful plates or any other number of covers for the table. Bring the light close and high above your subject for the brightest and most direct light.

No matter what you’re shooting, the trick is to be flexible and patient – photography is all about trial and error. Now that you have the basics – go crazy! The possibilities for your in-home photography studio are endless!
Got any more tips to add to building your own photo studio at home? Drop them in the comments below!

Leave a reply