Robert Cornelius originally attended film school with the intention of creating movies, but over time realized that his passion was in still photography and photo manipulation. Now he uses his knowledge of motion picture lighting, storytelling, and ninja Photoshopping powers to bring his cinematic visions to life one frame at a time.
Robert strives for his work to walk the line somewhere in between a photograph and a digital painting. You can find more of his work on 500px, his website, Facebook, Instagram, and Twitter.
A version of this post originally appeared on DIY Photography and is being republished here with express permission from Cornelius.

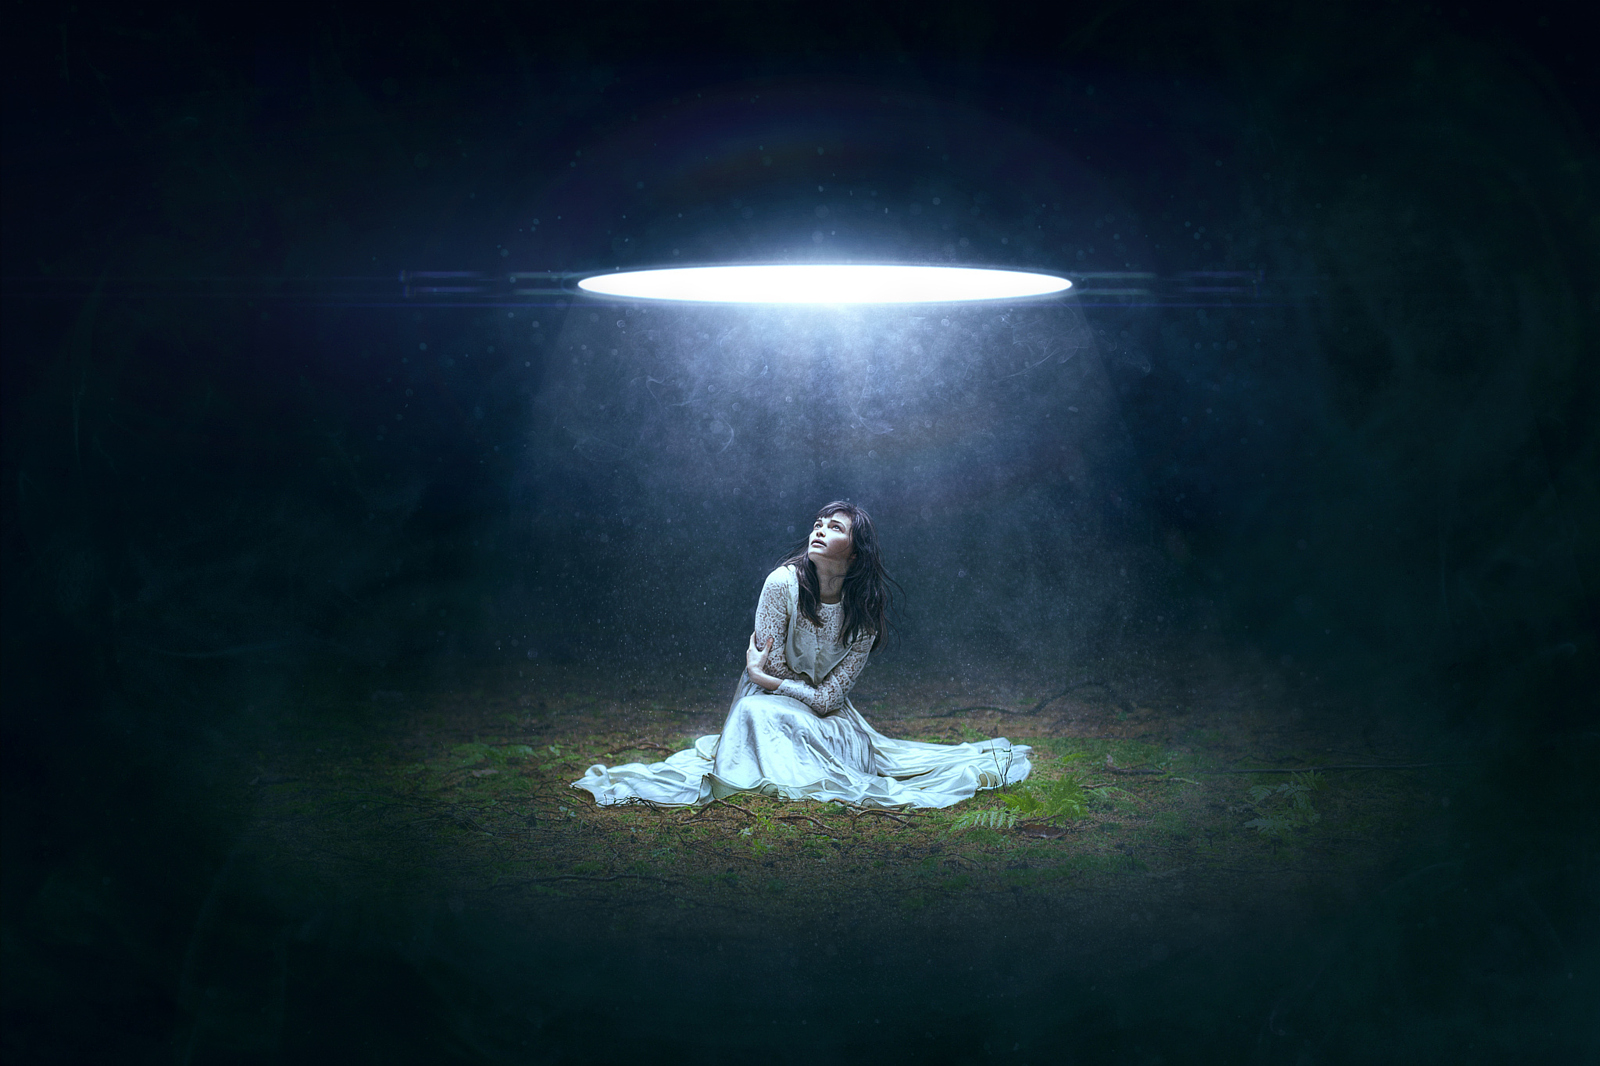
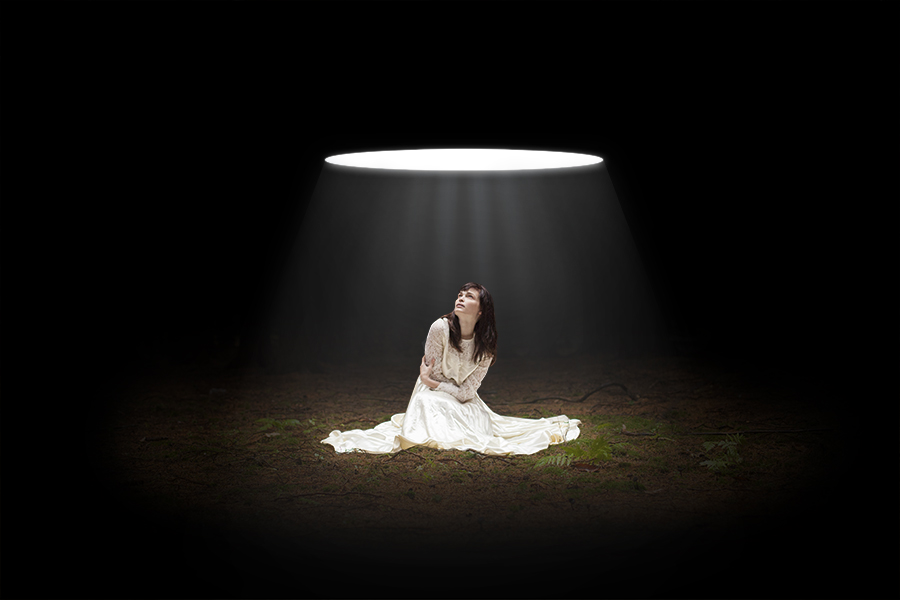
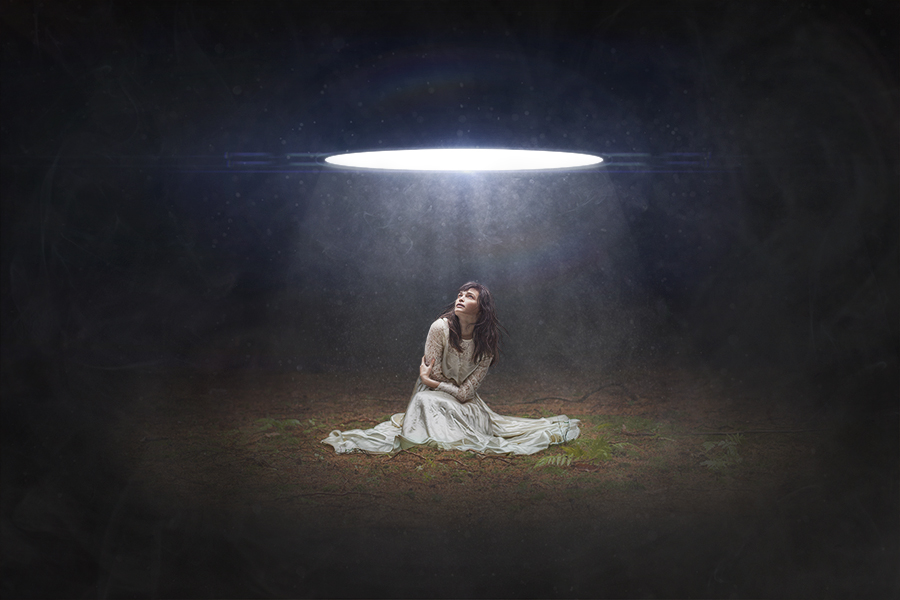
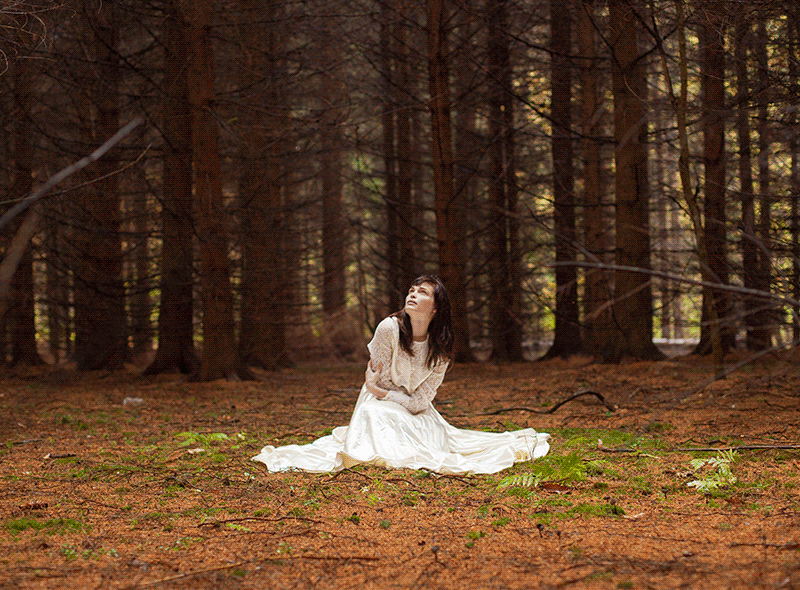
My newest image “The Portal” actually started with an outtake from this shoot I did a couple years ago in the Fall of 2014 at the Silver Lake Flickr Gathering.
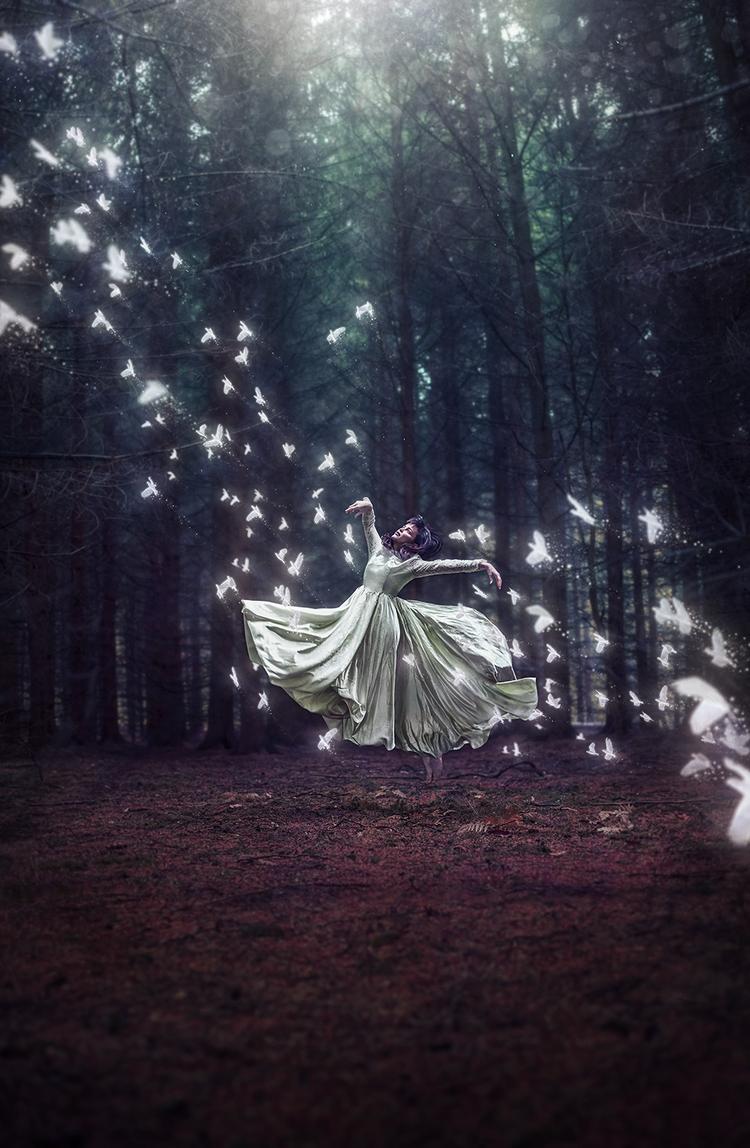
The incredibly vibrant and joyous human that is Lulu Lovering was put on this Earth to spread sunshine and also be a totally stellar model. This girl knows how to turn on the smolder … or the whatever it is that you need her to emote. Even though I already had the shot for my original idea (seen below), I decided to shoot a few random extra shots just in case I might one day find a use for one of them. (Guys, I was right.)
It’s not every day you have a lovely Lu in a fancy vintage wedding dress out in the middle of the woods. If you do, just shoot some more.
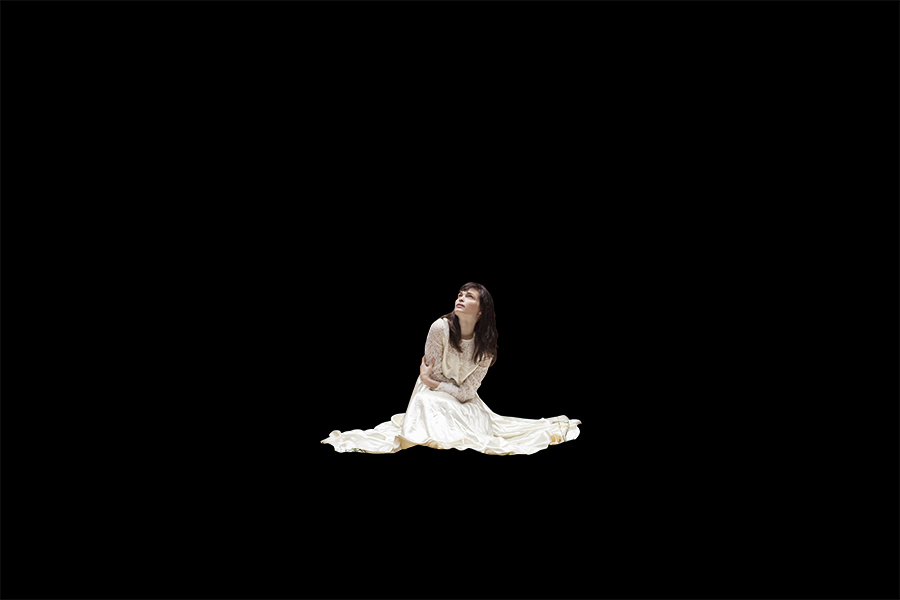
I wanted this new image from that shoot to be totally different from the original pic (now seen above). Right off the bat, Lulu was obviously in a wildly different position, so that helped. Also, because I already have several images taken in that same forest setting, I decided to tone down the background. And of course by “tone down” I mean “basically eliminate entirely.” So, in my usual fashion I pen-tool-ed her off the background and then essentially had her on a blank black canvas … Now what?
After staring at Lulu sitting in eternal darkness for an undetermined lengthy amount of time, I settled on the idea of having a magic portal opening above her head. The lighting in the image already had an overhead light source so it would be easy to play up the shadows and highlights a bit to sell the effect.
So, if you’d like to try your hand at creating this magical portal effect in Photoshop, feel free to read the following steps. If not, well … bye?
STEP ONE – Surrender to the Dark Side
For this effect to work, you’ll need to have a very dark background. It doesn’t necessarily have to be solid black like I used, but if it isn’t pretty darn dark it’s just not going to work correctly… because blending modes. Just stick with me and you’ll see. I guess you could potentially make a black portal floating on a bright background, but that not what we’re talking about today.
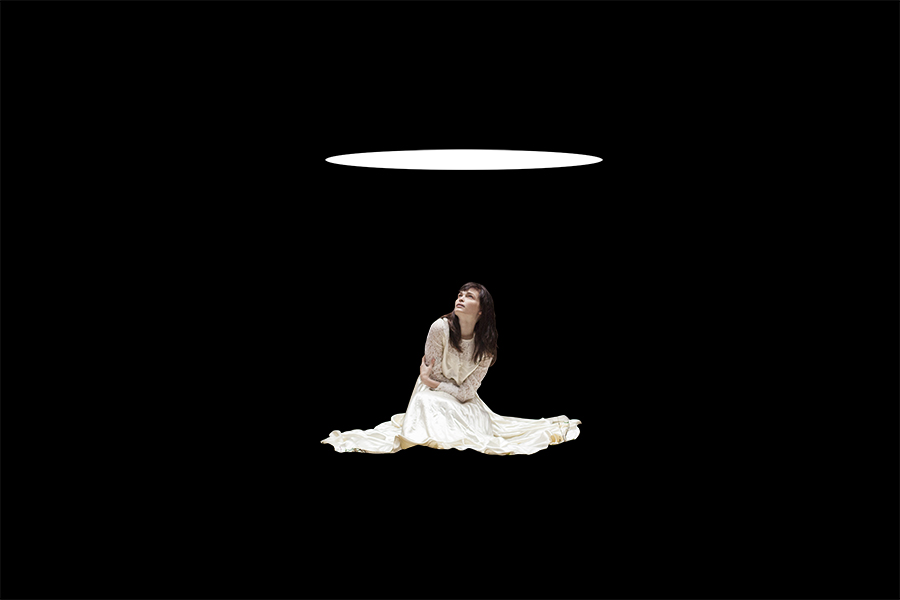
STEP TWO – Elliptical Marquee Tool
This step is crazy easy. Decide where it is that your portal will be—it should be placed wherever your light is coming from. This effect works much better if you start off with somewhat strong directional lighting because it helps to sell the fact that the portal is casting the light.
Once you know where you want your passageway to another dimension to be hovering, just use the elliptical marquee tool to make an oval on a new layer and fill it with white.
STEP THREE – Let There Be Light
I used images from this Light Beams set to add in some … well, light beams. I just picked an image, slapped it onto my picture, set the blending mode to soft light, turned the opacity down some and BAM! Lovely rays of light.
I also used the polygonal lasso tool to fill in a large white beam shape, turned that down considerably, and masked away the edges to brighten it a bit more in the center. Then I put a layer mask on the solid black layer below Lulu and painted away the area around her to reveal the ground from the original picture and fake like the portal was creating a small pool of light on the forest floor.
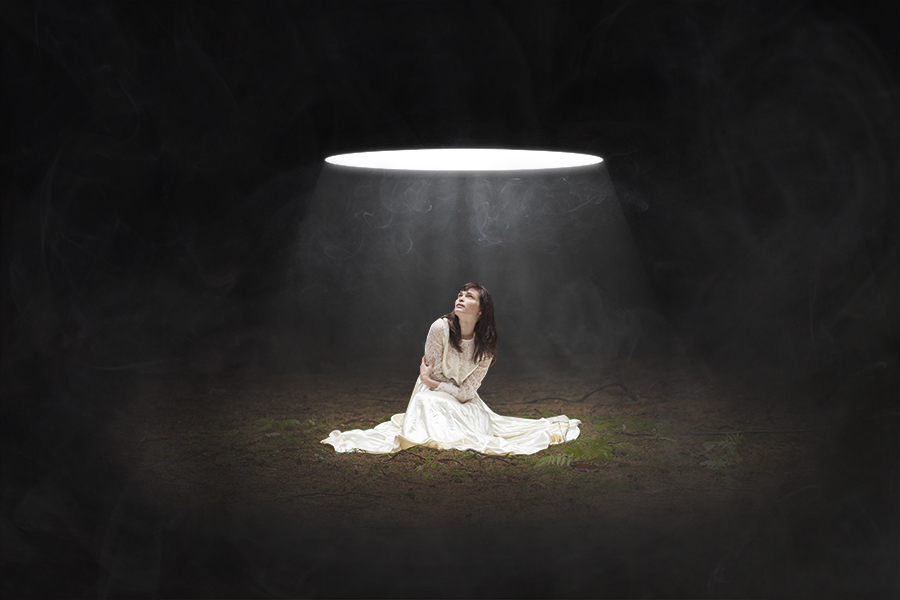
STEP FOUR – Smoke It Up
In real life you can’t actually see a ray of light unless there is something in the air for the beam to illuminate, so I added some smoke. The light beam image I added did have a bit of hazy smoke action going on (because like I said, otherwise you wouldn’t see the light), but it was pretty uniform and I wanted some more noticeable wisps of smoke.
I used images from this Smoke set as well as this Smoke & Steam set. Because they are shot on black it was so easy to work with them—I just set the blending mode to screen to get rid of the black pixels and placed the smoke where I wanted it!
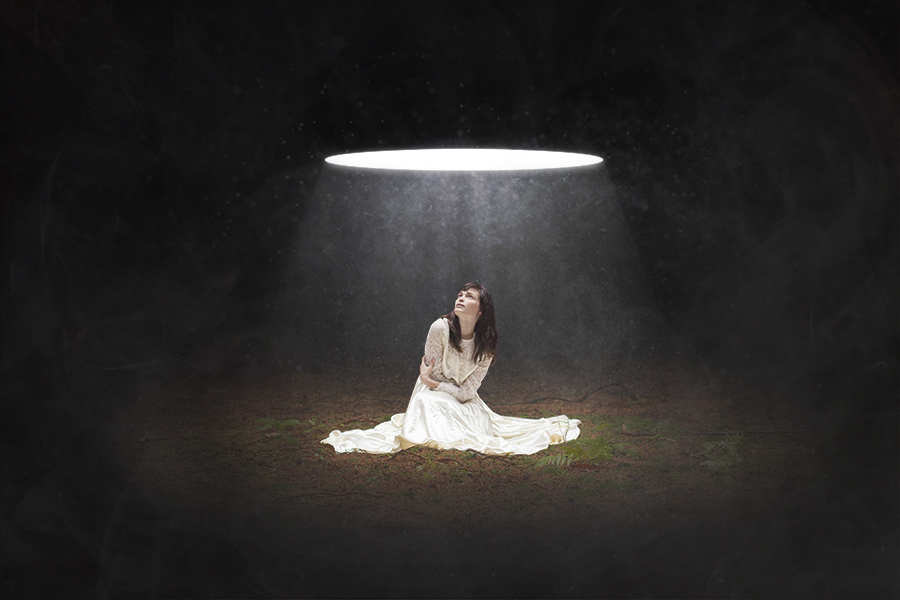
STEP FIVE – Plenty Of Particles
Over the years as my style and visual preferences have evolved, I’ve noticed that I’m kind of completely and utterly obsessed with any sort of float-y particle/dust/speckle/orb/bokeh/grit. Acceptance is the first step …. to NOT CARING AT ALL! 🙂 I really love the way dust can add so much motion, texture, and interest to the air in my images.
Some pictures call for a very clean, sharp, uncluttered feel, but more often than not I get to a stage in my editing process where I want to muck it up a bit with some atmospheric particles. So yeah, I obviously added a lot to this image.
To achieve the particles I used images from this Fire & Sparks set, and this Water & Rain set. Apparently in Photoshop, water + fire = magical particles? That’s my kind of math. I just set these layers to screen, turned down the opacity a bit, and masked away from some areas to keep them mainly below the portal, within the light. Oh and I desaturated the sparks image so that there wouldn’t be glowing red/orange orbs all over the place. (I did the very same thing with the same texture in this image).
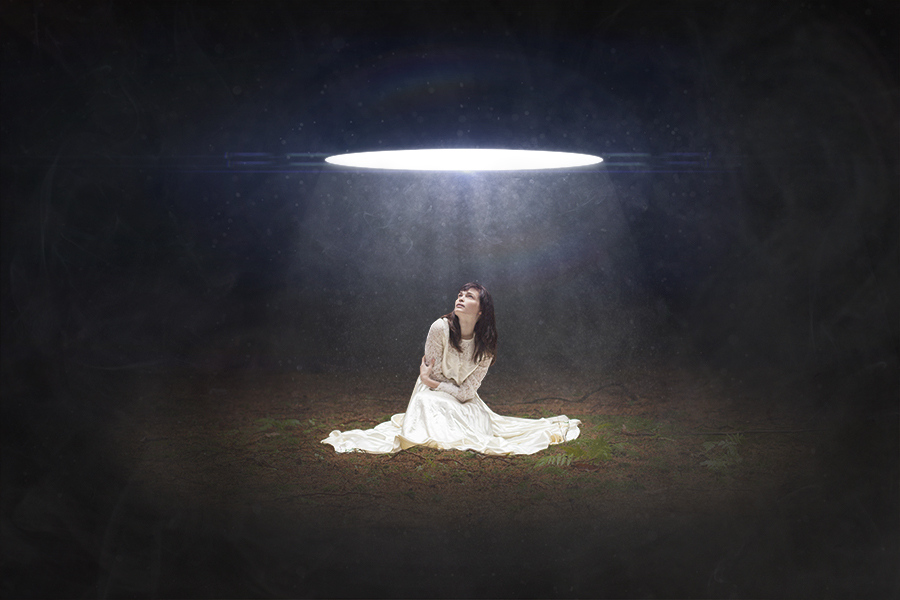
STEP SIX – Lens Flares, Yes Please
Guys. I’m just warning you … I’m about to go all J.J. Abrams on you. If that doesn’t make sense to you, just watch basically any Abrams film and count the lens flares. (HINT: There will be a lot).
I definitely fall into the category of humans who LOVE LENS FLARES! I absolutely adore this set of Sci-Fi Lens Flare images, so I chose two lovely blue-ish ones, set them to screen (are you noticing a pattern?), placed them over my portal, and the image immediately started taking on more of the magical sci-fi kinda look I was hoping for. Hooray! *epic mid air high five freeze frame with J.J.*
STEP SEVEN – Shading and Detail Painting
Usually my favorite stage in my editing process is when I get to strap on my Wacom tablet (no actual strapping occurs … I just pick up the pen), and start shading/detailing my image. On a handful of different layers set to overlay, soft light, and normal, I painted mostly with black or white to build onto my shadows and highlight and accentuate the light the portal would be casting.
Sometimes I will paint with color, in which case I’ll select a hue right from my image to paint with. If you do this, be sure ALL color adjustment layers above that layer are turned off.
The location we shot in had a small opening in the trees overhead, so there was already some nice directional overhead light to start with—the painting was almost too easy. I essentially just darkened where the shadows were and lightened where the highlights were. Then, to create a bit more motion and movement (like the portal just appeared and caused a small gust of wind), I painted in some extra flowy-blowing pieces of hair.
STEP EIGHT – Fun With Color
Altering the color of an image is SO FUN and can really affect the overall feel of the piece. The pose Lulu was in seemed to elude to the fact that she was a bit cold, so I figured I would go with a cool color pallet.
I used several adjustment layers including color balance, levels, selective color, and hue/saturation to push some blue/teal tones into the image (especially in the highlights). I also used my little mid tone contrast/color boosting trick where I checked the colorize box in the hue/saturation adjustment window, used the top slider to picked a blue color, set the layer to soft light, and turned the opacity way down. I also saturated the reds and greens of the ground a bit to contrast the blue, so the image wasn’t too monochromatic.
STEP NINE – Glows and Sharpening
Ok so not a LOT happened between here and the last step … but it’s an important step none the less. On a new layer with a large-ish soft default Photoshop brush at around 40% opacity, I clicked once in the center of the portal to give it one more punch of glowy-ness. Also, on the same layer with a much smaller brush and an even lower opacity, I clicked a few times on the highlights of her dress and shoulder to give them a slight glowing reflective quality.
Then, like I do with all my images, I sharpened using the High Pass filter (under “Other” in the filter drop down menu). First I duplicate and merge everything (stamp visible), then run the High Pass filter with a very low radius so you just barely start to see the outlines of the details. Then I set that layer to overlay. I’ve also been enjoying the look it gives if you do another High Pass layer and this time set the radius much higher, then set that layer to soft light, and turn down the opacity until it’s not so harsh and cartoon-y looking.
Well, there you have it—that’s how I created a magic portal!! Nothing all that crazy really, just stacked up layers of different texture elements all combined with some blending modes and a little masking to create one magical hot spot. Don’t tell the original picture I did this shoot for, but I think I like this new one better. 😉


Leave a reply