
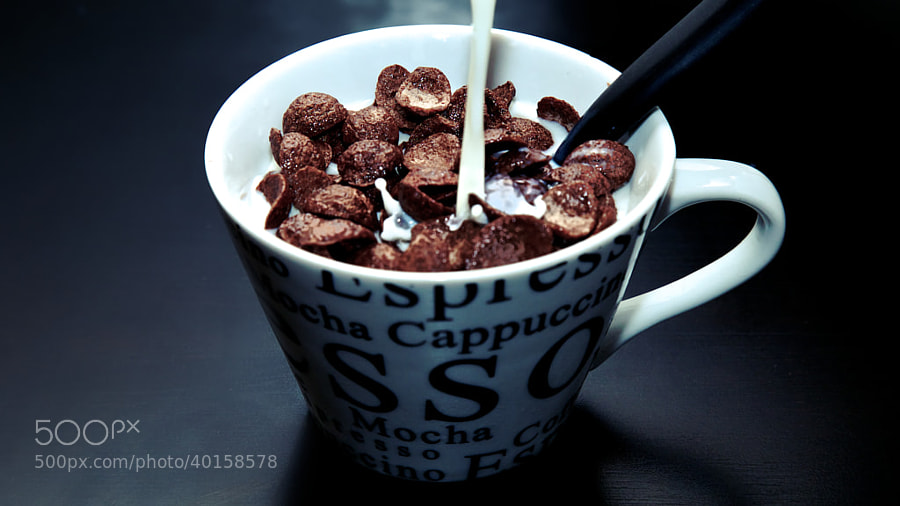
Looking for some inspiration to kickstart your day? Start with breakfast—literally. Start by photographing your breakfast of cereal at the exact moment it splashes onto your milk. Since it’s not obviously simple to do, Giammaria Zanella—a photographer and engineering student from Italy–is here to share a tutorial on how to get this explosive shot.
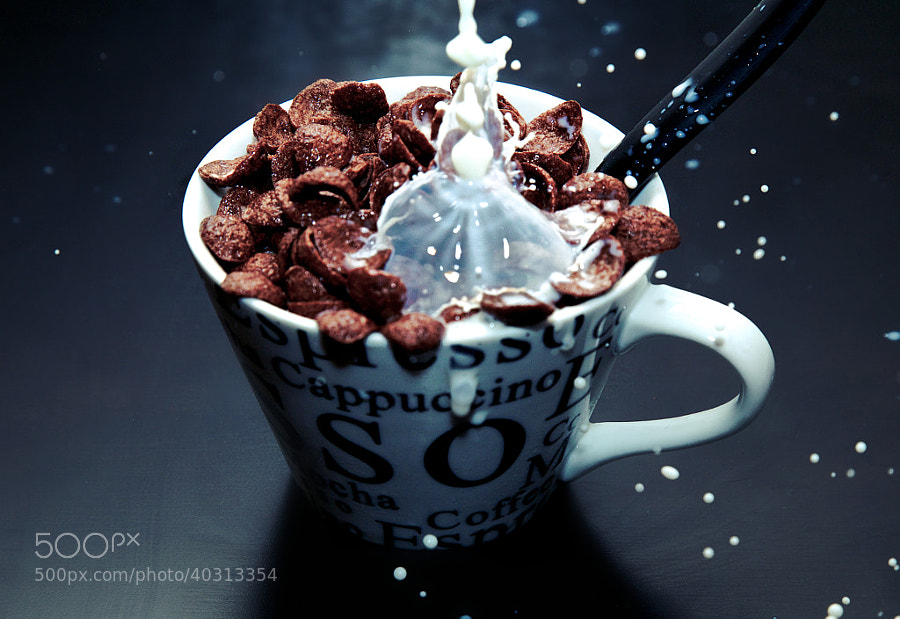
“Breakfast Explosion” High-Speed
Food Photo Tutorial
by Giammaria Zanella
I love high-speed photography — you can freeze a moment in time and get spectacular images, but the technique requires a great deal of training and patience. In this tutorial, you will learn some of these techniques in shooting high-speed, and how you can capture a great photo from a simple idea.
When people ask me to share the story behind my photo, Breakfast Explosion and why I chose such a simple subject, I always tell them that it happened by chance.
It all started one morning while I was having breakfast. A box of milk slipped from my hand and into my cereal. At that moment, the idea of the explosion came to life. I immediately got my camera, flash, and tripod and then I went to work. Four great photos came out of many attempts, and now they belong to my “Breakfast Explosion” series.
I have to confess that it wasn’t easy. It took nearly an hour to get a good result. I used up a lot of cereal and milk! But this moment can be recreated. And this is what my tutorial will be all about.
Don’t worry if you create splashes everywhere. It’s all part of the fun.
What You’ll Need
You don’t need expensive equipment to come up with a great result. Essentially, you’ll need:
• A camera. I used a Canon EOS 6D
• Lens. I used Canon EF 24-105mm f/4L IS USM
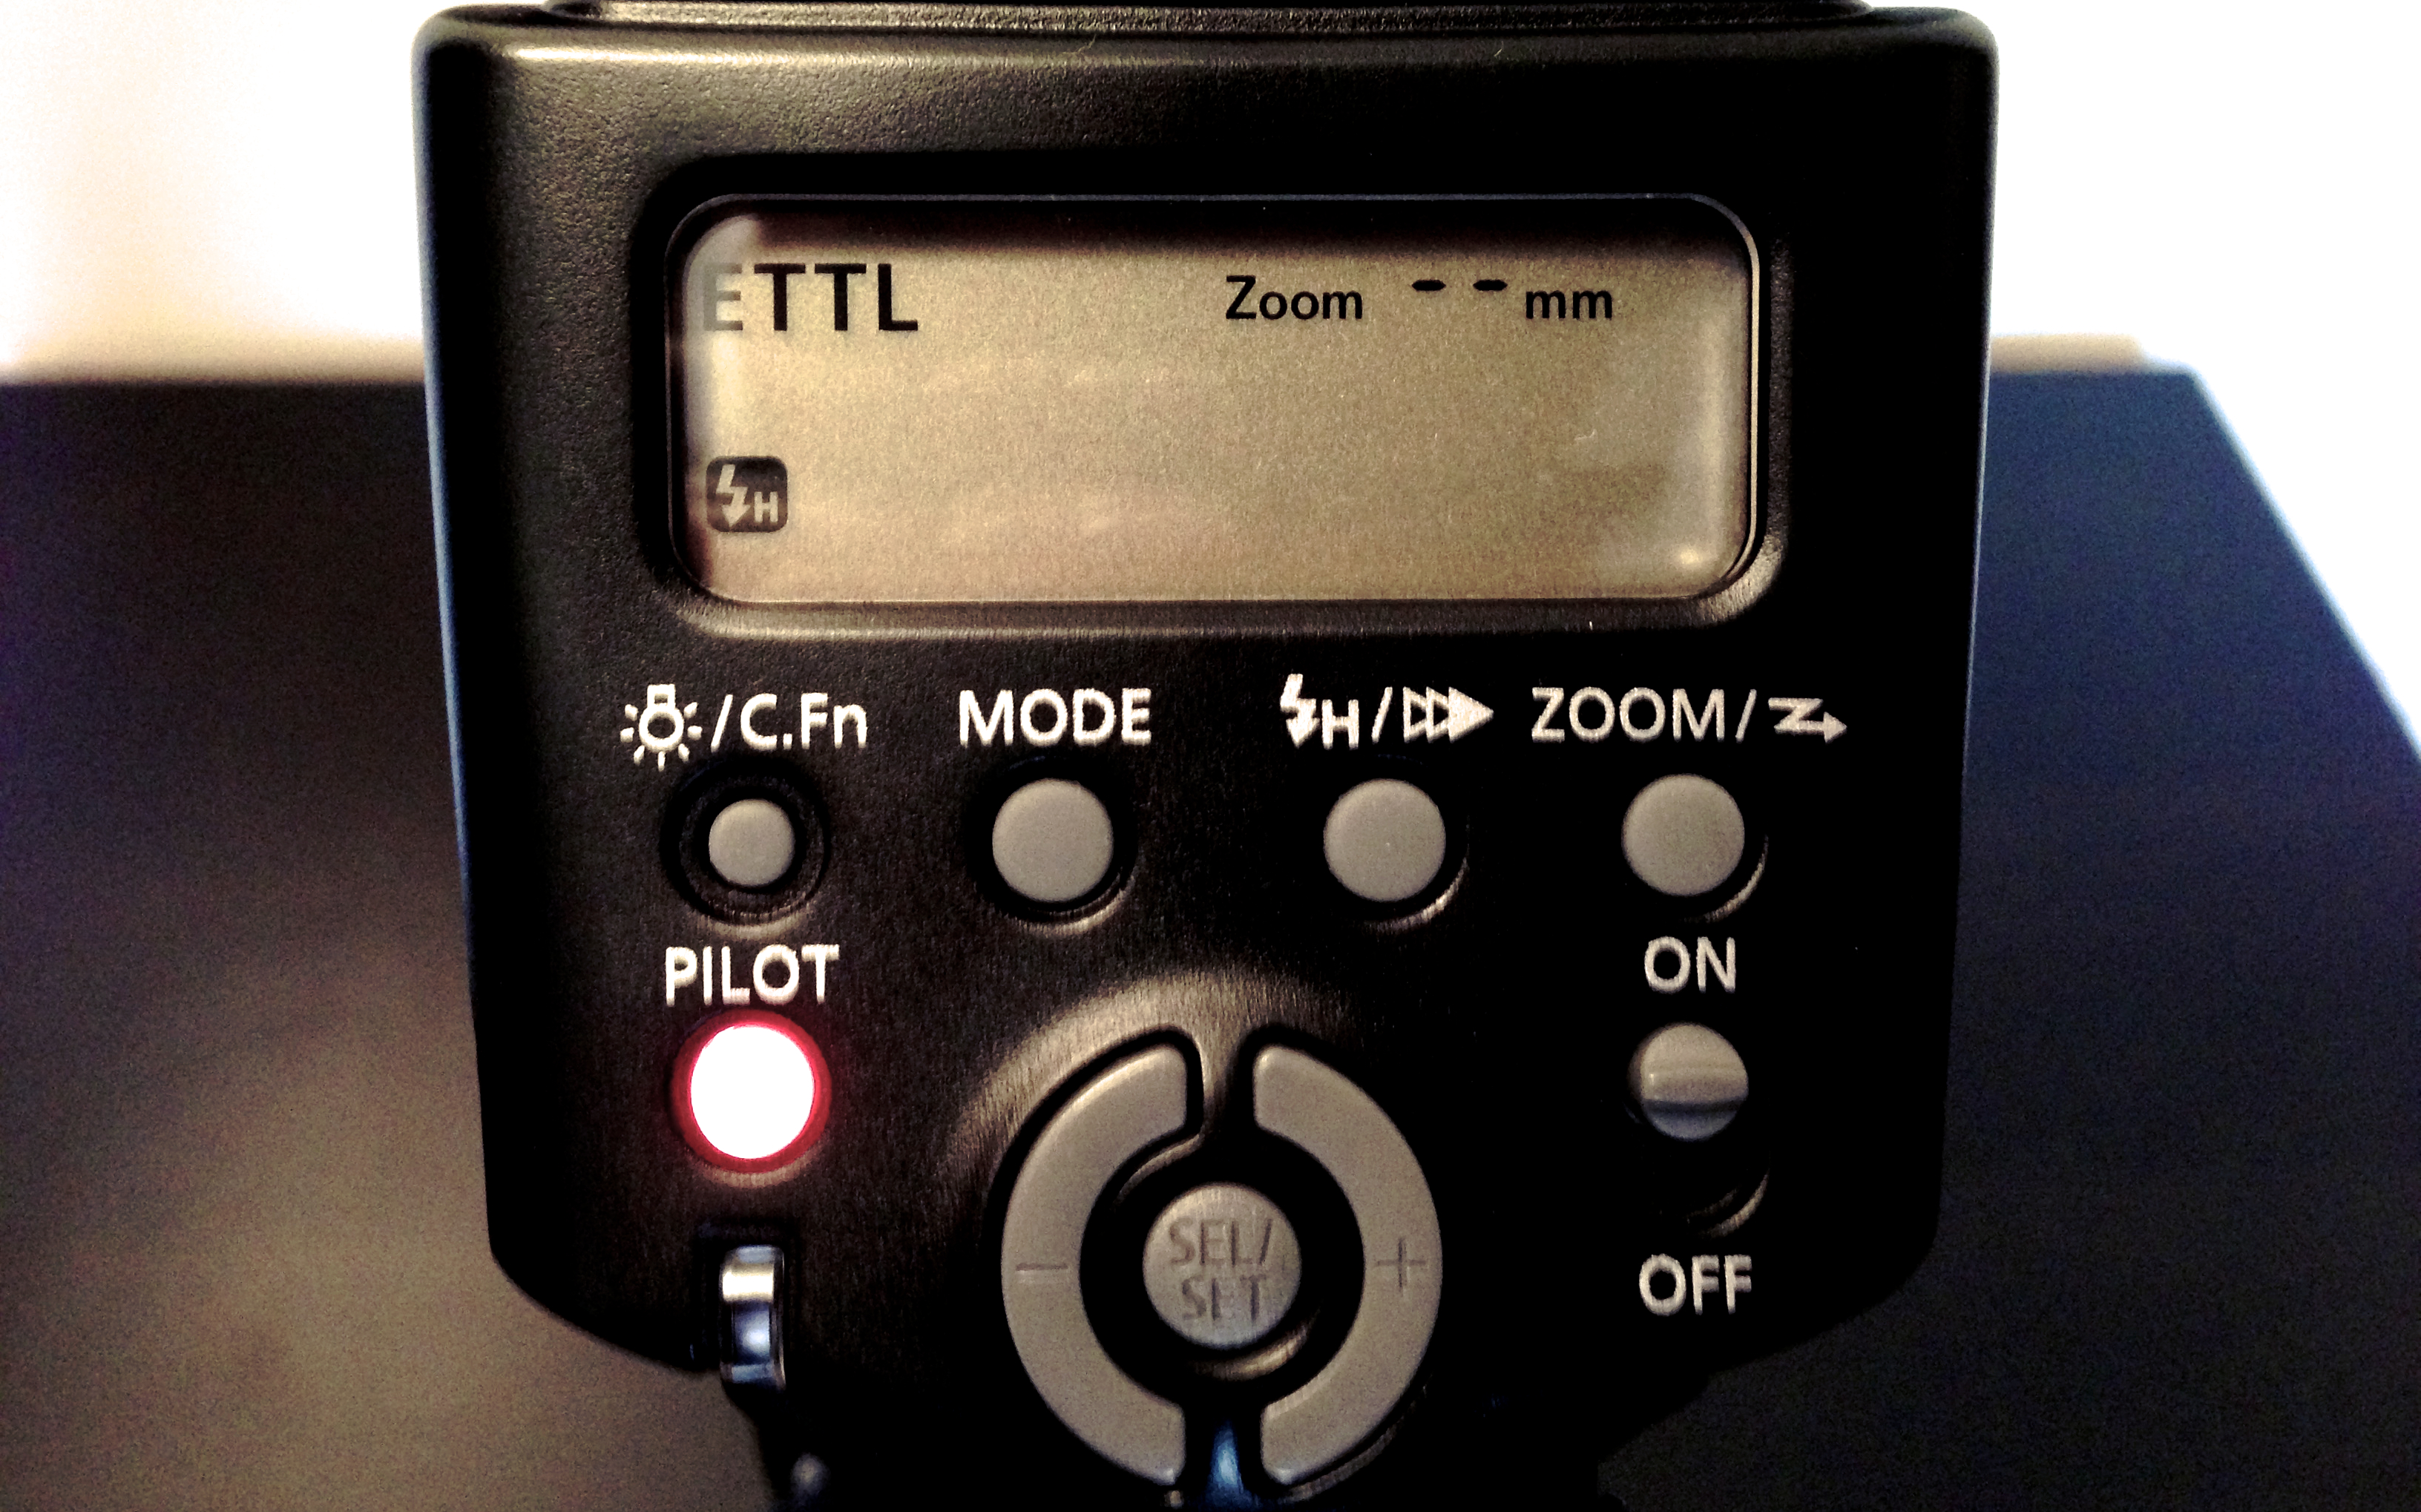
• External flash which you will mount over your camera. I used Canon Speedlite 430EX II
• Softbox for the flash
• Tripod
• Milk
• Chocolate breakfast cereals
• A cup
• A spoon
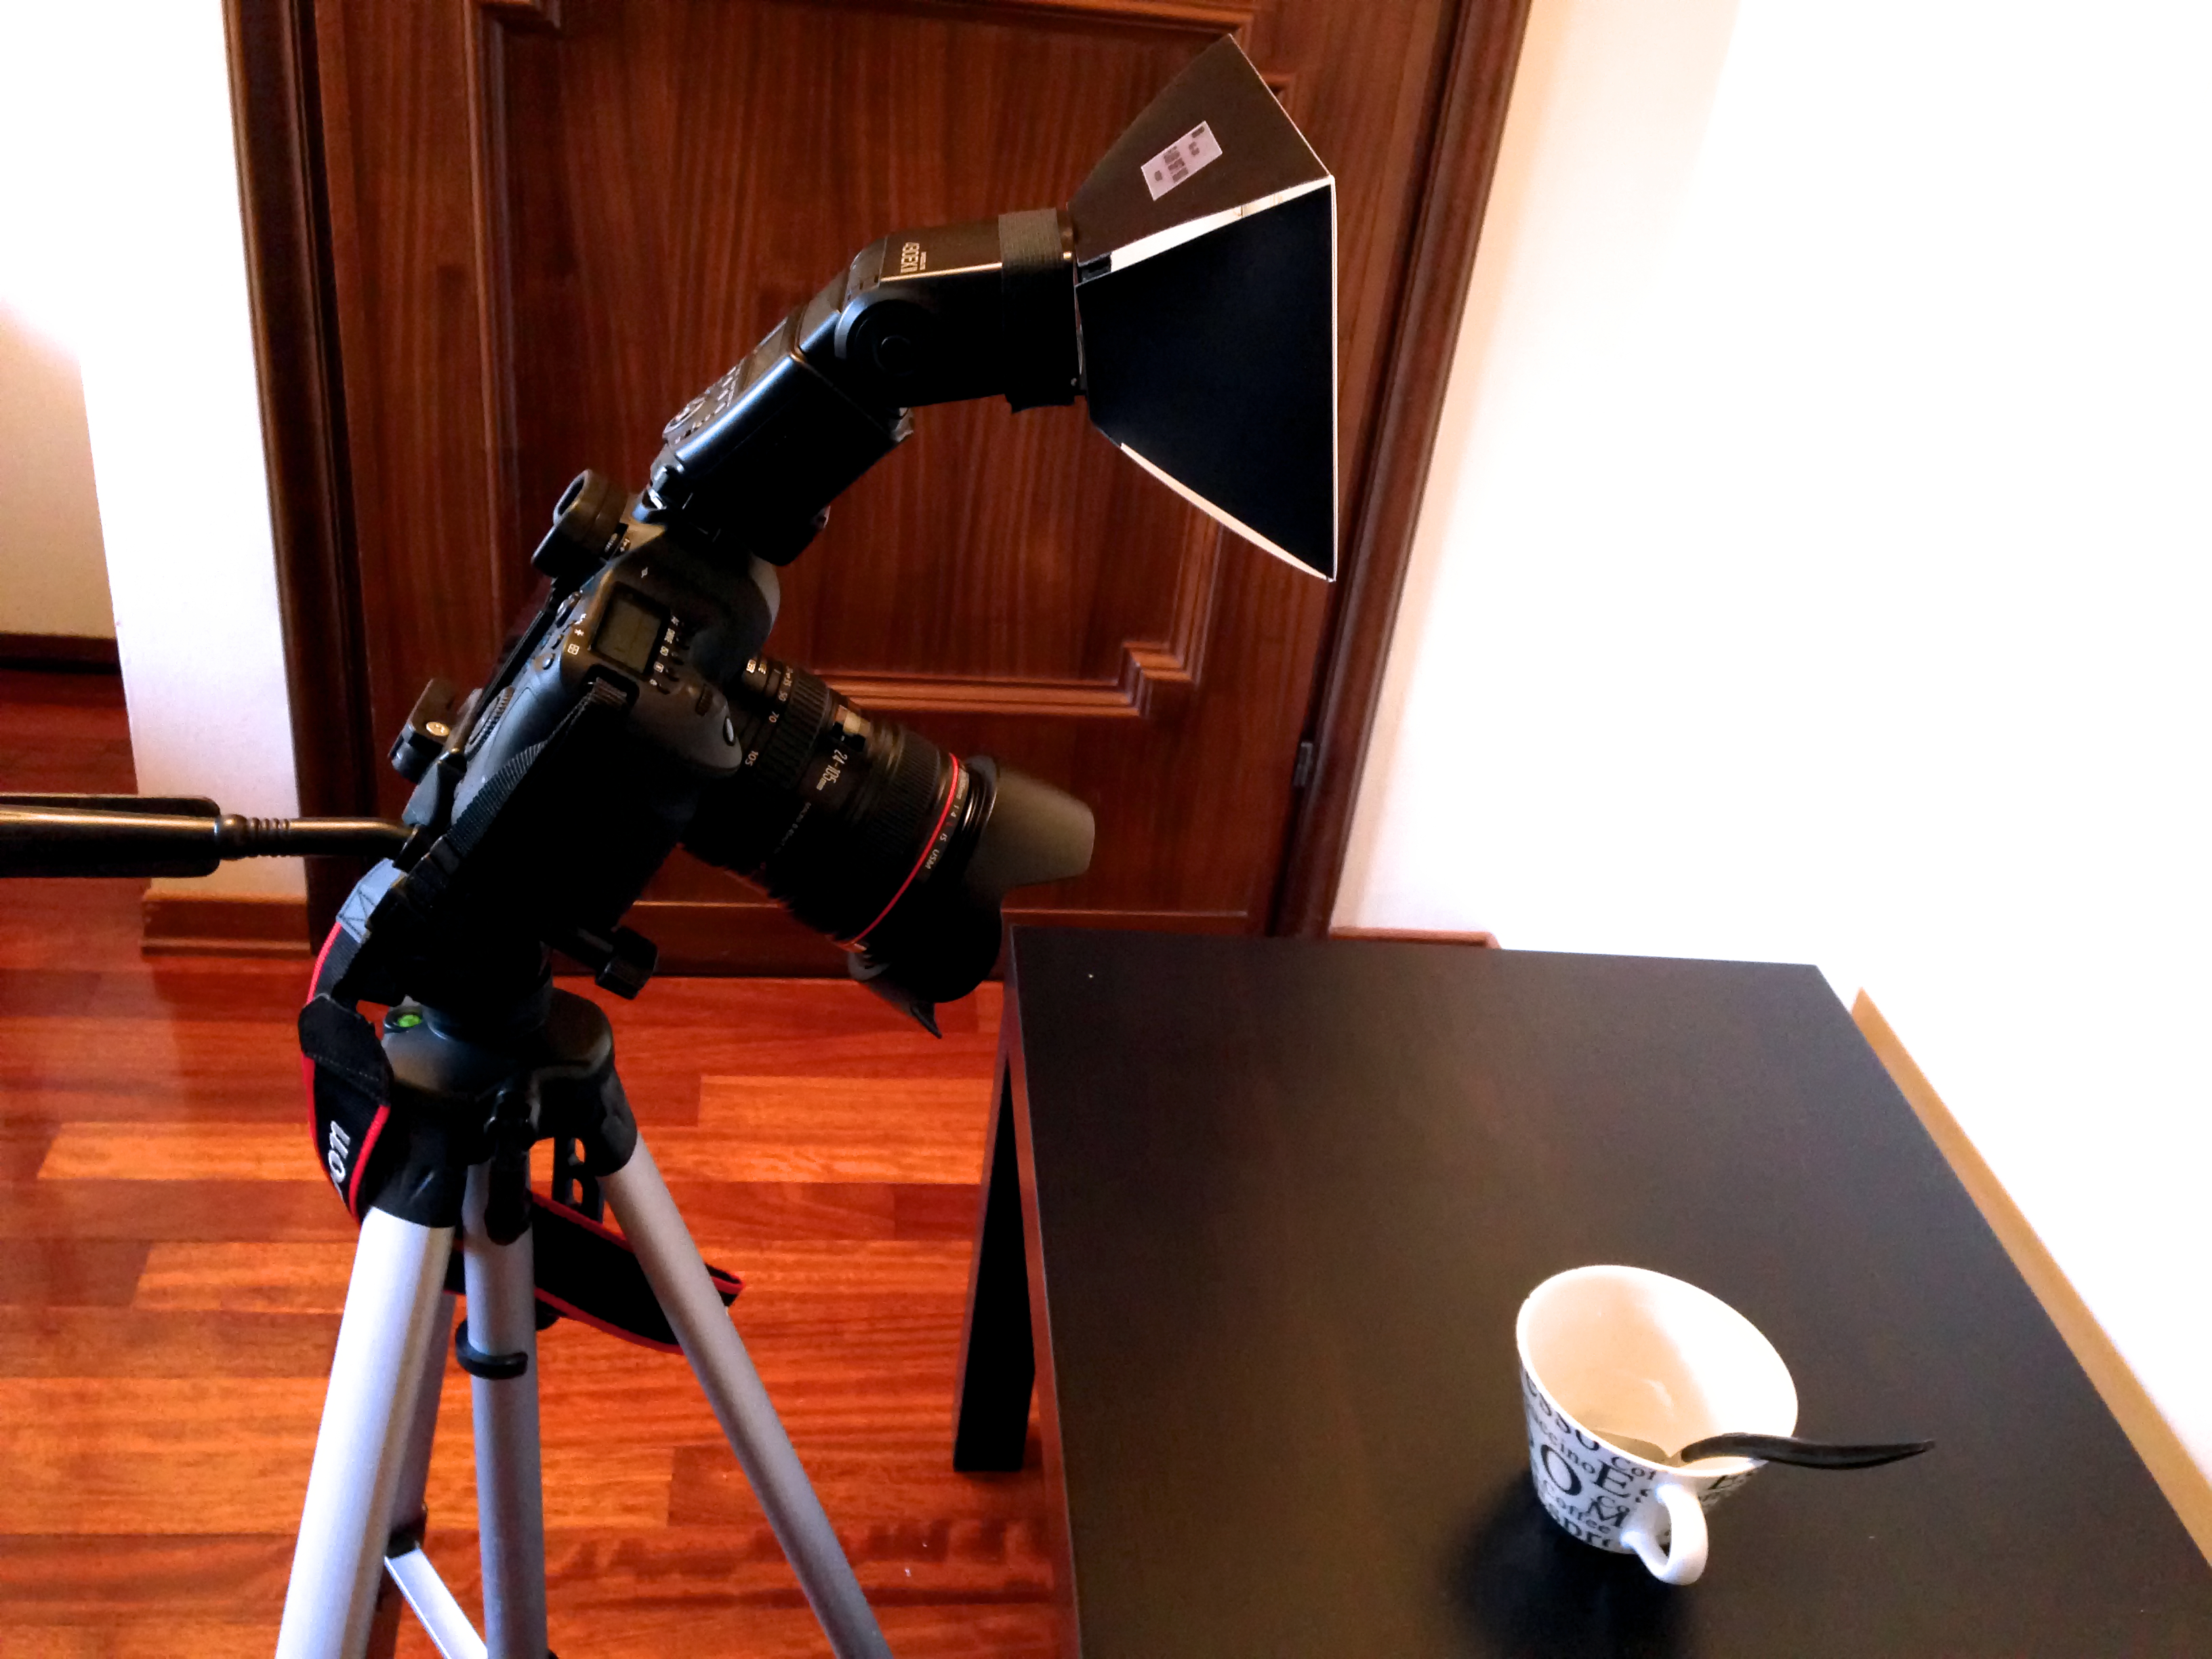
Location and Setup
You don’t need a special place for the project. You only need a dark room, a black table, and a white wall. I chose this setup, because I wanted a backlight. Without other flashes, I can use the wall as a bounce surface. You can also use a backdrop instead of a real wall.
Follow these steps:
1. Place the cup with the spoon inside on the table.
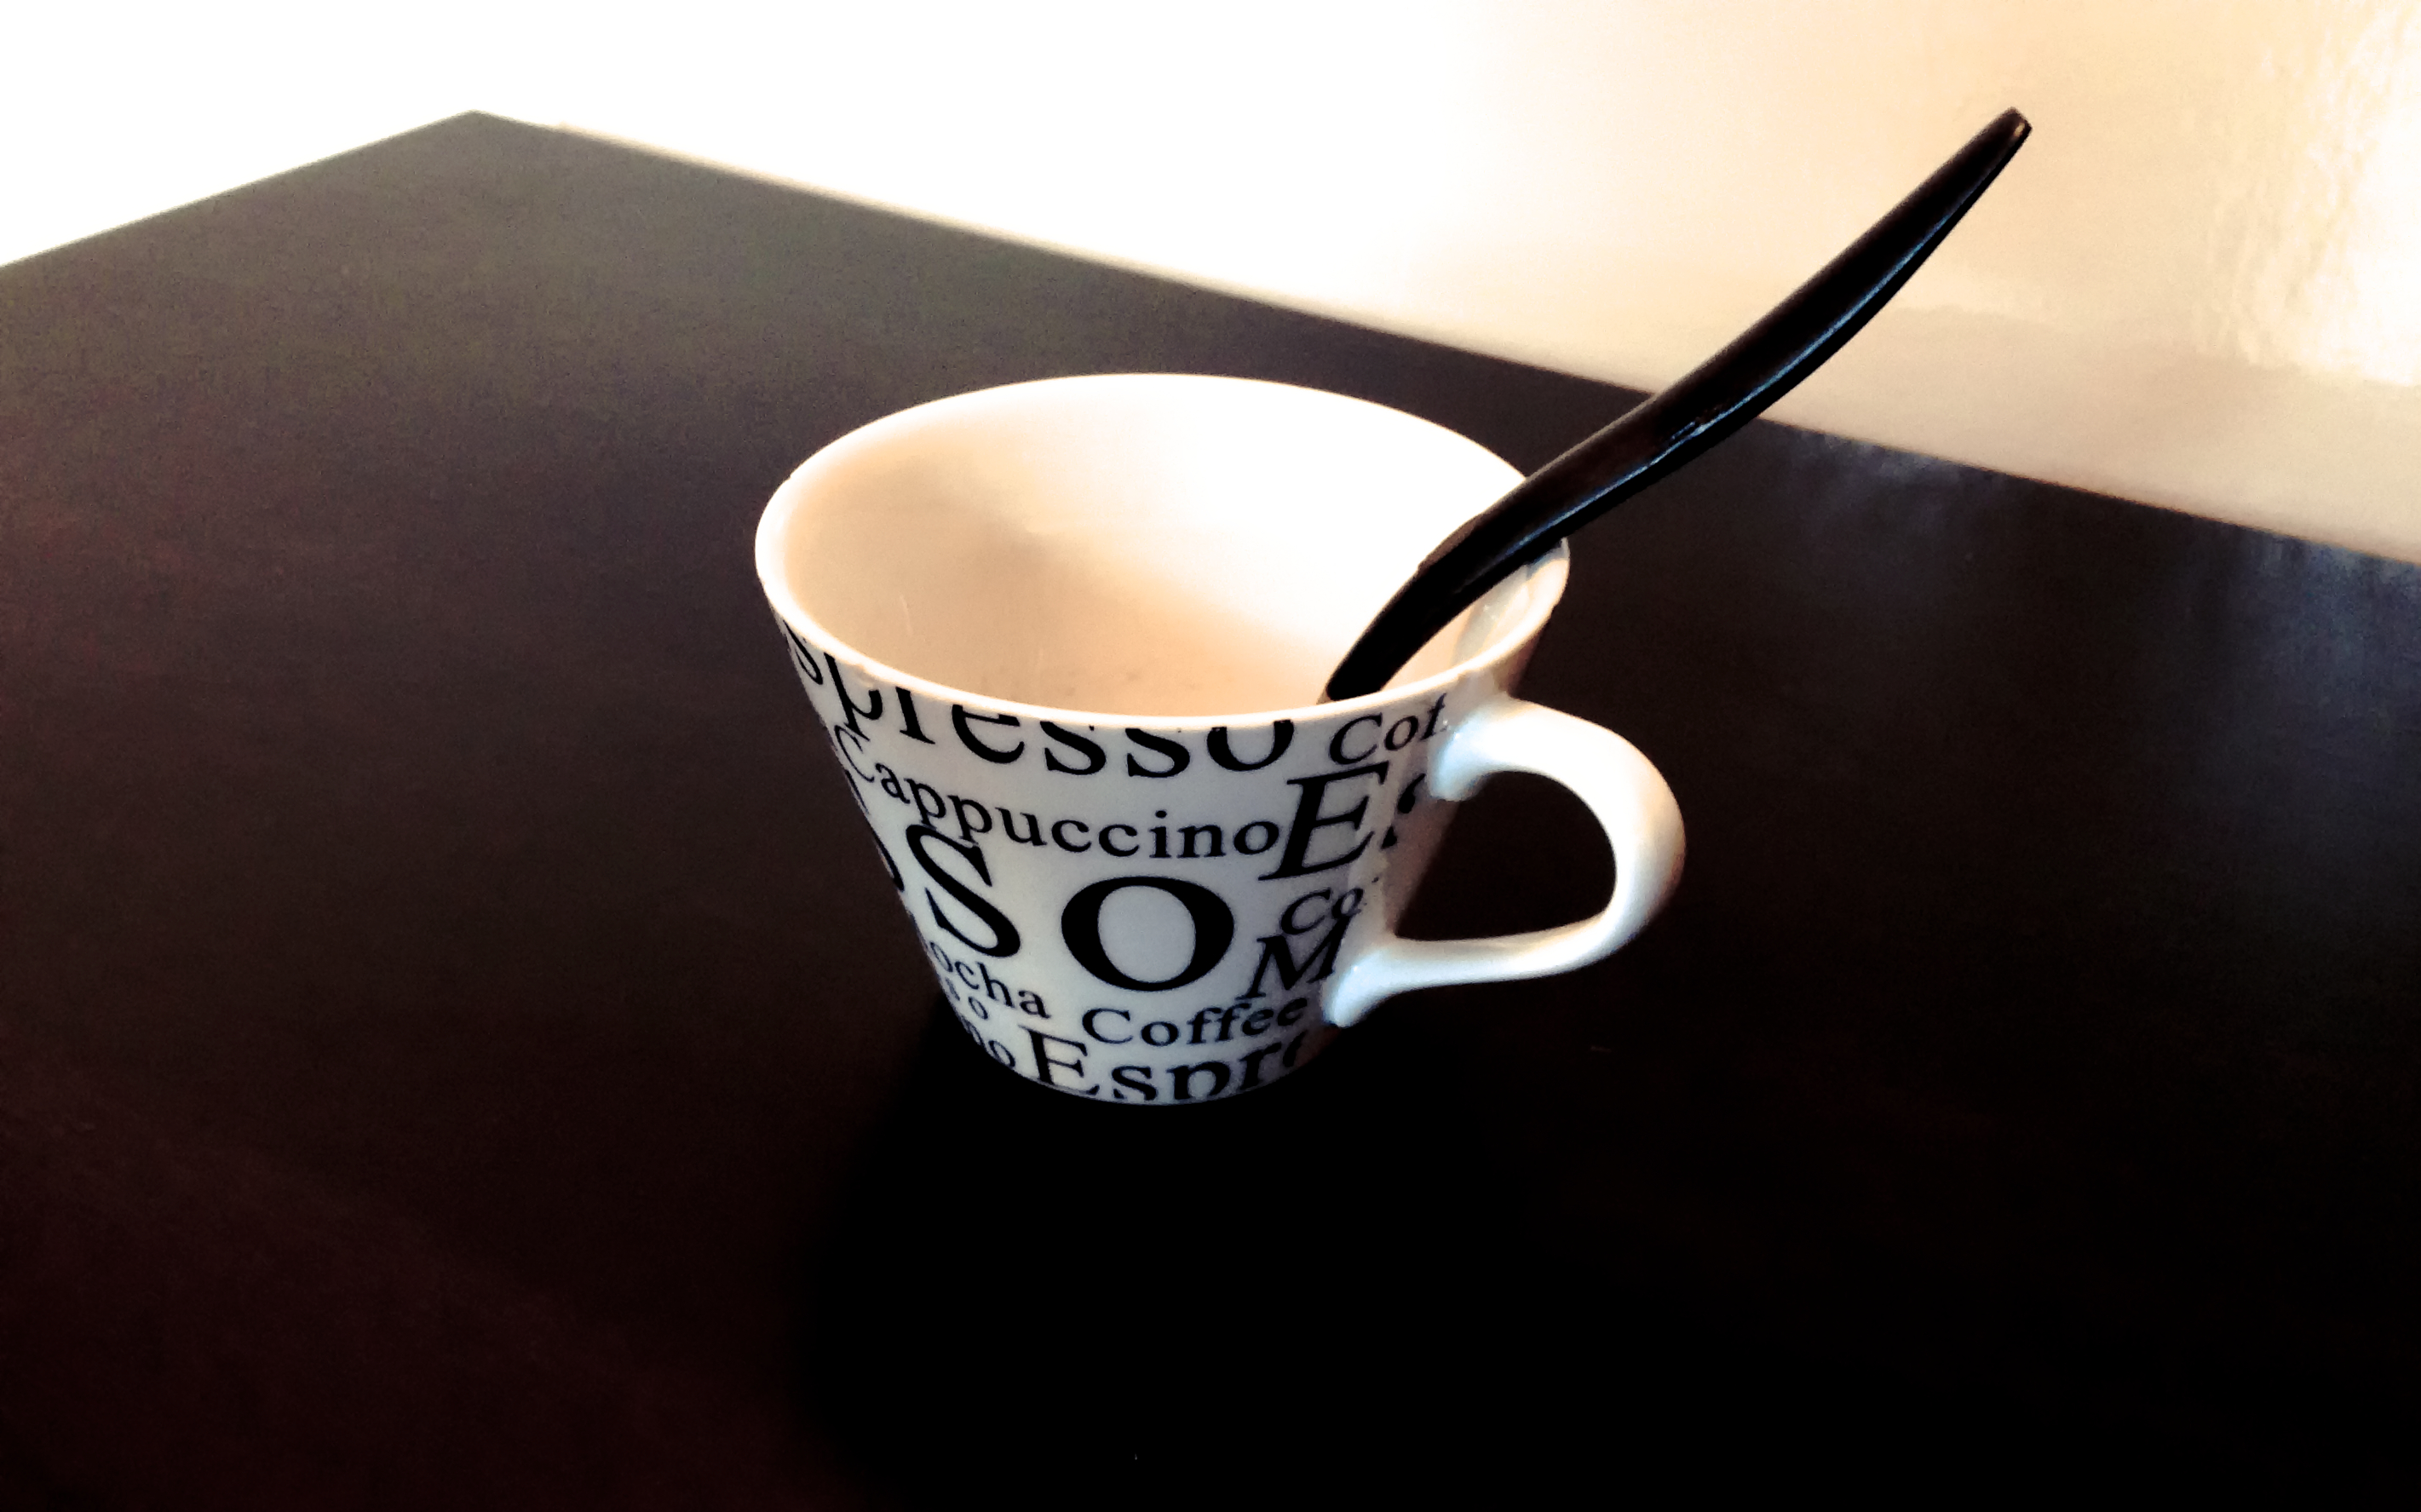
2. Fill the cup with milk halfway; add some chocolate cereals after.
3. Place the tripod with the camera in front of the cup.
4. Tilt the camera about 45 degrees. Make sure you to frame the cup and the table, not the wall behind.
5. Lay down some rags on the floor to absorb the milk that may spill.
Now we can move on to fixing the camera settings.
Camera Settings
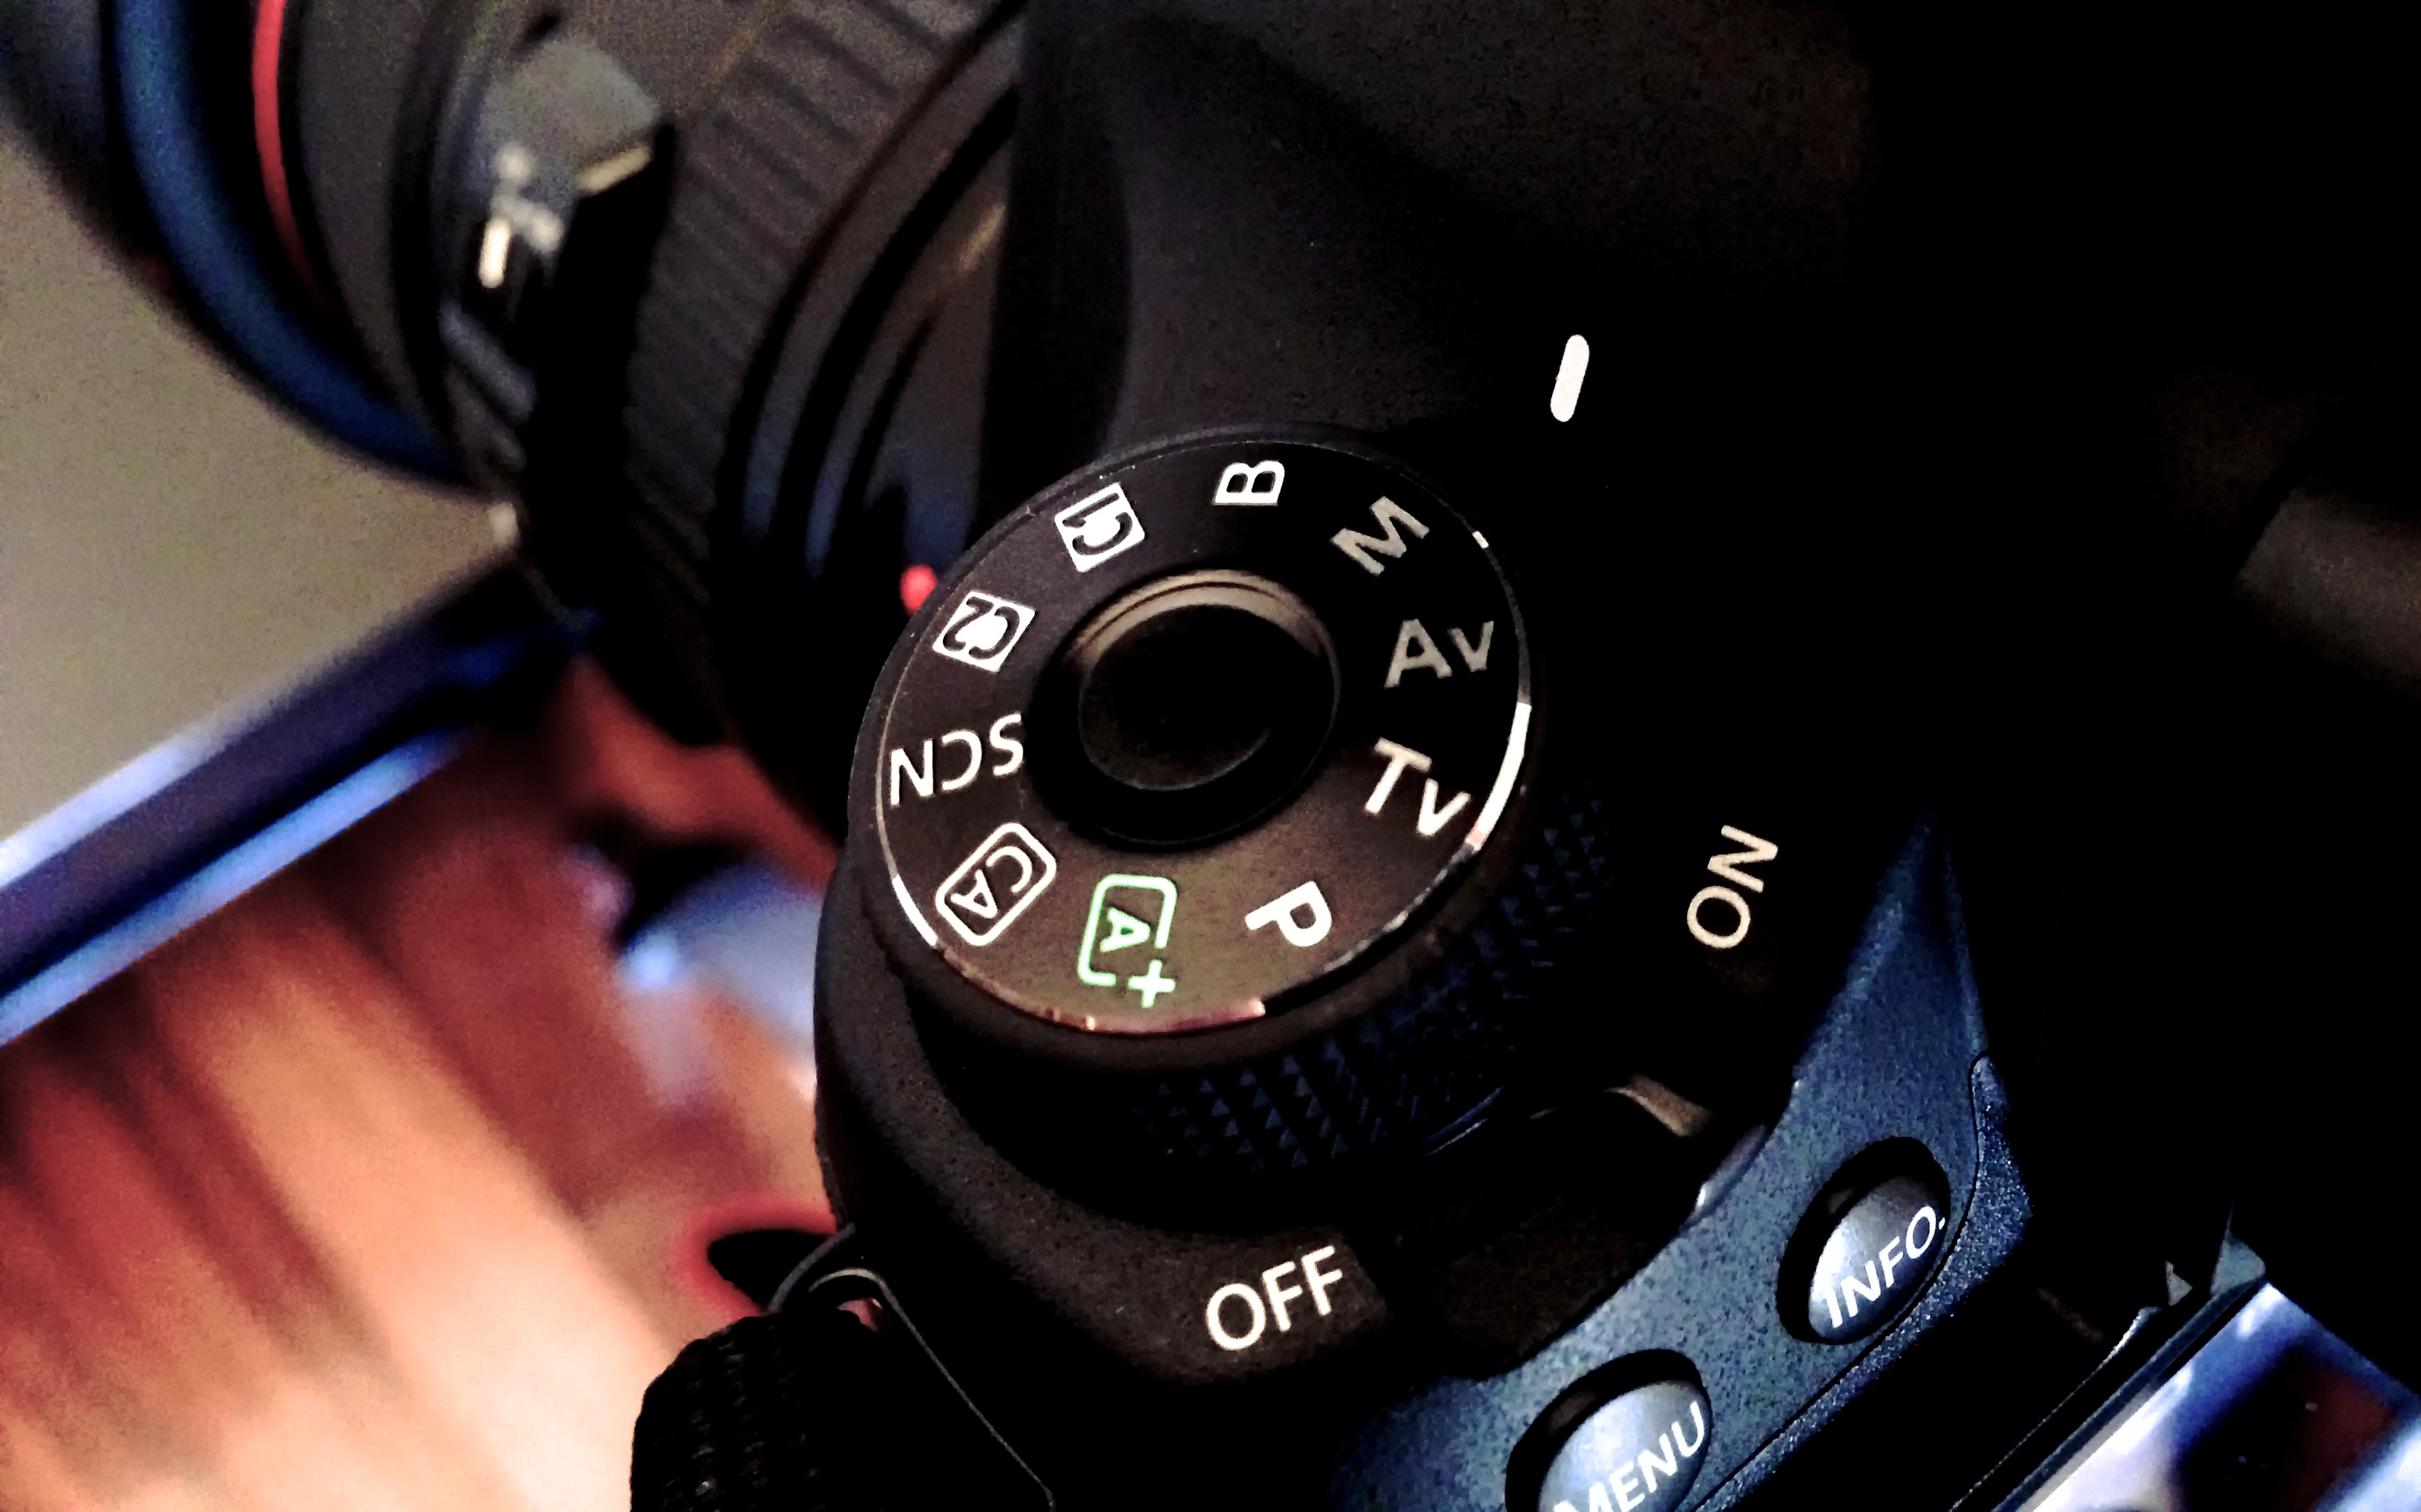
It took me several attempts to understand what the best settings are.
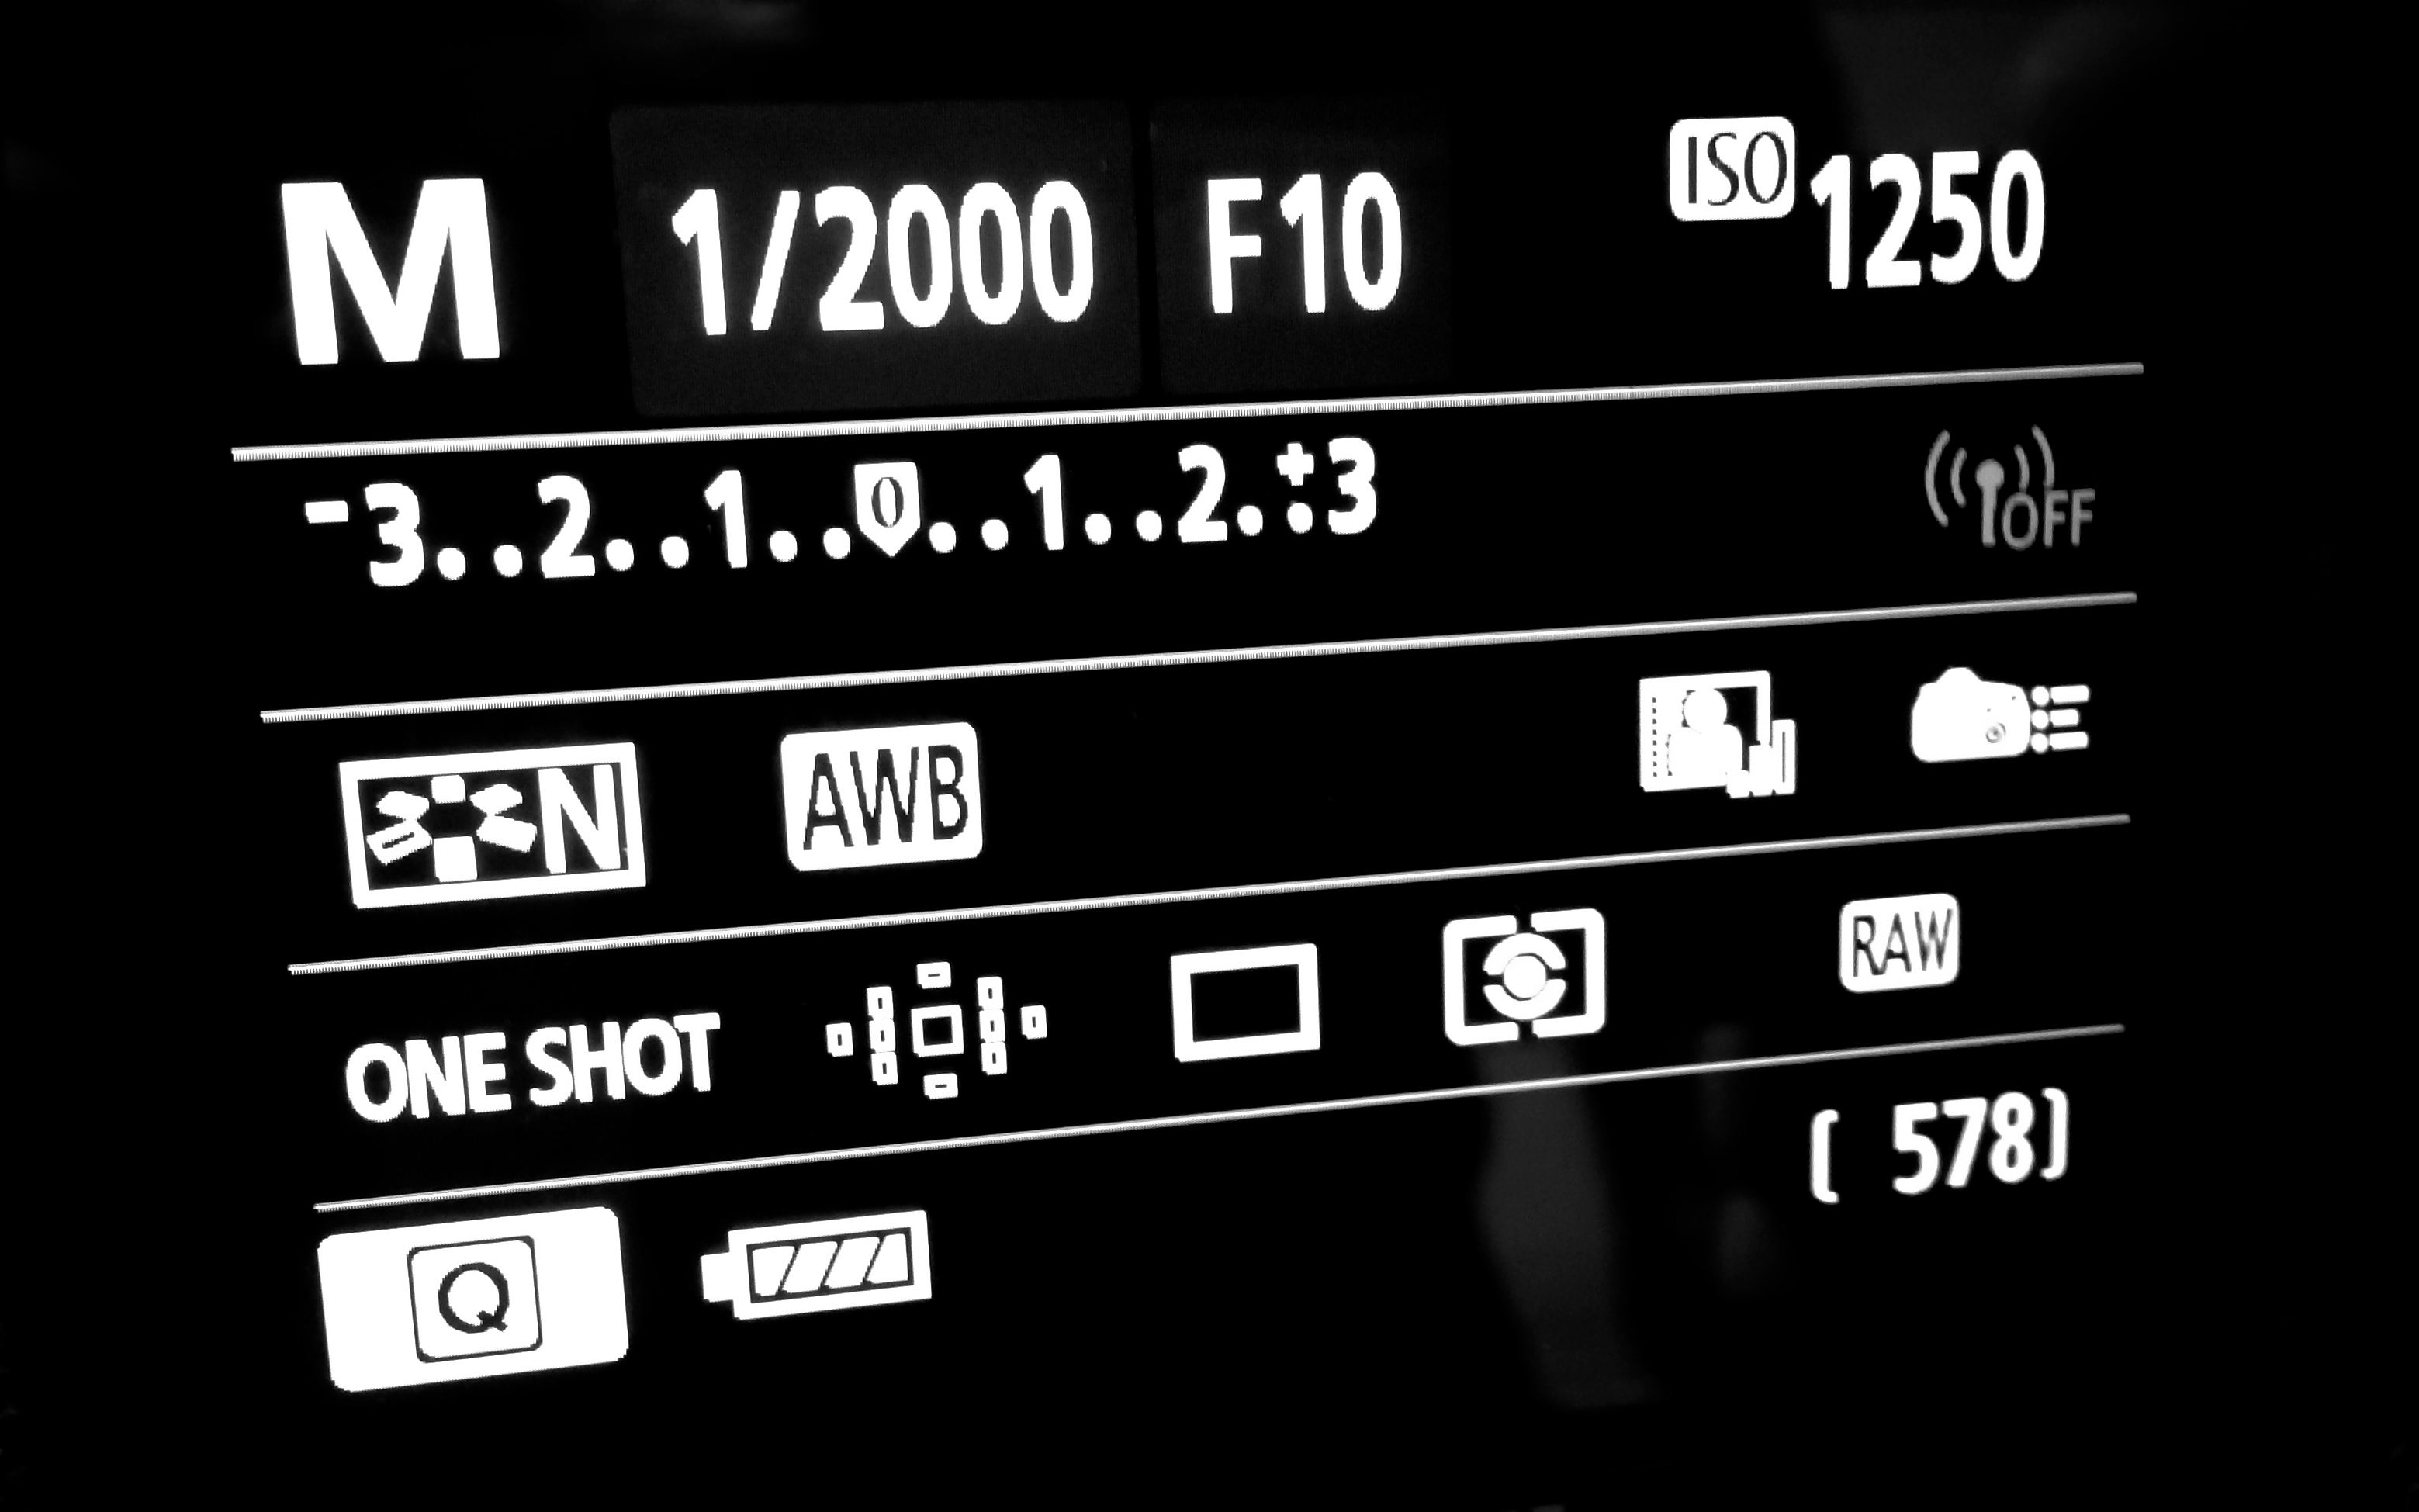
First of all, put your camera in manual mode, shoot in RAW, select Auto White Balance and Neutral picture style.
Then I set the Aperture. For a deep focus, I chose F/10.
Next is the shutter speed. I opted for 1/2000 sec. I need to freeze the moment, so I used a high shutter speed—but not too high because I don’t need to freeze a real explosion. The flash can also help you to freeze the moment. I set the speed to 1/2000, so I will have more light in the shot.
The final step is the ISO. I set this at the end, because it varies depending on Aperture and Shutter Speed. After many attempts, I choose ISO 1250. But this depends on the camera and the set up in general, so you have set it depending on your test shots. If your test shots come out too dark, choose the highest ISO.
For focal length, I can’t tell you the exact number. Again, it depends on the camera and the lens you mounted. My advice is to place the tripod with the camera in front the cup tilted about 45 degrees. Make sure you frame the cup and the table, and not the wall behind. The cup should cover, more or less, the entire photo.
Flash Settings
As I said before, you have to place the external flash on your camera, and set it to High Sync Speed mode.
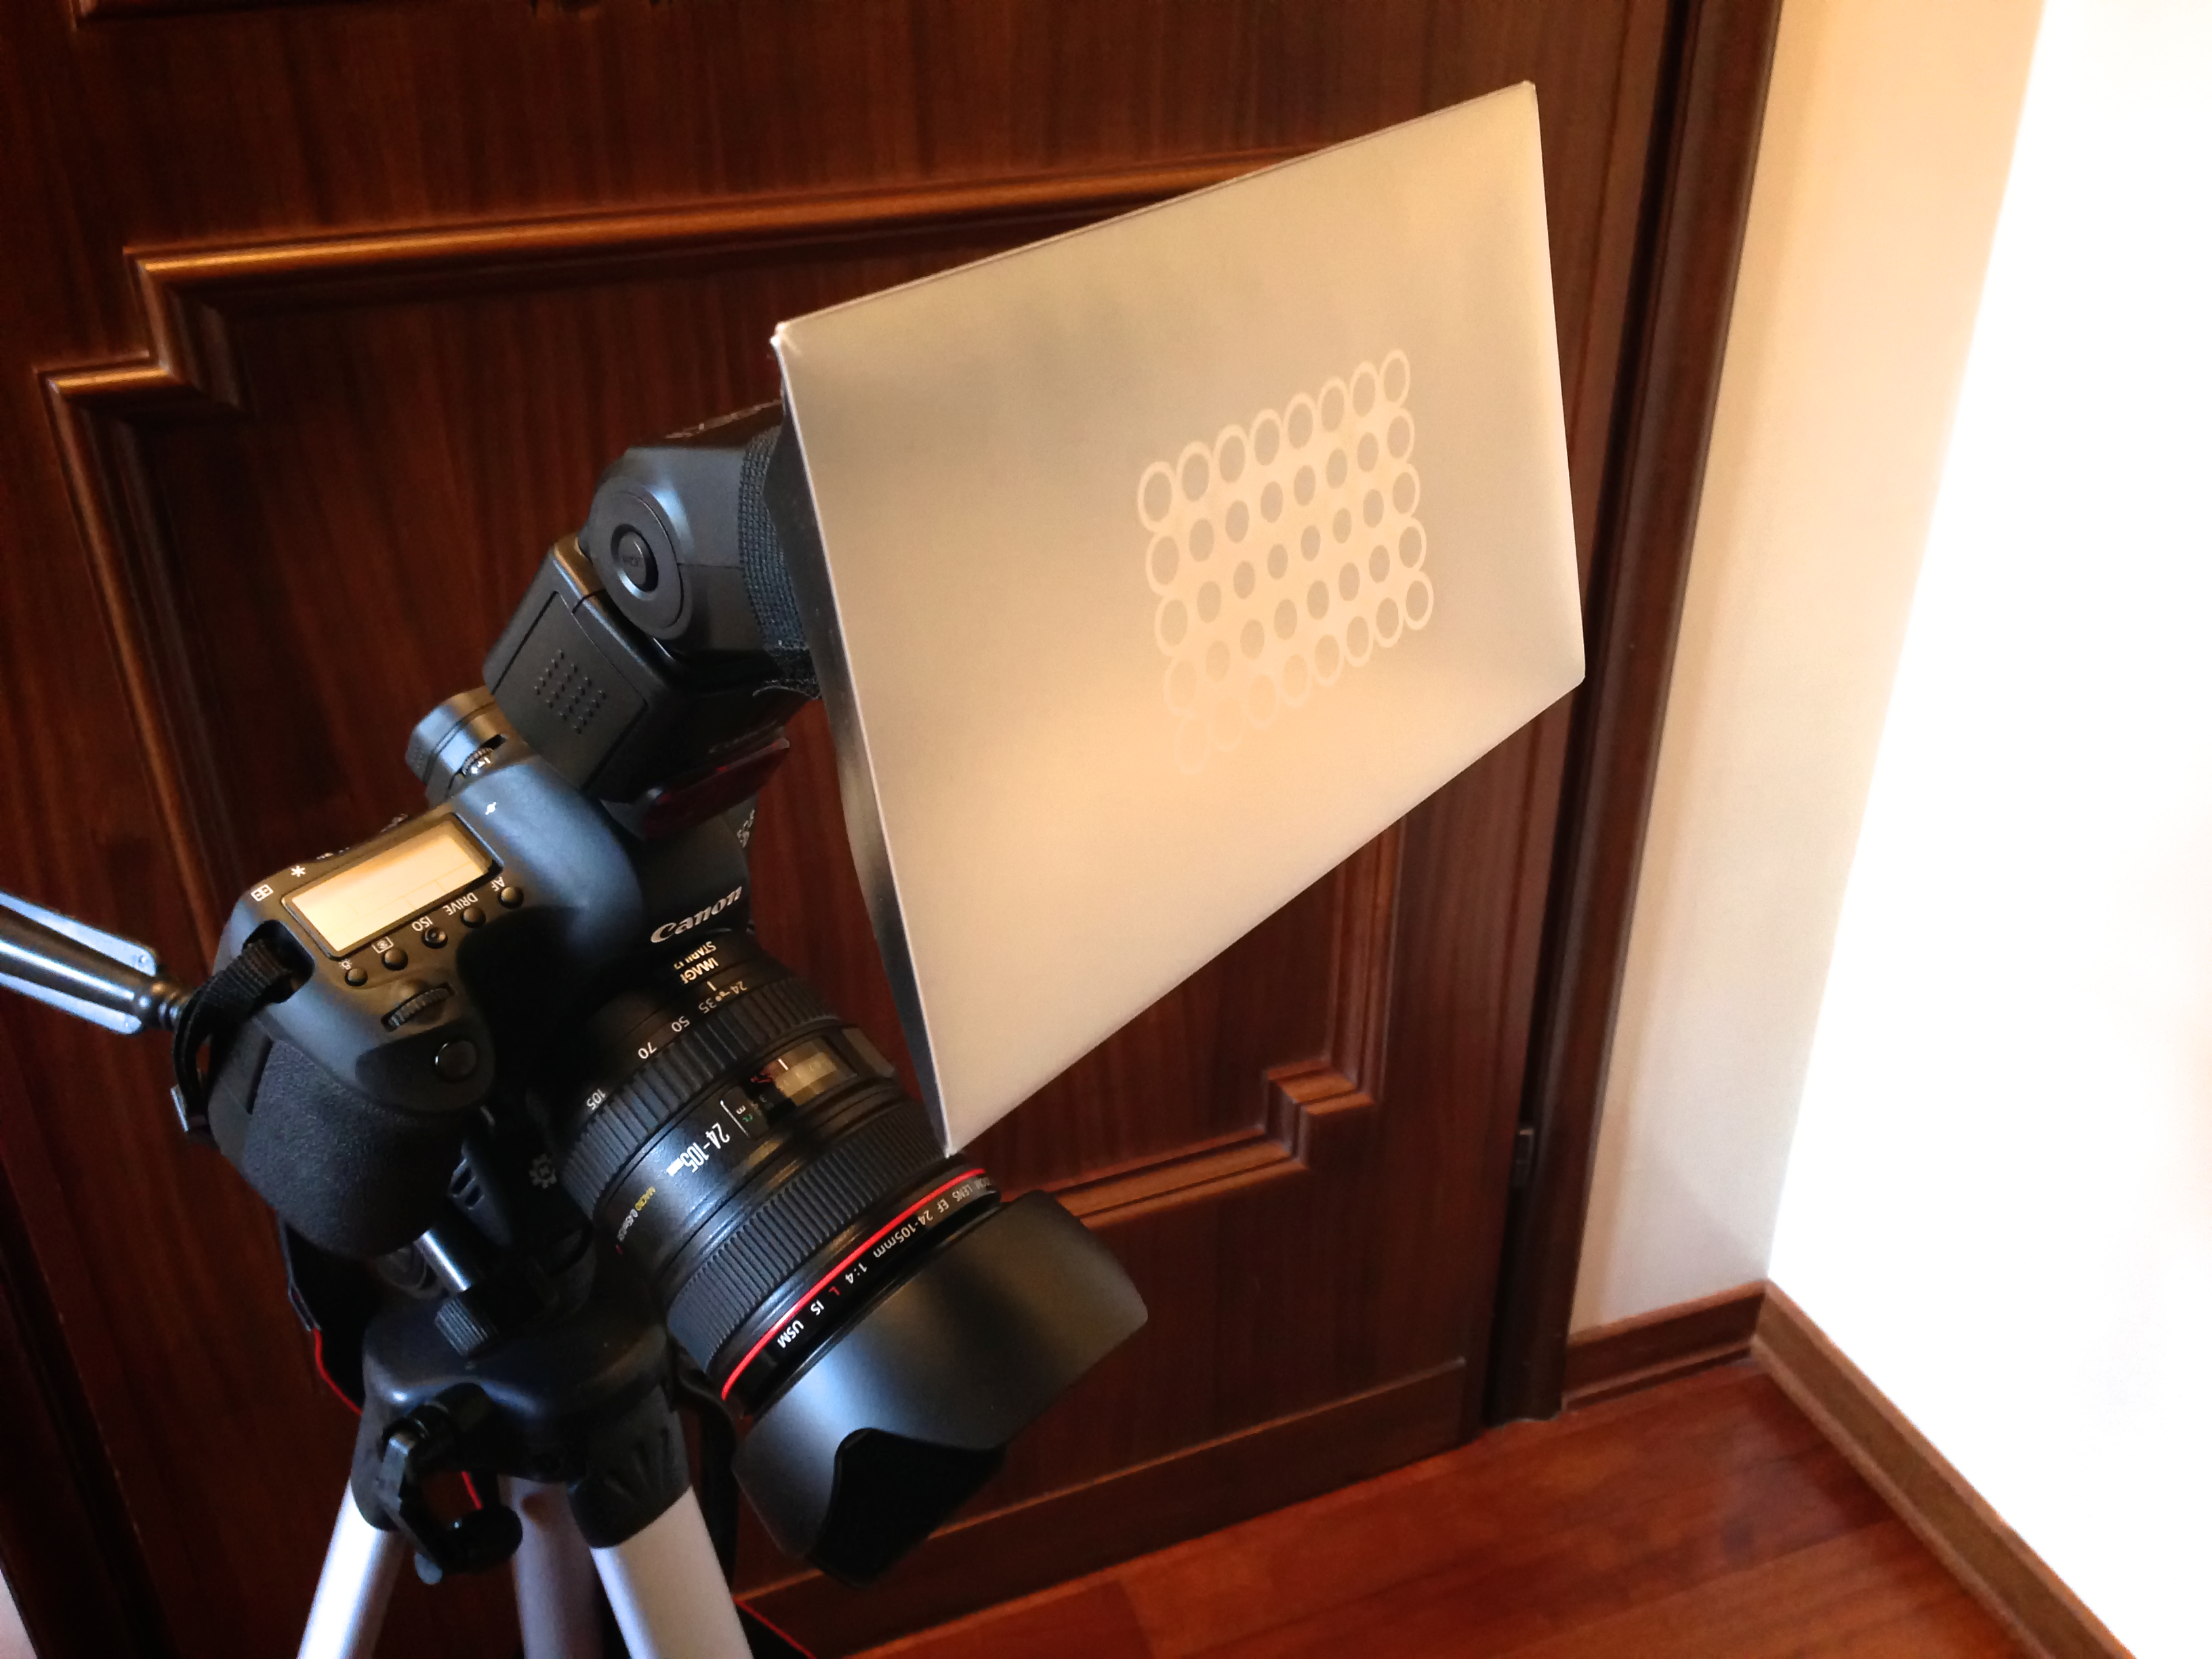
Put a diffuser on the flash, and tilt it 45 degrees toward the wall.
Remember, during the setup, you’ve tilted the camera so the flash will be perpendicular to the wall. This is a really simple setup, but it gives you great results!
Focus and Action
Focusing is really important. To have a perfect focus, put the cereal in the cup without milk, set the focus on manual, and focus the cereal in the center of the cup. Then, take the cereal off, and set the stage for the action. Make sure to place the cup in the same position of the focus step.
You need a lot of patience, but if you follow these steps, you’ll get a great result:
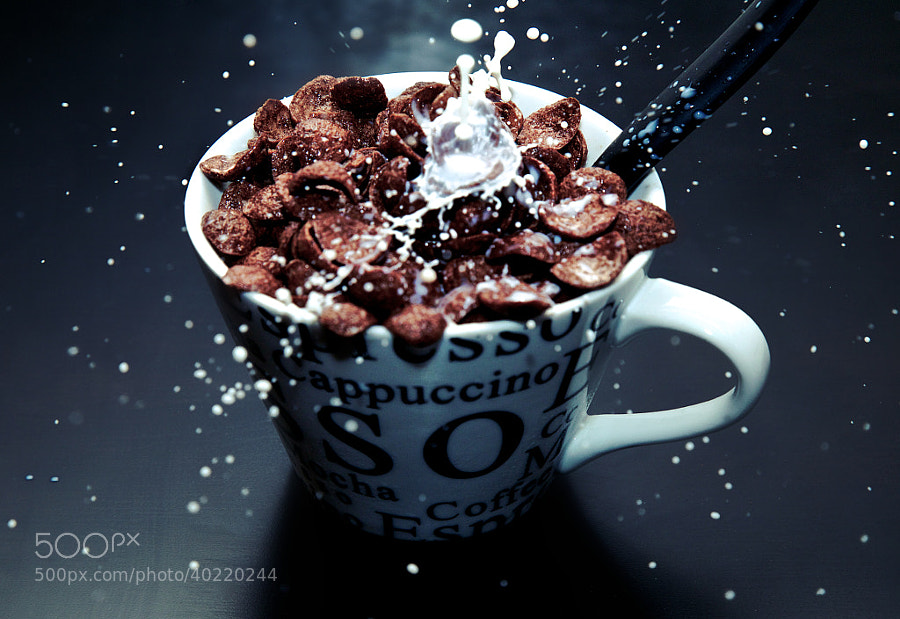
1. If you don’t want any drops, you have to fill the cup up halfway with cereal and add milk gradually from the top. When milk touches the cereal, wait a few seconds. Then take a photo and immediately stop adding milk. See the result on camera screen: this photo is very simple to make so you should have a good result.
2. Now we can shoot some action! Thanks to the shot before, we have now completely filled the cup with milk. If there are some drops on the table, you have to clean it up. The difference now is that for this photo, we have to pour the milk with more speed and strength, but in a lesser amount. The most important thing is to be ready to shoot!
Tip: Look at the milk and take a shot just before it touches the cereal. Taking the photo in the exact moment the milk touches the cereal could already be too late. Once you take the photo, stop adding milk immediately! In case the first photo is not good, clean the table and remove a bit of milk with a spoon from the cup without moving it. If you move the spoon, make sure focus the center of the cup again.
Below, you can see some examples of the shots I took:
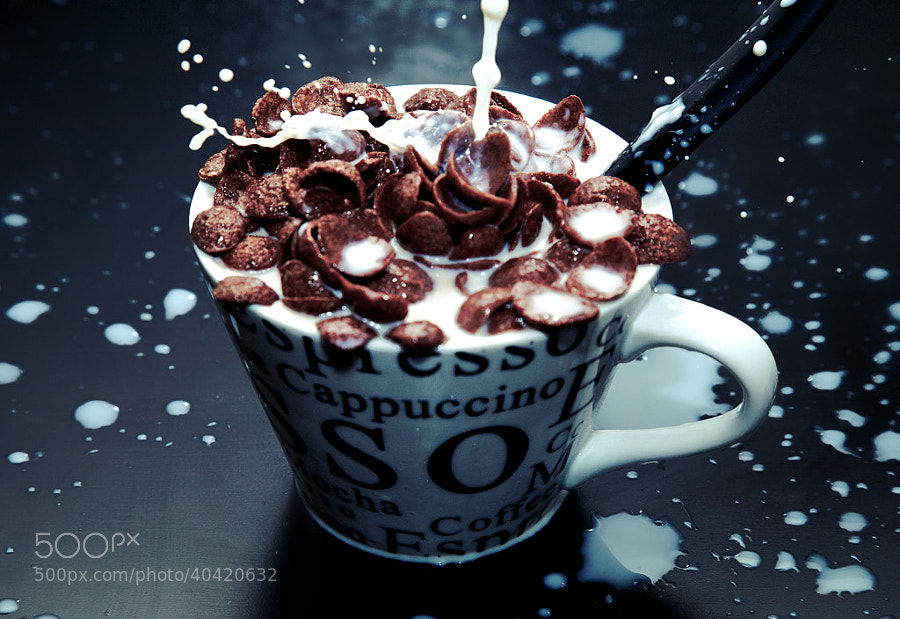
3. Now we can shoot more photos. Depending on the strength of how we’ve pour the milk, we will see different types of drops. Follow the same tips as the step previous to this, and you will get a great shot.
In the photo below, I cleaned the table and I took another shot. But if you don’t mind, you can leave the drops on the table and get a shot like this:
4. Since you have the set ready, you can now experiment by dropping other subjects into a cup full of milk. In photo below, I dropped a piece of chocolate into the milk.

Post-Production
This is the final step. When you’re doing taking all your shots, import them in Lightroom. There’s not a lot of editing to need to do. Just correct a few elements, such as White Balance, Exposure, and adding a black vignette to the scene. The vignette will draw your viewers’ attention to the subject.If you want, you even can burn the edges to get a darker, moodier look.
Hope you enjoyed this tutorial, and will have lots of fun playing with your food!
Follow Giammaria Zanella on 500px to see more of his work. You can also connect with him on his Facebook page.
Want to hang a some of his high-speed photo prints on your wall? Check out his 500px Art store.
Got your own tips or questions about high-speed photography? Let us know by leaving a comment below!


Leave a reply